Starting from iOS 12, developers can use the back-facing camera to detect and track known images by using an API called ARImageTrackingConfiguration. What does it mean to you? If you’ve watched the Harry Potter movie before, you probably remember the wizarding newspaper with animated images in print. With the image tracking configuration, we can turn this into a reality through an ARKit app.
In this chapter, you will learn how to use ARImageTrackingConfiguration to perform image tracking and build an AR newspaper app similar to that appeared in the Harry Potter movie. It’s not easy to describe how the app works in words. So, please head over to this link and see the demo app in action. When the app recognizes a specific photo, it overlays the image with a video. As you can see in the video, what’s amazing is that ARKit tracks the position change of the image and keep anchoring the video content.
Looking interesting, right? Let’s get started.
Creating a New Project Using ARKit template
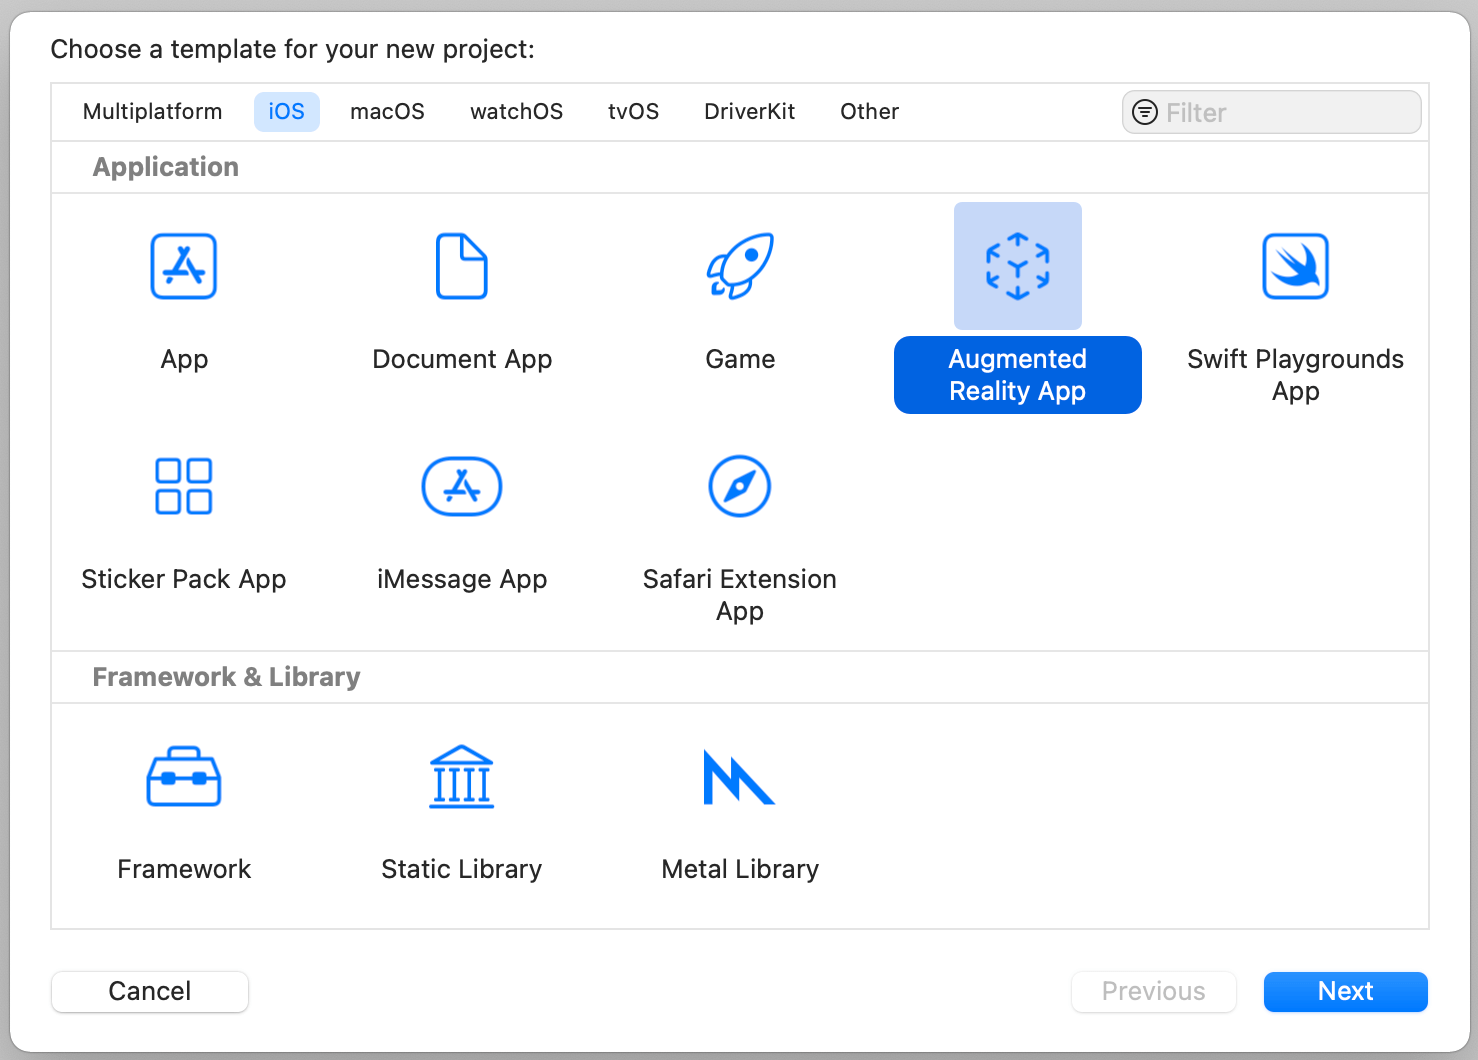
We will build this project from scratch. Assuming you’ve opened Xcode, you can start by creating a new project. Choose the Augmented Reality template and click Next. For the project information, name the project ARNewspaper and make sure you set the Content Technology to SceneKit.
Once you saved the project, Xcode will generate the ARKit project for you. There are a couple of things we don’t need in the generated code. By default, the template generates a 3D spaceship, which is loaded when the app launches. Obviously, we do not need this model. In the ViewController.swift file, change the following line of code in viewDidLoad() from:
|
1 |
let scene = SCNScene(named: "art.scnassets/ship.scn")! |
To:
|
1 |
let scene = SCNScene() |
For the viewWillAppear method, it’s loaded with ARWorldTrackingConfiguration():
|
1 2 3 4 5 6 7 8 9 |
override func viewWillAppear(_ animated: Bool) { super.viewWillAppear(animated) // Create a session configuration let configuration = ARWorldTrackingConfiguration() // Run the view's session sceneView.session.run(configuration) } |
We don’t need it too because we will use another tracking configuration to handle the image tracking. Meanwhile, empty the method like this:
|
1 2 3 |
override func viewWillAppear(_ animated: Bool) { super.viewWillAppear(animated) } |
Preparing the Resources
Now that we have created the project skeleton, let’s move onto the next step and import the required resources. First, download the resource pack from https://www.appcoda.com/resources/swift5/ARNewspaperResources.zip. Since this app is going to play a video when a particular image is recognized, you have to prepare the following resources:
- An image to be recognized. It can be any image (JPG/PNG) in your photo library. Or you can use the one (i.e.
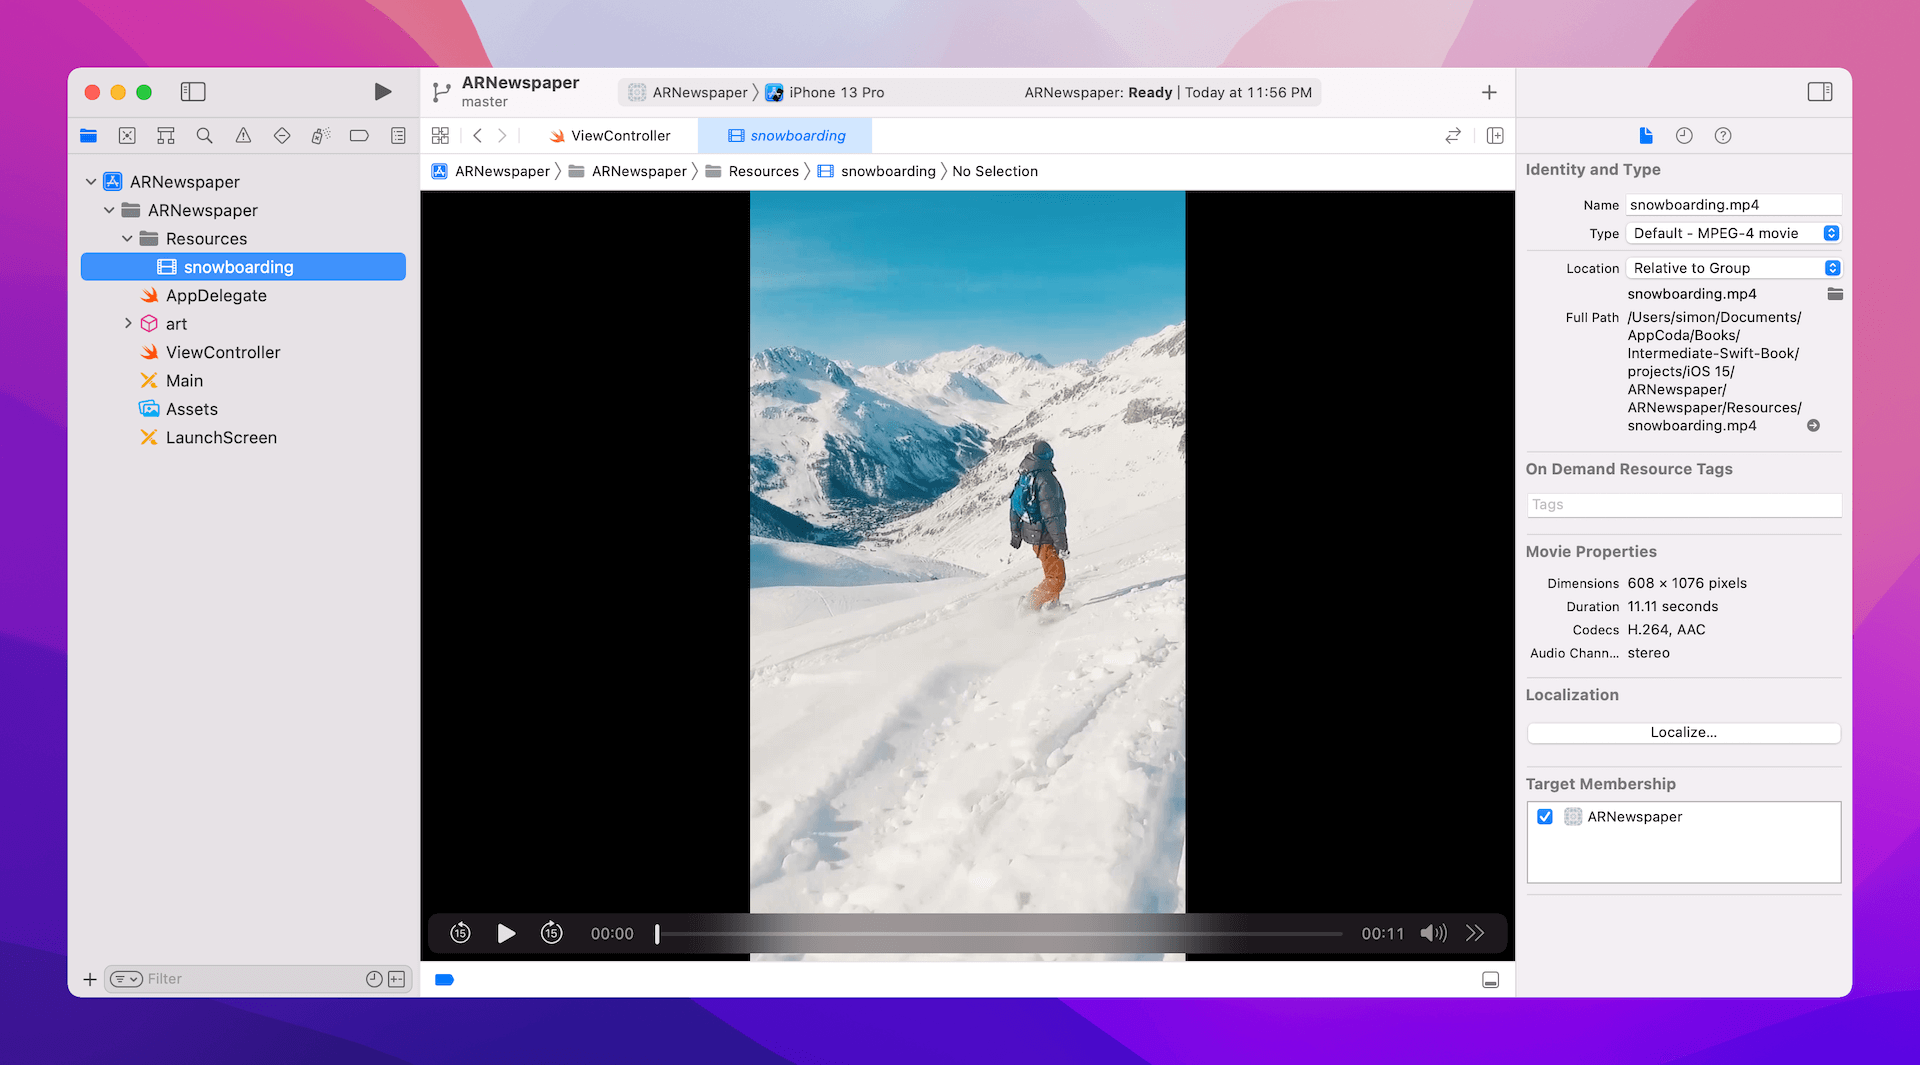
snowboarding.jpg) which comes with our resource pack. - A video to be played after the image is detected. Again, it can be any video in mp4 format. In the resource pack, you should find a video file named
snowboarding.mp4. - A document containing the image. This is completely optional. But to mimic the Harry Potter newspaper, the resource pack includes a PDF file named
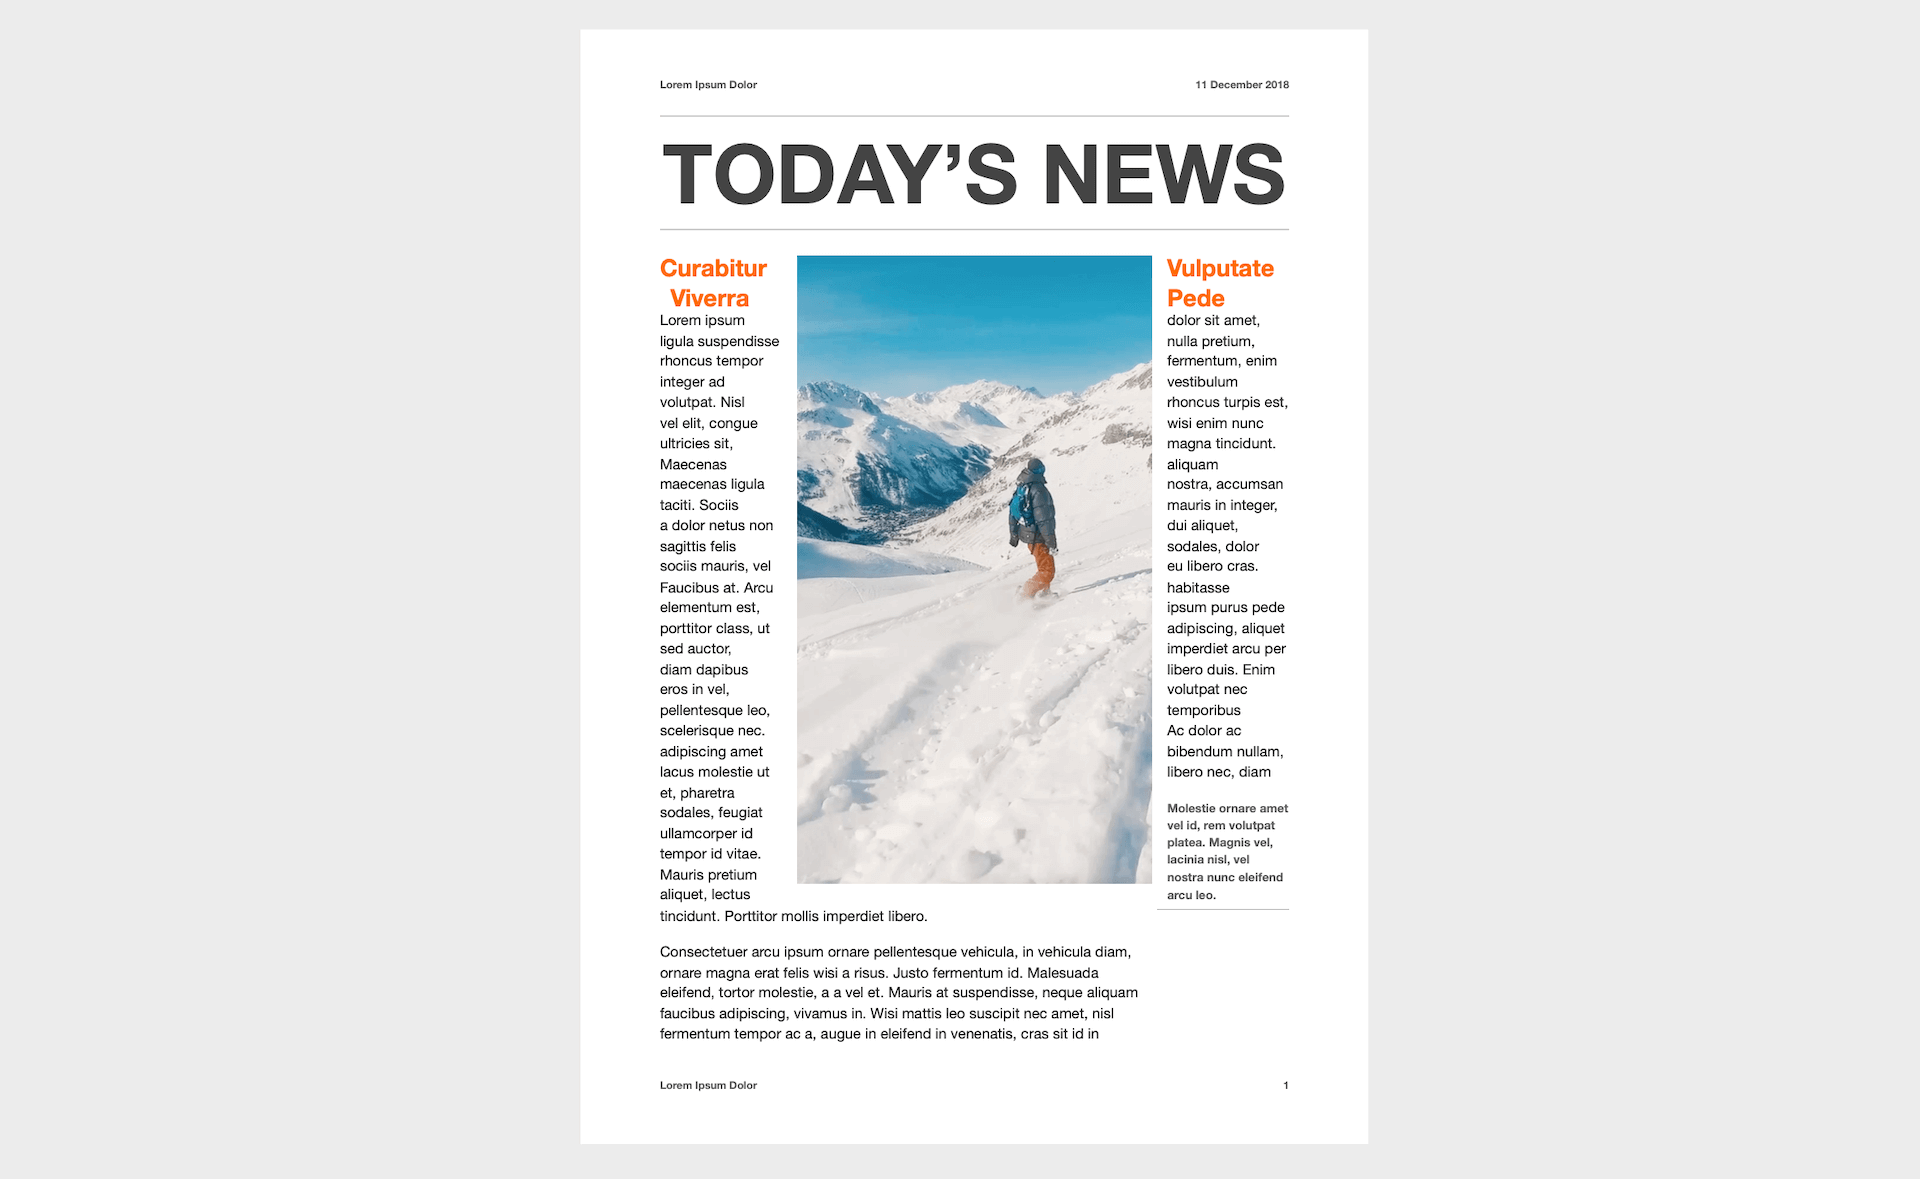
arkit-newspaper.pdf, as shown in figure 45.2. You can print it out in A4 size paper for later testing. If you don’t have a printer, this is okay. You can open the file on an iPad or a Mac. We will discuss more about how you can run the test in the later section.
Next, we will import the video file (i.e. snowboarding.mp4) into Xcode. In the project navigator of Xcode, right click ARNewspaper and create a new group named Resources. Drag the video file from Finder into Xcode and place it in the Resources folder. When Xcode prompts you to choose options for adding the file, please make sure you tick the checkbox of ARNewspaper in the Add to targets option. If you’ve successfully imported the video file, you should be able to preview it in Xcode.
Setting the Reference Image for Image Tracking
We haven’t imported the image yet. As you know, we used to add the images to the asset catalog. But this time, it needs a bit of extra work for image tracking. Open Assets and right-click to choose AR and Textures > New AR Resource Group. This creates a new resource group to specify the reference images for image tracking. You can drag the snowboarding.jpg file (or your own image) to the resource group.
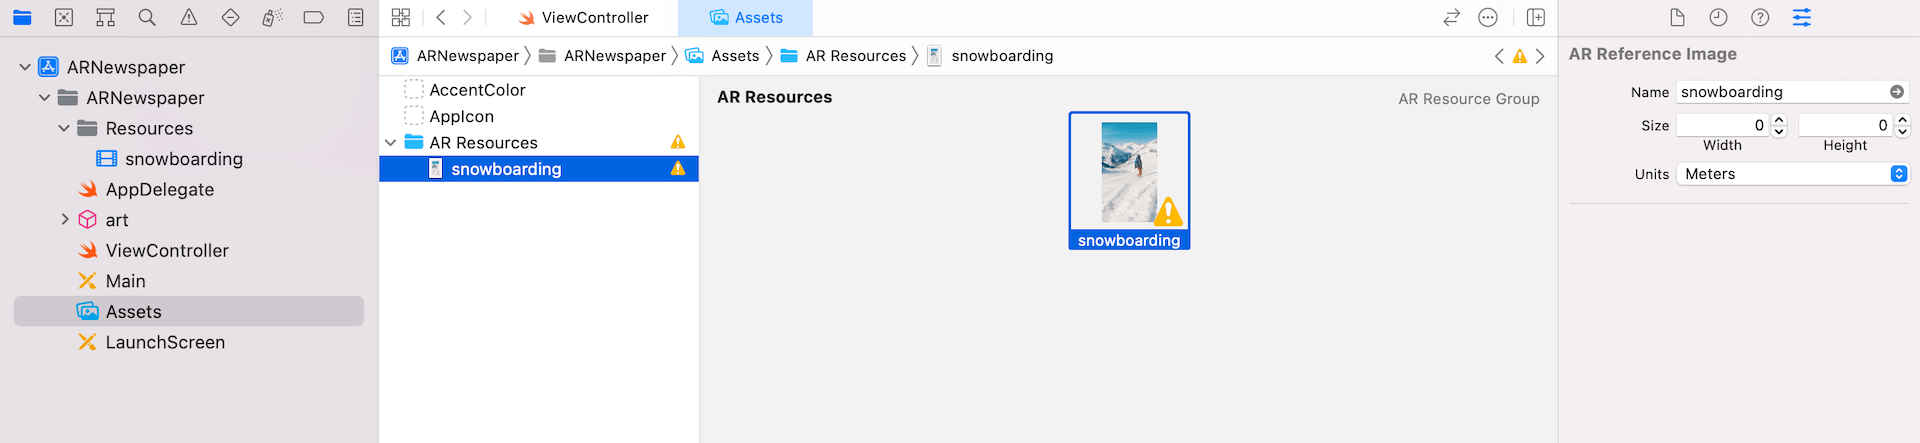
While we only have one image for this demo, you can actually put multiple images for image tracking in this group. As you can see, there is a big exclamation mark on the image, which means there is something missing. Now select the image in the group and open the Attributes inspector.
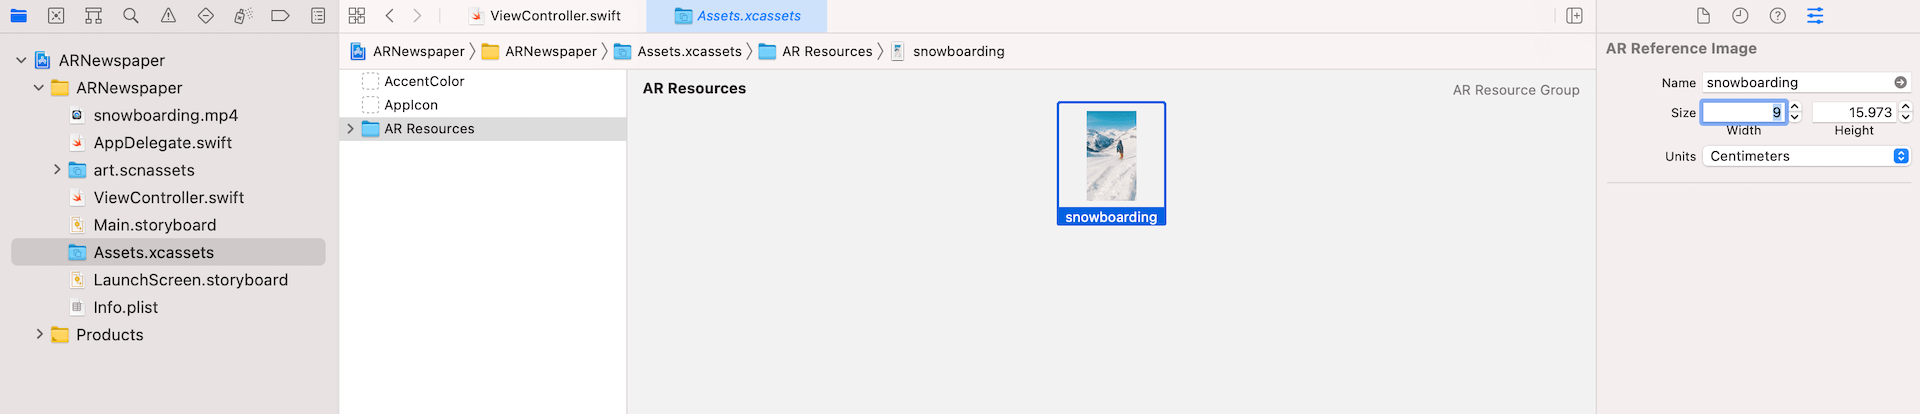
To detect the actual image, ARKit requires you to specify the real-world size of the image. Assuming you print the newspaper file on a A4-size paper, the image should have a width of 9cm and a height of 16cm. So, change the Units to Centimeters and set the width to 9. Once you set the width, Xcode automatically calculates the height value.
Please note that the real-world size of the image varies. If you print it on a A3-size paper or display the PDF file on a 42-inch screen, the physical size of the image becomes larger. You will then need to adjust these values accordingly.
Setting up the AR Image Tracking Configuration
In the earlier chapters, we used ARWorldTrackingConfiguration to track the device’s position and mix the virtual content with the real world. Other than the world tracking configuration, ARKit provides other types of configuration. To perform image tracking, we use a configuration called ARImageTrackingConfiguration. You use this configuration to detect and track the motion of known 2D images.
To set up this image tracking configuration, update the viewWillAppear method like this:
|
1 2 3 4 5 6 7 8 9 10 11 12 13 14 15 16 17 |
override func viewWillAppear(_ animated: Bool) { super.viewWillAppear(animated) // Create a session configuration let configuration = ARImageTrackingConfiguration() // Define reference images guard let referenceImages = ARReferenceImage.referenceImages(inGroupNamed: "AR Resources", bundle: Bundle.main) else { fatalError("Failed to load the reference images") } // Specify the images to track configuration.trackingImages = referenceImages // Run the view's session sceneView.session.run(configuration) } |
To accurately detect the position and orientation of a 2D image in the real world, ARKit requires preprocessed image data and knowledge of the image’s real-world dimensions. The ARReferenceImage class encapsulates this information.
– https://developer.apple.com/documentation/arkit/arreferenceimage
In the code, we specify to use ARImageTrackingConfiguration and tell ARKit what images to track. We call the referenceImages method of ARReferenceImage to load all referenced images from the asset catalog. The inGroupNamed parameter takes in the group name of the AR resource group. Recalled that we named it AR Resources, this is why we pass it to the method.
Once we loaded the reference images, we assigned them to the trackingImages property of the configuration. Lastly, we call the run method to begin the image tracking operation using the back camera.
Overlaying a Video Player to the Detected Image
Now that we have created the image tracking configuration, the question is how can we overlay a video on top of the detected image?
When ARKit starts the image tracking, it automatically adds an ARImageAnchor object when the reference image is recognized. In a Scened-based ARKit app, the renderer(_:didAdd:for:) method of ARSCNViewDelegate will be called when the anchor is added to the scene. Thus, we can implement the method to overlay the video on top of the detected image.
First, let’s declare the video play for the video playback in ViewController like this:
|
1 2 3 4 5 6 7 8 |
let videoPlayer: AVPlayer = { // Load the video guard let url = Bundle.main.url(forResource: "snowboarding", withExtension: "mp4") else { return AVPlayer() } return AVPlayer(url: url) }() |
We load the snowboarding.mp4 file and assign it to AVPlayer for playback. We just prepare the player for the video playback. The video won’t start playing until we call its play method.
Now implement the method in the ViewController class like this:
|
1 2 3 4 5 6 7 8 9 10 11 12 13 14 15 16 17 18 19 |
func renderer(_ renderer: SCNSceneRenderer, didAdd node: SCNNode, for anchor: ARAnchor) { guard let imageAnchor = anchor as? ARImageAnchor else { return } // Detected plane let plane = SCNPlane(width: imageAnchor.referenceImage.physicalSize.width, height: imageAnchor.referenceImage.physicalSize.height) plane.firstMaterial?.diffuse.contents = self.videoPlayer let planeNode = SCNNode(geometry: plane) planeNode.eulerAngles.x = -.pi / 2 node.addChildNode(planeNode) self.videoPlayer.play() } |
As said, every time a new anchor is added to the AR session. The method above will be called. Therefore, we first need to check if the newly added anchor is an ARImageAnchor. If it’s an image anchor, we create a plane by using SCNPlane for holding the video player. The size of the rectangular plane is set to its real-world size that you provided earlier when configuring the reference image.
Next, we instantiate a SCNNode with the plane we just created and add the plane to the scene by calling addChildNode. Lastly, we call the play() method of the player to start the video playback.
You may wonder why we need to modify the eulerAngles to rotate the plane. By default, SCNPlane is vertically oriented. However, the detected image is supposed to be horizontal. To match the detected image’s orientation, we have to rotate the plane. The figure below shows you the default orientation of the plane.
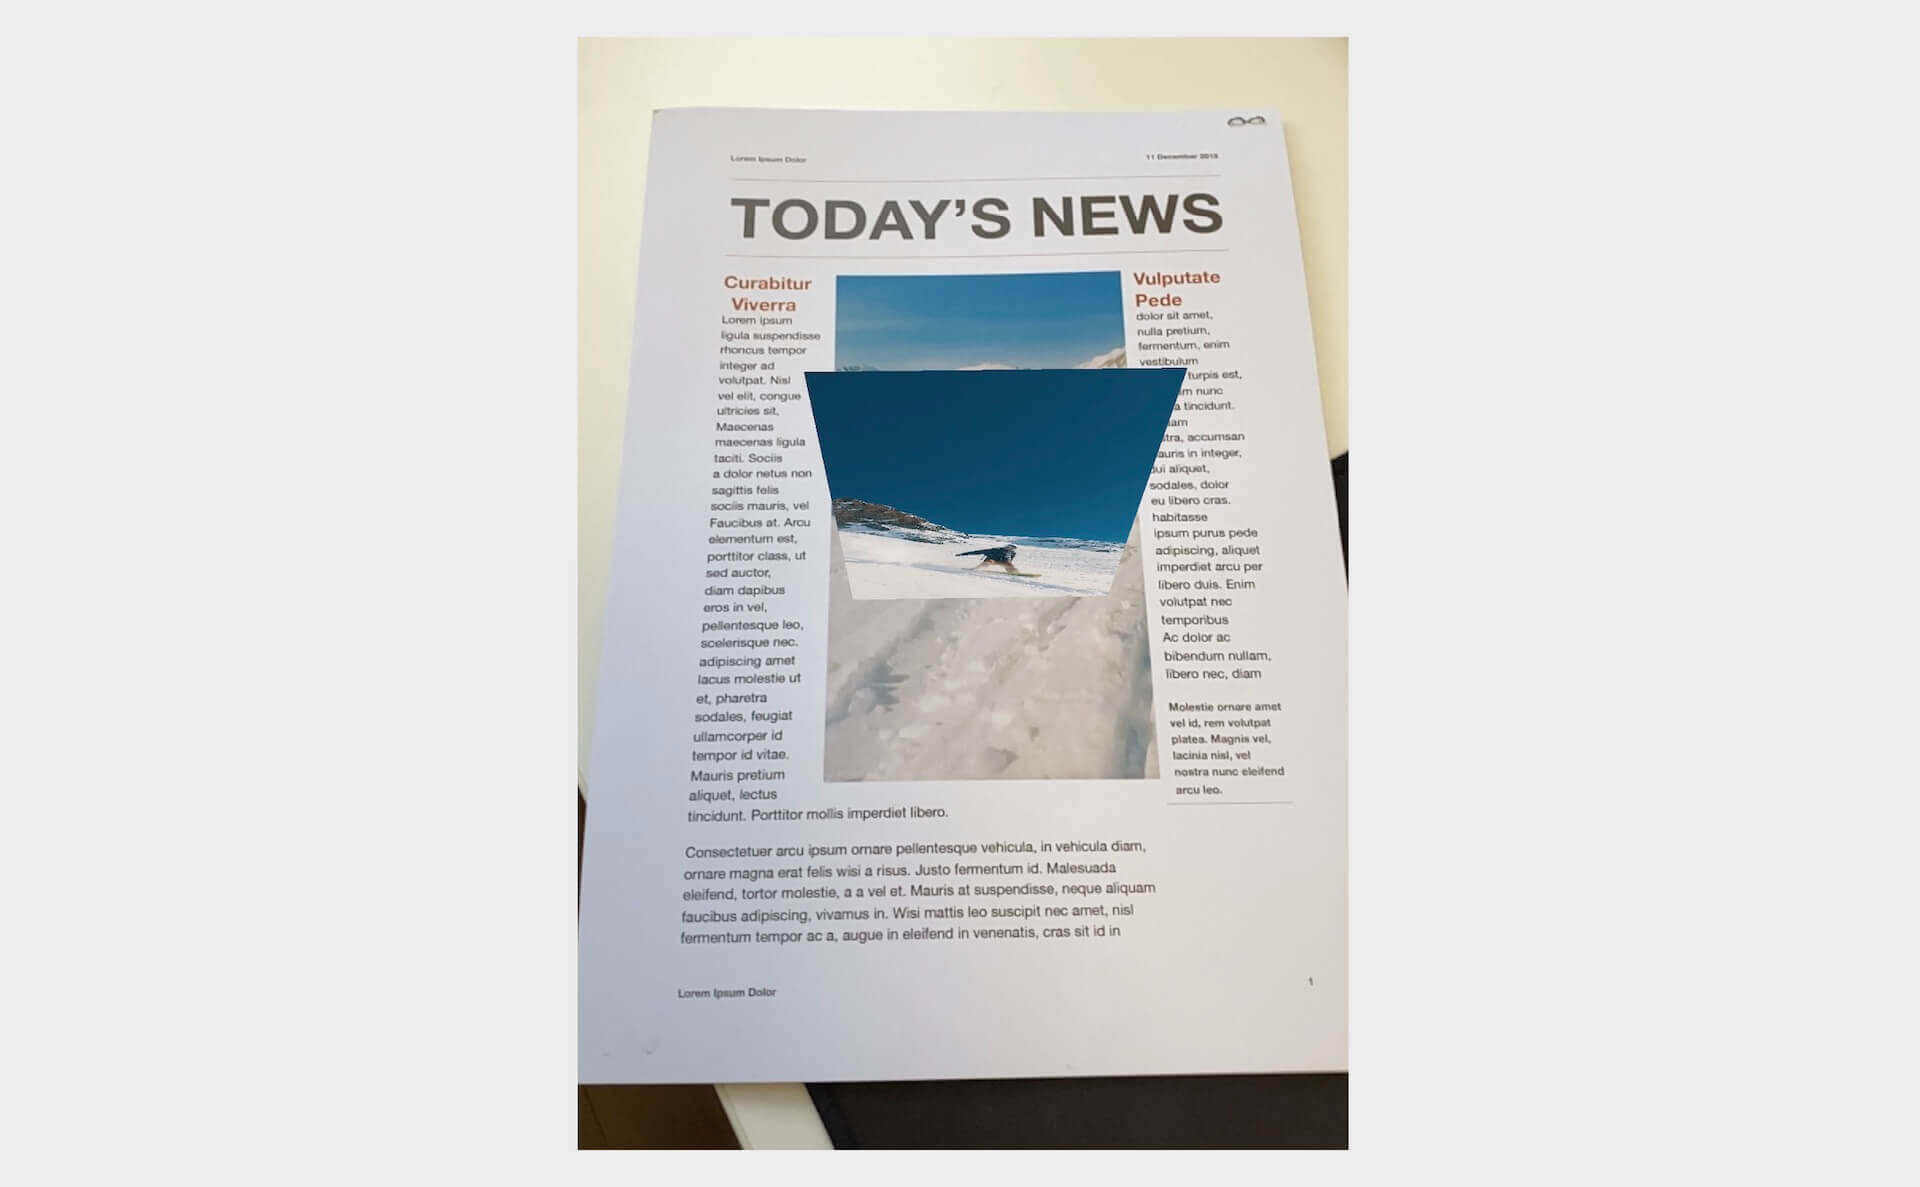
If you can’t wait to try out the image tracking, you can deploy the app to your iPhone. Assuming you’ve printed out the PDF document, you can point the device camera at the newspaper. When the app detects the “Snowboarding” image, it automatically overlay the video player on top of the image and starts the video playback.
In case that you do not have a printer, you may load the PDF document on iPad, which has a similar size of the A4 paper. Alternatively, you can open the file on your Mac for testing. But please try to resize it to A4 size.
Replaying the Video
The image tracking should work now. However, the video playback only occurs once. When the video finishes playing, it will not play again. To fix this issue, insert the following code in the viewDidLoad method:
|
1 2 3 4 |
NotificationCenter.default.addObserver(forName: .AVPlayerItemDidPlayToEndTime, object: self.videoPlayer.currentItem, queue: .main) { [weak self] (notification) in self?.videoPlayer.seek(to: CMTime.zero) } |
We added an observer to listen to the AVPlayerItemDidPlayToEndTime notification, which is posted when the video playback ends. In this case, we set the playback time back to zero.
To play the video again, insert the following method in ViewController:
|
1 2 3 4 5 6 7 8 9 10 11 12 |
func renderer(_ renderer: SCNSceneRenderer, didUpdate node: SCNNode, for anchor: ARAnchor) { if let pointOfView = sceneView.pointOfView { let isVisible = sceneView.isNode(node, insideFrustumOf: pointOfView) if isVisible { if videoPlayer.rate == 0.0 { videoPlayer.play() } } } } |
This method is automatically called by ARKit when the anchor is updated. We first check the reference image is visible on screen and then start the replay if the result is true.
Disabling Statistics
You should notice a statistics bar appeared at the bottom of the screen. If you do not need it, you can disable it by changing the following line of code in viewDidLoad and set its value to false:
|
1 |
sceneView.showsStatistics = false |
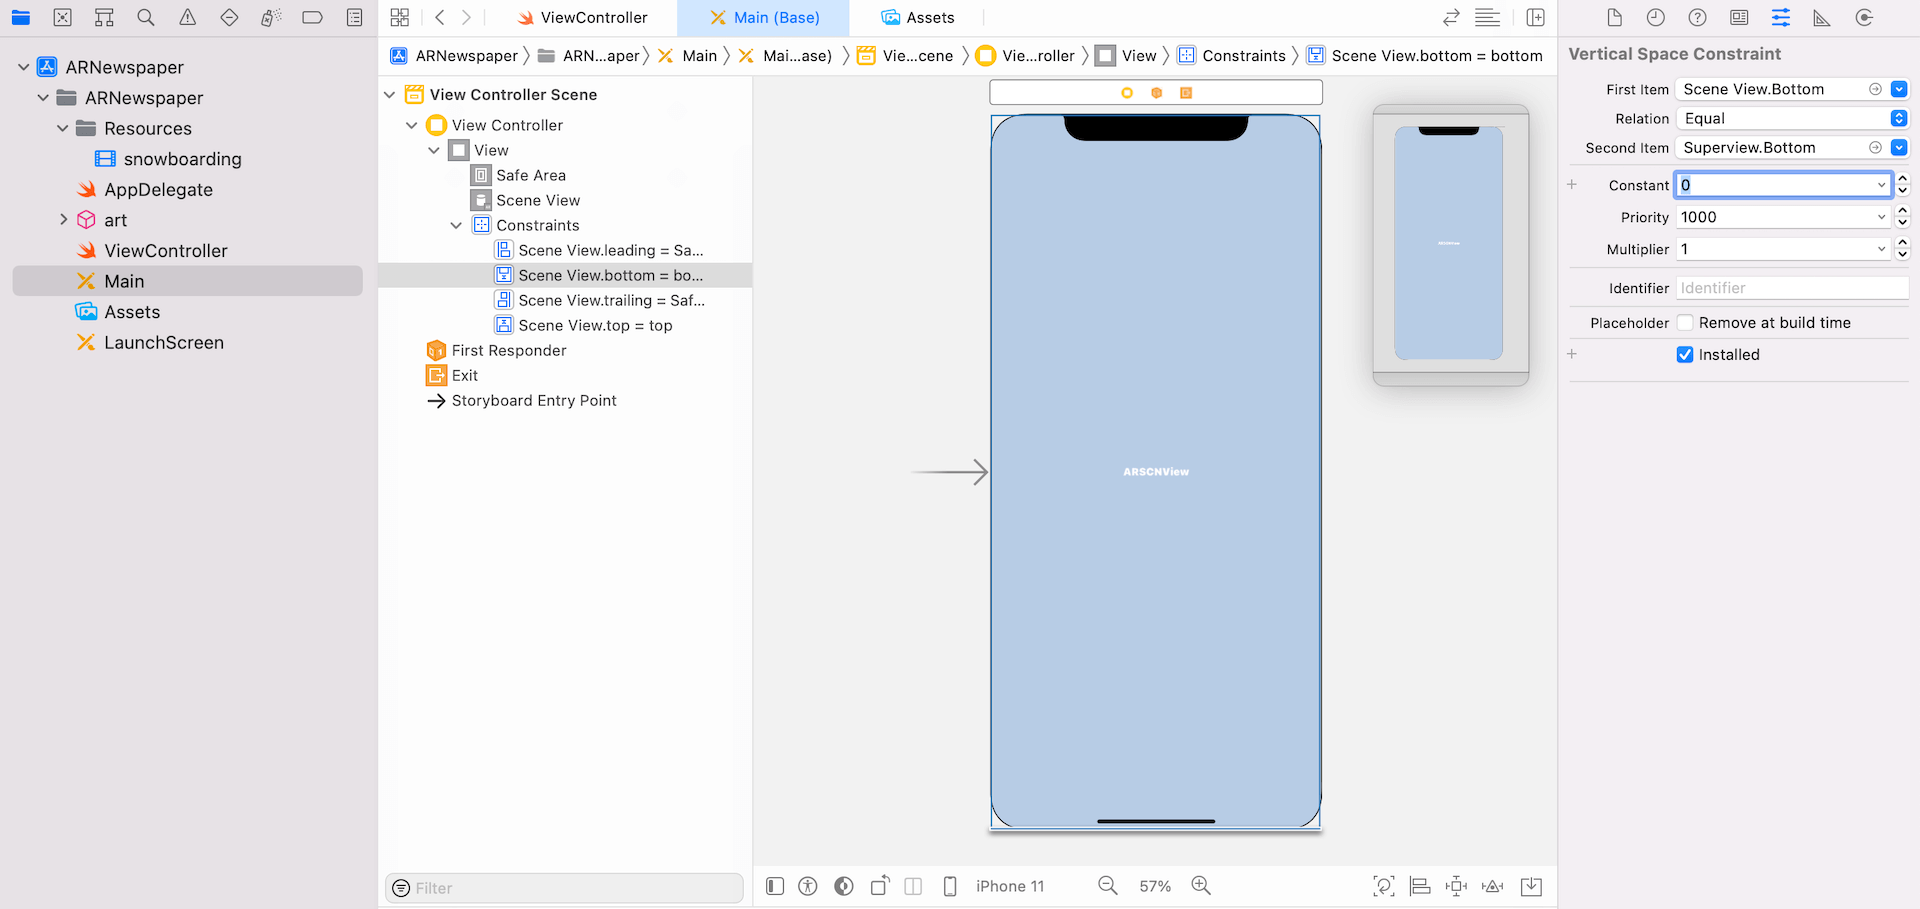
Expand the View to Full Screen
By default, the Scene View generated by Xcode has constraints that were configured respect to the safe area. This is why you see an empty white bar at the bottom of the screen. If you want to make the scene view full screen, you switch over to Main.storyboard and change the scene view’s bottom constraint. In the Attributes inspector, change the Second Item to Superview.Bottom and set its constant value to 0.
Summary
In this chapter, we explore another configuration provided by ARKit that lets you perform image tracking. With ARImageTrackingConfiguration, it empowers developers to build some interesting apps that merges virtual content with the real world environment. The Harry Potter newspaper is just one of the many examples. You may apply the technique to enrich the user experience and engagement of some real-world objects like postcard and restaurant menus.
This is a sample chapter of our Intermediate iOS Programming with Swift book. To download the full source code and access all its content, you can check it out here.

Founder of AppCoda. Author of multiple iOS programming books including Beginning iOS Programming with Swift and Mastering SwiftUI. iOS App Developer and Blogger. Follow me at Facebook, Twitter and Google+.