Earlier, Apple dropped the first beta of iOS 13 to the public. For a general user, dark mode is definitely the biggest visual change in this release. By flipping an option in Settings, iOS makes everything dark! In dark mode, the mobile operating system automatically applies a system-wide dark theme for all apps and screens. Apple’s preinstalled apps like Mail and Calendar already look nice in this mode. But for apps developed by other developers, it will need some works to make the app support dark mode.
The focus of this tutorial is not about how to adopt dark mode for your apps. Federico Zanetello already wrote a great article on the topic, showing you what to do to support dark mode in iOS 13. Instead, this tutorial will show you how to use the preview feature in Xcode 11 to test dark mode, as well as, light mode.
As a demo, I will use the sample app that we have built in the previous SwiftUI tutorial. If you haven’t read the tutorial, it’s recommended for you to check it out first to better understand the demo app.
Previewing the App in Dark Mode
Assuming you’ve download the demo project, open it using Xcode 11 and select the ContentView.swift file. Xcode should automatically generate the preview on the design canvas. If you can’t see the preview, it’s very likely your Mac hasn’t been upgraded to macOS Catalina. While Xcode 11 still supports macOS Mojave, the instant preview only works with Catalina.
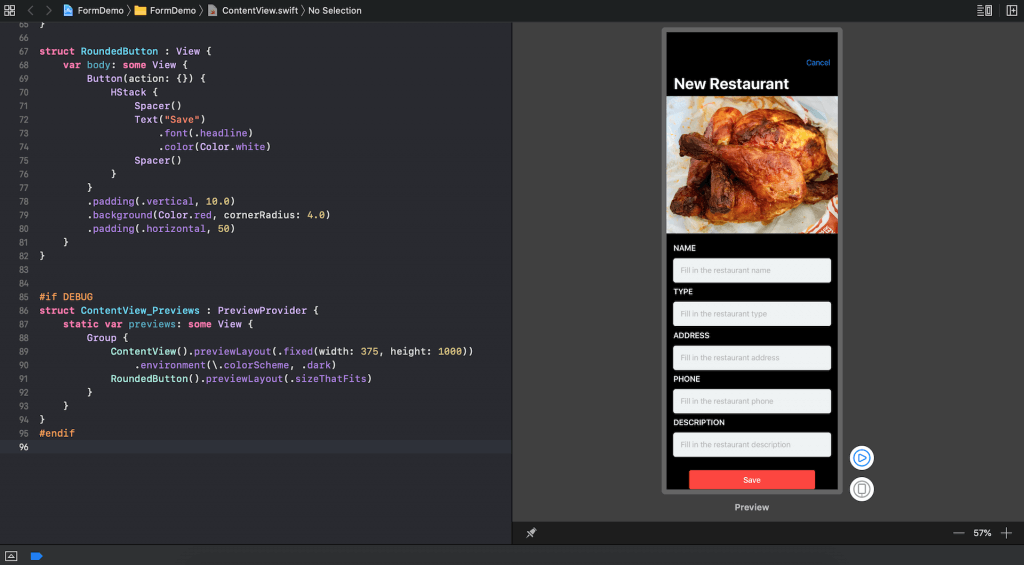
In the project, we use the following line of code to preview the app in a fixed layout mode:
|
1 |
ContentView().previewLayout(.fixed(width: 375, height: 1000)) |
To preview the screen in dark mode, all you need to do is update the line of code like this:
|
1 2 |
ContentView().previewLayout(.fixed(width: 375, height: 1000)) .environment(\.colorScheme, .dark) |
You can access the environment property and specify the color scheme you want to use. In the code above, we tell Xcode to render the screen in dark mode. In the design canvas, you should see the same screen with the dark theme applied:
Previewing the App in both dark and light mode
Now that we can only preview the app in dark mode, wouldn’t it be great if we can preview both dark and light mode in parallel? This should save us time from switching between these modes.
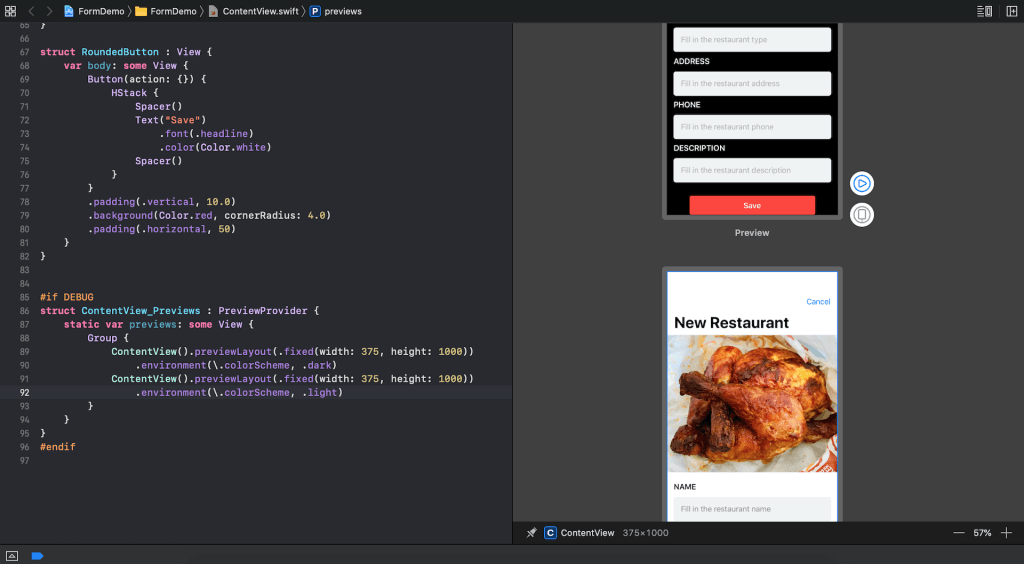
In SwiftUI, you can use Group to group multiple views together and it works for preview too. So, to display the preview in both light and dark modes, modify the ContentView_Previews struct like this:
|
1 2 3 4 5 6 7 8 9 10 |
struct ContentView_Previews : PreviewProvider { static var previews: some View { Group { ContentView().previewLayout(.fixed(width: 375, height: 1000)) .environment(\.colorScheme, .dark) ContentView().previewLayout(.fixed(width: 375, height: 1000)) .environment(\.colorScheme, .light) } } } |
Here we instruct Xcode to render two previews: one for dark mode (.dark) and one for light mode (.light). In the design canvas, you’ll see the preview in dark mode. If you scroll down a bit, you’ll find another preview for light mode. Cool, right?
Previewing the App in dark mode on a simulated device
If you prefer to preview the app screen on a simulated device, you can call the previewDevice function instead of previewLayout like this:
|
1 2 |
ContentView().previewDevice("iPhone Xs") .environment(\.colorScheme, .dark) |
Xcode will render the specified device on the design canvas in dark mode.
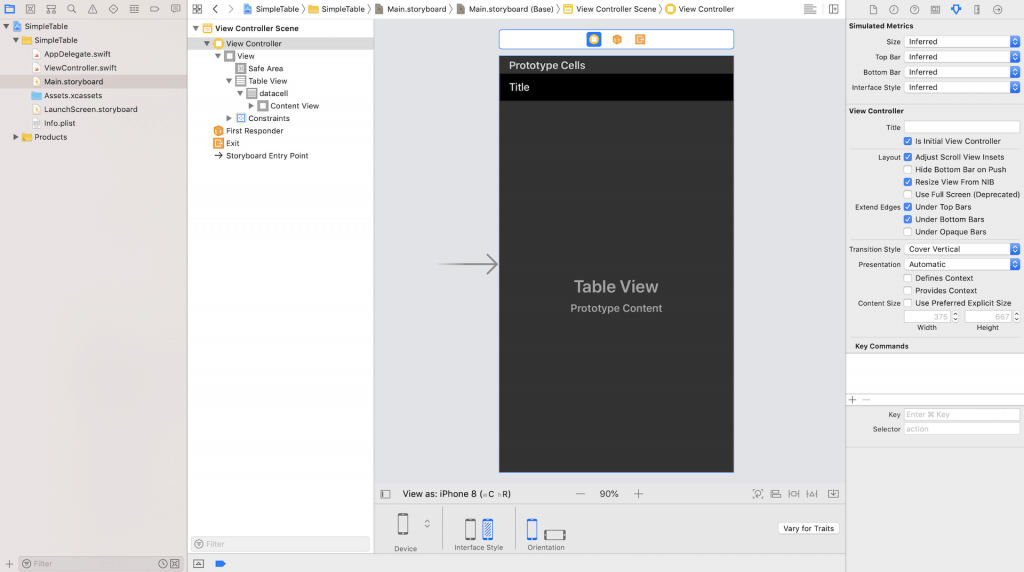
Previewing the App in dark mode in Storyboards
You may not adopt the SwiftUI framework in your app. For existing apps, you probably design and develop the UI using Storyboards. Xcode 11’s Interface Builder also comes with a new feature for you to preview the screen in dark mode. Open any of your storyboards file, you should find the Interface Style option in the device menu. Click the dark mode icon to switch to the dark mode.
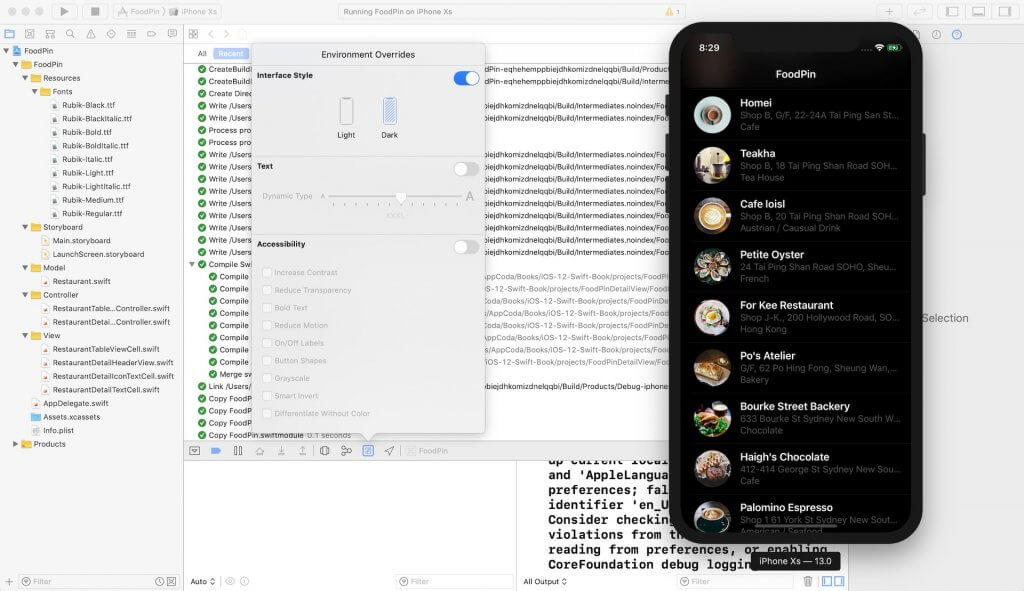
Testing the App with Simulators
Of course, you can test dark mode using the built-in simulators. In Xcode 11, you can find an Environment Overrides option in the debug bar after running the app on a simulator. Click that button and enable dark mode by choosing the dark interface style.
Wrap Up
For the upcoming iOS release, dark mode is the biggest cosmetic change to general users and it affects nearly all apps. It’s time to review your app in dark mode and make sure the app looks nice in this new mode. Whether you’re going to build a new app using SwiftUI or continue to develop the app using storyboard, you can use one of the methods we just discussed to preview your app.
I hope you enjoy the tutorial. Please feel free to leave me comment if you have any questions.

Founder of AppCoda. Author of multiple iOS programming books including Beginning iOS Programming with Swift and Mastering SwiftUI. iOS App Developer and Blogger. Follow me at Facebook, Twitter and Google+.
Comments