When a macOS user specifically grants a sandboxed app access to a file/folder outside of that app’s container, that special access only survives until the app is closed. If the user reopens the app and wants to again read from and write to that “outside” folder, they have to go through the whole process of showing macOS their “intent” to stray out of the container — unless the developer adds something called “security-scoped bookmarks.” These bookmarks are the topic of today’s tutorial.
I’ll be explaining in-depth how developers can create these special bookmarks, store them, access them later, including two required steps that must take place just before and just after a stored bookmark is referenced. Specifically, I’ll be clarifying Apple’s rather terse documentation on “the methods, constants, and entitlements to use for implementing security-scoped bookmarks in your app.”
Please download my sample Xcode 11.6 project, written in Swift, essential for getting the most out of this tutorial.
A series of tutorials
This is the fourth part in a four-part series of tutorials comparing the differences between distributing macOS apps inside and outside of the Mac App Store (MAS), comparing sandboxed and non-sandboxed apps, and considering app security.
In Part I of this series, I built a non-sandboxed app, discussed certificates, signed the app, notarized it, briefly talked about building an installer, signed and notarized the installer, and lastly touched on distribution of the app installer.
In my second tutorial (Part II), I examined the app sandbox and then built an app that, whether sandboxed or not sandboxed, could read and write outside of its container — and could be sold and distributed either outside the MAS or through the MAS, both with Apple’s blessings.
Part III was my detailed guide on how to use Packages, by far one of the most popular macOS development tools, for creating app installers, allowing you too securely distribute your products and help your customers easily add your functionality to their Macs. You can review my column here on AppCoda for a list of all four parts of my series, as well as all my other articles.
Review of app sandboxing
My Part II article has a detailed definition of sandboxing in the section entitled “What is an app sandbox?”. Please review, but let me briefly explain how today’s tutorial gives you additional control over sandbox restrictions.
You should think of the sandbox as a very constrictive fence surrounding your app. Of course, an app would be useless if this fence was impenetrable. Apps are only useful if they can act on some type of input and produce meaningful output. Apple wants us as developers to start with very little access to system resources and then only request more resources on an as-needed basis. Because of scope, time, and space constraints, I’ve confined the discussion of resources to the file system, but keep in mind that your vulnerable surface area includes Mac components like network connections, microphones, the camera, Bluetooth, etc. To reiterate, in this tutorial, we’re going to “bookmark” a resource — a folder’s URL — outside the sandbox so the user doesn’t have to approve access to that folder every time he/she opens the app.
To keep this article focused on one topic, let me just be precise in my terminology. There are actually two types of security-scoped bookmarks. Using Apple’s language, we’ll only be talking about an app-scoped bookmark, one which “provides your sandboxed app with persistent access to a user-specified file or folder.” The other type, a document-scoped bookmark, is similar but slightly more complex and “typically supports the notion of a project document that refers to other files.” I leave it to you to do some research and easily extrapolate from the knowledge provided in this tutorial.
Review of getting user intent for folders outside the sandbox
If a user wants to access a file/folder that is outside of the container, Apple requires the user to explicitly select that file/folder using an NSOpenPanel. Apple is getting the user’s overt permission — they call “intent” — to access that folder/file. This is one of Apple’s methods for limiting the vulnerable surface area of the app to attack by malware. Remember that no permission is needed from the user to access the file system inside the app’s sandboxed container.
Configuring and implementing this intent-getting feature requires some preparation via Xcode which is discussed in detail in Part II of this series. Please review the section in that article entitled “Getting user intent for folders outside the sandbox.” We’ll review the code shown in that section again as a slightly modified version of it is also incorporated into the source included with this tutorial’s sample project.
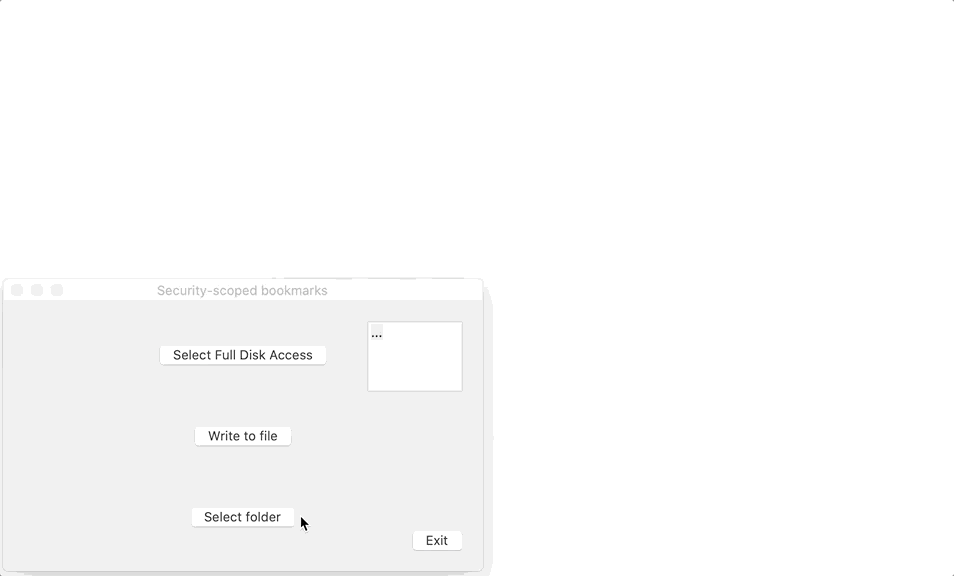
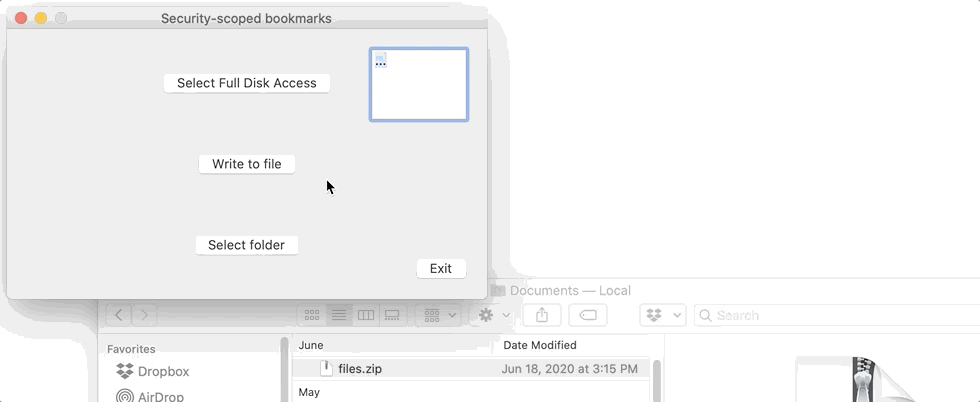
I determine the user’s “intent” by running my app, clicking my Select folder button, and recording the URL of the folder the user picked (~/Documents). What I’m doing is saying “If you want to access a folder outside of the container, you have to explicitly tell me it’s OK for the app to read and/or write there.” When you look at my sample source code for this tutorial, you’ll notice some new code I’ve added to the function in which user intent for a folder (and its URL) is obtained: I create a security-scoped bookmark for that folder/URL. Here’s a short video showing how my app gets the user’s permission to access their Mac’s ~/Documents folder and then creates a security-scoped bookmark for that folder:
This would be a really good time for you to open up my sample project and start following along.
Implementing security-scoped bookmarks
Let’s discuss my code so you can implement security-scoped bookmarks in your own macOS apps. I’ve placed some step numbers (e.g., “STEP 1”) in my source commentary that will make it easier for us to talk about my code here in the tutorial while also easily being able to find it in my project.
Project configuration
I’ve mentioned “Step 1” in my code just as a reminder, but it is an Xcode project configuration option. Open the project’s AppNotaryAndDistrib.entitlements file and make sure you take notice of 1) the entitlement turning on sandboxing and 2) the entitlement enabling security-scoped bookmarks, like so:
|
1 2 3 4 5 6 7 8 9 10 11 12 |
<?xml version="1.0" encoding="UTF-8"?> <!DOCTYPE plist PUBLIC "-//Apple//DTD PLIST 1.0//EN" "http://www.apple.com/DTDs/PropertyList-1.0.dtd"> <plist version="1.0"> <dict> <key>com.apple.security.app-sandbox</key> <true/> <key>com.apple.security.files.user-selected.read-write</key> <true/> <key>com.apple.security.files.bookmarks.app-scope</key> <true/> </dict> </plist> |
Selecting a folder to bookmark
Now let’s dive into my Swift. Look at the selectFolderBtnClicked(_ sender: Any) method in my sample project’s ViewController.swift file:
|
1 2 3 4 5 6 7 8 9 10 11 12 13 14 15 16 17 18 19 20 21 22 23 24 25 26 27 28 29 30 31 32 33 34 35 36 37 38 39 40 41 42 43 44 45 46 47 48 49 50 51 52 53 54 55 56 57 58 59 60 61 62 63 64 65 66 67 68 69 70 71 72 73 74 |
... /** We encourage the user to select a folder, like ~/Documents, showing their "intent" to grant our app access to that folder. That directory is OUTSIDE of this app's sandbox. We do this in preparation for allowing us to reach out of our container. What's new in this version of the code is BOOKMARKING the selected folder. */ @IBAction func selectFolderBtnClicked(_ sender: Any) { self.pathTextField.stringValue = "..." let folderSelectionDialog = NSOpenPanel() // a modal dialog folderSelectionDialog.prompt = "Select" folderSelectionDialog.message = "Please select a folder" folderSelectionDialog.canChooseFiles = false folderSelectionDialog.allowedFileTypes = ["N/A"] folderSelectionDialog.allowsOtherFileTypes = false folderSelectionDialog.allowsMultipleSelection = false folderSelectionDialog.canChooseDirectories = true // open the MODAL folder selection panel/dialog let dialogButtonPressed = folderSelectionDialog.runModal() // if the user pressed the "Select" (affirmative or "OK") // button, then they've chosen a folder if dialogButtonPressed == NSApplication.ModalResponse.OK { if folderSelectionDialog.urls.count == 1 { if let url = folderSelectionDialog.urls.first { // if the user doesn't select anything, then // the URL "file:///" is returned, which we ignore if url.absoluteString != "file:///" { // save the user's selection so that we can // access the folder they specified later self.userSelectedFolderURL = url print("User selected folder: \(url)") self.pathTextField.stringValue = url.absoluteString // STEP 1 - add the entitlement to our target notifying // macOS that we're using security-scoped bookmarks // STEP 2 - create a persistent bookmark for the // folder the user just selected _ = saveBookmarkForSelectedURL() } else { print("User did not select a folder: file:///") } } // end if let url = folderSelectionDialog.urls.first { } else { print("User did not select a folder") } // end if folderSelectionDialog.urls.count } else if dialogButtonPressed == NSApplication.ModalResponse.cancel { // user clicked on "Cancel" print("User cancelled folder selection panel") } // end if dialogButtonPressed == NSApplication.ModalResponse.OK } // end func selectFolderBtnClicked ... |
What I’m doing in here is popping up an NSOpenPanel, allowing the user to browse through their Mac’s file system, and enabling him/her to select a folder outside the sandbox. There’s one important difference between the Part II code and that shown immediately above: Once I obtain the URL of the folder for which the user has clearly shown their intent, I bookmark that folder. By doing this, the app remembers the folder so the user doesn’t have to go through all the rigamarole required to give permission to access that folder every time the app is run. Remember that I showed you a video up above of this process.
It might be a good idea to provide a checkbox in an accessoryView you wire into your NSOpenPanel with a prompt saying something like “Remember this folder?” This would provide a higher level of security by requiring your users to decide whether a folder outside the container should remain accessible “forever” or not. That’s a style issue I leave to you. Note that NSOpenPanel inherits from NSSavePanel.
Bookmarking a folder outside the container
Let’s continue talking about my selectFolderBtnClicked(_ sender: Any) method, but concentrate on the new bookmarking code. In an effort help developers understand my code, I added a project configuration reminder: “STEP 1 – add the entitlement to our target notifying macOS that we’re using security-scoped bookmarks.” In other words, don’t forget to add the com.apple.security.files.bookmarks.app-scope entitlement before doing anything else. STEP 2 is the call to my saveBookmarkForSelectedURL() method. There, I create a persistent bookmark for the folder/URL the user just selected. I pass the URL to the bookmarkData(options:includingResourceValuesForKeys:relativeTo:) instance method of the NSURL class (STEP 2.1) and then save the new bookmark in UserDefaults (STEP 2.2). The bookmark is some kind of Data blob (with metadata?), most likely encrypted so that malicious software with prying eyes can’t read it from a preferences .plist file. Remember to store the bookmark data value in preferences with a meaningfully-named key:
|
1 2 3 4 5 6 7 8 9 10 11 12 13 14 15 16 17 18 19 20 21 22 23 24 25 26 27 28 29 30 31 32 33 34 35 36 37 |
... func saveBookmarkForSelectedURL() -> Bool { do { if let selectedURL = self.userSelectedFolderURL { // STEP 2.1 - create a security-scoped bookmark // "Returns bookmark data for the URL, created with specified options and resource values." // Return Value: Type: Data - A bookmark for the URL. let bookmarkData = try selectedURL.bookmarkData(options: .withSecurityScope, includingResourceValuesForKeys: nil, relativeTo: nil) // get an instance of UserDefaults let userDefaults = UserDefaults.standard // STEP 2.2 - store the newly-created bookmark in UserDefaults // accessible with a meaningful key; user defaults supports storing // and fetching the Data/NSData types userDefaults.set(bookmarkData, forKey: "PermanentFolderBookmark") // creating the bookmark did not throw an error, so return positive return true } else { print("ERROR: You cannot bookmark a URL that is nil") return false } } catch let error { print("Could not create a bookmark because: ", error) return false } } // end func saveBookmarkForSelectedURL() ... |
Retrieving a bookmarked folder/URL
Now we’ll see how a security-scoped bookmark lasts across app launches. Let’s assume that the user of my app has explicitly used the Select folder button in my app’s UI, thus executing my selectFolderBtnClicked(_ sender: Any) method, and added the ~/Documents folder to their app sandbox as we just finished discussing. Let’s further assume that the user closed my app after bookmarking ~/Documents and it is now 5 days later. They launch my app and then click the Write to file button. The IBAction bound to that button, writeToFileBtnClicked(_ sender: Any), is shown below, but in this section we’ll only talk about STEP 3.
Getting the bookmark stored in UserDefaults is a whole step in and of itself. Accessing — reading from or writing to — the bookmark/URL takes some special handling that we’ll talk about separately. We’ll talk about STEP 4, STEP 5, and STEP 6 in the next section.
Read through the following code and take special notice of STEP 3, the call to getPersistentFileURL(). We’ll talk about that method just below the code for writeToFileBtnClicked(_ sender: Any).
|
1 2 3 4 5 6 7 8 9 10 11 12 13 14 15 16 17 18 19 20 21 22 23 24 25 26 27 28 29 30 31 32 33 34 35 36 37 |
... @IBAction func writeToFileBtnClicked(_ sender: Any) { self.pathTextField.stringValue = "..." // STEP 3 - get the permanent folder location the user selected earlier if var persistentURL = getPersistentFileURL() { // STEP 4 - "Explicitly indicate that you want to use the file-system resource whose URL you obtained in step 3. Do this immediately after obtaining the security-scoped URL..." _ = persistentURL.startAccessingSecurityScopedResource() // create the FULLY-QUALIFIED path to the file by // appending a file name to the URL (path) persistentURL = persistentURL.appendingPathComponent("test.txt", isDirectory: false) print("Persistent URL: ", persistentURL) // STEP 5 - prepare text to write to the file let fileText = "This is the text in the file."; // try writing file to a non-sandboxed folder... do { try fileText.write(to: persistentURL, atomically: false, encoding: String.Encoding.utf8) self.pathTextField.stringValue = persistentURL.absoluteString } catch let error // ... or find out why write fails { print(error.localizedDescription) // write some code to recover from error } // STEP 6 - "When done using the resource, explicitly indicate that you want to stop using it. Do this as soon as you know that you no longer need access to the resource (typically, after you close it)." persistentURL.stopAccessingSecurityScopedResource() } // end if var persistentURL = ... } // end func writeToFileBtnClicked ... |
STEP 3 is the call to getPersistentFileURL() which returns our previously-bookmarked URL. To get our bookmark, first we need to retrieve the bookmark’s Data value from UserDefaults by using the key with which we originally saved it. In STEP 3.1, we extract the URL from our bookmark’s Data by passing that blob to init(resolvingBookmarkData:options:relativeTo:bookmarkDataIsStale:), an initializer of NSURL. It’s pretty obvious that we want a URL from our stored bookmark, so there’s no need to dissect this SDK method call. The only thing I’ll highlight is the bookmarkDataIsStale variable that I pass as a pointer into the resolvingBookmarkData initializer. If an app gets deleted and reinstalled, macOS is upgraded, or some such unforeseen eventuality occurs, it’s possible that our bookmark may be wrong or outdated. We certainly don’t want a URL that points to garbage or nil, thus you see the code I’ve written to handle a “stale” bookmark in STEP 3.2. When getPersistentFileURL() returns, STEP 3 is done, and we’ve got our URL from our bookmark. Please go back up and review my writeToFileBtnClicked(_ sender: Any) method up above and we’ll pick up in the next section with STEP 4.
|
1 2 3 4 5 6 7 8 9 10 11 12 13 14 15 16 17 18 19 20 21 22 23 24 25 26 27 28 29 30 31 32 33 34 35 36 37 38 39 40 41 42 |
... func getPersistentFileURL() -> URL? { // STEP 3 - get the permanent folder location the user selected earlier // get from UserDefaults let userDefaults = UserDefaults.standard if let bookmarkData = userDefaults.data(forKey: "PermanentFolderBookmark") { do { // we'll pass this variable by value so it can be set // by an SDK method var bookmarkDataIsStale = false // STEP 3.1 - "When you later need access to a bookmarked resource, resolve its security-scoped bookmark by calling the the URLByResolvingBookmarkData:options:relativeToURL:bookmarkDataIsStale:error: method of the NSURL class" let urlForBookmark = try URL(resolvingBookmarkData: bookmarkData, options: .withSecurityScope, relativeTo: nil, bookmarkDataIsStale: &bookmarkDataIsStale) // STEP 3.2 - a bookmarks might be "stale" because the app hasn't been used // in many months, macOS has been upgraded, the app was // re-installed, the app's preferences .plist file was deleted, etc. if bookmarkDataIsStale { print("The bookmark is outdated and needs to be regenerated.") _ = saveBookmarkForSelectedURL() return nil } else { return urlForBookmark } } catch { print("Error resolving bookmark:", error) return nil } } else { // bookmarkData is nil print("Error retrieving persistent bookmark data.") return nil } // end if let bookmarkData = } // end getPersistentFileURL ... |
Accessing a bookmarked folder/URL
Let’s pick up where we left off in my writeToFileBtnClicked(_ sender: Any) method up above. Remember we took a short detour to examine how a URL is obtained from bookmark Data stored in UserDefaults. Let’s assume have our URL and resume our discussion with STEP 4. You cannot read from or write to a resolved bookmark’s URL directly. We’ll be writing a file to our bookmark folder’s URL in this case. Apple requires a special step both before and after we write (well, access in general).
I believe there is sound method in Apple’s madness. They want developers to be absolutely certain they know that they’re potentially accessing a file/folder that’s “outside” the sandbox, even though the user already provided their intent — permission — to do so. If a developer were careless in accessing a file/folder, they may accidentally expand the attackable surface area of their app. This could be especially dangerous if faced with a very aggressive and innovative invader.
Let’s walk through the remaining steps involved in accessing — writing to — a file in a bookmarked folder. Please again review the writeToFileBtnClicked(_ sender: Any) method shown above while pondering these final steps:
STEP 4: Before writing data to the file, you must call the startAccessingSecurityScopedResource() instance method of the bookmark’s NSURL.
STEP 5: Write text to file at the location specified by the bookmark’s URL, where I’ve hardcoded and appended a filename to the URL.
STEP 6: Immediately after you’re finished with a bookmark, in this case, writing to a file in the folder it represents, you must call the stopAccessingSecurityScopedResource() instance method of the bookmark’s NSURL. It is very important that you remember to balance every call to startAccessingSecurityScopedResource() with a call to stopAccessingSecurityScopedResource() because:
If you fail to relinquish your access to file-system resources when you no longer need them, your app leaks kernel resources. If sufficient kernel resources are leaked, your app loses its ability to add file-system locations to its sandbox, such as via Powerbox or security-scoped bookmarks, until relaunched.
Now you’ve gone through the complete cycle of getting user intent for a file/folder (resource) outside the sandbox, bookmarking that resource, saving the bookmark, closing and reopening the app perhaps multiple times, reading the bookmark, and accessing it without driving the user crazy with too many prompts, from beginning to end. Here’s a video showing my app writing a file to a folder, ~/Documents, that was bookmarked several sessions back; i.e., writing to a bookmark after the app has been closed and reopened several times:
Conclusion
After this four-part series covering macOS development, I’ve covered a lot of ground, including comparing the differences between distributing macOS apps inside and outside of the Mac App Store, comparing sandboxed and non-sandboxed apps, and considering app security. I’ve especially highlighted secure coding techniques in a world increasingly reliant on technology, but also besieged by throngs of malicious hacker-attackers. On a positive note, I’ve also shown you how lucrative it can be when you have macOS skills. With the blurring of the lines between iOS and macOS just around the corner with macOS Big Sur 11 and iOS 14, it will be increasingly important for you to know about both environments.
This tutorial has shown you how to allow macOS apps to conveniently — at least for the user — reach outside of their sandboxes without requiring repetitive tasks. Always keep a good user experience in mind when designing your code.
Happy coding!

Avid and well-published author and software developer now specializing in iOS mobile app development in Objective-C and Swift. He has a strong background in C#, C++, .NET, JavaScript, HTML, CSS, jQuery, SQL Server, Agile, TDD, Git, and other technologies. He earned a B.Sc. and M.Sc. in Computer Science. Andrew has published several apps in the Apple App Store and has 30 years of experience in software development and professional writing. You can read his blog at http://iosbrain.com/.