Last year, Apple debuted a new framework called NaturalLanguage. This was the next step in making text-based machine learning much more accessible to developers all around. This year, the progress has not stopped as Apple has continued to make advancements in this framework.
In this tutorial, we’ll see what are some of the new API’s in this framework, as well as, what else is possible with the use of NaturalLanguage.
You’ll need to use Xcode 11 and Swift 5.1 in order to follow the tutorial and build the sample app. At the time of writing, these softwares are still in beta, so some functionalities may not be the same after the official release.
I have enabled the Mac device in order to test Project Catalyst, while working on this sample app. You’ll find some of the screenshots below are a Mac app.
What’s Natural Language Processing?
What exactly is Natural Language Processing (NLP)? Simply put, this framework gives apps the ability to analyze natural language text and understand parts of it. This framework can perform a variety of tasks on text by assigning tag schemes to the text.
So, what are tag schemes? Well, basically tag schemes are the constants used to identify the pieces of information we want from the text. You can think of them as a set of tasks we ask a tagger to apply to the text. Some of the most common tag schemes we ask the tagger to look for are the language, name type, lemma, etc.
All NLP tasks can be split into 2 sections: Text Classification and Word Tagging. At WWDC 2019, Apple announced improvements in both these sections of NaturalLanguage. We’ll go through them one by one to see what’s new!
The Starter Project
Before you continue reading the tutorial, please first download the starter project.
In our starter project, you can see that we have an app called Text+. This is a tabbed application that is used to separate the new API’s we’ll work with. At the end of our project, we should have an app that runs Sentiment Analysis in one tab and Word Embedding in the other tab. I’ll explain what these are in more depth later on. Here’s what you’ll be building.
Text Classification
Text Classification is the process of assigning a label to a group of text, such as a sentence or a paragraph or even a whole document. These labels can be anything you choose: either a topic label, sentiment label, or any label that help you classify it.
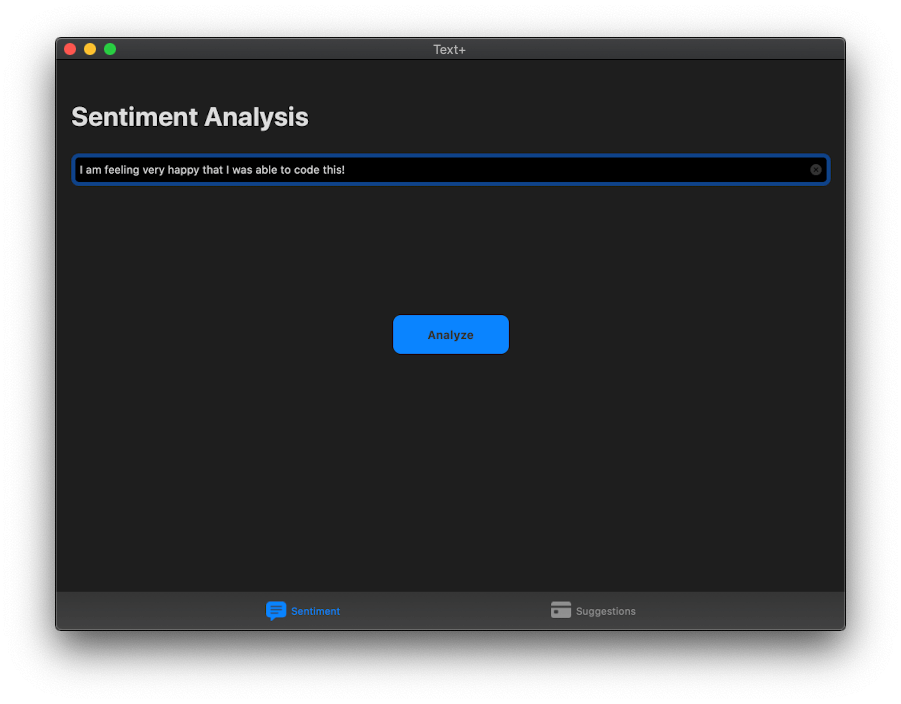
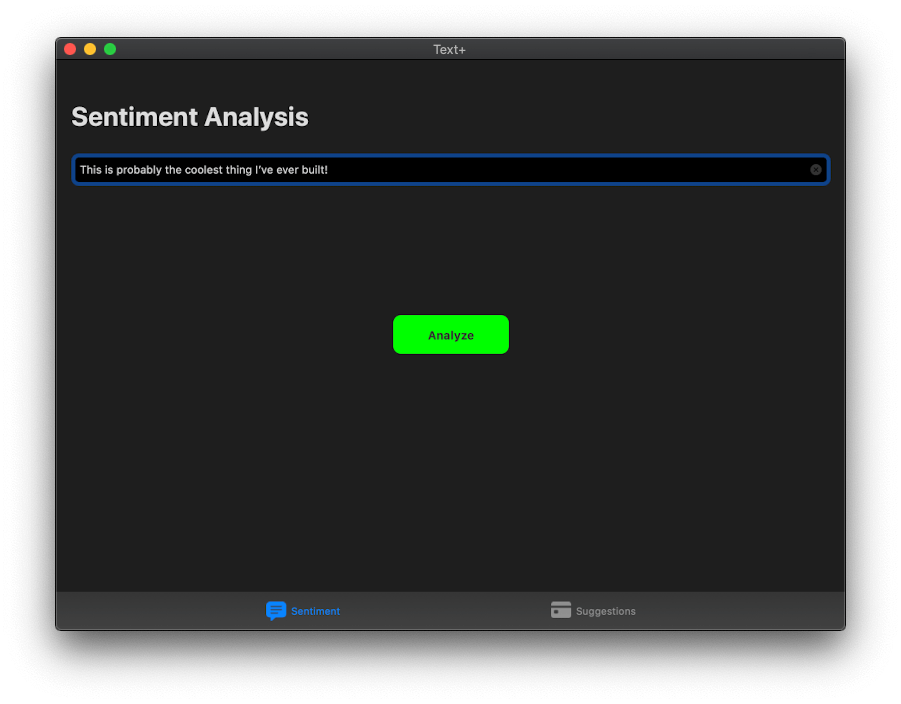
New in NaturalLanguage this year is the new built-in API for Sentiment Analysis. Sentiment Analysis is the task of classifying a block of text by it’s mood. From a score of -1.0 to 1.0, we can determine how positive or negative a group of text is.
In the demo application, choose the SuggestionViewController.swift file, you should see that we have a function called analyzeText(). This function will be called when the analyzeButton is tapped.
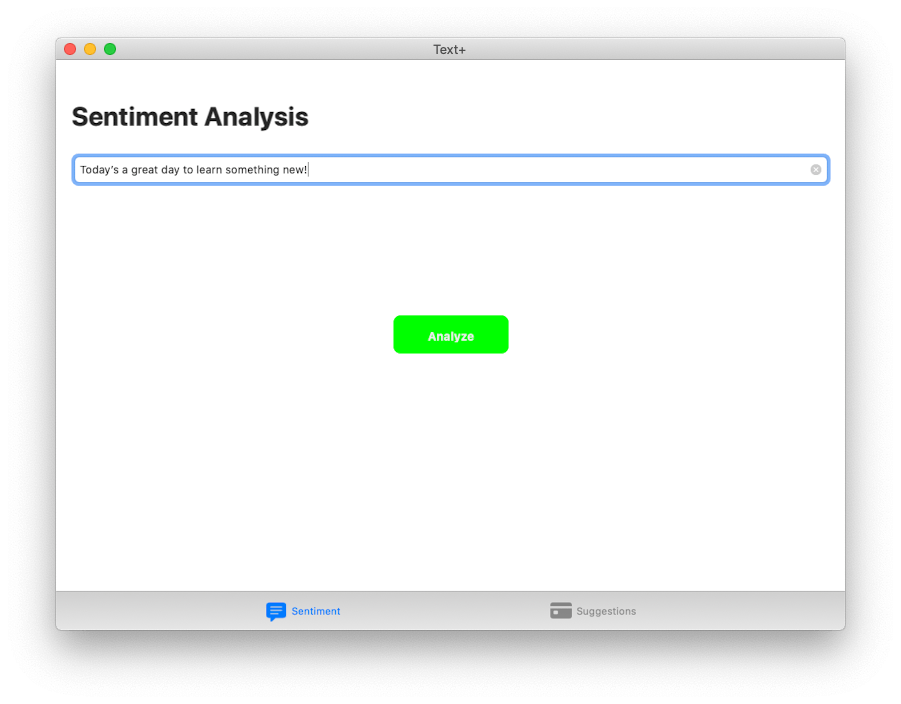
The user is free to type any message in the text field. What we want to do is to perform sentiment analysis on that message and change the color according of the button accordingly:
- green if the message is positive,
- red if the message is negative,
- Or blue if the message is neutral.
Let’s start to implement the change. Underneath where we declare our IBOutlets, let’s declare our tagger.
|
1 2 3 4 5 6 7 8 9 10 |
import UIKit import NaturalLanguage class SentimentViewController: UIViewController { @IBOutlet var analyzeButton: UIButton! @IBOutlet var messageTextField: UITextField! let tagger = NLTagger(tagSchemes: [.sentimentScore]) ... } |
Our tagger is an NLTagger where we ask it to observe the scheme of sentimentScore. This means that when we assign this tagger to our text, it will run the process of looking for a sentiment score.
Our next step is to add the logic to our analyzeText() function. Here’s how you do it:
|
1 2 3 4 5 |
@IBAction func analyzeText() { tagger.string = messageTextField.text let (sentiment, _) = tagger.tag(at: messageTextField.text!.startIndex, unit: .paragraph, scheme: .sentimentScore) print(sentiment!.rawValue) } |
If you’ve worked with NaturalLanguage before, this small block of code should be self-explanatory. If not, here’s what it means.
First, we assign the text in the messageTextField to our tagger by setting it in the string property. Next, we call the tag method of the tagger. This method will find a tag based on the given text and the specified scheme. Here the scheme we used is .sentimentScore. This scheme will score the text as positive, negative, or neutral based on its sentiment polarity.
The tag method also requires you to specify the linguistic unit. Since the user may type a paragraph of text, we specify the unit to .paragraph.
The call will return two values: the tag and the range in which our sentiment is detected. Since we don’t need it, we use _ in the code above. Finally, we print the value of sentiment.
You can now run the code and see the score printed to the console.
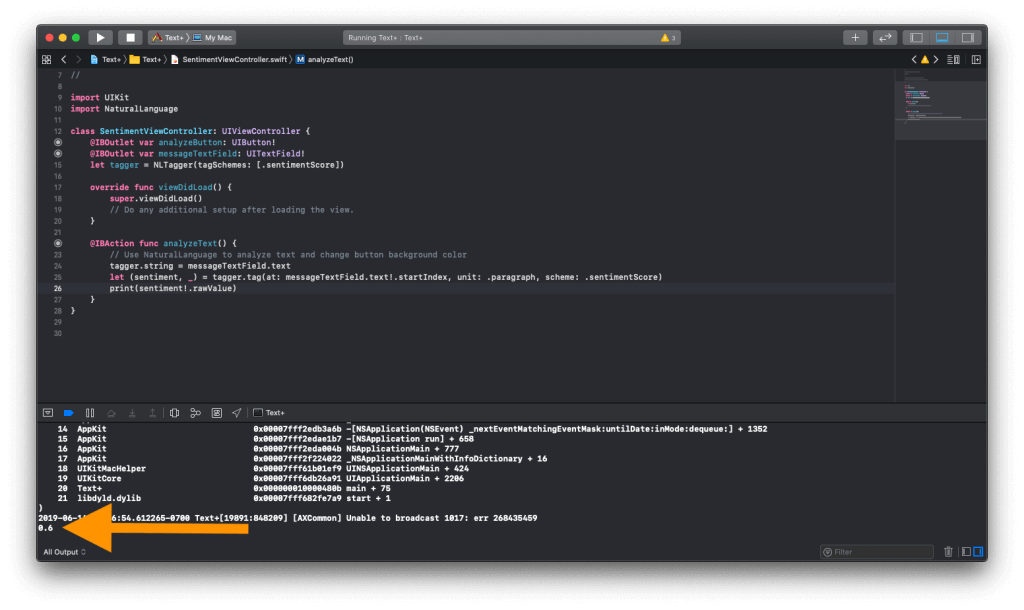
You can see that for my sentence, “I am feeling very happy that I was able to code this!”, I got a score of 0.6 which is mostly positive!
We’re done with the NLP part! Next, I challenge you to change the background color of analyzeButton in respect to the score we get. If the score is greater than 0, this means that it is positive so we’d like the background color to be green. If the score is less than 0, this means that it is negative so we’d like the background color to be red. Finally, if the score is 0, this means that it is neutral so we’d like the background color to be blue.
Were you able to do it? If not, no worries. Here’s how it can be done. Add the following lines of code in our analyzeText() function.
|
1 2 3 4 5 6 7 8 |
let score = Double(sentiment!.rawValue)! if score < 0 { self.analyzeButton.backgroundColor = .systemRed } else if score > 0 { self.analyzeButton.backgroundColor = .systemGreen } else { self.analyzeButton.backgroundColor = .systemBlue } |
This code is pretty easy. We transform the raw value of our sentiment constant into a type Double. Then, using an if-else statement, we change the background color of our button.
If possible, try to use .system colors in your apps from now on because they’re are universal within Apple’s OS and can automatically be adjusted for features like Dark Mode and Accessibility without you having to do anything.
Congratulations! With just a few lines of code, you were able to code a full Sentiment Analysis feature into your app. Previously, you would have to rely on a CoreML model but with NaturalLanguage, this just became much more easier! Next, let’s see what’s new with Word Tagging.
Word Tagging
Word Tagging is slightly different than Text Classification. In this process, given that we have a sequence of words (or tokens as it is commonly referred to in NLP), we want to assign a label to every single token. This could be assigning each token its respective part of speech, named entity recognition, or any other tagging system that helps you assign it to each token.
One important task of NLP which falls under Word Tagging is Word Embedding. Word embedding is a mapping of objects into a vector representation. A vector is nothing more than a continuous sequence of numbers. Well, what does this mean and why is it important? By using this method of mapping objects (or tokens in our case), we can find a way to quantitatively organize a group of objects. So when you plot these vectors, you can find that similar objects are clustered together. This helps when we want to build something that can also display objects similar to it. Apart from words, embedding can also be used for images, phrases, and more!
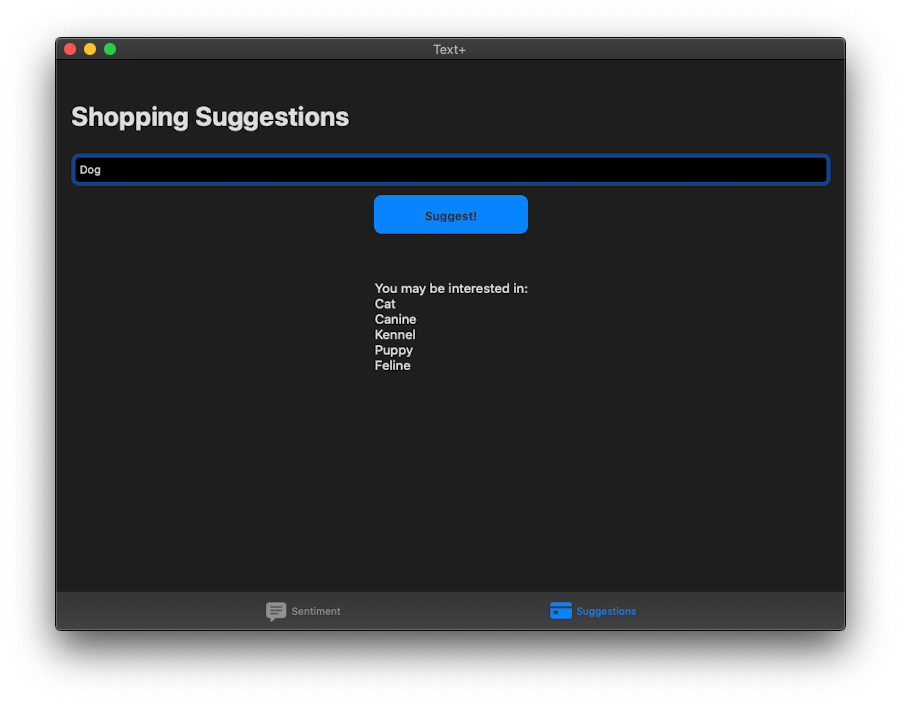
In the second part of our app, we’ll be building a suggestion system for someone going shopping with the help of word embedding. Here’s how we can achieve it. Looking at our storyboard, you can see that we have a text field for entering the item we’re looking for, a button to suggest items for us, and a label which will show us those suggestions. Since all of our UI is hooked up, all we need to do is add the following lines of code to our suggest() function.
|
1 2 3 4 5 6 7 8 9 10 11 12 13 |
@IBAction func suggest(_ sender: Any) { //1 suggestionLabel.text = "You may be interested in:\n" let embedding = NLEmbedding.wordEmbedding(for: .english) //2 embedding?.enumerateNeighbors(for: itemTextField.text!.lowercased(), maximumCount: 5) { (string, distance) -> Bool in //3 print("\(string) - \(distance)") suggestionLabel.text! += (string.capitalized + "\n") return true } } |
Let me explain the code above line by line:
- First, we want to reset the
suggestionLabelso the previous suggestions won’t be there. You use anNLEmbeddingto find similar strings. The framework provides some built-in word embeddings that we can use on-the-fly. Here, by calling itswordEmbeddingmethod with our preferred language, we can use the returnedNLEmbeddingfor finding similar words in English. - With the
NLEmbedding, we call theenumerateNeighborsmethod to find similar words for the input text. I have configured it to return only 5 of the closest neighbors but you can change that number. - Finally, I print the neighboring string and its distance from our input string to the console. This distance indicates the similarity of the two words. The smaller the distance, the higher is the similarity.
Build and run the project! You should see everything work flawlessly!
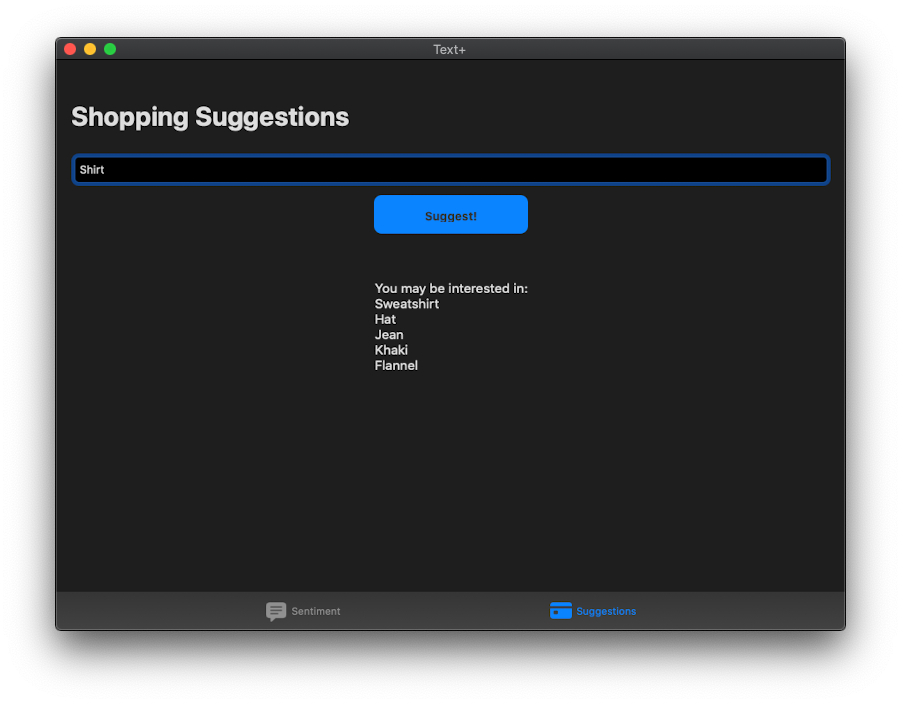
Now, you may notice that this isn’t the ideal experience since word embeddings only display words that are close to it, not necessarily the similarity of objects. For example, if I ask a word embedder to show me the closest words for “Meat”, one of the words would be “Vegetarian”. While this is a close word, it definitely is not something a shopper would be looking for. For our app, a Recommender System would be more apt. This also requires machine learning and will be covered in an upcoming tutorial on CreateML.
Where else can word embedding be used? In the Photos application, when you search for “sea”, it also shows you pictures of the beach, surfboard, and other sea-related pictures. This is possible through word embedding.
Another application of word embedding is with something called Fuzzy Searching. Has it every happened to you when you searched for something, either a song or a book, and you misspelled maybe a few letters but you still got the right result. This is because Fuzzy Searching uses Word Embedding to calculate the distance between your wrong input and the right input in the database which allows it to show the right phrase.
What else is new
Sentiment Analysis and Word Embedding were the top 2 API’s in this year’s update of NaturalLanguage. On top of that, there are 2 more features that were released as well. While going into them would make the tutorial too long, I’ll quickly cover these new features.
Custom Word Embeddings
Earlier, we used a general word embedding model that is built into all of Apple’s operating systems. However, sometimes, we may want a word embedding model that is based on specifically one domain, such as financial words or medical words. Apple has thought of that and NaturalLanguage also supports the use of custom word embeddings.
When we create recommender systems in Create ML, under the hood, it builds a custom word embedding using the data provided. However, if you’d like to control the algorithms, then Apple also allows us to do that as well. You can easily build your own word embedder using CreateML
|
1 2 3 4 5 6 7 8 9 |
import CreateML let vectors = ["Object A": [0.112, 0.324, -2.24, ...], "Object B": [0.112, 0.324, -2.24, ...], "Object C": [0.112, 0.324, -2.24, ...], ... ] let embedding = try MLWordEmbedding(dictionary: vectors) try embedding.write(to: url) |
You can obtain the vectors for these words through a custom neural network using either TensorFlow or PyTorch. This is way beyond the scope of the tutorial but if you’re interested, I highly suggest you take a look on the web because this is an active research area in NLP and can be quite interesting.
Text Catalog
We briefly mentioned how you can create your own word tagger with MLWordTagger. However, it would take a lot of efforts to create the word tagging model.
New this year is the addition of MLGazetteer. A gazetteer is a text catalog, or a dictionary, filled with names and labels. CreateML then takes this gazetteer and transforms it into a tagger that can be used in your app. For example, if you wanted a tagger that would tag electronic devices by its type, you would use a file that would look like this:
|
1 2 3 4 5 |
["smartphone": ["iPhone XS", "Samsung S10", "Google Pixel 3a", ...], "laptop": ["MacBook Pro", "Surface Laptop", "Chromebook", ...], "smartwatch": ["Apple Watch", "Samsung Galaxy Watch", "Fitbit Versa", ...], ... ] |
Ideally, in this JSON file, you would have thousands of entities. Then, you’d use CreateML to create your gazetteer like this:
|
1 2 3 4 5 6 7 8 9 |
import CreateML let entities = ["smartphone": ["iPhone XS", "Samsung S10", "Google Pixel 3a", ...], "laptop": ["MacBook Pro", "Surface Laptop", "Chromebook", ...], "smartwatch": ["Apple Watch", "Samsung Galaxy Watch", "Fitbit Versa", ...], ... ] let gazetteer = try MLGazetteer(dictionary: entities) try gazetteer.write(to: url) |
Then you would use it with the NaturalLanguage framework as such:
|
1 2 3 4 5 |
import NaturalLanguage let gazetteer = try! MLGazetteer(contentsOf: url) let tagger = NLTagger(tagSchemes: [.nameTypeOrLexicalClass]) tagger.setGazetteers([gazetteer], for: .nameTypeOrLexicalClass) |
If you’d like to see a second part of this tutorial with the above features explained more in depth, leave a comment below!
Conclusion
As shown, you can see how the field of Natural Language Processing is quickly expanding and Apple is doing its best to make these high level technologies much more accessible for developers. I suggest you take a look at some of the resources below such as the Apple’s documentation and the WWDC 2019 sessions given about this framework.
With powerful tools like Sentiment Analysis and Word Embedding, you can create a whole range of apps in all domains that can leverage the power of machine learning. If you have any questions, feel free to ask in the comments below.
For reference, you can download the completed project here.

Sai Kambampati is an app developer and designer currently attending the University of California, Santa Cruz. He is working towards his Bachelor of Science in Computer Science and Cognitive Science. Awarded Apple’s WWDC scholarship multiple times, he is proficient in many programming languages. When he's not busy studying, you can find him working on his many successful apps available on the App Store. Follow him @HeySaiK.