In WWDC 21, one of the announcements that caught my attention was the massive changes of Swift Playgrounds. Not only can you learn Swift using Playgrounds, the new update allows developers to create apps entirely on iPad and submit them to App Store directly.
Swift Playgrounds is a great way to learn to code right on a Mac or iPad. With Swift Playgrounds 4, coming later this year, users will be able to create the visual design of an app with SwiftUI. App projects can be opened and edited in Swift Playgrounds or in Xcode, and when they’re ready, users can build a real app and submit it directly to the App Store right from their iPad.
I have been waiting for its release for several months. A couple weeks ago, Apple finally released Swift Playgrounds 4 allowing us to build both iPhone and iPad apps right on iPad.
If you already own a Mac, you may wonder why it’s a huge step for Apple to bring iOS app development to iPad. Other than publishing online courses and ebooks, I also organize various in-person workshops for absolute beginners to experience iOS app development. One of the most common questions is: Can I write code and develop apps on iPad because I don’t have a Mac? In the past, the answer is obviously no. Now, with the version 4 release of Swift Playgrounds, beginners can start learning Swift & SwiftUI without a Mac.
Let’s take a look at Swift Playgrounds 4 and see how we can develop a simple text-to-speech app on iPad.
Creating a New Project Using Swift Playgrounds
Assuming you’ve downloaded and installed Swift Playgrounds 4 on your iPad, you should see the following screen when you first launch the app.
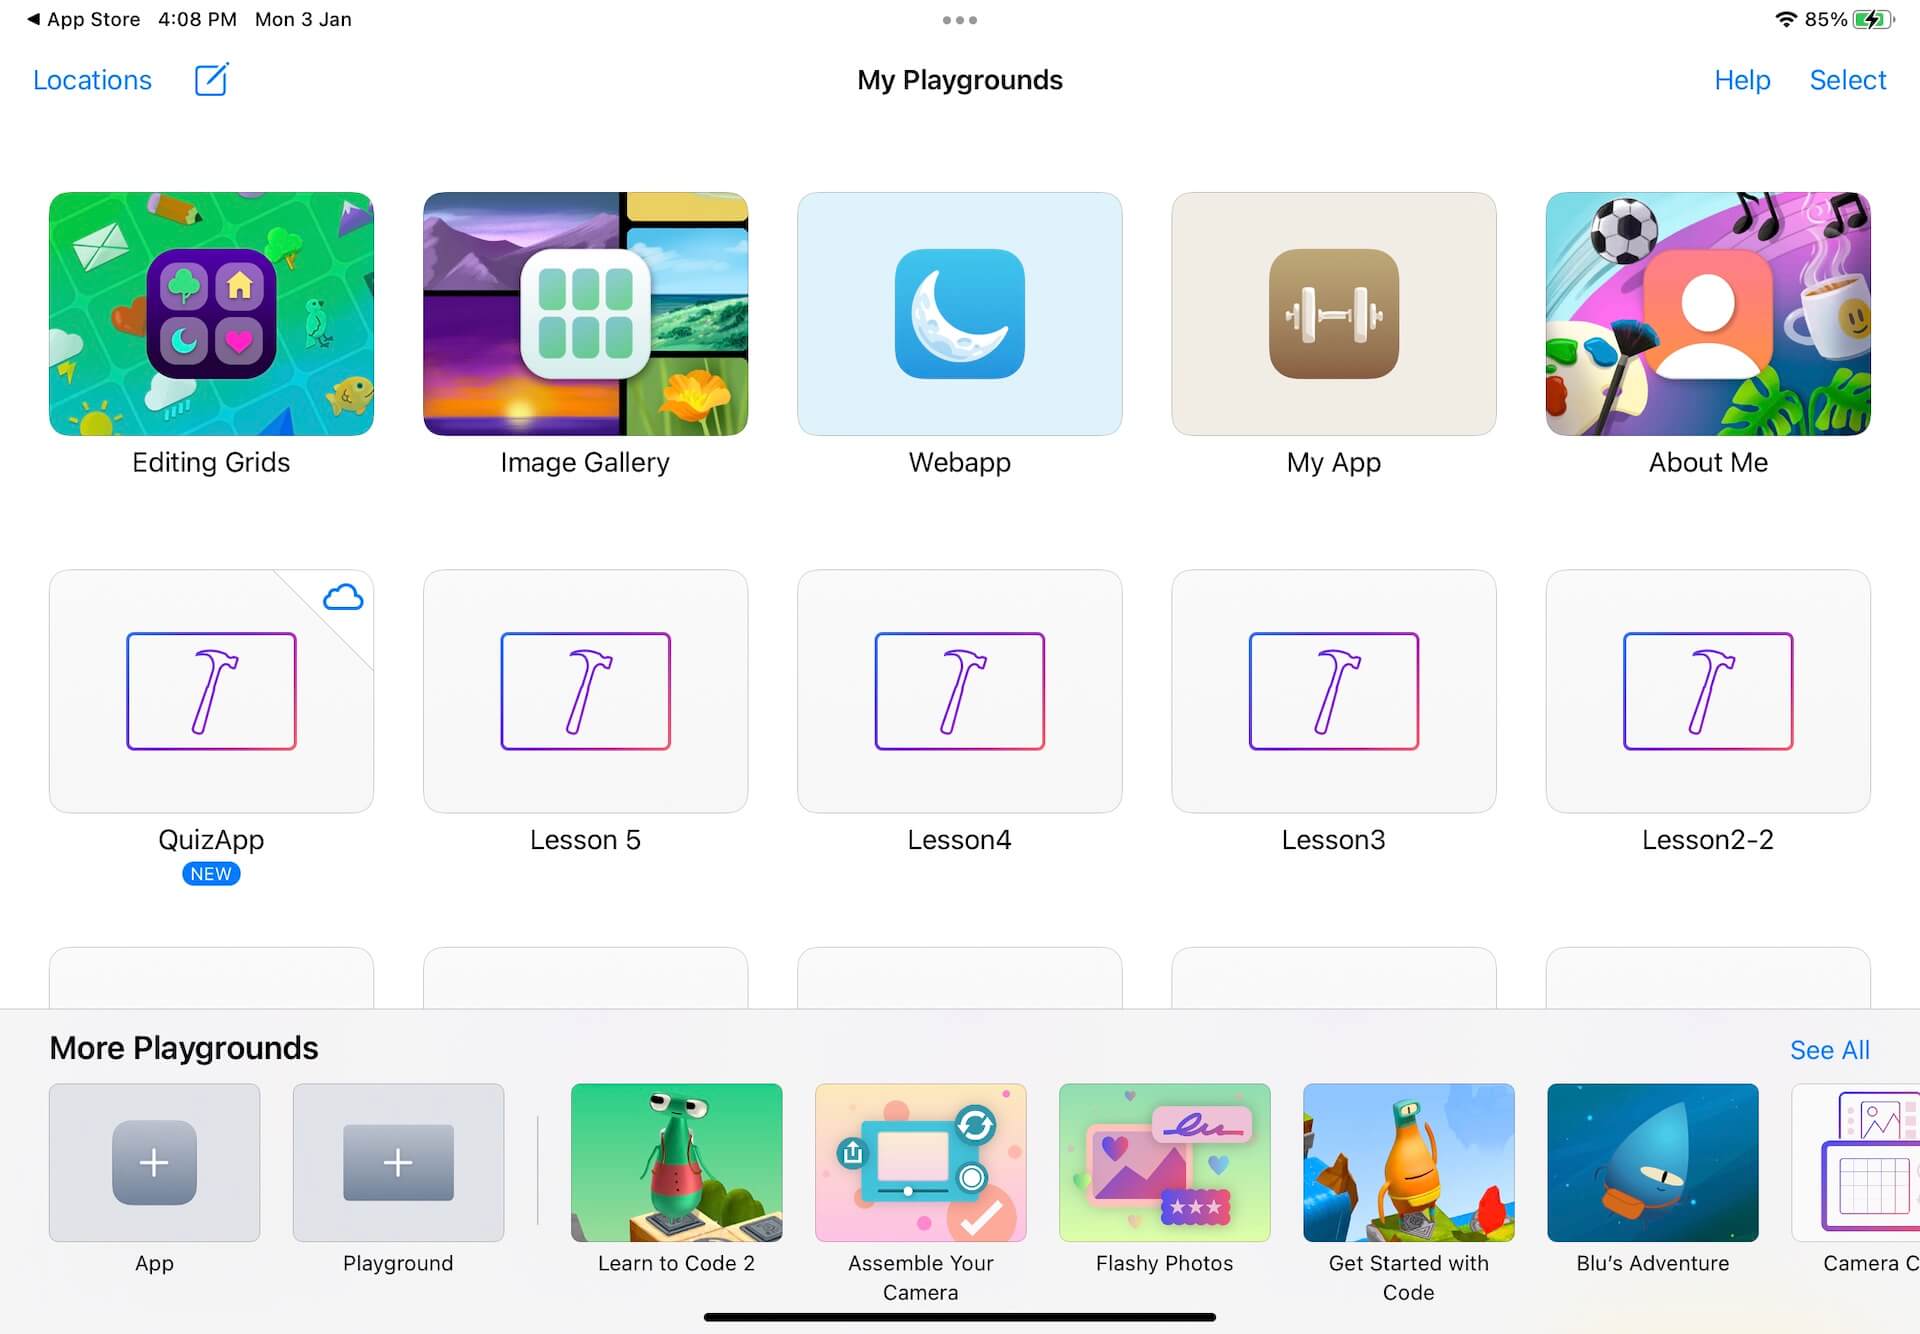
It now comes with a new project template called App. To develop an app on iPad, choose the App template at the lower left corner. Swift Playgrounds then create a new project for you. You can tap and hold the project icon to rename the project. For me, I rename it to HelloWorld.
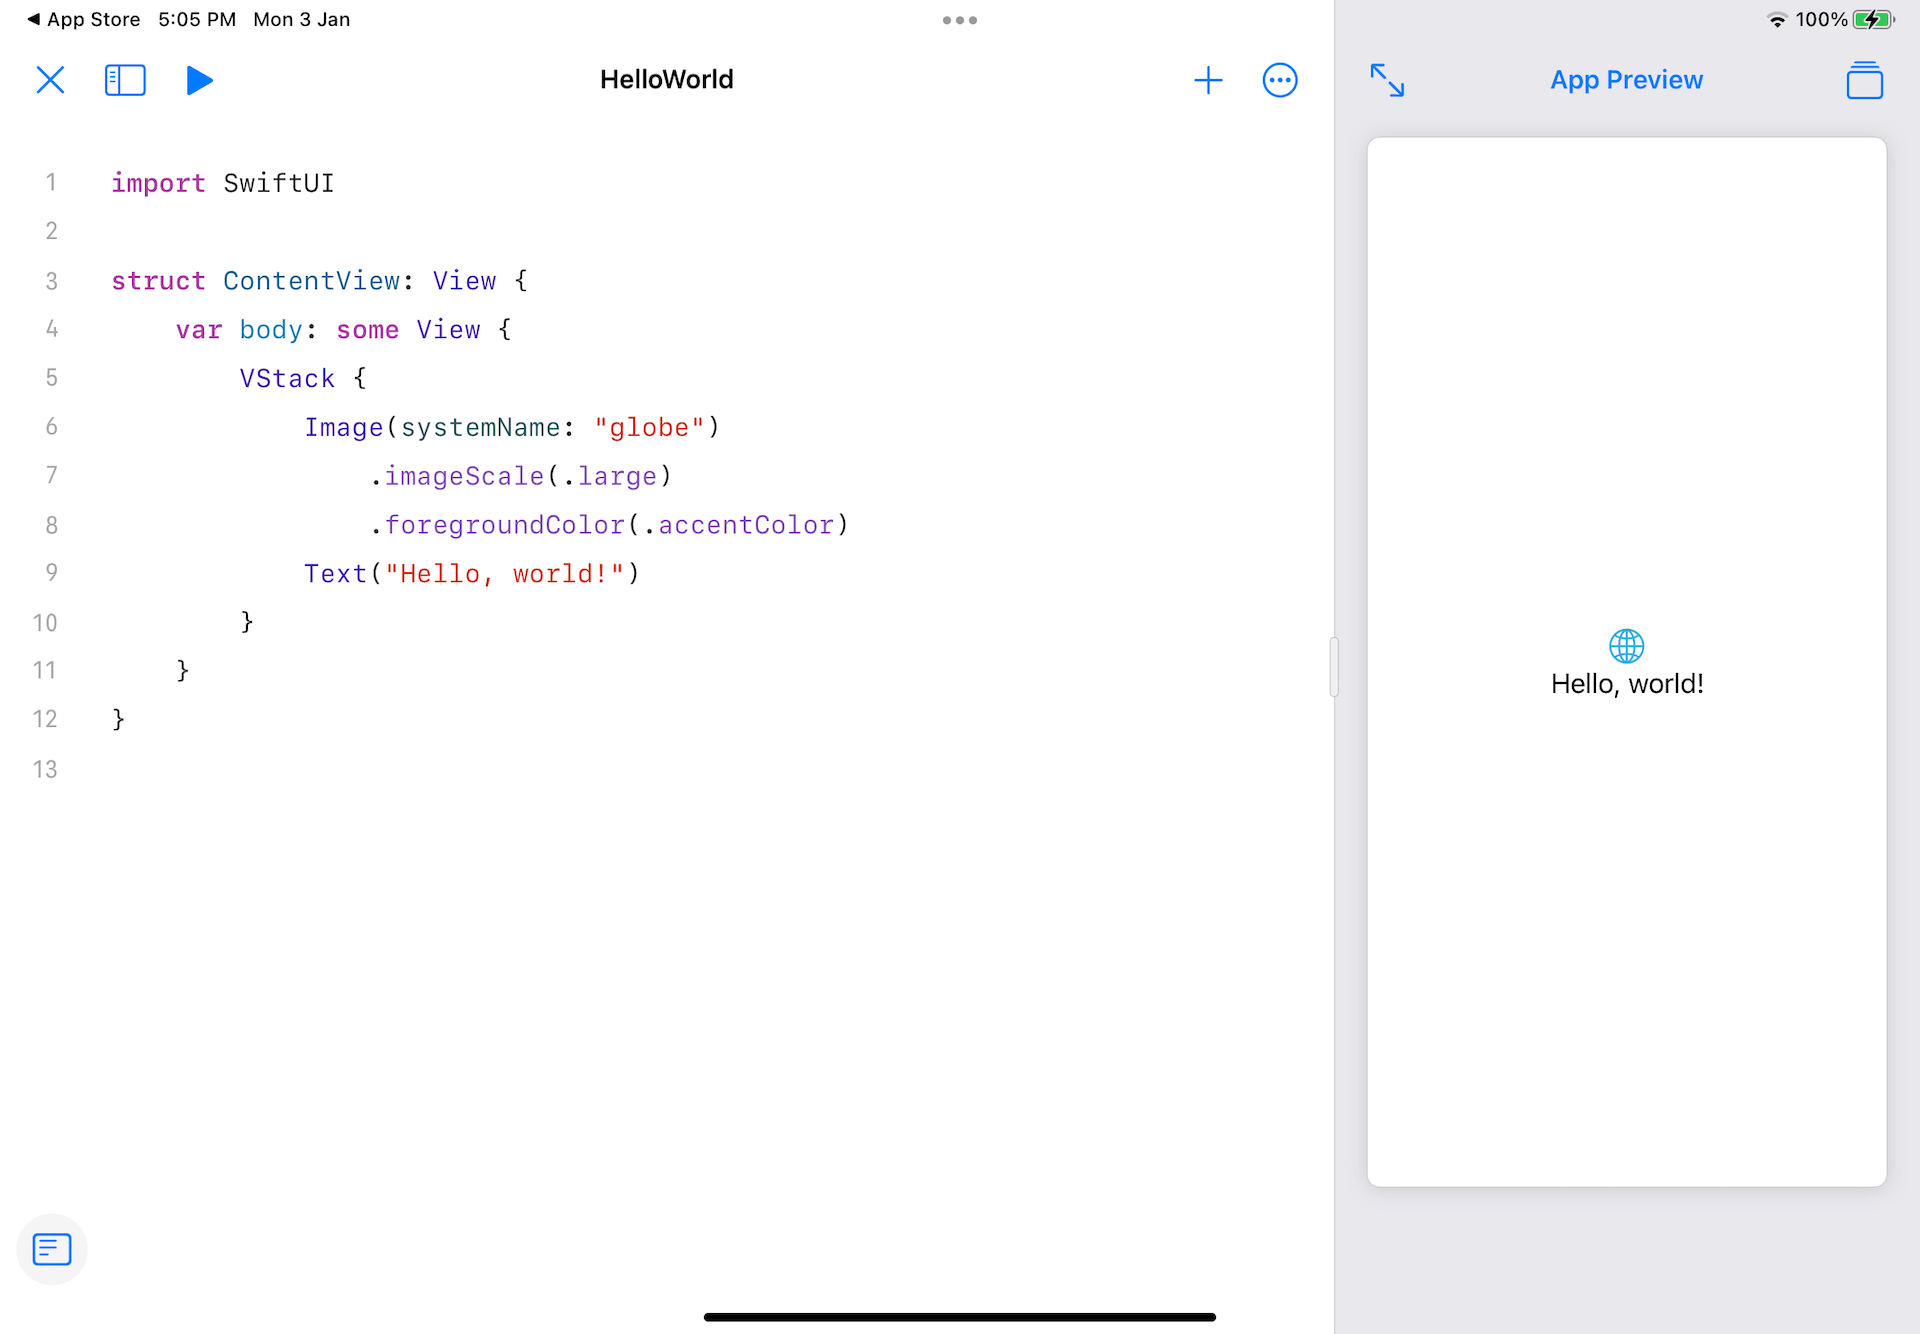
Tapping the project icon will bring you to code editor. Right next to the code editor, it’s the preview pane, which renders an instant preview for your code. By default, it already generates a code snippet that displays an icon and a Hello, world message.
Let’s Write Some Code
You may be skeptical about how to type code using the software keyboard of iPad. In fact, the powerful Xcode-like code completion makes the whole coding experience so enjoyable, even if you use the software keyboard.
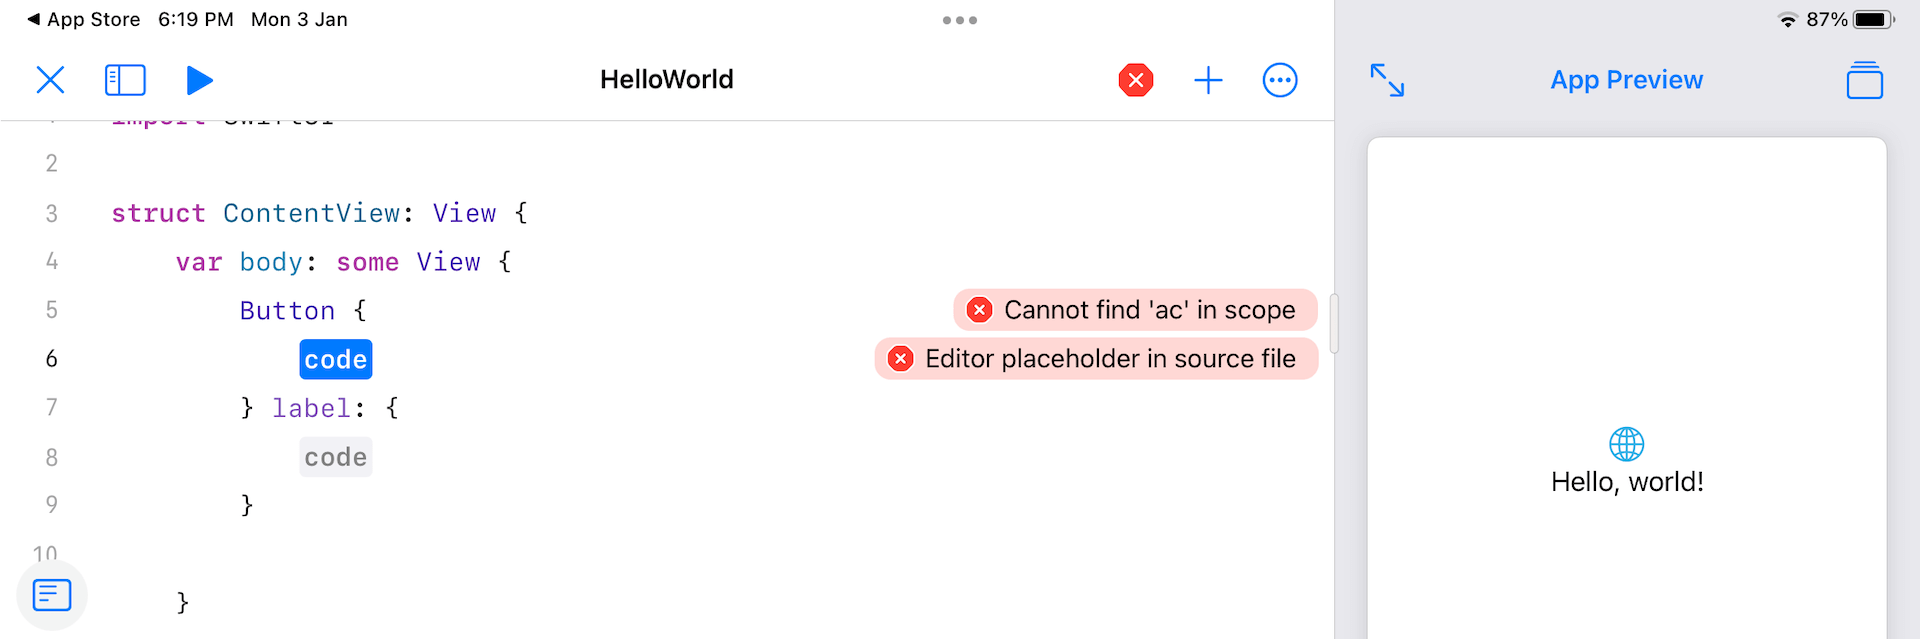
Let’s try to write some code and you will understand what I mean. We will modify the code of ContentView to create a button. First, we need to remove the generated code in body. To remove the VStack and its embedded views. You can simply tap the opening curly bracket and Playgrounds automatically selects the block of code. Choose Delete or hit the delete button to remove the code block.

Next, try to add a button to the app UI. When you start typing Button(ac, Playgrounds immediately shows you some code suggestions. You can hit return to choose the default selection.
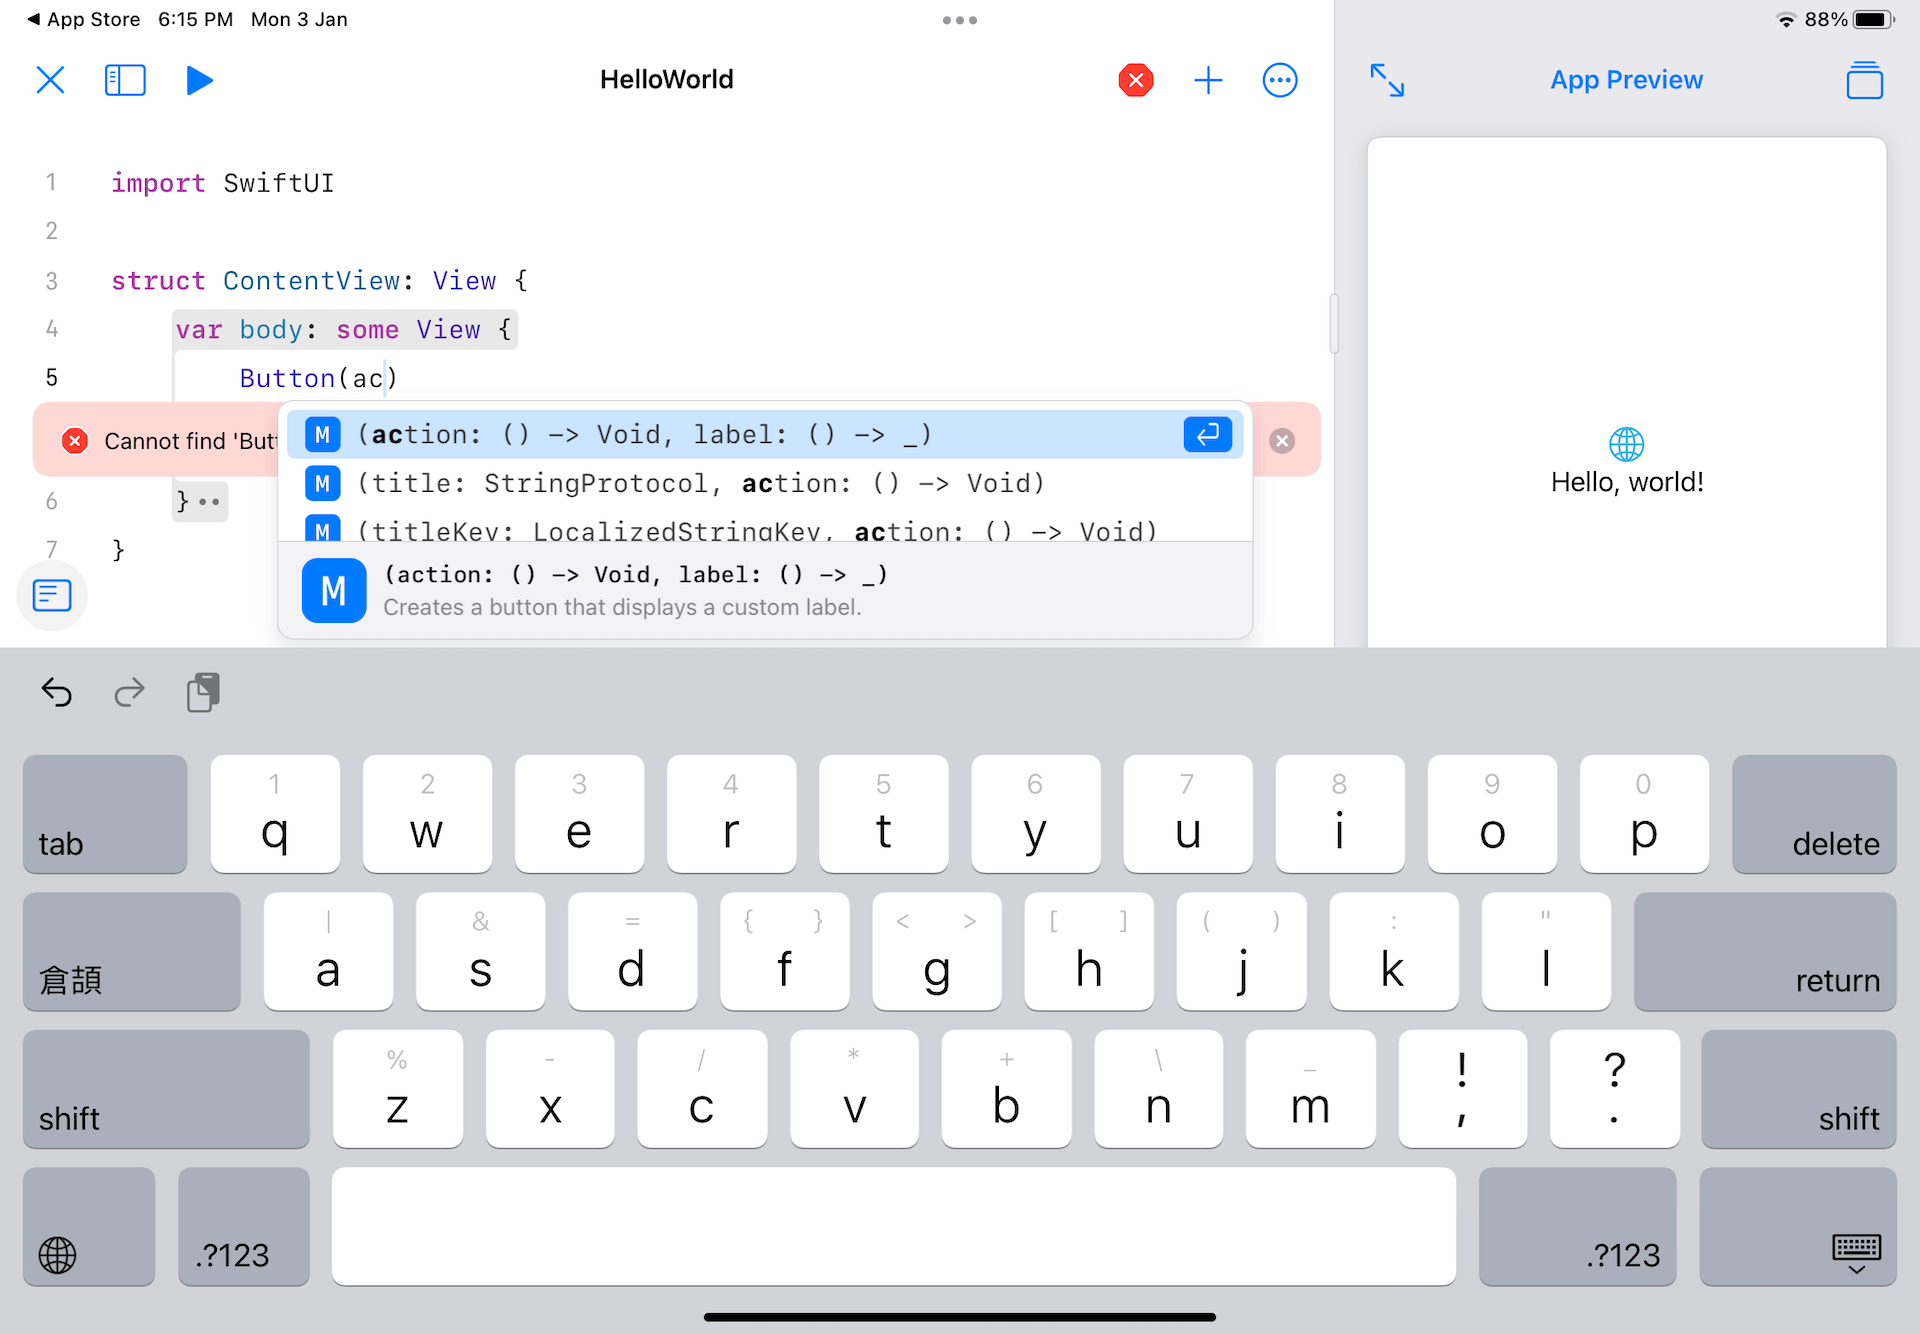
After that, you can hit the return key again. Playgrounds will generate the code skeleton of the Button view for you. It’s exactly the same as the auto completion feature of Xcode.
You can continue to write the code like this:
|
1 2 3 4 5 6 7 8 9 10 11 |
Button { } label: { Text("Speak") .fontWeight(.bold) .font(.system(.title, design: .rounded)) } .padding() .foregroundColor(.white) .background(.purple) .cornerRadius(20) |
The auto completion feature is very responsive. Once you type the dot (.) key, the app instantly displays all the available modifiers of the view for you. Just tap the one you need. This should save you quite a number of key strokes.
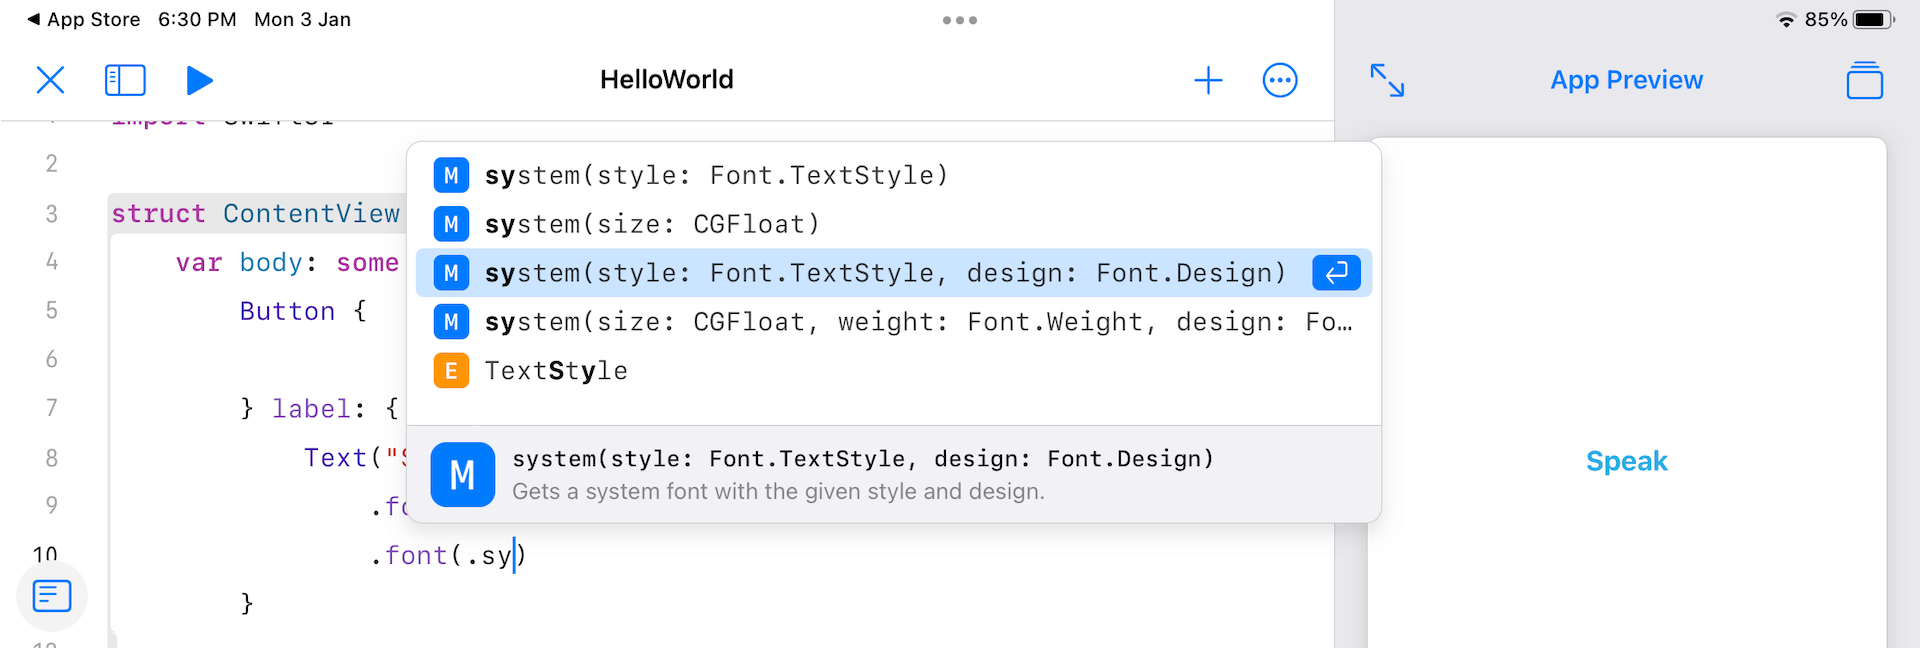
After the change, Playgrounds should render a purple button in the preview pane.
Adding a Stack View and Text Field
Next, we will add a text field right above the Speak button. Before adding the text field, we will first embed the button in a VStack view. Unlike Xcode, it doesn’t come with a context menu for embedding a view in a stack view.
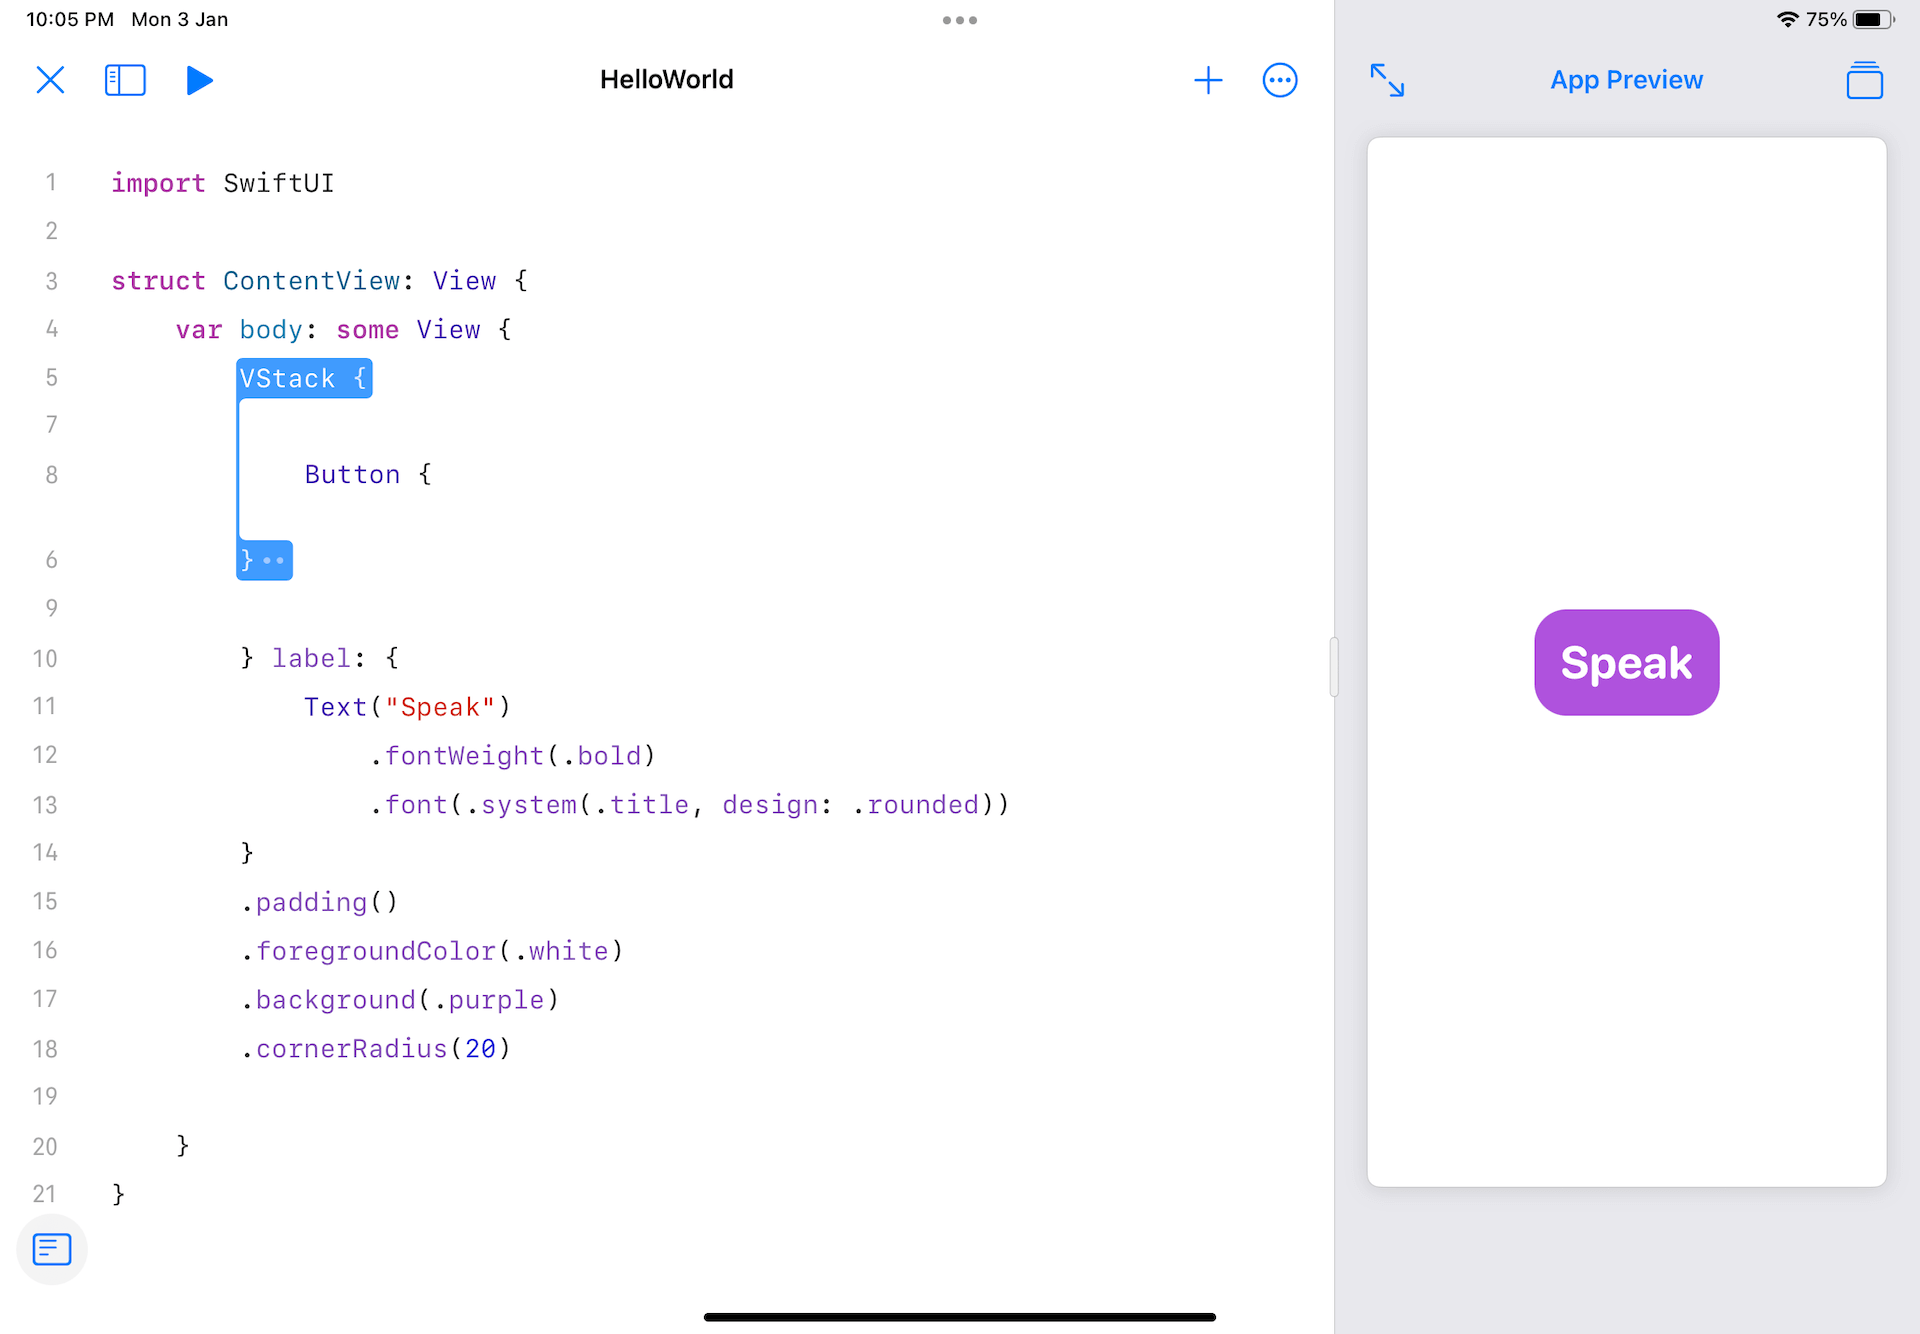
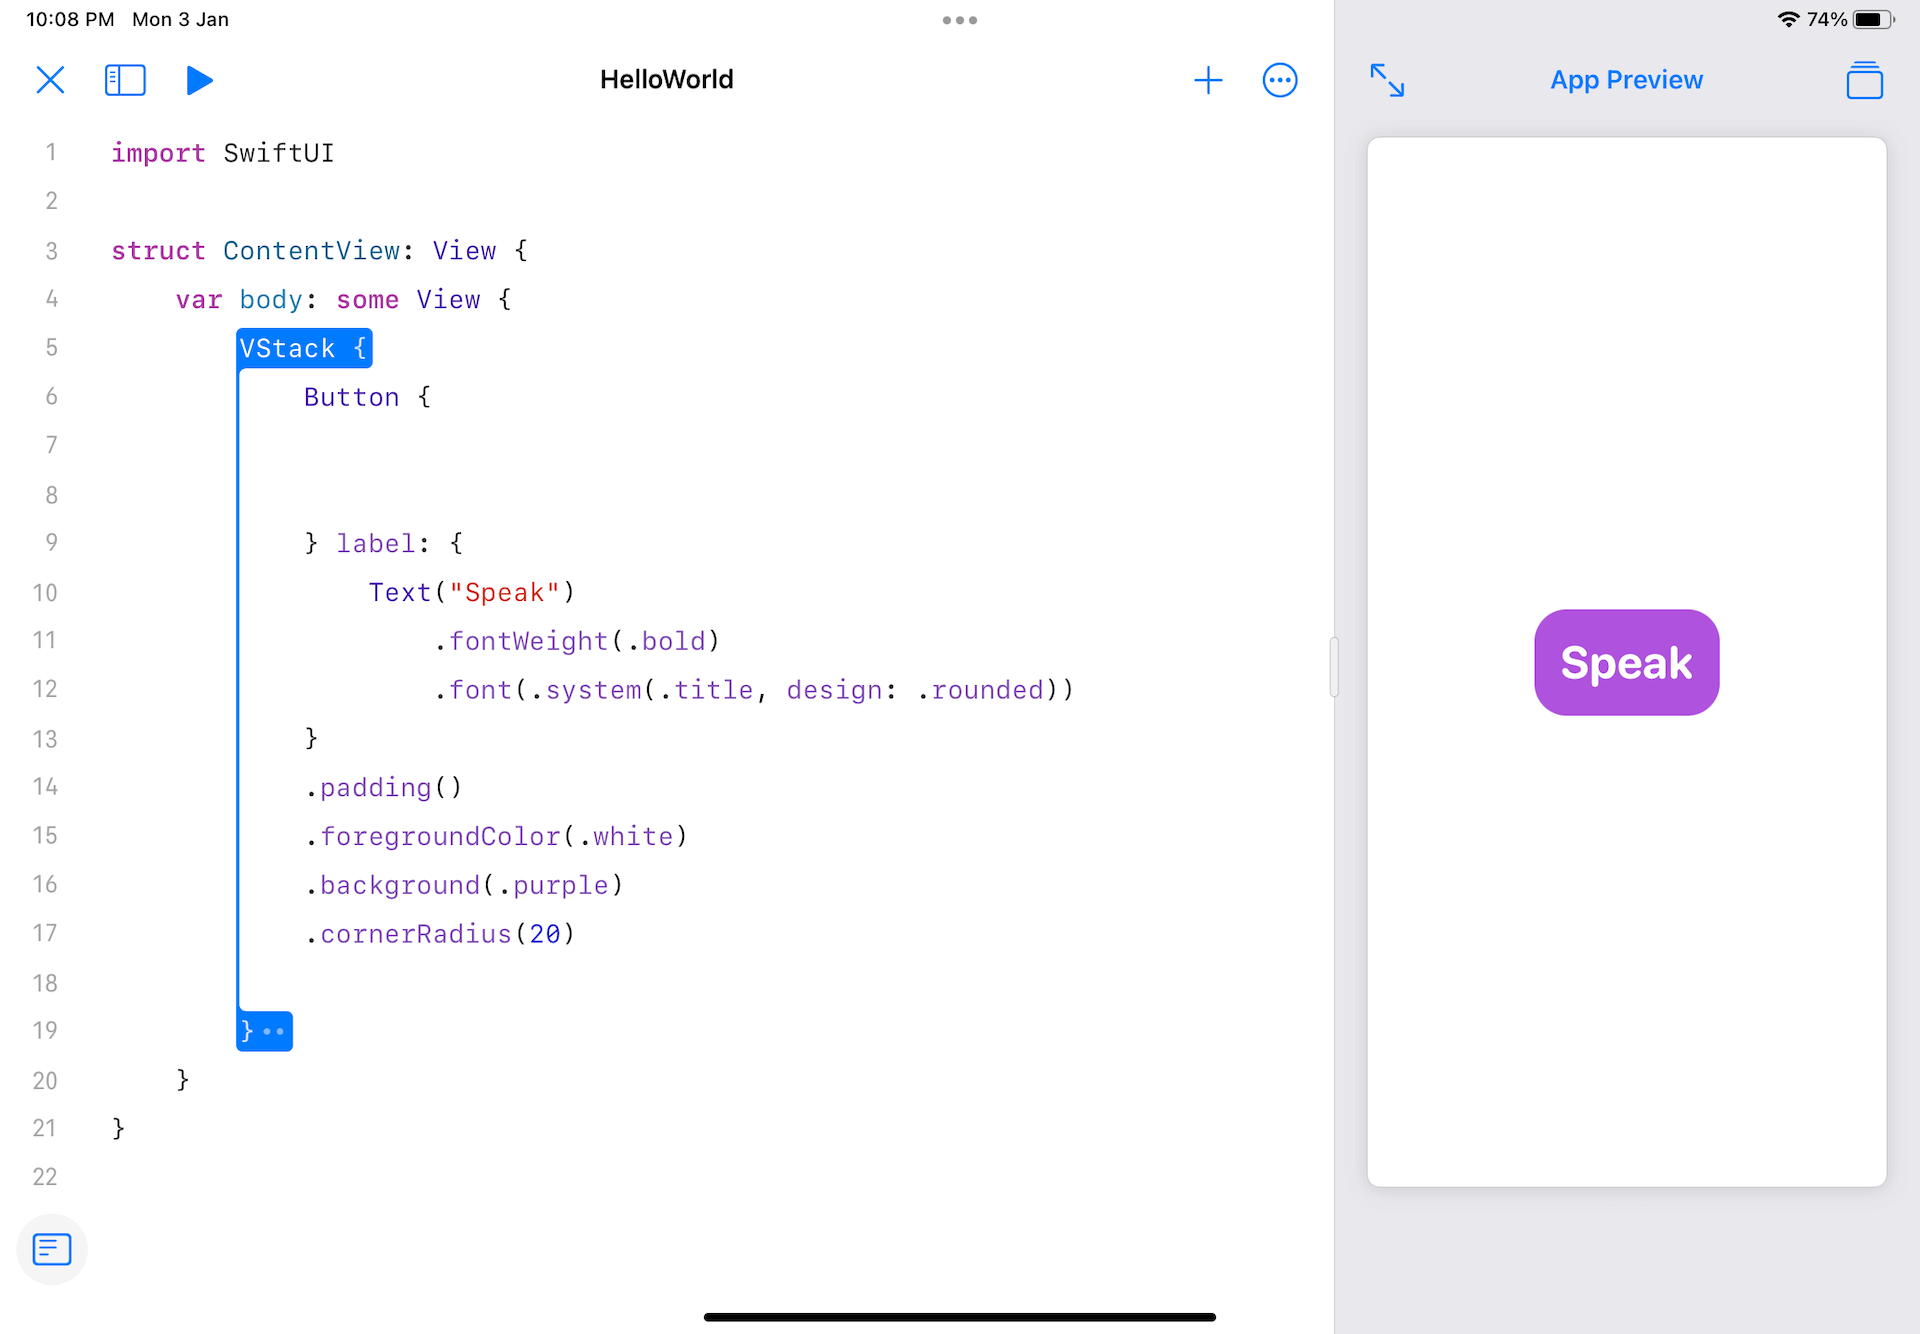
On iPad’s Playgrounds, you can type VStack to create a vertical stack view. To wrap the Button view in the VStack, you tap and hold the close curly bracket (}) of the stack view. Then drag it until the VStack view embeds the whole Button view.
To add the text field, declare a state variable for holding the user input in ContentView like this:
|
1 |
@State var userInput = "" |
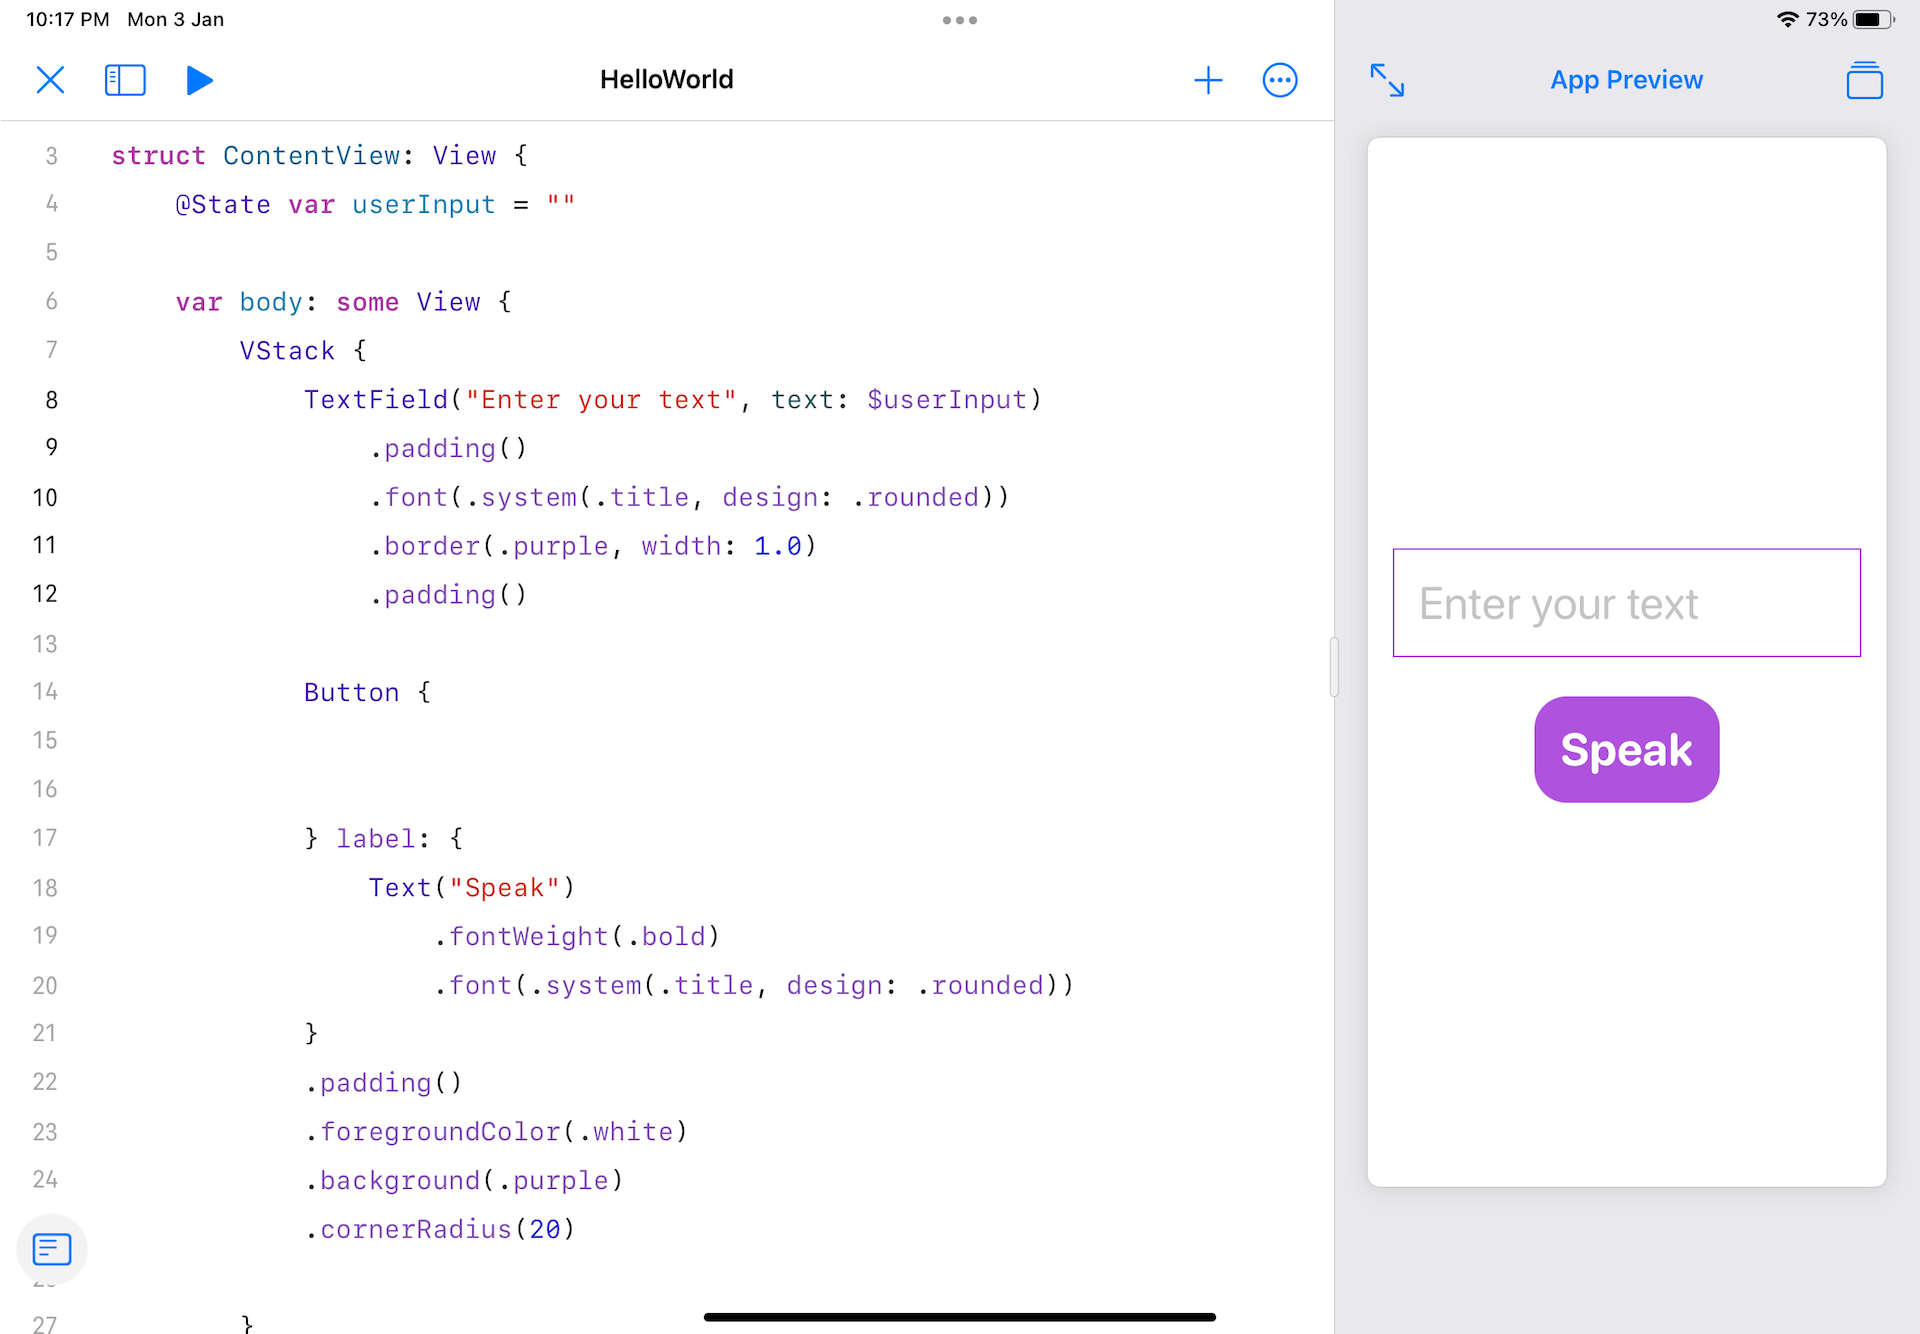
Then insert the following code before the Button view:
|
1 2 3 4 5 |
TextField("Enter your text", text: $userInput) .padding() .font(.system(.title, design: .rounded)) .border(.purple, width: 1.0) .padding() |
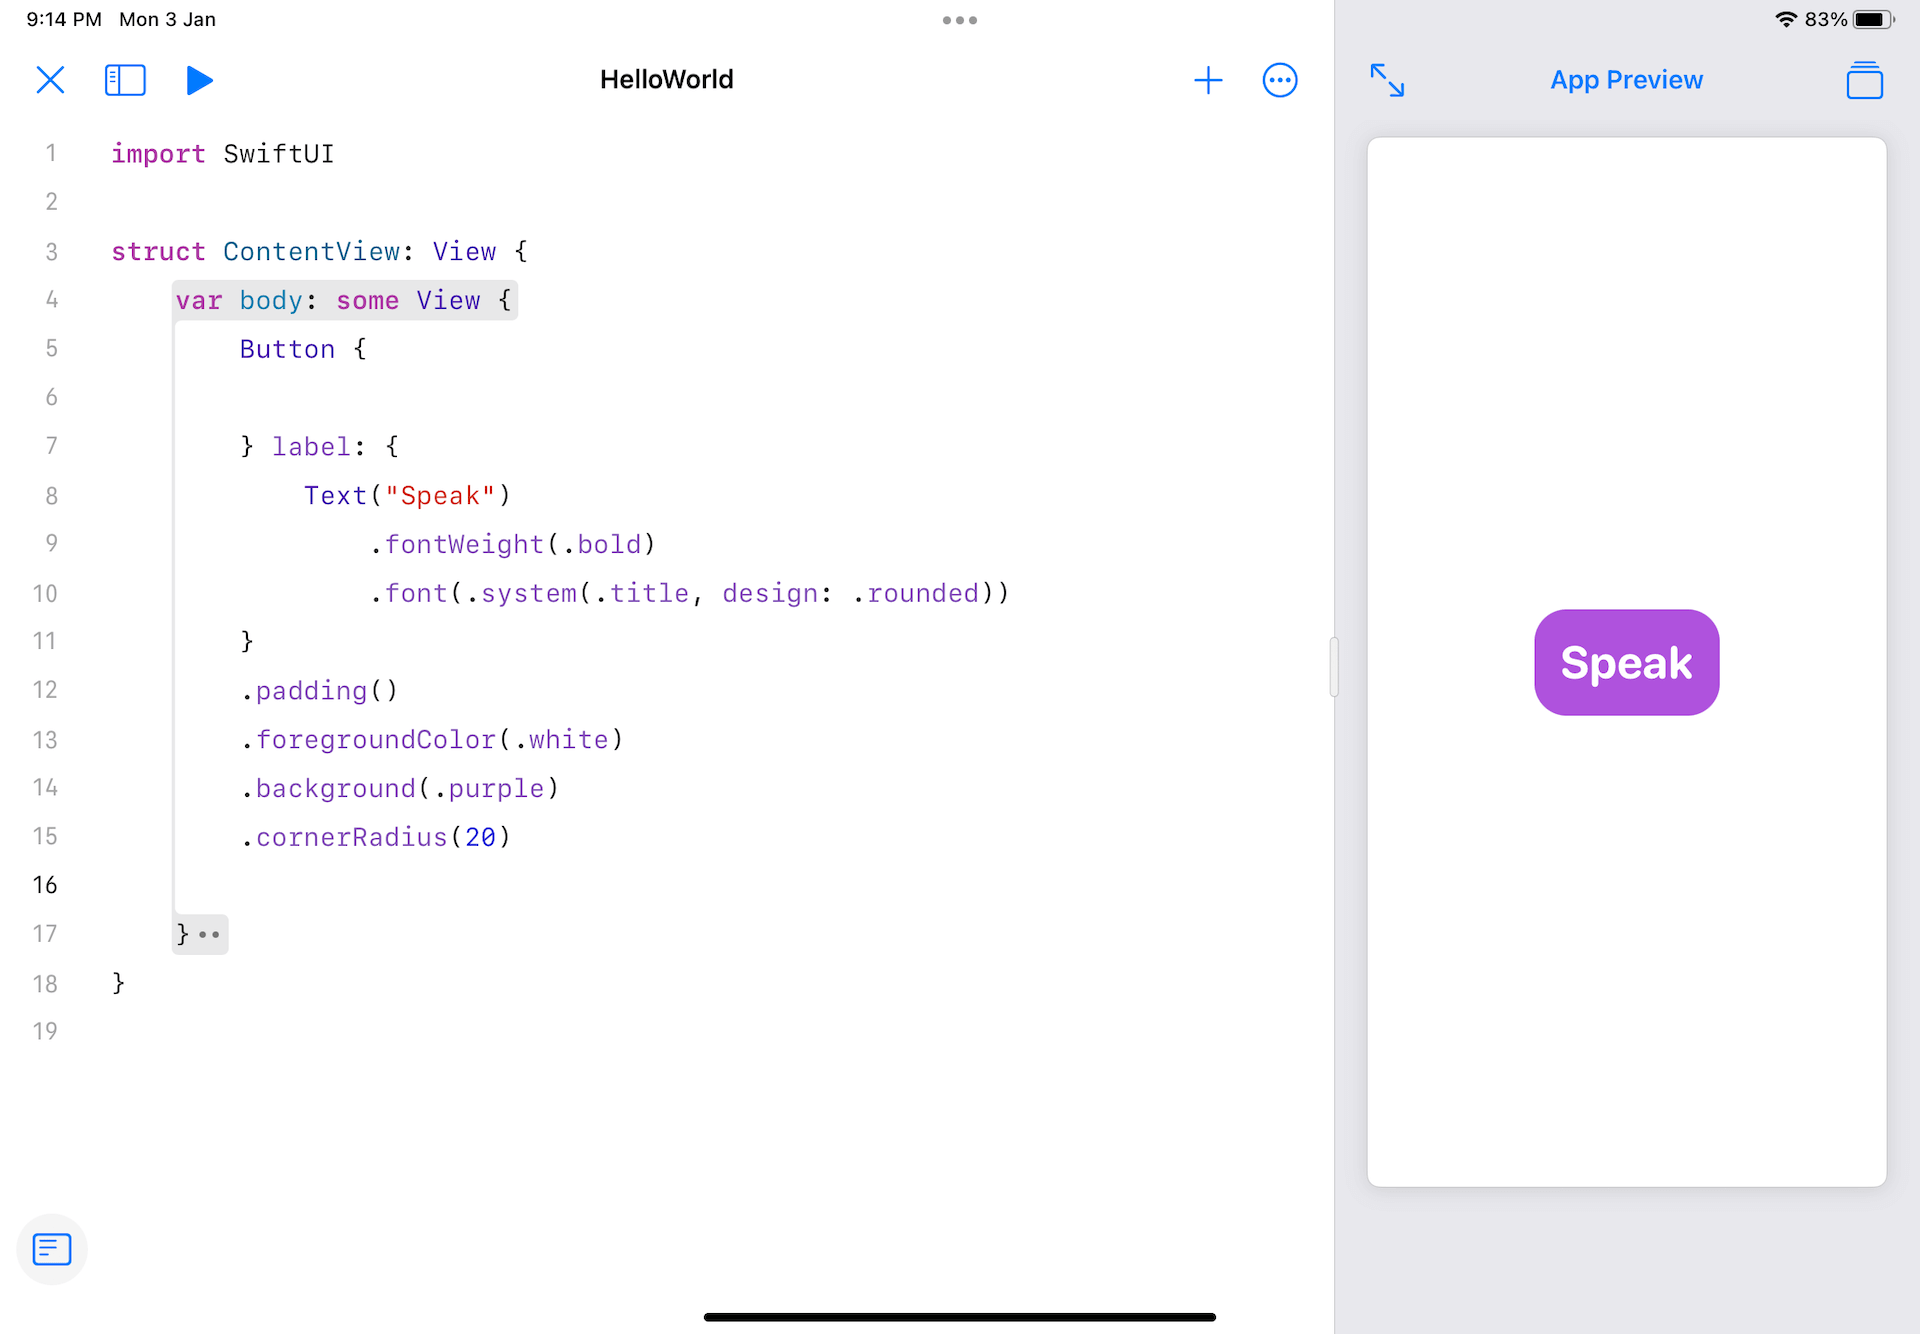
Once you made the changes, you should see the text field with a placeholder.
Implementing the Text to Speech Feature
The iOS SDK has built-in APIs for developers to incorporate the text-to-speech features in iOS apps. All you need is to import the AVFoundation framework:
|
1 |
import AVFoundation |
In the closure of Button, insert the following code:
|
1 2 3 4 |
let utterance = AVSpeechUtterance(string: userInput) utterance.voice = AVSpeechSynthesisVoice(language: "en-GB") let synthesizer = AVSpeechSynthesizer() synthesizer.speak(utterance) |
To synthesize speech, we create an AVSpeechUtterance instance with the text input. We then specify the voice type and create an AVSpeechSynthesizer instance to speak the text.
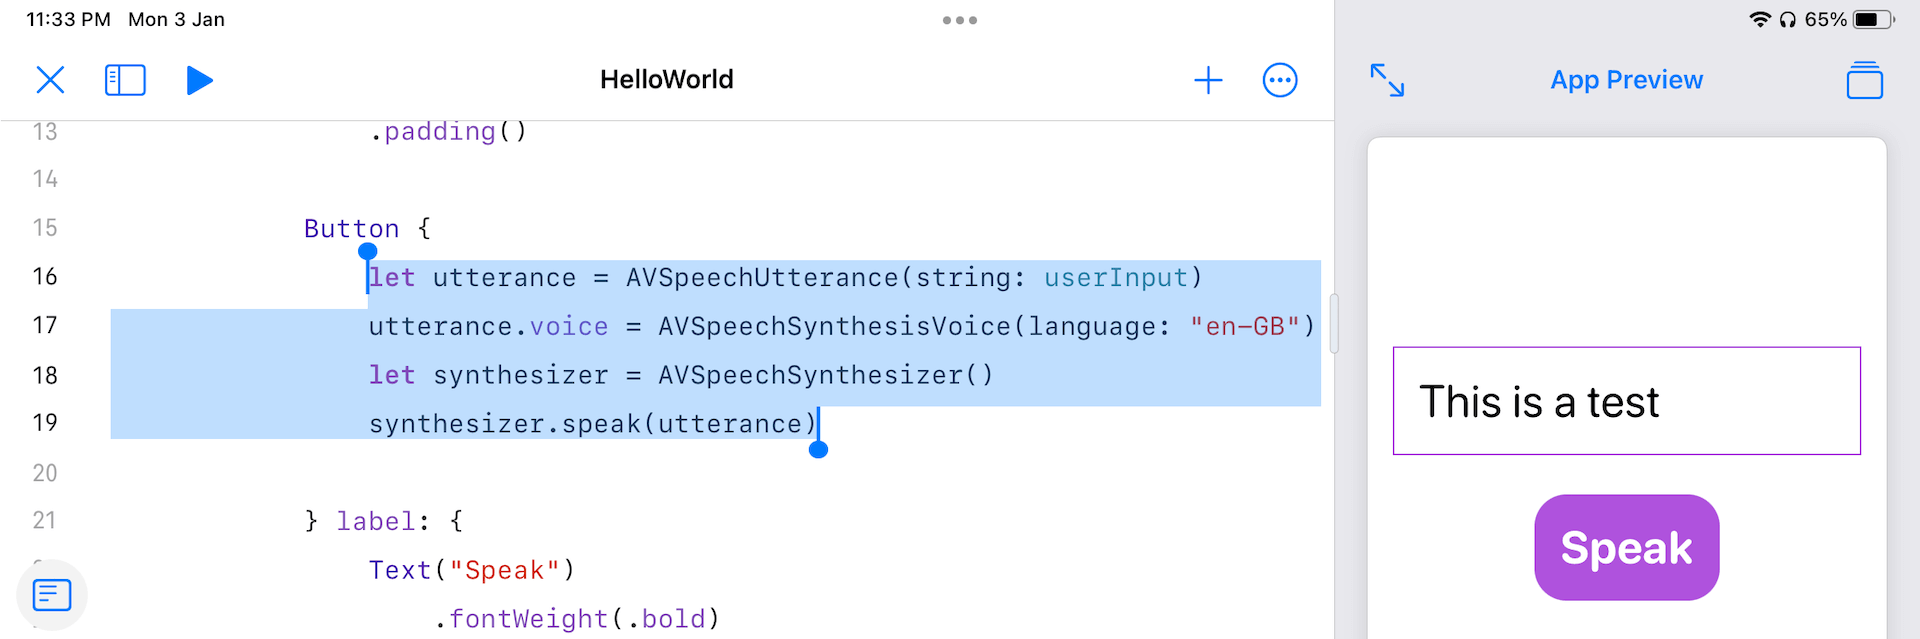
Now it’s ready to test the app. In the preview pane, type some text in the text field and tap Speak. The app should transform the text into speech. Please make sure you disable the silent mode during your testing.
Adding Images
The app already works perfectly. However, to make the app look better, let’s add an image above the text field. On the top left corner, tap the navigator icon to open the project navigator. Then tap the Add new file icon to bring up the option menu.
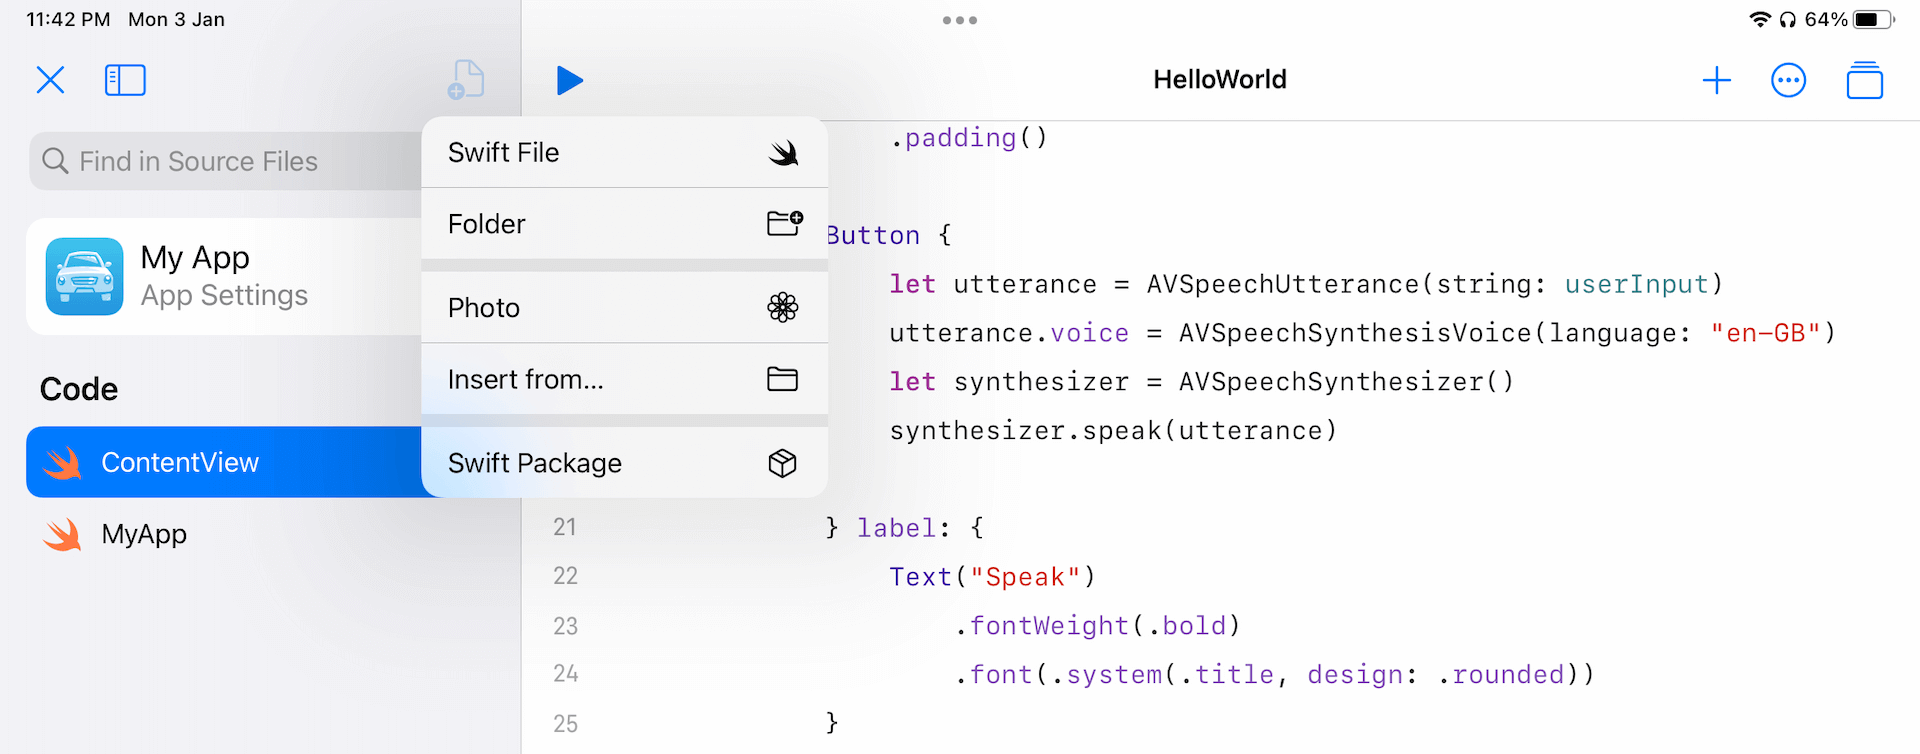
If you want to add photos from Photo library, choose Photo. Alternatively, you can choose Insert from… to select an image from iCloud drive. Once you added the image, you will see the Assets section in the project navigator.
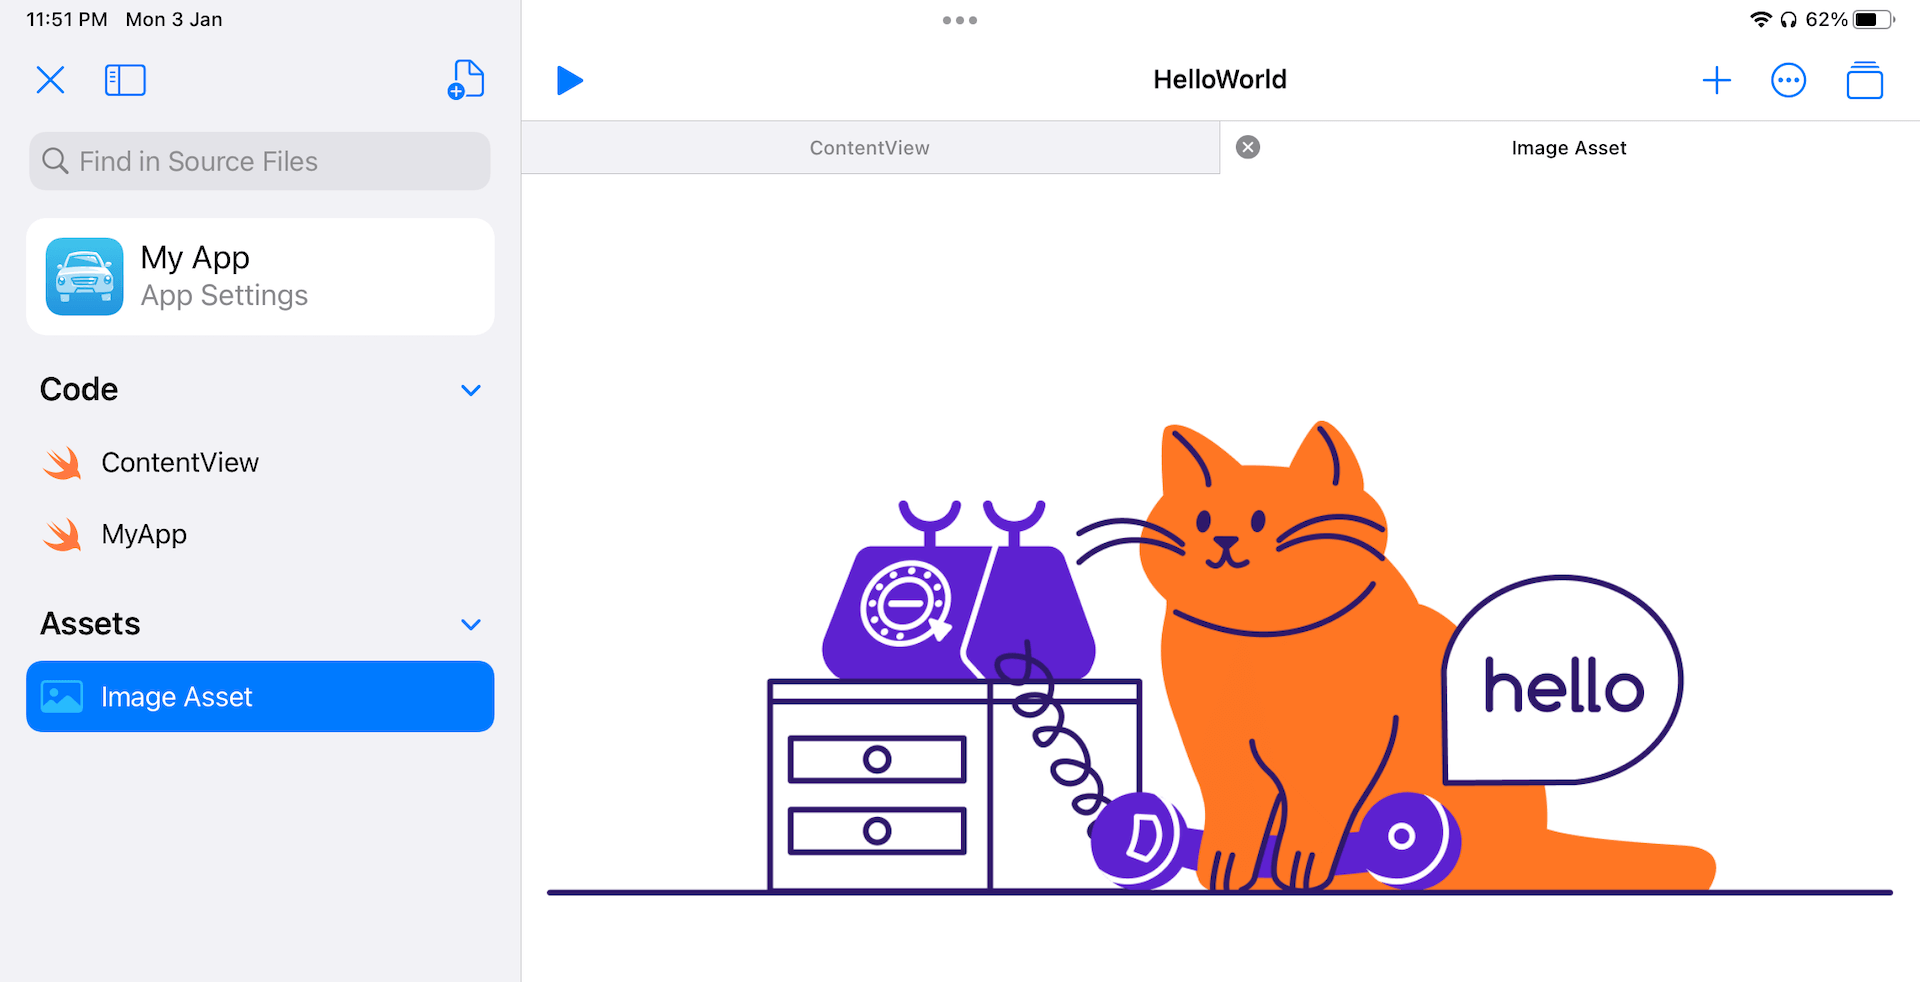
If you’re adding the image from Photo library, the default image name is set to Image Asset. You can tap and hold the file to bring up the Rename option. Rename the file to hellocat.
Now switch over to ContentView. Insert the following code before TextField:
|
1 2 3 |
Image("hellocat") .resizable() .scaledToFit() |
Optionally, you can add a heading before the Image view like this:
|
1 2 3 |
Text("Hello") .font(.system(size: 80)) .fontWeight(.heavy) |
Your final deliverable should look like this:

Running Your App Project
Unlike Xcode, the app preview on Swift Playgrounds is always interactive. You can already test the app in the preview pane. That said, if you want to run the app and see how it looks on iPad, you can tap the Play button.
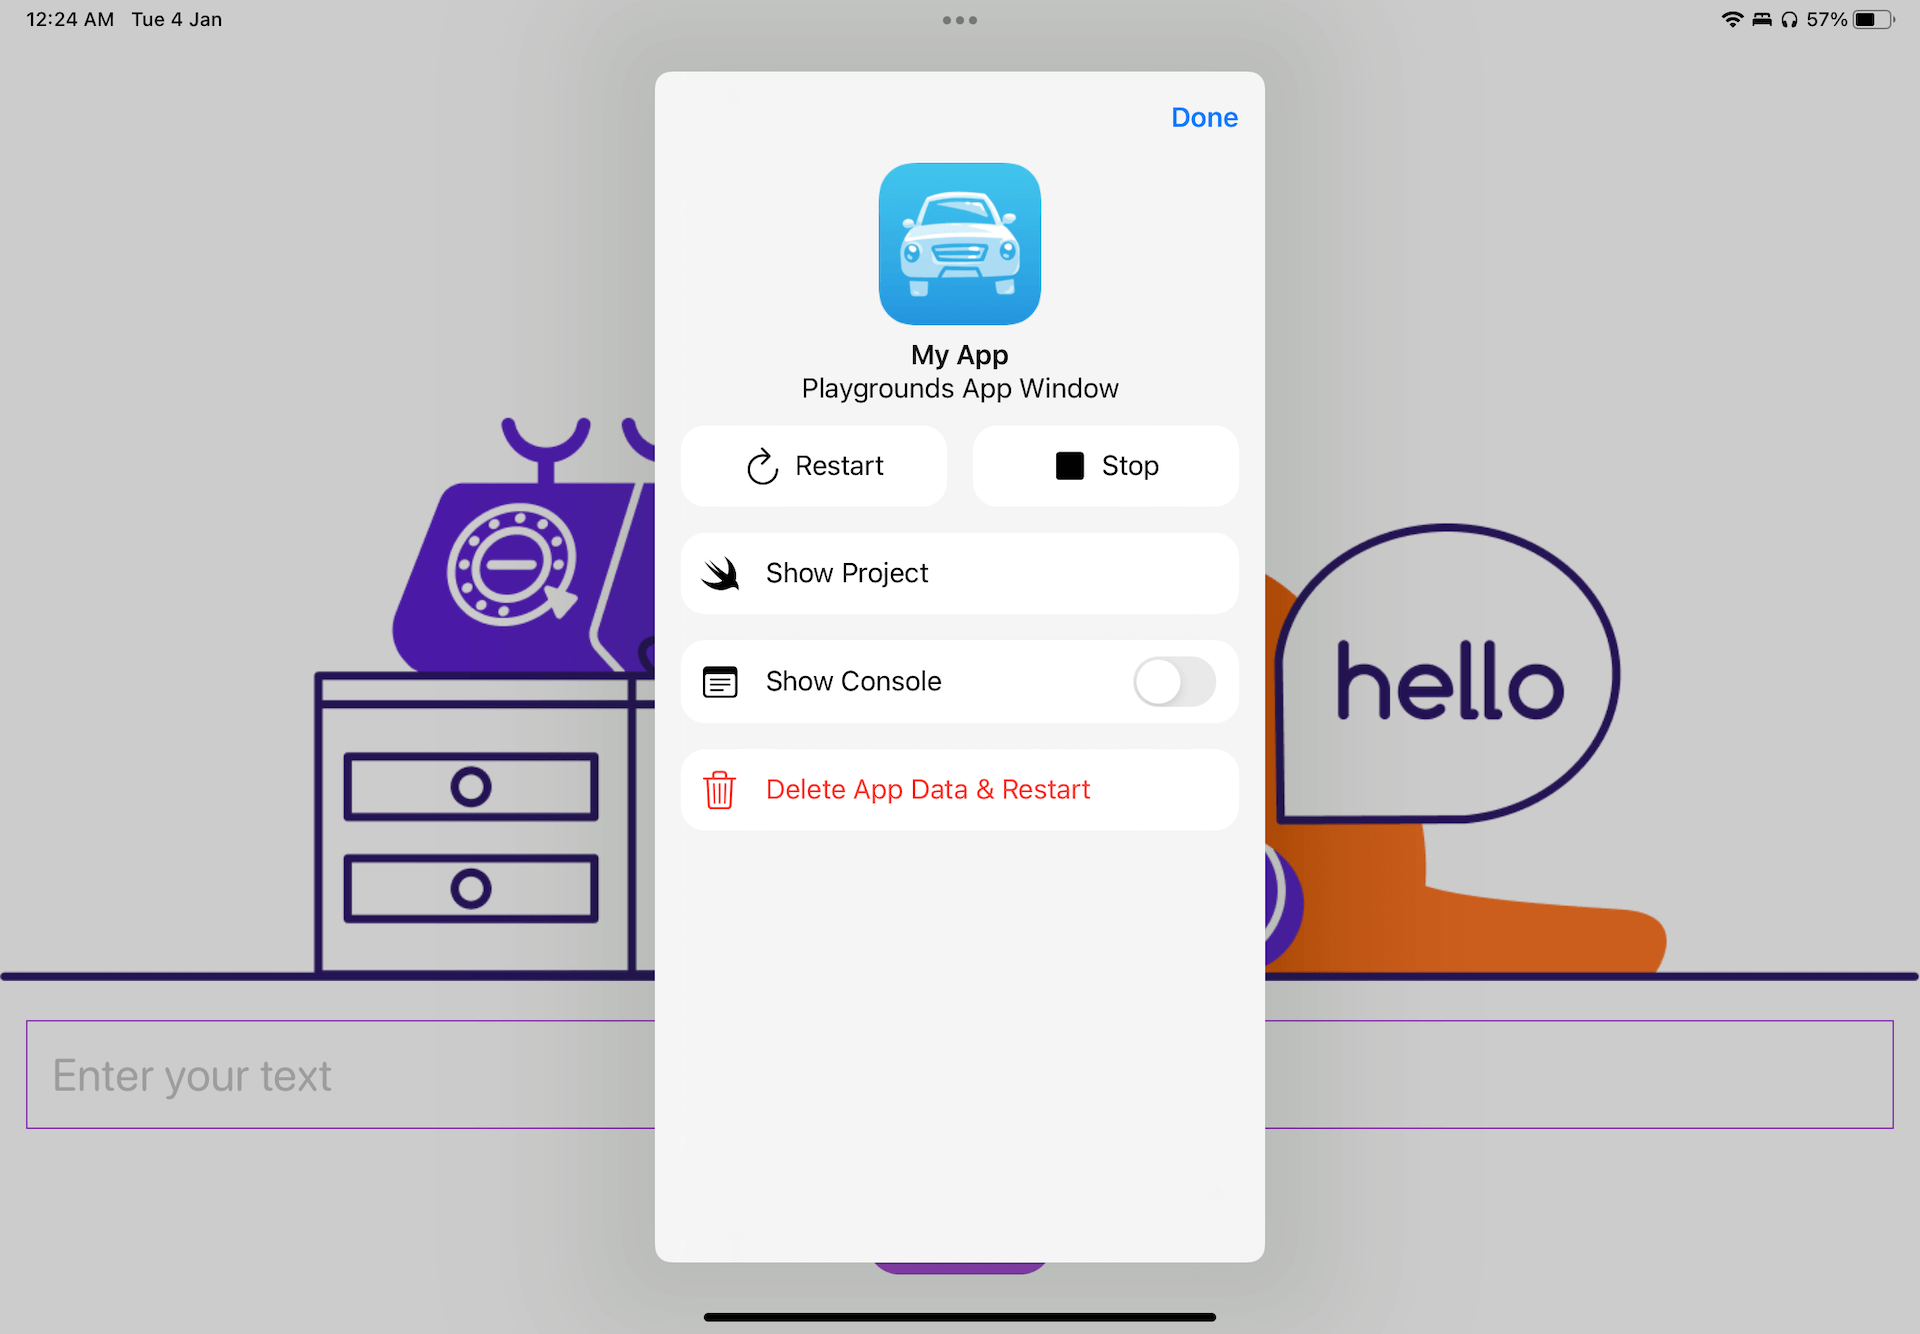
Swift Playgrounds will launch the app and run it in full screen mode. To stop the app and switch it back to the code editor, you can tap the Swift icon in the status bar. Then you can tap the Stop button to terminate the app.
Summary
Swift Playgrounds 4 delivers a huge improvement for aspiring developers who are interested in learning iOS development but without a Mac. As you can see in this tutorial, we can build an iOS app entirely using an iPad. The built-in code editor and the auto complete feature provide a delightful coding experience.
For those who own a Mac, there is probably no reason why you would develop apps using Swift Playgrounds. However, for beginners who only got an iPad and not ready to invest in a new Mac, this new update of Swift Playgrounds opens up a lot of opportunities for them.
If you know any iPad users who want to learn to code, feel free to share this tutorial to them. I’m excited to write more tutorials and show them how to build apps entirely on iPad.
To learn more about SwiftUI, you can further check out our Mastering SwiftUI book.

Founder of AppCoda. Author of multiple iOS programming books including Beginning iOS Programming with Swift and Mastering SwiftUI. iOS App Developer and Blogger. Follow me at Facebook, Twitter and Google+.