With iOS 9’s public launch earlier this week, it’s never been a better time to understand how to take advantage of the new and exciting APIs!
When Apple Senior Vice President Craig Federighi announced Search APIs at WWDC 2015 in June, many extolled them as the most powerful feature in iOS 9.
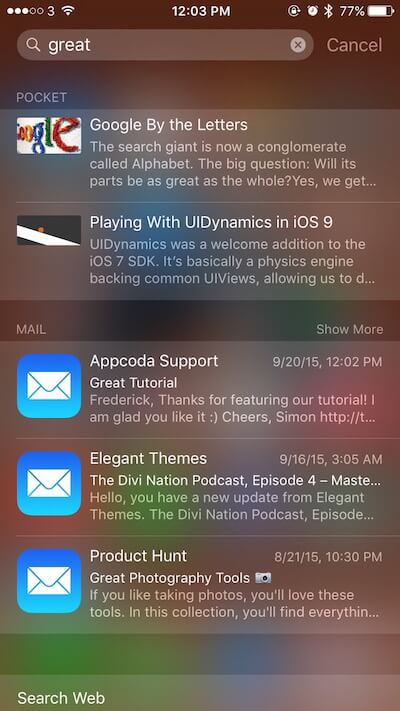
Search APIs offer an exciting new way to interact with users. With iOS 9, Apple has optimized Spotlight with incredible new features that indexes more content than ever. For instance users can fire up spotlight to search web content or data deep within apps. Using popular keywords they can easily access apps (even if they’re not certain the name of the app)! Search APIs help you do this.
Search in iOS 9 will be a major feature for developers. With the release of iOS 9, it’s never been a better time to jump on. Apple’s never been known to be big in the search engine industry, but with Search APIs in iOS 9, that might be about to change!
There are three main components of the new Search APIs in the iOS 9 SDK:
- NSUserActivity, which helps index keywords and other content
- Web Markup, which indexes web pages optimized for spotlight, and supports for “deep linking” and universal links for apps.
- Core Spotlight, which allows deep linking for all app content
In this tutorial, we’ll take a look at all three Search APIs. However, we won’t go into great detail on Core Spotlight, by far the most advanced Search API as it is beyond the introductory scope of this tutorial.
In the second half of this article, we will take a look at SFSafariWebController and why you should use it in your apps.
Getting Started
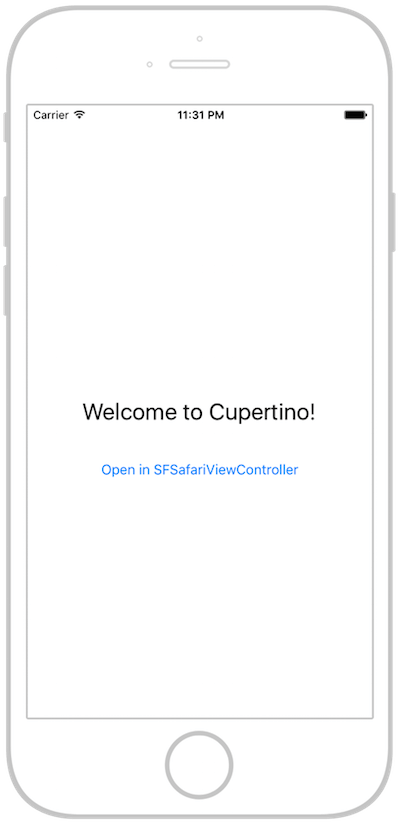
To begin, first get the starter project from here. Download it, unzip it, and run it on a device or in the simulator (Xcode 7.0 or later is required as we’re accessing the iOS 9 SDK). You’ll be presented with a simple app containing one view controller.
You’ll notice there’s nothing much in the ViewController.swift file. Nothing exciting here. Because this tutorial does not have any major prerequisites, we’re not going to work directly with handoff. However, when using Search APIs (especially Core Spotlight), it is common to interact with handoff as you’ll likely want to open specific view controllers or display particular content.
In this tutorial, we will just focus on the implementation for indexing the app content, making it accessible to your users through Spotlight. We’ll take a deeper look at these more advanced features in another tutorial.
NSUserActivity
Let’s begin with NSUserActivity. This class was first introduced at WWDC 2014 with iOS 8, but has since been updated for the new and exciting features of iOS 9. Although we won’t directly discuss handoff in this tutorial (as it’s an entirely separate topic), it’s good to know the NSUserActivity class is a handoff API. If you’re unfamiliar with handoff, I encourage you to take a look at Gabriel’s excellent tutorial about Handoff.
That being said, let’s dive in. We begin by initializing an NSUserActivity object in the viewDidLoad() method of ViewController.swift:
|
1 2 3 4 5 6 7 8 |
let myActivity = NSUserActivity(activityType: "com.appcoda.searchAPIs.detail") myActivity.title = "Cupertino" myActivity.eligibleForSearch = true myActivity.keywords = Set(arrayLiteral: "Cupertino", "Silicon Valley", "California", "San Jose", "San Francisco", "Apple Inc", "Mothership") self.userActivity = myActivity myActivity.eligibleForHandoff = false myActivity.becomeCurrent() |
In line 1, we initialize a new NSUserActivity object and set a unique identifier associated with this project.
Line 2 sets the title property – in our case the town in this View Controller, Cupertino.
In line 3 we set the object as eligible for search (since we’re using a Search API, this is very important).
Next, we create a Set (and make it an arrayLiteral) of keywords. When our users search using spotlight, these keywords will appear accordingly.
Then, in line 5 the userActivity property is assigned to myActivity and in line 6 eligibleForHandoff is set to false. As we’re not using handoff directly in this tutorial, we can safely set this property to false.
Finally, in line 7 we call the becomeCurrent() method on myActivity. This method adds the activity to spotlight and indexes the content.
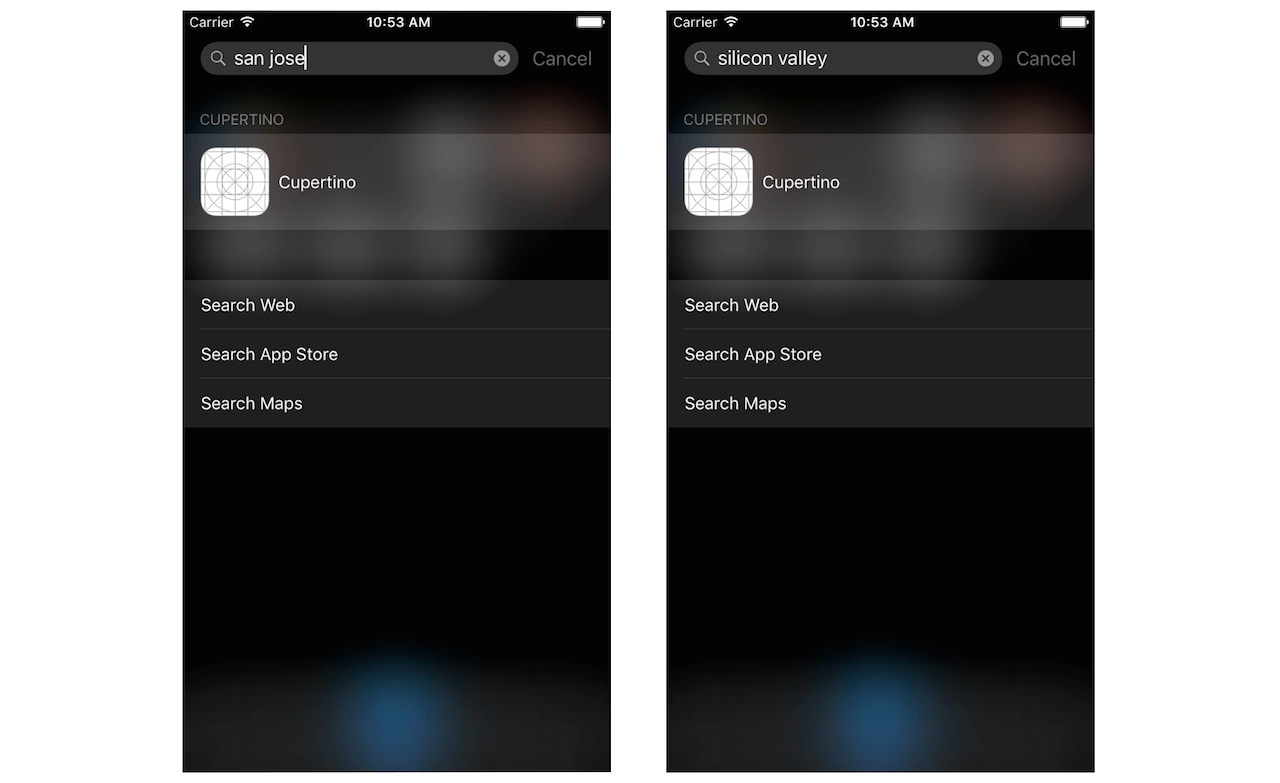
Now, run the app on the simulator or your iPhone. Once you are up and running on a device, close the app and pull down from the home screen to show spotlight. Type “San Jose” (a keyword we assigned above) or any of the others you’ve implemented. You’ll see the app appear with the keyword you typed! Great job so far.
As you can see, it is quite simple to add NSUserActivity to an iOS 9 app, and allow users to access your apps through keyword search.
Web Markup
Web Markup is the second aspect of the three Search APIs Apple announced at WWDC. With Web Markup, developers can use deep links to make content searchable. Apple recommends using this API for any app that mirrors content on the web. Suppose you have some web content for your app, using Web Markup lets the Applebot web crawler index your content. Most importantly, the indexed content will be available to all iOS users in Spotlight and Safari search results. This will definitely increase your app exposure and engagement.
According to Apple, there are four main things that must be done to enable Web Markup:
- Allow Apple to discover and crawl an app’s website with the Applebot (apple’s web crawler)
- Ensure the app’s website has the Web markup for deep linking.
- On the other end, make sure the app is set up to handle deep linking.
- Add markup for rich data and structured data to be able to surface in search.
If you haven’t started using Smart App Banners on your website, it’s never been a better time.
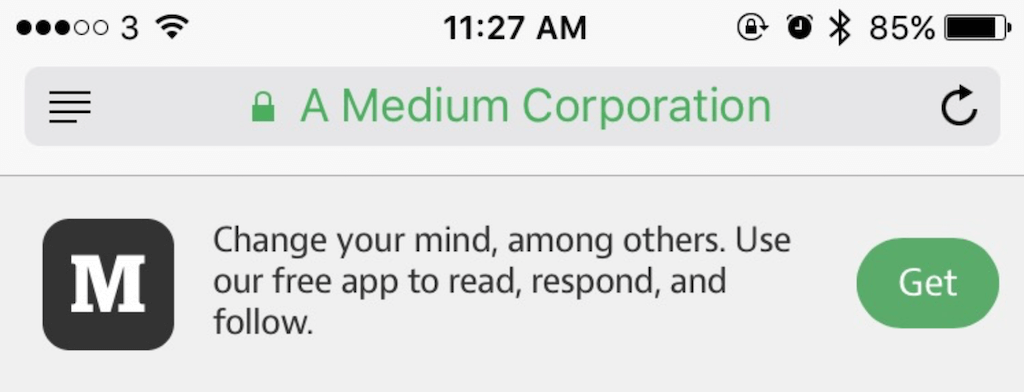
With Web Markup, users can download apps directly from a website (and never leave Safari, thus ensuring a seamless process). Nothing new has really changed in the world of Smart App Banners but with the advent of Web Markup, Apple is heavily encouraging developers to adopt them. You can add a smart app banner to your website with the following HTML meta tag.
|
1 |
<meta name="apple-itunes-app" content="app-id=yourAppID"/> |
In order for your app to appear, you need to pass in the app’s id, which can be found on iTunes Connect for apps live in the store. That’s all you need for the banner to appear!
Using iTunes Connect, you can also ensure Applebot finds and crawls your website. This can be done from the support and marketing links in iTunes Connect by entering your app’s URLs. Lastly, Apple supports now universal linking.
Previously to universal links, launching an app would require registering an URL scheme in the app’s info.plist and then calling that link. Safari would then open, redirecting to the app store or opening the app. This all required using a special url scheme such as facebook://.
Clearly this isn’t ideal. Universal Links allow users to launch apps over standard HTTP links. So why is this important? Take Twitter for example. If (and hopefully when) Twitter adopts universal links, simply navigating to twitter.com will launch the Twitter app (if it’s installed). This dramatically simplifies the user experience and doesn’t result in empty Safari tabs (a longstanding problem with iOS 8 and below).
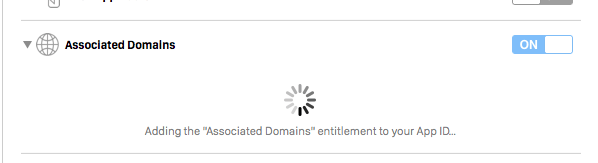
Because we need a server to test Universal Links, we’re not actually going to showcase a live demo, but rather equip you with the knowledge to begin the process. Working with universal links can be a confusing process, so following the next steps will set you off on your way. However, please note that universal links do require handoff, which is again a bit beyond the scope of this tutorial. As such, we will not go into all the specifics on how everything works. Apps using Universal Links must enable the “Associated Domains” toggle under the capabilities tab.
Then, you must create, sign, and upload a file called apple-app-site-assocation.json to your root https server. Let’s take a look at the details dictionary below. You’ll notice it accepts the app’s bundle ID with the team ID before the full bundle ID. This information can be found on iTunes Connect or within the Xcode project settings.
|
1 2 3 4 5 6 7 8 9 10 |
{ "applinks": { "apps": [], "details": { "TBEJCS6FFP.com.yourdomain.yourapp”: { "paths":[ "*" ] } } } } |
You will next need to configure your entitlements file (back in Xcode) with the proper domain to match the file and implement the following method in your AppDelegate.swift.
|
1 2 3 |
func application(application: UIApplication, continueUserActivity userActivity: NSUserActivity, restorationHandler:([AnyObject]!) -> void) -> Bool { // This is a handoff API } |
Web Markup is a powerful new Search API. With Applebot crawling the web for content and universal links, spotlight will become an increasingly powerful web searcher and universal links will only aid in that process!
Core Spotlight
Now, meet Core Spotlight, the star of the Search API show. Core Spotlight is a new Search API introduced with the iOS 9 SDK. This API, unlike the first two, is by far the most advanced. Core Spotlight is intertwined with handoff and to understand it means a to have knowledge of the handoff technology. As we’re not directly discussing handoff in this tutorial, we will simply introduce Core Spotlight and in a follow-up tutorial dive into its specifics and how to use it.
Core Spotlight is used to index search results much like NSUserActivity. Unlike NSUserActivity, it works hand in hand with handoff (pun intended)! As such, users searching specific keywords in spotlight can be brought directly to individual View Controllers.
Used by Apple apps such as Mail, Contacts and Notes, this feature allows developers to surface content in our own apps for public and private use. You can define a searchable item like an article with metadata and then place it into the Cloud Index. The item will then be accessed through Spotlight search.
In an upcoming tutorial we’ll take a detailed look at this very powerful new API and all its specifics. For now, be aware of its existence and that it works directly with handoff APIs.
The new SFSafariViewController Class

In this second half of the tutorial, we’ll discuss SFSafariViewController, a new class introduced in iOS 9, and the incredible potential it presents to developers. While not a Search API, SFSafariViewController has gained a lot of attention lately for its ease of use and ability to integrate web content with the power of the Safari browser. Further, SFSafariViewController can be intermingled with Search APIs. For example, if you’re indexing your app with keywords and one of those view controllers displays web content, then SFSafariViewController is perfect!
For years, developers have been using UIWebView (and most recently WKWebView – check out the this tutorial on WKWebView if you are unfamiliar with this class). UIWebView was criticized much for its slower-than-safari javascript engine and performance. At WWDC 2014, Apple introduced WKWebView to follow up developer complaints of performance improvements. WKWebView requires using the Web Kit framework as well as understanding the Web Kit delegate methods. I encourage you to take a deeper look at this technology if you’re interested but for this tutorial we are going to examine SFSafariViewController.
This year, Apple introduced exciting new changes with SFSafariViewController. Many users want the full power of the Safari browser within their app, but do not want to force users to navigate out of their app (a well known problem for user retention) or have the time to build an in-app browser. SFSafariViewController packs a punch by providing the power of the Safari browser inside apps without prompting users to open Safari.
Setting up SFSafariViewController is incredibly simple. Reopen the starter project we worked on earlier and make an IBAction called didPressButton() on the button in the storyboard. We will use this IBAction to place our code for SFSafariViewController. But instead of opening in Safari or a WKWebView, pressing this button will open a SFSafariViewController.
Let’s begin by importing Safari Services. Just add the import statement to the top of our View Controller.
|
1 |
import SafariServices |
Next, since we’ll be working with delegate methods, we need to conform to the SFSafariViewControllerDelegate. After the class declaration, add:
|
1 |
SFSafariViewControllerDelegate |
Your class declaration should look identical to the one shown below.
|
1 |
class ViewController: UIViewController, SFSafariViewControllerDelegate { |
Awesome. With Safari Services imported, we can now instantiate SFSafariViewController set some properties on it. Let’s write some code under the didPressButton() IBAction.
|
1 2 3 |
let safariVC = SFSafariViewController(URL:NSURL(string: "https://en.wikipedia.org/wiki/Cupertino,_California")!, entersReaderIfAvailable: true) safariVC.delegate = self self.presentViewController(safariVC, animated: true, completion: nil) |
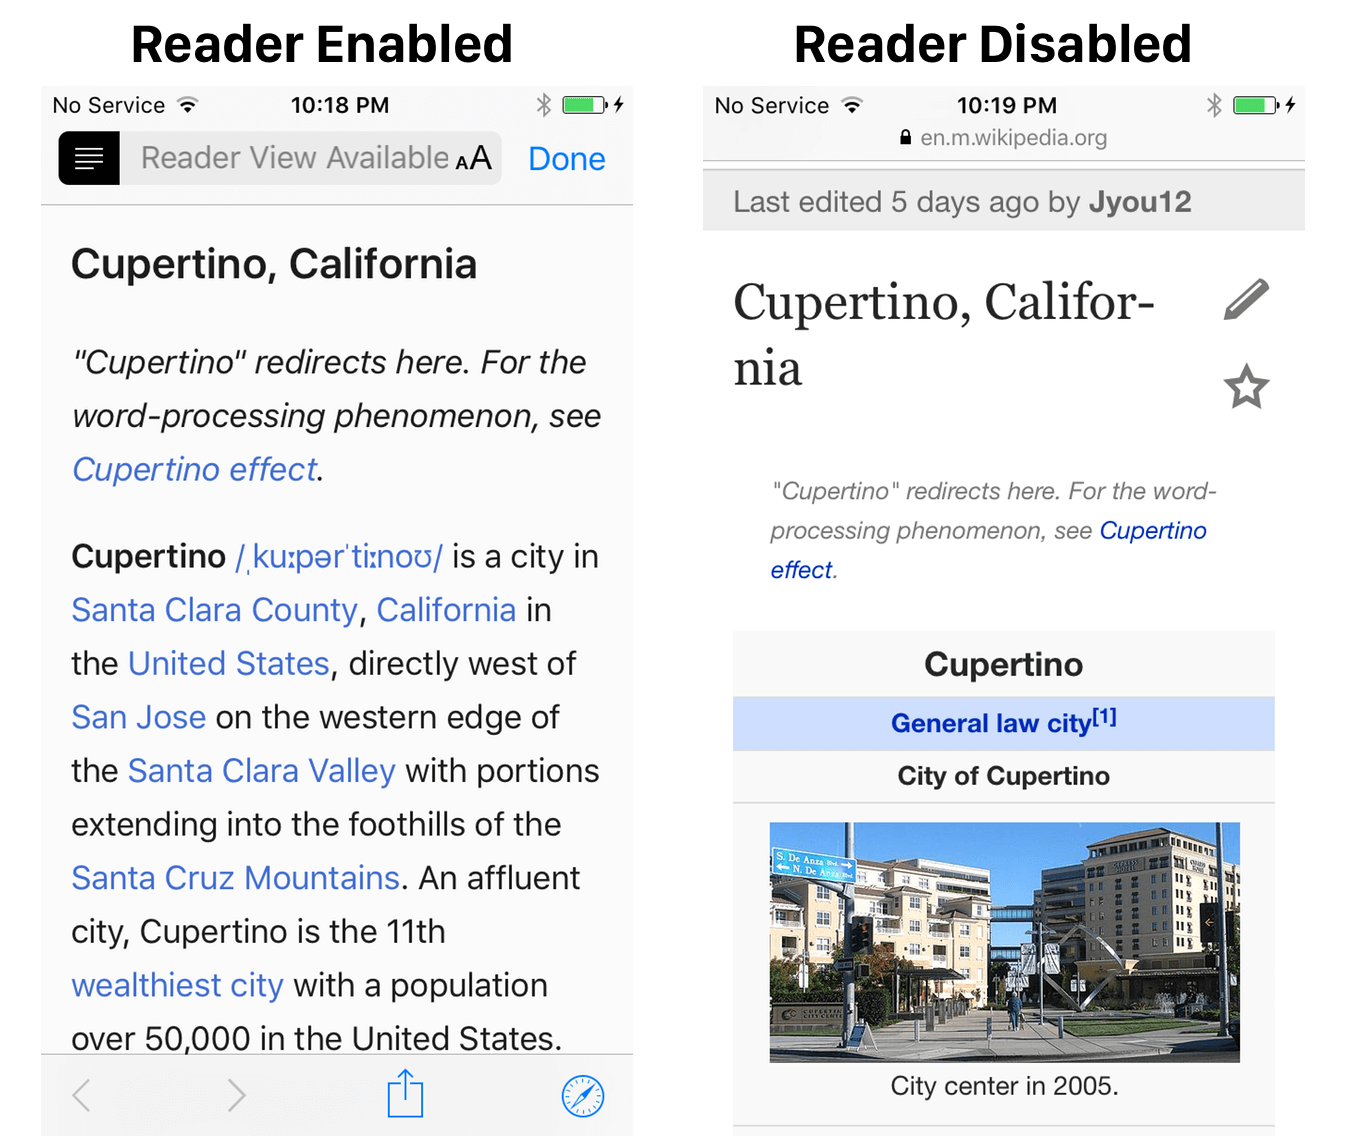
In the first line we are simply initializing SFSafariViewController, passing an string wrapped in a NSURL object in as a parameter, and setting entersReaderIfAvailable to true. Because we want to display Wikipedia content, we’re going to take advantage of reader. If you’re not familiar with reader, it’s a handy feature in Safari that extracts and displays important content from a website.
In the next line we set the delegate to self, an instance of this view controller.
In the third line call self.presentViewController by passing in the SFSafariViewController along with a boolean (true). We then set the completion handler to nil.
Alternatively, you can view this web page in SFSafariViewController without reader mode enabled by changing the true boolean to false as seen below.
|
1 |
let safariVC = SFSafariViewController(URL:NSURL(string: "https://en.wikipedia.org/wiki/Cupertino,_California")!, entersReaderIfAvailable: false) |
If you are still unfamiliar with the usage of reader, take a look at the image below to better understand when reader is enabled and disabled.
In order to dismiss SFSafariViewController, we are going to call a delegate method:
|
1 |
safariViewControllerDidFinish |
Add the following code after your the didPressButton() function.
|
1 2 3 |
func safariViewControllerDidFinish(controller: SFSafariViewController) { controller.dismissViewControllerAnimated(true, completion: nil) } |
This code is mostly straightforward. We call the delegate method in the first line and in the method call:
|
1 |
controller.dismissViewControllerAnimated() |
We pass in the true boolean indicating we want the view controller to close and set the completion closure to nil. Don’t worry about the nil parameter; it is simply taking the place of a closure (closures are a more advanced concept in Swift).
With that, you’ve officially implemented SFSafariViewController in iOS 9 – and it was nearly painless!
Summary
We’ve covered a lot of great iOS 9 content in this tutorial. In the first half we introduced the three Search APIs and the potential they present to developers. These Search APIs, NSUserActivity, Web Markup, and Core Spotlight, offer developers more engaging ways to interact with users. We examined how NSUserActivity is used for indexing app content and worked with Web Markup. In so doing, we discussed Smart App Banners and Universal Links.
In the second half of the tutorial we introduced SFSafariViewController and how to implement it into your apps. Gone are the days of UIWebViews/WKWebViews. With SFSafariViewController, you can embed a web page in your app using the power of the Safari web browser without ever having to leave the app. This approach focuses on user engagement rather than forcing your users to open an external browser. We discussed how easy it is to implement this class, conform to the delegate, and get started.
For your reference, you can download the final project files here.
I hope you found this tutorial useful and I look forward to your feedback in the comments. Get your apps ready for iOS 9 and Search APIs!

Gregg Mojica is a software engineer & CEO at Clovis, a startup focusing on voice technology. When not hard at work building frontend, backend, and everything-else-end code, he enjoys writing, sharing his knowledge, and photography. Gregg has published several apps on the app store and worked at various startups. You can follow him on Twitter or connect with him on LinkedIn.
Comments
 Steven
AuthorI have a ques. from where you got this iPhone 6 template ? (search-api-starter.png) <- from this pic.
Thx
 Gregg Mojica
AuthorIt’s an AppCoda file we use. I can double check for you. Are you looking for it in your own projects?
 Steven
AuthorYes, Right. For demonstration.
 Simon Ng
AuthorSteven, you can download it here:
https://dribbble.com/shots/1727466-iPhone-6-Wireframes
 zzh
zzh
Author你好,请问有关于oc的基本教程的书么,类似您的那本swift书
 Gregg Mojica
AuthorIt’s an AppCoda file we use. I can double check for you. Are you looking for it in your own projects?
 Yazeed Almuhaideb
AuthorGreat finding a place to read your thoughts Gregg!
Keep it up!!
 Gregg Mojica
AuthorThanks, Yazeed!!
 icoderz
AuthorYou are posted every New Tutorial in Swift.Is it not Possible that u also Posted it in Objective c.
 Paul
Paul
AuthorIs it actually necessary to dismiss the Safari VC in safariViewControllerDidFinish? The docs say yes, but everything works fine without doing this. It will dismiss itself when you tap Done.
 Roy
Roy
AuthorGreat!
 Ramprasad G
AuthorI have a query here. Can I get the HTML response from Done button clicked deligate ?