

Do you want to learn how to develop your very own macOS app that you can be proud of and use it on your personal MacBook? Or maybe you have a stirring passion to start developing on Mac? Then you are at the right place! Here, I will walk you through the steps in developing what could be your first very macOS app with one of the most modern languages, Swift!
Pre-requisites
- Have some interest in programming
- Have some basic understanding of Swift-programming (advantage)
- Xcode 9 installed
- Passion to build a macOS app
What will you learn?
- Basic concepts of macOS development
- How to integrate Alamofire with macOS app to perform network calls
- How to create a drag and drop mechanic
- Some Swift 3.2 syntax
What will we build?
I’m sure you are excited to know what good stuff we will be building! In this tutorial, we will be working on Mac’s main application layer, Cocoa. This layer is responsible for the appearance and user actions’ responsiveness of the app which is also where we will be introducing all our visual elements, networking, and app logics. We will upload our images to uploads.im as it provides an open API for us to use. This will be the end product after going through this entire tutorial,
The user will first be presented with a home screen with instruction saying “Drag and Drop your image here”. Then the user can drag any jpg format image into the app, then the app will present a loading spinner to inform the user that it is uploading the image to server. Once the server respond with success, the user will get a pop-up alert window where he/she can copy URL to clipboard, then he/she can paste the URL anywhere, like on a internet browser to view his/her image from the server.
Enough of talking, let’s get started!
Creating your macOS project
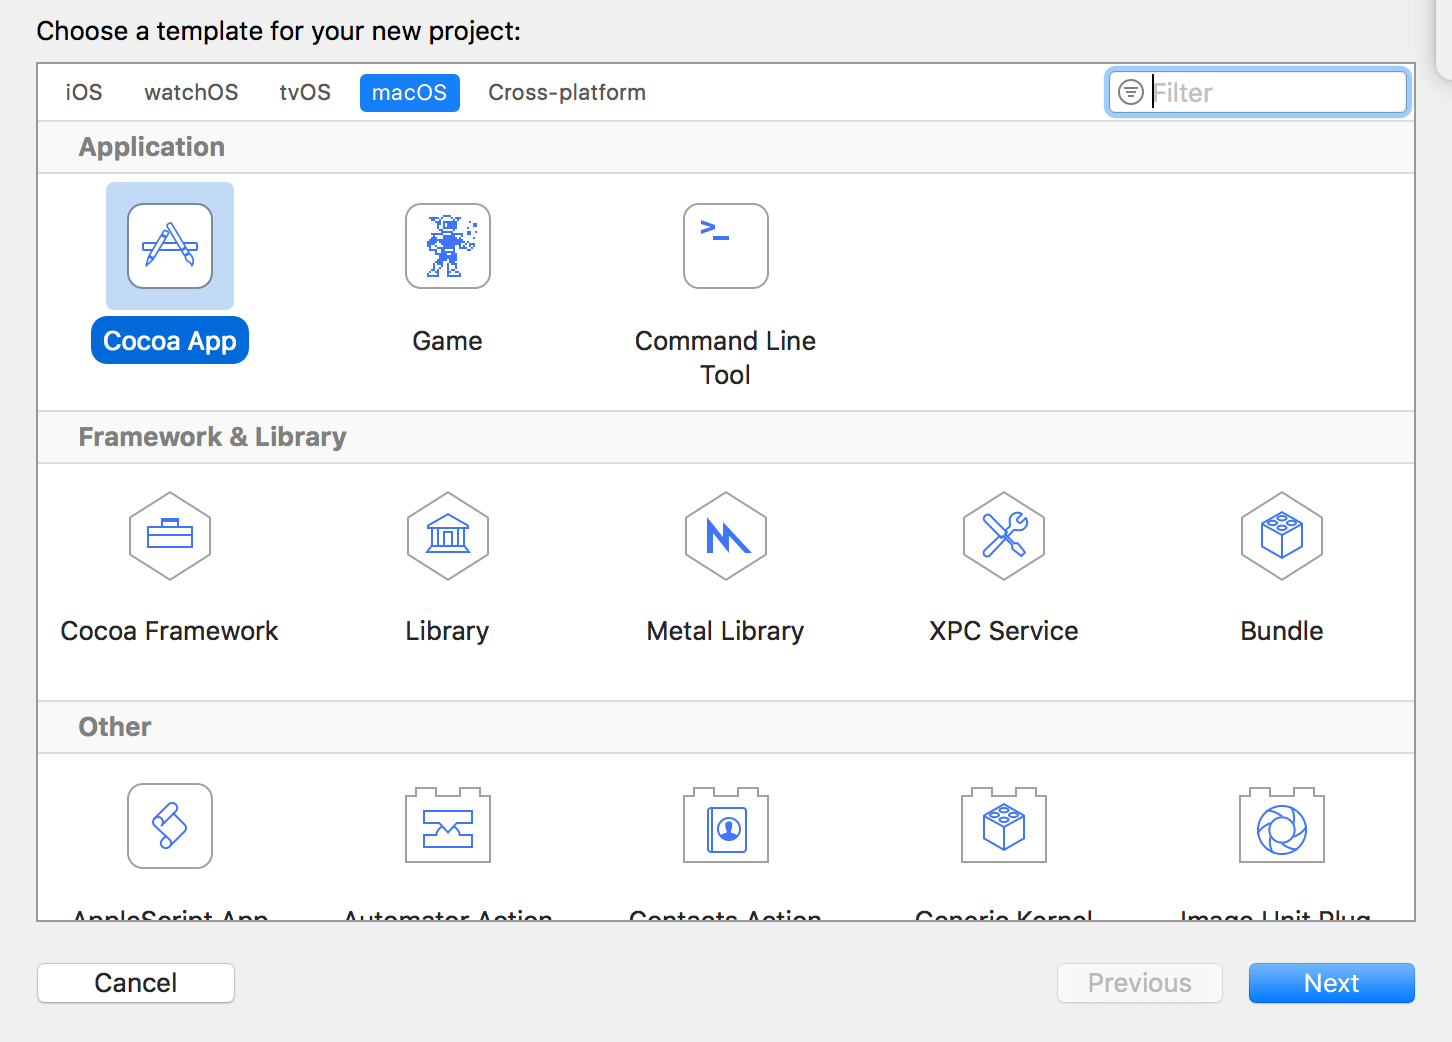
First, let’s launch our Xcode 9 and create your macOS app project call PushImage. Choose macOS and Cocoa App under Application.
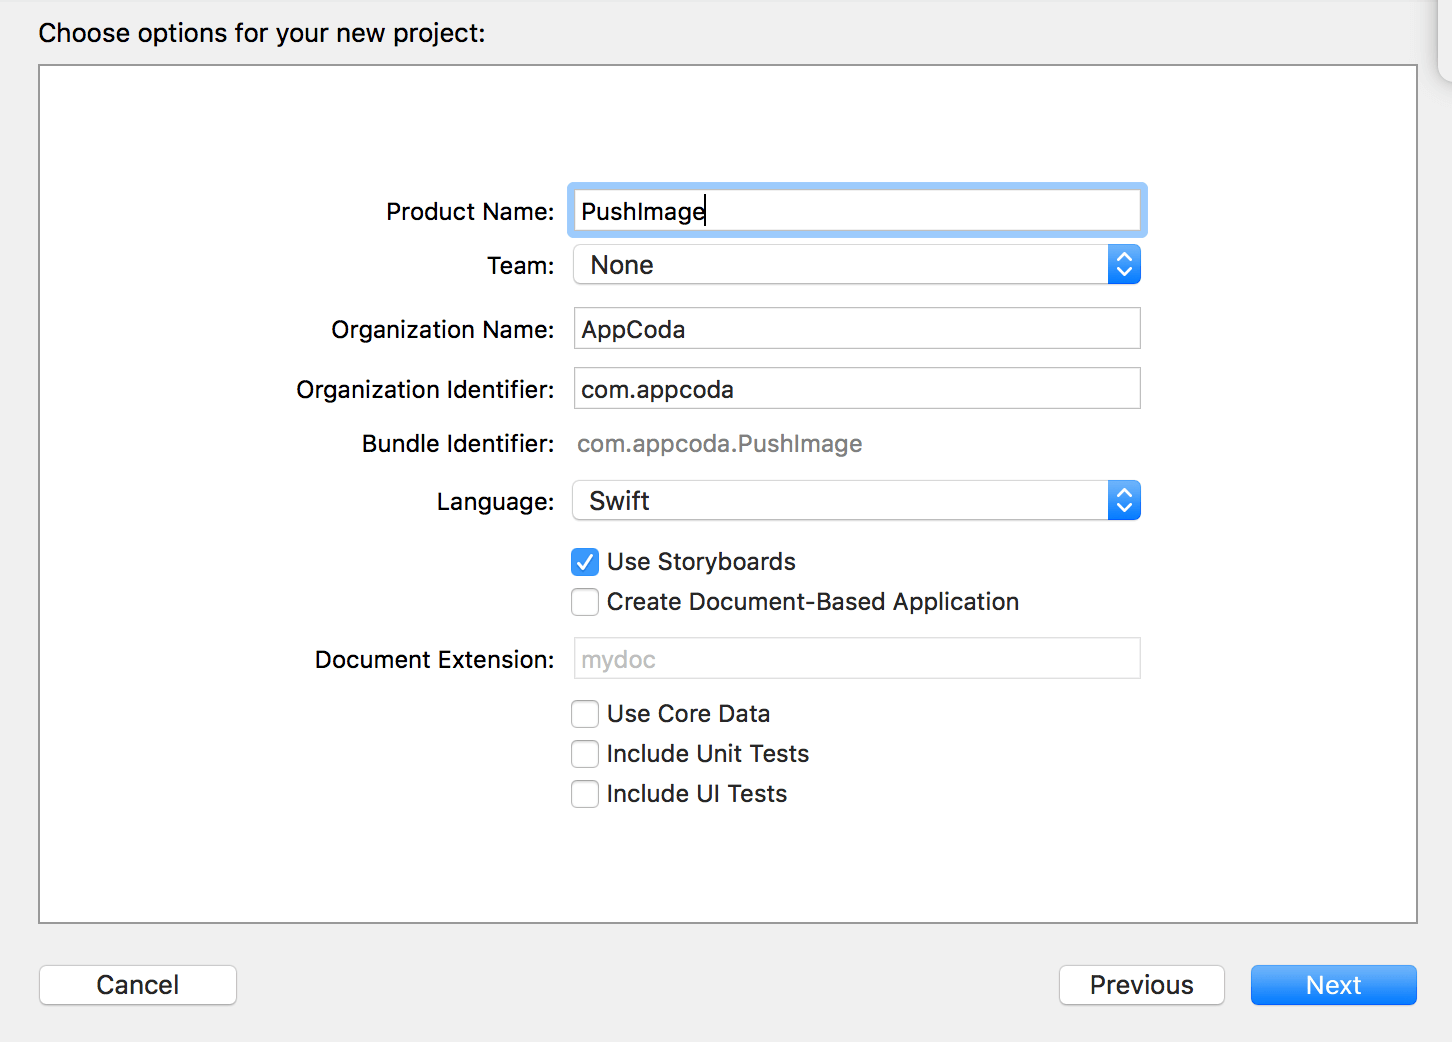
You can follow the settings I put in the next page as follow, then choose a directory of your choice for your project files.
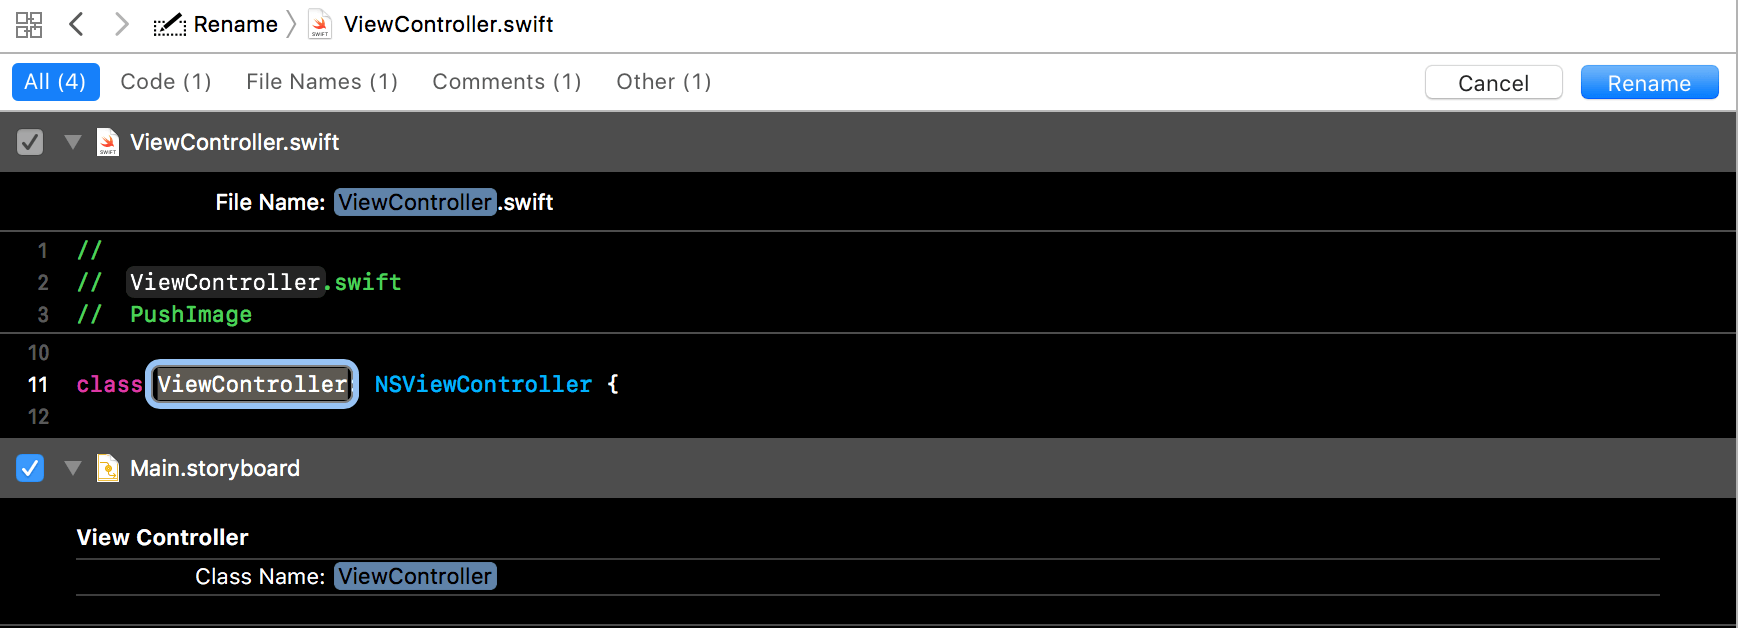
Now that you have your project all setup, I want to take this chance to introduce one of my favourite new feature in Xcode 9, Refactor! If you have used the past versions of Xcode, refactoring of Swift code is not possible. Let’s give it a shot. Highlight ViewController and go to Editor->Refactor.
I don’t want to use the default name ViewController. Let’s change it to HomeViewController and click Rename. This will perform a global change to your filename, class name and Storyboard viewcontroller class name, how cool is that!
Going back to our HomeViewController class, you would have noticed that this controller is a subclass of NSViewController. If you come from developing iOS apps, you would have straight away notice the difference that we are using NS and not UI here. That’s because we are using Cocoa (AppKit) and not Cocoa Touch (UIKit). I believe Apple made these 2 distinct frameworks mainly to separate the technologies behind mobile and OS. In short, UIKit is a slimmed down version of AppKit.
Creating our Home Page
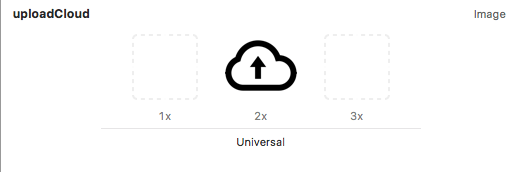
You can download a cloud image icon from this link. Once you have the asset, drag it into Assets.xcassets and lets rename is to uploadCloud and move the asset to 2x.
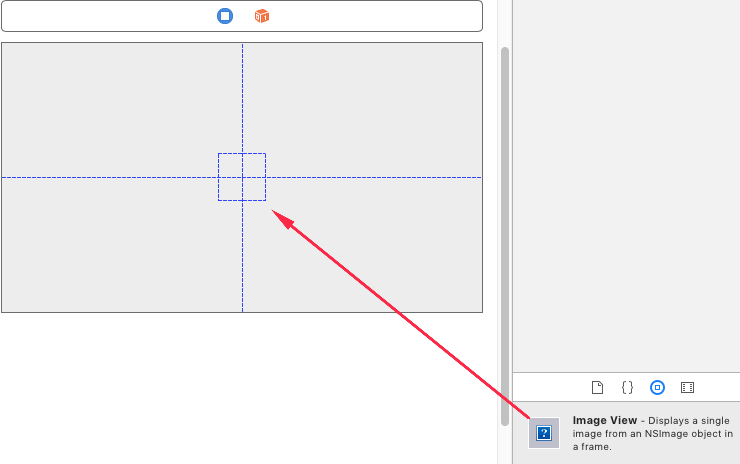
Next, let’s move to our Main.Storyboard to create our view which user will interact with. We will be using Xcode’s beautiful interface builder to design the looks of our home page. In the bottom right container, go to the third item which is an object library and search for NSImageView, then drag in into the center of the HomeViewController view.
Now, click the NSImageView you just dragged in once, and go to the fourth item, which is the Attributes Inspector to set the Image to uploadCloud. Because in our last step, we have renamed it to uploadCloud, Xcode automatically registers the name and we can use it directly by inserting the name here without the need to specify its file extensions. One of the wonders of Xcode!
Let’s also increase the width and height a little so that it will look nicer as a whole. Click the fifth item in the right (Utilities) panel. which is the Size Inspector and increase its width and height to 150x150.
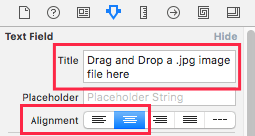
We will also need a text to tell user what they need to do, so now go ahead and search for label and put in below the imageView. Again, go to the Utilities panel, under Attributes Inspector, set the Title as Drag and Drop a .jpg image file here. You can see that the text is totally truncated, let’s increase the width to 300 in Size Inspector and set the Text Alignment to be Center-aligned.
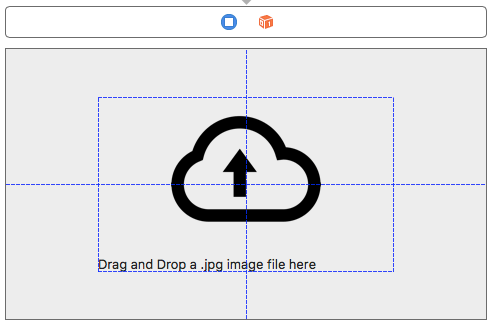
Let’s now align both the imageView and the label to the center of the window by first clicking on the imageView, then hold CMD and click on the label. This should let you highlight both, then drag them till you see a cross, which the the guiding lines for you to accurately guage if the components are centered.
The second last UI component we want to add is the Indicator. Go ahead and search for it and drag it into the window, place it at the center of your label.
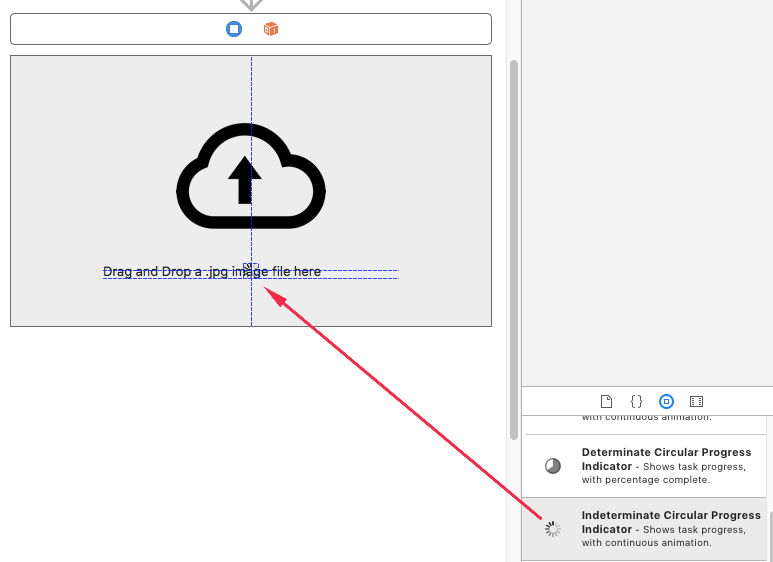
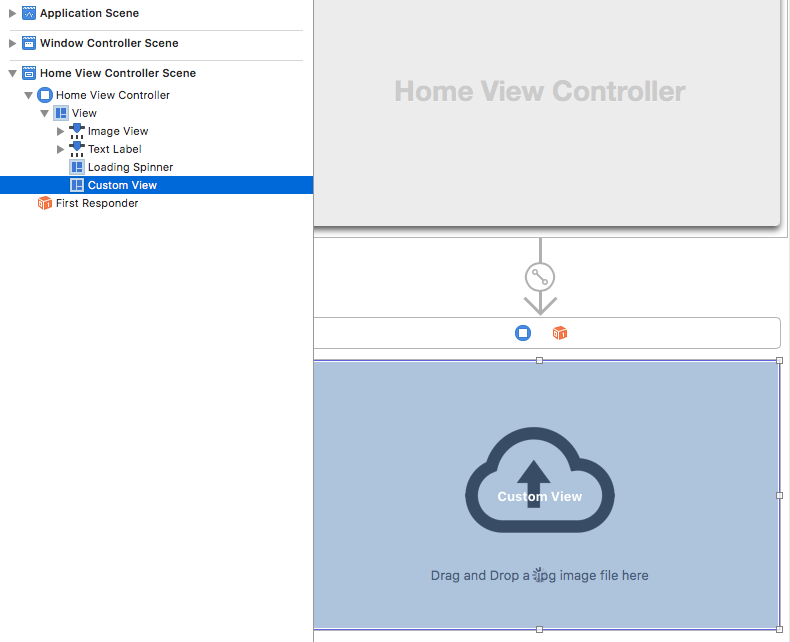
The final component we need is our most important piece, the DragView! We need a View that act as a droppable area in our app. So following the same ritual of searching for components, search for NSView and drag it in, then extend it such that it fills the entire window. The Storyboard ordered the layers from bottom up or LastInFirstOut concept. So now, our view covers all the other view components. Later on, we will set the view such that it has a transparent background, and it won’t block any view underneath it.
Way to go! That is all the components we needed to add into our Storyboard, let’s now connect Outlets, which are references the Interface Builder used to connect to a property declared in its ViewController.
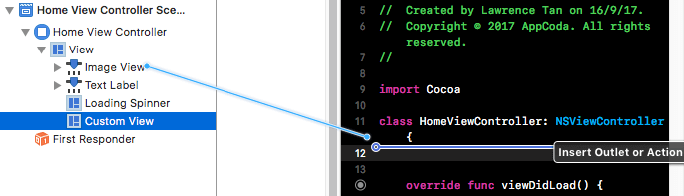
With our Storyboard as our active window, we can open a separate window showing our HomeViewController class by activating Assistant Editor located at the top right.
Holding ctrl, click on ImageView and drag it just below our class declaration and let’s call it imageView. Great! Now your outlet for the imageView is connected to a property in our class, we can now programmatically adjust its propertise and work with it.
Challenge Time
Now, try doing the same for the view, label and the indicator, let’s call them dragView, staticLabel and loadingSpinner respectively. Your code should look like this at the end.
import Cocoa

class HomeViewController: NSViewController {
    @IBOutlet weak var imageView: NSImageView!
    @IBOutlet weak var staticLabel: NSTextField!
    @IBOutlet weak var loadingSpinner: NSProgressIndicator!
    @IBOutlet weak var dragView: NSView!

    override func viewDidLoad() {
        super.viewDidLoad()

        // Do any additional setup after loading the view.
    }

    override var representedObject: Any? {
        didSet {
        // Update the view, if already loaded.
        }
    }
}
To get back some space in our window, let’s go back to Standard Editor by clicking the first item at the top right and we will move to our next mission.
Creating our Drag View
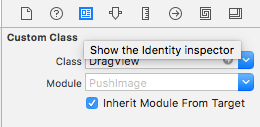
Our next mission is really to make our DragView a proper “drop-off” point for our .jpg image files. Go ahead and right-click on your root folder and choose New File. Choose Cocoa Class and create a new DragView subclass of NSView. We will also need to go back to our Storyboard and set our DragView’s class as DragView.
Then go back to our HomeViewController and change NSView! to DragView!:
@IBOutlet weak var dragView: DragView!
If we look closely at NSView, we found out that it actually automatically conforms to NSDraggingDestination protocol which is exactly what we need to make our “drop-off” space.
Before we can use all the draggable methods, we first need to register our view. Replace the code in the view class with this:
    required init?(coder: NSCoder) {
        super.init(coder: coder)
        registerForDraggedTypes([NSPasteboard.PasteboardType
            .fileNameType(forPathExtension: ".jpg")])
    }
This line of code registers the view for any dragged item thrown inside the app with the file extension of “.jpg”. All we did is registering, our view is not ready to accept files just yet.
Following the NSDraggingDestination documentation, we can conclude that we need these functions to achieve what we want:
So let’s go ahead and add these chunk of code. I will explain what they do :
import Cocoa

class DragView: NSView {

    //1
    private var fileTypeIsOk = false
    private var acceptedFileExtensions = ["jpg"]

    required init?(coder: NSCoder) {
        super.init(coder: coder)
        register(forDraggedTypes: [NSFilenamesPboardType])
    }

    //2
    override func draggingEntered(_ sender: NSDraggingInfo) -> NSDragOperation {
        fileTypeIsOk = checkExtension(drag: sender)
        return []
    }

    //3
    override func draggingUpdated(_ sender: NSDraggingInfo) -> NSDragOperation {
        return fileTypeIsOk ? .copy : []
    }

    //4
    override func performDragOperation(_ sender: NSDraggingInfo) -> Bool {
        guard let draggedFileURL = sender.draggedFileURL else {
            return false
        }

        return true
    }

    //5
    fileprivate func checkExtension(drag: NSDraggingInfo) -> Bool {
        guard let fileExtension = drag.draggedFileURL?.pathExtension?.lowercased() else {
            return false
        }

        return acceptedFileExtensions.contains(fileExtension)
    }

}

//6
extension NSDraggingInfo {
    var draggedFileURL: NSURL? {
        let filenames = draggingPasteboard().propertyList(forType: NSFilenamesPboardType) as? [String]
        let path = filenames?.first

        return path.map(NSURL.init)
    }
}
1 – Firstly, we need to create a boolean flag call fileTypeIsOk, defaulted to false to help us push forward only the right file format of our images. We also create a acceptedFileExtensions which is an array of acceptable file format in string.
2 – draggingEntered function will be called when the file first enter the “drop area”. Here, we will call a function checkExtension which we will discuss later, to set our fileTypeIsOk boolean to true if the file type is of .jpg or false if it is not.
3 – draggingUpdated function is implemented here to get the details of the image. In this case, if the fileTypeIsOk, we will return the copy of the image, else it will return an empty data represented by [].
4 – performDragOperation function is called once the user releases his mouse, we will make use of this function to pass the url to our HomeViewController later.
5 – checkExtension is our “home-made” function where we check our drag object, grab the url of the file coming in, and check if it complies with our acceptedFileExtensions.
6 – Here, we extend our NSDraggingInfo which is actually all the senders we see in our draggingEntered and draggingUpdated. We added a variable call draggedFileURL here to reference the url of our image file.
If you run the app now, you should be able to drag in an image file with .jpg and see a green + sign at your cursor, but not for other file types. Great! Now that we know our app only accepts a specific file type correctly, let’s move on to establishing a communication between the view and our controller.
Creating our Delegate
Delegation Pattern is one of the most commonly seen patterns in Cocoa programming. It is like creating a command center to broadcast what A has done, so now B should do this. In short, we will be creating these:
- Our command center (DragViewDelegate)
- Function call
didDragFileWith - View to hold a reference to
DragViewDelegate‘s subscribers and calldidDragFileWith - ViewController to subscribe to
DragViewDelegateto do something whendidDragFileWithis called in theView.
So, let’s head back to our DragView and input this code on top of our class declaration just below import Cocoa:
protocol DragViewDelegate {
    func dragView(didDragFileWith URL: NSURL)
}
We create a delegate protocol here which defines the responsibilities that the delegate wants to command. And here the sole responsibility is when the dragView receive an event call dragViewdidDragFileWith, the delegate will be called, and subscribers will react. So let’s also create a variable reference for subscribers and put this just after the opening bracket of our class declaration:
class DragView: NSView {

    var delegate: DragViewDelegate?
We want to immediately inform our HomeViewController that a correct file is placed, so the best place for our delegate to broadcast will be in the performDragOperation after the user releases his drag event, and when all the checks are done. So go ahead and add this line of code:
    override func performDragOperation(_ sender: NSDraggingInfo) -> Bool {
        guard let draggedFileURL = sender.draggedFileURL else {
            return false
        }

        //call the delegate
        if fileTypeIsOk {
            delegate?.dragView(didDragFileWith: draggedFileURL)
        }

        return true
    }
Now let’s head back to our HomeViewController and extend our class to implement our delegate method. Go ahead and add these lines of code:
extension HomeViewController: DragViewDelegate {
    func dragView(didDragFileWith URL: NSURL) {
        print(URL.absoluteString)
    }
}
If we run the app now, we will expect to see our file URL being printed in our console, let’s try it!
Hmmm… nothing happens when we drag our .jpg files in, did we miss out anything? Yes! We need our HomeViewController to subscribe to our View‘s delegate. This is a common omissions where developers forgot to add the subscriber, so lets go ahead and fix that. Add this in viewDidLoad():
    override func viewDidLoad() {
        super.viewDidLoad()
        dragView.delegate = self
    }
After you done that, run the app again and you will see the URL printed. Great Job! You deserved a big pat on your back for coming this far. We are almost there, we can now push our files up to the server!
Integrating Alamofire
Alamofire is a powerful networking library written in Swift. Formerly known as AFNetworking, it is the most well maintained networking library to date.
Installing Alamofire using CocoaPods
Cocoapods helps to define our project’s dependencies all in one file and it automatically links them to our Xcode project by generating a workspace file. If you have no prior experience with Cocoapods, please check out this tutorial.
We first need to create a PodFile. You can open up Terminal and navigate to the project directory ({ROOT}/PushImage). Then run pod init. Now that our Podfile is created, go ahead and open PodFile and fill them with this code:
platform :osx, '10.10'
target 'PushImage' do
use_frameworks!

  # Pods for PushImage
    pod 'Alamofire', '~> 4.5'

end
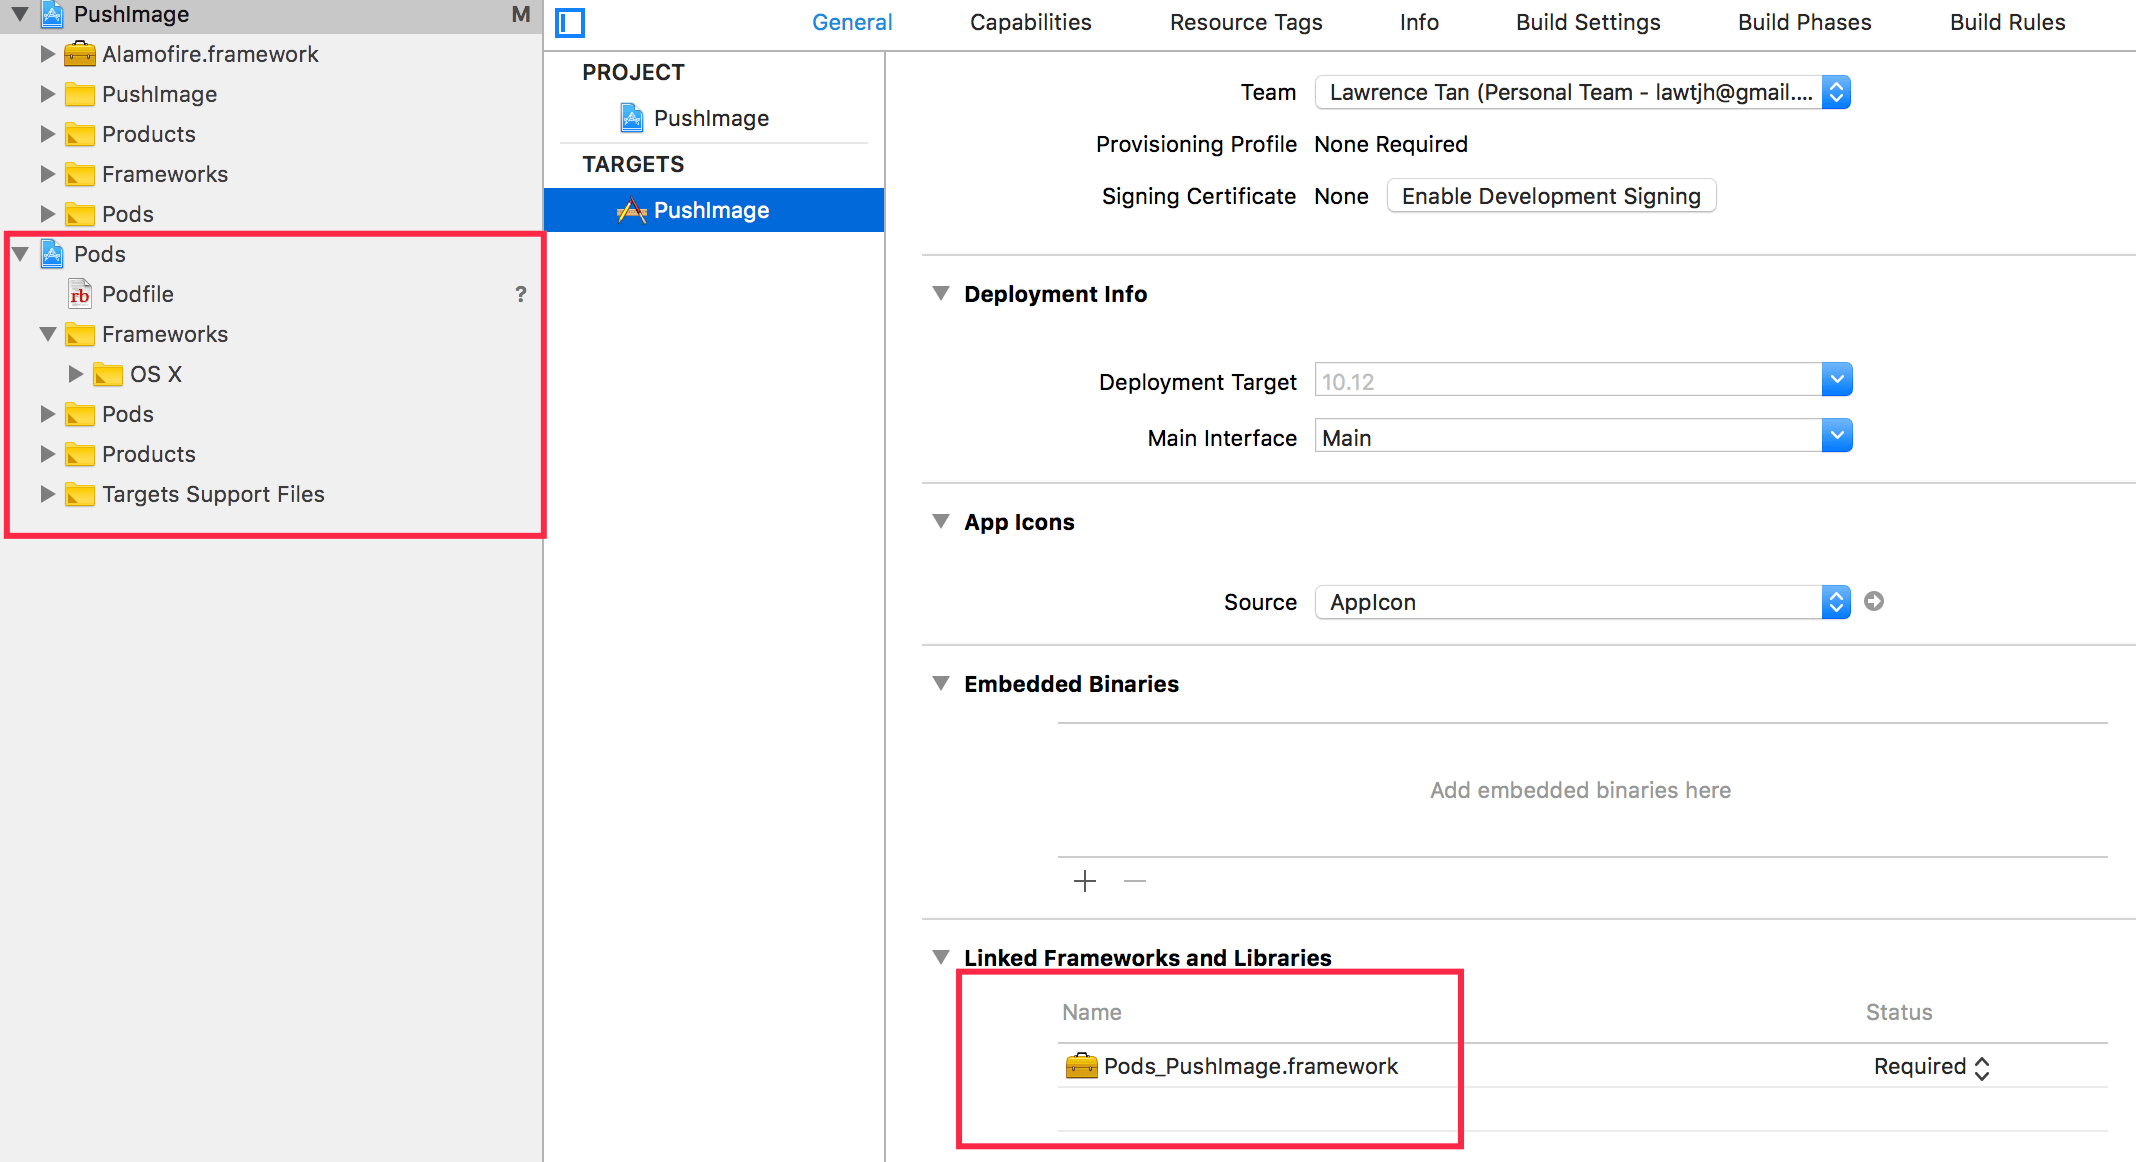
Next run pod install. This will clone the dependencies and you should get Alamofire framework linked to a newly created workspace file. You should see this screen at the end:

Close your current project and from now on we will work on Cocoapod’s newly created PushImage.xcworkspace.
Way to go! You now have your networking library all set up!
Making our network call to uploads.im
Following the api document written by Uploads.im, we will be making use the following API to do our POST just like the example given in the document as well.
upload– URL or image sent by POST method. The system automatically detects that you upload.
So let’s go ahead and import the library:
import Cocoa
import Alamofire
And then, add these lines of codes in dragView function:
extension HomeViewController: DragViewDelegate {
    func dragView(didDragFileWith URL: NSURL) {
        Alamofire.upload(multipartFormData: { (data: MultipartFormData) in
            data.append(URL as URL, withName: "upload")
        }, to: "http://uploads.im/api?format=json") { [weak self] (encodingResult) in
            switch encodingResult {
            case .success(let upload, _, _):
                upload.responseJSON { response in
                    guard
                        let dataDict = response.result.value as? NSDictionary,
                        let data = dataDict["data"] as? NSDictionary,
                        let imgUrl = data["img_url"] as? String else { return }

                    print(imgUrl)
                }
            case .failure(let encodingError):
                print(encodingError)
            }
        }
    }
}
That’s a lot of codes!!! Don’t be frightened, special thanks to Alamofire, the library provided us with a single upload function call that allows us to POST file with multipartFormData, which is a networking method we normally use to upload files. Here, we appended the url of our file, which is the given location of where our file is in string, passed in as a URL object with parameter name upload.
The endpoint http://uploads.im/api?format=json is appended with query parameter format=json to also specify the format response we want. When the server response with upload success, we grab the img_url by parsing the JSON response, and print it out. Let’s try it!
Oops! There will be another common error message we may see when we make the first networking call in our apps. It goes something like:
App Transport Security has blocked a cleartext HTTP (http://) resource load since it is insecure. Temporary exceptions can be configured via your app's Info.plist file.
Apple has recently introduced this new ruling where all apps have to communicate through https protocols. Since we are just experimenting this and making this for personal use, we can perform a workaround.
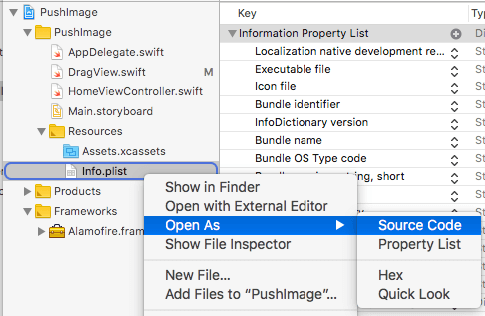
Head over to Info.plist at your project directory panel, right click on it and select open as source code.
Then add these code:
  NSAppTransportSecurity

        NSAllowsArbitraryLoads
This will bypass the ATS and allow us to communicate with non-https protocols. Run the app and try to upload another image file! After a few seconds, you should see your file URL uploaded printed in the console! Go ahead and paste it in your browser to see the image on your local machine now loaded from uploads.im server!
Polishing up
We know that our Image Loader is almost done, but we need some additional UX (User Experience) added so that it is more complete.
Loading Spinner
Previously we talked about our loading spinner, so lets go ahead and implement the logic of our loading spinner to:
- Hide when app starts
- Show and animated when uploading
- Hide and stop animation when uploading finishes or failed
Hide when app starts
Add this in our viewDidLoad():
    override func viewDidLoad() {
        super.viewDidLoad()
        dragView.delegate = self
        loadingSpinner.isHidden = true
    }
Upload Animation
    func dragView(didDragFileWith URL: NSURL) {
        loadingSpinner.isHidden = false
        loadingSpinner.startAnimation(self.view)

        Alamofire.upload(multipartFormData: { (data: MultipartFormData) in
            data.append(URL as URL, withName: "upload")
        }, to: "http://uploads.im/api?format=json") { [weak self] (encodingResult) in
            switch encodingResult {
            case .success(let upload, _, _):
                upload.responseJSON { response in
                    guard
                        let dataDict = response.result.value as? NSDictionary,
                        let data = dataDict["data"] as? NSDictionary,
                        let imgUrl = data["img_url"] as? String else { return }

                    self?.loadingSpinner.isHidden = true
                    self?.loadingSpinner.stopAnimation(self?.view)
                }
            case .failure(let encodingError):
                print(encodingError)
            }
        }
    }
Add them in our dragView function. Run the app and drag in an image file, when the uploading starts, you should see the loading spinner in action!
Show/Hide Label
We can see that sometimes the label is obstructing our loading spinner, let’s:
- Show when loading spinner is inactive
- Hide when loading spinner is active
Add staticLabel.isHidden = true after loadingSpinner.startAnimation(self.view), which is right after loading spinner is shown. and self?.staticLabel.isHidden = false after self?.loadingSpinner.stopAnimation(self?.view) after loading spinner is hidden.
Run the app again and you should see a beautiful loading spinner non-obstructed!
Pop-up Alert
The last piece of UI component we want to add is our Alert Box. We will be making use of NSAlert which is a built-in alert sheet that comes with simple settings that allow us to tweak and present a nice pop-up alert box.
Go ahead and add this function which will present our NSAlert pop-up box:
    fileprivate func showSuccessAlert(url: String) {
        let alert = NSAlert()
        alert.messageText = url
        alert.alertStyle = .informational
        alert.addButton(withTitle: "Copy to clipboard")
        let response = alert.runModal()
        if response == NSAlertFirstButtonReturn {
            NSPasteboard.general().clearContents()
            NSPasteboard.general().setString(url, forType: NSPasteboardTypeString)
        }
    }
Then, go ahead and add it right after self?.staticLabel.isHidden = false with this line of code:
self?.showSuccessAlert(url: imgUrl)
Run the app now and drag an image in, you should see a nice native pop-up alert box with a button which when you click, it will copy the URL to the clipboard, and you can paste it anywhere for your personal usage!
Recap
So what have we achieved?
- We learnt how to build a macOS app entirely from scratch using Cocoa.
- We learnt how to use Xcode IB to design our UI elements.
- We learnt how to create our custom view class.
- We learnt how to design delegate pattern.
- We learnt how to install external library with Carthage.
- We learnt how to use Alamofire to upload image.
- We learnt how to use open source API of uploads.im.
- We learnt how to use NSAlert.
This is generally how creating a macOS app is like. There are a lot more that I did not cover, and it is up to you to further explore and make meaningful and useful products for people all around the world to use!
Wrapping Up.
If you have any questions about the tutorial, please leave your comment below and let me know.
For the sample project, you can download the full source code on GitHub.


