iOS Programming 101: Implementing Pull-to-Refresh and Handling Empty Table
In this iOS Programming 101 post, I would like to answer two common questions raised by our readers.
- I follow your table view tutorial to create my first app. The tutorial is great. It shows us how to display data in the table view. But what if the table is empty? When there is no data, the app should display a friendly message instead of just display empty rows. How can I do that?
- I like the pull-to-refresh gesture. It’s a great way for content update. How can I implement such feature in my table-based app?
Let us first take a look at the first question and see how to display a text message when the table is empty. The UITableView class includes the backgroundView property, which is the background view of the table view. This property is set to nil by default. To display a message or an image when the table is empty, usually we configure this property and set it to our own view.
Displaying Message in Empty Table
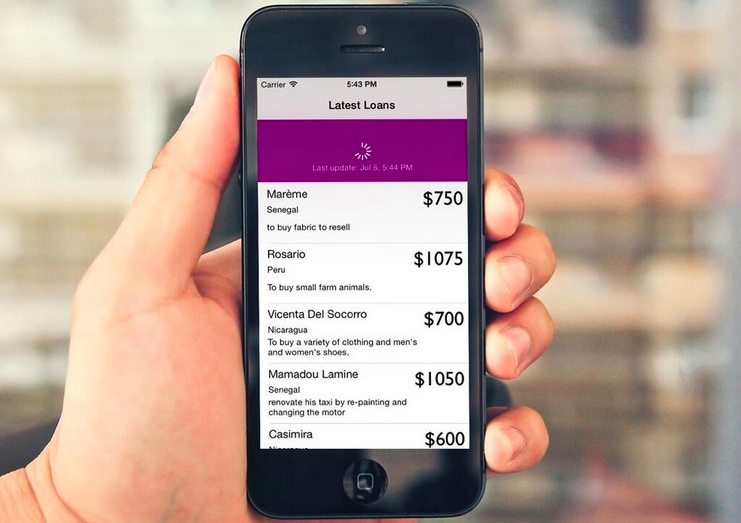
There is no better way to illustrate the usage by an example. You can first download the sample project from here. The demo app uses a free web-based API from Kiva.org to retrieve the most recent fundraising loans and display the loan information in a table view. If you haven’t heard of Kiva.org, it is a non-profit organization with a mission to connect people through lending to alleviate poverty. It lets individuals lend as little as $25 to help create opportunity around the world. Kiva provides free web-based APIs for developers to access their loan data.
If you compile and run the demo app now, it shows a blank table. Let’s modify the app and display a friendlier message. In the KivaLoanTableViewController.m, update the numberOfSectionsInTableView: method with the following code:
|
1 2 3 4 5 6 7 8 9 10 11 12 13 14 15 16 17 18 19 20 21 22 23 24 25 26 27 |
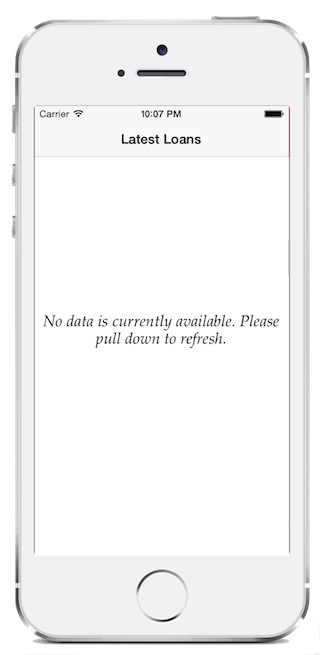
- (NSInteger)numberOfSectionsInTableView:(UITableView *)tableView { // Return the number of sections. if (loans) { self.tableView.separatorStyle = UITableViewCellSeparatorStyleSingleLine; return 1; } else { // Display a message when the table is empty UILabel *messageLabel = [[UILabel alloc] initWithFrame:CGRectMake(0, 0, self.view.bounds.size.width, self.view.bounds.size.height)]; messageLabel.text = @"No data is currently available. Please pull down to refresh."; messageLabel.textColor = [UIColor blackColor]; messageLabel.numberOfLines = 0; messageLabel.textAlignment = NSTextAlignmentCenter; messageLabel.font = [UIFont fontWithName:@"Palatino-Italic" size:20]; [messageLabel sizeToFit]; self.tableView.backgroundView = messageLabel; self.tableView.separatorStyle = UITableViewCellSeparatorStyleNone; } return 0; } |
When there is no data available (i.e. the loans object is nil), we create a UILabel and set it as the backgroundView property to display the “No data is currently available. Please pull down to refresh.” message.
Easy, right? Now that you should have a basic understanding of the backgroundView property. Let’s continue to look into the pull-to-refresh feature.
Implementing Pull-to-Refresh in UITableView
The pull-to-refresh interaction for updating data of a table view was originally created by Loren Brichter. Since its invention, an endless number of apps including Apple’s Mail app adopt the design for content updates. Prior to iOS 6, adding such feature to your app is not an easy task. You either implement your own solution or rely on third-party libraries. Both solutions will take you considerable time and efforts. Thanks to the popularity of the pull-to-refresh feature. Starting from iOS 6.0, Apple added a pull-to-refresh control known as UIRefreshControl in iOS SDK. With the built-in control, you just need to write a few lines of code to add the pull-to-refresh feature in your app.
The UIRefreshControl is a standard control that provides the pull-to-refresh feature. You can simply link a refresh control with a table view controller. The controller then automatically adds the control to the table and manage the display of that control in response to the appropriate gestures.
In the viewDidLoad: method of KivaLoanTableViewController.m, add the following code:
|
1 2 3 4 5 6 7 |
// Initialize the refresh control. self.refreshControl = [[UIRefreshControl alloc] init]; self.refreshControl.backgroundColor = [UIColor purpleColor]; self.refreshControl.tintColor = [UIColor whiteColor]; [self.refreshControl addTarget:self action:@selector(getLatestLoans) forControlEvents:UIControlEventValueChanged]; |
It is very simple to use UIRefreshControl. Simply instantiate it and assign it to the table view controller’s refreshControl property. That’s it. The table view controller handles the work of adding the control to the table’s visual appearance.
Optionally, you can change the background color and tint color by using the backgroundColor and tintColor properties respectively.
The refresh control doesn’t initiate the refresh operation when it is first created. Instead, when the table view is pulled down sufficiently, the refresh control triggers the UIControlEventValueChanged event. We have to assign an action method to this event and use it to perform the retrieval of the latest loans (that is, calling the getLatestLoans: method).
If you compile and run the app, the pull-to-refresh feature should work. Try to pull down the table until it triggers the refresh. But there is a problem. The refresh control still appears even after the table content is loaded.
So how can we hide the refresh control?
It’s your responsibility to hide the refresh control. The control itself doesn’t know when it should be hidden. To hide the control, you can simply call the endRefreshing: method:
|
1 |
[self.refreshControl endRefreshing]; |
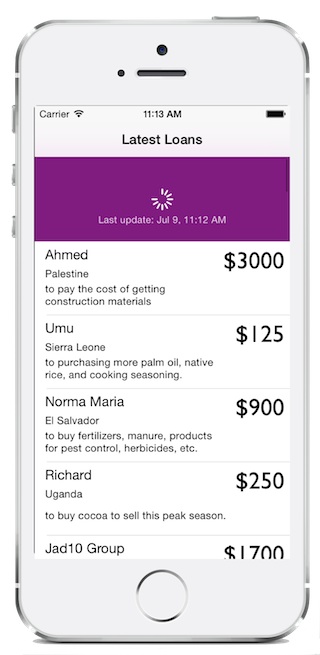
The UIRefreshControl provides an option for you to assign a title text via the attributedTitle property. In the demo app, we’ll display the date/time of the last refresh operation in the refresh control. Obviously, we need to modify the reloadData: method in the demo app as we want to update the last update date/time and hide the refresh control when the data is loaded in the table. So, update the method with the following code:
|
1 2 3 4 5 6 7 8 9 10 11 12 13 14 15 16 17 18 19 |
- (void)reloadData { // Reload table data [self.tableView reloadData]; // End the refreshing if (self.refreshControl) { NSDateFormatter *formatter = [[NSDateFormatter alloc] init]; [formatter setDateFormat:@"MMM d, h:mm a"]; NSString *title = [NSString stringWithFormat:@"Last update: %@", [formatter stringFromDate:[NSDate date]]]; NSDictionary *attrsDictionary = [NSDictionary dictionaryWithObject:[UIColor whiteColor] forKey:NSForegroundColorAttributeName]; NSAttributedString *attributedTitle = [[NSAttributedString alloc] initWithString:title attributes:attrsDictionary]; self.refreshControl.attributedTitle = attributedTitle; [self.refreshControl endRefreshing]; } } |
The code is very straightforward. We determine the current date/time and create the corresponding attributedTitle. Lastly, we hide the control by calling the endRefreshing: method.
Now it’s ready to test the app again. Your app should work properly. The refresh control should be hidden right after content update.
Cool, right? So far the app works really well for normal situation. What if your app fails to connect to the Internet? The refresh control won’t disappear. You’ll need to insert a few lines of code to handle that exception. I’ll leave it for you as an exercise.
What do you think about this tutorial? Feel free to leave comment and share your thought.
Love this tutorial? You will probably want to check out our Intermediate Swift Book.

Founder of AppCoda. Author of multiple iOS programming books including Beginning iOS Programming with Swift and Mastering SwiftUI. iOS App Developer and Blogger. Follow me at Facebook, Twitter and Google+.