

As promised, here is the Swift version of the slide out sidebar menu tutorial. Again we will make use of an open source library called SWRevealViewController to build the sidebar menu. Though the library was written in Objective-C, you can easily integrate it into any Swift project. You will see how easy you can access and interact with Objective-C classes using Swift.
Okay, let’s get started.
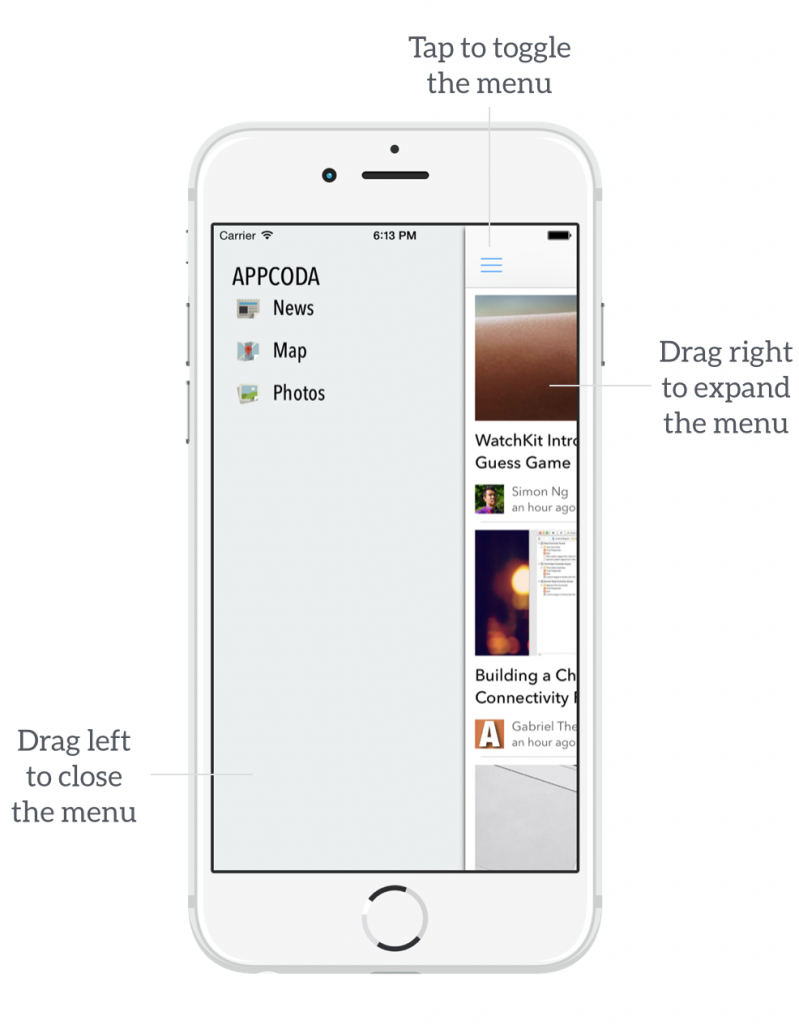
In this tutorial, I will show you how create a slide-out navigation menu similar to the one you find in the Gmail app. If you’re unfamiliar with slide out navigation menu, take a look at the figure on the right. Ken Yarmost gave a good explanation and defined it as follows:
Slide-out navigation consists of a panel that slides out from underneath the left or the right of the main content area, revealing a vertically independent scroll view that serves as the primary navigation for the application.
From what I know, the slide-out sidebar menu was first introduced by Facebook. Since then it quickly becomes a standard way to implement navigation menu. Nowadays, you can easily find this design pattern in most of the popular content-related apps such as Inbox, Digg, LinkedIn, etc.
The slide-out design pattern lets you build a navigation menu in your apps but without wasting the screen real estate. Normally, the navigation menu is hidden behind the front view. The menu can then be triggered by tapping a list button in the navigation bar. Once the menu is expanded and becomes visible, users can close it by using the list button or simply swiping left on the content area.
You can build the sidebar menu from the ground up. But with so many free pre-built solutions on GitHub, we’re not going to build it from scratch. Instead, we’ll make use of a library called SWRevealViewController. Developed by John Lluch, this excellent library provides a quick and easy way to put up a slide-out navigation menu in your apps. Best of all, the library is available for free.
The library was written in Objective-C. But it is very straightforward to integrate it in your Swift project. You will learn how it can be done in a minute.
A Glance at the Demo App
As usual, we’ll build a demo app to show you how to apply the SWRevealViewController. The app is very simple but not fully functional. The primary purpose of the app is to walk you through the implementation of slide-out navigation menu. The navigation menu will work like this:
- User triggers the menu by tapping the list button at the top-left of navigation bar.
- User can also bring up the menu by swiping right on the main content area.
- Once the menu appears, user can close it by tapping the list button again.
- User can also close the menu by dragging left on the content area.
Creating the Xcode Project
The focus of this chapter is on the sidebar implementation. So to save your time from setting up the project, you can download the Xcode project template to start with.
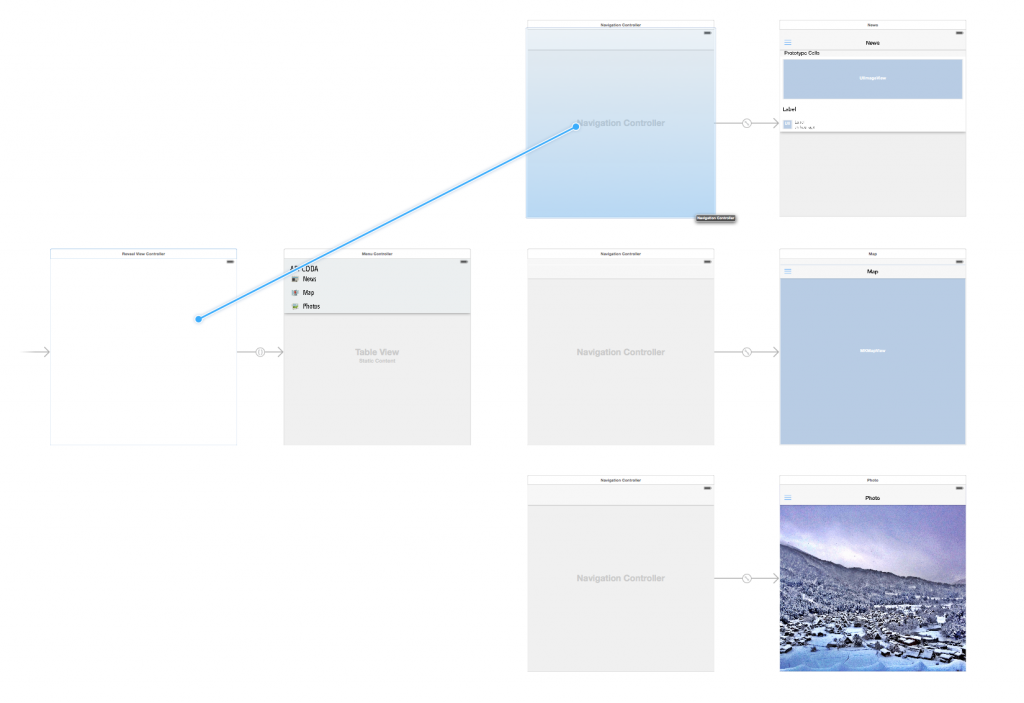
The project already comes with a pre-built storyboard with all the required view controllers. If you’ve downloaded the template, open the storyboard to take a look. To use SWRevealViewController for building a sidebar menu, you create a container view controller, which is actually an empty view controller, to hold both the menu view controller and a set of content view controllers.
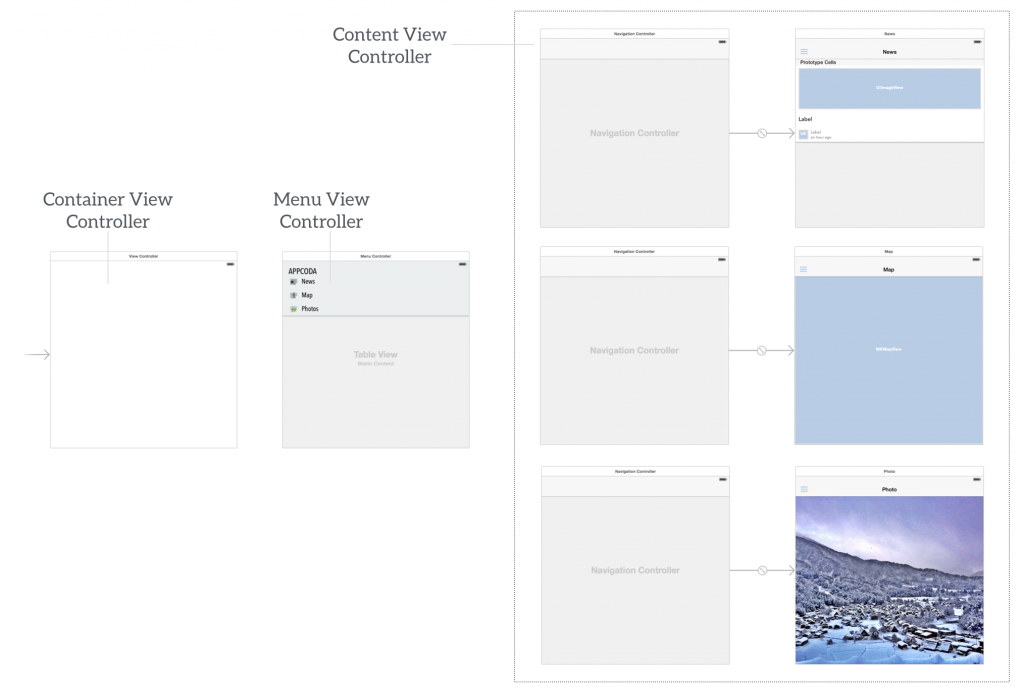
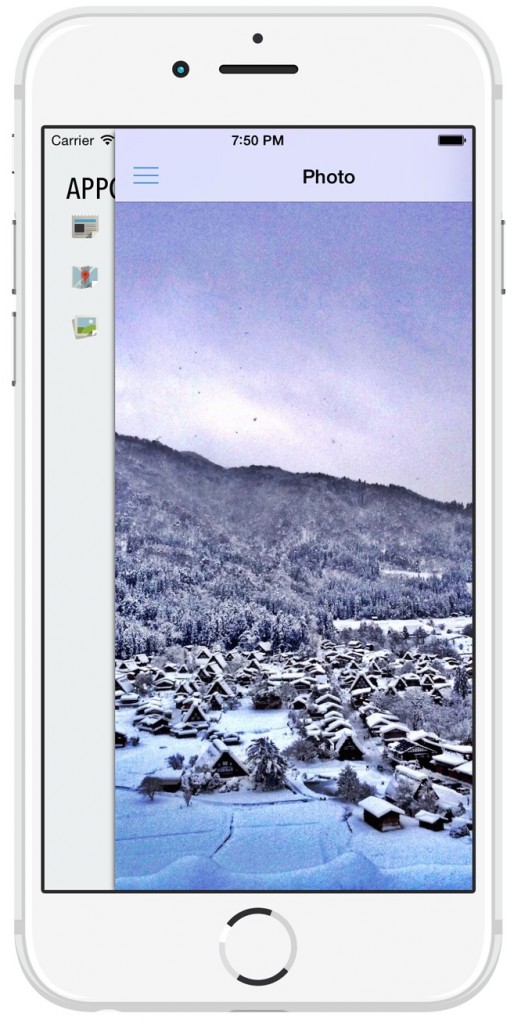
I have already created the menu view controller for you. It is just a static table view with three menu items. There are three content view controllers for displaying news, map and photos. For demo purpose, the content view controllers only shows static data. And I just created three controllers. If you need to have a few more controllers, simply insert them into the storyboard. All icons and images are included in the project template (credit: thanks for the free icon from Pixeden).
Using the SWRevealViewController Library
As mentioned, we’ll use the free SWRevealViewController library to implement the slide-out menu. So, first download the library from GitHub and extract the zipped file. After you extract the file, you should find the SWRevealViewController folder. In that folder, there are two files : SWRevealViewController.h and SWRevealViewController.m. If you do not have any Objective-C background, you may wonder why the file extension is not .swift. As mentioned before, the SWRevealViewController was written in Objective-C. The file extension differs from that of Swift’s source file. Anyway, we will add both files to the project. In the project navigator, right-click SidebarMenu folder and select “New Group”. Name the group “SWRevealViewController”. Drag both files to the SWRevealViewController group. As soon as you confirm to add the files, Xcode prompts you to configure an Objective-C bridging header. By creating the header file, you’ll be able to access the Objective-C code from Swift. So click Yes to proceed.
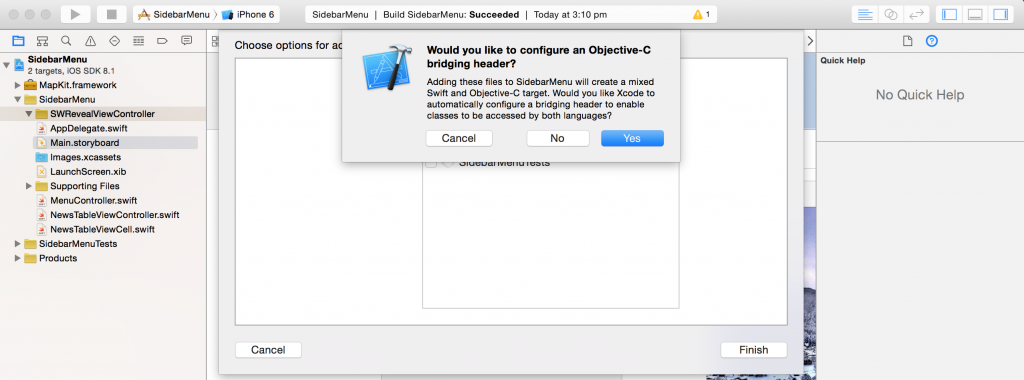
Xcode then generates a header file named SidebarMenu-Bridging-Header.h, along with the SWRevealViewController files. Open the SidebarMenu-Bridging-Header.h and insert the following line:
#import "SWRevealViewController.h"
Associate the Front View and Rear View Controller
SWRevealViewController library provides a built-in support for Storyboard. When implementing a sidebar menu using, all you need to do is associate the SWRevealViewController with a front and a rear view controller using segues. The front view controller is the main controller for displaying content. In our storyboard, it’s the navigation controller which associates with a view controller for presenting news. The rear view controller is the controller that shows the navigation menu. Here it is the Sidebar View Controller.
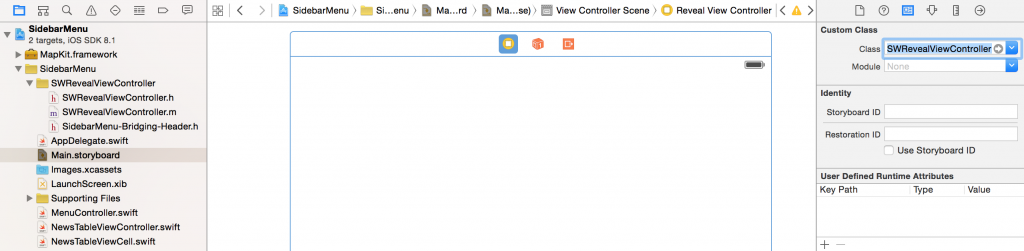
Go to the storyboard. First, select the empty view controller (i.e. container view controller) and change its class to SWRevealViewController.
Next, control-drag from SWRevealViewController to the Menu view controller. After releasing the button, you will see a context menu for segue selection. In this case, select “reveal view controller set segue”.
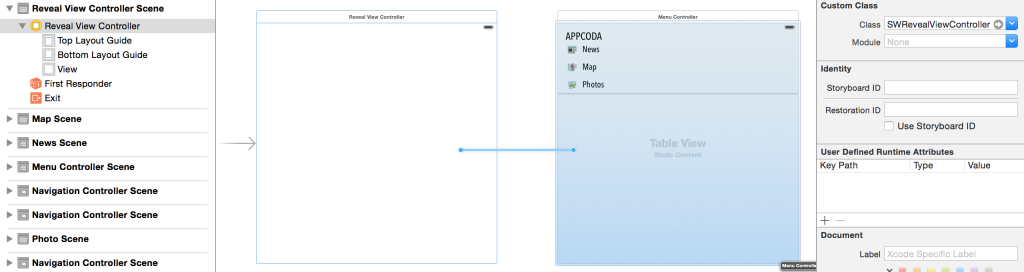
This defines a custom segue “SWRevealViewControllerSetSegue”. Select the segue and change its identifier to “sw_rear” under the Identity inspector. By setting the identifier, you tell SWRevealViewController that the menu view controller is the rear view controller. In this case, the sidebar menu will be hidden behind a content view controller.
Next, repeat the same procedures to connect SWRevealViewController with the navigation controller of the news view controller. Again, select “reveal view controller set segue” when prompted.
Set the identifier of the segue to “sw_front”. This tells the SWRevealViewController that the navigation controller is the front view controller.
Before moving on, you can now compile the app and have a quick test. Your app should display the news view. You couldn’t unhide the sidebar menu when tapping the menu button (or what so called hamburger button) as we haven’t implemented the action method yet.
If your app works properly, let’s continue with the implementation. Open NewsTableViewController.swift, which is the controller class of News Controller. In the viewDidLoad method, insert the following lines of code:
if self.revealViewController() != nil {
    menuButton.target = self.revealViewController()
    menuButton.action = "revealToggle:"
    self.view.addGestureRecognizer(self.revealViewController().panGestureRecognizer())
}
The SWRevealViewController provides a method called revealViewController() to get the parent SWRevealViewController from any child controller. It also provides the revealToggle: method to handle the expansion and contraction of the sidebar menu. As you know, Cocoa uses the target-action mechanism for communication between a control and another object. We set the target of the menu button to the reveal view controller and action to the revealToggle: method. So when the menu button is tapped, it will call the revealToggle: method to display the sidebar menu.
Lastly, we add a gesture recognizer. Not only you can use the menu button to bring out the sidebar menu, the user can swipe the content area to activate the sidebar as well.
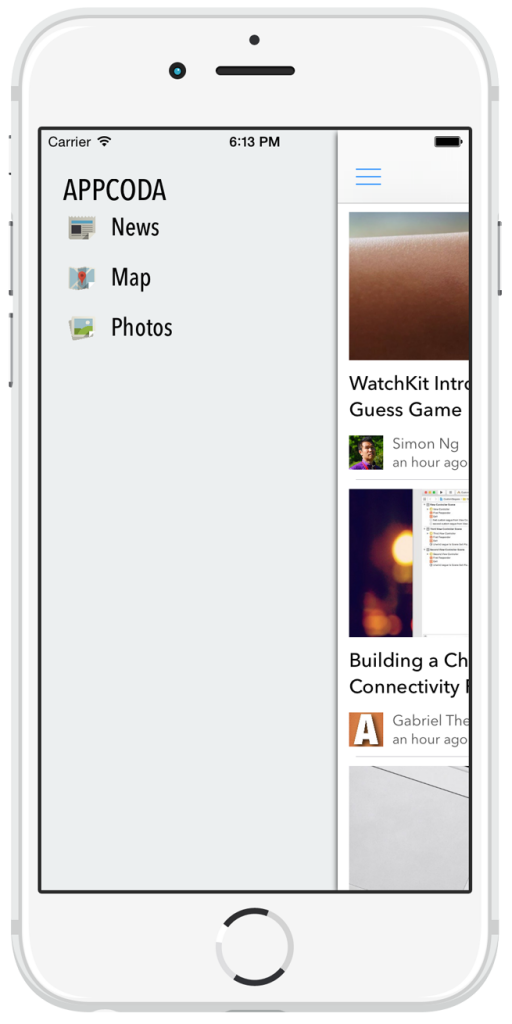
Cool! Let’s compile and run the app in the simulator. Tap the menu button and the sidebar menu should appear. You can hide the sidebar menu by tapping the menu button again. You can also open the menu by using gesture. Try to swipe right on the content area and see what you get.
Handling Menu Item Selection
You’ve already built a visually appealing sidebar menu. There is still one thing left. For now, we haven’t defined any segues for the menu items. When you select any of the menu item, it will not transit to the corresponding view.
Okay, go back to storyboard. First, select the map cell. Press and hold the control key and click on the map cell. Drag to the navigation controller of the map view controller and select the “reveal view controller push controller” segue under Selection Segue. Repeat the procedure for the News and Photos items, but connect then with the navigation controllers of the news view controller and photos view controller respectively.
The custom SWRevealViewControllerSeguePushController segue automatically handles the switching of the controllers.
Again insert the following lines of code in the viewDidLoad method of MapViewController.swift and PhotoViewController.swift to toggle the sidebar menu:
if self.revealViewController() != nil {
    menuButton.target = self.revealViewController()
    menuButton.action = "revealToggle:"
    self.view.addGestureRecognizer(self.revealViewController().panGestureRecognizer())
}
That’s it! Hit the Run button and test out the app.
Customizing the Menu
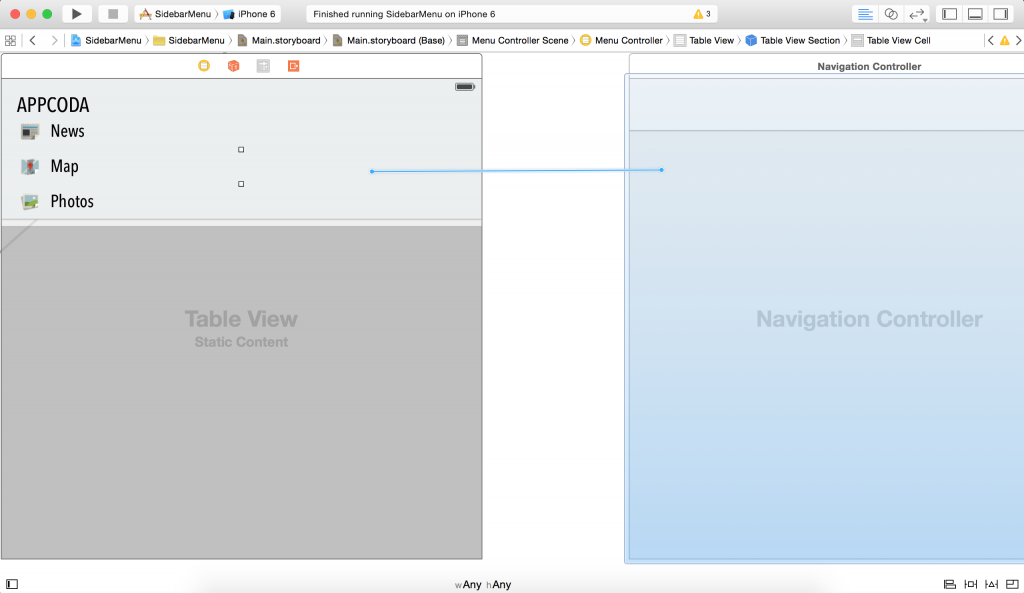
The SWRevealViewController class provides a number of options for configuring the sidebar menu. Say, if you want to change the width of the menu, you can update the value of rearViewRevealWidth property. Try to insert the following line of code in the viewDidLoad method of NewsTableViewController:
self.revealViewController().rearViewRevealWidth = 62
If you run the app, you’ll have a sidebar menu like the one on your left. You can look into the SWRevealViewController.h file to explore the customizable options.
Summary
In this tutorial, I walked you through the SWRevealViewController library and showed you how to create a slide-out navigation menu in Swift. This is one of the many approaches to create a sidebar menu. If you like, you can try to build the navigation menu from scratch using custom view animation or explore other open source libraries such as ENSwiftSideMenu.
For your reference, you can download the final project here. What do you think about the tutorial? Leave me comment and share your thoughts.
If you enjoy reading this tutorial, you will probably like our Intermediate Swift book, which covers more than 25 development recipes. The book is now available in the starter/complete package of the Swift bundle. You can check it out here.


