With the release of Xcode 15, Apple introduced an exciting feature called String Catalogs. This feature aims to streamline the localization process for your app, making it easier to manage all your strings in one central location. By leveraging String Catalogs, you can ensure that your app is fully localized before it reaches your users. This new feature offers both convenience and confidence in the localization process.
In earlier versions of Xcode, you have to go through a string internationalization process that requires to modify the existing texts with the String(localized:) macro before localization. However, with the introduction of String Catalogs, this process is no longer necessary. For SwiftUI projects, String Catalogs automatically extracts all user-facing texts for you, eliminating the need for manual modifications.
Let’s create a simple project and see how String Catalogs can simplify the localization process for your SwiftUI app projects.
Building a Simple Demo for Localization
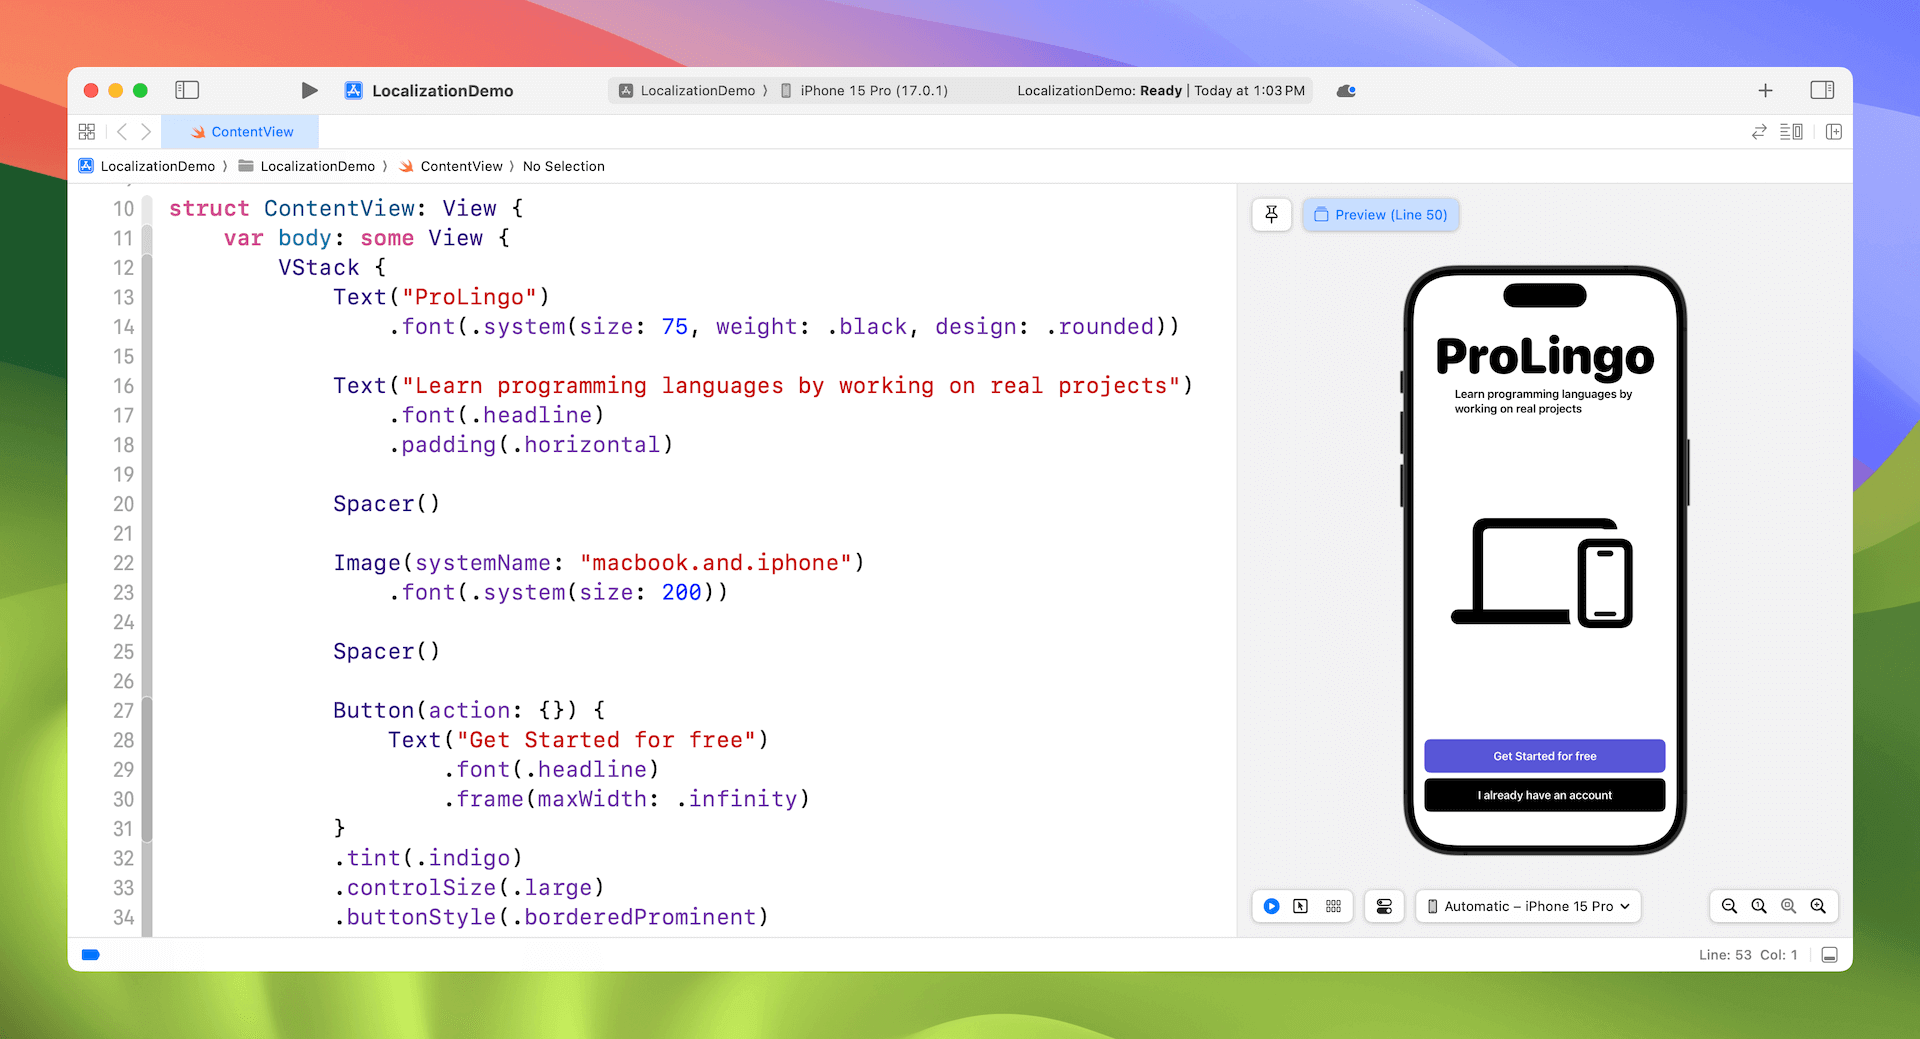
Assuming you’ve installed Xcode 15, create a new SwiftUI project and replace the code in ContentView like this:
struct ContentView: View {
    var body: some View {
        VStack {
            Text("ProLingo")
                .font(.system(size: 75, weight: .black, design: .rounded))

            Text("Learn programming languages by working on real projects")
                .font(.headline)
                .padding(.horizontal)

            Spacer()

            Image(systemName: "macbook.and.iphone")
                .font(.system(size: 200))

            Spacer()

            Button(action: {}) {
                Text("Get Started for free")
                    .font(.headline)
                    .frame(maxWidth: .infinity)
            }
            .tint(.indigo)
            .controlSize(.large)
            .buttonStyle(.borderedProminent)

            Button(action: {}) {
                Text("I already have an account")
                    .font(.headline)
                    .frame(maxWidth: .infinity)
            }
            .tint(.black)
            .controlSize(.large)
            .buttonStyle(.borderedProminent)

        }
        .padding()
    }
}
It’s a very simple login screen for demo purpose. If you’ve written the code above, Xcode should show you the sample login screen in the preview pane.
Using String Catalogs
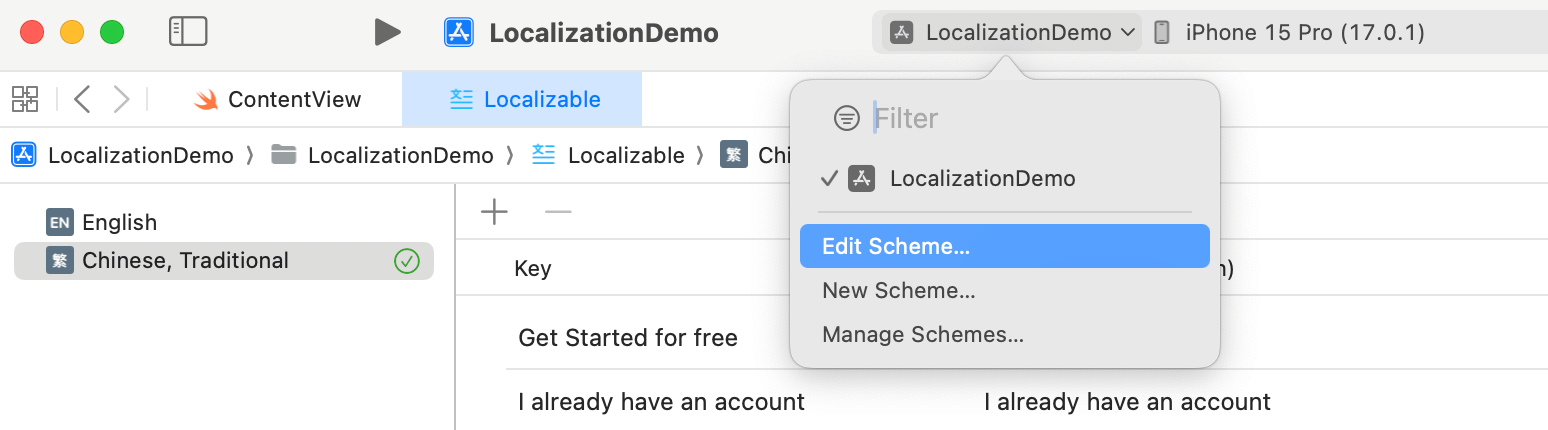
By default, Xcode projects are configured to support only the English language. If you want to add support for an additional language, first select the project file in the project navigator. Then go to the Info tab and locate the Localizations section. Click the “+” button to add a new language. Next, choose your desired language, such as traditional Chinese, from the available options.
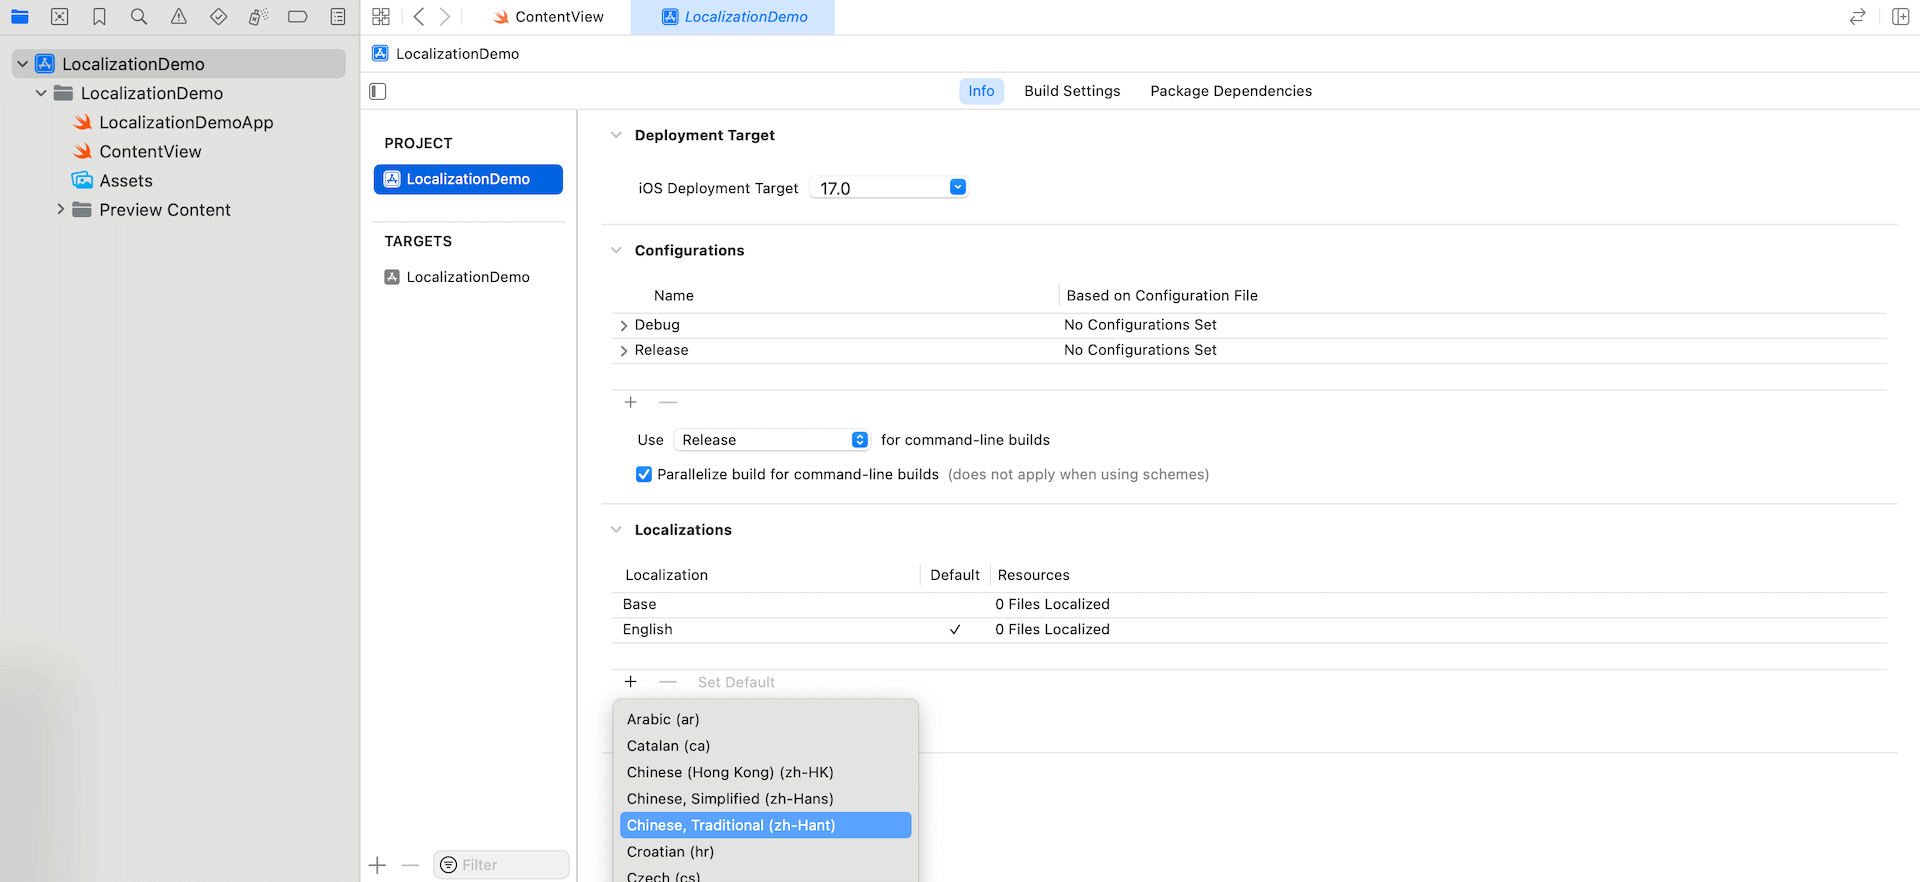
Once you’ve completed these steps, your Xcode project will have support for the selected language, allowing for localization.
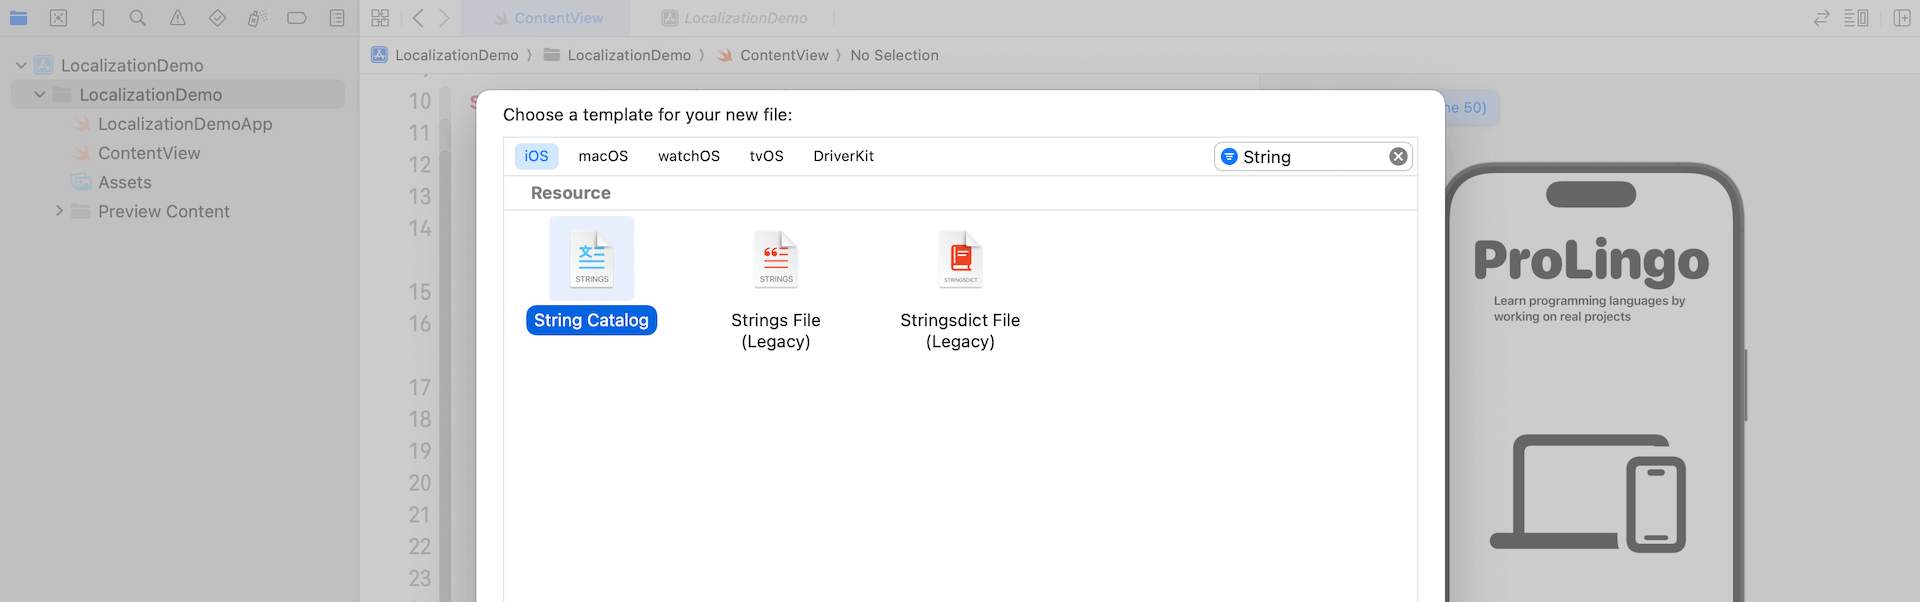
The String Catalog file is not bundled in the Xcode project. Before localization, you have to manually create a String Catalog file. In the project navigator, right-click the project folder and select “New File…”. Under the iOS category, look for the String Catalog template. Click Next to proceed and then name the file Localizable.
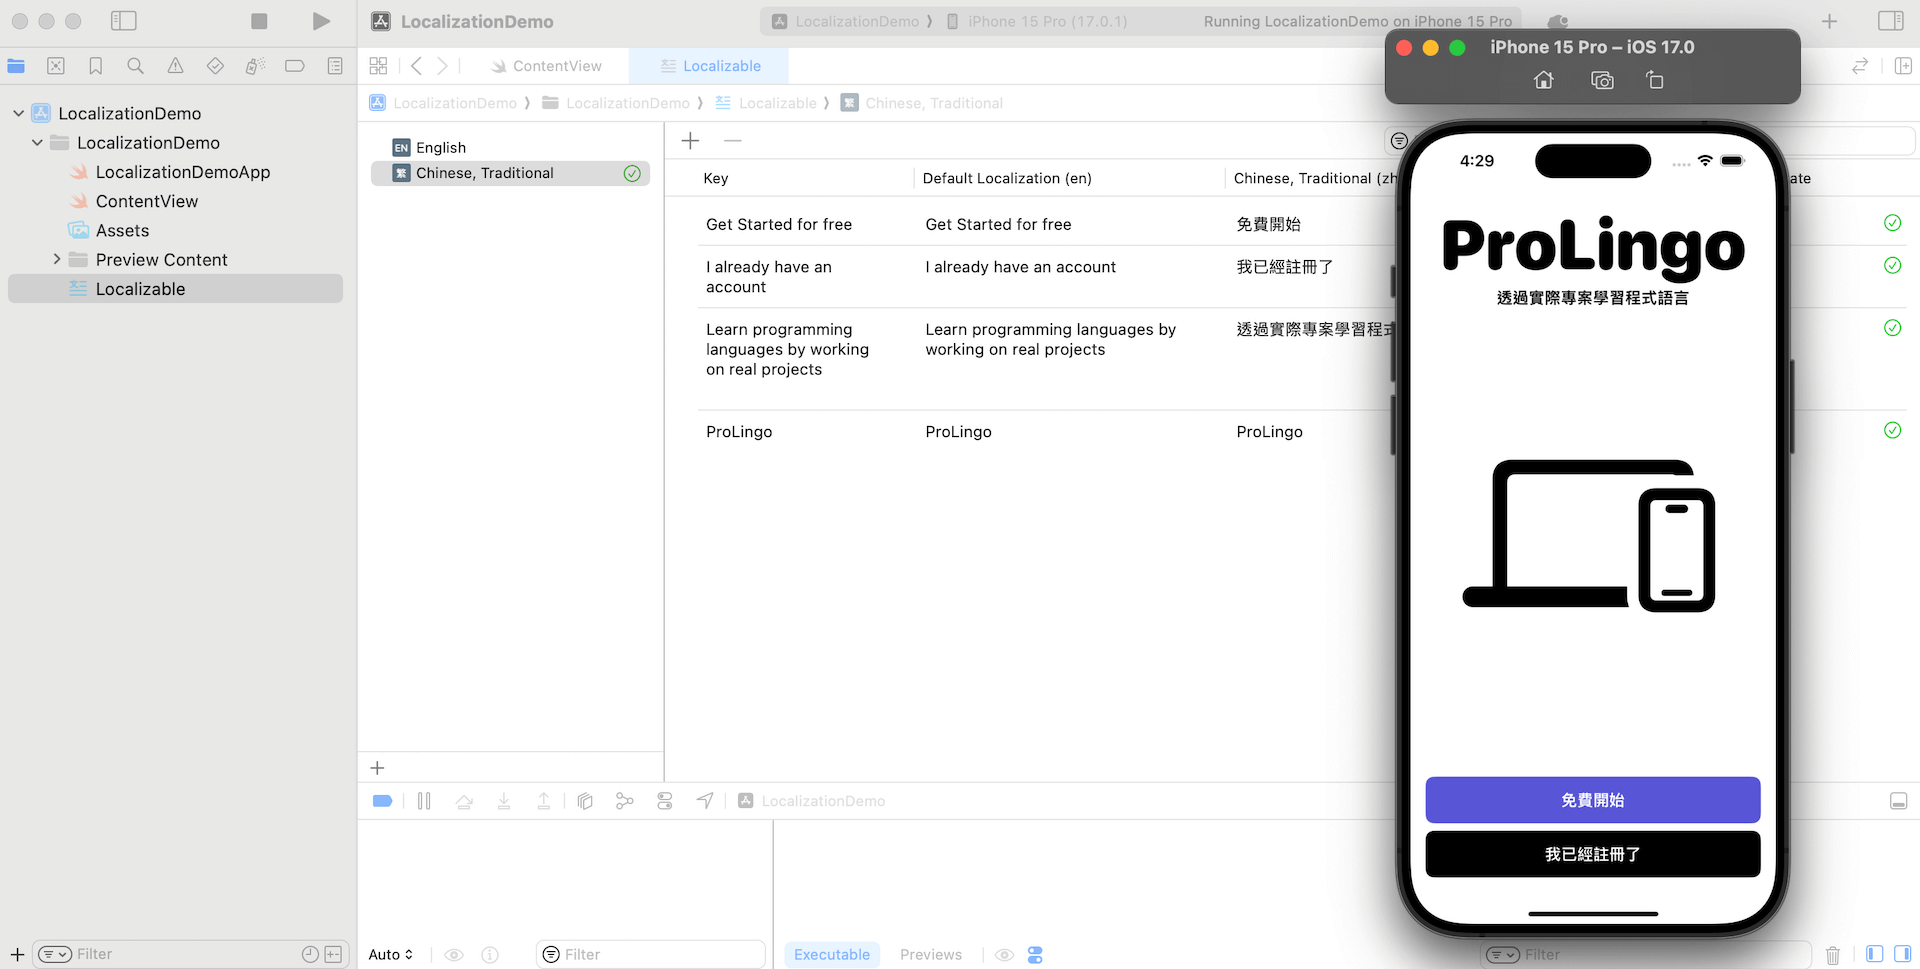
This process generates an empty Localizable file that includes all the supported languages for your app. To extract all the user-facing texts into this file, you can follow these steps: select Product from the Xcode menu and choose Build to rebuild the project. After the build process, Xcode will automatically extract all the text and populate them in the Localizable file.
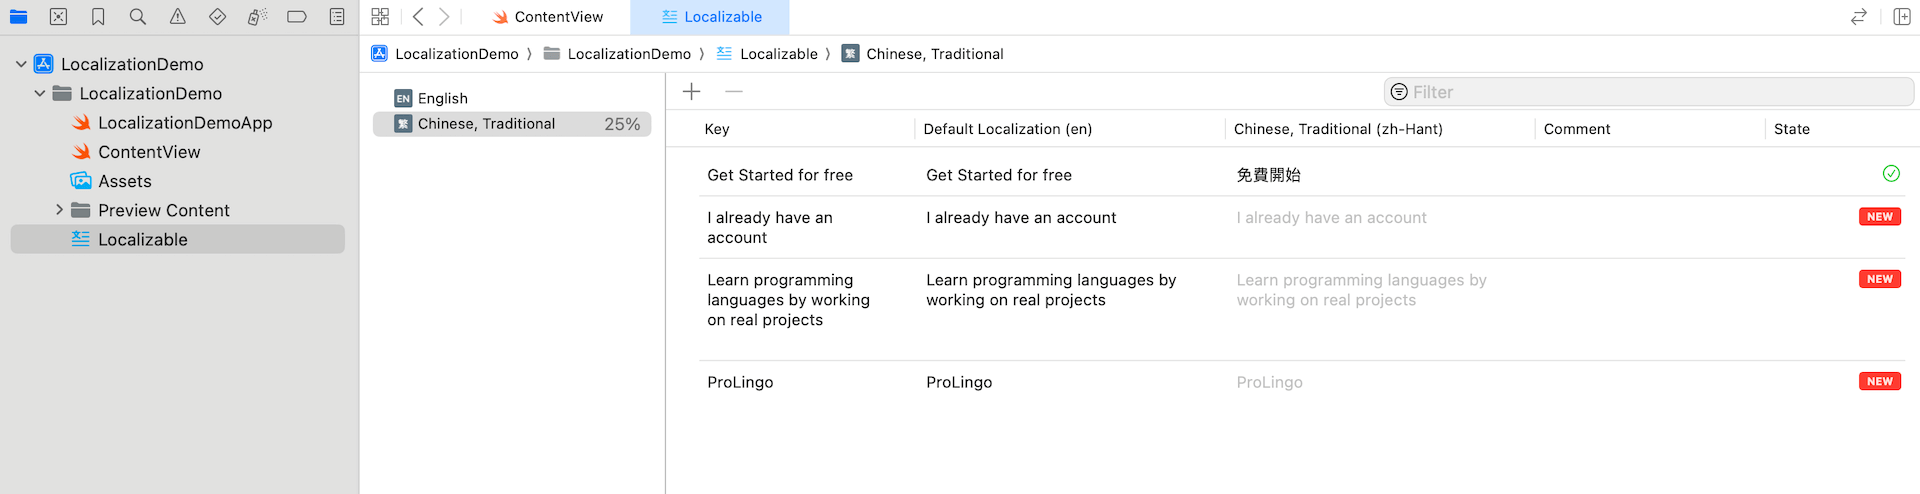
Once the texts are extracted, you can proceed to add translations directly in the String Catalog file for each language. This allows you to provide localized versions of the text and ensure the app is properly localized for different languages.
When you add new user-facing text in your project, Xcode will automatically include them in the String Catalog. This process occurs every time you build the project. It ensures that the newly added text is properly managed and can be easily localized for different languages.
Testing the Localized App
There are a couple of ways to test the localization of your app. One approach is to change the language preference of the simulator and then run the localized app on it, allowing you to see how the app behaves in different languages. Another option is to utilize a preview feature in Xcode that enables you to test your app in various languages and regions, both at runtime and in Interface Builder. Let’s explore these options in detail.
To enable the preview at runtime feature in Xcode, you can modify the scheme sheet. Within the scheme settings, you can set your preferred language in the dialog box, allowing you to preview how the app appears and functions in that specific language.
In the dialog box, select Run > Options and change the App language to your preferred language. For example, Chinese (Traditional). Click the Close button to save the setting.
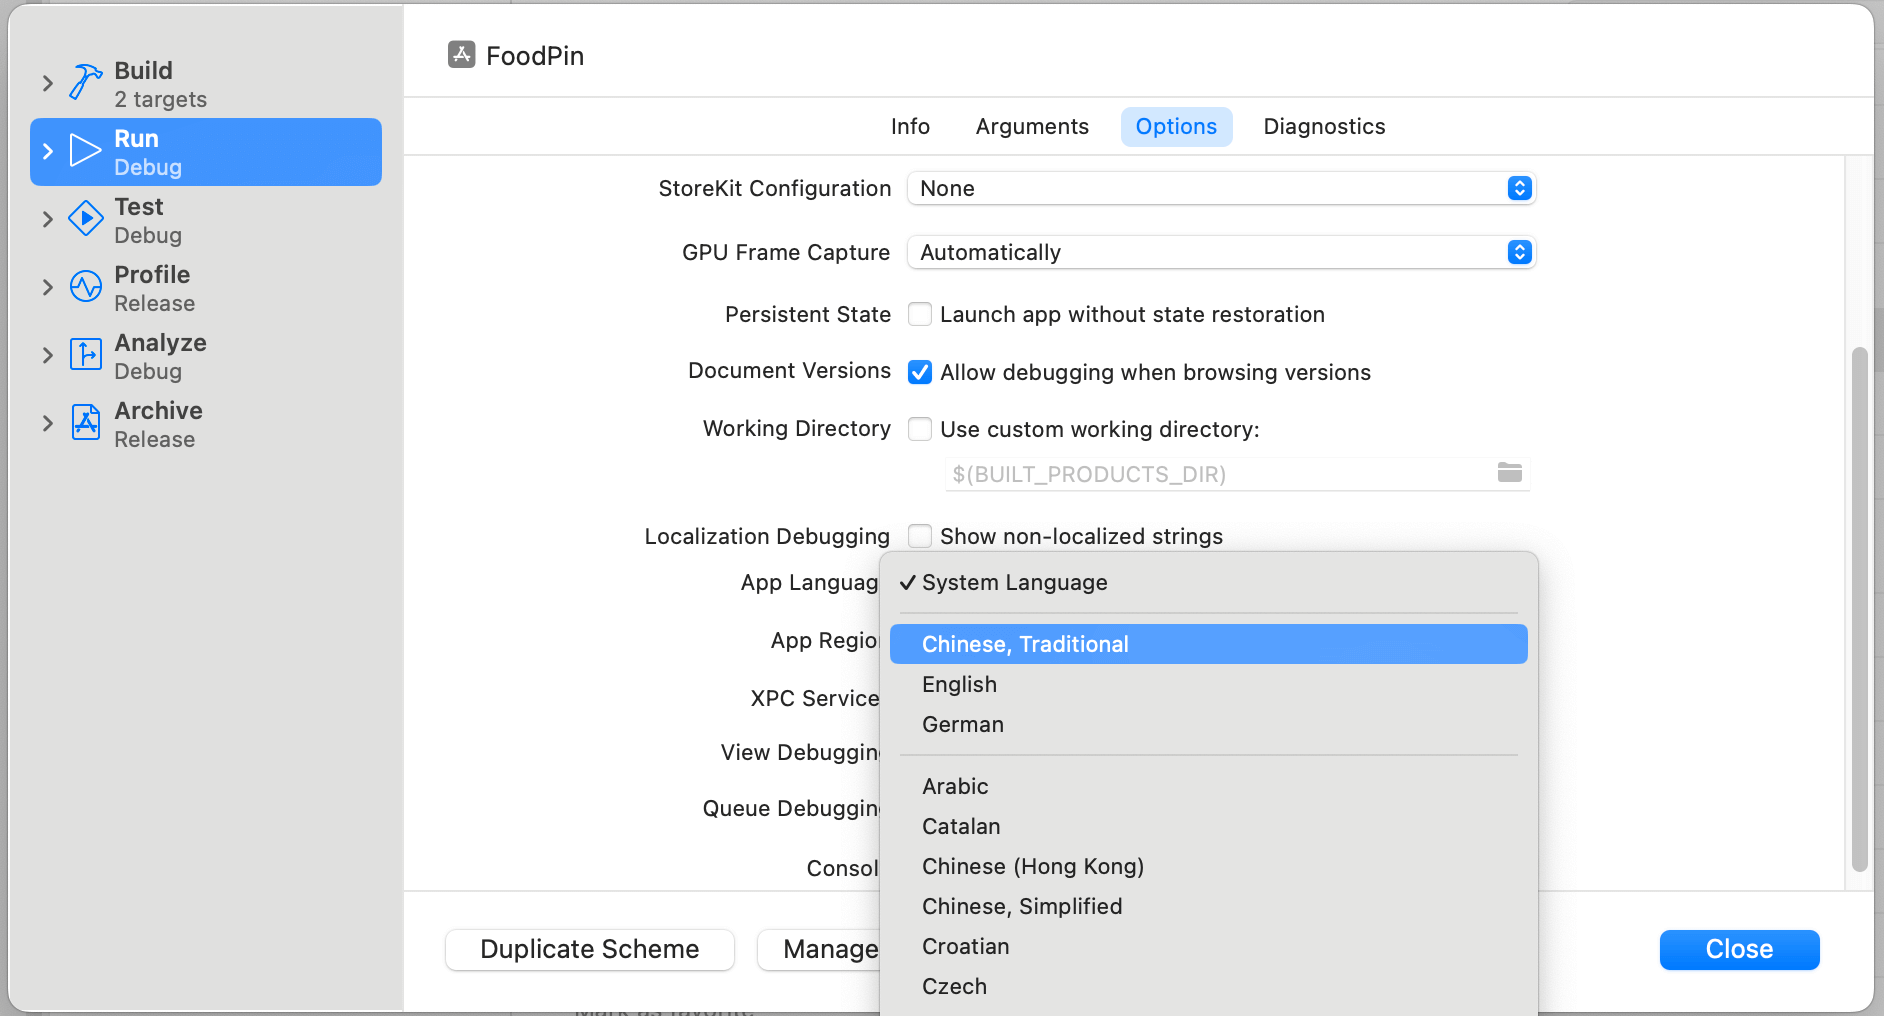
Now click the Run button to launch the app; the language of the simulator should set to your preferred language. If you’ve set it to Chinese/German, your app should look like the screenshot.
Testing the Localization Using Preview
To preview the localization of a SwiftUI app, you can utilize the locale environment variable in your preview code. This allows you to simulate the app UI in different languages. For example, if you wish to preview the app UI in Traditional Chinese, you can add an additional preview code block with the desired locale settings. Here’s an example:
#Preview("Traditional Chinese") {
    ContentView()
        .environment(\.locale, .init(identifier: "zh-Hant"))
}
By setting the locale environment variable to .init(identifier: "zh-Hant"), you can preview the app UI with Traditional Chinese. You can modify the identifier to simulate other languages as needed.
Adding Comment to Your Text
In the Localizable file, there is a comment field that displays the associated comment for each key and translation. If you wish to add comments for a specific key, you can include them when defining the Text view, like this:
Text("I already have an account", comment: "Login button")Once you modify the code with the comment, it’ll appear in the Localizable file.

Summary
In this tutorial, I have guided you through the localization process in Xcode. The introduction of String Catalogs in Xcode 15 has significantly simplified the workflow for developers. This new feature automates the extraction of text from SwiftUI views and consolidates them into a centralized file. Furthermore, translators can conveniently edit the translations directly within Xcode, streamlining the localization process.
Note: This is a sample chapter (modified version) of the Mastering SwiftUI book.