At the upcoming WWDC, Apple is expected to announce an on-device large language model (LLM). The next version of the iOS SDK will likely make it easier for developers to integrate AI features into their apps. While we await Apple’s debut of its own Generative AI models, companies like OpenAI and Google already provide SDKs for iOS developers to incorporate AI features into mobile apps. In this tutorial, we will explore Google Gemini, formerly known as Bard, and demonstrate how to use its API to build a simple SwiftUI app.
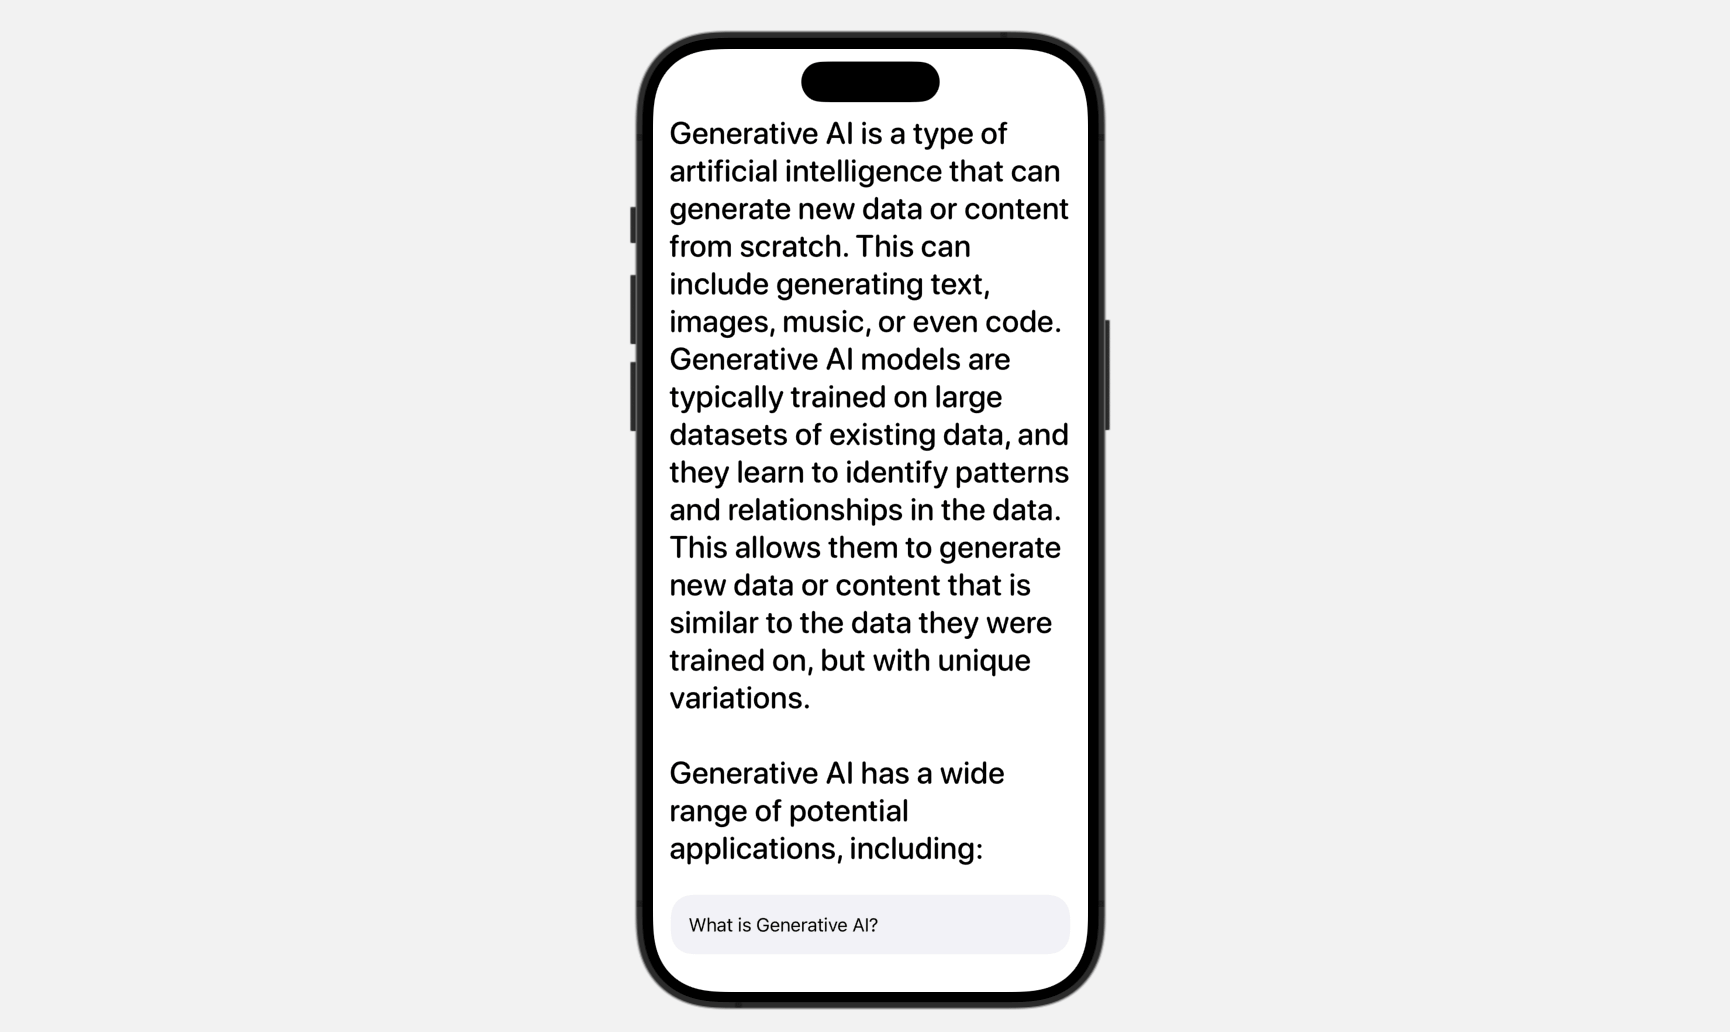
We are set to build a Q&A app that utilizes the Gemini API. The app features a straightforward UI with a text field for users to input their questions. Behind the scenes, we will send the user’s question to Google Gemini to retrieve the answer.
Please note that you have to use Xcode 15 (or up) to follow this tutorial.
Getting Started with Google Gemini APIs
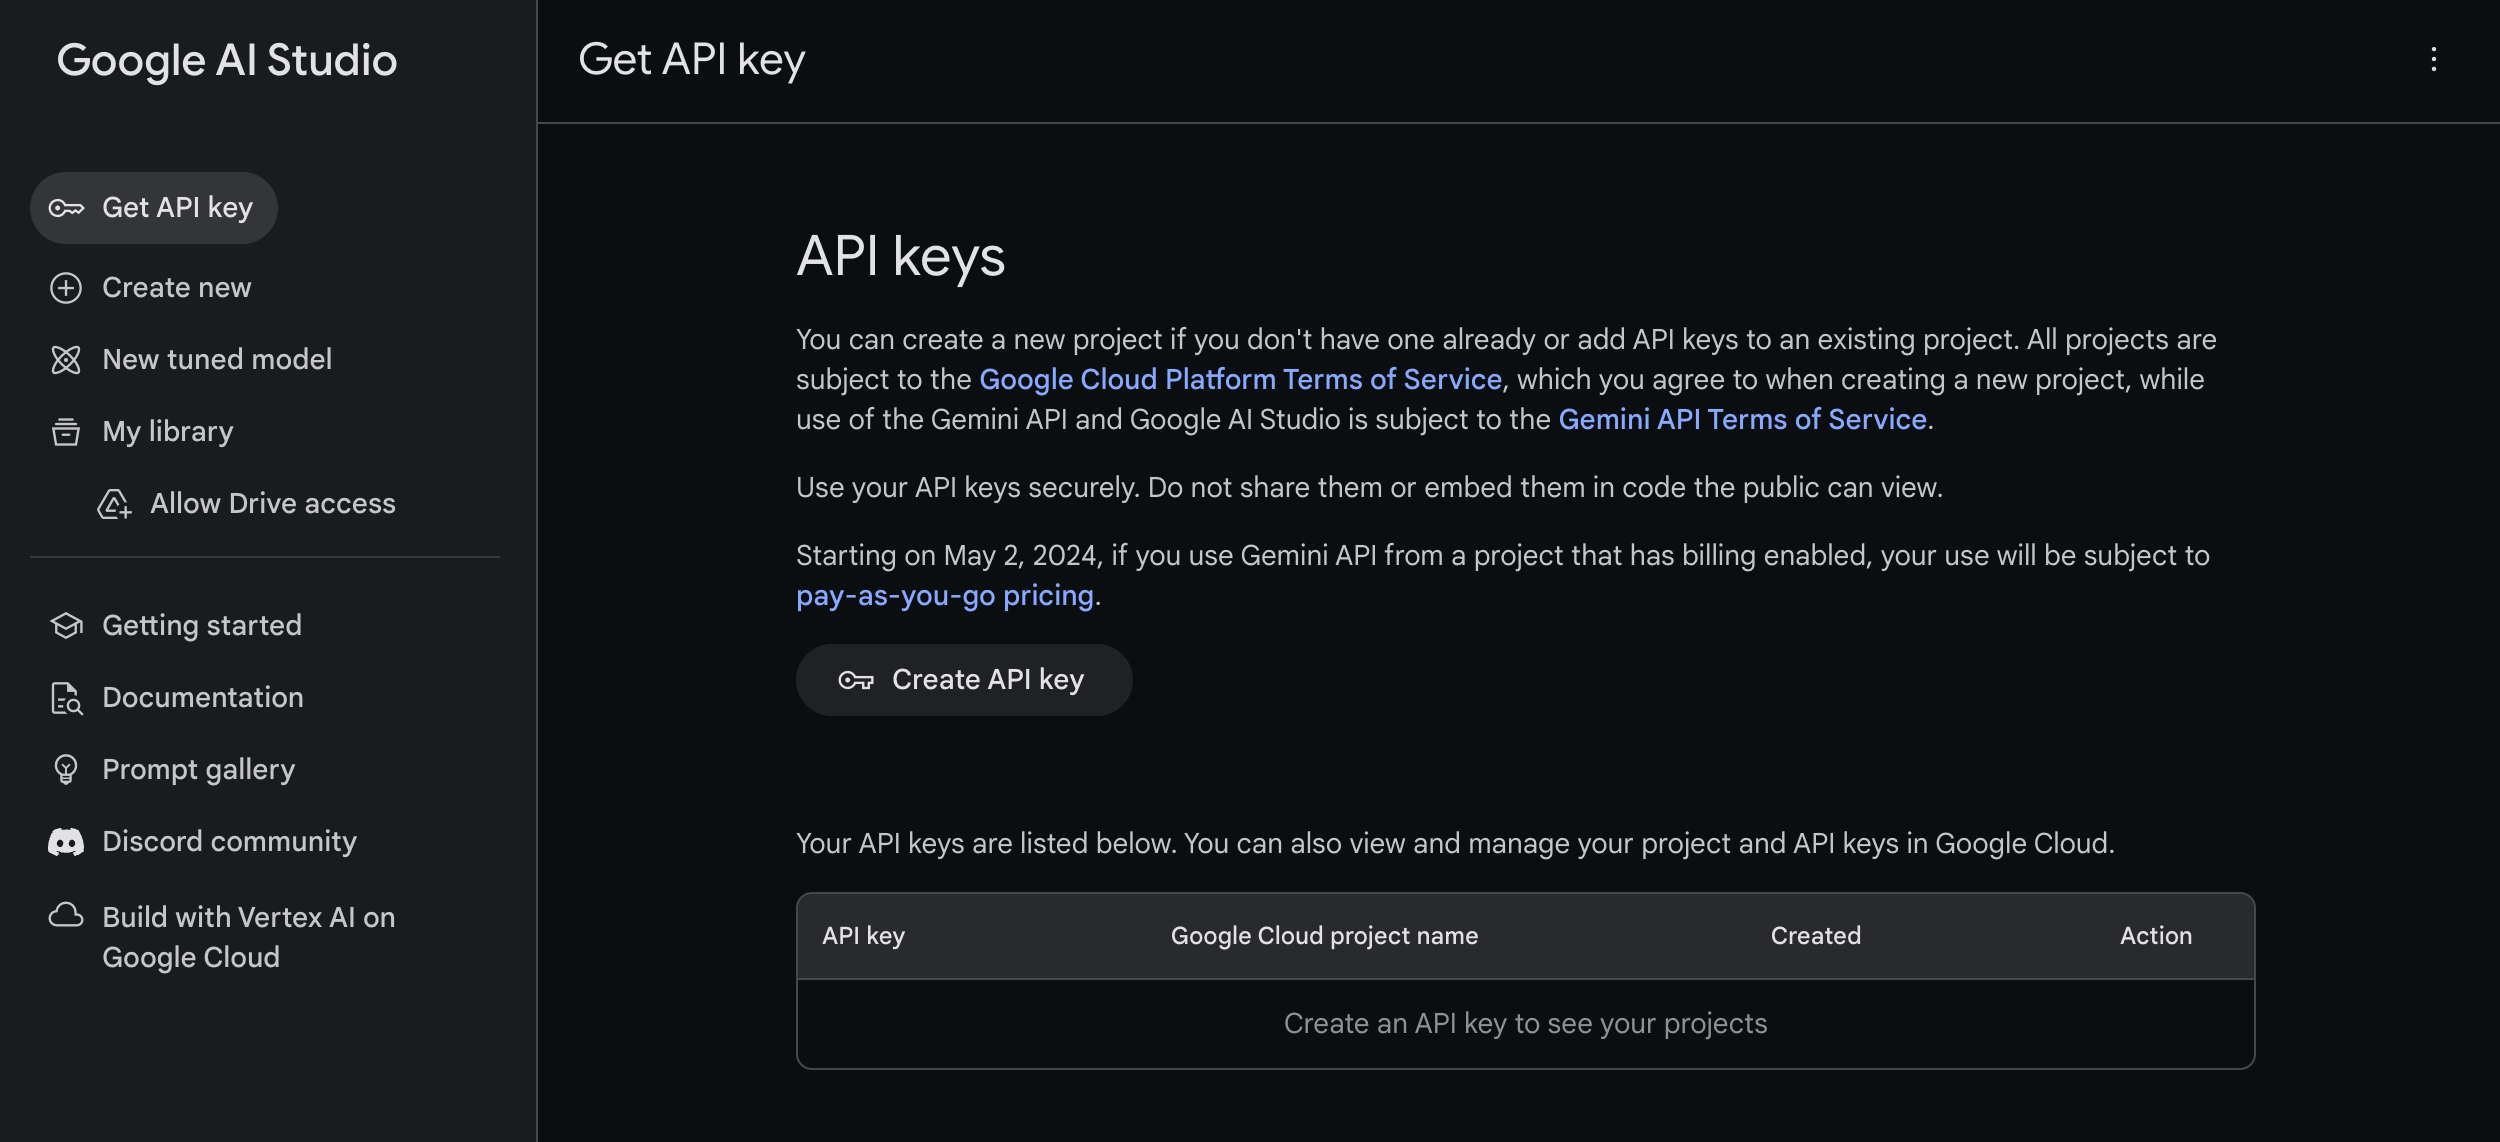
Assuming that you haven’t worked with Gemini, the very first thing is to go up to get an API key for using the Gemini APIs. To create one, you can go up to Google AI Studio and click the Create API key button.
Using Gemini APIs in Swift Apps
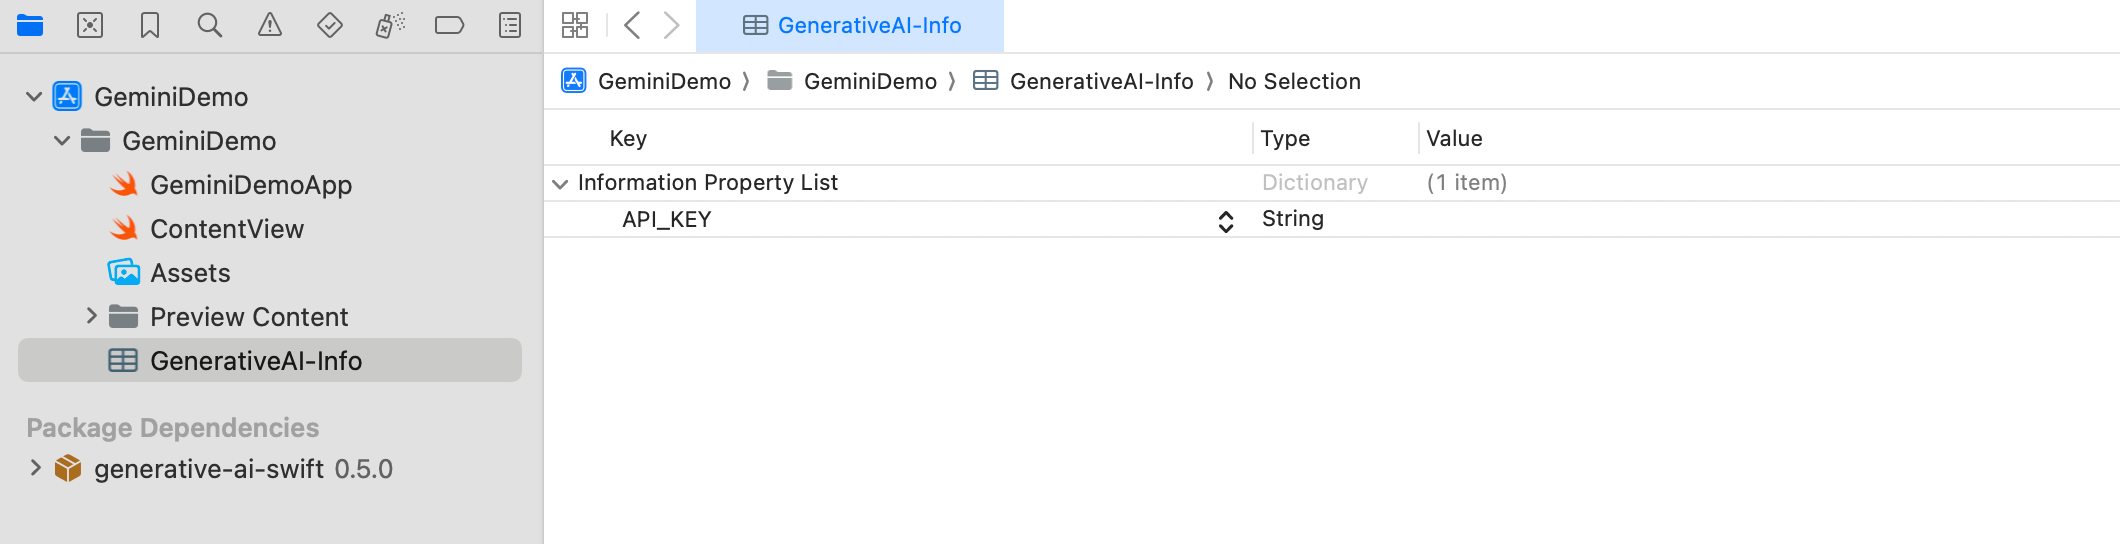
You should now have created the API key. We’ll use this in our Xcode project. Open Xcode and create a new SwiftUI project, which I’ll call GeminiDemo. To store the API key, create a property file named GeneratedAI-Info.plist. In this file, create a key named API_KEY and enter your API key as the value.
To read the API key from the property file, create another Swift file named APIKey.swift. Add the following code to this file:
enum APIKey {
  // Fetch the API key from `GenerativeAI-Info.plist`
  static var `default`: String {

    guard let filePath = Bundle.main.path(forResource: "GenerativeAI-Info", ofType: "plist")
    else {
      fatalError("Couldn't find file 'GenerativeAI-Info.plist'.")
    }

    let plist = NSDictionary(contentsOfFile: filePath)

    guard let value = plist?.object(forKey: "API_KEY") as? String else {
      fatalError("Couldn't find key 'API_KEY' in 'GenerativeAI-Info.plist'.")
    }

    if value.starts(with: "_") {
      fatalError(
        "Follow the instructions at https://ai.google.dev/tutorials/setup to get an API key."
      )
    }

    return value
  }
}
If you decide to use a different name for the property file instead of the original ‘GenerativeAI-Info.plist’, you will need to modify the code in your ‘APIKey.swift’ file. This modification is necessary because the code references the specific filename when fetching the API key. So, any change in the property file name should be reflected in the code to ensure the successful retrieval of the API key.
Adding the SDK Using Swift Package
The Google Gemini SDK is easily accessible as a Swift Package, making it simple to add to your Xcode project. To do this, right-click the project folder in the project navigator and select Add Package Dependencies. In the dialog, input the following package URL:
https://github.com/google/generative-ai-swiftYou can then click on the Add Package button to download and incorporate the GoogleGenerativeAI package into the project.
Building the App UI
Let’s start with the UI. It’s straightforward, with only a text field for user input and a label to display responses from Google Gemini.
Open ContentView.swift and declare the following properties:
@State private var textInput = ""
@State private var response: LocalizedStringKey = "Hello! How can I help you today?"

@State private var isThinking = false
The textInput variable is used to capture user input from the text field. The response variable displays the API’s returned response. Given the API’s response time, we include an isThinking variable to monitor the status and show animated effects.
For the body variable, replace it with the following code to create the user interface:
VStack(alignment: .leading) {
ScrollView {
VStack {
Text(response)
.font(.system(.title, design: .rounded, weight: .medium))
.opacity(isThinking ? 0.2 : 1.0)
}
}
.contentMargins(.horizontal, 15, for: .scrollContent)
Spacer()
HStack {
TextField("Type your message here", text: $textInput)
.textFieldStyle(.plain)
.padding()
.background(Color(.systemGray6))
.clipShape(RoundedRectangle(cornerRadius: 20))
}
.padding(.horizontal)
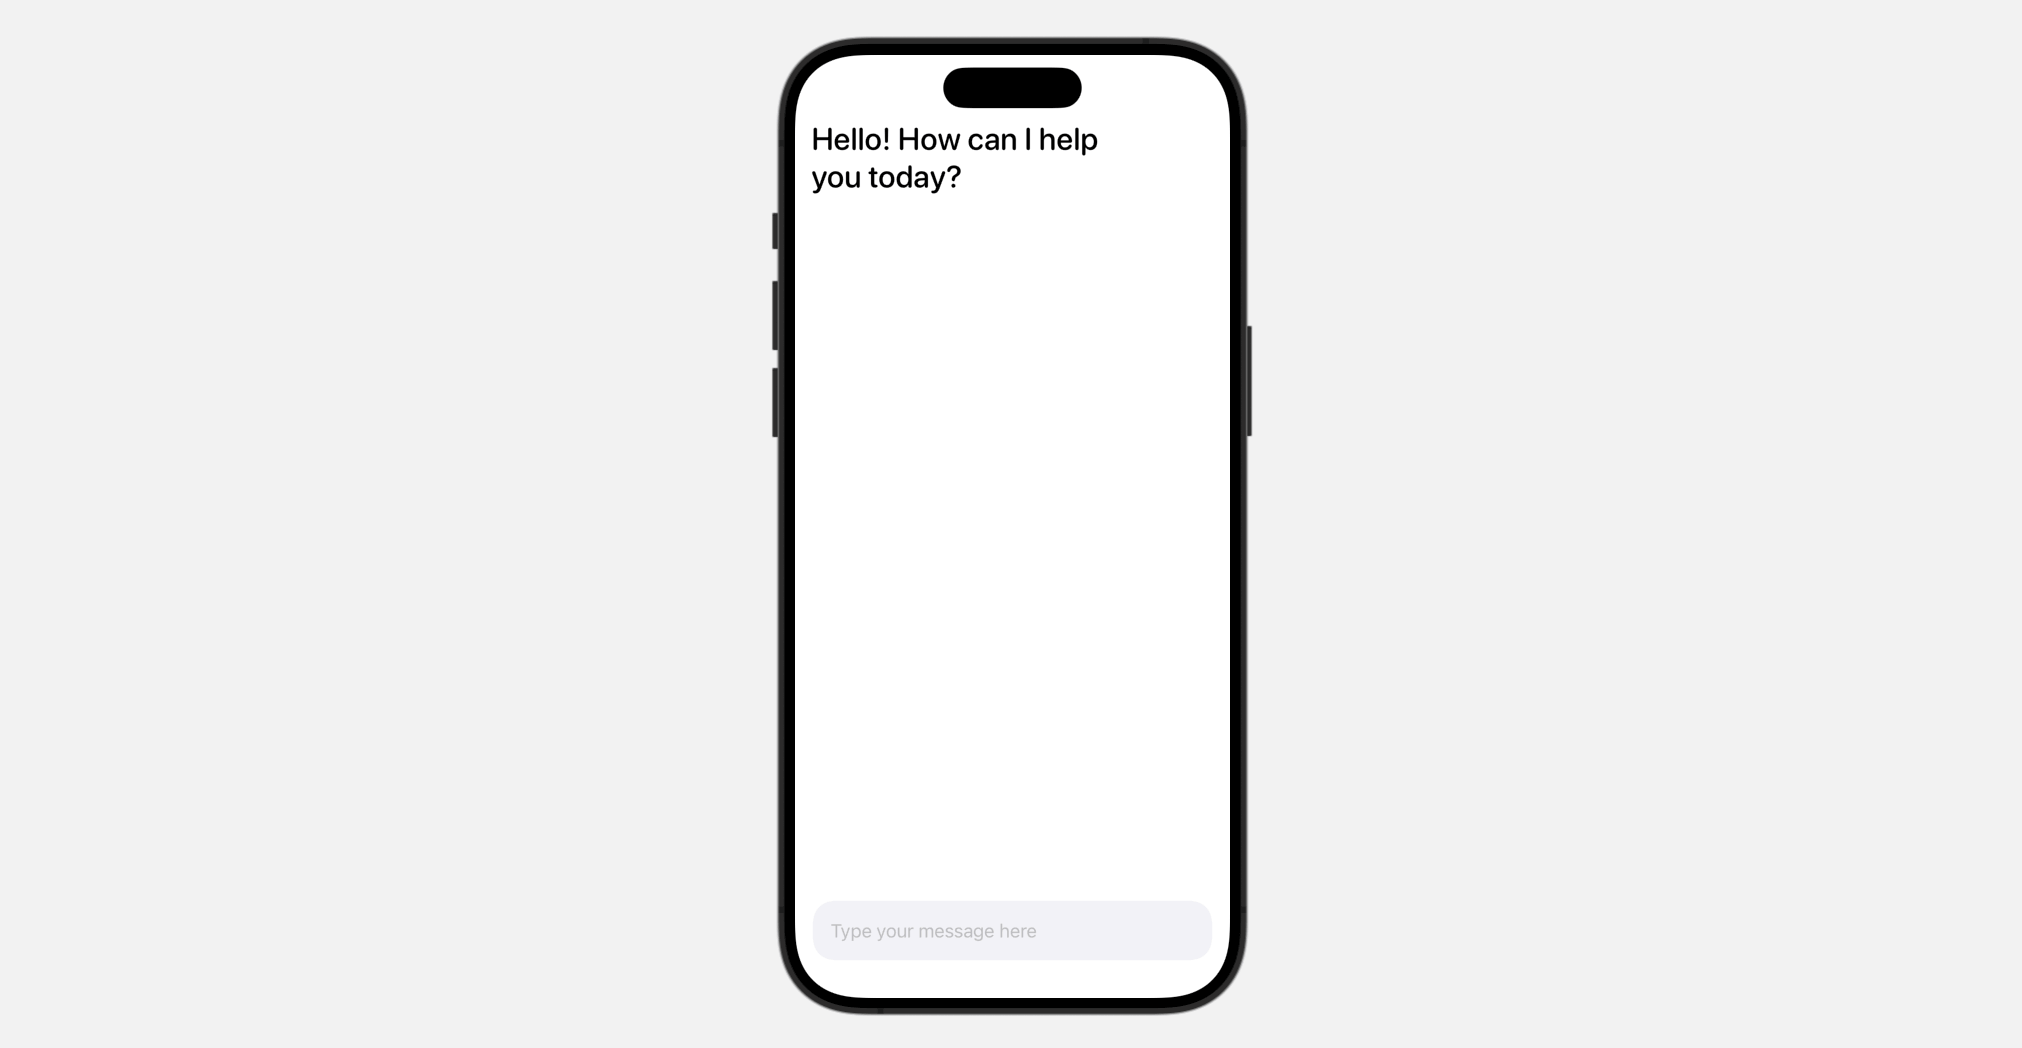
}The code is quite straightforward, especially if you have some experience with SwiftUI. After making the changes, you should see the following user interface in the preview.
Integrating with Google Gemini
Before you can use the Google Gemini APIs, you first need to import the GoogleGenerativeAI module:
import GoogleGenerativeAINext, declare a model variable and initialize the Generative model like this:
let model = GenerativeModel(name: "gemini-pro", apiKey: APIKey.default)Here, we utilize the gemini-pro model, which is specifically designed to generate text from text input.
To send the text to Google Gemini, let’s create a new function called sendMessage():
func sendMessage() {
    response = "Thinking..."

    withAnimation(.easeInOut(duration: 0.6).repeatForever(autoreverses: true)) {
        isThinking.toggle()
    }

    Task {
        do {
            let generatedResponse = try await model.generateContent(textInput)

            guard let text = generatedResponse.text else  {
                textInput = "Sorry, Gemini got some problems.\nPlease try again later."
                return
            }

            textInput = ""
            response = LocalizedStringKey(text)

            isThinking.toggle()
        } catch {
            response = "Something went wrong!\n\(error.localizedDescription)"
        }
    }
}
As you can see from the code above, you only need to call the generateContent method of the model to input text and receive the generated response. The result is in Markdown format, so we use LocalizedStringKey to wrap the returned text.
To call the sendMessage() function, update the TextField view and attach the onSubmit modifier to it:
TextField("Type your message here", text: $textInput)
    .textFieldStyle(.plain)
    .padding()
    .background(Color(.systemGray6))
    .clipShape(RoundedRectangle(cornerRadius: 20))
    .onSubmit {
        sendMessage()
    }
In this situation, when the user finishes inputting the text and presses the return key, the sendMessage() function is called to submit the text to Google Gemini.
That’s it! You can now run the app in a simulator or execute it directly in the preview to test the AI feature.

Summary
This tutorial shows how to integrate Google Gemini AI into a SwiftUI app. It only requires a few lines of code to enable your app with Generative AI features. In this demo, we use the gemini-pro model to generate text from text-only input.
However, the capabilities of Gemini AI are not just limited to text-based input. Gemini also offers a multimodal model named gemini-pro-vision that allows developers to input both text and images. We encourage you to take full advantage of this tutorial by modifying the provided code and experimenting with it.
If you have any questions about the tutorial, please let me know by leaving a comment below.