How to Beta Test Your App Using TestFlight
Suppose you built an app and completed the testing of your app on a real device. So what’s next? Submit your app directly to App Store and make it available for download? Yes, you can if your app is a simple one. However, if you’re developing a high quality app, don’t rush to get your app out. I suggest you beta test the app before the actual release.
A beta test is a step in the cycle of a software product release. I know you’ve tested your app using the built-in simulator and on your own device. Interestingly, you may not be able to uncover some of the bugs, even though you’re the app creator. By going through beta test, you would be amazed at the number of flaws discovered at this stage. Beta testing is generally opened to a select number of users. They may be your potential app users, your blog followers, your colleagues, friends or even family members. The whole point of beta testing is to let a small group of real people get their hands on your app, test it and provide feedback. You want your beta tester to discover as many bugs as possible in this stage so that you can fix them before rolling out your app to the public.
You may be wondering how can you conduct a beta test for your app, how beta testers run your app before it’s available on App Store and how testers report bugs?
In iOS 8, Apple released a new tool called TestFlight to streamline the beta testing. You may have heard of TestFlight before. It has been around for several years as an independent mobile platform for mobile app testing. In February 2014, Apple acquired TestFlight’s parent company, Burstly. With the official release of Xcode 6 and iOS 8, TestFlight is now integrated into iTunes Connect that allows you to invite beta testers using just their email addresses.
TestFlight allows you to arrange testing with external testers and internal users. Conceptually, both can be your testers at the beta testing stage. However, TestFlight refers internal users as members of your development team who have been assigned the Technical or Admin role in iTunes Connect. You’re allowed to invite up to 25 internal users to test your app. An external tester, on the other hand, is considered as an user outside your team and company. You can invite up to 1,000 users to beta test your app. There is a catch, though. Your app must be approved by Apple before you can invite your external testers for testing. This restriction doesn’t apply to internal users. Your internal users can begin beta testing once you upload your app to iTunes Connect.
In this tutorial, I will walk you through the beta test process using TestFlight. At the time of this writing, you can only arrange beta test for internal users only. So we will focus on beta testing with internal users. In general, you need to go through the below tasks to distribute an app for beta testing:
- Create an app record on iTunes Connect.
- Update the build string.
- Archive and upload your app.
- Manage beta testing in iTunes Connect.
Let’s get started.
Creating an App Record on iTunes Connect
Firstly, you need an app record on iTunes Connect before you can beta test an app. iTunes Connect is a web-based application for iOS developers to manage their apps sold on App Store. Assuming you have enrolled in the iOS Developer Program, you should be able to access iTunes Connect at http://itunesconnect.apple.com.
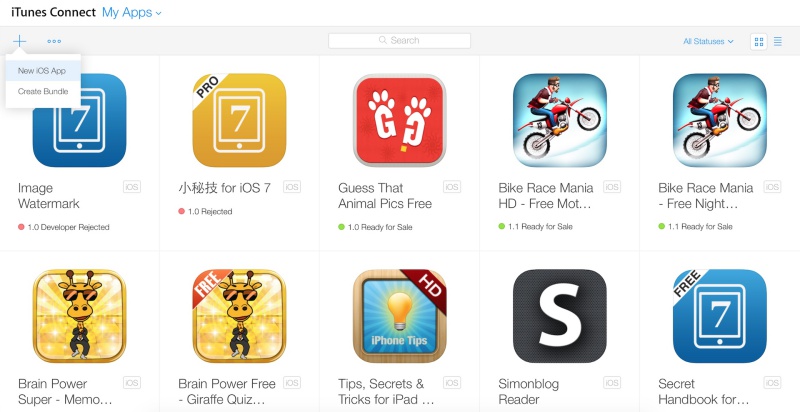
Once signed into iTunes Connect, select My Apps and the + icon to create a new iOS app. You’ll be prompted to complete the following information:
- App name – your app name appears on App Store
- Primary language – the primary language of your app such as English
- Bundle ID – the bundle ID of your app
- Version – the version number of your app. If this is the first release, you can just put in
1.0. - SKU – stands for Stock Keeping Unit. It can be anything you like. For example, your app
name is “Awesome Food App”. You can use “awesome_food_app” as the SKU. You can use letters, numbers, hyphens, periods and underscores except space.
Once you click the Create button, you’ll proceed to another screen to fill in the details of your app.
App Video and Preview
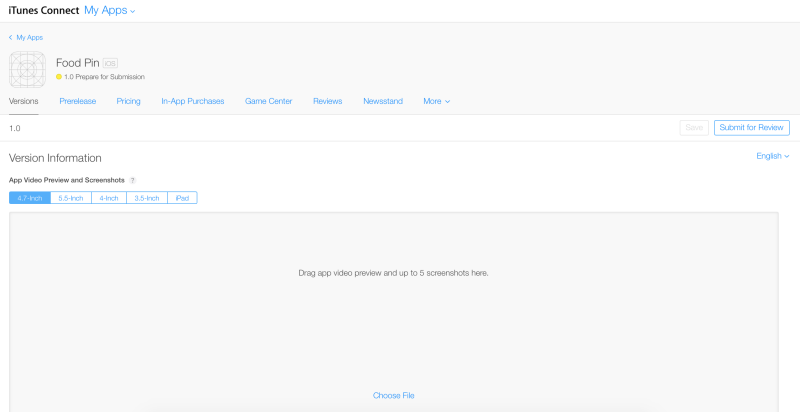
These are the preview screens for your app. In iOS 8, Apple lets you incorporate an app video in the preview. You need to provide at least one screenshot for 3.5- inch (640×960 pixels for portrait or 960×640 pixels for landscape), 4-inch (640×1136 pixels for portrait or 1136×640 pixels for landscape), 4.7-inch (750×1334 pixels) and 5.5-inch (1242×2208 pixels) devices. You can further refer to Apple’s iTunes Connect Developer guide for details.
App Description and URL
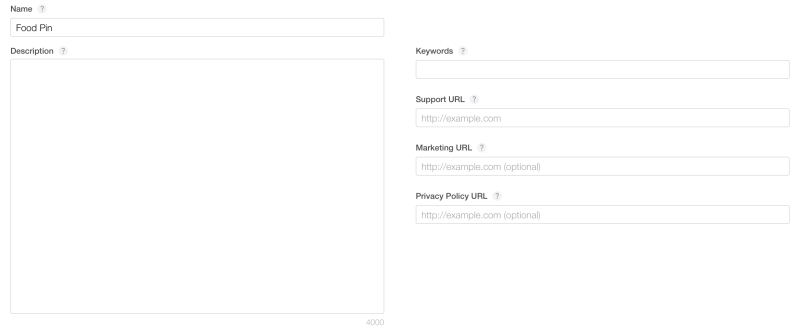
Next, fill in your app description and at at least one keyword that describes your app. It’s one of the most important elements affecting your app download. You may have heard of App Store Optimization (ASO). Keyword optimization is a part of ASO. I will not go into keyword optimization here. If you want to learn more about keyword optimization, you can refer to this article or just google ASO.
The support URL is mandatory. You can fill in the URL of your website or blog. If you don’t have one, register a website at wordpress.com.
General App Information
The next section is about the general information of your app. You need to upload the app icon. Remember the app icon (1024×1024 pixels) must be not contained any transparency element. Here is a sample of the app icon.

The icon has a square shape. After you upload the app icon to iTunes Connect, the icon will be converted to appear with rounded corners.
Next, fill in the version number (e.g. 1.0) and pick a category that best describes your app.
You need to give a rating for your app. Just click the Edit button next to Rating and complete the form. iTunes Connect generates a rating for your app based on your answers.
For the copyright field, you can just fill in your name or company preceded by the year the rights were obtained (e.g. 2014 AppCoda Limited).
If you want to list your app on Korean App Store, you need to provide the Trade Representative Contact Information.
App Review Information
You can skip the Build section and go straight to the App Review Information. Simply fill in your contact information.
The demo account field is optional. It is for those apps that require login.
Version Release
You’re allowed to release your app automatically or manually right once it has been approved by App Review. Just set it to Automatically release this version.
Finally click the Save button on the top right corner to save the changes.
If you didn’t miss any information, the “Submit for Review” should be enabled. That means your app record was successfully created on iTunes Connect.
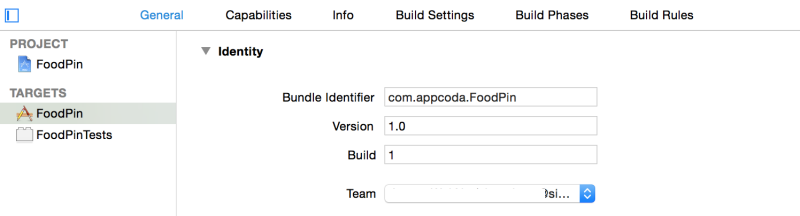
Update Your Build String
Now go back to Xcode. You’re going to build your app and upload to iTunes Connect. But before that, review your project and make sure the version number matches what you entered in iTunes Connect.
In the project navigator, select the project and the target to display the project editor. Under the General tab, review the version field under Identity section. As this is the first build, set the Build field to 1.
Archiving and Uploading Your App
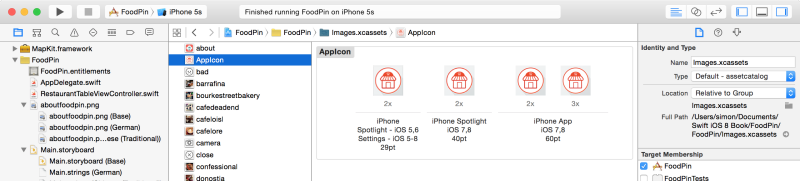
Before archiving your app, you should include the app icon and launch image in your Xcode project. The app icons are managed by the asset catalog. You should find the AppIcon set in Images.xcassets. To add an icon to the set, select an app icon in the Finder and drag it to the appropriate image well in the set viewer. You will need to provide various sizes of app icons to fit for different devices.
Assuming you’ve included the app icon and launch screen in your Xcode project. You’re now ready to archive upload your app to iTunes Connect. It’s pretty easy to archive your app in Xcode 6. First, review the Archive scheme settings and ensure the build configuration sets to Release (instead of Debug).
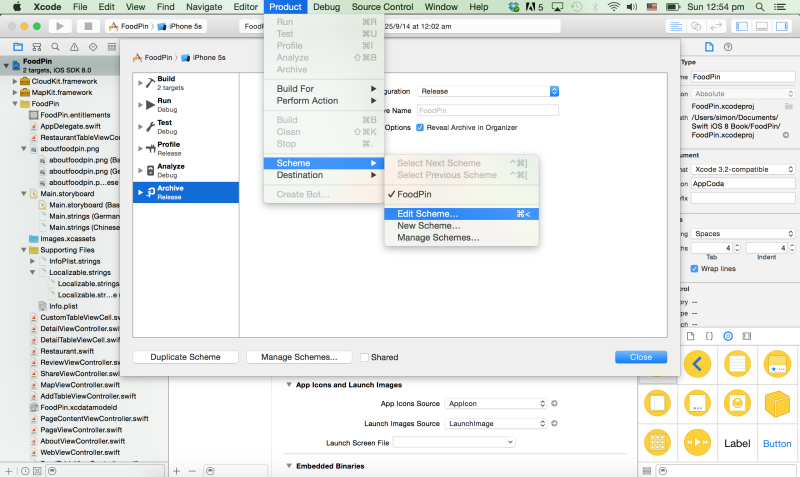
Go up to the Xcode menu. Choose Product > Scheme > Edit Scheme. Select Archive scheme and review the Build Configuration setting. The option should be set to Release.
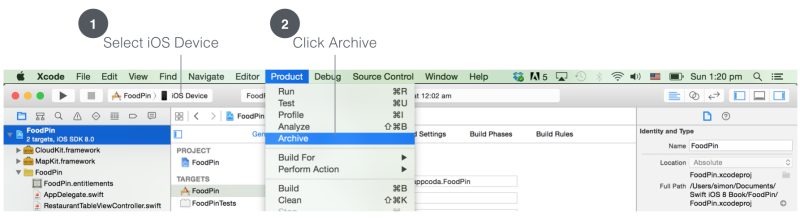
Now you’re ready to archive your app. The Archive feature is disabled if you’re using a simulator. So first select iOS Device or your device name (if you have connected your iPhone to your Mac) from the Scheme toolbar menu. Then go up to the Xcode menu and choose Product > Archive.
After archiving, your archive will appear in the Organizer. It’s ready to upload to iTunes Connect. But it’s best to go through the validation process to see if there are any issues. Just click the Validate button and then select your developer account. Xcode will then validate your archive.
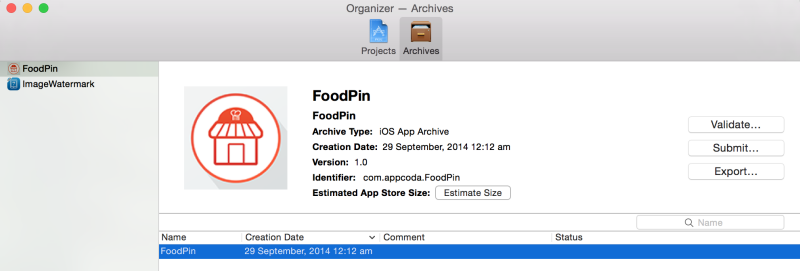
If the validation is successful, you can click the Submit button to upload the archive to iTunes Connect.

Manage Beta Testing in iTunes Connect
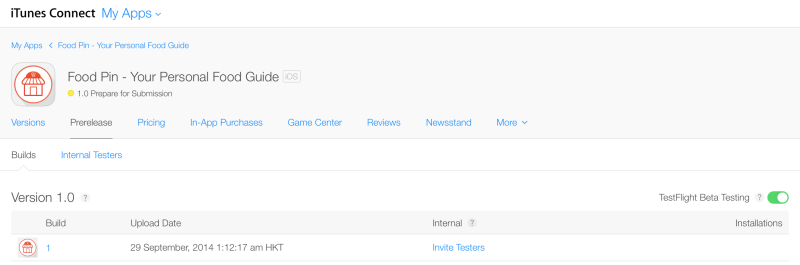
Now that you’ve uploaded your build to iTunes Connect. Go back to http://itunesconnect.apple.com. Select My Apps and then your app.
You will find your app archive under PreRelease tab. To enable beta testing, flip the TestFlight Beta Testing to ON. The status will be changed from Inactive to Invite Testers.
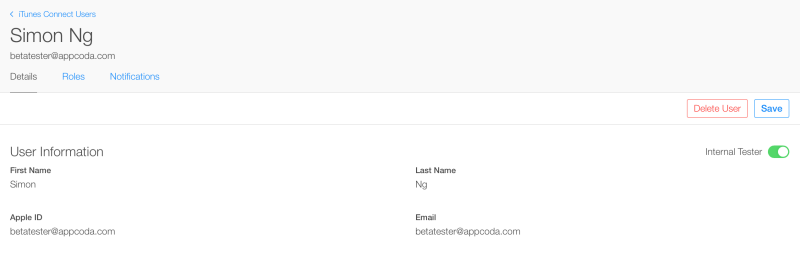
Click Invite Testers and then click “Users and Roles” to invite your internal testers to try out the app. For existing users with Admin, Legal, or Technical role, you will see an Internal Tester switch. Flip it to ON to assign it as a tester.
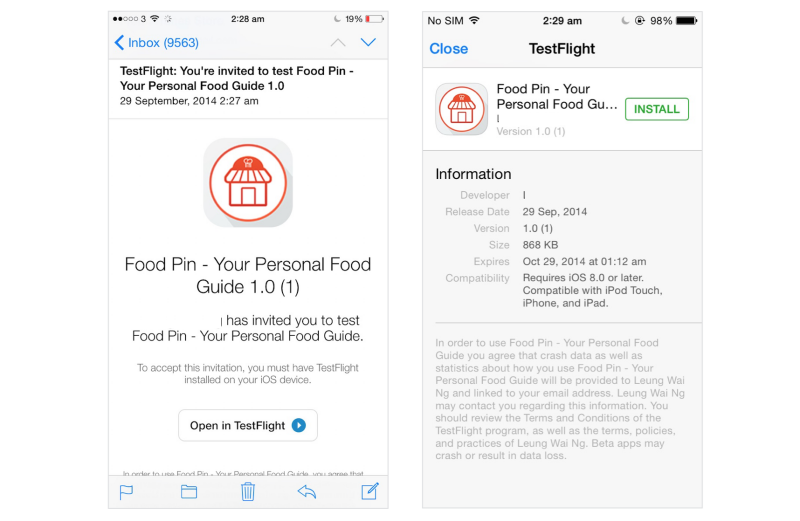
Then go back to your app. Under the Prerelease tab, select Internal Testers tab and you will see the tester that you just assigned. Click the checkbox of the tester and click Invite
button to send an invitation of the TestFlight Beta Testing. Your tester will receive an email of the invitation.

The tester just needs to click the Open TestFlight button and iOS automatically opens TestFlight app. The tester can then install your app for beta testing. If your tester does not have the TestFlight app installed, he/she will need to install it first.
For any future update of your beta app, your internal testers will always get the most recent build you uploaded.
Summary
Apple’s acquisition of TestFlight provides us with a powerful tool to easily beta test our apps. In this tutorial, I have walked you through the basics of TestFlight Beta Testing. If you’re building your next app, use the tool to invite your friends to test out your app before the official release. This is an important step to build a high quality app.
What do you think about the tutorial? Leave us comment and share your thought.
This is an excerpt of our Beginning iOS 8 Programming with Swift book. If you like the tutorial, check out our new book and support us.

Founder of AppCoda. Author of multiple iOS programming books including Beginning iOS Programming with Swift and Mastering SwiftUI. iOS App Developer and Blogger. Follow me at Facebook, Twitter and Google+.
Comments
 Ashish Kakkad
AuthorThanks. You have done great job. This will help me.
Thanks once again !
ASHISH KAKKAD
 Pavel Gnatyuk
AuthorIt is impossible to invite the external users. “Coming soon” – Apple says.
 Simon Ng
AuthorYes. For now, you can only invite internal users.
 Wendell Beverly
AuthorGood tutorial, I’ll be trying this out later, as I’ve got an app that I am close to releasing.
 Will Morin
AuthorPlease if u need tester please include me my Apple ID is- Willhng@yahoo. Would love to be included in any upcomingapp beta projects thank you.
 Hoang Nguyen
AuthorSimon Nguyen ?
 gabbyb
AuthorAnyone know if the invitee (external tester) needs to own the app already? Or can they beta test without owning the app?
 Victor
Authorit’s not required to have AppStore version to be able participate in tests – that why Apple restricts beta-versions life period to 1 month and also overseeing distribution for external testers.
 Rahul
Rahul
AuthorNice tutorial …Thanks
 Kartik
AuthorNice tutorial…Does this beta testing provide us the ability to test the updated version of the app.
I mean, once i install the app from testflight does it replace the older version of App downloaded from AppStore?
 Victor
Authorreplacement – yes, the AppStore version will be replaced and App icon will have special circle/dot sign highlighting beta-version.
 Sergey
AuthorOK, Apple shut down TestFlight. So the only way to test app is itunes connect testing. And it is super inconvenient. Let’s pretend I need my app be tested by a customer. But I don’t want him to see my other apps. In iTunesConnect I can grant him with technical user role and enable testing as internal tester, but in this case he will be able to see all my apps. Any solutions?
 Matt
Matt
AuthorYou can add someone as an external tester
 Sergey
AuthorBut before external tester can test the app it has to be reviewed for beta testing by Apple which takes about one week
 dstudeba
AuthorThe beta App review is shorter. Mine just took a day.
 Damitha Raveendra
AuthorThanks for the information. Nice tutorial. Loved Testflight earlier, not so after this change.
 Dang Ngoc Hoa
AuthorThank you for this post, very informative.
I am having problem with this at the moment, it’s seem that apple change the rules again. We have to test the app via Prerelease before make an submit to apple for review.
What i don’t like about this, after uploaded, it’s take too long to process the app.
Any idea about this?
Why all my new submit via app loader go to prerelease instead of release build?
 Glob Design
AuthorThere is no way to ever resend an invite email in TestFlight in iTunes Connect. None. TestFlight sucks bigtime.
 John Robb
AuthorIt looks like TestFlight used to allow mandatory updates for users when they launched the app. Is this gone? Bummer.
 Luca Bastelli
Authorhello I would become iOS beta testers. how can I do to have the invitation for TestFlight? thank you
 Luca Bastelli
AuthorHi, I would like to become iOS beta tester Disqus (iphone 7 Plus iOS 11.1.2 updated) you can help me. thank you so much
 Yusuf
Yusuf
AuthorFirst I tried to submit app to the App Store but got rejected becouse my app was specific to my company (metadata rejected) now I just want to distribute the app to my company employee either by TestFlight or anything please suggest me what I can do