

Welcome to the sixth installment of our ARKit tutorial series. This week we are going to talk about image recognition in augmented reality. Starting from iOS 11.3, ARKit has the capability to recognize 2D images. If you are interested in learning about building apps that recognize 2D images with ARKit, this tutorial is written for you.
Many AR experiences can be enhanced by using known features of the user’s environment to trigger the appearance of virtual content. For example, a museum app might show a virtual curator when the user points their device at a painting, or a board game might place virtual pieces when the player points their device at a game board. In iOS 11.3 and later, you can add such features to your AR experience by enabling image recognition in ARKit: Your app provides known 2D images, and ARKit tells you when and where those images are detected during an AR session.
- Apple Documentation
Prequisites
This tutorial requires you to have a solid understanding of previous ARKit tutorial topics we discussed. If you are new to ARKit, please do check out our ARKit tutorial series here.
In order to follow this tutorial, you will need to have Xcode running on version 9.3 or later and an Apple device running on iOS 11.3 or later.
Without further ado, let’s dive in.
What You’ll Build
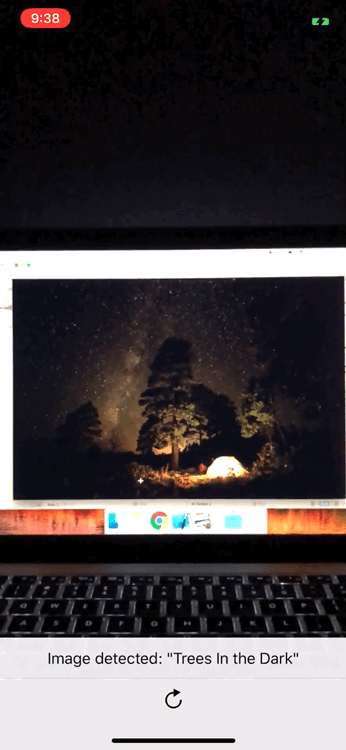
We shall build an ARKit image recognition App. At anytime the app detects a recognizable image, it shall run an animation sequence that shows the location and size of the detected image in the world. On top of that, the app will have a label that reflects the detected image’s name. If you don’t know what I mean, the image below will give you a better idea.
Getting Started
First, begin by downloading the starter project here. The starter project has pre-built UI elements and action methods. This way, we can focus on the core elements of ARKit’s image recognition.
Once you have downloaded the starter project, build and run it on your iOS Device. You should be prompted to allow camera access in the App. Tap OK to allow camera access in your App.
Nice. Now let’s jump into preparing images for ARKit image recognition.
Enabling Image Recognition in ARKit
In order for ARKit to recognize images, you will first need to provide two things:
- The images that are to be recognized by your app.
- The physical size of the images.
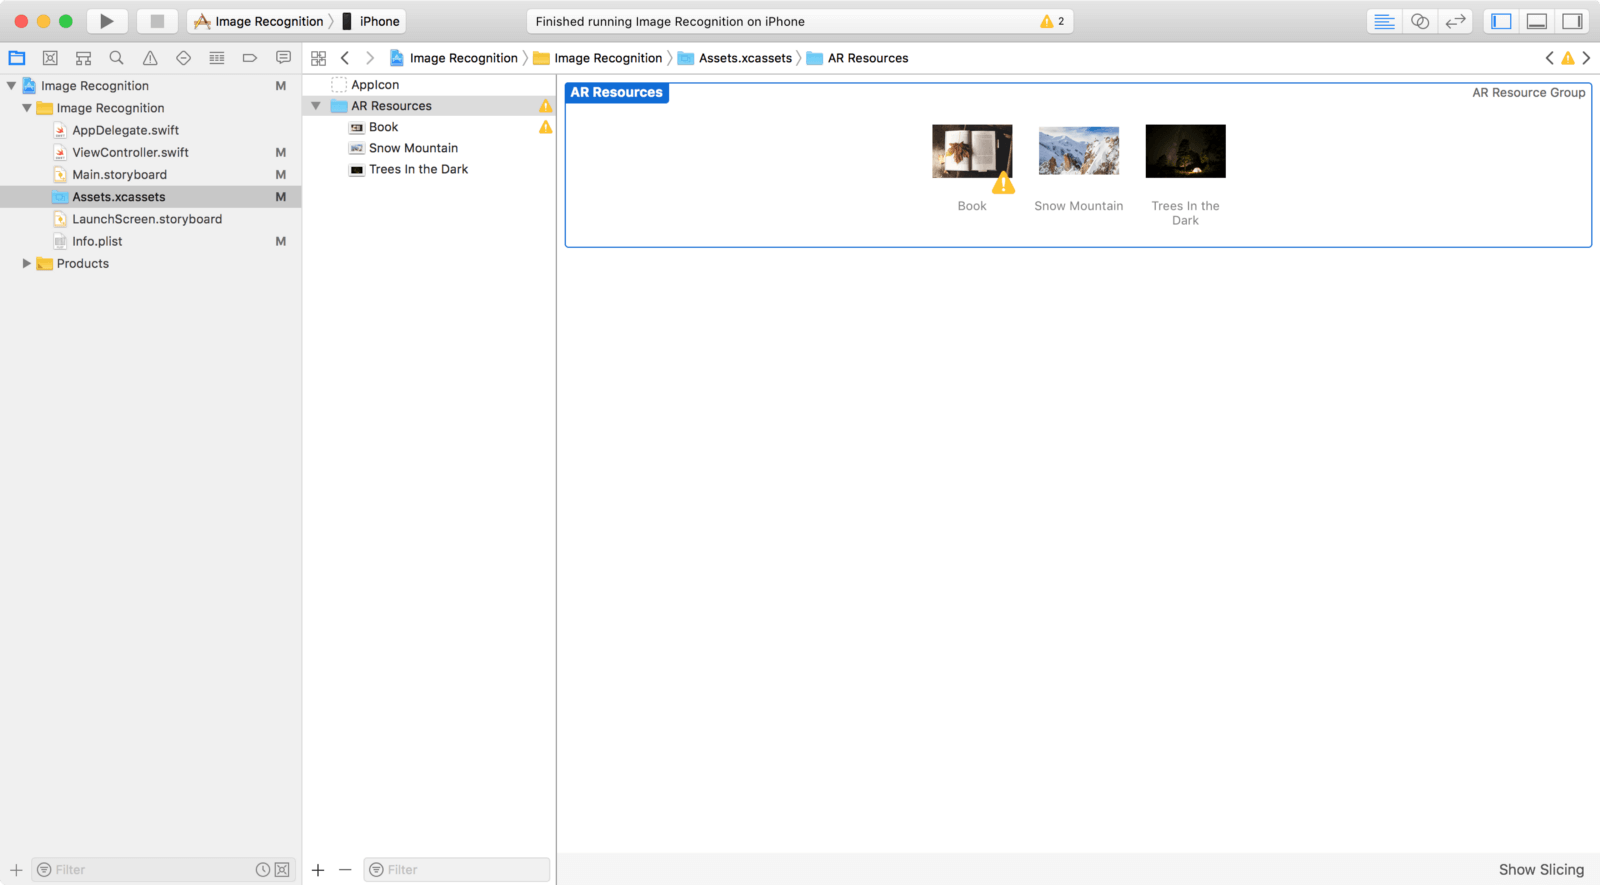
Let’s begin with the first step by providing the images themselves. Inside the starter project, click on the Assets.xcassets group. Afterwards, you should be able to see the AR Resources group. Click on that group. There should be three images within that group.
You can also drag your own images into this group. But make sure to give the image a descriptive name as well.
As mentioned earlier, by having the image file itself within your project is only the first step in preparing for ARKit image recognition. In addition, you’ll also need to provide the physical image size.
Let’s move on to the next section to talk about physical image size.
Physical Image Size
ARKit needs to know the physical image size in the world to determine the distance of the image from the camera. Entering an incorrect physical image size will result in an ARImageAnchor that has the wrong distance from the camera.
Remember to provide the physical image size every time you add a new image for ARKit to recognize. The values should reflect the image size when measured in the world. For example, the “Book” image has the following physical size:
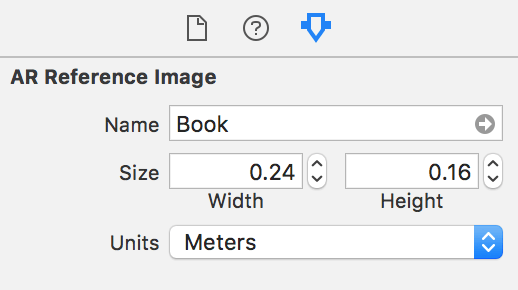
This is the physical image size property for when the image file is opened in Preview on a 15.4 inch MacBook Pro display. You can set physical image size properties accordingly in the image’s attributes inspector.
Image Properties
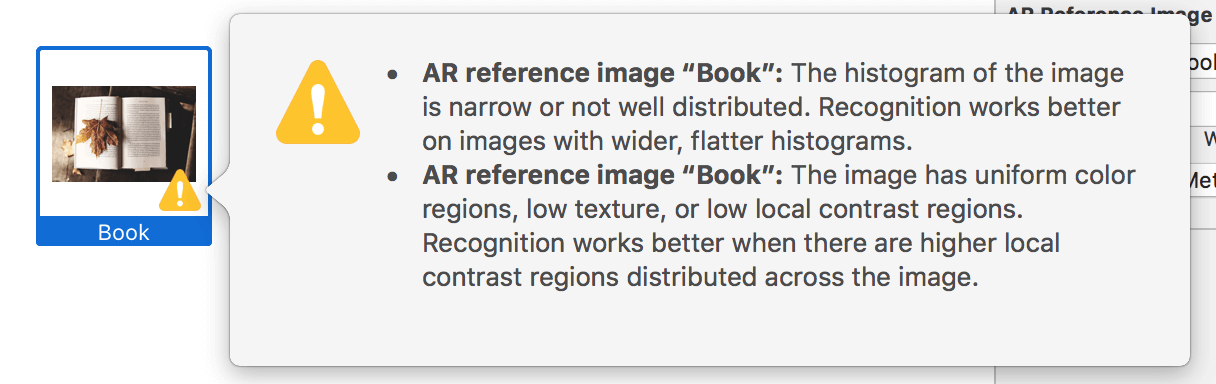
The image recognition capability of ARKit may vary with the images’ properties. Take a look at the images inside the AR Resources group. You’ll see that the “Book” image has two quality estimation warnings. Pay attention to this when you add reference images. Image detection works best when the image has high contrast.
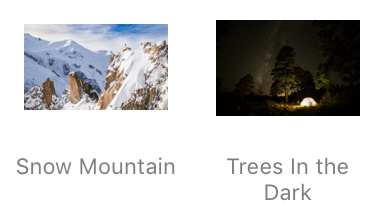
The “Snow Mountain” and “Trees In The Dark” images have no yellow warnings. This means ARKit considers these images are easily recognizable.
Despite the yellow warnings or not, it is still best to test out the images you plan to use in the world. And then, you can see it yourself which images are easily recognizable.
Next, we are getting our hands dirty with some code.
Setting Configuration for Image Recognition
We are going to set our scene view’s configuration to detect the reference images inside the AR Resources group. The configuration will have to reset tracking and remove existing anchors run options. After running the scene view session with the configuration, we update the label’s text with App usage instruction.
Open up the ViewController.swift file and insert the following method to the View Controller class:
func resetTrackingConfiguration() {
guard let referenceImages = ARReferenceImage.referenceImages(inGroupNamed: "AR Resources", bundle: nil) else { return }
let configuration = ARWorldTrackingConfiguration()
configuration.detectionImages = referenceImages
let options: ARSession.RunOptions = [.resetTracking, .removeExistingAnchors]
sceneView.session.run(configuration, options: options)
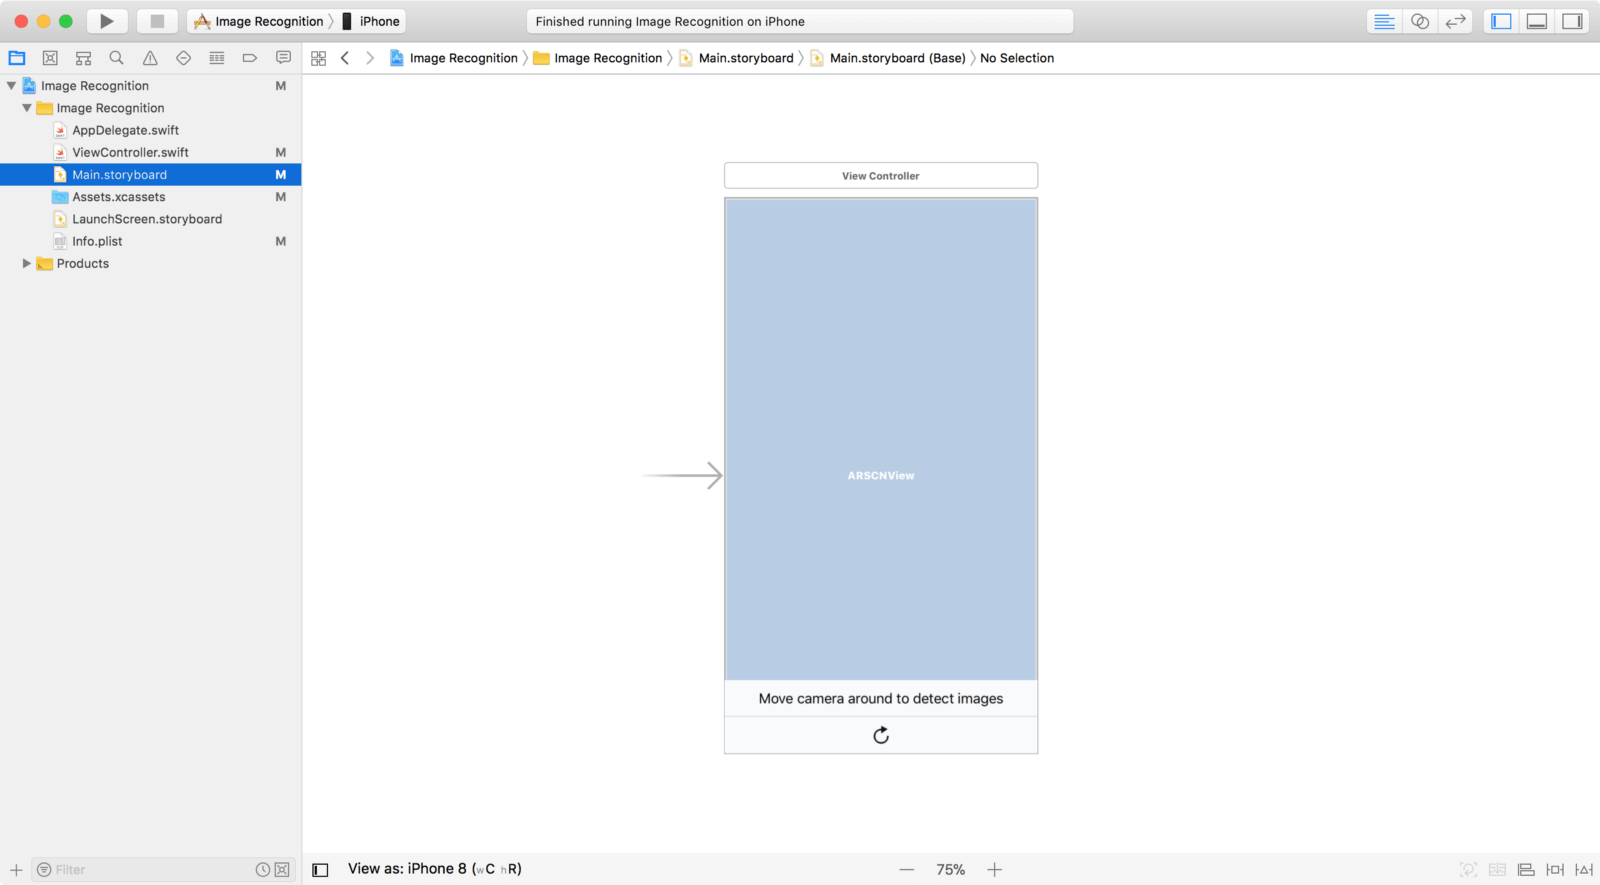
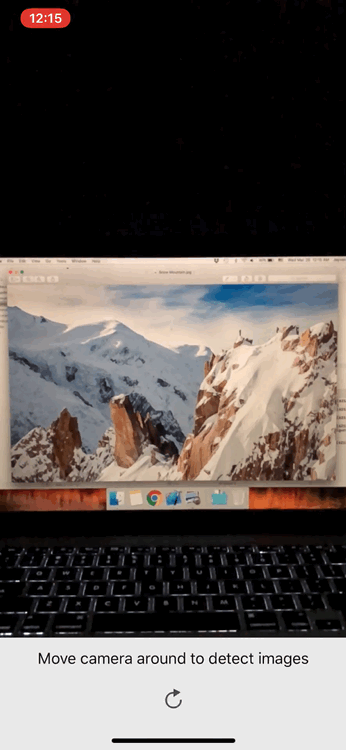
label.text = "Move camera around to detect images"
}
Next, call the resetTrackingConfiguration() method inside of viewWillAppear(_:) and resetButtonDidTouch(_:) methods.
Recognizing Images with ARImageAnchor
We are now going to overlay a transparent white plane onto newly detected images. The plane will reflect the shape and size the newly detected reference image and the distance the image is from the device’s camera. The plane overlay UI will appear when a new node is mapped to the given anchor.
Update the renderer(_:didAdd:for:) method like this:
func renderer(_ renderer: SCNSceneRenderer, didAdd node: SCNNode, for anchor: ARAnchor) {
    guard let imageAnchor = anchor as? ARImageAnchor else { return }
    let referenceImage = imageAnchor.referenceImage
        let imageName = referenceImage.name ?? "no name"

    let plane = SCNPlane(width: referenceImage.physicalSize.width, height: referenceImage.physicalSize.height)
    let planeNode = SCNNode(geometry: plane)
    planeNode.opacity = 0.20
    planeNode.eulerAngles.x = -.pi / 2

    planeNode.runAction(imageHighlightAction)
}
The plane node is set to run a SCNAction sequence that it runs a fade in and fade out animation.
Now that we have the plane node and the detected image’s name, we will add the plane node to the node parameter and set the label’s text to show the recognized image’s name. Insert the following code right after planeNode.runAction(imageHighlightAction):
node.addChildNode(planeNode)
DispatchQueue.main.async {
    self.label.text = "Image detected: \"\(imageName)\""
}
Great! You’ve got yourself a newly built ARKit Image Recognition App.
Testing the demo app
For the demo, you can print out a physical image copy for each of the AR Resources group’s images. Or, you can test it out by opening up the image file in Preview.
Let’s transition to the next round and overlay 3D objects on detected images.
Overlaying 3D Objects on Detected Images
Now that we have visualized the detected image’s size and location in the world, let’s overlay 3D objects on detected images.
First, comment out the following codes to bring focus to overlaying 3D objects on detected images:
let planeNode = self.getPlaneNode(withReferenceImage: imageAnchor.referenceImage)
planeNode.opacity = 0.0
planeNode.eulerAngles.x = -.pi / 2
planeNode.runAction(self.fadeAction)

node.addChildNode(planeNode)
Next, replace the TODO: Overlay 3D Object comment with the following codes:
let overlayNode = self.getNode(withImageName: imageName)
overlayNode.opacity = 0
overlayNode.position.y = 0.2
overlayNode.runAction(self.fadeAndSpinAction)

node.addChildNode(overlayNode)
Upon image detection, you should now be able to see a SceneKit node run a fade and spin animation sequence away from your detected image and towards you.
Last Remarks
Congratulations for making it this far into the tutorial! I hope you have enjoyed and learned something valuable from my tutorial. Feel free to share this tutorial on your social networks so that your circle can make some knowledge gains too!
For reference, you can download the complete Xcode project on GitHub.


