

Nowadays, more people look to their mobile devices to surf the web than traditionally fixed devices. And when they’re on their phones, they’re using apps. Indeed, people spend 85% of their time on their phones using apps. Basically, this means that every day, more and more people are using apps on their phones to surf and shop. When you design your iOS app you need to keep in mind how you plan to capture those customers and monetize your brand.
In this tutorial, you are going to learn how to accept credit cards in iOS using a service called Braintree to handle purchases right whitin your app. For those who are asking about In-App Purchase, you’re required to use In-App Purchase to sell digital content such as extra game levels for your game, and bonus content for your apps. For physical goods like clothing, you’re allowed to use other payment solutions such as Braintree or Stripe.
What is Braintree?
Braintree is a payment processor acquired by PayPal, which emphasizes “simple, robust way to accept payments”, and with features like a drop-in payment UI and libraries for various programming languages enabling fairly easy integration. It is a solid choice for accepting payments via credit card, PayPal, Venmo and Apple Pay.
Braintree is in competition with Stripe for all the coolest clients. Stripe has Lyft, Braintree has Uber. Stripe has Kickstarter, Braintree has AirBnB. The reason for the competition is the easy integration of Braintree, the amount of payment options available (like Bitcoin and Apple Pay), and their quick One Touch checkout option. Basically, if you want a quick and easy payment processing choice for your iOS app, Braintree is one of the best and coolest options you can go with.
Donate: The Braintree Sample Project
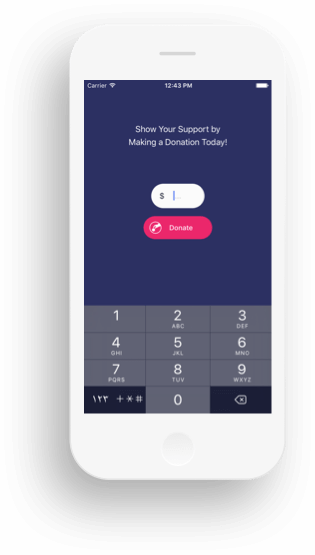
Your project for this tutorial is going to be “Donate”, a fully-functional mobile app that collects donation from your supporters. Note that this is just for demonstration purpose. According to App Store Review Guidelines, if your app supports donation, it should be free and the collection of charitable donations must be done via a web site in Safari or an SMS.
You don’t want to waste your time setting up the view controller or dragging out buttons in Interface Builder when you’re here to learn about Braintree. So you’ll be happy to hear this tutorial provides you with a starter project that has everything unrelated to Braintree already implemented for you.
You can download the starter project here.
How Braintree Works
It’s actually really simple. There are only three basic steps that you have to follow in order to start accepting payments within your application.
For each application that uses Braintree, you will need to set up both the client-side and server-side. Obviously, the client-side means your iOS app. The server-side is a web application developed in any programming language that’s available today like Javascript, Ruby and Python.
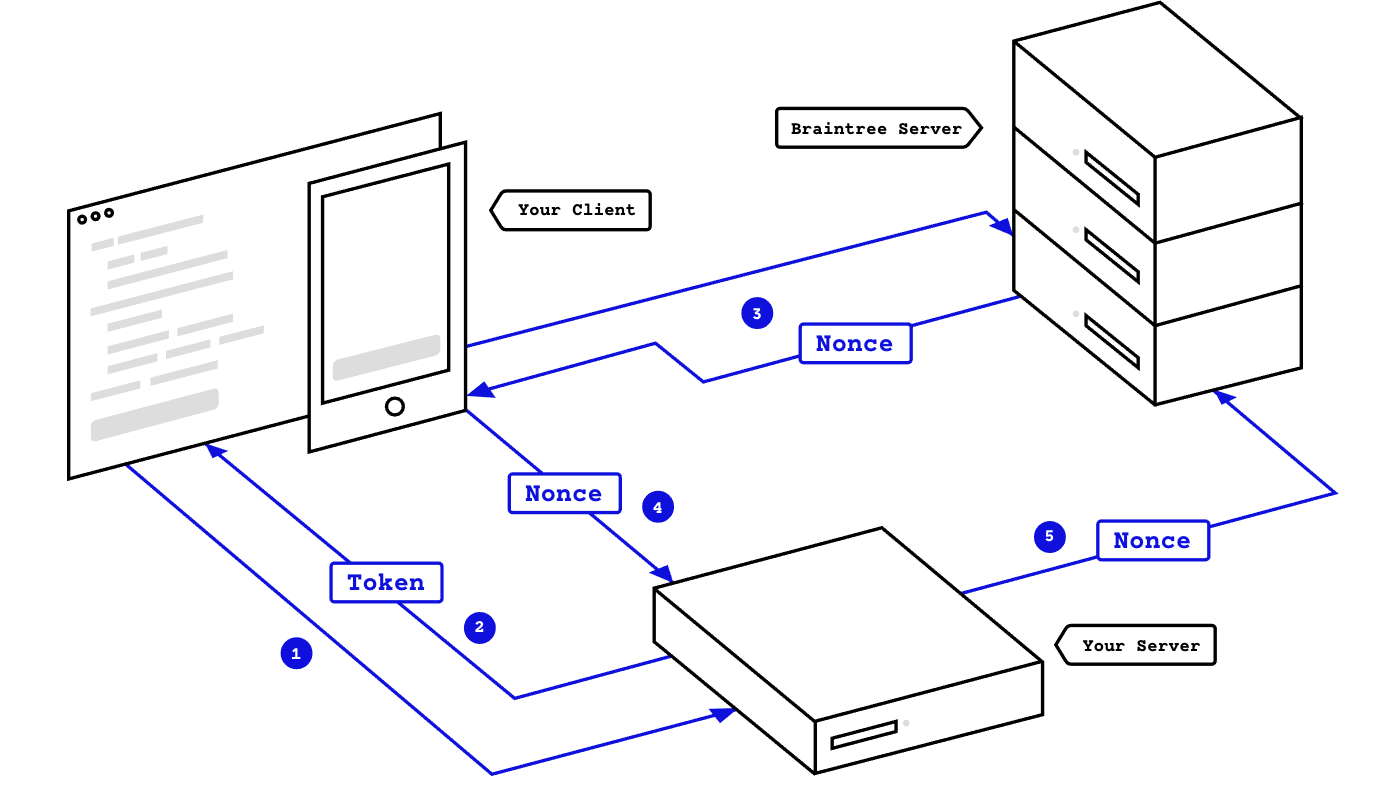
When you application first starts, all it needs to do is request a token from your server. The server application generates the token and pass it back to your iOS app. With the token you can setup your application and tells Braintree to associate your application with your Braintree account.
Once your have that setup, you don’t actually have to build the payment UI yourself. The payment form and credit card validation are provided for you. You just need to call the form when you are ready to accept money. Once your form shows up, the user goes in and log in with PayPal or just put in the credit card numbers and click pay, everything is done by the SDK.
Next, it tokenizes all that credit card data into what Braintree calls it Nonce. This concept of Nonce is important because you, as the merchant, don’t want to handle all that sensitive credit card details such as credit card number, expiry date. There are compliance issues (which mean you have to be a PCI compliant) you have to conform in order to handle all these sensitive data. This is not something you want to deal with. With the solution of Braintree to tokenize the credit card information, merchants are not hidden from the raw date of credit card details, so the liability is on Braintree, not you.
Once your have the Nonce, you call a server-side SDK function, saying that you want to charge this Nonce which is a one-time-use reference to payment information including payment method and the amount charged. Soon after, Braintree will perform that transaction for you. It will charge the client’s credit card and then the payment will be settled into the bank account within 3 business days.
Configuring Your Braintree Sandbox Account
Creating a sandbox account on Braintree is pretty straightforward by following the steps below. It can be done within a few seconds.
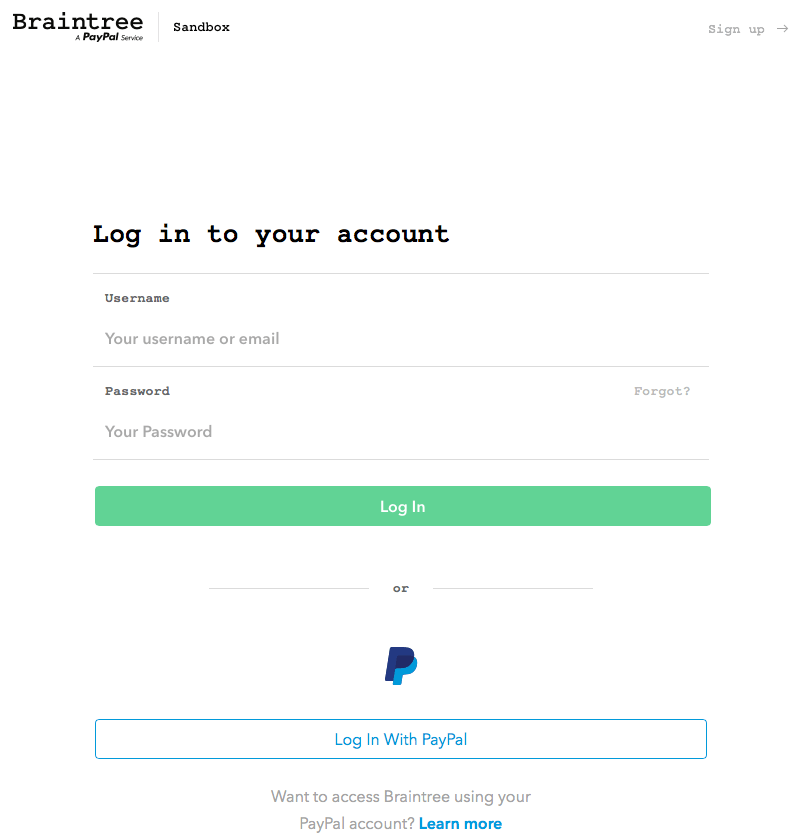
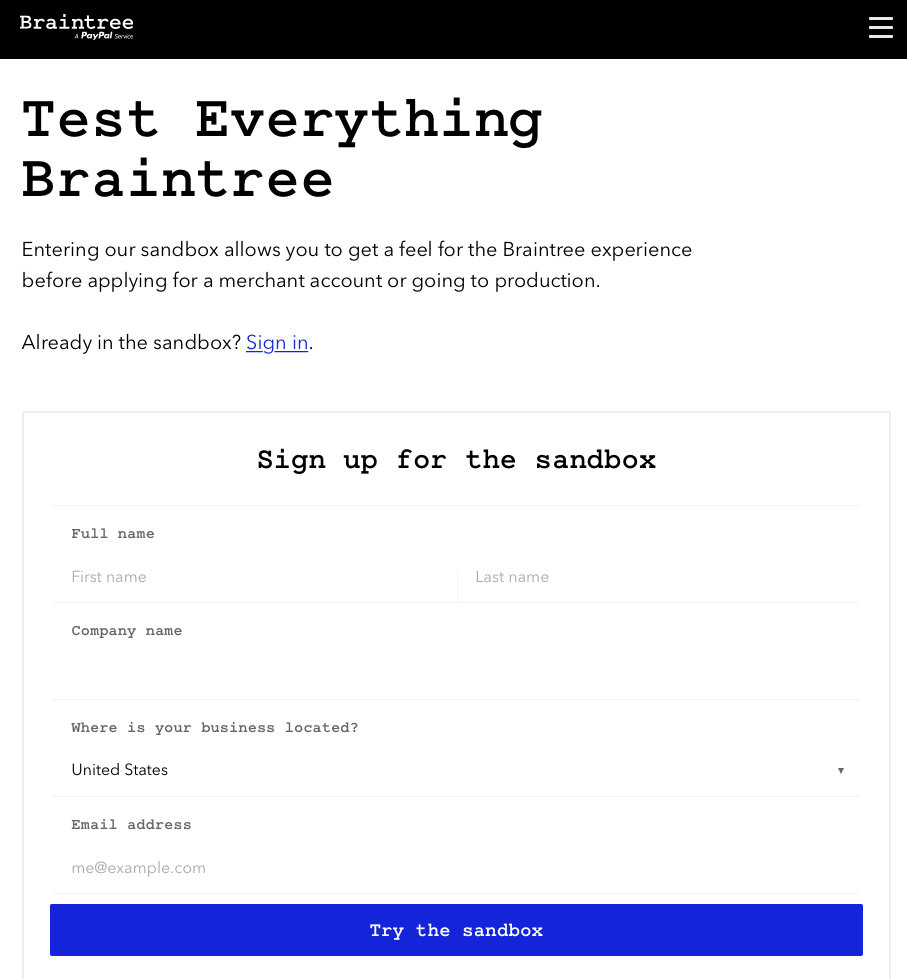
The first step is to go to Braintree Sandbox and click the sign up button:
You’ll be directed to the signup page to create a new account. Here, you can fill in your personal information.
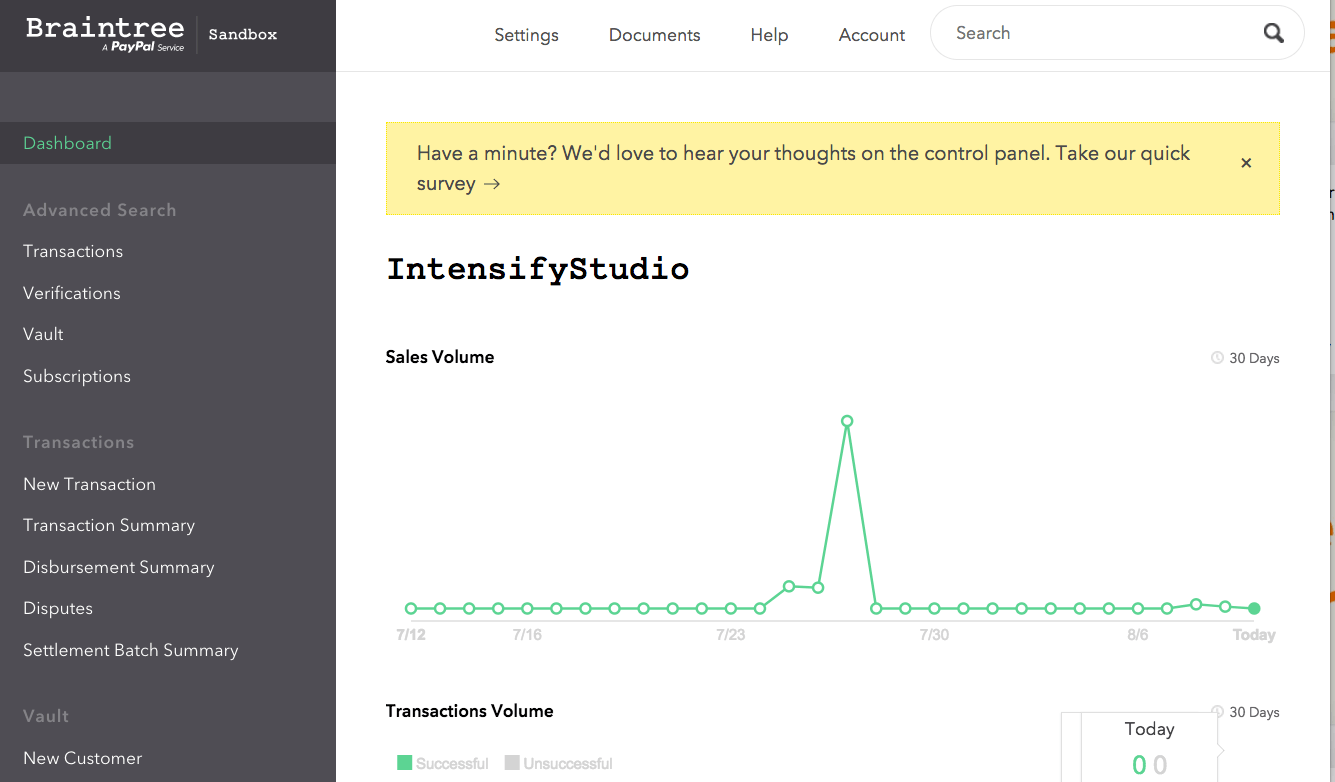
Once done, Braintree will present you the dashboard:
Next, go to “Account” menu and press “My Users”, then click the “View Authorizations” under the “API Keys, Tokenization Keys, Encryption Keys” section to reveal the keys for our app development.
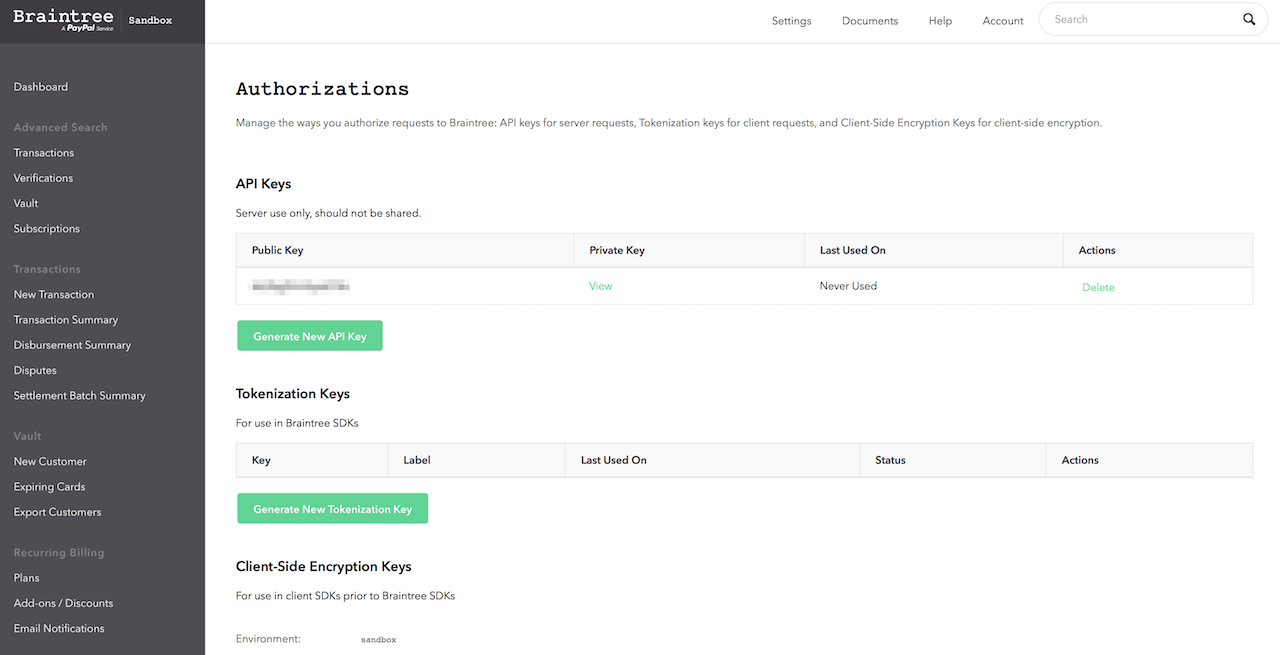
That’s it for Braintree configuration. From now on, you can use the Braintree APIs to test transaction. Later you’ll come back to the dashboard to check if the transactions are successfully processed.
Server Setup
Before moving onto the implementation of the app, let’s take a minute to setup our server for processing the payment. To create our backend, we will use PHP as the programming language and make use of the library provided by Braintree. No worries. You don’t need to be an expert in web development. Just go ahead and follow the steps as described, and you will be able to configure the required backend for processing the Braintree payment.
First, download XAMPP (for OS X) v5.6.8 (or up), and install it onto your Mac. Next, download the project from here. After that, go to the folder where XAMPP is installed. Normally it is installed under the “Applications” folder. Open the folder “Applications/XAMPP/htdocs”, then copy the folder that you just unzipped to here.

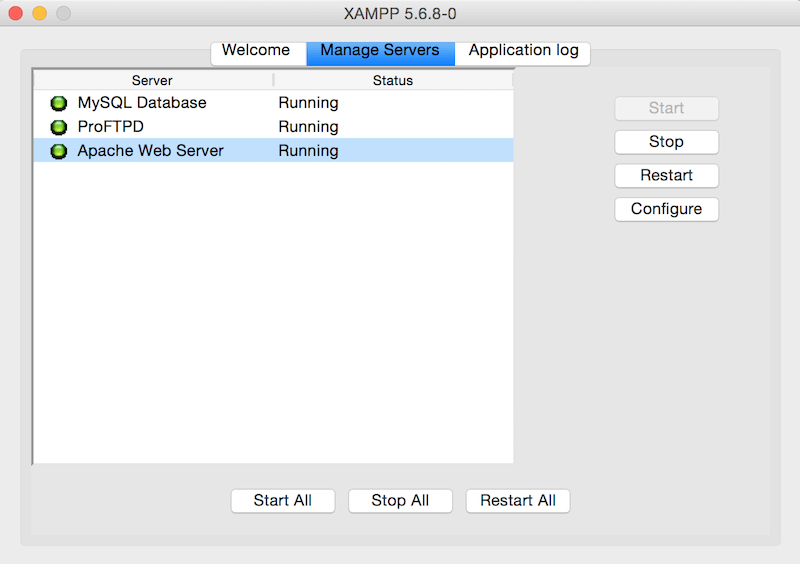
Once done, go back to the XAMPP folder and open “manager-osx”. When launched, hit the button “Start All” under the “Manage Server” tab as shown below:
The next step is to locate API keys from your control panel under the Braintree account by following these steps:
- Log into either the production Control Panel or the sandbox Control Panel, depending on which environment you are working in
- Navigate to Account > My user
- Under API Keys, Tokenization Keys, Encryption Keys, click View Authorizations
- If no API keys appear, click Generate New API Key
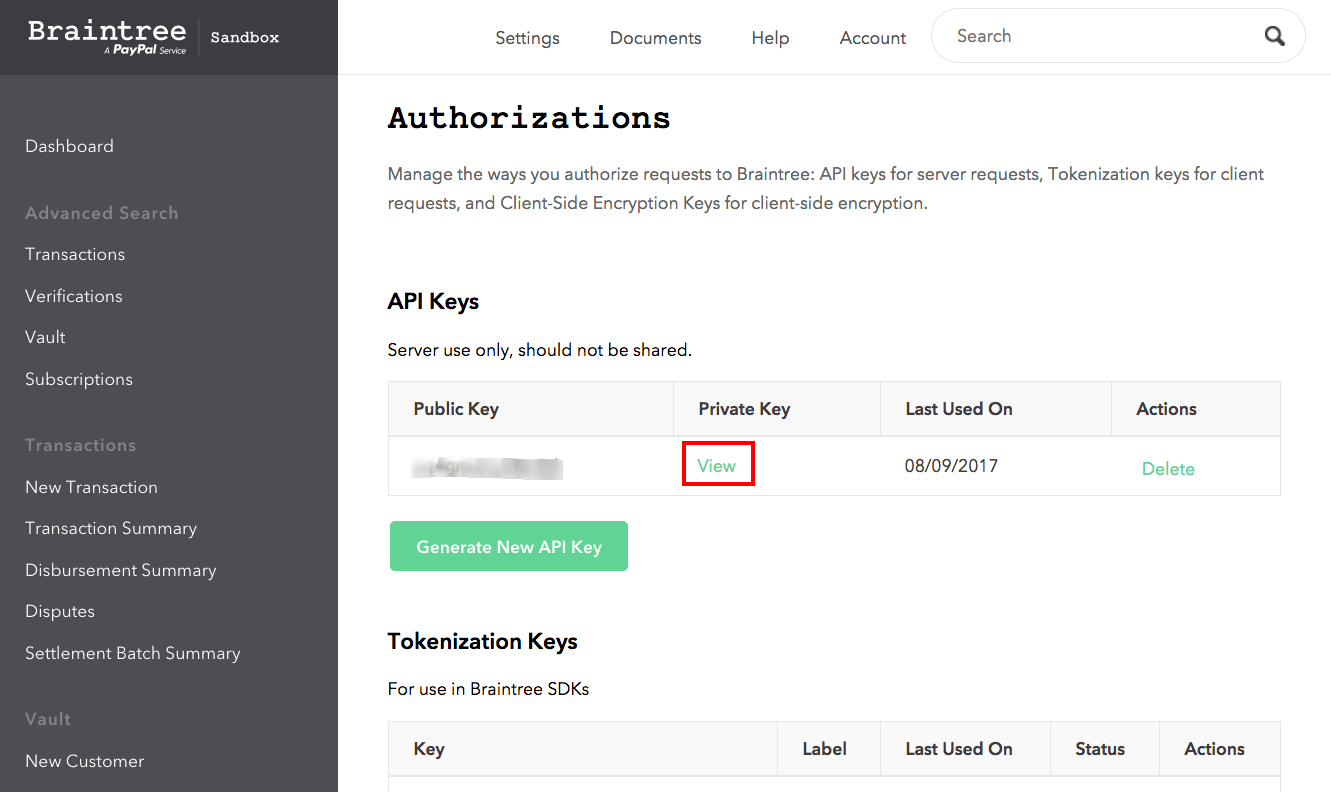
- Click View under the Private Key column to see your public and private keys, merchant ID, and environment
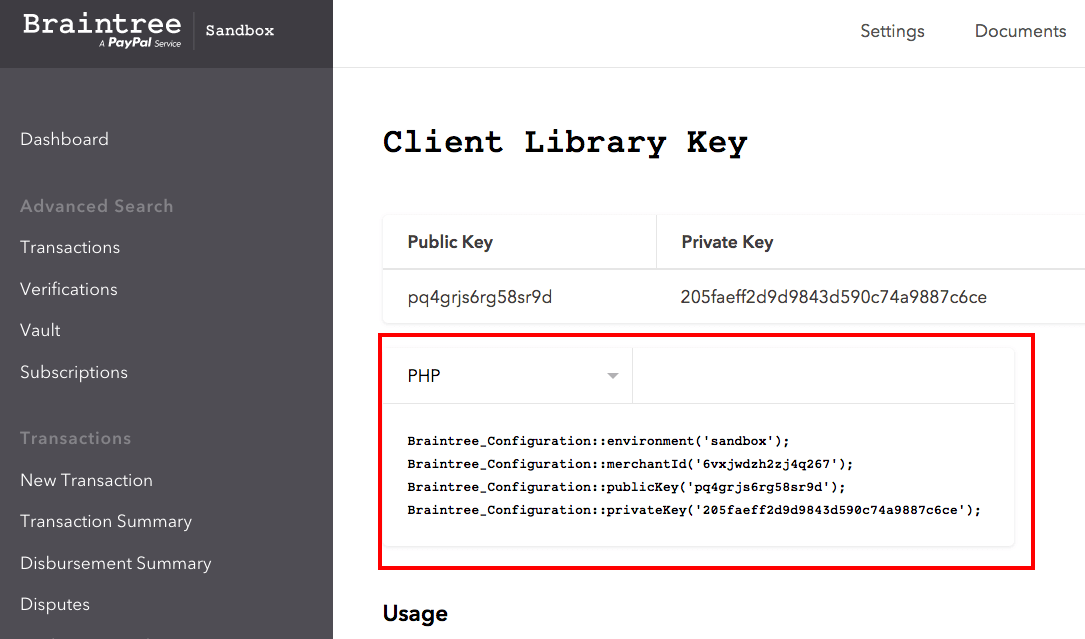
Finally, go to “Applications/XAMPP/htdocs/donate”. Open the file “pay.php” with any text editor you are comfortable with. Then, replace the API keys with yours, that was demonstrated earlier in this tutorial:
Braintree_Configuration::environment('sandbox');
Braintree_Configuration::merchantId('YOUR_MARCHANT_ID');
Braintree_Configuration::publicKey('YOU_PUBLIC_KEY');
Braintree_Configuration::privateKey('YOUR_PRIVATE_KEY');
That’s it! You’ve just completed the configuration of your backend. Isn’t it easy?
Perform Transaction
In the file ViewController.swift, you’ll notice that we specified an endpoint of /braintree/pay.php in the sendRequestPaymentToServer function on the client-side. So, on the server side, let’s define this endpoint and process the payment.
$paymentMethodNonce =  $_POST['payment_method_nonce'];
$amount = $_POST['amount'];

$result = Braintree_Transaction::sale([
  'amount' => $amount,
  'paymentMethodNonce' => $paymentMethodNonce,
  'options' => [
    'submitForSettlement' => True
  ]
]);

echo json_encode($result);
It is pretty easy to follow what’s going on here. We are performing one-time, immediate settlement sale transaction using the payment nonce sent to us by the client. Then the sale call returns the transaction result in the form of a JSON Object, which contains the transaction and information about the request.
Configuring / Obtaining a tokenization key
As mentioned in the section “How Braintree Works”, we will be using a tokenization key and skip the process of token request. The process is no longer mandatory with the new version of the Braintree SDK.
To obtain a tokenization key, follow these steps:
- Log into either the production Control Panel or the sandbox Control Panel, depending on which environment you are working in
- Navigate to Account > My user
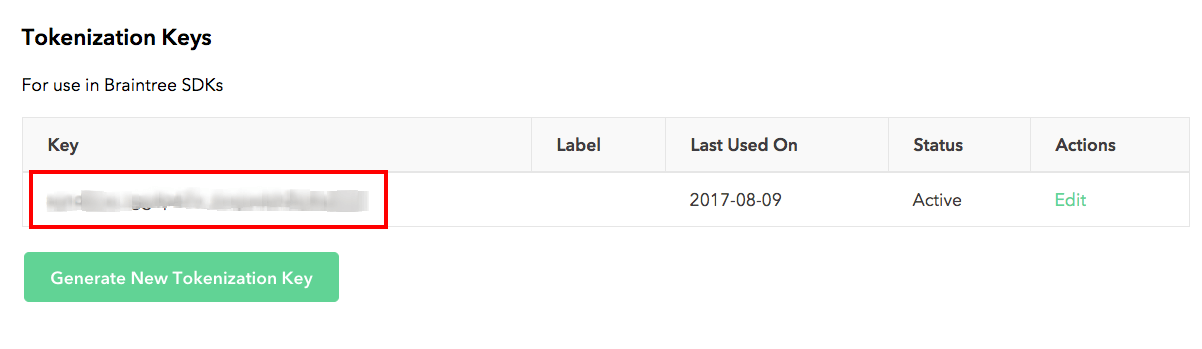
- Under API Keys, Tokenization Keys, Encryption Keys, click View Authorizations
- You should see your key under the Tokenization Key section. If no key appears, click Generate New Tokenization Key.
Open ViewController.swift and insert a line of code:
let toKinizationKey = "REPLACE_THIS_WITH_YOUR_TOKENIZATION_KEY"
Sending Nonce to the Backend for Payment Processing
Now that our backend is ready to process the payment, let’s switch back to Xcode and start sending the Nonce and the payment amount to our backend by initiating a HTTP POST request. Open ViewController.swift and insert the following code:
func sendRequestPaymentToServer(nonce: String, amount: String) {
        let paymentURL = URL(string: "http://localhost/braintree/pay.php")!
        var request = URLRequest(url: paymentURL)
        request.httpBody = "payment_method_nonce=\(nonce)&amount=\(amount)".data(using: String.Encoding.utf8)
        request.httpMethod = "POST"

        URLSession.shared.dataTask(with: request) { [weak self] (data, response, error) -> Void in
            guard let data = data else {
                print(message: error!.localizedDescription)
                return
            }

            guard let result = try? JSONSerialization.jsonObject(with: data, options: []) as? [String: Any], let success = result?["success"] as? Bool, success == true else {
                print(message: "Transaction failed. Please try again.")
                return
            }

            print(message: "Successfully charged. Thanks So Much :)")
            }.resume()
    }
As we are hosting our backend locally, the URL is set to http://localhost/donate/pay.php. If you host the script in a remote server, modify this URL to your own setup.
To perform the actual charge, Braintree requires us to submit the Nonce Payment Method and the payment amount. Once the parameters are configured, we submit an asynchronous POST request using URLSession. Either way, if the request succeeds or fails, we print out a message in the console.
When a certain user presses the Donate button, it invokes the pay action method:
@IBAction func pay(_ sender: Any) {
        let request =  BTDropInRequest()
        let dropIn = BTDropInController(authorization: toKinizationKey, request: request)
        { [unowned self] (controller, result, error) in

            if let error = error {
                print(error.localizedDescription)

            } else if (result?.isCancelled == true) {
                print(message: "Transaction Cancelled")

            } else if let nonce = result?.paymentMethod?.nonce, let amount = self.amountTextField.text {
                self.sendRequestPaymentToServer(nonce: nonce, amount: amount)
            }
            controller.dismiss(animated: true, completion: nil)
        }
        self.present(dropIn!, animated: true, completion: nil)
    }
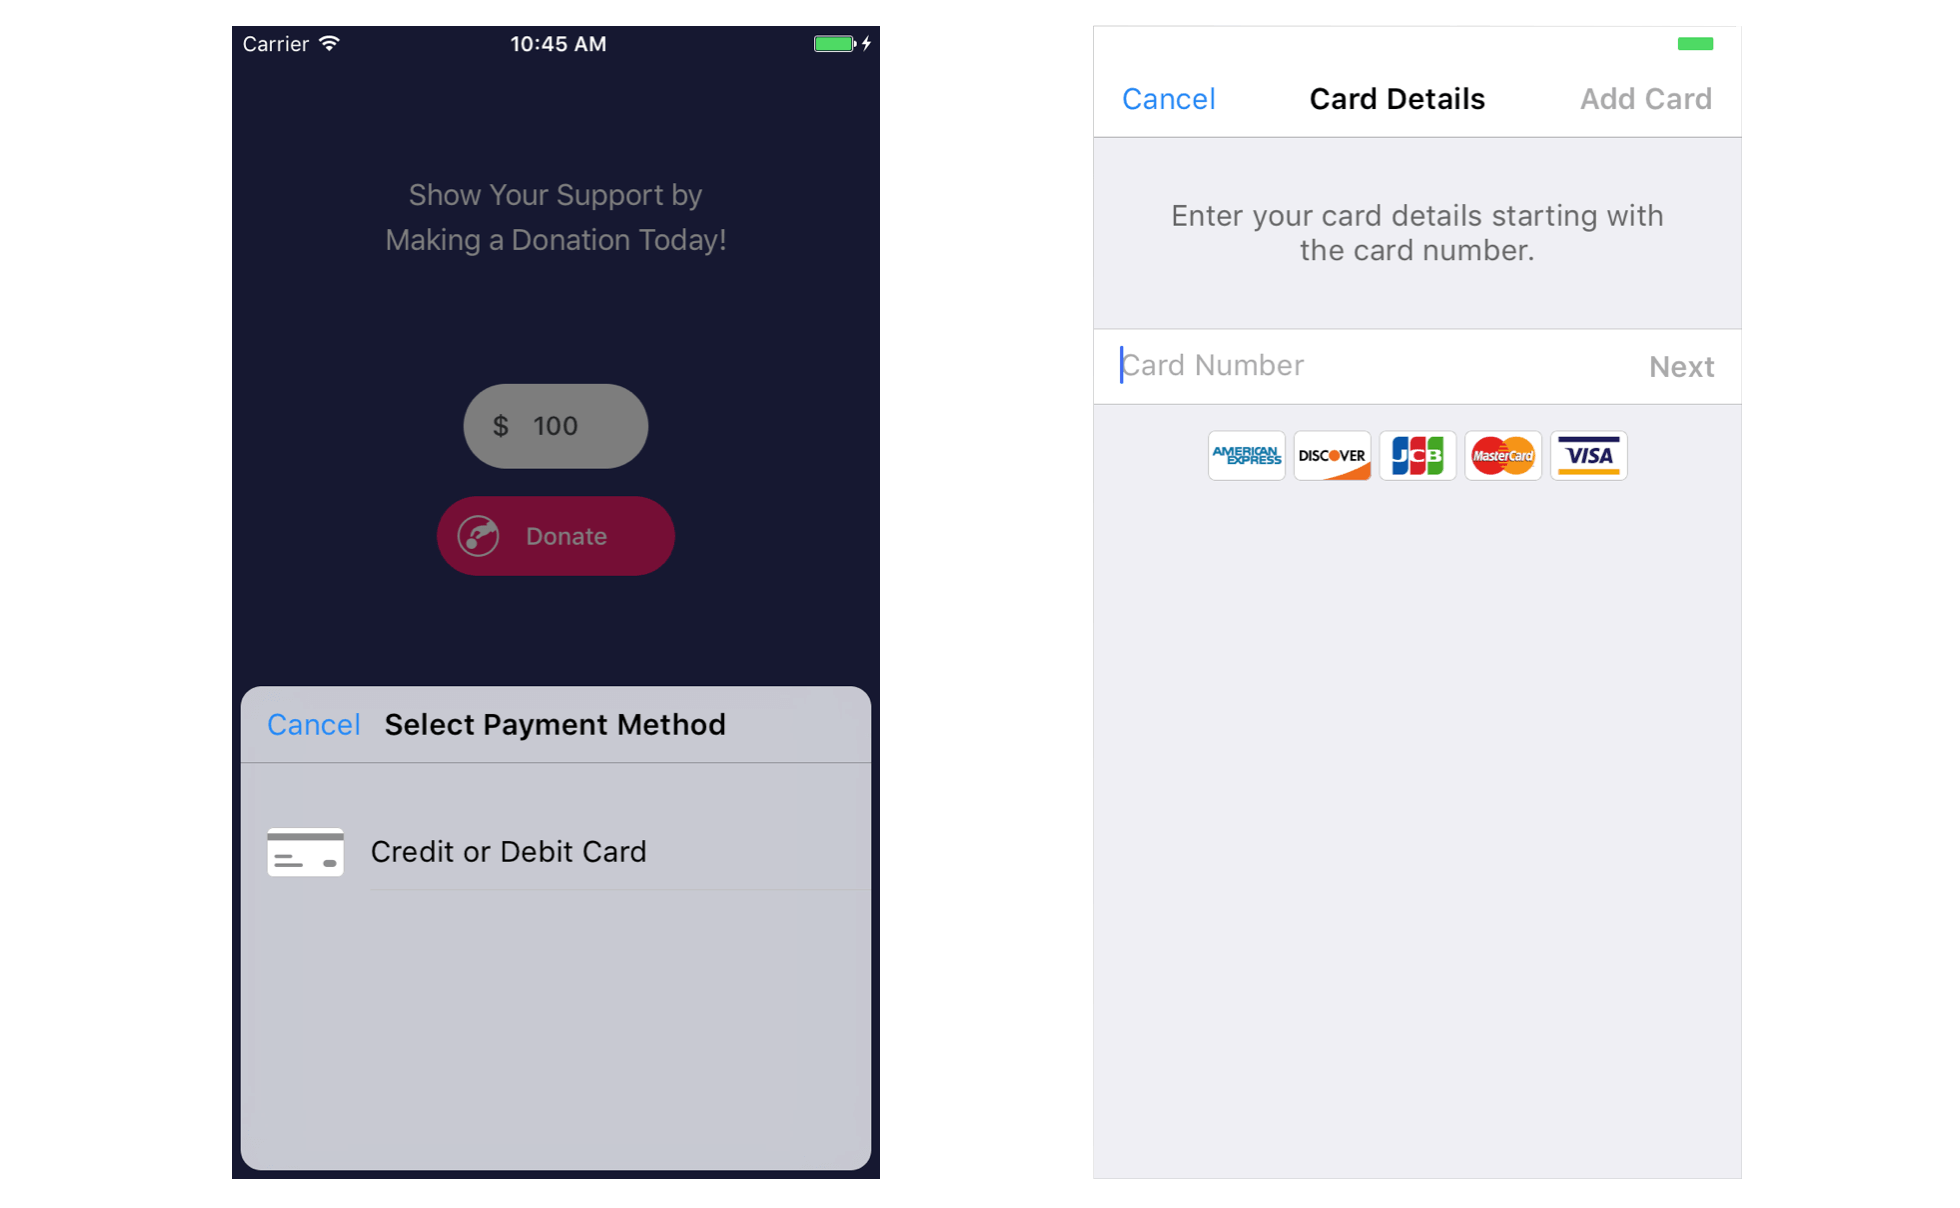
The exciting part here is that all we need to do is to create a BTDropInController and present it into your UI stack. The payment form and the workflow are automatically handled by the Braintree SDK. We just need to handle the result returned in the closure. The whole flow yields us the Nonce. We can then send it to our local server to perform the final transaction by calling sendRequestPaymentToServer.
That’s it! You can now run the app and perform a test transaction. For testing purpose, you can use the credit card number 4111 1111 1111 1111, along with any future expiration date (e.g 07/2019), to simulate a transaction.
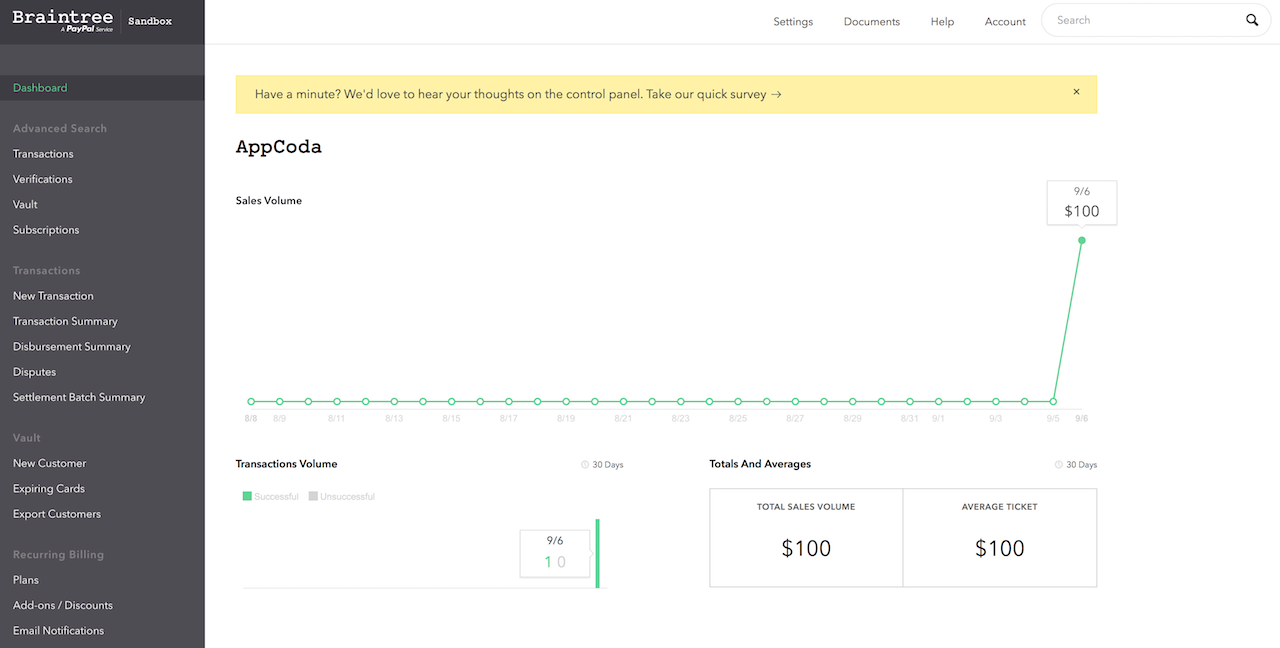
To further verify if the payment succeeds, you can check out Braintree’s dashboard:
Summary
At this point, you should know how to integrate Braintree in your app to accept credit card payment. Braintree provides many ways to accept payments through its APIs. You can refer to its official documentation for further information.
For reference, you can download the complete project on GitHub.. Please use Xcode 8.3.3 (or up) to run the project.
What do you think about the tutorial and Braintree? Let me know in the comment section if you would like me to cover PayPal integration using Braintree 😉


