

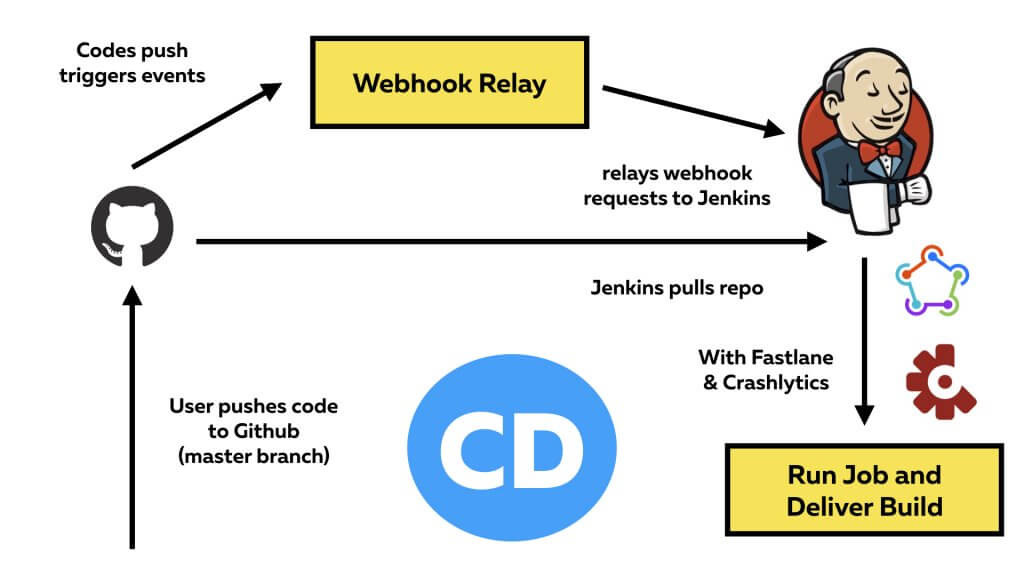
Testing has been an essential part of most medium-to-large projects, hence, it is important that every code change to our main branches triggers a full execution of test suite, so as to ensure that the change we made does not break any other test cases. This entire process is what we call Continuous Integration (CI). It is to validate the correctness of code changes and to quickly identify integration errors.
After receiving a green light from CI, the next step is to ensure delivery of the new software that consists of new features and/or bug fixes. This is what we call Continuous Delivery. As the test suite was already taken care of by CI, here we run scripts to sign certificates (in Xcode/iOS contexts), and perform archives with third-party tool like FastLane to trigger a deployable software that can be sent to users’ emails for immediate testing.
What is Jenkins?
Jenkins provides us seamless ways to set up a CI/CD environment for almost any combination of code languages and source code repositories using pipelines. It is an open source automation server which can be used to automate tasks related to building, testing, and delivering or deploying software. It is also an essential tool that aid the DevOps teams, which is getting more popular nowadays due to the increasing amount of projects we manage at a given period, to ensure their high quality deliverables. Jenkins has plugins that integrates with third-party source-controllers like Github and BitBucket.
What is Fastlane?
FastLane is a Ruby-written CD tool for releasing mobile apps (iOS/Android), eliminating tedious tasks for you. Due to its earlier development for the iOS ecosystem, we can see more functionalities made available to iOS than Android.
Pre-requisites
To go through this tutorial, I assume you have equipped yourself with the following knowledge and tools:
- Some basic knowledge in building iOS projects.
- Some Unit-Testing knowledge with Quick & Nimble in Swift.
- Some Web Hosting knowledge.
- A mac machine to follow this tutorial.
- A developer account to generate certificates.
- Patience
Setting up this entire process is time-consuming and tedious. It was through a lot of trials and errors that I could piece everything together to come out with this tutorial. At the time of writing, there might be updates coming in and the content might be obsolete. Do compare the version upgrades this arises and handle accordingly. Don’t hesitate to drop me a comment so I could credit you and update this tutorial as well to benefit the rest! Thank you 🙂
What will you learn?
You will learn a lot about CD and CI by going through this tutorial including:
- How to set up Jenkins 2.121.3 (Java 8).
- How to set up Fastlane.
- How to manage your CI with Jenkins + Github.
- How to manage your CD with Jenkins + Github + Fastlane.
- How to set up CI/CD for your project.
- How to use Webhook Relay to hook Github with Jenkins.
Set up Jenkins
Let’s start off by downloading Jenkins on the machine you would like to host CI/CD. I personally prefer the Long-term Support (LTS) as a starter. As it is written fully in Java, you will need the appropriate version of Java to launch the .war file later on.
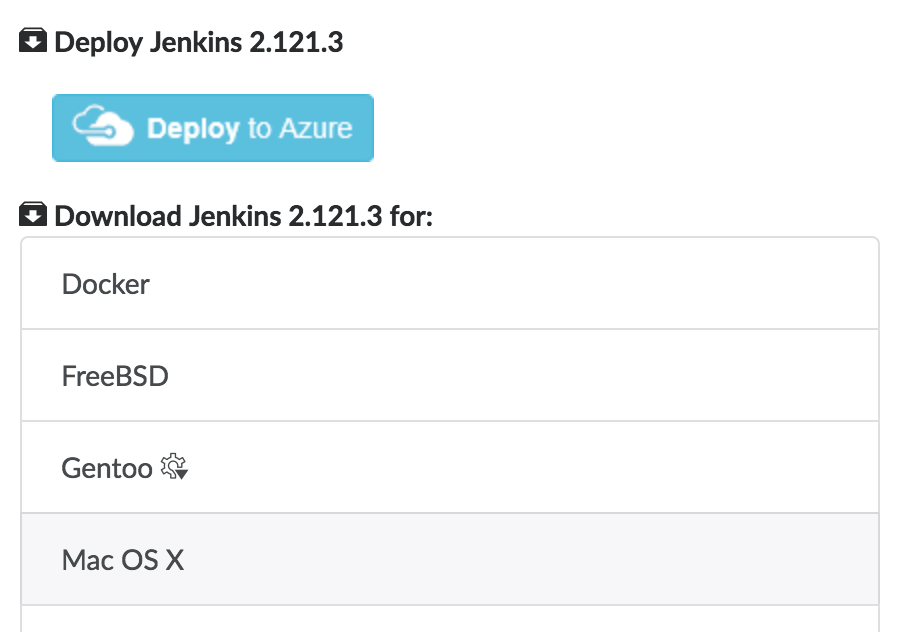
Once the download is completed, unpack the package and install its contents. It will automatically install Jenkins into Applications folder. As Jenkins 2.121.3 is written in Java 8, we will need the same version to execute the war file. Do a quick check of the version currently in your path by running:
java -version
For me, I have:
java version "9.0.1"
Java(TM) SE Runtime Environment (build 9.0.1+11)
Java HotSpot(TM) 64-Bit Server VM (build 9.0.1+11, mixed mode)
Hence, I will need to change to the supported version. You could download it here.
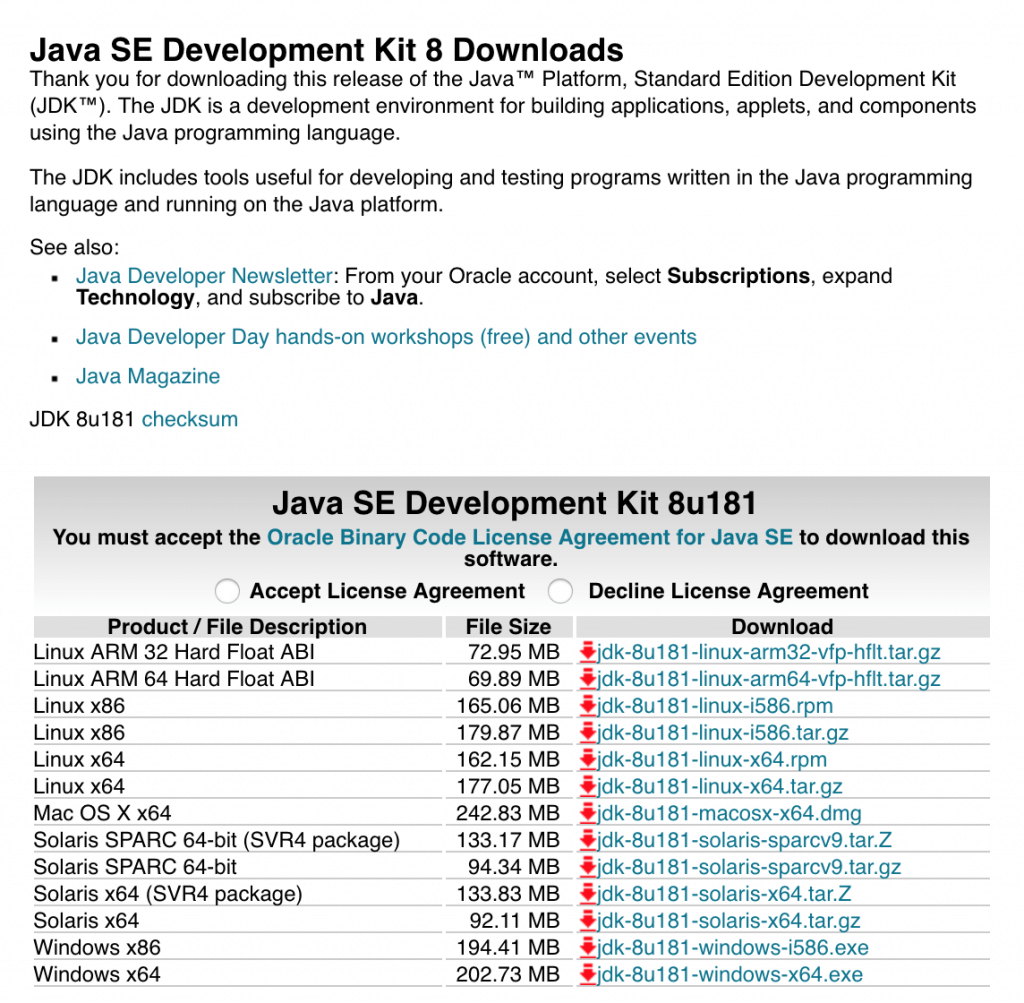
After installing of Java 8 JDK, run:
/usr/libexec/java_home -V
Please ensure you have output similar to the following:
Matching Java Virtual Machines (2):
    9.0.1, x86_64:  "Java SE 9.0.1" /Library/Java/JavaVirtualMachines/jdk-9.0.1.jdk/Contents/Home
    1.8.0_181, x86_64:  "Java SE 8" /Library/Java/JavaVirtualMachines/jdk1.8.0_181.jdk/Contents/Home

/Library/Java/JavaVirtualMachines/jdk-9.0.1.jdk/Contents/Home
Now let’s set our default java version to 1.8 to run our jenkins:
export JAVA_HOME=`/usr/libexec/java_home -v 1.8`
Run Jenkins war file:
java -jar jenkins.war
Viola! You now have your jenkins running on localhost:8080!

As seen on the first screen, just copy the url and run vi /Users/[computername]/.jenkins/secrets/initialAdminPassword in terminal to retrieve your password (or you could get it from console log in terminal). Follow the wizard and:
- Install suggested plugins
- Create a User Admin Account
- Set url (we can use
http://localhost:8080/for this tutorial)

You should be greeted with Jenkins Dashboard and ready to start creating CI/CD jobs for our project!
Install Jenkins Plugins (Github & Xcode)
To enable Jenkins receive a notification from Github and run a job, it will require a plugin to be installed in our Jenkins server.
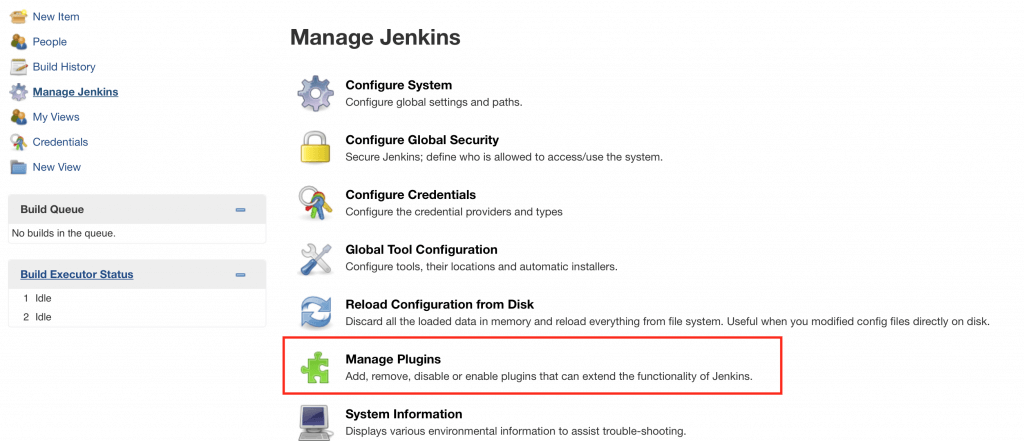
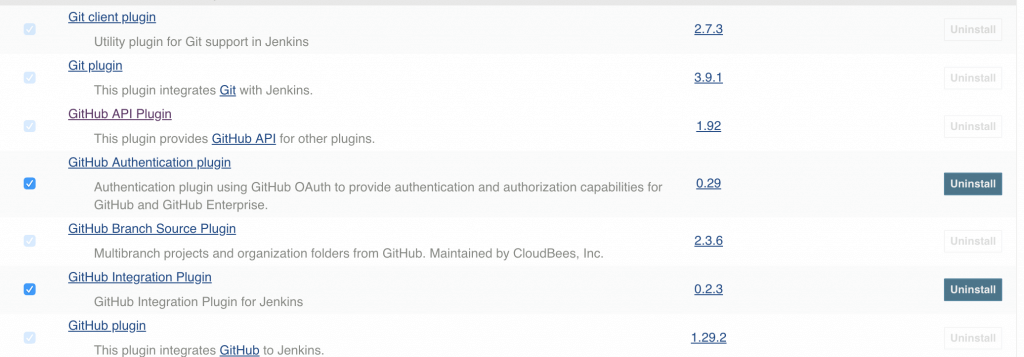
- Go to your plugins manager
- Find and install GitHub plugin
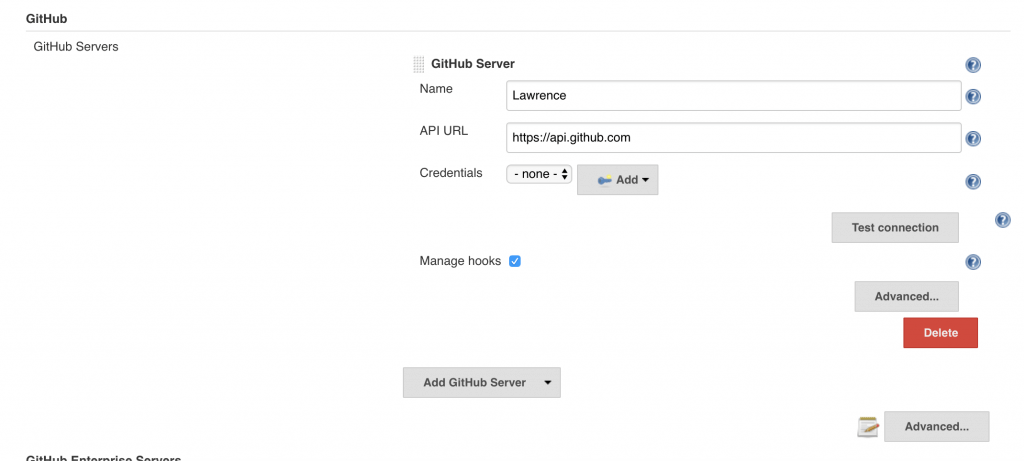
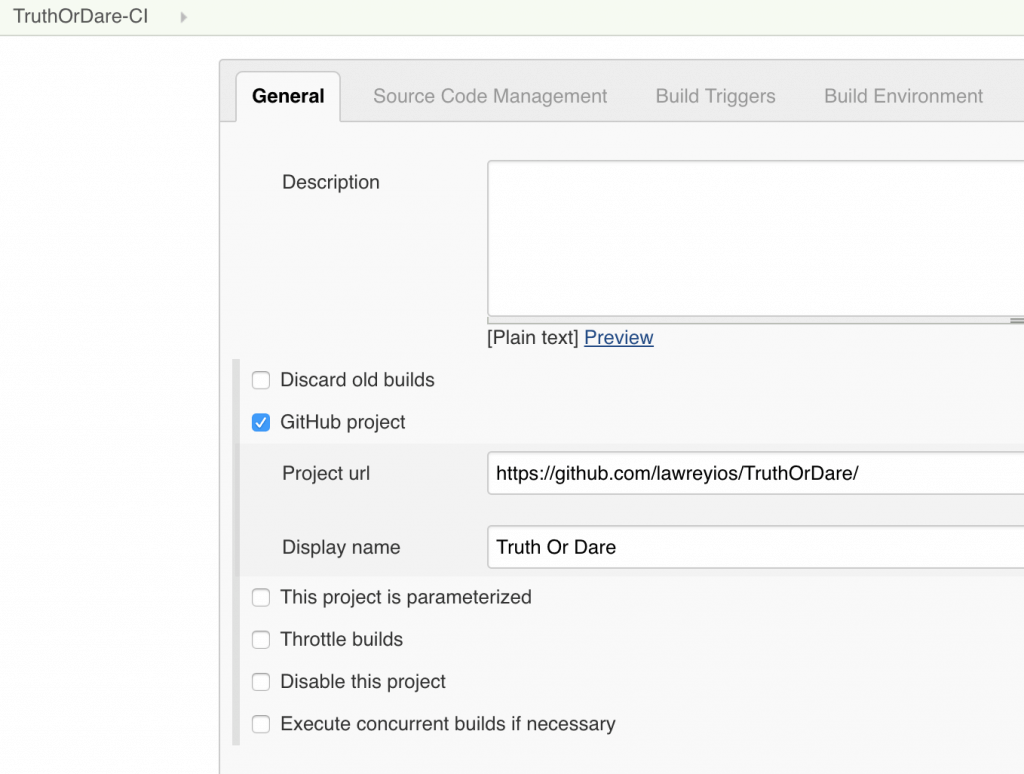
- Once installed, head over to Configure System and look for Github Server to add Default Github Servers. We dont have to add credentials here since we will be using public repo.
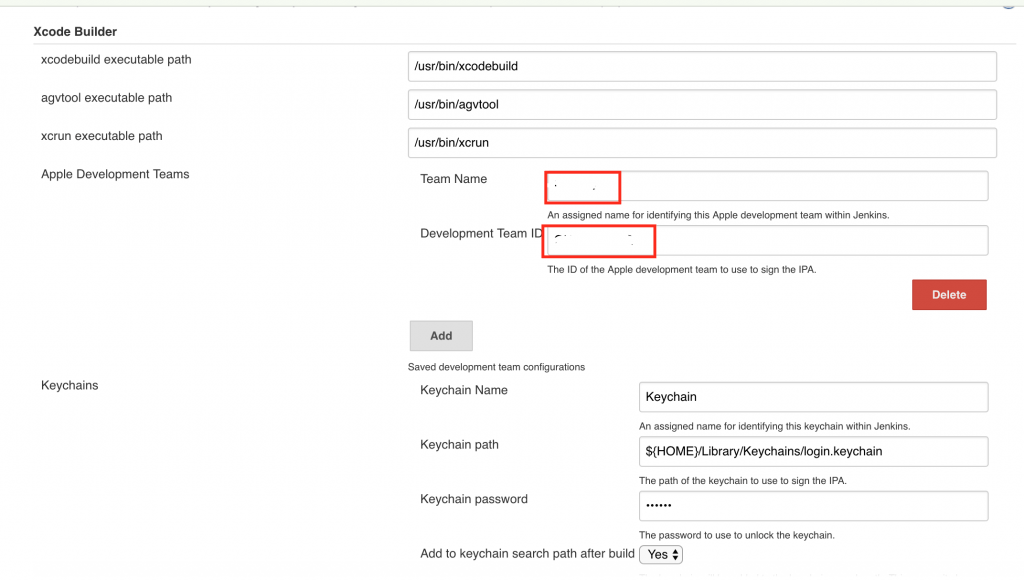
- Also update your Xcode Builder settings and ensure you have the appropriate plugins.
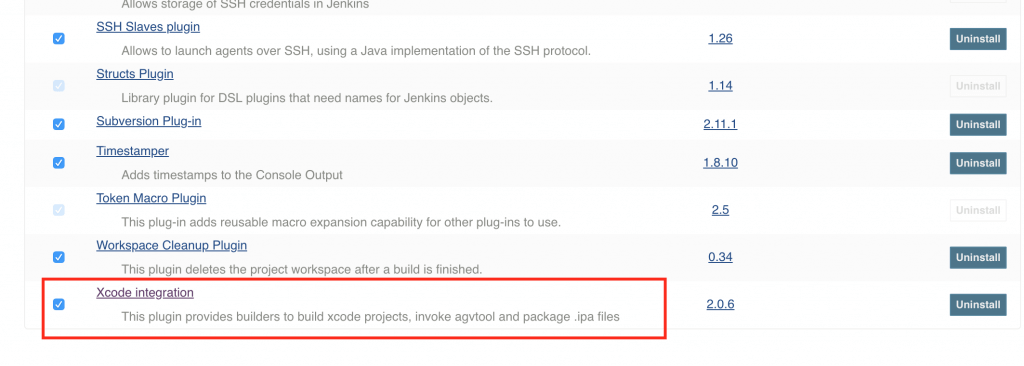
- Install Xcode plugin.
Create Jenkins Job
Now, go back to our Jenkins Main Dashboard and create 2 new jobs.
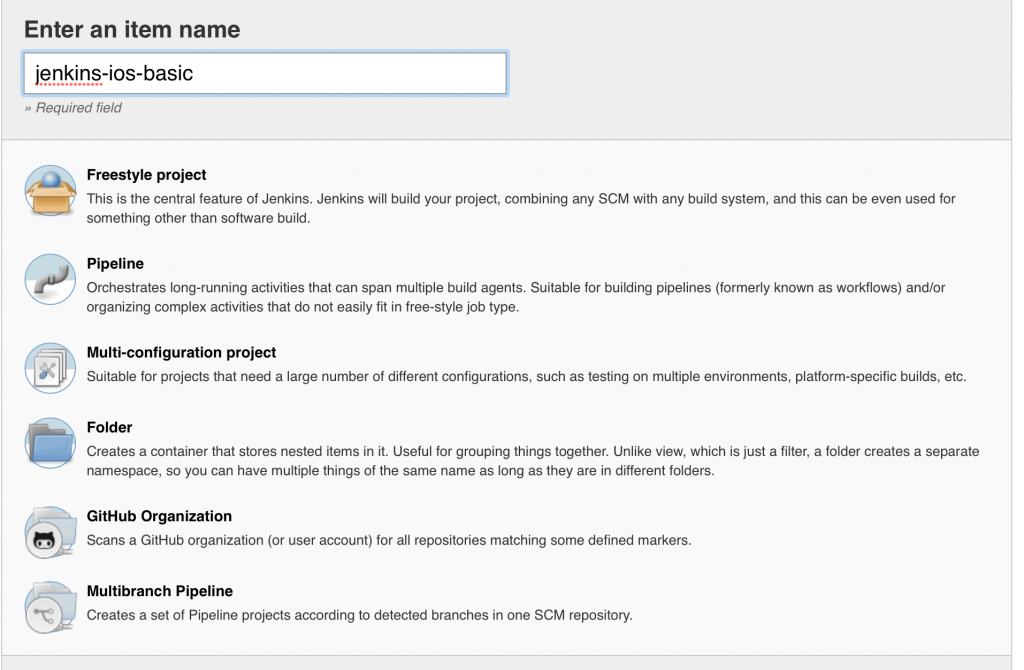
- TruthOrDare-CI (Freestyle Project)
- TruthOrDare-CD (Freestyle Project)
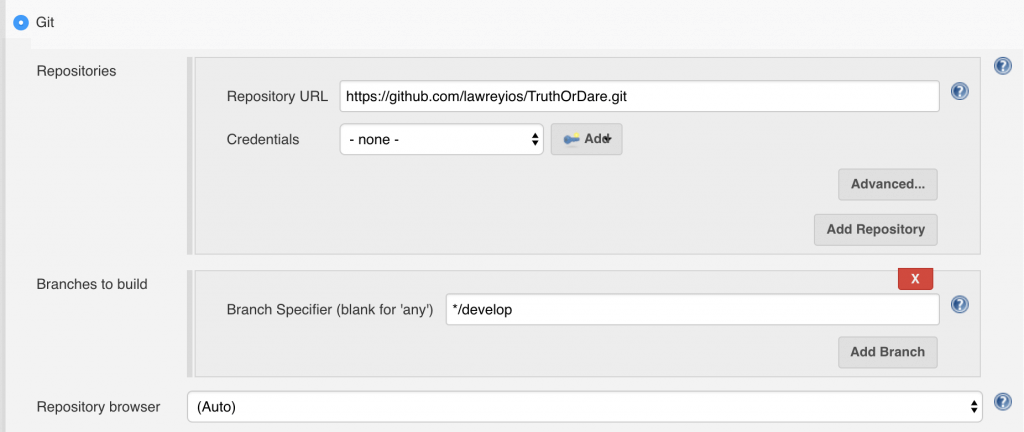
Let’s just configure our TruthOrDare-CI first by heading over to Source Code Management and enable Git. Copy your public github repo url in. It will look something like https://github.com/[user]/[project].git
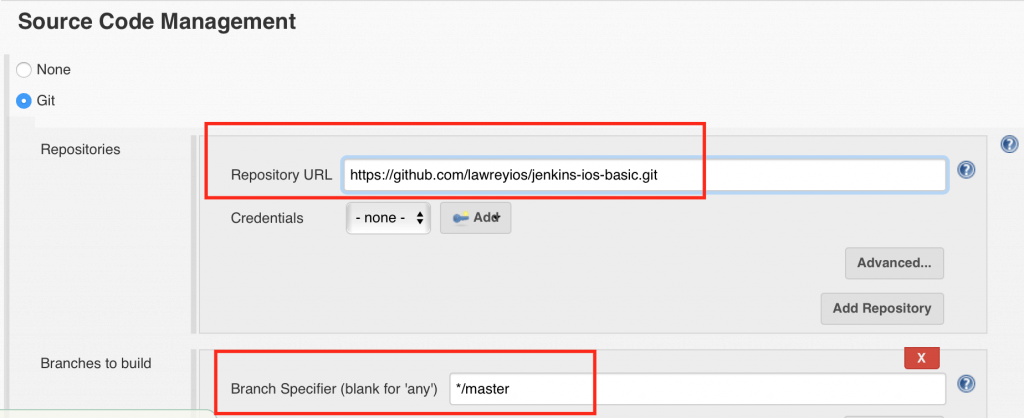
We will change our Branch Specifier here from */master to */develop.
- We will run
CIfor every change made todevelopbranch. - We will run
CDfor all CI change(s) made tomasterbranch.
If we made multiple code changes to develop branch, we do not want to generate a build for each code change. Most of the time a feature consists of multiple code changes (except bug fixes). Once all these code changes have their CI passed, we will merge them into master where it will run CD and push a build to your stated emails.
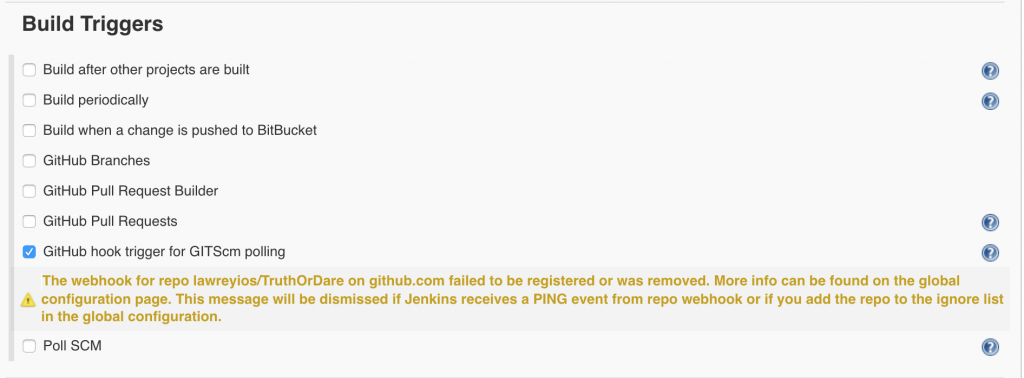
Next we will toggle on GitHub hook trigger for GITScm polling. This is the main switch that allows Jenkins to respond to webhook where it identifies which repo is changed and then run jobs.
Configure your Webhook
As mentioned, we will now set up our webhook by following this installation steps.
Once you have CLI downloaded, use it:
relay login -k token-key-here -s token-secret-here
and then start forwarding your webhook to Jenkins:
relay forward --bucket github-jenkins http://localhost:8080/github-webhook/
Once you see the following message, this means your webhook relay succeeded!
https://my.webhookrelay.com/v1/webhooks/6edf55c7-e774-46f8-a058-f4d9c527a6a7 -> http://localhost:8080/github-webhook/
Starting webhook relay agent...
Woohoo! You deserve a pat on your back for coming this far!
Paste this url in a notepad or something, you will need it soon.
Now add this webhook into Jenkins.

By now you should have 2 terminals opened:
- Running Jenkins
- Running Webhook Relay
Download Xcode project and Push to Github
For simplicity, I will be providing a sample project here call Truth or Dare. I encourage you to create a new public repository yourself and push this code to a repo of your choice to follow this tutorial closely. This project integrates with Quick & Nimble using Carthage to run unit tests as part of CI’s process to ensure test suite always passes before a merge can be done. So go ahead and push this to Github.
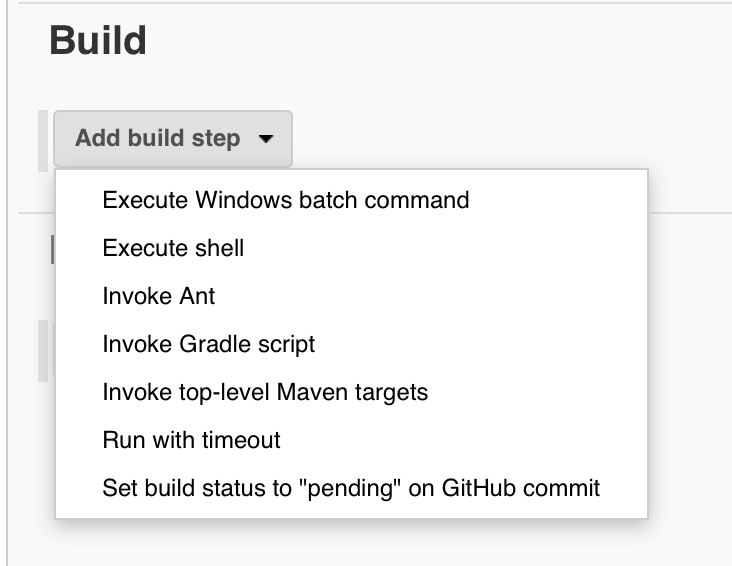
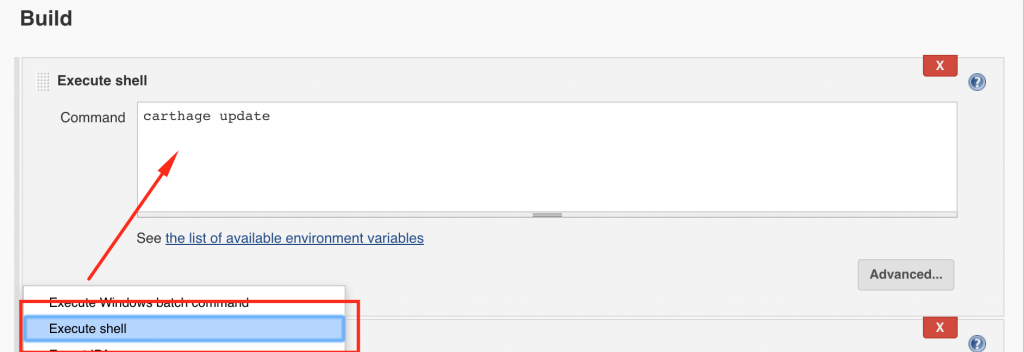
As we are using Carthage, we will need to add carthage update command in Jenkins to build the folder required in Jenkins. So go ahead and add this command as another build step in both Jenkins jobs.
Do remember to set up your own App ID in your Apple Developer Portal. Generate the certificates so our Jenkins jobs can build successfully.
Use Webhook in Github
Now grab the webhook relay url you generated just now, which looks something like https://my.webhookrelay.com/v1/webhooks/6edf55c7-e774-46f8-a058-f4d9c527a6a7, and paste it in your repo’s webhook section.
That’s it! The agent is running and forwarding requests.
Set up Fastlane
Now let’s set up Fastlane by running:
sudo gem install fastlane -NV
Then, head to TruthOrDare‘s project folder and run:
fastlane init
🚀🚀🚀 Your Fastlane is initialised! 🚀🚀🚀
It’s time to up the speed here since our Fastlane is now activated! Let’s choose 4 🛠 Manual Setup. After this you should have generated:
- AppFile
- FastFile
Open Fastfile in your favourite TextEditor and paste this code in:
# This file contains the fastlane.tools configuration
# You can find the documentation at https://docs.fastlane.tools
#
# For a list of all available actions, check out
#
# https://docs.fastlane.tools/actions
#
# For a list of all available plugins, check out
#
# https://docs.fastlane.tools/plugins/available-plugins
#
# Uncomment the line if you want fastlane to automatically update itself
# update_fastlane
default_platform(:ios)
platform :ios do
desc "Description of what the lane does"
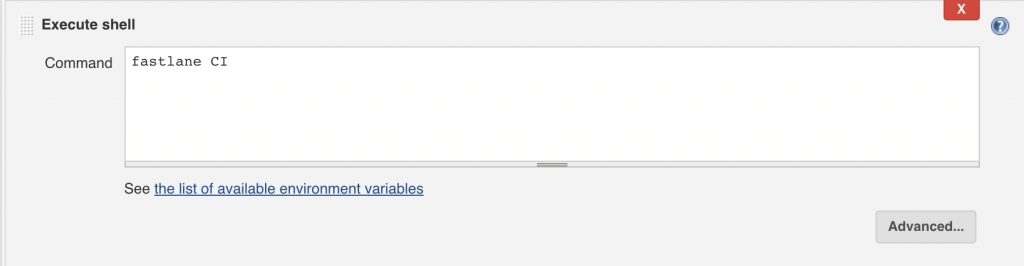
lane :CI do
run_tests(project: "TruthOrDare.xcodeproj",
devices: ["iPhone 6s"],
scheme: "TruthOrDare")
end
lane :CD do |values|
gym(scheme: 'TruthOrDare', project: "TruthOrDare.xcodeproj", clean: true, silent: true, include_bitcode: false, export_method: 'ad-hoc')
emails = values[:test_email] ? values[:test_email] : ['[email]'] # You can list more emails here
groups = values[:test_email] ? nil : nil # You can define groups on the web and reference them here
crashlytics(api_token: '[CRASHLYTICS_API_TOKEN]',
build_secret: '[CRASHLYTICS_ORG_SECRET]',
emails: emails,
groups: groups,
notes: 'Distributed with fastlane', # Check out the changelog_from_git_commits action
notifications: true) # Should this distribution notify your testers via email?
end
end
You will need to fill in 3 items:
- Email to receive build from Crashlytics.
- App API Token from here.
- App’s Organisation’s Secret from the same dashboard.
Here, we have created 2 lanes:
fastlane CIto run tests on our Jenkins.fastlane CDto build and push build to Crashlytics.
So let’s go back to Jenkins and include this command as our next build step.

Phew, take a deep breath
Let’s recap what we just did:
- We set up our CI/CD Jenkins on machine or localhost.
- We did a Webhook Relay/Forwarding to a public url.
- We created and pushed our Xcode Project to a public Github repo.
- We set up the repo’s webhook using the public url.
- We set up fastlane on our repo.
Ready? Get Set … Go!
Congratulations! You have completed setting up the automation process! If you encounter some issues as the automation runs, don’t be dismayed, drop a comment below and we can solve it together. The results may be different from machine to machine, but the concept is this!
So let’s checkout from master branch to our develop branch and make a change to the code base. Replace our truths array with this:
//Truths
    private let truths = [
        "What are you most self-conscious about?",
        "What would you do if you were the sex for a month?",
        "What is the most expensive thing you have stolen?",
        "What is the most childish thing you still do?",
        "Have you ever let someone take the blame for something you did?"
    ]
...
- Do an add:
git add TruthOrDare/ViewModel.swift. - Do a commit:
git commit -m "Add Comment Truths" - Do a push:
'git push
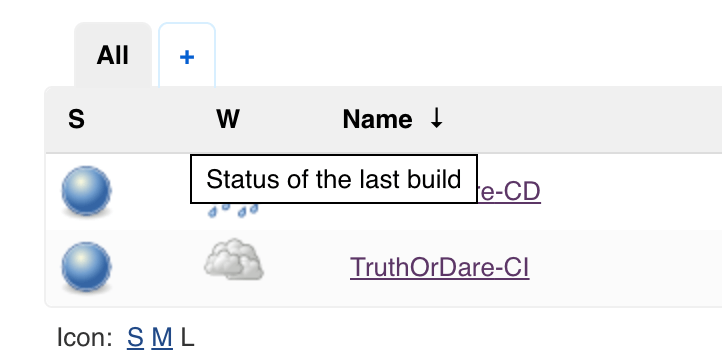
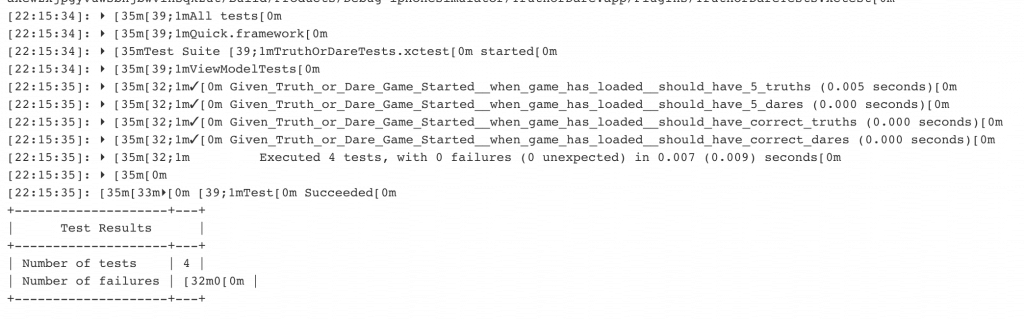
Go to Jenkins now. After a few seconds, you should see your CI job running. Take a look at the console log and see if everything goes well.
OH NO! The status turns red because our test case failed. The test case results point us to the fact that one of the truth is being edited! You do not want unauthorised code changes!
This is one beauty of CI, where it always ensures the correctness of the app especially when the app grows, it’s easy to alter other codes that you have written decades ago. A break in the CI or running test case locally will give you a hint.
Try putting back the code and push the code again.
You should see the Status turned Blue this time!
Let’s add one more truth and one more dare so we could run our CD.
- What is your deepest darkest fear? (Truth)
- Serenade the person on your right. (Dare)
Don’t forget to make changes to your test case! Now do a:
git add .git commit -m "Add new Truth and Dare!"git push
Let the CI go through.
Running our CD
Once CI succeeded, lets run our CD! Remember that we are observing master branch for CD? Go ahead and
git checkout mastergit merge developgit push
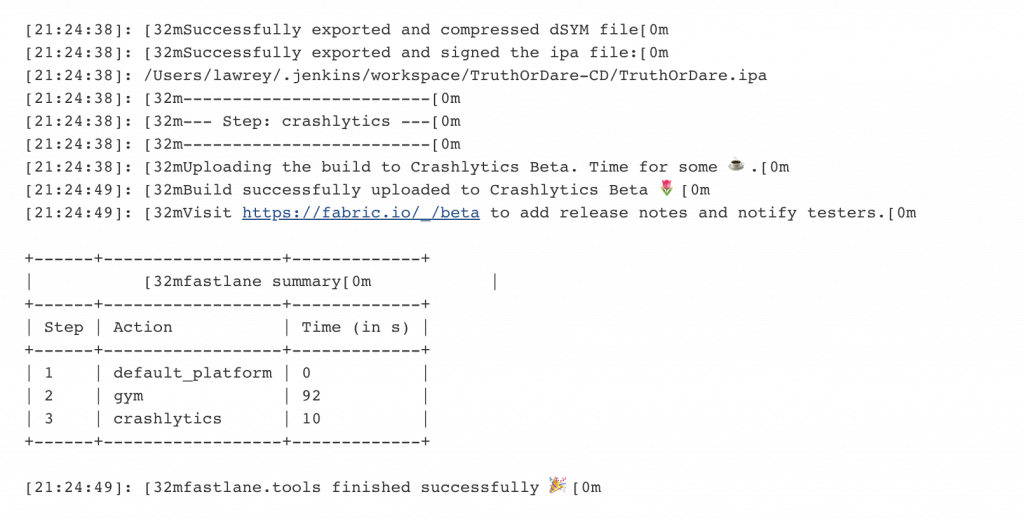
As our master branch still holds the codebase with only 5 Truths & Dares, we need to merge in changes we made from develop. Once changes is applied, CD will start running and viola! You will receive the build at your email!
You might need to run it twice if your device is not registered with Crashlytics. You can trigger the build manually by clicking
Build Now.
Recap
So what have we achieved?
- We learnt in theory how CI/CD works from code commit to release of a build.
- We learnt how to Setup Jenkins.
- We learnt how to Setup Webhook.
- We learnt how to Setup Fastlane & Crashlytics.
- We learnt how to Integrate and Automate the entire process.
We all deserve a pat on our back, one for completing the write up for this tutorial, and one for you to follow through this lengthy process to get your CI/CD up and running!
Wrapping Up
If you have any questions about the tutorial, please leave your comments below and let me know.
If you would like me to write follow-up tutorials with more advanced CI/CD techniques like caching Carthage or integrating with Pull Requests, do not hestitate to drop me a comment!


