

In case you weren’t aware, Apple’s Worldwide Developers Conference happened this week! It was a big event with a lot of improvements to both the software and the current frameworks Apple currently has. One of these frameworks is Create ML.
Last year, Apple introduced Core ML: a quick way for you to import pre-trained machine learning models into your app with as little code as possible! This year, with Create ML, Apple is giving us developers the ability to create our own machine learning models straight into Xcode Playgrounds! All we need is some data and we’re good to go! As of right now, Create ML allows text, images, and tables as data. However, since this constitutes for most ML applications, this should serve your purpose well! I’ll show you how to create a ML model with all 3 of these types of data.
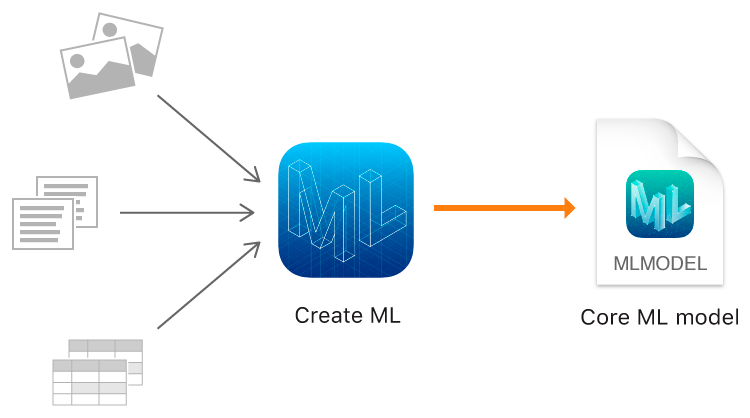
[Image source: Apple]
Why Create ML
You’re probably wondering, why should I prefer Create ML? This is because of what it’s capable of. Create ML harnesses the machine learning infrastructure built into the software. When you download iOS 12 or macOS Mojave, you are also downloading some machine learning frameworks. That way, when you create your own ML model, it can take up less space since most of the data is already on the user’s device.
Another reason why Create ML is so popular is because of its ease-of-use. All you need to do with Create ML is have an extensive dataset (either text or image), write just a few lines of code, and run the playground! This is far more simpler than the other popular tools out there like Tensorflow and Caffe. Those tools require lots of code and don’t have a friendly visual interface. Create ML is all built into Xcode Playgrounds so you get the familiarity and best of all, it’s all done in Swift!
Prerequisites
In this tutorial, I will only be showing you how to create your own ML model using Create ML. If you would like to learn how to import a Core ML model into your iOS app, you can find the tutorial here.
At the time of writing, iOS 12 and macOS Mojave is still in beta. To successfully run the tutorial, you will need to be running macOS Mojave (10.14) and the Xcode 10 beta. Let’s get started!
The Image Classifier Model
The Data
We’ll first get started on building an image classifier model. We can add as many images with as many labels as we want, but for simplicity, we’ll be building an image classifier that recognizes fruits as apples or bananas. You can download the images here.
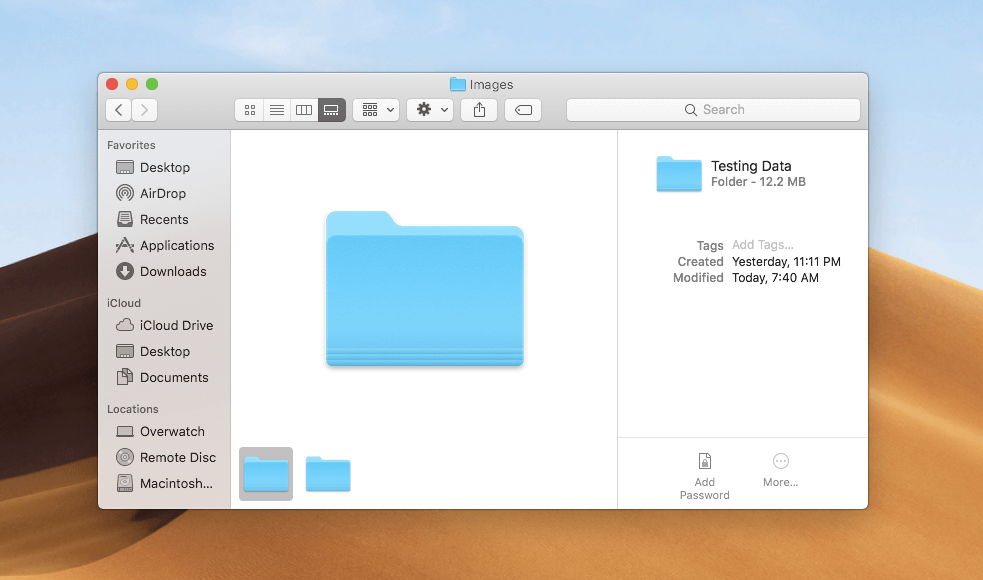
When you open the folder, you’ll notice two more folders: Training Data and Testing Data. Each folder consists of a mix between picture of apples and bananas. There are approximately 20 images of apples and 20 images of bananas in the folder called Testing Data and 80 images of apples and 80 images of bananas in Training Data. We will be using the images in Training Data to train our classifier and then use Testing Data to determine its accuracy.
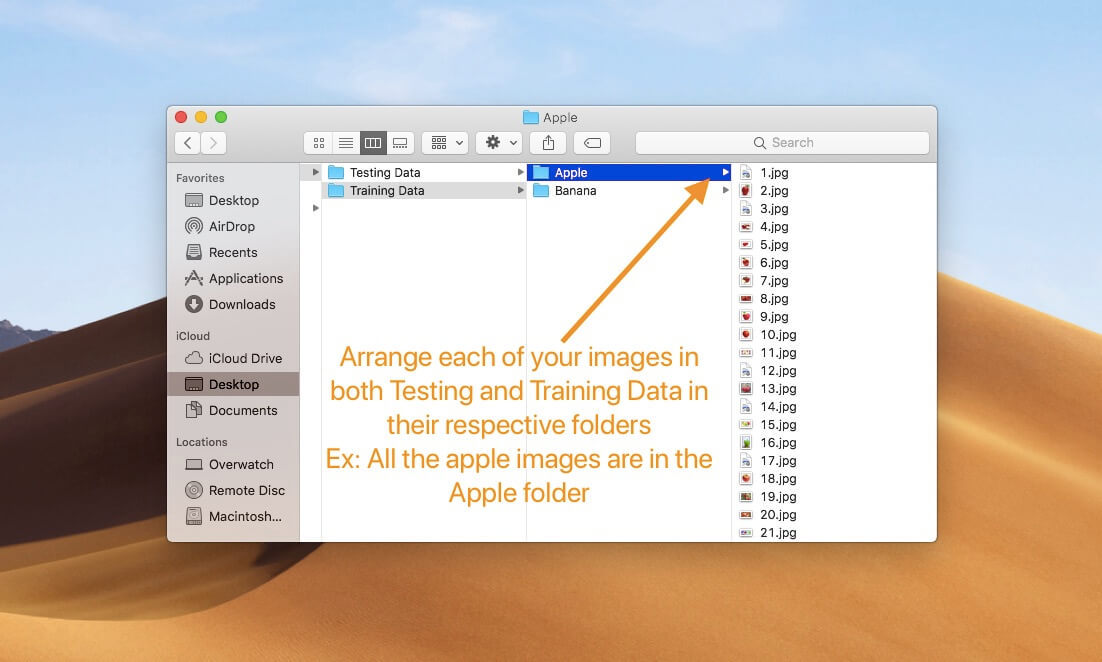
If you want to build your own image classifier, it is important that you split your dataset into 80-20. Approximately 80% of your images go to Training Data and the remaining head to Testing Data. That way, your classifier has more data to train off of. In each of these folders, put the images in their respective folders. Name these folders based on the category label of the images.
Now, let’s open Xcode and click on Get Started with a Playground. When you do this, a new window opens up. This is the important part: under macOS, select the Blank template as shown below.
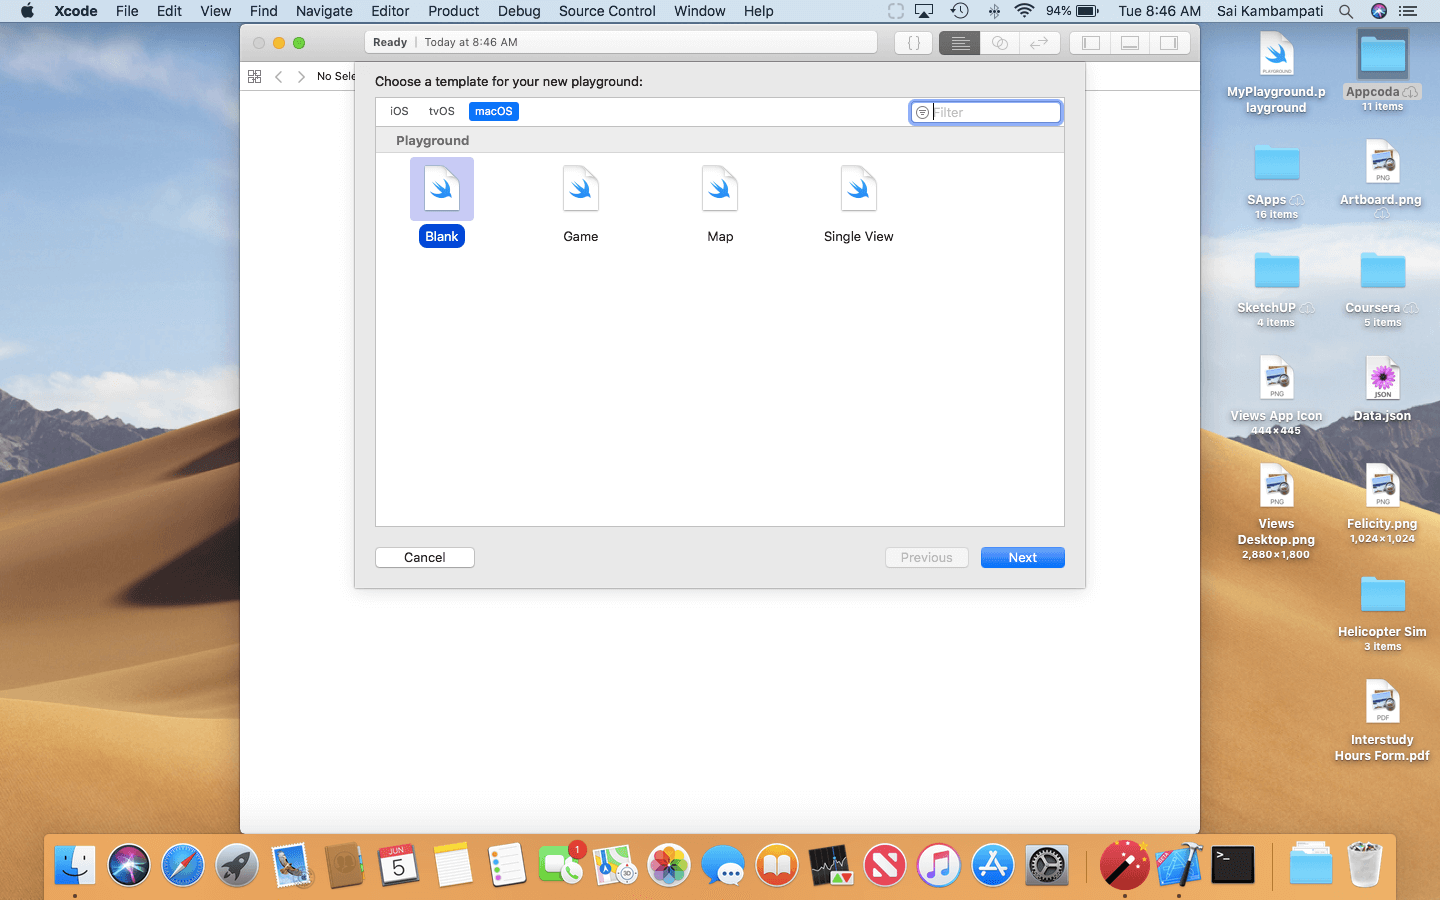
It is crucial that you select the Blank template under macOS and not iOS because the framework CreateML isn’t supported for iOS Playgrounds.
Name your playground and save it to wherever you want to. Let’s get coding now!
The Code
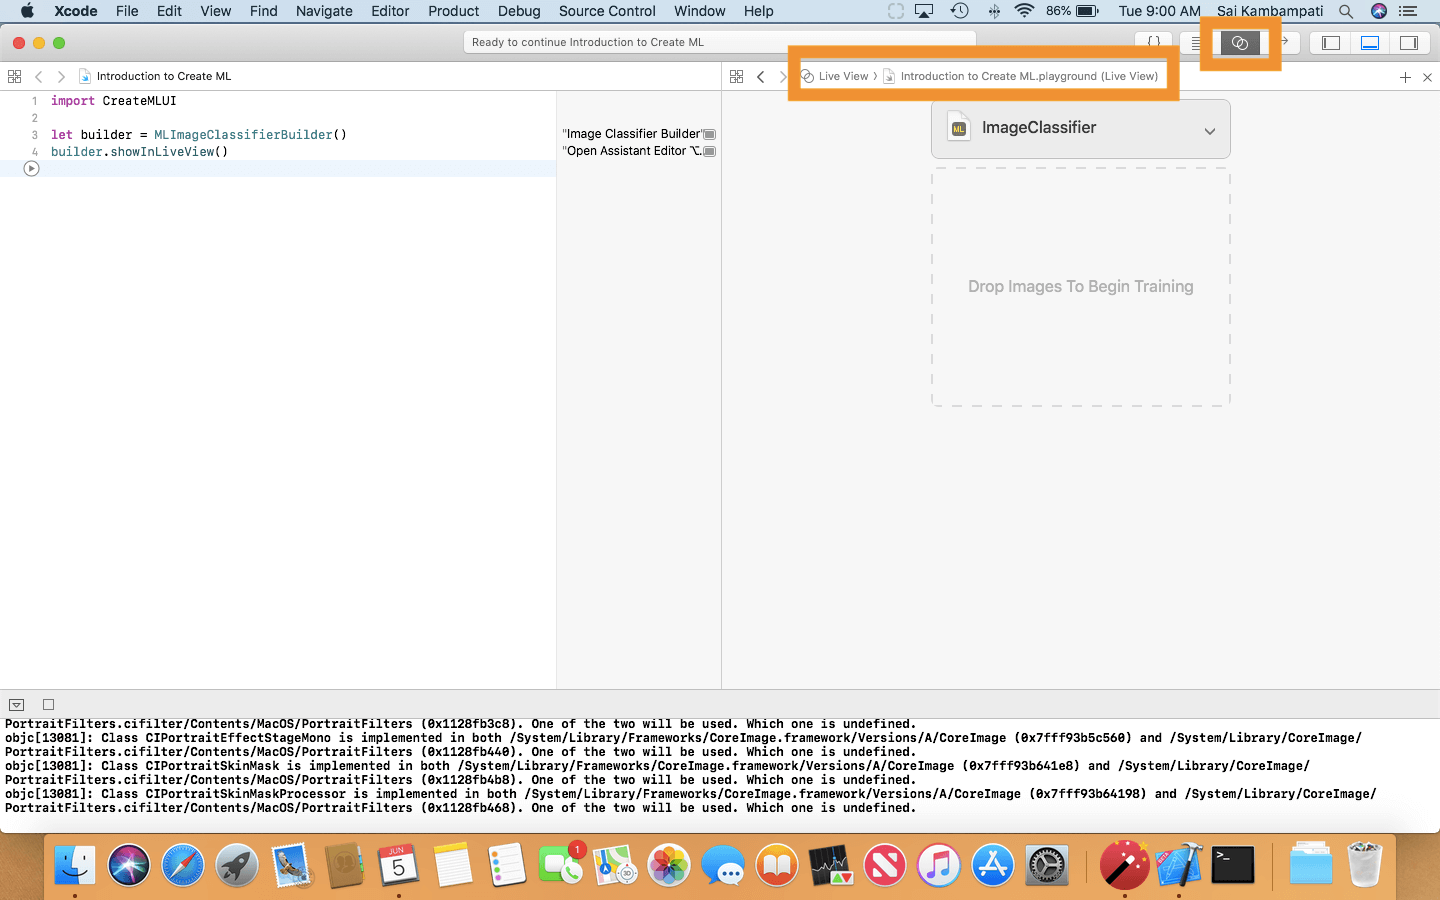
Now what I’m about to show you will blow your mind. All you need are 3 lines of code! Let me show you! Delete everything in the playground and type the following:
import CreateMLUI

let builder = MLImageClassifierBuilder()
builder.showInLiveView()
And that’s it! Make sure you enable the Live View feature in Xcode Playgrounds and you’ll be able to see the visual interface!
CreateMLUI is a framework just like CreateML but has a UI to it. As of now, CreateMLUI can only be used for image classification. Now, let’s see how we can interact with the UI! You’ll see it’s quite simple!
The User Interface
In the Live View, you’ll see that we need to drop images to begin! This is quite simple. Take the Training Data folder, and drop the entire folder into the area.
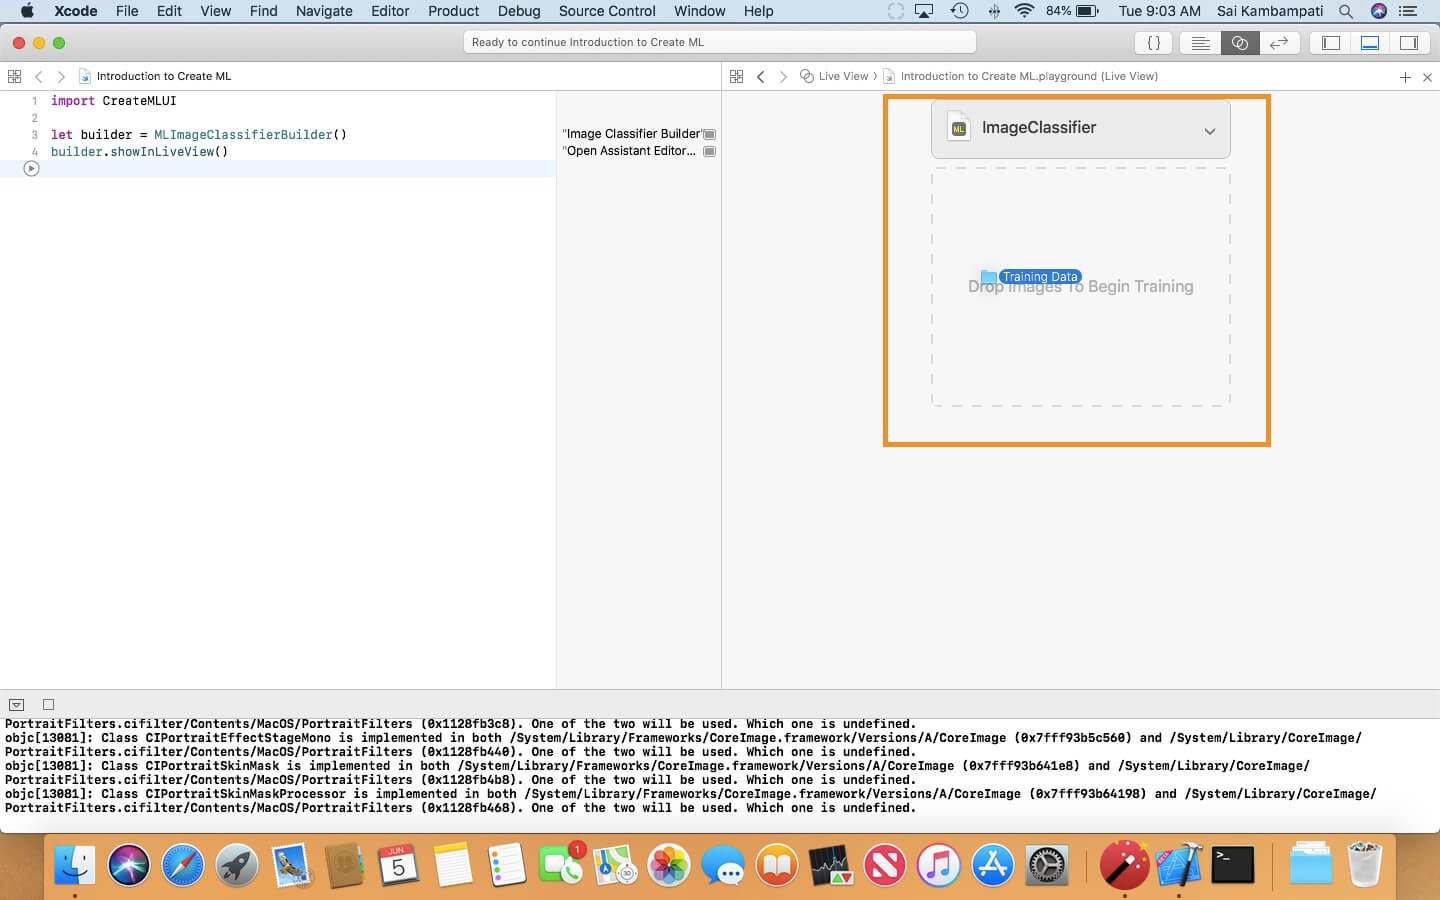
The moment you drop the folder, you’ll see the playground start to train the image classifier! In the console, you’ll see the number of images processed in what time and how much percentage of your data was trained!
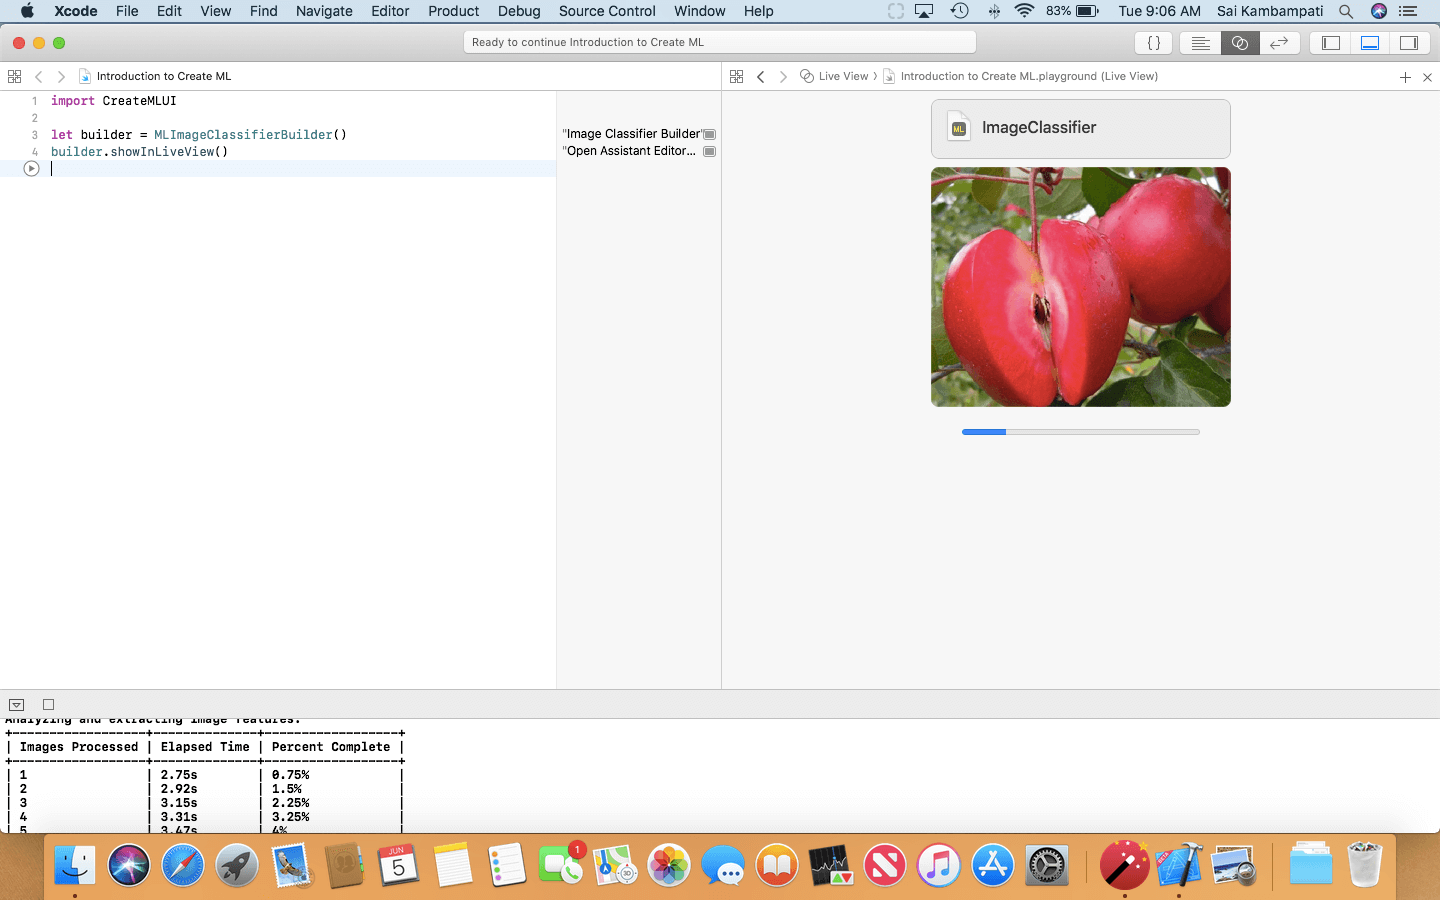
This should take around 30 seconds (depending on your device). When everything is done processing, you should see something like this:
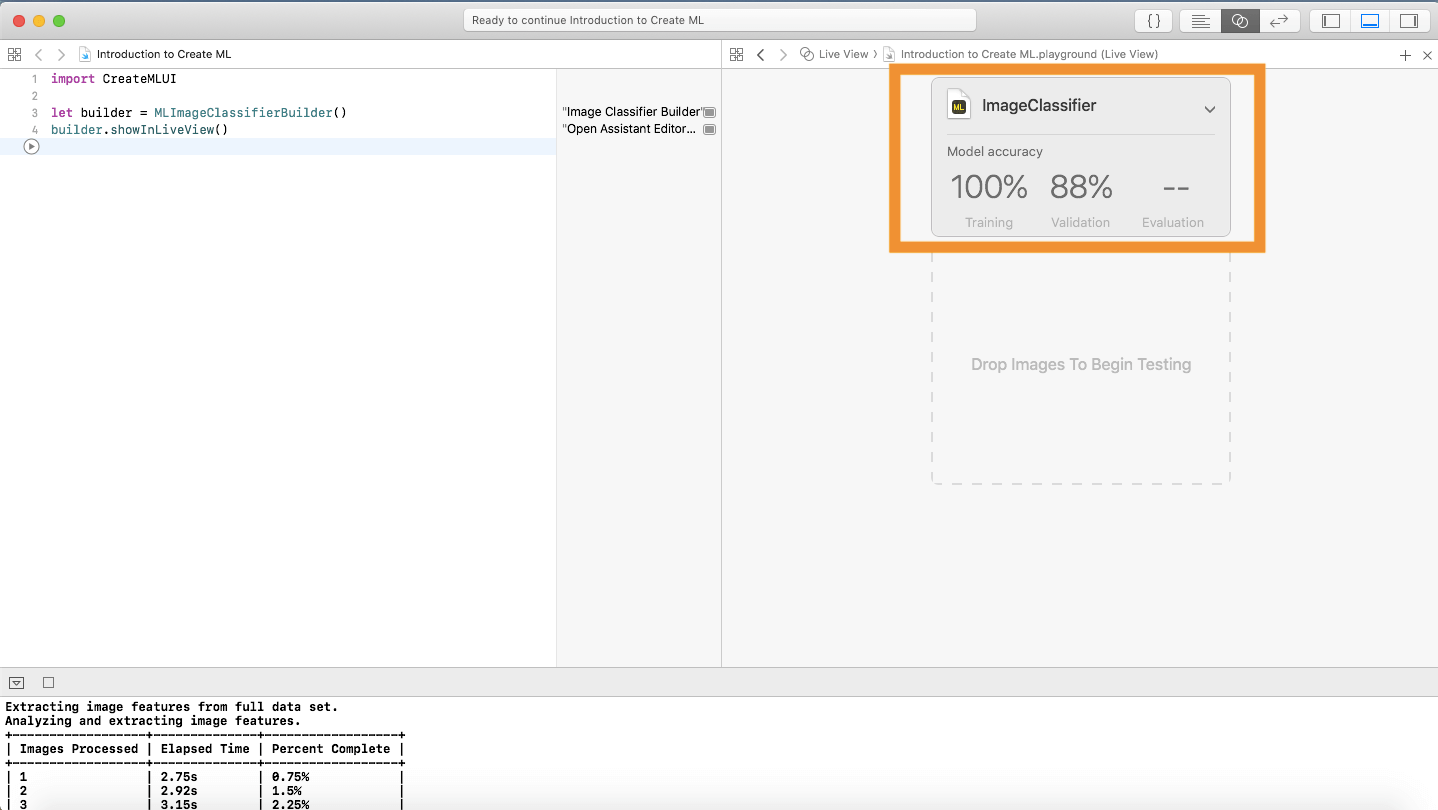
You’ll see a card with three labels: Training, Validation, and Evaluation. Training refers to the percentage of training data Xcode was successfully able to train. This should read 100%.
While training, Xcode distributes the training data into 80-20. After training 80% of training data, Xcode runs the classifier on the remaining 20%. This is what Validation refers to: the percentage of training images the classifier was able to get right. Usually, this can vary because Xcode may not always split the same data. In my case, Xcode had an 88% validation. I wouldn’t worry too much about this. Evaluation is empty because we did not give the classifier any testing data. Let’s do that now!

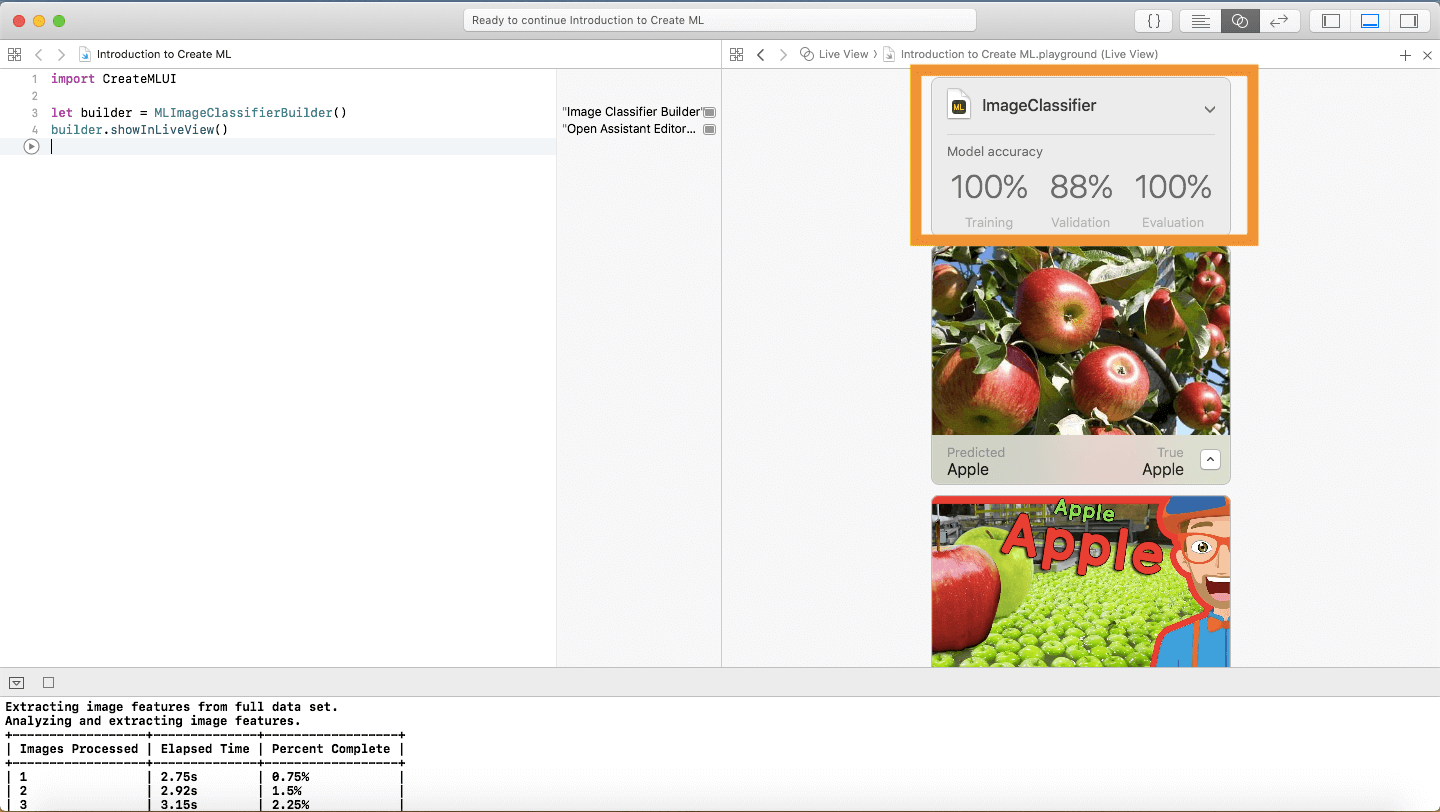
This should happen pretty quick. When everything is finished, your evaluation score should ready 100%. This means that the classifier labelled all the images correctly!
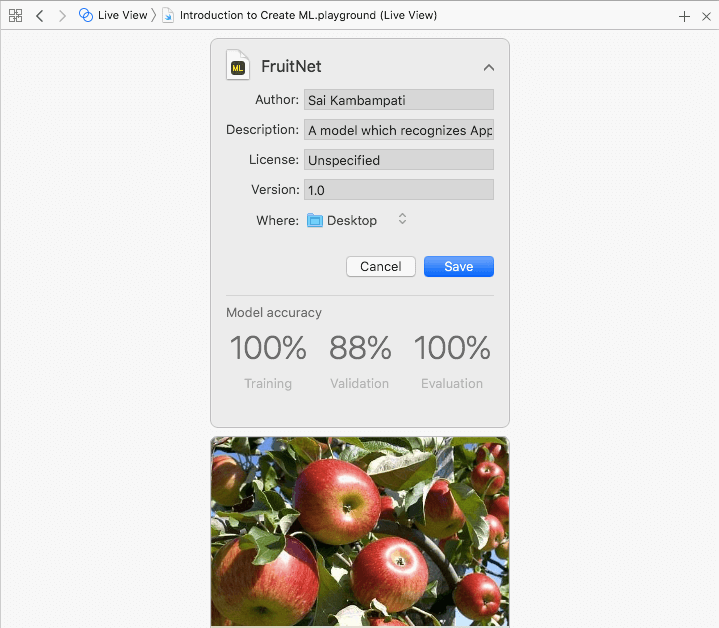
If you’re satisfied with your results, all that’s left is saving the file! Click on the arrow next to the Image Classifier title. A dropdown menu should appear displaying all the metadata. Change your metadata to how you would like it and save it to where you want to!
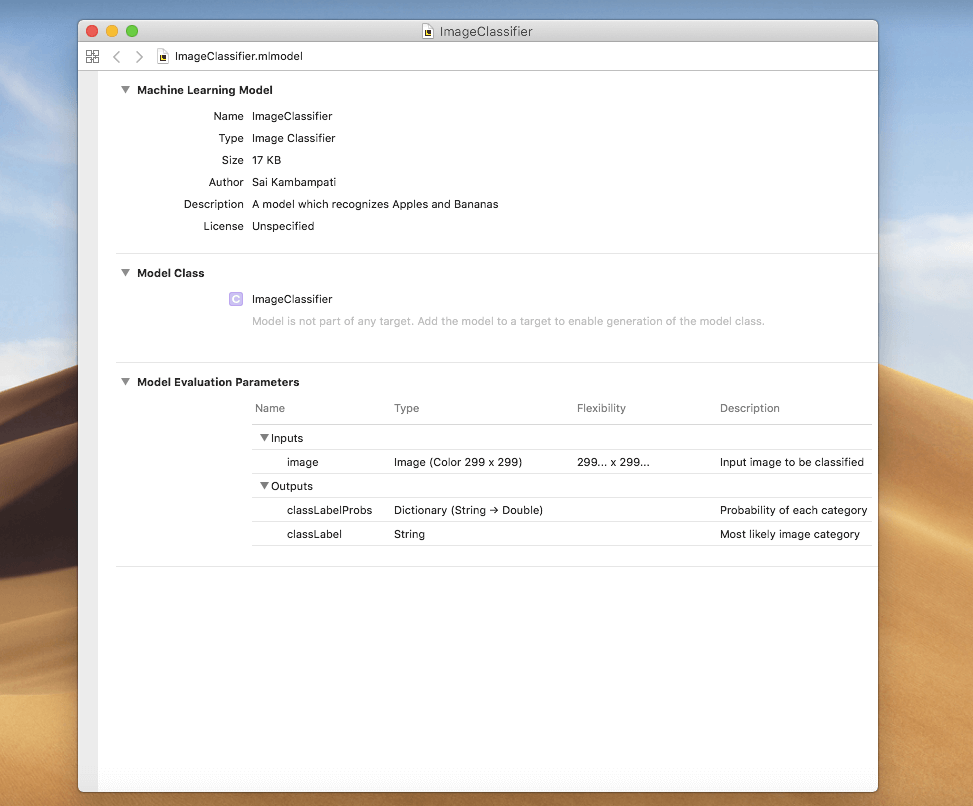
Open the CoreML model and view the metadata. It has everything you filled out! Congratulations! You are the author of your own Image Classifier model that’s super powerful, and takes only 17 KB!
You can import it into your iOS app and see how it runs! Next, let’s check out how to create our own Text Classifier. This requires a little more code!
The Text Classifier Model
The Data
Next, we’ll be building a Spam Detector model with Create ML. This is a type of model which determines if a message is either spam or ham (ham being not spam). Just like all machine learning applications, we’ll need some data. Download the sample JSON file here.
Opening it, you can see that it is a JSON table containing lots of messages, each labelled either spam or ham. The amount of data in this sample is very minimal compared to what you might want in your application.
The Code
Now, we have to ask Xcode to train the data. While we don’t have a nice and simple UI, the code we use is not too difficult. Type the following:
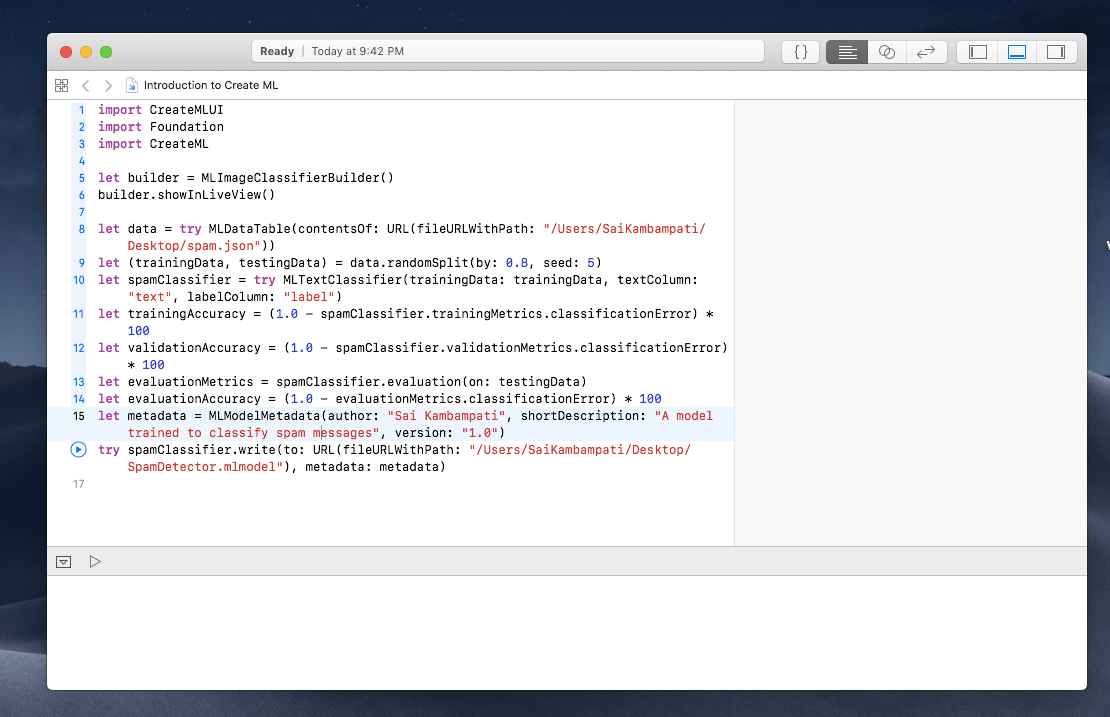
import CreateML
import Foundation
//1
let data = try MLDataTable(contentsOf: URL(fileURLWithPath: "/Users/Path/To/spam.json"))
let (trainingData, testingData) = data.randomSplit(by: 0.8, seed: 5)
let spamClassifier = try MLTextClassifier(trainingData: trainingData, textColumn: "text", labelColumn: "label")
//2
let trainingAccuracy = (1.0 - spamClassifier.trainingMetrics.classificationError) * 100
let validationAccuracy = (1.0 - spamClassifier.validationMetrics.classificationError) * 100
//3
let evaluationMetrics = spamClassifier.evaluation(on: testingData)
let evaluationAccuracy = (1.0 - evaluationMetrics.classificationError) * 100
//4
let metadata = MLModelMetadata(author: "Sai Kambampati", shortDescription: "A model trained to classify spam messages", version: "1.0")
try spamClassifier.write(to: URL(fileURLWithPath: "/Users/Path/To/Save/SpamDetector.mlmodel"), metadata: metadata)
Let me explain what happen. Most of the code should be fairly simple!
- First, we create a constant called
datawhich is a type ofMLDataTableto ourspam.jsonfile.MLDataTableis a brand new object used to create a table determined to train or evaluate a ML model. We split our data intotrainingDataandtestingData. Like before, the ratio is 80-20 and the seed is 5. The seed refers to where the classifier should start from. Then we define aMLTextClassifiercalledspamClassifierwith our training data, defining what values of the data are text and what values are labels. - We create two variables called
trainingAccuracyandvalidationAccuracyused to determine how accurate our classifier is. In the side pane, you’ll be able to see the percentage. - We also check how the evaluation performed. (Remember that the evaluation is the results used on text which the classifier has not seen before and how accurate it got them.)
- Finally, we create some metadata for the ML model like the author, description, and version. We use the
write()function to save the model to the location of our choice! In the image below, you’ll see that I chose the Desktop!
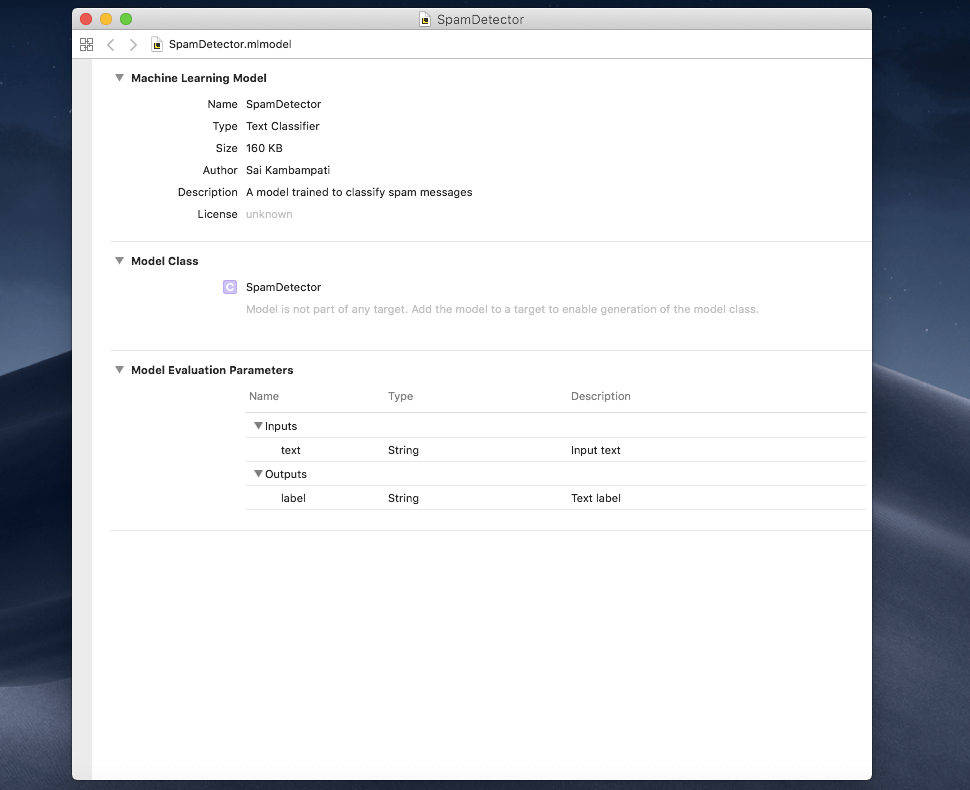
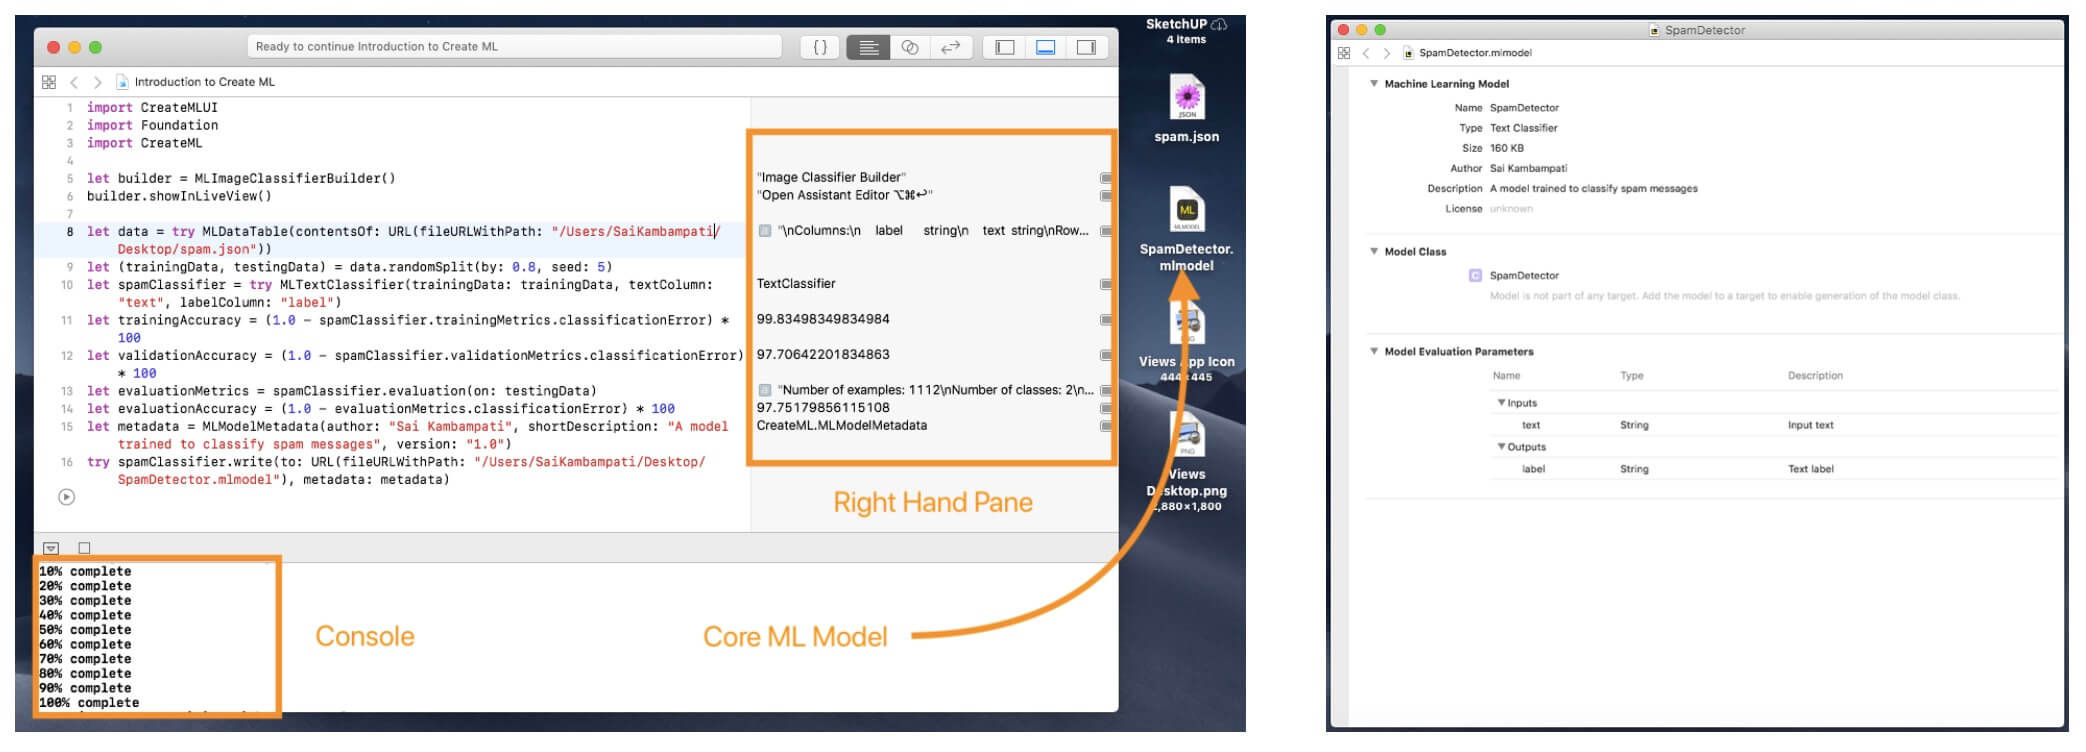
Run the playground. You can see the iterations in the console and the accuracy in the right hand bar! When all is done, the Core ML model is saved! You can view the model and see the metadata!
Tabular Classification
The Data
Tabular data is one of the most advanced and interesting features about Create ML. By observing a bunch of features in a table, Create ML can detect patterns and create a classifier to detect the target feature you want.
In this case, let’s deal with one of the most popular datasets in the world of machine learning- house pricings! And to make this more interesting, the dataset is not in the JSON format but rather the CSV format! Download the dataset here
This dataset is a modified version of the Boston housing dataset found on the UCI Machine Learning Repository. Opening the file you can see that there is a huge table filled with numbers and 4 abbreviations. Here’s what they mean:
- RM: The average number of rooms per dwelling
- LSTAT: The percentage of population considered lower status
- PTRATIO: The pupil-student ratio in town
- MEDV: The median value of owner-occupied homes
As you can guess, we’ll be using the 3 features (RM, LSTAT, PTRATIO) to calculate the final price (MEDV)!
The Code
Getting Xcode to read the table is quite simple! The following code should look really similar to the text classification code!
//1
let houseData = try MLDataTable(contentsOf: URL(fileURLWithPath: "/Users/Path/To/HouseData.csv"))
let (trainingCSVData, testCSVData) = houseData.randomSplit(by: 0.8, seed: 0)
//2
let pricer = try MLRegressor(trainingData: houseData, targetColumn: "MEDV")
//3
let csvMetadata = MLModelMetadata(author: "Sai Kambampati", shortDescription: "A model used to determine the price of a house based on some features.", version: "1.0")
try pricer.write(to: URL(fileURLWithPath: "/Users/Path/To/Write/HousePricer.mlmodel"), metadata: csvMetadata)
If you weren’t able to understand the above code, no problem! I’ll go through it step by step!
- The first step is to reference our data in `HouseData.csv`. This is done through a simple call of `URL(fileURLWithPath:)`. Next, we define what portion of the data should be split into training and testing. We’ll split it into 80-20 like always and just to change things up a bit, let’s start from the beginning (setting the `seed` to 0).
- Next, we define a type of regressor named `pricer` for our data using the brand new MLRegressor enumeration. This is one of the coolest parts about Create ML. There are a lot of regressors ML algorithms use: Linear, Boosted Tree, Decision Tree, and Random Forests. And these are just the most common ones. Unless you’re a ML expert, it can be hard to determine which one is the best suited for your data. This is where Create ML comes in to help. When you select `MLRegressor`, Create ML runs your data through all these regressors and chooses the best one for you. We choose the training data to be `houseData` and set the target column as `MEDV` which is the median price.
Here’s some quick terminology. You may be wondering what’s the difference between a classifier and a regressor. A classifier groups the output of your data into classes or labels. Regressors, on the other hand, predicts the output value using training data. Regressors don’t have labels. Also, in machine learning, features are the variables in a dataset. In our case, the features are the average number of rooms, percent of population, and the pupil-student ratio. The target is also a column in our data which is what we want the regression to predict. In this case, it’s the median price of the houses.
- Finally, we define some metadata for our model and save it to wherever we would like!
As of this writing, Create ML does not support showing the accuracy of MLRegressors. It can only show the maximum error and the square root error, both of which don’t contribute much to displaying how accurate the model is. Trust me though, when I say that the model Xcode generates is fairly accurate.
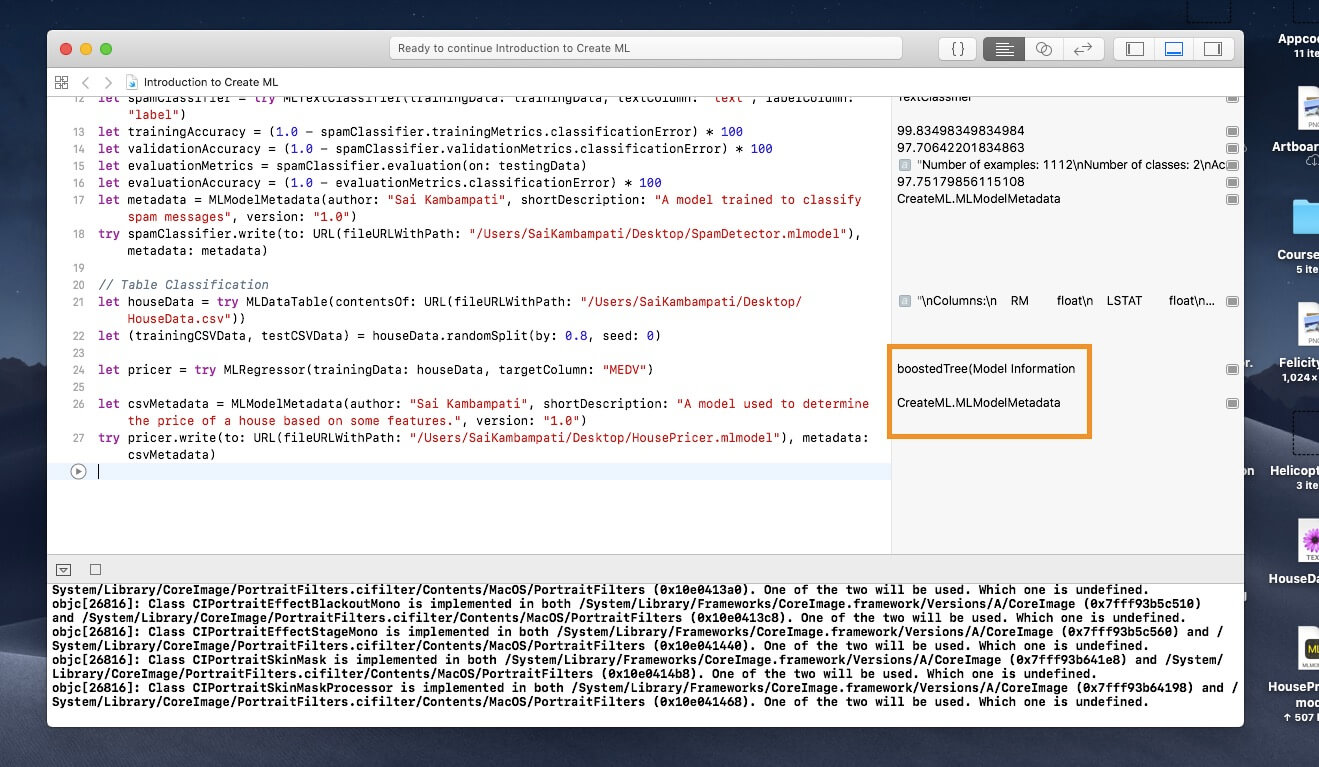
After the playground is done running, observe the right hand pane. It looks like Create ML has determined that Boosted Tree is the best regressor for our data! Isn’t that amazing? I have saved my Core ML model to my Desktop. Open your Core ML model and observe the metadata.
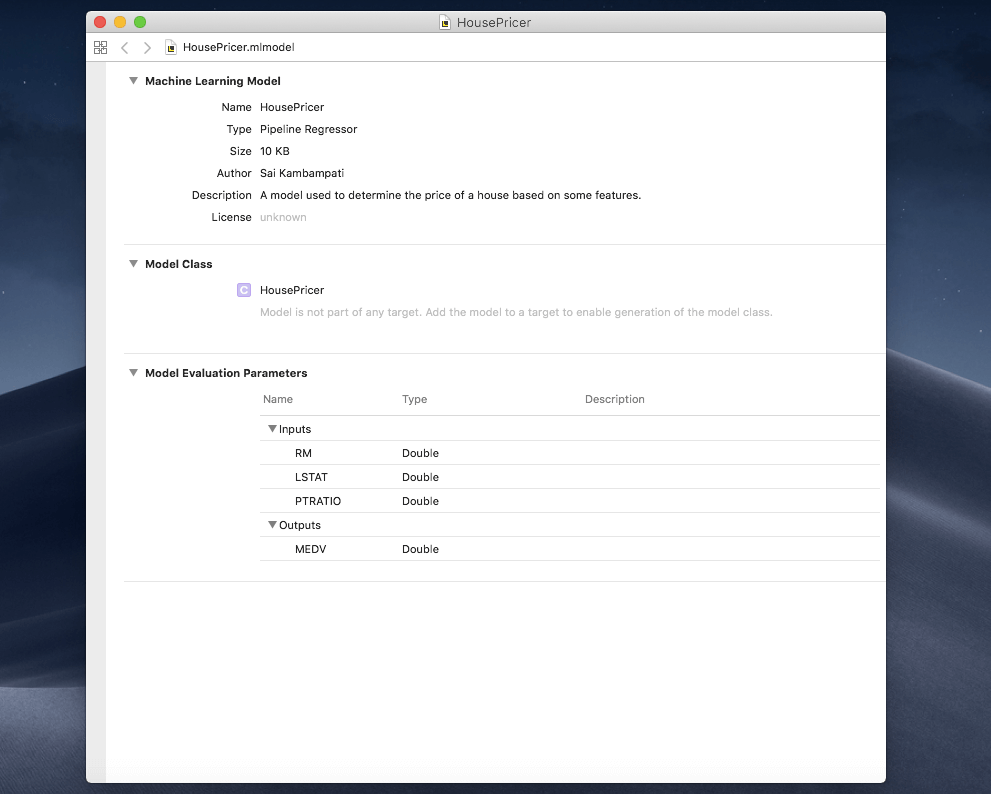
You can see that the model is a Pipeline Regressor and is about 10 KB. It takes in 3 features (just like we wanted) and output the final price!
Conclusion
In this tutorial, you saw how to create your own machine learning models using Apple’s newest framework Create ML! With just a few lines of code, you can create advanced, state-of-the-art machine learning algorithms to process your data and give you the results you want!
You saw how to train images, text, and tabular data in both CSV and JSON formats. With CreateMLUI it’s super simple to train images and while there is no UI for text and tabular data, you can write the code in less than 10 lines.
To learn more about Create ML, you can watch Apple’s video on Create ML from WWDC 2018 here. You can also check out Apple’s documentation on Create ML here.
You can download the final playground here. Along with the project, you’ll get access to the final Core ML models so you can see if your model matches up! Keep experimenting with Create ML and observe your results as you import them to your iOS app! Let me know how everything goes and share screenshots of your app using CoreML in the comments below!


