

Welcome to the first part of the Drag and Drop series! In this tutorial, you will learn how to implement the drag and drop functionality onto a UIViewController. In the next part of the series, you will learn how to use the Drag and Drop APIs with UITableViewControllers and UICollectionViewControllers .
One of the most anticipated releases of iOS 11 was the announcement of several new Drag and Drop APIs. So for those of you who aren’t familiar with Drag and Drop, it is a way to graphically move or copy data from one application to another or sometimes within the same application.
There are a lot of examples where you can implement Drag and Drop into your apps and while there are a numerous number of APIs for you to implement for different scenarios, it is really easy to implement. I’ll be teaching you how you can implement Drag and Drop within your apps specifically regarding to the UIViewController. Let’s get started!
Introduction to Drag and Drop
As mentioned earlier, Drag and Drop is a graphical way to move or copy data between two applications. Here’s some quick terminology:
- Source App: The app from which the item or information is dragged (copied)
- Destination App: The app from which the item or information is dropped (pasted)
- Drag Activity: The dragging action, from start to finish.
- Drag Session: The items which are dragged, managed by the system, throughout teh drag activity
A really neat fact about Drag and Drop is that while you are dragging items from one app to another, the source and destination apps continue processing as usual. Therefore, these two actions are synchronous. You can continue operating an app with another finger or start a new drag activity.
Also, there is no need to incorporate these APIs into UITextViews and UITextField as they automatically support drag and drop. You can configure UICollectionViews, UITableViews, and almost any view to support Drag and Drop.
For this tutorial, we’ll focus on adding Drag and Drop into UIViewControllers. Let’s dive into the implementation.
How to Implement Dropping
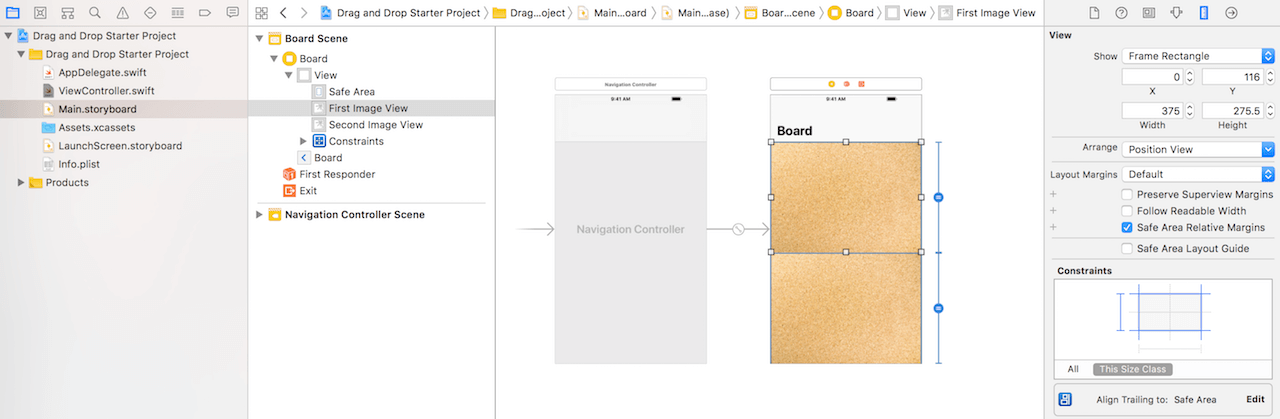
First, download the starter project over here. As you can see, we have a simple ViewController with two UIImageViews that are already linked to the code. These two image views are designed for you to drop an image. Now all we have to do is start coding!
Let’s start with integrating the Dropping APIs. We can now implement the API in several short steps. Our first step is to add the UIDropInteractionDelegate to the ViewController. So adjust the class to look like this:
class ViewController: UIViewController, UIDropInteractionDelegate {

    @IBOutlet weak var firstImageView: UIImageView!
    @IBOutlet weak var secondImageView: UIImageView!

    override func viewDidLoad() {
        super.viewDidLoad()
        // Do any additional setup after loading the view, typically from a nib.
    }
    override func didReceiveMemoryWarning() {
        super.didReceiveMemoryWarning()
        // Dispose of any resources that can be recreated.
    }
}
Next, we have to add an interaction recognizer to our view. This can be implemented in our viewDidLoad method. After super.viewDidLoad(), type the following line:
view.addInteraction(UIDropInteraction(delegate: self))
Now, to make our class conform to the UIDropInteractionDelegate, we have to implement 3 methods. I will explain each one to you.
func dropInteraction(_ interaction: UIDropInteraction, performDrop session: UIDropSession)
This method tells the delegate it can request the item provider data from the session’s drag items.func dropInteraction(_ interaction: UIDropInteraction, sessionDidUpdate session: UIDropSession) -> UIDropProposal
This method tells the delegate that the drop session has changed. In our case, we want to copy the items if the session has updated.func dropInteraction(_ interaction: UIDropInteraction, canHandle session: UIDropSession) -> Bool
This method check to see if the view can handle the session’s drag items. In our scenario, we want the view to accept images as the drag item.
Let’s first implement the second and third methods like this:
func dropInteraction(_ interaction: UIDropInteraction, sessionDidUpdate session: UIDropSession) -> UIDropProposal {
    return UIDropProposal(operation: .copy)
}

func dropInteraction(_ interaction: UIDropInteraction, canHandle session: UIDropSession) -> Bool {
    return session.canLoadObjects(ofClass: UIImage.self)
}
In the dropInteraction(_:sessionDidUpdate:) method, we return a UIDropProposal object and specify it’s a copy operation. You must return a UIDropProposal object if a view’s drop interaction delegate accepts dropped items. For the dropInteraction(_:canHandle:) method, the return value of the implementation indicates whether the drop is accepted. In the code above, we only accept drop activities that contain images.
We are almost done. We now have to add the code that will allow the app to perform the drop onto the view. Copy and paste the code below:
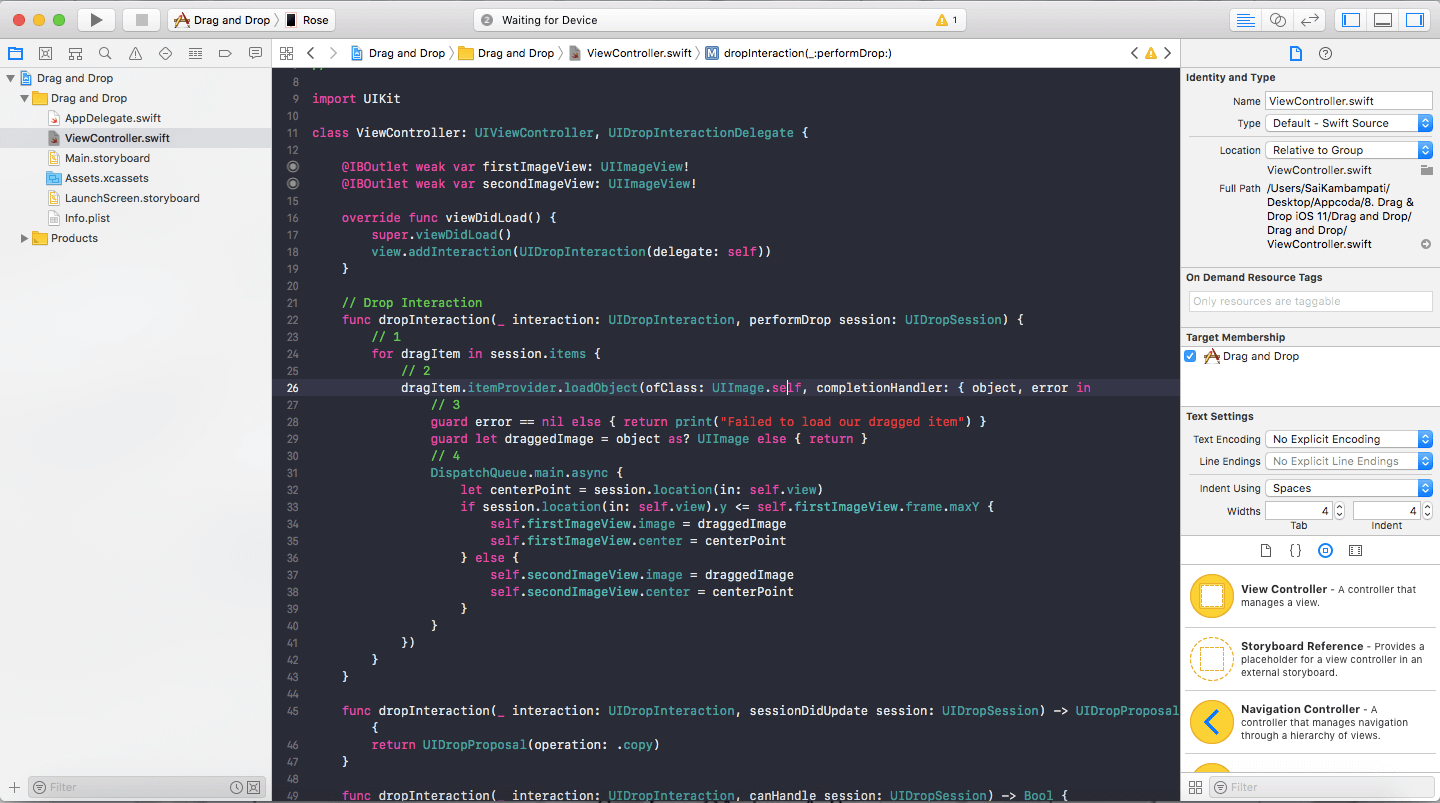
func dropInteraction(_ interaction: UIDropInteraction, performDrop session: UIDropSession) {
    // 1
    for dragItem in session.items {
        // 2
        dragItem.itemProvider.loadObject(ofClass: UIImage.self, completionHandler: { object, error in
            // 3
            guard error == nil else { return print("Failed to load our dragged item") }
            guard let draggedImage = object as? UIImage else { return }
            // 4
            DispatchQueue.main.async {
                let centerPoint = session.location(in: self.view)
                //5
                if session.location(in: self.view).y <= self.firstImageView.frame.maxY {
                    self.firstImageView.image = draggedImage
                    self.firstImageView.center = centerPoint
                } else {
                    self.secondImageView.image = draggedImage
                    self.secondImageView.center = centerPoint
                }
            }
        })
    }
}
- Sometimes, when we drag an image onto our board, we may end up dragging more than one image. This returns an array
session.items, so we run the following code for eachdragItem. - We load the object which are
UIImagein thedragItems. - In case of an error, we use a
guardstatement to handle the error. If an error exists (say, the item doesn’t conform to theUIImageclass), then we print an error message. - If there is no error, we set the image of
imageViewtodraggedImage. - We determine where the finger is placed in order to see if we set the image to the first
imageViewor the secondimageView. Notice that the center of the image is exactly where our finger is.
Now, we are done! Let’s run the app and check to see how well it works! But, first make sure your code looks something like this:
Dragging and Dropping between apps is supported only on iPads. So if you want to drag and image from Safari or Photos and drop it onto the view, you will need to run the sample app on an iPad. iPhone only supports dragging and dropping within the app. On a simulator, it may take sometime for the image to copy itself onto the board.

If you follow me correctly, your app should run as expected! But what if you made a mistake and want to drag the image in the first image view into the second? Well it’s quite simple! Now, we have to implement the dragging API.
Dragging an item
Now, say that the image we had in our board was a mistake and we wanted it to be removed. Well, this would require us to drag the image to another location. To achieve this, we would need to implement the dragging APIs. Let’s see how it’s done!
First, let’s add the UIDragInteractionDelegate. To do this, we simply have to add UIDragInteractionDelegate to the list of protocols in our class:
class ViewController: UIViewController, UIDropInteractionDelegate, UIDragInteractionDelegate
Now you might get an error and that’s because we have not implemented the required protocol stubs in our code. Unlike the UIDropInteractionDelegate where we needed 3 methods to adhere to the protocol, we need only one in this case. Add this function at the end of the code:
func dragInteraction(_ interaction: UIDragInteraction, itemsForBeginning session: UIDragSession) -> [UIDragItem] {
}
This method is basically used for detecting the type of object being dragged and how to handle it.
Before we implement this method, we need to modify our viewDidLoad code slightly. Since we’ll be touching the image view, we need to enable the userInteraction property for both image views. Modify the viewDidLoad method to look like this:
override func viewDidLoad() {
    super.viewDidLoad()
    view.addInteraction(UIDropInteraction(delegate: self))
    view.addInteraction(UIDragInteraction(delegate: self))
    firstImageView.isUserInteractionEnabled = true
    secondImageView.isUserInteractionEnabled = true
}
Now, we’re almost done. Modify your dragInteraction(:_) function to this.
func dragInteraction(_ interaction: UIDragInteraction, itemsForBeginning session: UIDragSession) -> [UIDragItem] {
        if session.location(in: self.view).y <= self.firstImageView.frame.maxY {
            guard let image = firstImageView.image else { return [] }
            let provider = NSItemProvider(object: image)
            let item = UIDragItem(itemProvider: provider)
            return [item]
        } else {
            guard let image = secondImageView.image else { return [] }
            let provider = NSItemProvider(object: image)
            let item = UIDragItem(itemProvider: provider)
            return [item]
        }
}
And that’s all! Run your code and see if you can drag and drop between images from your Photos albums or the web. Copy them from the first image view to the second image view! It’s a drag fest! Check out the result below!

What’s Next
As you can see, it’s quite simple to add Drag and Drop to your apps enabling your app to activate a whole new set of powerful APIs. In this tutorial, you learned how to drag and drop images, but this can be applied to text as well! What’s more is that drag and drop in different view controllers such as UITableViews and UICollectionViews can really provide a seamless experience for your users.
To download the complete project, you can do so from the Github repository here.
To learn more about Drag and Drop, I reccomend checking out some of these video from WWDC 2017!
- Introducing Drag and Drop
- Mastering Drag and Drop
- Drag and Drop with Collection and Table View
- Data Delivery with Drag and Drop
Finally, here is Apple’s Official Documentation on Drag and Drop.
Let me know what you think of the tutorial and whether or not you would like to see a series on Drag and Drop!


