

One of the most common tasks that iOS -and not only- developers are called to perform in their programming endeavours is fetching and managing remote images that should be displayed to an app. For instance, suppose that you’re building the next great messaging application where obviously users have contacts. Those contacts have avatar images residing to a server. When users connect to the app then avatars must be downloaded in order to be used by the app. Or, another example, think of an app that manages the event of a worldwide convention, and among its features is the list of all attendees. Their images must be fetched and handled by the app, and displayed properly when necessary.
What makes things complicated is the fact that image fetching is an asynchronous process. When fetching multiple images then it’s really easy to display the wrong image to the wrong place in certain cases. Think of the contact list again, which is a list of images with text at its simplest form. Displaying fetched avatar images to the proper contacts can end up being a hell depending on how image handling has been implemented. It would be really bad to see the app displaying the wrong avatar next to each name, and it would be even worse to have avatar images being replaced by other avatar images when contacts appear and disappear while scrolling. Have you seen this maybe? A perfect chaos and no consistency at all!
Another troubling point can be the way images are handled locally once they are fetched. Are there any rules about naming or storing details? Are there best and worst practices one should follow? Should images be stored in documents or in caches directory? These and more questions will most probably arise when building an app and it’s about time to deal with remote images. The answers though should not be given and implemented when an actual application is being built; that kind of issues should be already fixed and be part of the solution, not the problem.
So, here we come. In this tutorial I will present you a simple, yet quite effective recipe that makes fetching remote images and then handling them locally a really straightforward task. I’ll show you how to create a handy tool that you’ll be able to use right when it’s needed, and you won’t need to worry anymore about all that I described above. Even if you won’t use what we’ll build here eventually, you might get some ideas to apply in your own solutions. So, keep on reading to find out some really interesting stuff.
What We’re Going To Build
The main “component” we’re going to implement in this post is a protocol along with a default implementation that will make possible to fetch an image from a remote source, or load it from a local file. Creating a protocol makes it super-easy to integrate image handling capabilities on any custom type simply by adopting it, so in plain words our soon-to-be-implemented solution can be used out of the box everywhere. However, what’s the point to get into that trouble if we’re just to create a method that will fetch a single image?
The truth is that we won’t stop there; we’ll add more capabilities and we’ll support multiple image fetching, as well as single and batch image deletion. As a bonus point, we’ll add the capability to save a new image locally straight from an app, even though it doesn’t sound like a much related thing to do. It would be a shame though to have a component that fetches, loads and deletes images, but it does not support saving new ones and just for that operation to need a different tool or implementation.
Except for the protocol that will be the primary and most important custom type, there will be two additional custom types, two structures:
- The first one will be used to specify optionally some settings. It’s necessary so the solution we’ll build to be as much flexible as possible, and you’ll understand pretty soon what I mean by that.
- The second structure will be working behind the scenes and it will contain a small collection of static methods and properties valuable for the default implementation of the protocol’s methods.
We’ll build everything step by step and by discussing each aspect thoroughly. In order to see the results of our efforts though we’ll use…
A Demo Project for Fetching Remote Images
Before we start doing anything, it’s necessary to download a starter project. It contains a SwiftUI based iOS app called FetchableImageDemo. Let me describe fast its various parts starting from the views:
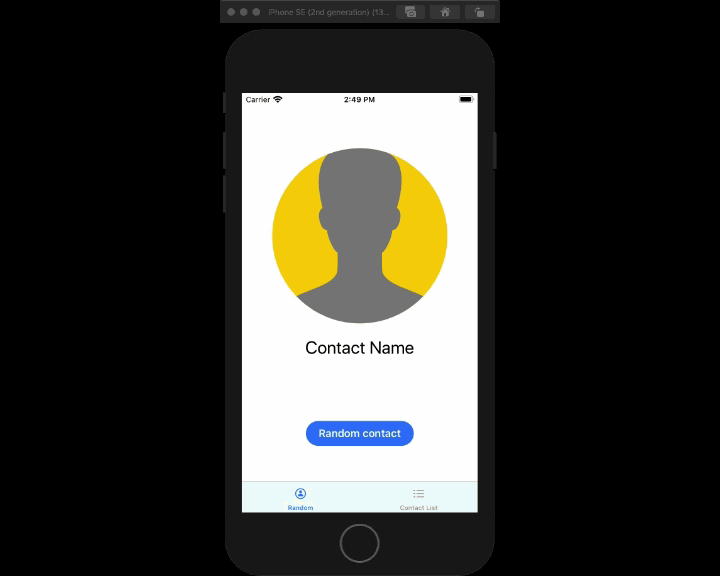
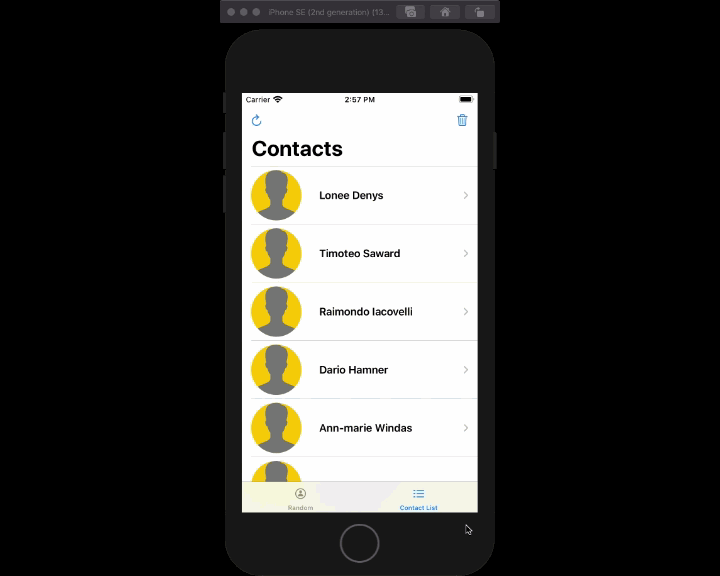
UserView: A custom view with an Image and a Text that will display an avatar image and the contact name. It’s embedded to two other views,RandomContactViewandContactDetailsView.RandomContactView: A view that besides theUserView, also contains a button that triggers the selection of a contact randomly. We’ll use it for testing single image fetching.ContactListView: The primary component here is a List that will be displaying a list of contacts. We’ll use it for testing multiple image fetching and deletion. This view is embedded in a navigation view with two bar items; one for initiating the fetching process, and one for deleting all fetched avatars. When tapping on any contact item, theContactDetailsViewwill be shown. Additionally, it contains another custom view, theProgressView, which will display visually the download progress of all avatars.ContactDetailsView: Another view that embeds theUserView, and it also contains a button that will enable us to try out deleting a single image (the selected contact’s avatar), as well as to fetch it back.ProgressView: A custom implementation of a progress bar.Tabs:FetchableImageDemois a tab bar application, andTabsview is the one creating the tabs.
Besides the above, you’ll also find:
- The
Contactstructure: It represents a single contact. It contains anid,name,avatarURL, andavatar. We’ll be using theavatarURLin order to fetch the image that we’ll be assigning toavatar. It conforms toDecodableprotocol so fake contact data can be loaded and decoded from the two JSON files included in the project, and also conforms toIdentifiableprotocol in order to easily iterate through such objects in theContactListViewusing aForEachloop. - The
RandomContactModelclass: We’ll use it as the model for theRandomContactView. It’s partially implemented, and when we’ll finish with it it’ll be able to pick a random contact and fetch its avatar image using the protocol that we’ll build next. - The
ContactListModelclass: The model for theContactListViewclass. We’ll use it to try out most of the features we’ll add to the protocol, such as multiple image fetching and deletion, as well as single image deletion and download progress.
The fake contact data we’ll use is already embedded to the project. There are two JSON files named fakedata_small.json and fakedata.json, where the first one has data for 10 contacts, and the second data for 50 contacts. We’ll use the first one with the RandomContactModel and the RandomContactView classes, and the other with the contact list and the ContactListModel. Each contact data contains an id, name and a URL to an avatar image.
Note: Fake data was generated with Mockaroo.
Take your time to navigate in the starter project. When you’re ready, then keep reading and get prepared to start adding the missing pieces in the project.
Getting Started
Let’s start by creating a new Swift file where we’ll add the implementation that we’ll do here. Press Cmd+N in your keyboard, select the Swift file template under the Source category, and then continue to create the new file. Name it FetchableImage.swift. Once it’s ready select to open it in the Project Navigator if it doesn’t open automatically.
In order to make things easy for us as future users of the protocol that we’ll make, as well as for other developers, we’ll be based on a main idea: To use the URL of the remote image both for fetching the image from the remote source, and as a file name when saving an image locally after it has been fetched. To perform the latter though we’ll need to do some processing in the URL first; we can’t have a URL as a file name. Regardless, it won’t be necessary to add an additional burden of dealing with custom file names when images exist locally that way; the original URL that is already known will be used for both cases.
We’ll see everything in details, but for starters, let’s define the custom types that we’ll need. Let’s begin with the protocol and its extension. We’ll name it FetchableImage:
protocol FetchableImage {

}


extension FetchableImage {

}
Now, let’s declare the two structures that will help us build it:
struct FetchableImageOptions {

}


fileprivate struct FetchableImageHelper {

}
Note that the FetchableImageHelper structure is marked as file-private. That’s because we want it to be visible within this file only, and accessible only by the methods that we’ll implement next.
Specifying Available Options
Let’s talk a bit now about what the FetchableImageOptions structure will contain. Initially, let me tell you that we’re going to add a few stored properties only and no methods; it’s up to you to enrich it and add any methods that you might find suitable to exist.
Now, let’s focus on the directory where fetched images will be stored into. There are two options here; either have them stored in the documents or in the caches directory. The best practice says that they should be saved in the caches directory, as they can be fetched again if they are deleted by the system (in case of low free space on the device for example). However, there will be cases where it’s more appropriate to have a downloaded image stored in the document directory. Since there’s not a concrete rule about that and it all depends on the situation that FetchableImage comes to serve, then this is the first setting that we’ll allow through the FetchableImageOptions:
struct FetchableImageOptions {
    var storeInCachesDirectory: Bool = true
}
See that we set true as the default value of the storeInCachesDirectory property, so images are automatically saved to caches directory. This can be changed by creating a new FetchableImageOptions object and setting that flag to false.
Next, let’s refer to another scenario. In the majority of the the cases we’ll be keeping fetched images stored locally. In certain circumstances though we might don’t want that to happen; we might want to only fetch but not store locally. To deal with that, let’s add one more option where we’ll specify if fetched images are allowed to be stored locally or not:
struct FetchableImageOptions {
    ...

    var allowLocalStorage: Bool = true
}
We set true as the default value, because most commonly we’ll need fetched images to be saved locally by default.
Finally, one more property that even though we can live without it, we are definitely going to need it later in order to be able to save a new image straight from an app to a local directory. That is the file name of the image:
struct FetchableImageOptions {
    ...

    var customFileName: String?
}
Unless you’re saving new images with the FetchableImage protocol, chances are that you won’t need to use the customFileName property. It doesn’t hurt though to be a bit predictive and provide solutions that we may need in the future.
FetchableImageHelper First Bits
Right above we discussed about the documents and caches directory, but only in a theoretical level. Since we’re going to need to access them pretty soon, now it’s a good time to specify the URL to both.
In the FetchableImageHelper structure add the next two static properties:
fileprivate struct FetchableImageHelper {
    static var documentsDirectoryURL = FileManager.default.urls(for: .documentDirectory, in: .userDomainMask)[0]
    static var cachesDirectoryURL = FileManager.default.urls(for: .cachesDirectory, in: .userDomainMask)[0]
}
Declaring them as static makes it possible to use them without creating a FetchableImageHelper object, just like that: FetchableImageHelper.cachesDirectoryURL.
Adding The First Protocol Method
After having done the first steps, let’s start implementing the FetchableImage protocol. Normally, you’d expect to begin with a method that’s responsible for fetching a remote image, but that’s not the place where we’ll start from. First we’ll implement a method that returns the URL to the local image. We’ll need right next it in order to determine whether an image should be fetched from a remote source or be loaded from a local directory.
Initially, let’s declare it in the FetchableImage protocol:
func localFileURL(for imageURL: String?, options: FetchableImageOptions?) -> URL?This method expects for two parameter values: The first one is the remote URL of the image. Please don’t be confused here; imageURL is the URL where the image should be fetched from. The method will return the URL to the local file, if that file exists.
Note that it’s declared as an optional, and it can be nil in one case only: If the image’s origin is not a remote site, but the image was created and stored locally directly from an app. In that case the customFileName must be provided through a FetchableImageOptions object, and that brings us to the second parameter value.
If the default values that we specified in the FetchableImageOptions properties are in accordance to our needs (store fetched images, save to caches directory, don’t use a custom file name), then passing nil is just fine. If one of the options should be altered, then a new FetchableImageOptions object must be given with the proper values being set to the properties.
With the above said, let’s pass to the default implementation of the method:
extension FetchableImage {

    func localFileURL(for imageURL: String?, options: FetchableImageOptions? = nil) -> URL? {

    }

}
Even though is not allowed to declare a default parameter value when declaring a method to a protocol, notice above (inside the FetchableImage extension) that we set nil as the default value for the options parameter.
The first thing we have to do is to determine what the containing directory of the file is; document or caches directory. We can determine that through the provided options argument in case it’s not nil. If it’s nil then the caches directory is the storage directory. But we can handle this a bit more generally and optimally; if options parameter value is nil, then we can initialize a new FetchableImageOptions object and “read” the default settings specified:
let opt = options != nil ? options! : FetchableImageOptions()I can tell you from now that the above is something that we’ll need to do multiple times next. So instead of writing the above condition again and again, let’s just create a new method in the FetchableImageHelper structure that will return the proper object:
static func getOptions(_ options: FetchableImageOptions?) -> FetchableImageOptions {
    return options != nil ? options! : FetchableImageOptions()
}
Make sure that you added the above method in the FetchableImageHelper structure. Simply enough, the given options parameter value is returned by the method if it’s not nil. Otherwise, a new FetchableImageOptions object is being returned instead.
Back to the localFileURL(for:options:) method implementation, replace the first line we added before with this:
let opt = FetchableImageHelper.getOptions(options)Now it’s easy to determine the containing directory:
let targetDir = opt.storeInCachesDirectory ?
    FetchableImageHelper.cachesDirectoryURL :
    FetchableImageHelper.documentsDirectoryURL
Knowing the target directory, let’s specify the file name of the image. First, let’s make sure that the imageURL parameter values is not nil:
guard let urlString = imageURL else {

}
If it’s nil and the code execution falls to the else clause above, then we’ll check if there’s a custom file name provided in the options argument or not. If not, we return nil from the method; there’s nothing else to do without a file name. Otherwise, we append the custom file name to the target directory and we return it altogether as a URL object:
guard let customFileName = opt.customFileName else { return nil }
return targetDir.appendingPathComponent(customFileName)
The above handles the case where the imageURL parameter value is nil. If it’s not nil, then we’ll generate a file name based on the URL, and eventually we’ll return it as a full URL along with the target directory:
guard let imageName = FetchableImageHelper.getImageName(from: urlString) else { return nil }
return targetDir.appendingPathComponent(imageName)
getImageName(from:) is a method that we’ll implement right next. It will be possible to return a nil value, so a guard statement is necessary here (or use an if-let alternatively).
Before we get to it, here’s the localFileURL(for:options:) method in one piece:
func localFileURL(for imageURL: String?, options: FetchableImageOptions? = nil) -> URL? {
    let opt = FetchableImageHelper.getOptions(options)
    let targetDir = opt.storeInCachesDirectory ?
        FetchableImageHelper.cachesDirectoryURL :
        FetchableImageHelper.documentsDirectoryURL

    guard let urlString = imageURL else {
        guard let customFileName = opt.customFileName else { return nil }
        return targetDir.appendingPathComponent(customFileName)
    }

    guard let imageName = FetchableImageHelper.getImageName(from: urlString) else { return nil }
    return targetDir.appendingPathComponent(imageName)
}
Generating Image Name From Remote URL
A remote image URL contains special characters, such as the column and slashes, so it cannot consist of a file name when storing fetched images locally. There are various approaches one could follow here. For example, we could create a hash based on the URL path, but the downside is that we’d need to import cryptography frameworks. Or we could just remove all special characters and keep the alphanumeric part of the URL only. We could even come up with a custom algorithm to produce a file name based on the original URL.
In this implementation we’ll do something different. We’ll convert the URL’s path to a Base64 encoded string, and then we’ll remove any non-alphanumeric characters. This is going to be the file name we’ll be using for each image.
Jump to the FetchableImageHelper struct, and define the following method:
static func getImageName(from urlString: String) -> String? {

}
In order to get a Base64 encoded string from the parameter value, we need to convert it first to a Data object as shown next:
guard var base64String = urlString.data(using: .utf8)?.base64EncodedString() else { return nil }
base64String = base64String.components(separatedBy: CharacterSet.alphanumerics.inverted).joined()
return base64String
If the task to create a Data object first and the Base64 encoded representation afterwards does not fail, then we remove all non-alphanumeric characters in the second line. It probably does not look straightforward at first look, but all it does is to break the Base64 encoded string to an array based on the the non-alphanumeric characters (we get them by inverting the alphanumeric character set), and then to rejoin the separated pieces back to one string again.
The above small implementation is fine, however there’s a catch; depending on the length of the URL, we might end up with really long Base64 string values.
To work around that, we’ll add a check in the method. If base64String is longer than 50 characters long, then we’ll drop the first characters and we’ll keep the last 50 only. We won’t keep the first characters because all image URLs start pretty much the same way (“https://some.url/some_path/…”). The fact that we keep 50 characters instead of 10 or 20 ensures that there will be different characters in the resulting Base64 value.
So, before the return statement above add the following:
guard base64String.count < 50 else {
    return String(base64String.dropFirst(base64String.count - 50))
}
Here’s the entire method now:
static func getImageName(from urlString: String) -> String? {
    guard var base64String = urlString.data(using: .utf8)?.base64EncodedString() else { return nil }
    base64String = base64String.components(separatedBy: CharacterSet.alphanumerics.inverted).joined()

    guard base64String.count < 50 else {
        return String(base64String.dropFirst(base64String.count - 50))
    }

    return base64String
}
Fetching An Image
Time to implement one of the core methods of the FetchableImage protocol, maybe the most important one. In the FetchableImage protocol add the following declaration:
func fetchImage(from urlString: String?, options: FetchableImageOptions?, completion: @escaping (_ imageData: Data?) -> Void)And in the protocol’s extension let’s start implementing it:
extension FetchableImage {
    ...

    func fetchImage(from urlString: String?, options: FetchableImageOptions? = nil, completion: @escaping (_ imageData: Data?) -> Void) {

    }
}
Although we call it “fetchImage”, this method won’t fetch remote images only; it will load images from local files as well. So, depending on the context, when saying fetching from now on we’ll be referring either to remote image fetching only, or both remote fetching and loading from a local file too.
Let’s take a look at its parameters for a moment. The first one is the URL of the remote image as a String value. It’s declared as an optional in order to cover the case of images not fetched from a remote site, but created and saved by the app locally; there will be no remote URL in this case.
The second parameter value is once again a FetchableImageOptions optional object. By default is nil, considering that the default values will consist of the desirable configuration most of the times.
Lastly, there’s the completion handler. Remember that fetching a remote image must be an asynchronous process, as there are many factors that can affect the download process (such as image size, network speed, and more) and therefore an image cannot be returned in real time; required fetching time is undetermined. The parameter value of the completion handler (imageData) is an optional Data object. If fetching an image from a remote source is successful, then we’ll pass its data to the completion handler. If it fails, we’ll just pass nil.
Note #1: We could have used the Result type introduced in Swift 5 as the parameter value of the completion handler and in case of failure to pass the actual error occurred: Result<Data, Error>. However, we’ll stick to the above approach for simplicity.
Note #2: We’ll pass the fetched (or loaded) image to the completion handler as a Data object. Instead of that, we could have a UIImage object, or a CGImage object, or even a NSImage object if we’re talking about macOS. However, we’re trying to implement a generic solution here, flexible enough to work with UIKit, SwiftUI, even AppKit on macOS. Passing a Data object to the completion handler consists of the most general solution, since data can be converted to the most appropriate object afterwards.
With the above being said, the first step in the method’s implementation is to make sure that we’re working on a background thread. That’s important, as we don’t want to block the main thread for as long as the image fetching is in progress:
DispatchQueue.global(qos: .background).async {

}
The next two steps involve getting the options (either from the options argument, or from a new FetchableImageOptions object if it’s nil), and the URL to the local file of the image:
let opt = FetchableImageHelper.getOptions(options)
let localURL = self.localFileURL(for: urlString, options: options)
You can see here that we’re using the getOptions(_:) method we implemented earlier once again, and we’re making use of the localFileURL(for:options:) even from the beginning of this method.
What’s coming next is important. First, we’ll check if the image exists locally. If that’s true, then we’ll try to load it from the local file and pass its data to the completion handler. If the image does not exist locally, or the allowLocalStorage property of the options argument has been set to false (meaning that the image with the given URL is not allowed to be stored locally), then we’ll fetch it using the URL. So, here we go:
if opt.allowLocalStorage,
    let localURL = localURL,
    FileManager.default.fileExists(atPath: localURL.path) {

} else {

}
Inside the if body which is the case of an image existing locally, we’ll call another method that will perform the actual loading from the file using the localURL value:
let loadedImageData = FetchableImageHelper.loadLocalImage(from: localURL)We’ll implement the loadLocalImage(from:) pretty soon. loadedImageData will contain either the actual image as a Data object, or nil of something has gone wrong and no image data could be read from the file. In any case, we can pass the loadedImageData to the completion handler right after the above line:
completion(loadedImageData)In the else body now, let’s take care of the case where the image does not exist locally and must be fetched from the given remote URL. Keep in mind that the URL is given as a String value though, so we must create a URL object using it:
guard let urlString = urlString, let url = URL(string: urlString) else {
    completion(nil)
    return
}
If the code execution ends up to the else case and the urlString parameter value is nil, or if it’s not a valid URL and the url object cannot be initialized, then we just pass nil to the completion handler; there’s nothing more to do.
On the other hand, if url object is initialized successfully, then we can download the image from the remote URL. Actual download code will be implemented to another method just like the loadLocalImage(from:), but for now let’s use it and we’ll deal with the missing methods in a while.
FetchableImageHelper.downloadImage(from: url) { (imageData) in

}
The downloadImage(from:completion:) method that we’re about to implement soon, accepts the URL that the image should be downloaded from, and a completion handler that gets called when download has finished. That completion handler contains the actual image data on success, or nil in case of error.
Inside the body of the completion handler we must perform two distinct tasks:
- To save the fetched image data locally, if allowed.
- To pass the
imageDatadata (ornil) to the completion handler.
Here are both:
FetchableImageHelper.downloadImage(from: url) { (imageData) in
    if opt.allowLocalStorage, let localURL = localURL {
        try? imageData?.write(to: localURL)
    }

    completion(imageData)
}
And the fetchImage(from:options:completion:) method is now complete. There are two missing methods we’re using here and we’re going to add next, but before doing so, here’s the entire method implemented:
func fetchImage(from urlString: String?, options: FetchableImageOptions? = nil, completion: @escaping (_ imageData: Data?) -> Void) {
    DispatchQueue.global(qos: .background).async {

        let opt = FetchableImageHelper.getOptions(options)
        let localURL = self.localFileURL(for: urlString, options: options)

        // Determine if image exists locally first.
        if opt.allowLocalStorage,
            let localURL = localURL,
            FileManager.default.fileExists(atPath: localURL.path) {

            // Image exists locally!
            // Load it using the composed localURL.
            let loadedImageData = FetchableImageHelper.loadLocalImage(from: localURL)
            completion(loadedImageData)

        } else {
            // Image does not exist locally!
            // Download it.

            guard let urlString = urlString, let url = URL(string: urlString) else {
                completion(nil)
                return
            }

            FetchableImageHelper.downloadImage(from: url) { (imageData) in
                if opt.allowLocalStorage, let localURL = localURL {
                    try? imageData?.write(to: localURL)
                }

                completion(imageData)
            }

        }
    }
}
Performing The Actual Image Download
We’ll implement the missing methods starting from the most recent one, the one that performs the actual image download. In it, we’ll simply initialize a URLSession object and through that, we’ll use a data task in order to fetch the image data from the specified URL. If you’ve ever used URLSession before, then the following implementation will look familiar. Just make sure to add the next implementation in the FetchableImageHelper structure:
static func downloadImage(from url: URL, completion: @escaping (_ imageData: Data?) -> Void) {
    let sessionConfiguration = URLSessionConfiguration.ephemeral
    let session = URLSession(configuration: sessionConfiguration)
    let task = session.dataTask(with: url) { (data, response, error) in
        completion(data)
    }
    task.resume()
}
Notice that we don’t mind about the response or the potential error coming back from the server here. However, you’re free to update the above code and handle them too if they’re important to you. The only thing we’re doing here is to call the completion handler passing the fetched data to it.
Loading A Local Image File
With the downloadImage(from:completion:) in place, let’s pass to the other currently missing method; the loadLocalImage(from:) that we already made use of in the fetchImage(from:options:completion:) method previously.
Inside its body we’re going to perform a simple action; we’ll try to initialize a Data object using the contents of the file specified by the given URL. On success, we’ll return the initialized data object which is nothing else but the image data. On failure, we’ll just return nil. Once again, we’re adding this implementation to the FetchableImageHelper structure:
static func loadLocalImage(from url: URL) -> Data? {
    do {
        let imageData = try Data(contentsOf: url)
        return imageData
    } catch {
        print(error.localizedDescription)
        return nil
    }
}
Trying Out Image Fetching
Time to try out what we’ve done so far! In the starter project you’ve downloaded, you’ll find a file called RandomContactModel.swift. Spot it in the Project Navigator and click to open it.
The first thing that RandomContactModel class does is to load the fake contacts from the fakedata_small.json file, decode the JSON data and populate decoded data to the collection of Contact objects, called contacts.
It also contains a method called pickRandomContact() that selects randomly a Contact object from the collection of contacts. The selected contact will be displayed in the UserView view, which is embedded in the RandomContactView. For every contact, the avatar image will be fetched either from a remote or a local source and when it’ll become available the UI will be updated to display it.
Currently, the picker method does nothing fancy except for just picking a random contact as you can see in the pickRandomContact() method implementation:
func pickRandomContact() {
    let random = Int.random(in: 0..<10)
    guard random < contacts.count else { return }
    contact = contacts[random]
}
Since we want to use the FetchableImage protocol here, the first step we necessarily need to do is to make RandomContactModel class conform to it:
class RandomContactModel: ObservableObject, FetchableImage {
    ...
}
In the pickRandomContact() method, we can now call the fetchImage(from:options:completion:) method in order to fetch the image matching to the avatarURL property of the randomly picked contact object:
func pickRandomContact() {
    ...

    fetchImage(from: contact.avatarURL, options: nil) { (avatarData) in

    }
}
At the time being we pass no options, so the default ones will be used (images will be stored to the caches directory, storing remote images is allowed and no custom file names will be used).
Based on the logic we applied earlier, the above method will first try to load the image from a local file. If it doesn’t exist, then it’ll try to fetch it, and then store it to the caches directory for future use. In suqsequent calls of the method, the image will be loaded from the local file, so the display time will be remarkably smaller. We’ll see all that in action.
Since it’s convenient to work with CGImage images in Image controls in SwiftUI, we’ll first make sure that the avatarData is not nil and then we’ll try to initialize a UIImage object from that data. Then, from the UIImage object we’ll get the CGImage representation we’re looking for. Something important to note is that we must use the main thread in order to do what I just described. Remember that image fething takes place in the background, and altering the UI is only allowed from the main thread of the app.
func pickRandomContact() {
    ...

    fetchImage(from: contact.avatarURL, options: nil) { (avatarData) in
        if let data = avatarData {
            DispatchQueue.main.async {
                self.contact.avatar = UIImage(data: data)?.cgImage
            }
        }
    }
}
The avatar CGImage representation is assigned to the avatar property of the randomly selected contact. Since it’s marked as @Published, that change will trigger the UI to be updated in the UserView view.
Now, open the RandomContactView and add the following line as the action of the button:
Button("Random contact") {
    self.randomDataModel.pickRandomContact()
}
And… run the app to see the results! By default, each fake contact has a default avatar indicating the lack of the proper one. Click on the Random Contact button to pick a random contact, and see that within a few seconds the image will be fetched and displayed on the Image control. Keep clicking the button, so more images for more contacts to be fetched. Then, stop and run the app again so the avatar property of each contact becomes empty again. You’ll see that fetching images that have been downloaded already is almost instant; they’re loaded from the local file!
If you want to see the stored images, go to the pickRandomContact() method, and right before the fetchImage method call add the following print command:
func pickRandomContact() {
    ...

    print(localFileURL(for: contact.avatarURL))

    fetchImage(from: contact.avatarURL, options: nil) { (avatarData) in
        ...
    }
}
Run again and start tapping on the Random Contact button. This time, you’ll see in the console the URLs to local image files. Copy any displayed URL, but make sure not to include the prefix “file://” and the file name (stop in “Caches/”). Go to Finder and press Shift+Cmd+G, then paste the copied URL and press Return. That’s also a good chance to see the generated image names.
You can also play around with the options. Delete all downloaded files, and before calling the fetchImage method create the following FetchableImageOptions object. Pass it as the second argument in the fetchImage call:
let options = FetchableImageOptions(storeInCachesDirectory: true, allowLocalStorage: false, customFileName: nil)

func pickRandomContact() {
    ...

    let options = FetchableImageOptions(storeInCachesDirectory: true, allowLocalStorage: false, customFileName: nil)

    fetchImage(from: contact.avatarURL, options: options) { (avatarData) in
        ...
    }
}
By running again you’ll see that no images are stored anymore locally, and every time you ask for a random contact its avatar is being fetched again.
Let’s try something else. Update the above code with this:
func pickRandomContact() {
    ...

    // let options = FetchableImageOptions(storeInCachesDirectory: true, allowLocalStorage: false, customFileName: nil)
    let options = FetchableImageOptions(storeInCachesDirectory: false, allowLocalStorage: true, customFileName: nil)

    fetchImage(from: contact.avatarURL, options: options) { (avatarData) in
        ...
    }
}
In this configuration we allow local storage, but we set false to the first parameter value of the FetchableImageOptions initializer. Images will be stored to documents directory instead of caches directory.
Run and see that this time contact avatars are stored in the documents directory indeed.
Fetching Batch Images
Let’s move on and let’s make FetchableImage protocol capable of fetching multiple images as well. The good news is that we’ll be based on what we’ve built so far, so fetching batch images shouldn’t be intimidating. Initially, we’ll declare a new method in the FetchableImage protocol (switch to the FetchableImage.swift file):
protocol FetchableImage {
    func fetchBatchImages(using urlStrings: [String?], options: FetchableImageOptions?,
         partialFetchHandler: @escaping (_ imageData: Data?, _ index: Int) -> Void,
         completion: @escaping () -> Void)
}
Before we start implementing it in the protocol’s extension, let’s see the parameter values we’re setting here. First, it’s the collection of URLs as String values; we want to fetch multiple images, therefore we need multiple URLs. Next, we have the options that we’ve talked about many times so far.
What’s new and interesting here is the third parameter value, the partialFetchHandler. You might think of it as a progress handler as well. Imagine that you have to download a big number of images, and that task is going to take some time. Most probably you’ll want to keep your users informed about the download progress by showing a progress bar or a relevant message. This handler makes that possible. Every time an image is fetched, its data will be given as the first argument to this handler, with the second argument being the index of the image in the collection of all images. That way we will have every single image at our disposal right when it becomes available, and with the index we’ll be able to show the progress that has been made at any given moment.
Finally, the last parameter value it’s a completion that will be called when the overall process is finished. Notice that we pass no image data here; that happens in the partialFetchHandler.
Let’s go to the implementation part now. In the FetchableImage extension add the method definition:
extension FetchableImage {
    func fetchBatchImages(using urlStrings: [String?], options: FetchableImageOptions?,
         partialFetchHandler: @escaping (_ imageData: Data?, _ index: Int) -> Void,
         completion: @escaping () -> Void) {


    }
}
Now, an important clarification. We’ll fetch multiple images recursively, meaning we’ll be calling the same method to fetch an image again and again until all images have been fetched. That method won’t be the one we just defined; for that purpose, we’ll implement a new one.
Still being in the FetchableImage extension, add the next private method. This won’t be visible out of the extension, however it’ll help us achieve our goal:
private func performBatchImageFetching(using urlStrings: [String?], currentImageIndex: Int,
    options: FetchableImageOptions?,
    partialFetchHandler: @escaping (_ imageData: Data?, _ index: Int) -> Void,
    completion: @escaping () -> Void) {

}
As you notice, the parameters are almost identical to those of the previous method. The new thing here is the second parameter, which is the index of the URL that should be used in the urlStrings collection.
The implementation is fairly simple. At first, it’s necessary to make sure that the currentImageIndex is within the urlStrings count range, and proceed if only that’s true. Otherwise, we’ll just call the completion handler and return from the method:
private func performBatchImageFetching(using urlStrings: [String?], currentImageIndex: Int,
    options: FetchableImageOptions?,
    partialFetchHandler: @escaping (_ imageData: Data?, _ index: Int) -> Void,
    completion: @escaping () -> Void) {

    guard currentImageIndex < urlStrings.count else {
        completion()
        return
    }
}
The next step is to fetch the image pointed by the currentImageIndex. In order to do that, we’ll use the fetchImage(from:options:completion:) method that we have already made:
private func performBatchImageFetching(using urlStrings: [String?], currentImageIndex: Int,
    options: FetchableImageOptions?,
    partialFetchHandler: @escaping (_ imageData: Data?, _ index: Int) -> Void,
    completion: @escaping () -> Void) {

    ...

    fetchImage(from: urlStrings[currentImageIndex], options: options) { (imageData) in

    }
}
Inside the body of the above completion handler we’ll do two things. First, we’ll call the partial handler in order to pass to the caller the image data that was just fetched (or nil if no data exists), and the index of the current image:
private func performBatchImageFetching(using urlStrings: [String?], currentImageIndex: Int,
    options: FetchableImageOptions?,
    partialFetchHandler: @escaping (_ imageData: Data?, _ index: Int) -> Void,
    completion: @escaping () -> Void) {

    ...

    fetchImage(from: urlStrings[currentImageIndex], options: options) { (imageData) in
        partialFetchHandler(imageData, currentImageIndex)
    }
}
The second thing is to call the same method and recursively fetch the next image. What’s important to take care of here is the second argument; we pass the currentImageIndex increased by 1 to point to the next image. At the end we’ll call the completion handler:
private func performBatchImageFetching(using urlStrings: [String?], currentImageIndex: Int,
    options: FetchableImageOptions?,
    partialFetchHandler: @escaping (_ imageData: Data?, _ index: Int) -> Void,
    completion: @escaping () -> Void) {

    ...

    fetchImage(from: urlStrings[currentImageIndex], options: options) { (imageData) in
        partialFetchHandler(imageData, currentImageIndex)

        self.performBatchImageFetching(using: urlStrings,
            currentImageIndex: currentImageIndex + 1,
            options: options, partialFetchHandler: partialFetchHandler) {
            completion()
        }
    }
}
With that method implemented, we can go back to the fetchBatchImages(using:options:partialFetchHandler:completion:) method that we started making, but we never finished it. Simply enough, in it we’ll call the above method indicating the index of the first URL; 0 (zero). At the body of the completion handler of the invoked method, we’ll call the completion handler of this one so the caller knows that the entire process has finished.
func fetchBatchImages(using urlStrings: [String?],
                      options: FetchableImageOptions? = nil,
                      partialFetchHandler: @escaping (_ imageData: Data?, _ index: Int) -> Void,
                      completion: @escaping () -> Void) {

    performBatchImageFetching(using: urlStrings, currentImageIndex: 0,
        options: options, partialFetchHandler: { (imageData, index) in

        partialFetchHandler(imageData, index)

    }) {
        completion()
    }

}
And with that we finish the necessary work in order to enable multiple image fetching. As you understand, all the essential stuff was already made. Here we focused only on the recursion and on using the code that already works.
Trying Out Fetching Multiple Images
So, now that FetchableImage is capable of fetching batch images, let’s give it a try and see that it actually works. To start, open the ContactListModel.swift file where you’ll find the ContactListModel class. What’s already implemented here is the loading and decoding of the fake contact data, read this time by the fakedata.json file that exists in the demo project.
Notice here that there are three observed properties marked as @Published:
contacts: An array ofContactobjects that contains the fake contact data.progress: A Double value that will keep the download progress. Any change on this property will lead to visual update of the progress bar (implemented in theProgressView, but embedded in theContactListView).isFetching: A flag indicating whether a download process is taking place or not. We’re going to need it in order to show or hide the progress, as well as to prevent starting a new download process while another one is already in progress.
Let’s fetch batch images now. First, adopt the FetchableImage protocol:
class ContactListModel: ObservableObject, FetchableImage {
    ...
}
Next, implement a new method called fetchAvatars(). First we’ll make sure that isFetching is false, and if so we’ll turn it to true and we’ll initialize the progress value:
func fetchAvatars() {
    guard !isFetching else { return }
    isFetching = true
    progress = 0.0
}
Next, let’s create a collection of all avatar URLs:
func fetchAvatars() {
    ...

    let allAvatarURLs = contacts.map { $0.avatarURL }
}
Time to call the fetchBatchImages(using:options:partialFetchHandler:completion:) method in order to initiate the batch image fetching:
func fetchAvatars() {
    ...

    fetchBatchImages(using: allAvatarURLs, options: nil, partialFetchHandler: { (imageData, index) in

        DispatchQueue.main.async {
            guard let data = imageData else { return }
            self.contacts[index].avatar = UIImage(data: data)?.cgImage

            self.progress = Double(((index + 1) * 100) / self.contacts.count)
        }

    }) {
        print("Finished fetching avatars!")

        DispatchQueue.main.asyncAfter(deadline: .now() + 0.4, execute: {
            self.isFetching = false
        })
    }
}
See what happens every time the partial handler is called:
- First, we switch to the main thread necessarily because image fetching is taking place in the background.
- Second, we make sure that there’s image data fetched and the returned value is not
nil. - Third, and probably most importantly, we use the index of the image in order to access the matching object in the
contactsarray and update its avatar. That action will make the UI get updated and display the avatar image. - Finally, we calculate the progress as a percentage. This will update the progress bar.
Once all downloads are finished, the completion handler is called. Besides the non-important print statement which exists just for verification purposes, we switch the value of the isFetching property back to false. This is taking place on the main thread because it will affect the UI; it’ll make the progress bar become hidden. The small delay of 0.4 seconds is there just for the pleasure of the eye, so the progress bar does not disappear instantly right after the last image fetching.
Open the ContactListView.swift file now, and spot the button that works as the first navigation item. There we’ll call the fetchAvatars() method:
.navigationBarItems(
leading:
Button(action: {
// Add this line:
self.contactList.fetchAvatars()
}) {
Image(systemName: "arrow.clockwise")
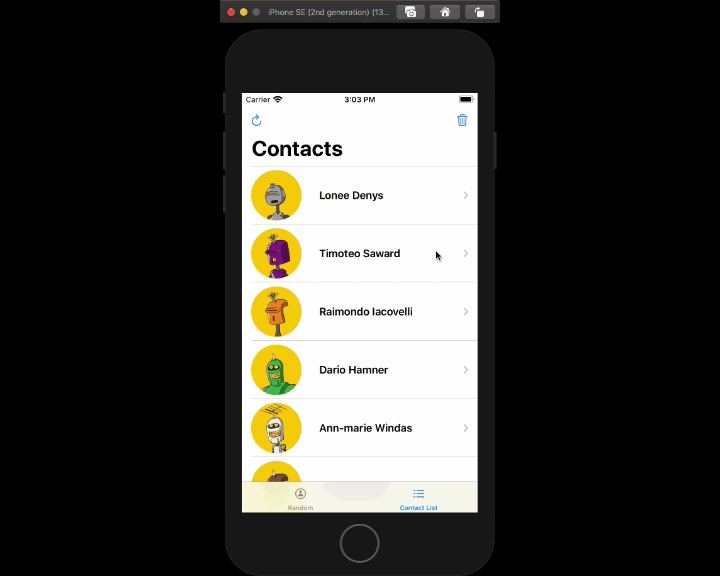
},Run the app, and open the second tab. You’ll see a long list of fake contacts having the default avatar image. Tap on the refresh button, and see the avatars gradually being updated. On next run, you’ll find out that avatars will be shown almost instantly; that’s because they’re stored locally.
Note: We could have avatars being fetched automatically, but to make it easier to try out what we’re building we keep it as a manual action that gets triggered with the refresh bar button item.
Deleting Single Local Image Files
Fetching images is out of our way now, so let’s focus on the opposite actions for a while. Let’s make it possible to remove either single or batch image files from a local directory, and let’s start in this part with the first one.
Back to the FetchableImage.swift file, let’s declare the following new method:
protocol FetchableImage {
    ...

    func deleteImage(using imageURL: String?, options: FetchableImageOptions?) -> Bool
}
Whatever we’ve discussed about the image URL and options applies here too, so I’m skipping any kind of further discussion about them. However, see that this time there’s not a completion handler here. Instead, the deletion result is returned instantly from the method as a Boolean value. On successful deletion it’ll return true, otherwise it’ll return false.
Let’s jump to its implementation now. In the FetchableImage extension we’ll start by finding the URL to the local image:
extension FetchableImage {
    ...

    func deleteImage(using imageURL: String?, options: FetchableImageOptions? = nil) -> Bool {
        guard let localURL = localFileURL(for: imageURL, options: options),
            FileManager.default.fileExists(atPath: localURL.path) else { return false }
    }
}
If the URL to the local image is nil, or the file cannot be found, we just return false and we stop here. Otherwise, we try to delete the image file in a do-catch statement as shown next:
func deleteImage(using imageURL: String?, options: FetchableImageOptions? = nil) -> Bool {
    ...

    do {
        try FileManager.default.removeItem(at: localURL)
        return true
    } catch {
        print(error.localizedDescription)
        return false
    }
}
And that’s all. We can now go to try out single image deletion.
Trying Out Deleting Single Images
When using the demo app, then by tapping on a contact’s row in the list (second tab) you’re navigating to a details page. That’s nothing more than the contact’s avatar, name, and a button that allows to delete the avatar image. Actually, you’ll find out soon that the button has a double role. When the contact’s avatar exists, it allows to delete it. In the opposite case, it will be used to fetch it again.
So, here’s the place where we’ll test the image deletion. Before we get to the button though, open the ContactListModel.swift file where it’s necessary to add a couple of new methods. In the first one we’ll call the deleteImage(using:options:) method we implemented right above:
func deleteAvatar(for contact: Contact) {
    guard let index = contacts.firstIndex(where: { $0.id == contact.id }) else { return }

    if deleteImage(using: contacts[index].avatarURL, options: nil) {
        contacts[index].avatar = nil
    }
}
The brand new deleteAvatar(for:) method gets a Contact object as an argument, and based on that it tries to find its index among all Contact objects in the contacts array. Then, it calls the deleteImage(using:options:) method of the FetchableImage protocol, and on success it removes the actual avatar image by setting nil to the respective property.
The next method we’ll add in the ContactListModel class is necessary only to let us make the button in the ContactDetailsView have the double role I mentioned previously; delete and fetch. There’s nothing new that we haven’t discussed about already, so I’m presenting it at once:
func fetchAvatar(for contact: Contact, completion: @escaping (_ avatar: CGImage?) -> Void) {
    guard let index = contacts.firstIndex(where: { $0.id == contact.id }) else { return }

    fetchImage(from: contacts[index].avatarURL) { (imageData) in
        DispatchQueue.main.async {
            guard let data = imageData else { return }
            self.contacts[index].avatar = UIImage(data: data)?.cgImage
            completion(self.contacts[index].avatar)
        }
    }
}
Open the ContactDetailsView.swift now, and update the following:
Button(contact.avatar != nil ? "Delete Avatar" : "Fetch Avatar") {

}
with this:
Button(contact.avatar != nil ? "Delete Avatar" : "Fetch Avatar") {
    if self.contact.avatar != nil {
        self.contact.avatar = nil
        self.contactList.deleteAvatar(for: self.contact)
    } else {
        self.contactList.fetchAvatar(for: self.contact) { (fetchedAvatar) in
            guard let avatar = fetchedAvatar else { return }
            self.contact.avatar = avatar
        }
    }
}
Finally, run the app. Go to the details of a contact, and use the button you’ll find there. If the avatar already exists, it’ll be deleted, otherwise it’ll be fetched and displayed.
Deleting Multiple images
Now that single image deletion is working, we can easily add a new method in the FetchableImage protocol that will be deleting multiple images. And I’m saying easily, because we’ll be based on the single deletion method we implemented right before.
Open the FetchableImage.swift file, and add the following method declaration in the FetchableImage protocol:
protocol FetchableImage {
    ...

    func deleteBatchImages(using imageURLs: [String?], options: FetchableImageOptions?)
}
Then, in the protocol’s extension implement it. It’s as simple as it can get:
extension FetchableImage {
    ...

    func deleteBatchImages(using imageURLs: [String?], options: FetchableImageOptions? = nil) {
        DispatchQueue.global().async {
            imageURLs.forEach { _ = self.deleteImage(using: $0, options: options) }
        }
    }
}
First, we use the global background thread for our task. Then, using the forEach higher order function we go through all image URLs provided in the first parameter value, and we’re deleting one by one all image files.
Note: Read more about higher order functions here.
Notice that the above implementation is based on the assumption that the imageURLs parameter value contains the URLs of the images that should be deleted. It won’t work in case we wanted to delete multiple files with custom file names provided to the customFileName property of equal number of FetchableImageOptions objects. In such scenario, we would need to create a new method:
protocol FetchableImage {
    ...

    func deleteBatchImages(using multipleOptions: [FetchableImageOptions])
}
And the implementation in the protocol’s extension:
func deleteBatchImages(using multipleOptions: [FetchableImageOptions]) {
    DispatchQueue.global().async {
        multipleOptions.forEach { _ = self.deleteImage(using: nil, options: $0) }
    }
}
As you understand, each FetchableImageOptions item in the multipleOptions array will match to a single file with custom file name.
Trying Out Batch Image Deletion
We are going to try out here the batch deletion of images based on URLs, so open the ContactListModel.swift file where it’s necessary to add one new method in the ContactListModel class:
func deleteAllAvatars() {

}
In it, we’ll create an array of all avatar URLs, then we’ll call the method we just implemented in order to delete all local image files, and finally we’ll iterate through all contact objects in the contacts array to set nil to all avatar objects:
func deleteAllAvatars() {
    let allAvatarURLs = contacts.map { $0.avatarURL }
    deleteBatchImages(using: allAvatarURLs, options: nil)
    for (index, _) in contacts.enumerated() {
        contacts[index].avatar = nil
    }
}
Finally, go to the ContactListView.swift file, and find the second bar button. In the action closure call the deleteAllAvatars():
.navigationBarItems(
    leading:
    ...,

    trailing:
    Button(action: {

        // Add this line:
        self.contactList.deleteAllAvatars()

    }) {
        Image(systemName: "trash")
    }
)
Run the app and tap on the trash button in the contacts list if you’ve already fetched remote avatar images. All avatars will be removed, and you’ll need to tap on the refresh button to fetch them again.
Saving A Custom Image
There’s one last thing left to be done, and that is to add one last method in the FetchableImage protocol that will make it easy for us to save an image locally straight from the app, instead of fetching it from a remote source. That last method is not something that we need in order to use the FetchableImage protocol; however it would be nice to exist, so we can save custom images if necessary without having to come up with new solutions while developing an app.
So, open the FetchableImage.swift file for one last time, and add the next method declaration in the protocol:
protocol FetchableImage {
    ...

    func save(image data: Data, options: FetchableImageOptions) -> Bool
}
Notice here that:
- The method accepts the data of the image that we want to save.
- The
optionsparameter value is not optional here; we need it to get the file name!
Let’s implement it now in the protocol’s extension:
extension FetchableImage {
    ...

    func save(image data: Data, options: FetchableImageOptions) -> Bool {
        guard let url = localFileURL(for: nil, options: options) else { return false }
        do {
            try data.write(to: url)
            return true
        } catch {
            print(error.localizedDescription)
            return false
        }
    }
}
If the URL to the actual file name cannot be formed or writing to file fails, we return false. If writing image data to file succeeds though, then we return true.
I leave that last feature for you to test.
Summary
FetchableImage protocol is now complete, and that brings us to the end of this post. I hope you enjoyed this step-by-step implementation of a really handy tool, which hopefully will fit in your own projects.
If you haven’t implemented your own solution in order to deal with remote images, then you can consider starting with what you read here and to extend or modify it in order to cover your specific needs.
For reference, you can download the complete project on GitHub.
If you want to go even further, you can make it a reusable library and wrap it up in a Swift package. Thanks for reading!


