

Following the last tutorial, we have created our first Search Ad Campaigns which are up and running! Have you ever wondered how well your money was spent for your ad campaign? Who have viewed your ads on the App Store? How can you alter the bid while the campaign is still running? In this tutorial, you will learn to how to interpret the ad performance, fine tune your search ad campaign, so that our money will work harder for you to deliver results.
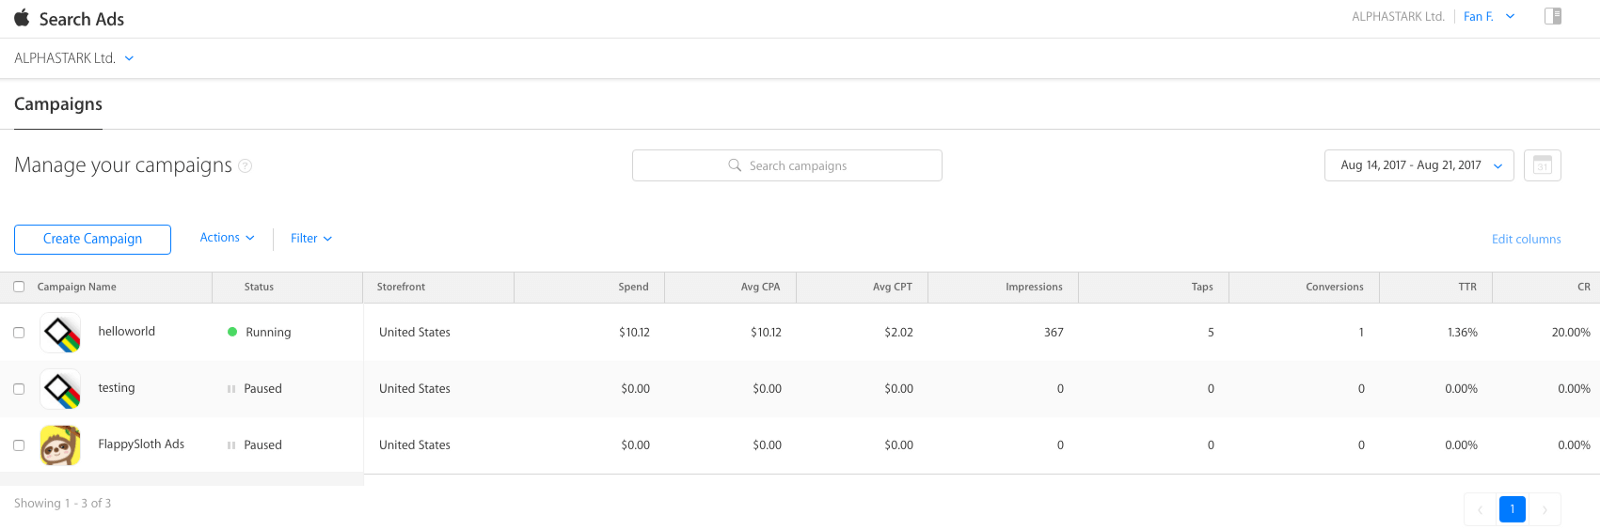
Let’s get started. Do you still remember this page? After you log in to you account, you land on this All Campaign page. Here, it shows all the campaigns you have set up and the option to create one.
Understanding the Ad Campaign Metrics
Now let’s take a look at the metrics shown on the “helloworld” row:

The first item is the ad campaign name with the app icon next to it. You can see the status of our ad, whether it is running, paused or no payment method, and the storefront we choose to target.
The next item is “Spend”, which is the overall budget we have spent on this campaign. “Avg CPA” is the average cost per action (factual) that our ad is performing. This is an important reference for us to fine tune our campaign later. “Avg CPT” is the average cost per tap (factual), showing us how much an Ad on according Keyword is charged when users click on the Ad, no matter whether they have downloaded our app or not.
The “Impressions” column shows the number of times the ad has been displayed to users. “Taps” is the number of taps that users tap on our ads, and “Conversions” is the number of downloads/ re-downloads throughout the whole campaign.
“TTR” (Tap-Through Rate) is the percentage of users who tapped on our ad that directs the user to the app’s description page. “CR” is the number of conversions (downloads/ re-downloads) over the number of taps people clicked on our Ads.
The above are the metrics that show us how the search ad campaign performs when you navigate down to the Ad Groups and Keywords under our “helloworld” campaign. We will find a more specific data sets of how each Ad Groups and Keywords are performing using the exact same metrics. That’s why if we have mastered the above metrics’ concept, you will find it pretty easy to understand the following sessions. If you do not understand the above metrics definitions thoroughly, try to read the above metrics twice to get yourself familiar, and feel free to comment below to ask me if you have any questions.
Tweaking the Ad Campaign
Before we move on, I suggest you edit the columns and add two metrics to our campaign view, both “Budget” and “Daily Cap”:
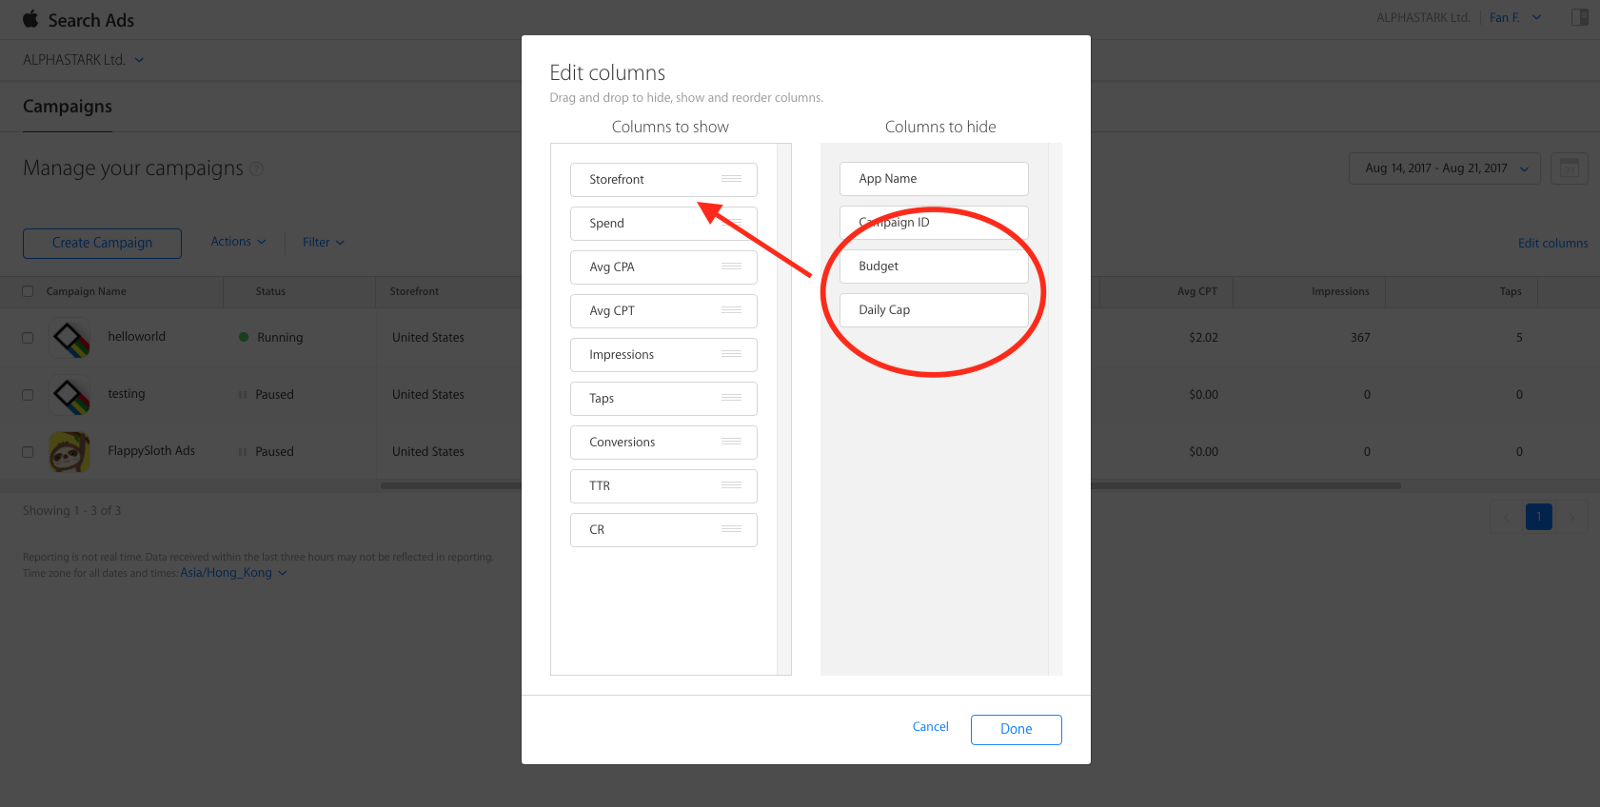
These metrics are the settings we made when we create a campaign in the previous tutorial. By adding these two columns, you can now fine tune these two items easily on the campaign page according to our budget:

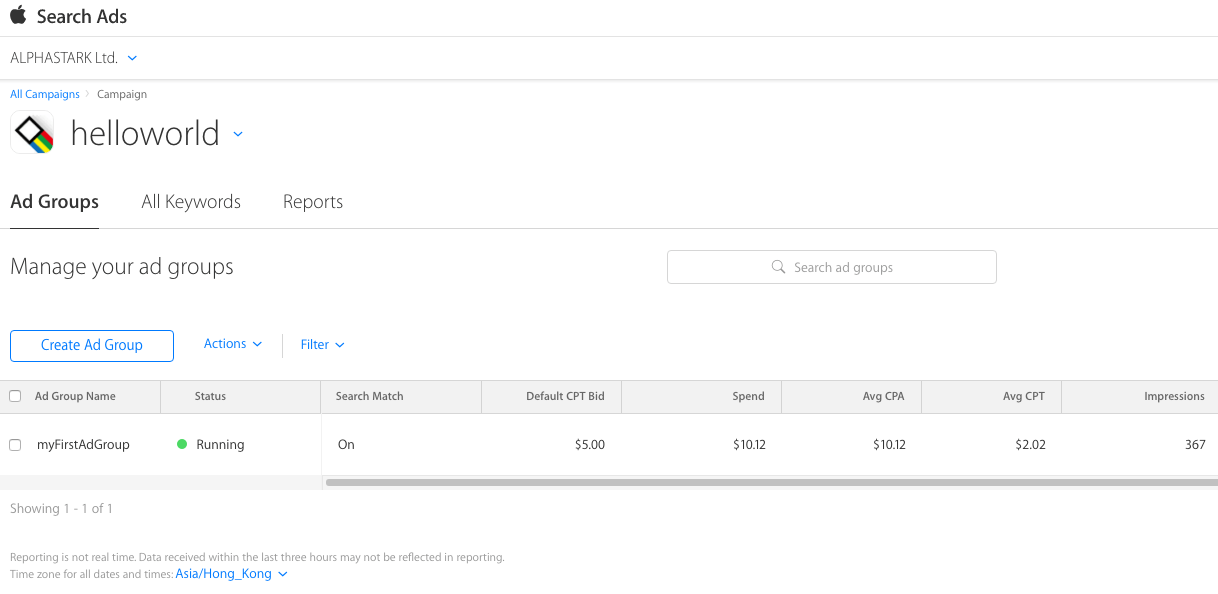
Now, let’s navigate down to Ad group page by clicking on the “Campaign”:

In Ad Groups Page, we see our preset myFirstAdGroup:
In Ad Group page, we see two new metrics, one is Search Match, the second one is Default CPT Bid. For Search Match it shows ON, which tells Apple to smartly pick relevant keywords for us. For Default CPT Bid, it is the default price you want to bid under myFirstAdGroup, you can adjust the Default CPT Bid value anytime by clicking on the number:

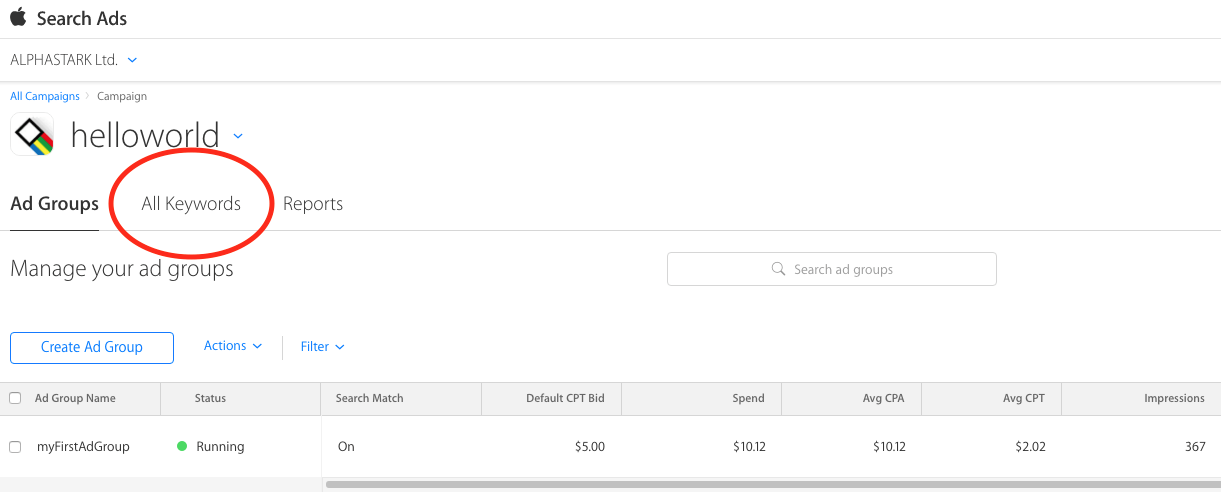
Please note that Default CPT Bid only affects new keywords we add under this Ad Group. It does not affect the bidding price we previously set for each keywords. If you want to amend the real-time keywords CPT Bid, you must navigate to the next page, the All Keywords:
Under All Keywords page, not only you can amend CPT Bid in real time, you can learn how each keyword performs:
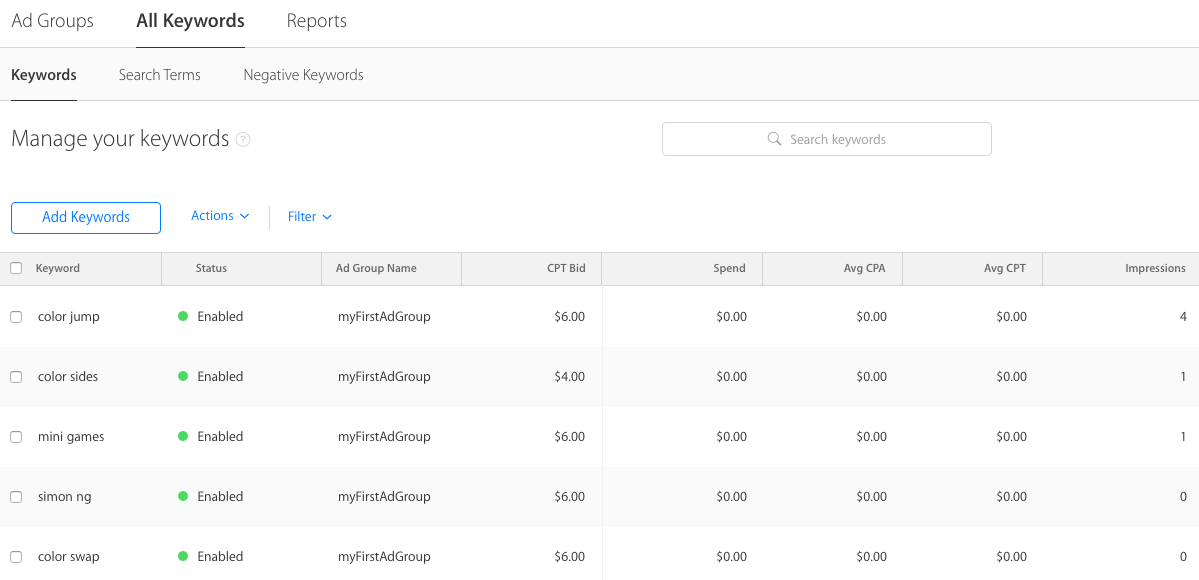
Under CPT Bid, you can change the bidding price anytime. Besides it, you might feel familiar with the metrics on the right-hand side. Yes, they are the same metrics as mentioned above in Campaign page, just that in All Keywords page, we gain the insight to know how each keyword performs individually. Optionally, you may remove those keywords that do not have any impressions.

You may wonder if you need to change the bid price from time to time to avoid over payment. In my opinion, you do not have to. Search Ads use a second price auction, which determines the actual cost of a tap based on what the bid price of your nearest competitor. Let me give you an example. Say, for the “color jump” keyword, our bid price is set to $6. If the bid price of the same keyword of our nearest competiter is $3, you do not need to pay $6 for your ad. Search Ads will compute the actual cost based on the bid price of your competiter, which is $3. Your actual bid price will be something like $3.x.
Now let’s navigate to Search Terms:
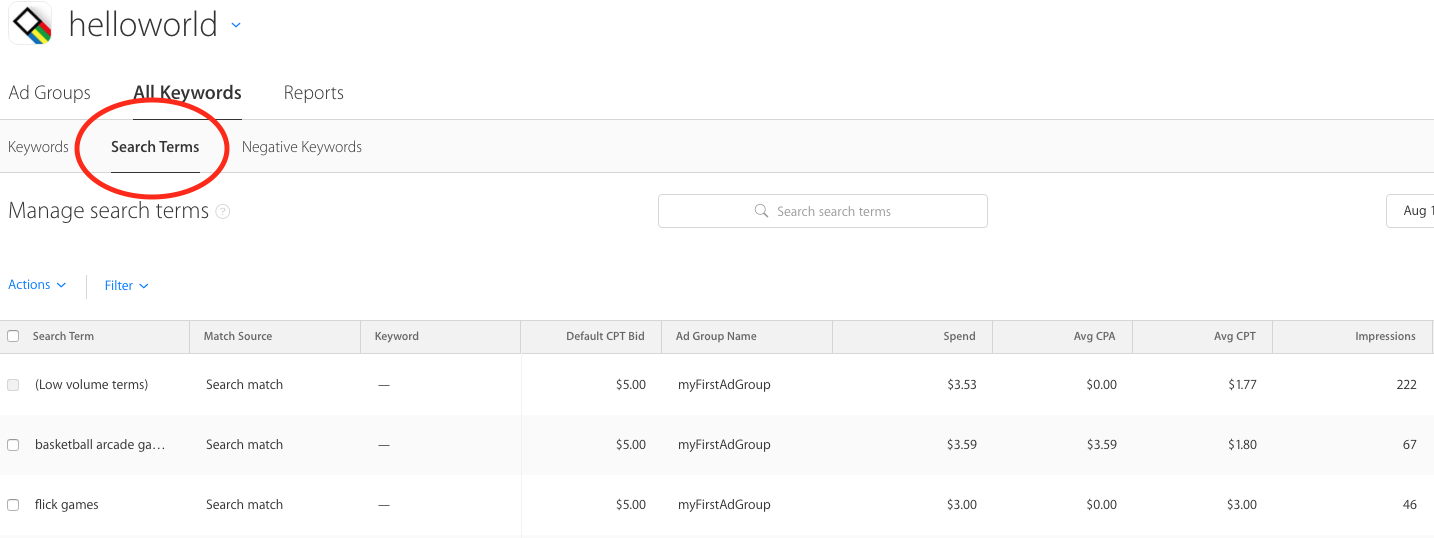
Remember that we have turned on Search Matches and set Broad Match Type for our keywords when we create a campaign in the previous tutorial? In Search Terms page, it shows us all our Search Match terms and bid keywords. We can also add search terms as keywords or negative keywords here.
Besides Search Terms, let’s click on Negative Keywords:
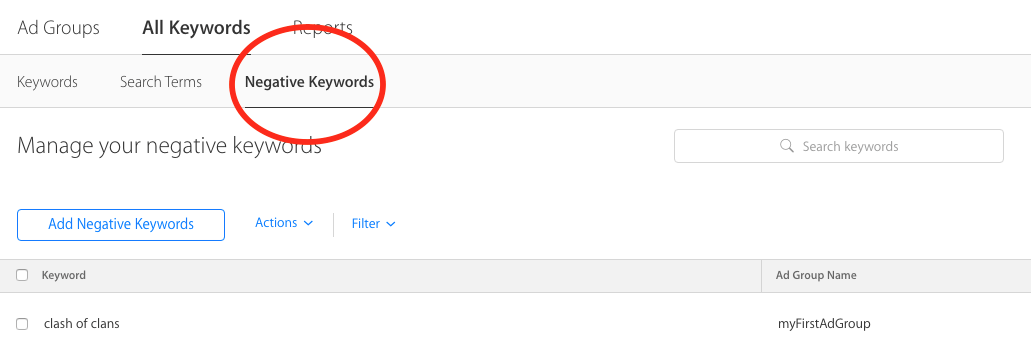
Here, we can add or delete negative keywords. But we cannot amend the previously set keywords. If by mistake we set a wrong match type for according keywords, we can correct that by simply deleting it and adding a new keyword.
Now let’s go to the next session, Reports:
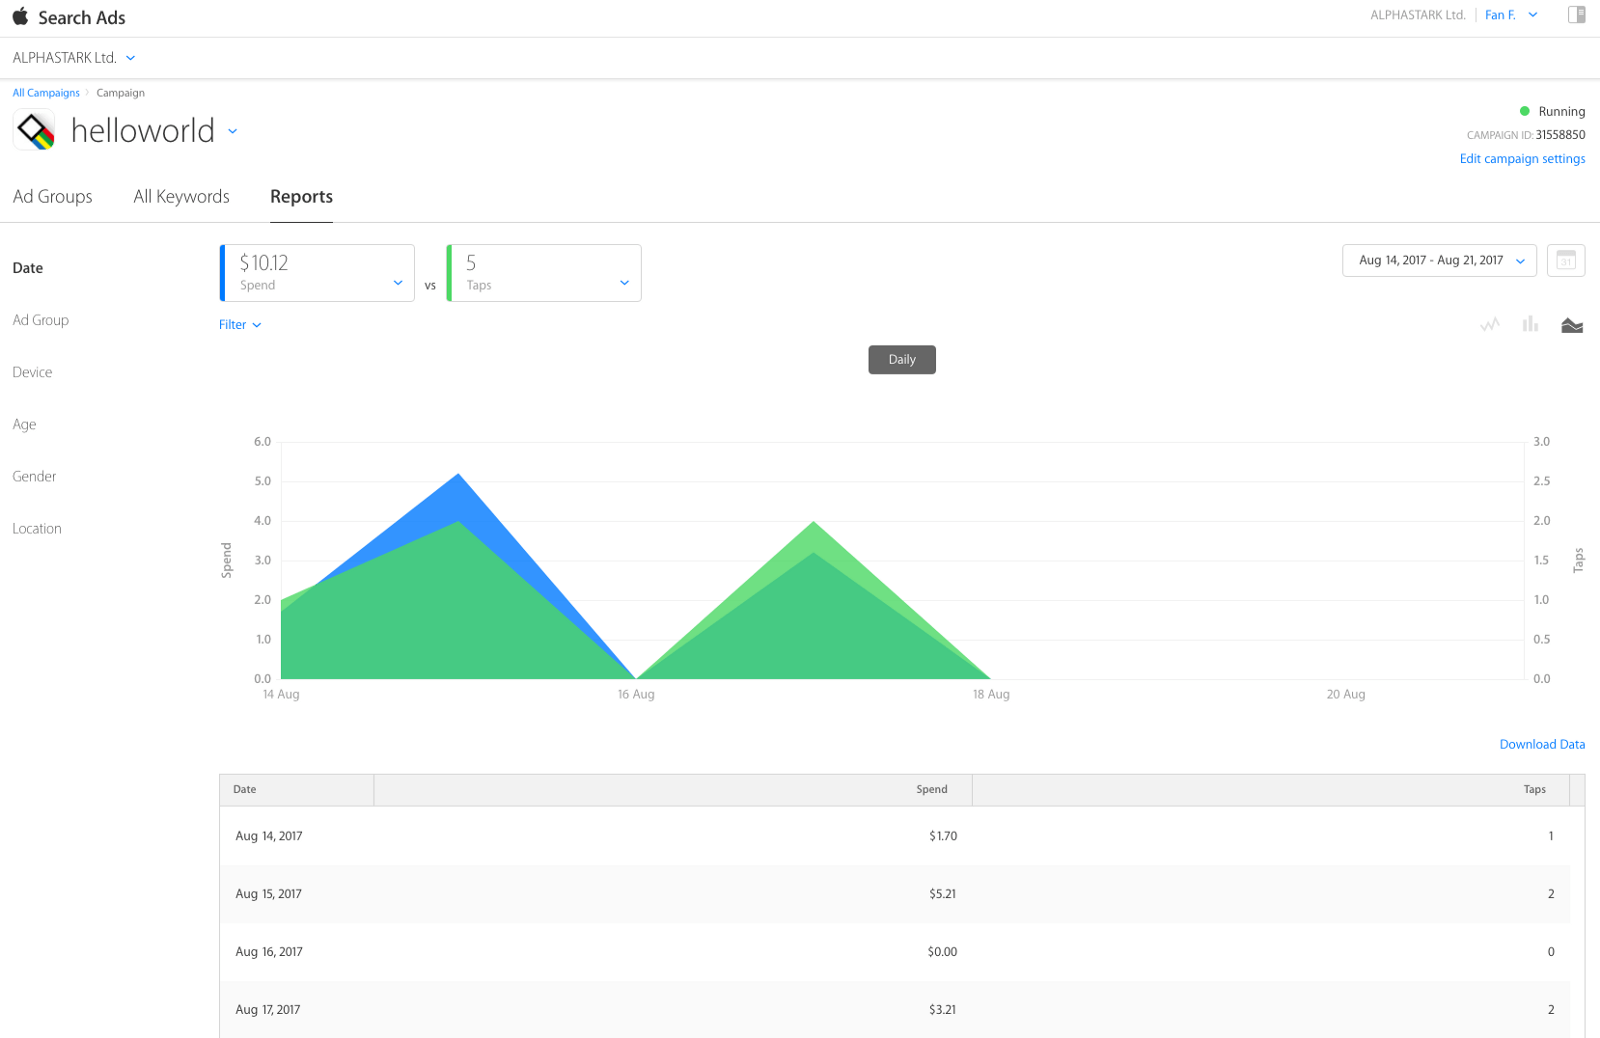
Reports page shows us necessary data that are reflected from factual customer feedbacks, in terms of daily and even hourly.
To understand more about our impressed users, we can view the data we mentioned above including Spend, Average CPT, Average CPA, Impressions, Taps, Conversions, TTR and CR, on a chart. Data are sorted in terms of Date, Ad Group, Devices, Age, Gender and Location.

The advantages of maintaining a report-checking habit are many. One is to understand clearly about the factual results versus our presumptions. Sometimes we assume that our app might be more appealing to male users, but CR metrics tells us the opposite. Sometimes we assume that younger people might be more interested in downloading our apps but the Conversions metrics tells us a factual feedback that middle-age users convert more during the same period.
It is very important to check these data regularly in order to verify our assumptions and hence refine our marketing strategy over time. Lastly, as in Report Page, data are intuitively displayed. I will leave it for you to discover more about your campaign.
To recap, I have walked you through on how to fine tune our marketing budget, daily cap, default CPT Bid of Ad Group, add keywords/ negative keywords, discover search terms and change Keywords’ CPT in real time. You also learned how to read Reports in order to refine our marketing campaign and improve Ad performances.
Please feel free to let me know if you have any problems when fine tuning your campaign. If you have any experience or insight about Search Ads you want to talk about, please don’t hesitate to share it by commenting below!


