

There are times when you struggle to navigate your customer to the office, especially when it is located in an obscure building somewhere inside suburbs. You may start to tell your customer the direction on phone. But in such situation, the best way is to opt for Google Street View.
Google Street View – the technology is used for panoramic views of streets and buildings around the world. This feature was created by Google as an extension for Google Maps and available for mobile app developers via a dedicated SDK (software development kit). You can integrate Street View in your iOS apps as a feature.
You can find this service extremely useful while developing mobile apps for various industries. Here are some examples:
- Travel Industry – obviously, there are many hostels hiding inside suburbs across the world.
- Sport & Fitness – the feature allows you to display and animate run routes.
- eCommerce & Food Delivery – can be applied for internal use in order to navigate couriers across the city.
And the list goes on. For instance, we at GBKSOFT found Street View extremely useful while developing a iOS app for traders and finance consultants. Thus, we’d like to share our knowledge with you! In particular, we will cover the following topics in this tutorial:
- Integration of Google Maps;
- Working with Google Street View;
- Setting up camera positioning to display the needed object;
- Testing and tweaking Google Street View.
Setting up the Project
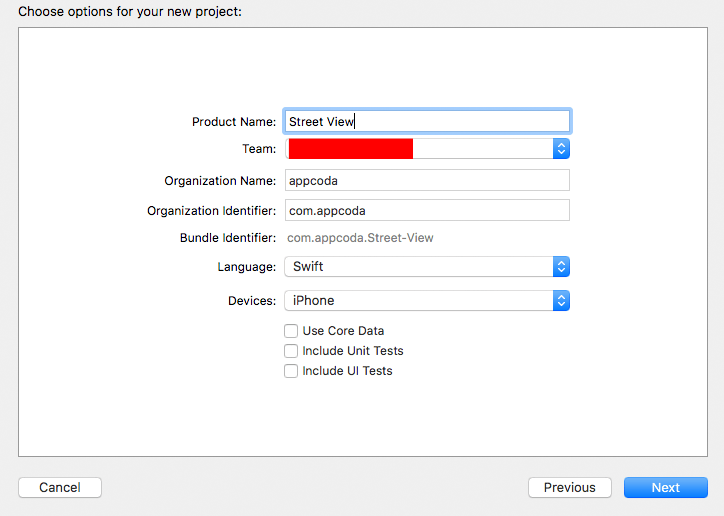
To get started with Street View, let’s first create a test project with minimal configurations. Fire up Xcode and create a new project using the Single View Application template. Name the project Street View (or whatever name you like).
Next, you need to add Google Maps library using Cocoapods. Open terminal and change to your project folder. Type the following command to initiate pod:
cdpod init
Next, edit the Podfile like this to include the GoogleMaps library:
target 'Street View' do
  # Comment the next line if you're not using Swift and don't want to use dynamic frameworks
  use_frameworks!

  # Pods for Street View
  pod 'GoogleMaps'
end
Make sure you close the Xcode project. Go back to the terminal and type the following command to install the pod:
pod install
If everything works great, you should have Google Maps bundle in your Xcode project. We are now ready to implement Google Street View in the app. Open Street View.xcworkspace to get started!
Getting the API Key from Google
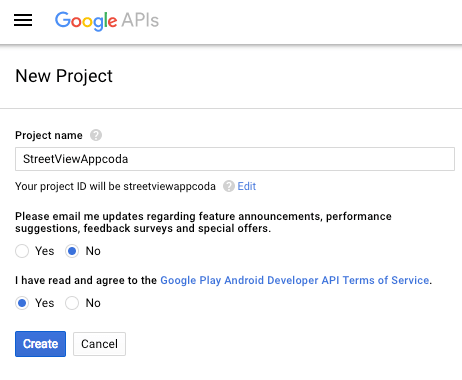
Now, you’ll need to get an API key, so your app could communicate with Google Maps service. First, go to https://console.developers.google.com, and create a new project. I name it StreetViewAppCoda. You can just pick another name if you like.
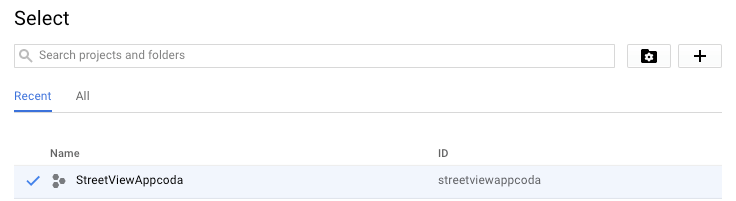
Next, open your fresh made project.
And click “Enable API” in Google API Manager:

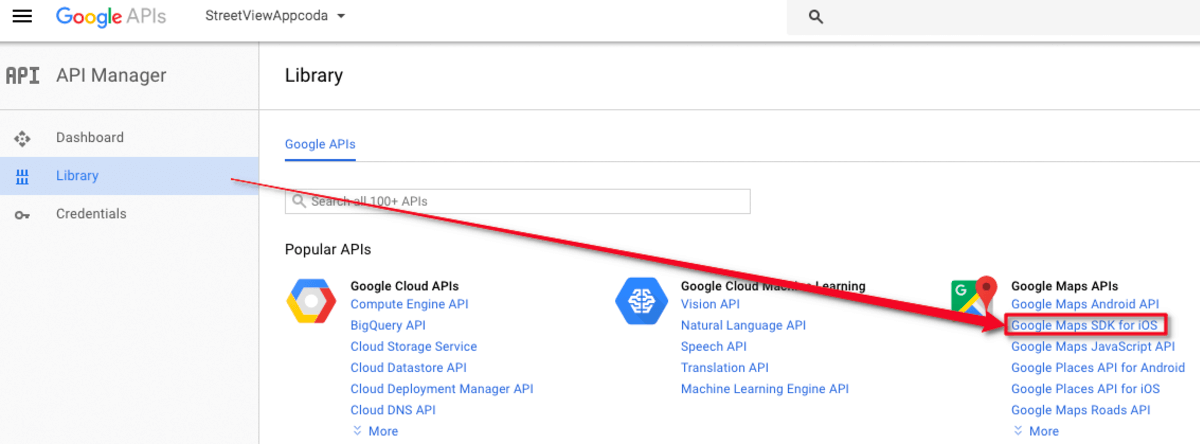
Next, we need to register our application in Google for using the Google Maps SDK. Go to the Library tab and select Google Maps SDK for iOS.
Then, click Enable to enable the API:

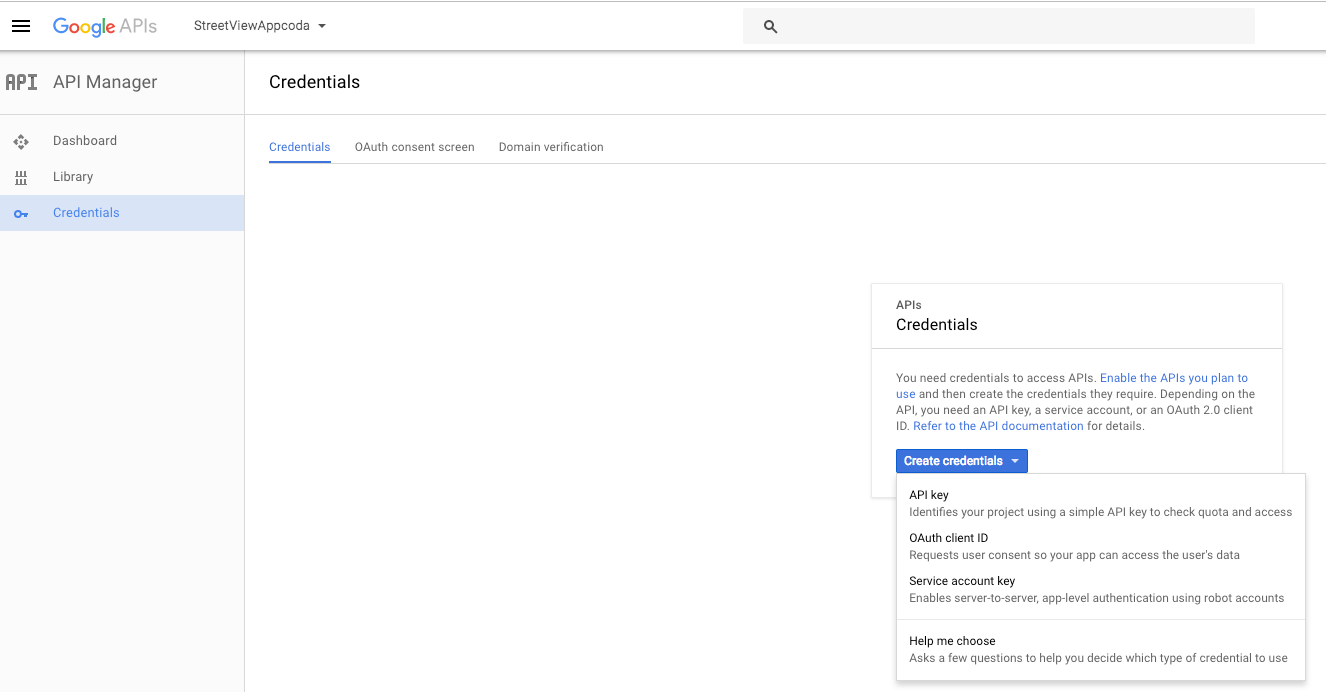
Now go to the Credentials tab. Click “Create Credentials” and choose “API key” to create your own API key.
Then, go to API key settings, and click the Edit icon.

Here you will need to limit the API key to our demo app only. Choose iOS app in the key restriction section, and enter the bundle ID of your app (e.g. com.appcoda.Street-View).

Save it. You made it! You can now access Google Maps service from your demo app. It’s time to return Xcode and code our demo app for Google Street View.
Configure Google Street View
Open Street View.xcworkspace if you have closed it. Go to the AppDelegate.swift. Here we will initialize the Google Maps SDK. At the beginning of the file, add the import statement to import the GoogleMaps library:
import GoogleMaps
Edit the method and insert a line of code to configure the API key:
func application(_ application: UIApplication, didFinishLaunchingWithOptions launchOptions: [UIApplicationLaunchOptionsKey: Any]?) -> Bool {

    GMSServices.provideAPIKey("")
    return true
}
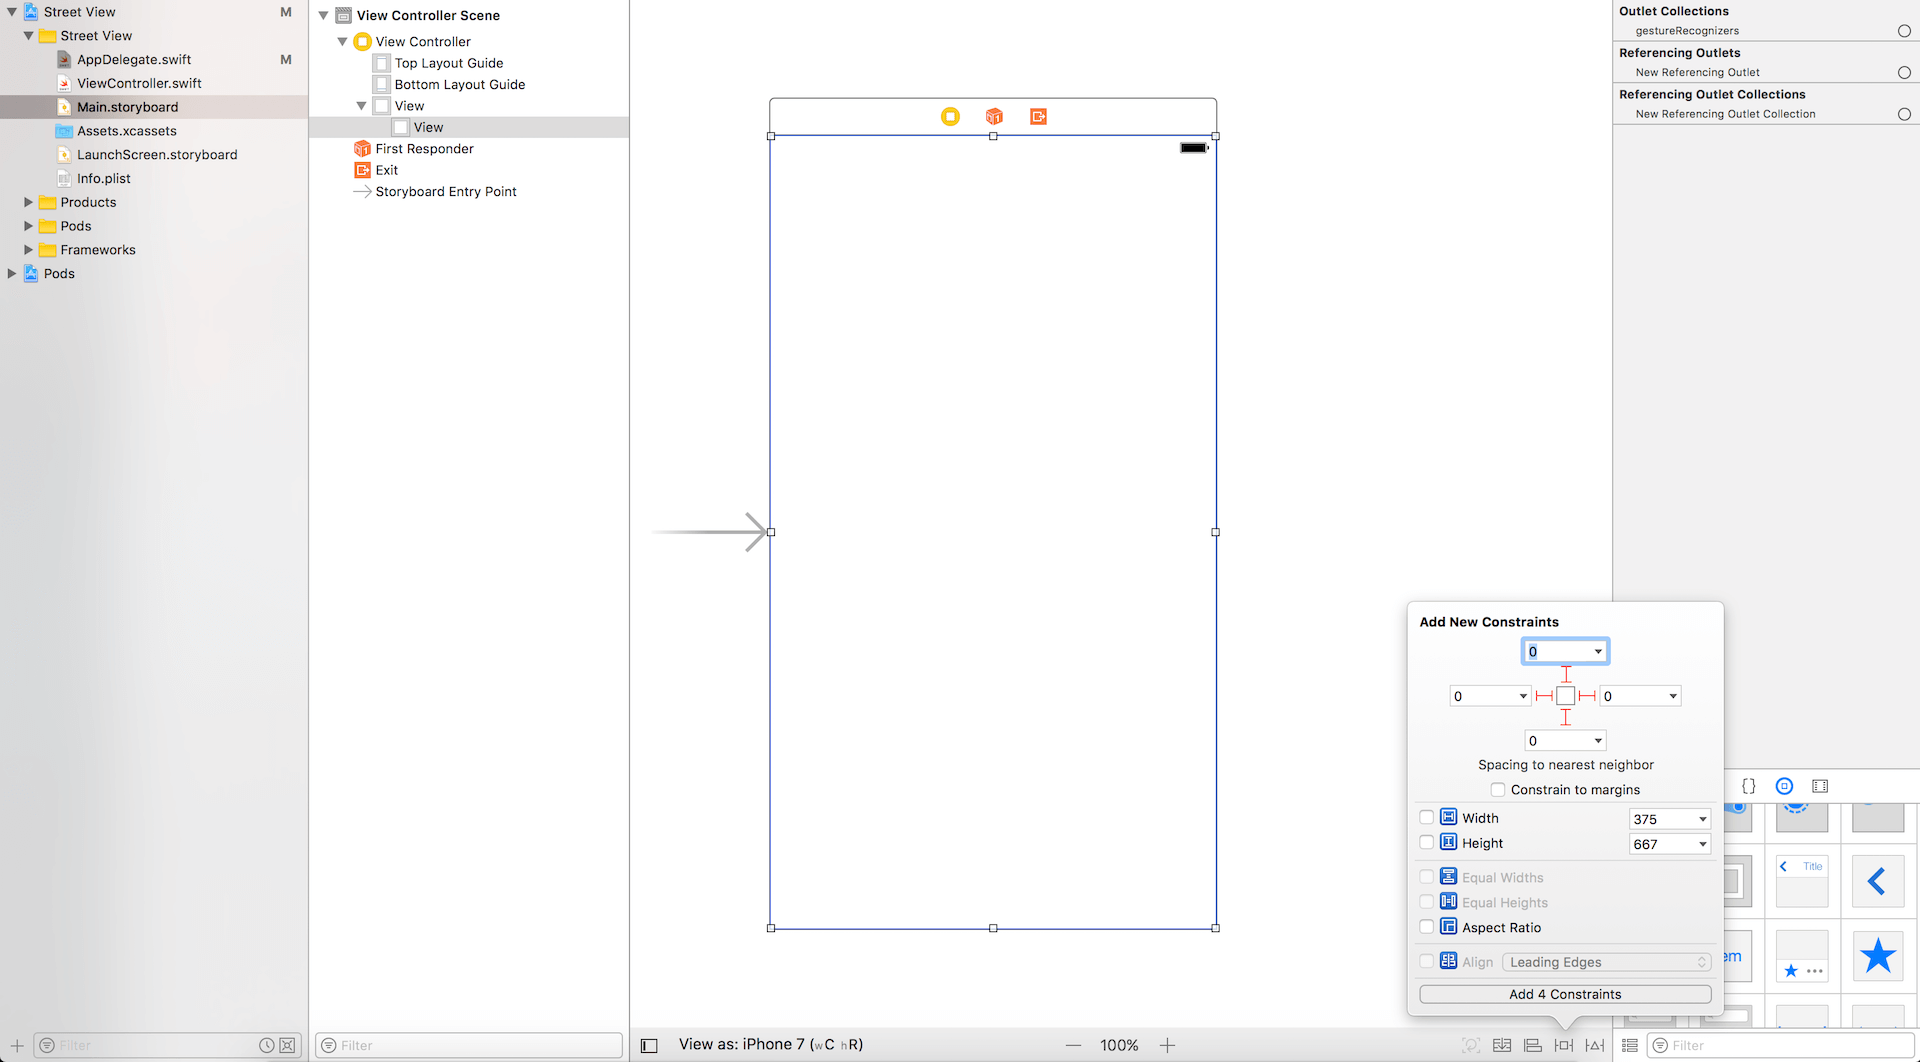
Now we need to place our panorama (Street View) on the screen. Go to Main.storyboard and add a view to the view controller. This view is used to display the street view, provided by the Google Maps SDK. In order to make it fit for all screen sizes, add a few layout constraints as shown below.
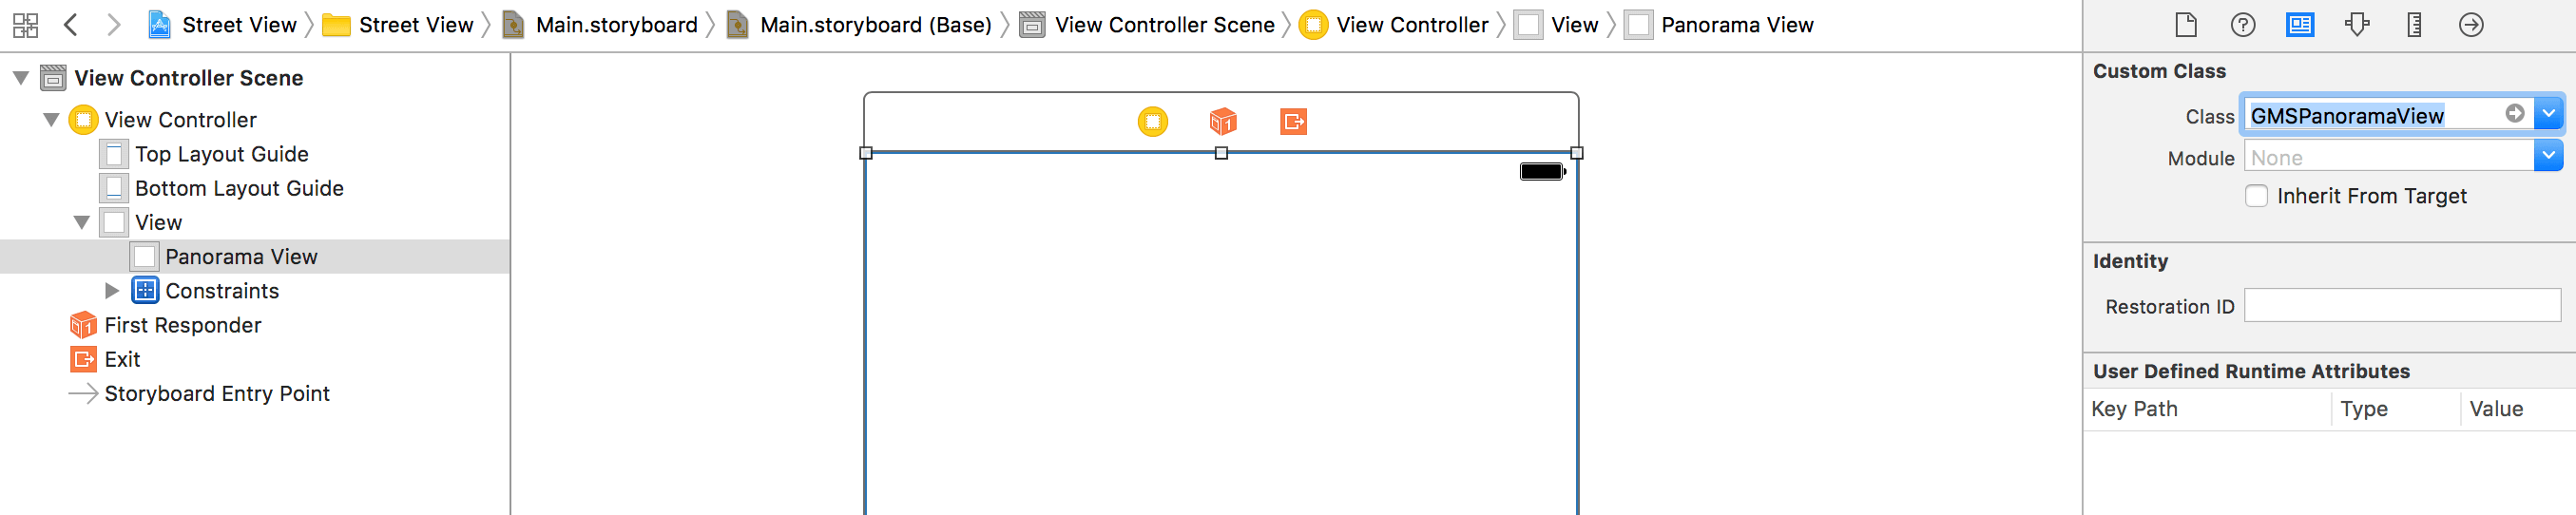
To enable street view for this view, select it and go to the Identity inspector. Change its class from UIView to GMSPanoramaView.
The view is ready. The last thing is to connect it with the code. Switch to assistant editor. Control drag from the view to ViewController.swift. Add an outlet named panoramaView.
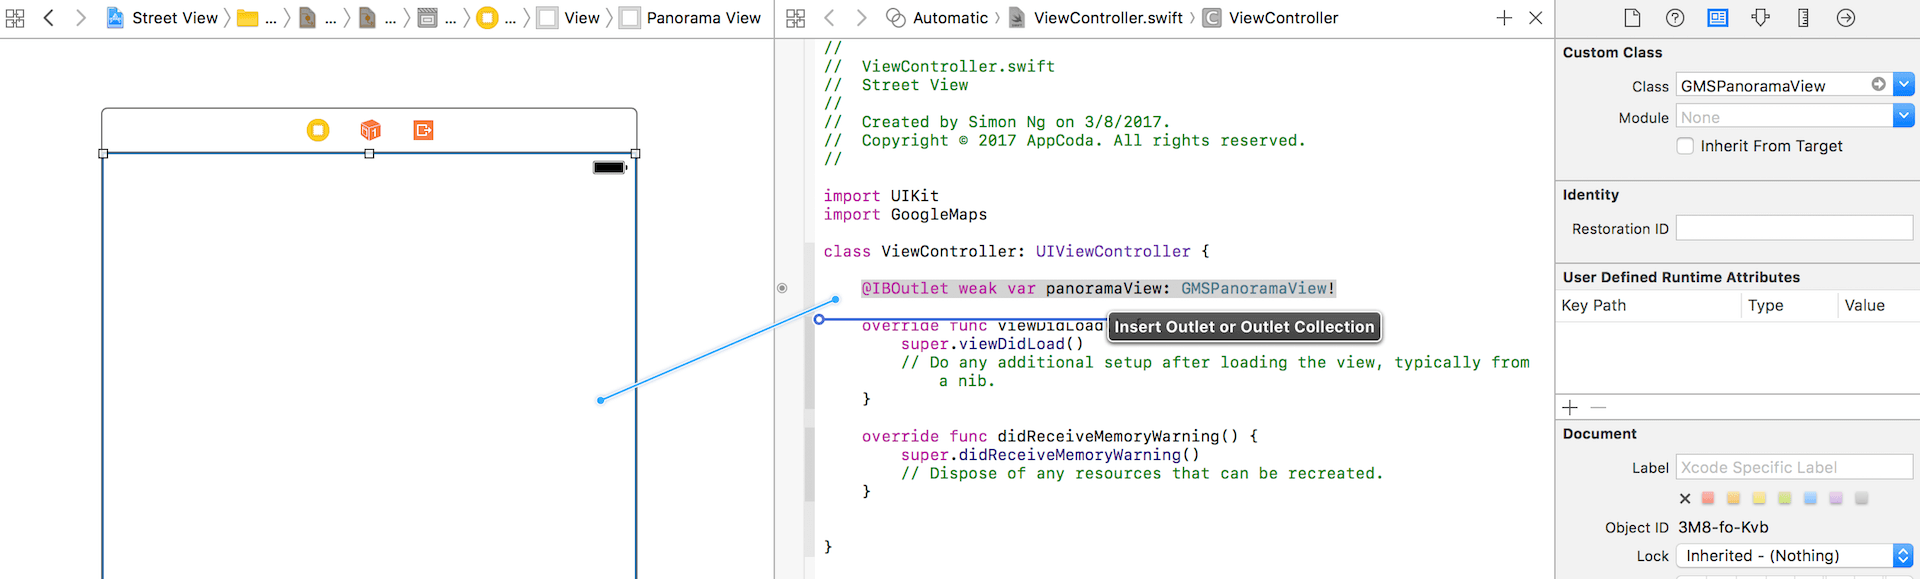
Also remember to insert the import GoogleMaps statement at the very beginning. Otherwise, you will get some errors.
To test the street view we just implement, insert the following code in the viewDidLoad method to load the street view for a specific coordinate (that’s Apple’s Infinite Loop coordinates):
panoramaView.moveNearCoordinate(CLLocationCoordinate2D(latitude: 37.3317134, longitude: -122.0307466))
Now run the project to try it out. The demo app should show you the street view.
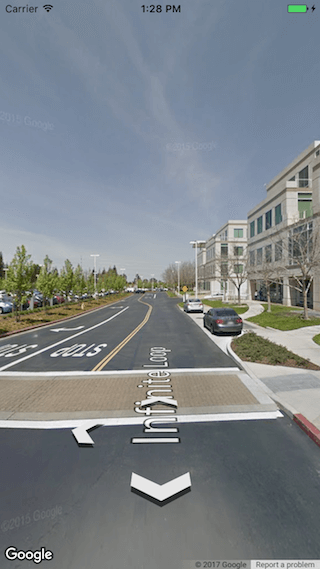
Cool, right? However, you may want to turn the camera to face the exact building or spot. You can manually drag the view to achieve that, but how can we tweak the view position programmatically? This is what I am going to show you.
Go back to the ViewController class, and insert the following code:
override func viewDidAppear(_ animated: Bool) {
    super.viewDidAppear(animated)

    DispatchQueue.main.asyncAfter(deadline: DispatchTime.now() + 2) {
        self.panoramaView.animate(to: GMSPanoramaCamera(heading: 90, pitch: 0, zoom: 1), animationDuration: 2)
    }
}
GMSPanoramaCamera is used to control the viewing direction of a GMSPanoramaView. It accepts three parameters:
- heading – is the angle of rotation of the camera [values from 0 to 360]
- pitch – this camera angle [values from -90 to 90]
- zoom – zoom to enlarge this image [values from 1 to 5]
- animationDuration – an optional value which sets the time for the turn
I used the image below in order to determine the heading:
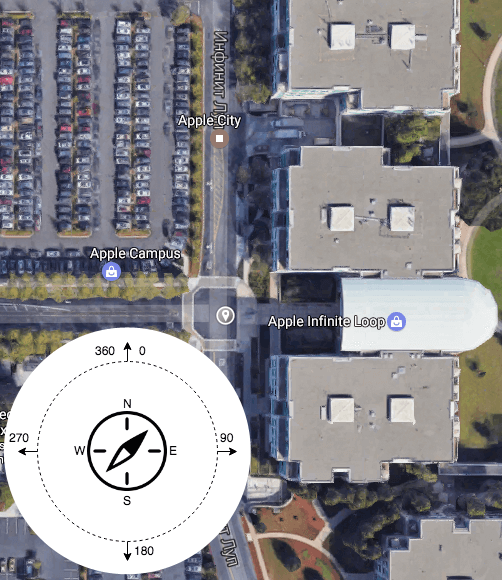
By default, camera direction is set to 0. For example, if you want to turn the camera from the street to Apple’s office, you need to rotate by 90 degrees clockwise.
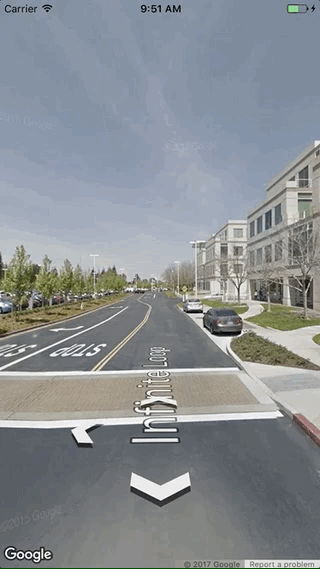
For the pitch parameter, the image below should give you a better understanding. This is why we set its value to 0.

Now you are ready to have a quick test. If you run the app in simulator, the view angle will change after the app is launched.
Handling Events
After loading the street view, you can adopt the protocol GMSPanoramaViewDelegate to capture any events such as panorama changes, user interactions, etc. One event you will need to handle is the error event. What if Google Maps doesn’t have street view for your specified coordinate?
To handle the error event, you adopt the GMSPanoramaViewDelegate protocol and implement the following method:
func panoramaView(_ view: GMSPanoramaView, error: Error, onMoveNearCoordinate coordinate: CLLocationCoordinate2D)
To do that, we use extension to adopt the protocol. Insert the following code in ViewController.swift:
extension ViewController: GMSPanoramaViewDelegate {
    func panoramaView(_ view: GMSPanoramaView, error: Error, onMoveNearCoordinate coordinate: CLLocationCoordinate2D) {
        print(error.localizedDescription)
    }
}
Now in the viewDidLoad() method, assign the delegate of panoramaView to self:
panoramaView.delegate = self
If you change the coordinate to a random coordinate (e.g. (12.3, 98.2)), you will end up with an error in the console:
The operation couldn’t be completed. (com.google.maps.GMSPanoramaService error 0.)
There are other configurations available for the panorama view. You can refer to the Google Maps SDK for iOS for details.
Wrapping Up
While the feature is available from standalone Google Maps application almost on every mobile device, putting Street View directly into your app may increase the average usage time and user engagement rate. Keep in mind that Google Street View comes with many cool features and methods that allow developer to go beyond the simple panoramic view. For instance, you can connect gyro to the panorama, so the user could turn the view by moving his phone.
If you have any questions about the tutorial, please leave your comment below and let me know.
For the sample project, you can download the full source code on GitHub.
This is a guest tutorial written by Andrew Zakhliupanyi, an iOS developer at GBKSOFT, an outsourcing web and mobile development company. Andrew is an iOS developer that loves to build great apps and create juicy features.


