

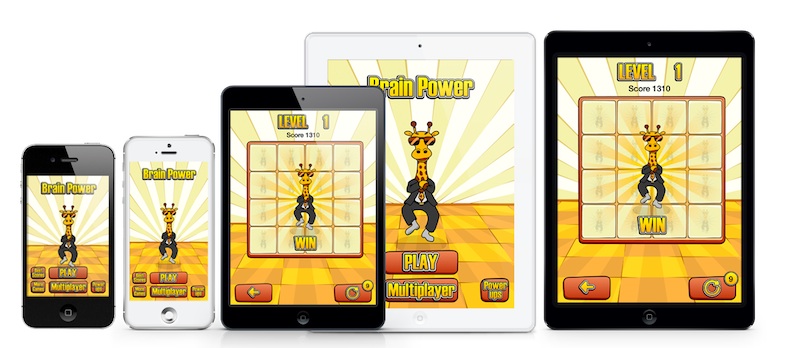
A universal app is a single app that is optimized for iPhone, iPod touch, and iPad devices. From user’s perspective, this provides the best user experience without downloading two different versions of apps. When user opens the universal app on iPhone, one will see the iPhone version. And if user runs it on iPad, he/she will be see the iPad version, not the “blown-up” version of iPhone app, but the custom designed version for the iPad.
Before Apple introduced the concept of universal app, developers would have to create two binaries – one for iPhone and the other for iPad. With universal app, you create a single binary that caters for multiple iOS devices with different screen sizes.
Xcode makes coding universal apps simple. That said, the whole process is not automatic. This still involves a lot of extra work to optimize the view controllers due to the differences in device screen sizes. Obviously, the view controller for iPhone (and iPod touch) differs from that of iPad.
In Xcode, you can either create user interface using Interface Builder (i.e. nib file) or Storyboard. The process of creating universal app varies depending on the way you use for UI design. In this tutorial, we’ll give you a brief walkthrough for both approaches and build a very simple app as demo.
Creating Universal App Using Storyboard
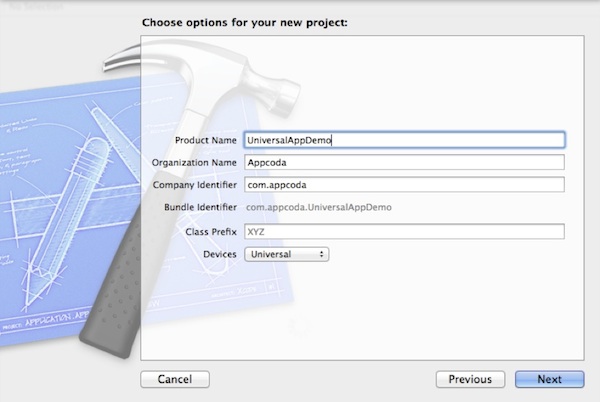
When you first create a Xcode project, you’re provided with an option to define the supported devices. Choose “Universal” and Xcode will automatically create a project for all iOS devices.
You’ll find two different Storyboard files – one for iPhone / iPod touch and one for iPad. If you switch over to the project summary (i.e. summary tab under project settings), you should see two sections of deployment info for different devices.
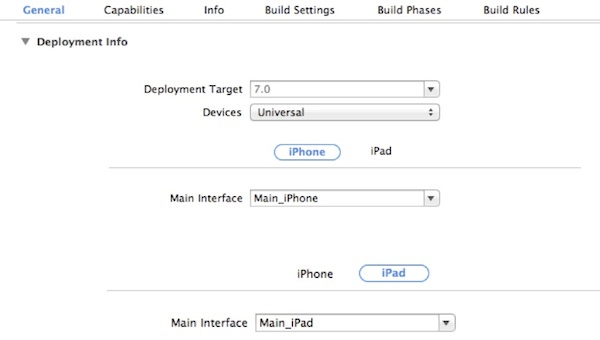
As you can see, each device has its own version of Storyboard. This is how you can design custom interface for different devices in a single Xcode project. You define different version of views or view controllers in each storyboard. Say, when you open the app on iPhone, the iPhone version of storyboard is used and you’ll see the views of iPhone version.
Building a Simple Universal App Demo
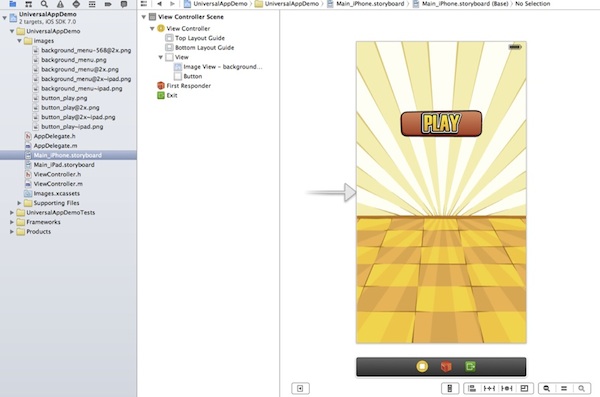
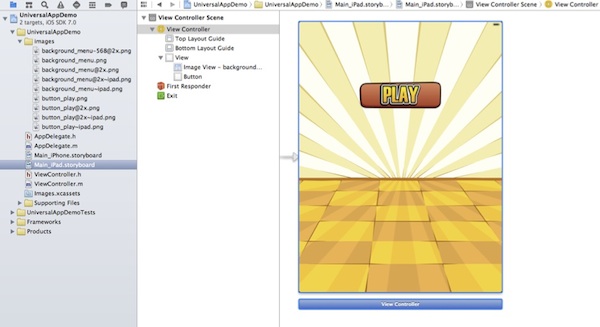
We’ll develop a very simple app to illustrate how you can create a universal app using Storyboard. Assuming you’ve created a Xcode project for universal devices (or you can download the project template to jump start), let’s first go to the iPhone version of storyboard (i.e. MainStoryboard_iPhone.storyboard) and design the UI.
First drag an image view into the view controller and set the image as background-menu.png. Next, add a button object to the controller. Under Attributes Inspector, change the button type to “custom” and set the button image as button_play.png. You will end up with a storyboard similar to the below.
Now switch to the iPad version of Storyboard. By default, Xcode should already generate a view controller that is customized for the iPad. Again, drag an image view into the view controller. This time, set the image as background-menu~ipad.png. The ~ipad suffix indicates it’s an image for iPad. Then add a button object to the view and set the image as button_play~ipad.png. Also change the button type to “custom”.
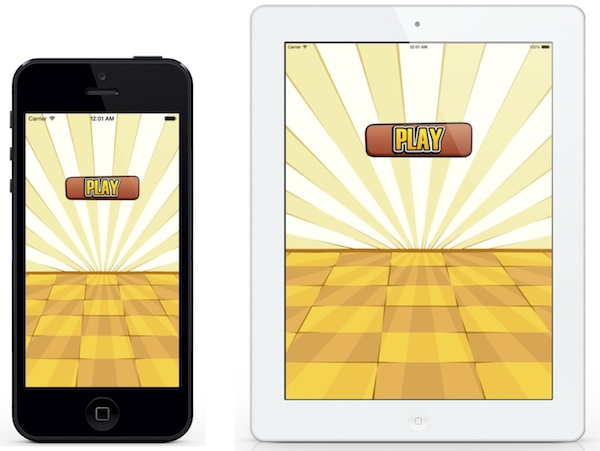
That’s it! You’ve built a universal app. Compile, run the app and test it on both iPhone and iPad Simulator.
View Controller Class
Should you use a single view controller class for both iPhone and iPad? Or separate ones? In general, it’s easier to use separate view controllers for different platforms. If the look & feel of view controllers are similar like the one in the above example, you may use a single view controller class for both platforms. But make sure your code handles the differences between iPad and iPhone.
The iOS SDK provides the UI_USER_INTERFACE_IDIOM macro for you to create conditional code paths for supporting device-specific functionality. The macro lets you easily determine the device type. If the device is an iPad, the value returned from the macro will be UIUserInterfaceIdiomPad. If the device is either and iPhone or iPod Touch, the value returned is UIUserInterfaceIdiomPhone. A typical conditional statement would look like the following:
if (UI_USER_INTERFACE_IDIOM() == UIUserInterfaceIdiomPhone)
{
        // Place iPhone/iPod specific code here...
} else {
        // Place iPad-specific code here...
}
Let’s continue with the example. The Xcode project includes a ViewController class that is associated with the view controller of both iPhone and iPad versions of Storyboard.
First, create a “Action” connection between the Play button and ViewController.h. Associate the same action for the Play buttons in both versions of Storyboard.

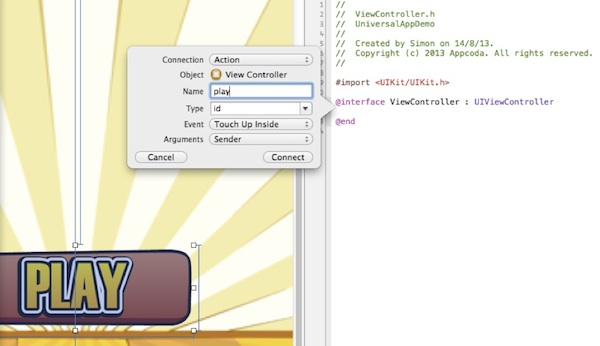
In the ViewController.m, edit the play: method with the following code:
- (IBAction)play:(id)sender {
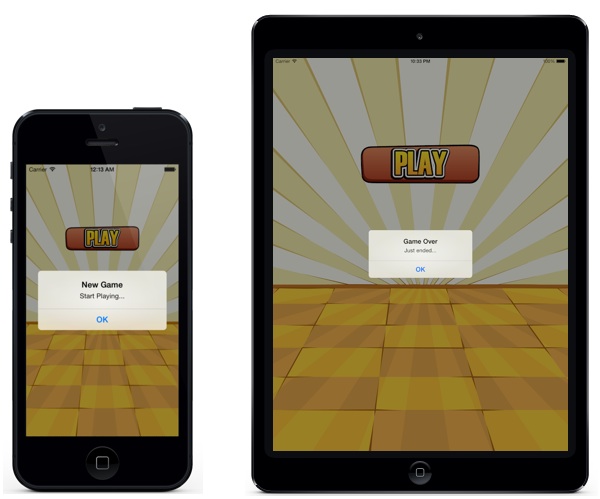
if (UI_USER_INTERFACE_IDIOM() == UIUserInterfaceIdiomPhone) {
// For iPhone
UIAlertView *playAlert = [[UIAlertView alloc] initWithTitle:@"New Game" message:@"Start Playing..." delegate:self cancelButtonTitle:@"OK" otherButtonTitles:nil, nil];
[playAlert show];
} else {
// For iPad
UIAlertView *playAlert = [[UIAlertView alloc] initWithTitle:@"Game Over" message:@"Just ended..." delegate:self cancelButtonTitle:@"OK" otherButtonTitles:nil, nil];
[playAlert show];
}
}
What we just did is to display two different alert messages on iPhone and iPad. Compile and run the app again using iPhone and iPad Simulator. You’ll get different alert message depending on the device you’re using.
The demo is very simple. But this is how you can differentiate the device type when you want to share a common view controller class.
Creating Universal app Using Interface Builder
Okay, you’ve learnt the basics of universal app development. Other than Storyboard, you may use Interface Builder to create the user interface. In this case, you will create two nib files – one for iPhone and one for iPad. The nib file of iPad is commonly indicated by the device modifier “~ipad”.
We will not go into the details of code for interface builder. But usually, we have a conditional branch to choose which nib file to load based on the current device idiom. Here is the code snippet you may use:
+ (id) loadFromXib {
    NSString *xibName = NSStringFromClass(self);
    if (UI_USER_INTERFACE_IDIOM() == UIUserInterfaceIdiomPad) {
        xibName = [xibName stringByAppendingString:@"~ipad"];
    }
    return [self loadFromXibNamed:xibName];
}
Launch Images, App Icon and App Images
Other than two versions of storyboard or interface builder, you’ll have to create two versions of resource files. For instance, if you use images, you may need to add larger (or higher-resolution) versions to support iPad devices. To keep it simple, we’ll briefly discuss three types of resources including launch image, app icon and app images.
Launch Images
Universal apps must provide launch images for both the iPhone and iPad. Typically you have to include one launch image in a portrait orientation for iPhone apps, as well as, iPad apps.
iPhone apps require only one launch image in a portrait orientation, whereas iPad apps typically require different images for portrait and landscape orientations. In brief, you have to provide the following launch images for universal app:
- launch image for non-retina iPhone (320×480)
- launch image for retina iPhone 4 and 4S (640×960)
- launch image for retina iPhone 5 (640×1136)
- launch image for non-retina iPad (1024×768)
- launch image for retina iPad (2048×1536)
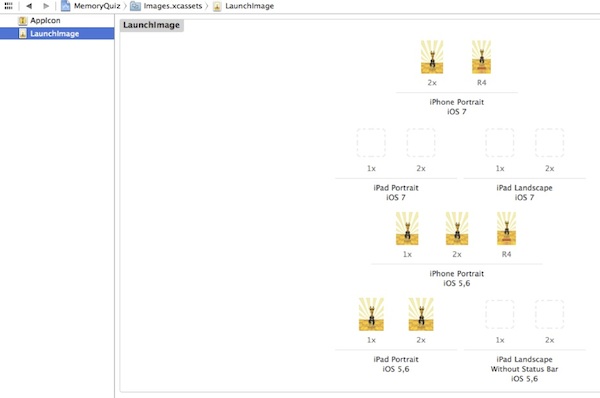
Xcode 5 introduces Asset Catalogs that simplifies management of launch images and app icons. Under the General settings of your target, you should find the App Icons and Launch Images sections.
![]()
Tap the arrow button of Launch Images to access the launch image set. The launch image set contains all the representations of the static launch image that the app displays during launch. You can simply drag the image from Finder and set it into appropriate image well.

For requirements of launch image, you can further refer to the Apple’s iOS Human Interface Guidelines.
App Icon
Like launch images, you have to provide various versions of app icons that conform to Apple’s requirement. If you miss any of the app icons, the app will not be able to submit to App Store.
Similar to what we’ve discussed in previous section, you have to provide various versions of app icons in order to support different screen resolutions. The filenames can be anything you want, but all image files must be in the PNG format.
Below lists the dimensions of the icons as required by Apple:
- app icon for non-retina iPhone – 57×57 pixels for iOS 6 or lower, 60×60 pixels for iOS 7
- app icon for retina iPhone – 114×114 pixels for iOS 6 or lower, 120×120 pixels for iOS 7
- app icon for non-retina iPad – 72×72 pixels for iOS 6 or lower, 76×76 pixels for iOS 7
- app icon for retina iPad – 144×144 pixels for iOS 6 or lower, 156×156 pixels for iOS 7
Optionally, you can fill in the icon for settings and spotlight. The asset catalog clearly denotes the required size of the icons. To assign an icon for the app, the easiest way is configure it via the Asset Catalog. Simply drag your icon into the image well of the icon set. That’s it.
![]()

App Images
To fulfill the requirements of universal app, other than launch images and app icons, you also need to create two different sets of application images – one version for iPhone and the other larger version for iPad. To be precise, you need to create four different versions of application images. Here is a sample:
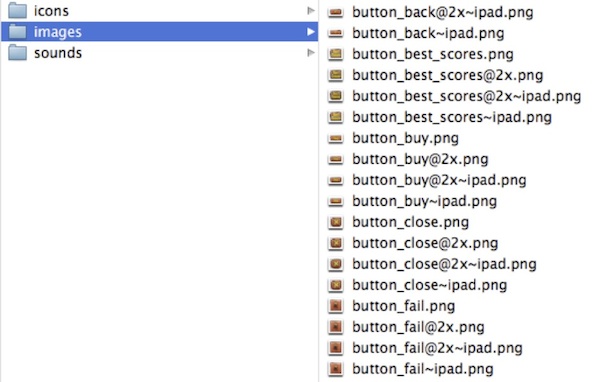

Similar to the launch images, we use the device modifier (~ipad) to indicate the images of iPad.
Let’s take the button_buy.png as an example. Say, you’d like to add a Buy button in the storyboard. For the iPhone version of storyboard, you should assign the button_buy.png as the image, whereas you should use the button_buy~ipad.png in the iPad version of storyboard. You do not need to assign the @2x images directly. iOS automatically loads the @2x images on retina devices.
Wrap Up
In this tutorial, we give you a very brief introduction of a universal app and walk you through its requirements such as launch image, app icon and resource files. You should then have a basic idea about how universal app is created by using Storyboard. To learn more about universal app, you can further refer to Apple’s official developer doc.
For your reference, you can download the sample Xcode project from here. You’ll need to use Xcode 5 to open it.
This tutorial is extracted from our upcoming iOS Game Starter Kit. As always, if you have any questions or suggestions, feel free to leave us comment.


