

For a long time I wanted to write a post about how Swift and JavaScript can be tied together, and lead eventually to more powerful and rich-featured apps. Being able to embed JavaScript code in iOS projects is not something that you hear for first time, but if you have never tried to do that then you should really read this and find out how simple is to do magical things with just a few actions. The one that makes that magic available has a name, and is called JavaScriptCore framework.
You might be thoughtful about that, and wondering why someone would really like to use JavaScript when everything can be done in Swift. I admit that I was thoughtful too in the beginning, but here are some good reasons that answer to the above:
- iOS developers that were used to write web apps and they miss JavaScript-ing, can take the maximum out of the JavaScriptCore framework coding again using their favourite language.
- There might exist JavaScript libraries that perform specific tasks suitable for your needs, and there’s nothing equivalent in Swift or you have to do it on your own. Why not to use them?
- It’s possible that some tasks are easier to be handled in JavaScript.
- You want to modify the behaviour of your app remotely. In that case the JavaScript code resides on a server and not locally in the app’s bundle. Be careful though, because it’s easy to end up with a disaster.
- You could possibly make your app more flexible and powerful.
- You are curious enough and you want to use JavaScript in your iOS projects.
Of course, you can think more than the above, but even these are good reasons to make you want to get started with JavaScript in iOS. Now that you feel the excitement too, let me underline a few necessary technical details. First off, JavaScript execution has its own environment, or to put it in a better way, a virtual machine where it runs into. In the JavaScriptCore framework, the JSVirtualMachine class represents programmatically that virtual machine, but usually you won’t have to deal directly with it. It’s possible to have multiple virtual machines running in an app, but they cannot exchange any data directly.
On the other hand, the class that you’ll be dealing the most with, is JSContext. This class is the actual environment (context) that executes your JavaScript code. Inside a virtual machine (JSVirtualMachine) you can have multiple contexts, and you can pass data between them. As you’ll discover in the next parts, the JSContext class is our mean for exposing Swift code to JavaScript, and JavaScript code to Swift. We’ll use it extensively, but the use cases are going to be similar in most of the times.
All values in JSContext, are JSValue objects, as the JSValue class represents the datatype of any JavaScript value. That means that if you access a JavaScript variable and a JavaScript function from Swift, both are considered to be JSValue objects. However, there are methods that make the conversion to specific datatypes easy. For example, a JSValue can be converted to a String using the toString() method, or to a dictionary using the toDictionary() method (more about that later in action). For a full list regarding these methods, take a look here.
I strongly advice you to read the official documentation regarding the JavaScriptCore framework. Whatever mentioned previously gives you an idea of the basic tools that we’ll work with, but getting a deeper understanding will have a positive impact to what you’ll read next.
So, let’s get started, and let’s take a quick look at what’s on the “menu” today.
Demo Project Overview
We are going to begin our exploration on the JavaScriptCore framework and its features starting with really simple examples that demonstrate how we can use JavaScript code in Swift. Actually, we’re going to start with the famous “Hello World” (I always wanted to do that), which will be stored as a string value in a JavaScript variable. Our very first try will focus on how to access that variable from Swift, so we can print it to the Xcode’s console. Then, we’ll continue making similar simple examples, and we’ll be exploring more and more features. Of course, we won’t just learn how to pass JavaScript code to Swift; we’ll go to the opposite direction too. For our needs, we’ll write code in both Swift and JavaScript, but no need to worry if you don’t feel quite comfortable with JavaScript. Nothing complicated will exist! Note that at this phase all the output will be in the console only, so we focus on what it really worths for us here.
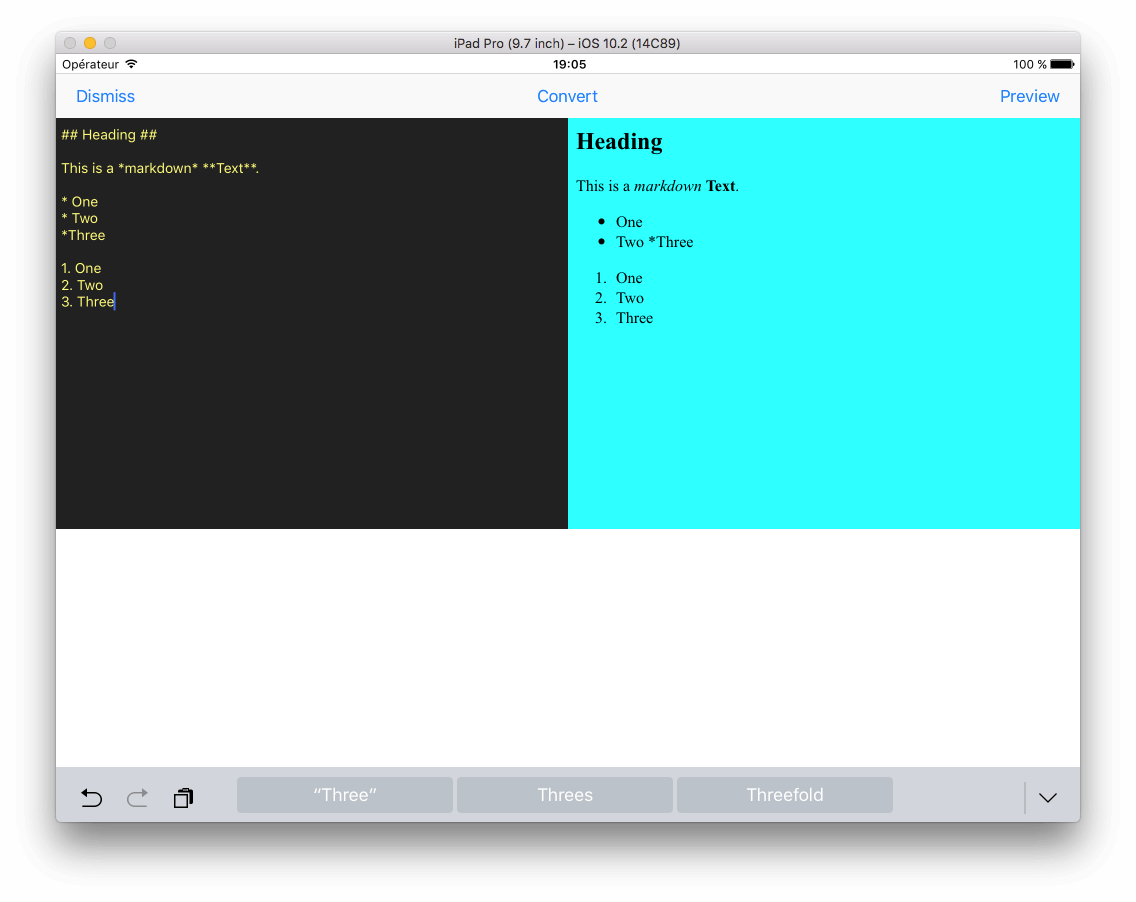
Once we understand the basics and how we can expose and use code from one language to the other, we’ll advance to something more realistic, and for first time we’ll also use a third-party JavaScript library. In that second part of our project we are going to make a markdown to HTML converter, or even better, we’re going to use a converter library that will do the heavy work for us. Our job is to gather the user’s input (the markdown text) from an editor (a simple UITextView), to pass it to the JavaScript environment, perform the conversion and display the returned HTML (by the JavaScript environment) into a UIWebView. A button will exist to trigger the conversion, so we can call our code on demand. The following screenshot demonstrates it:
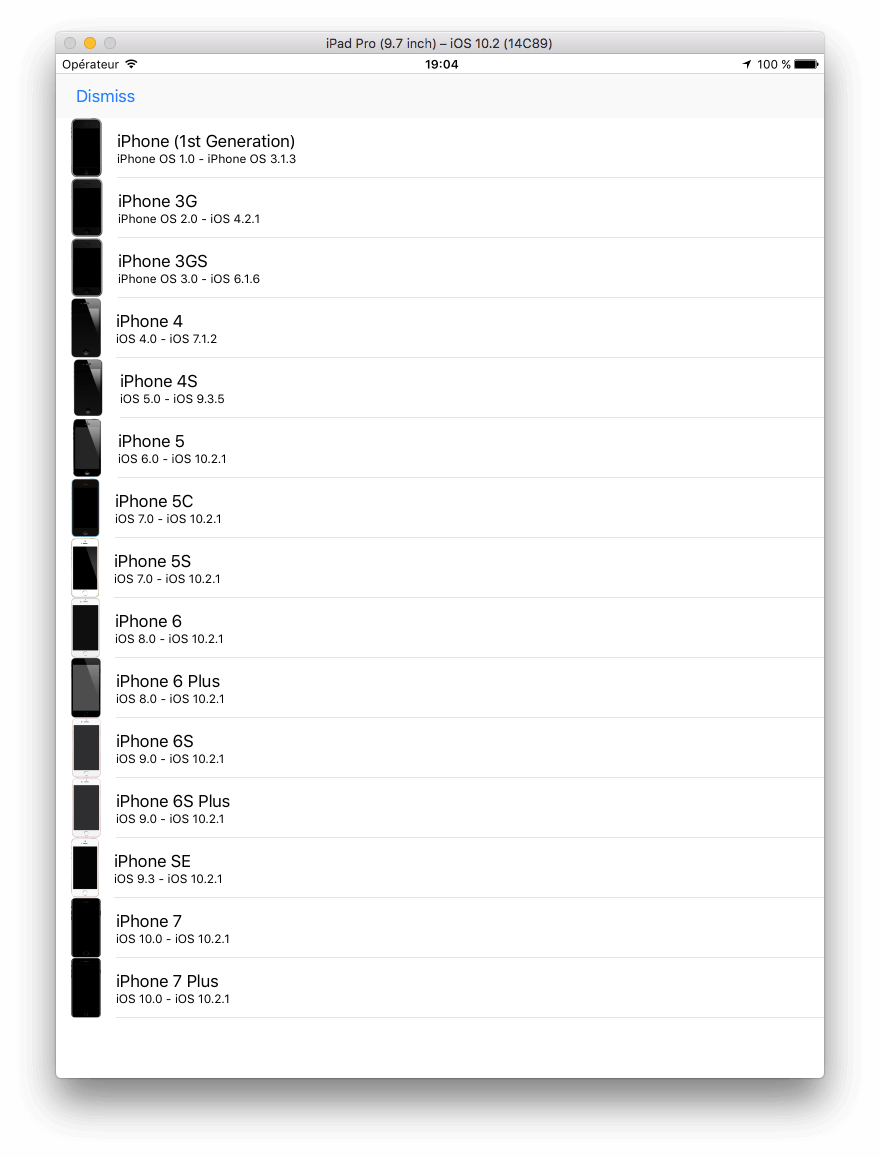
In the third and last part, we’ll go even further and we’ll examine how we can pass a custom class along with properties and methods into the JavaScript context. And not just that; we’ll use the exposed class in JavaScript by creating objects and setting values to the properties. Our goal will be to display a list of all the iPhone devices that have been released so far (model names), along with their initial and latest OS versions, and their images. The data we need for that exist in a csv file, and for our case we’ll use another third-party library to parse it. By acquiring the parsed data, we’ll use our Swift class (in JavaScript) to populate the values in custom objects, and then we’ll return everything back to Swift. We’ll use a tableview to display the devices list. Here’s a sample:
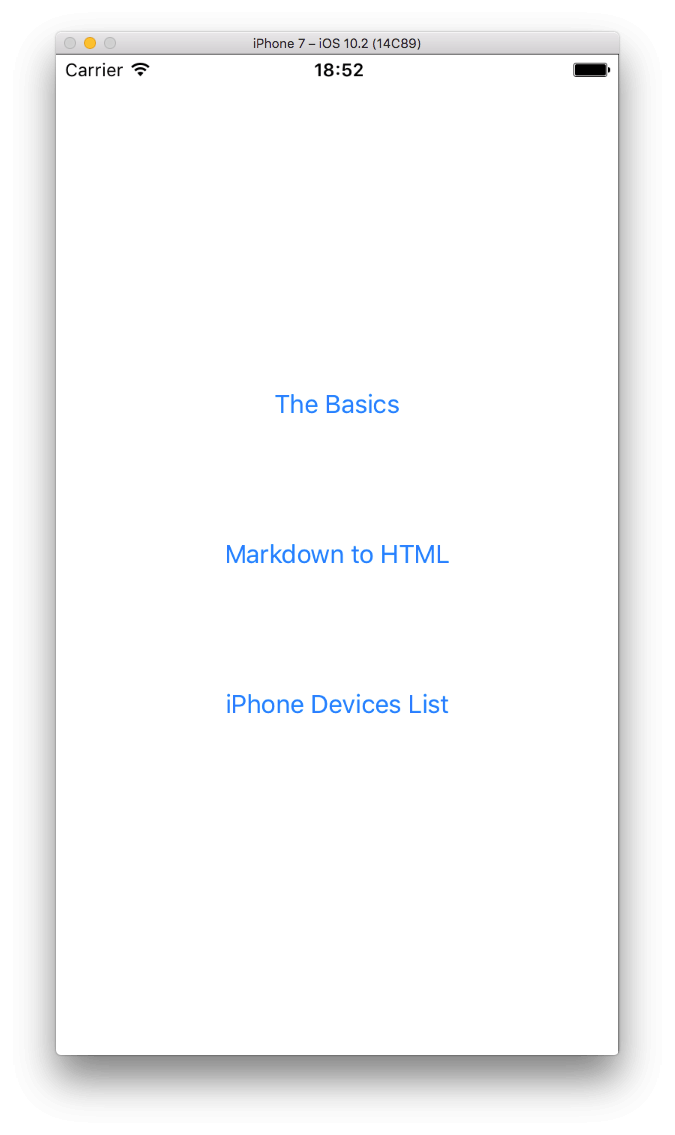
The above describe in general the three distinct tasks that will let us get to know the JavaScriptCore framework. As there are a lot of things wrapped up together in the package of one, we’ll have an initial menu screen that we’ll use to navigate to the proper part of the project:
To let us get started in an easy way, there’s a starter project for you to download here. Once you get it, you can start exploring the JavaScriptCore framework features. We’ll do several things throughout this tutorial, but at the end you’ll realise that most of them are standard techniques that we just repeat so we can achieve our goals.
Let’s dive in!
Calling JavaScript From Swift
As mentioned in the introduction, the most valuable player in the JavaScriptCore framework is the JSContext class. An instance of that class is our bridge to JavaScript environment where we can execute native JavaScript code, therefore declaring such a property in the BasicsViewController class will be our entry point. In the BasicsViewController.swift file, go to the beginning of the class and add the next declaration:
var jsContext: JSContext!
The jsContext object has to be a class property, otherwise you’ll lose access to it if you initialise it locally inside the body of a method, and the method’s execution is finished.
Necessarily now we have to import the JavaScriptCore framework, so update the beginning of the file with the following line:
import JavaScriptCore
Our next step would be to initialise the jsContext object and start using it, but before we get there, let’s write some initial JavaScript code. We’ll do that in the jssource.js file that you can find in the Project Navigator of the starter project. We’ll begin by declaring a variable that contains the “Hello World” string, and then we’ll keep going by implementing a few, really simple functions which we’ll try to access them through iOS. Don’t worry if you’re not familiar with JavaScript, what we are going to do is honestly extremely simple, and you’ll understand it instantly.
So, open the jssource.js file, and add the following variable to the top:
var helloWorld = "Hello World!"
Printing the above variable in the console is our primary target as of now!
Back to the BasicsViewController.swift file, our next step is to create a method that will perform two tasks:
- Initialise the
jsContextproperty that we previously declared. - Load the contents of the jssource.js file, and pass them to the JavaScript runtime so it’s possible to use any code we write there.
Let’s create a new method in the BasicsViewController class, and let’s initialise the jsContext variable. It’s as easy as shown next:
func initializeJS() {
    self.jsContext = JSContext()

}
The second task described previously includes more than one steps, but nothing that will cause any trouble. Let’s see it first, and then we talk about it:
func initializeJS() {
    ...

    // Specify the path to the jssource.js file.
    if let jsSourcePath = Bundle.main.path(forResource: "jssource", ofType: "js") {
        do {
            // Load its contents to a String variable.
            let jsSourceContents = try String(contentsOfFile: jsSourcePath)

            // Add the Javascript code that currently exists in the jsSourceContents to the Javascript Runtime through the jsContext object.
            self.jsContext.evaluateScript(jsSourceContents)
        }
        catch {
            print(error.localizedDescription)
        }
    }

}
The existing comments in the snippet makes it easy to understand what’s going on. Initially, we define the path the jssource.js file, and then we load its contents into the jsSourceContents string (for now, that content is the JavaScript variable we wrote previously in the jssource.js file). Once that happens successfully, the most important line of code is coming: We evaluate the JavaScript code by using the jsContext object, and we manage to pass our JS code into the JavaScript environment on the fly.
Time for another brand new method:
func helloWorld() {
    if let variableHelloWorld = self.jsContext.objectForKeyedSubscript("helloWorld") {
        print(variableHelloWorld.toString())
    }
}
Even though it’s small, it performs something really important. The “juicy” part above is the method objectForKeyedSubscript(_:) which gives us access to the helloWorld variable in the JavaScript code. The first line actually returns a JSValue object (or nil if there’s nothing to return), and that value is assigned to variableHelloWorld. To put it really simple words, the above is our first achievement, because we have written some JavaScript code in Swift, and we can handle it in any way we want! And what can we do with a variable that contains the “Hello World” string? We print it to the console.
Now, let’s call the two new methods that we created previously in the viewDidAppear(_:) method:
override func viewDidAppear(_ animated: Bool) {
    super.viewDidAppear(animated)

    self.initializeJS()
    self.helloWorld()
}
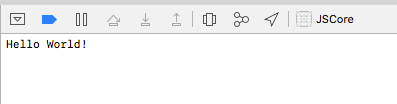
Run the app, and tap on the first button titled The Basics. Then look at the Xcode’s console, and be proud of your first “Hello World” message using the JavaScriptCore framework!
When combining Swift and JavaScript, then you definitely need to go further than declaring simple variables and printing their values. So, let’s move forward by creating our first JavaScript function, and then to see how we can make use of it.
I could probably not find any simpler example, as the following JavaScript function concatenates a first and last name and returns the full name. Add the next snippet to the jssource.js file:
function getFullname(firstname, lastname) {
    return firstname + " " + lastname;
}
The first and last name are given as parameters in the function. Save that file now, and return to BasicsViewController.swift.
Calling a JavaScript function in Swift is a two-step process: Initially, we get access to the desired function by asking from jsContext to return it as an object (a JSValue object) in the exact same fashion as before where we accessed the helloWorld JavaScript variable. Next, we call it by using a special method named call and passing any arguments that are possibly required. We’ll see that right next, where we implement a new method:
func jsDemo1() {
    let firstname = "Mickey"
    let lastname = "Mouse"

    if let functionFullname = self.jsContext.objectForKeyedSubscript("getFullname") {

    }
}
By writing that, functionFullname now is our reference point for the getFullname JS function in Swift. Continuing with the second step, calling it is as simple as shown next:
func jsDemo1() {
    let firstname = "Mickey"
    let lastname = "Mouse"

    if let functionFullname = self.jsContext.objectForKeyedSubscript("getFullname") {
        // Call the function that composes the fullname.
        if let fullname = functionFullname.call(withArguments: [firstname, lastname]) {
            print(fullname.toString())
        }
    }
}
The call(withArguments:) method invokes the getFullName function, and triggers that way its execution. It accepts one argument only, and array of Any objects, which of course can be nil if the function that gets called doesn’t require any parameter values. In our example here, we pass the firstname and lastname string values as arguments. The return value of that method is a JSValue object, which we use to print the full name on the console. As we’ll see later, the return value of that method is not always useful, so quite often we just don’t make any use of it.
Now, let’s call the jsDemo1() method:
override func viewDidAppear(_ animated: Bool) {
    ...

    self.jsDemo1()
}
Running the project now will lead to the following output on the console:
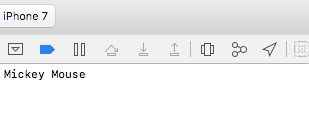
It might not look fancy, but just think that the output that you’re watching at is the result of a JavaScript function called from Swift. Furthermore, whatever we’ve seen in this part is pretty much a default process which can be summarised as follows:
- Initialise a JSContext object.
- Load any custom JavaScript code and evaluate it (in other words, pass it to the JavaScript environment).
- Get access to any JS function using the
objectForKeyedSubscript(_:)method of theJSContextclass. - Call the JS function and optionally handle the returned results.
Handling JavaScript Exceptions
Making mistakes during programming is always an unavoidable part of the development process, but any errors occurred must have a way to become visible to developers so they can be easily fixed. If you combine JavaScript and iOS programming, then there will be times where you won’t know where to debug; Swift or JavaScript? Logging errors in Swift is easy, but how can we really see any errors happening on the JavaScript’s side?
Luckily enough, the JavaScriptCore framework provides a way to catch exceptions that take place in the JS environment inside our Swift code. Observing for exceptions is a standard process as we’ll see right next, but the way you’ll handle them is clearly a subjective matter.
Back to where we left off, let’s make an addition to the initializeJS() method that will allow us to catch any exceptions that the JS runtime will report. In that method, go right after the jsContext property’s initialisation, and add the following snippet:
func initializeJS() {
    self.jsContext = JSContext()

    // Add an exception handler.
    self.jsContext.exceptionHandler = { context, exception in
        if let exc = exception {
            print("JS Exception:", exc.toString())
        }
    }

    ...
}
As you see, the exception handler is a closure that is called by the jsContext every time an exception occurs. It contains two parameters: The context (JSContext) that the exception happened on, and the exception itself. The exception is a JSValue object. In this demo, we keep things simple, and we print the exception message to the console.
Let’s try now to cause an exception so we demonstrate the way it works. For this purpose, we’ll create a new Javascript function in the jssource.js file, where we’ll provide it with an array of integer numbers (positive and negative), and the function will return a dictionary containing the max, min and average values of the set of given numbers.
Switch to the jssource.js file, and add the next function:
function maxMinAverage(values) {
    var max = Math.max.apply(null, values);
    var min = Math.min.apply(null, values);
    var average = Math.average(values);

    return {
        "max": max,
        "min": min,
        "average": average
    };
}
The mistake in the above code is that there’s no average function in the Math object, so the following is totally wrong:
var average = Math.average(values);
Supposing that we don’t know that already, let’s go back to BasicsViewController.swift, and let’s add a new method where we’ll call the previous one. Here it is that entire new method:
func jsDemo2() {
    let values = [10, -5, 22, 14, -35, 101, -55, 16, 14]

    if let functionMaxMinAverage = self.jsContext.objectForKeyedSubscript("maxMinAverage") {
        if let results = functionMaxMinAverage.call(withArguments: [values]) {
            if let resultsDict = results.toDictionary() {
                for (key, value) in resultsDict {
                    print(key, value)
                }
            }
        }
    }
}
Firstly, we create an array with some random integer numbers as its contents. We’ll provide that array right next in the maxMinAverage method, which is now referenced in Swift by the functionMaxMinAverage object. On call, we pass the values array as the one and only argument. If everything is okay so far, then we handle the returned results as a Dictionary (look at the toDictionary() method), and we print one by one the returned values to the console (don’t forget that the maxMinAverage method returns a dictionary, so we print both keys and values).
Time to test all the above, but prior to that let’s call the jsDemo2() method:
override func viewDidAppear(_ animated: Bool) {
    ...

    self.jsDemo2()
}
Let’s run it now, having the fake hope that we’ll get as an output the maximum, minimum and average of the values we specified. However, instead of these, what we receive back from the JS runtime environment is an ugly, but quite explanatory exception:
JS Exception: TypeError: Math.average is not a function. (In 'Math.average(values)', 'Math.average' is undefined)

Before we fix that intentionally caused error, let’s think for a second the importance of what we did here. Just try to imagine how difficult it would really be to track down any errors if it wasn’t possible to catch JavaScript exceptions. Being able to do so turns to be an almost life saving feature, especially in big and complicated programs where the errors are not caused intentionally; trying to spot them in blind is a truly painful process.
So, after the moral story of this part, let’s fix our error. In the jssource.js file, update the minMaxAverage function and make it similar to the next one:
function maxMinAverage(values) {
    var max = Math.max.apply(null, values);
    var min = Math.min.apply(null, values);

    var average = null;
    if (values.length > 0) {
        var sum = 0;
        for (var i=0; i < values.length; i++) {
            sum += values[i];
        }

        average = sum / values.length;
    }

    return {
        "max": max,
        "min": min,
        "average": average
    };
}
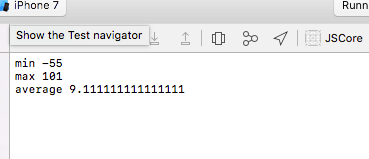
Run the project again, and this time you'll see the expected results:
I bet now that you're probably thinking that it would be nice to be able to print any kind of JavaScript messages in Xcode's console, and it would be even nicer if it was as easy as catching exceptions. Well, unfortunately that's a more tricky thing to do, and we'll see it in the next part. To make the long story short, the JavaScriptCore framework doesn't provide any direct solution that substitutes or simulates the JavaScript's console.log() function, therefore that's something that we'll do on our own. But before we're able to do that, there's something new to learn.
Calling Swift From JavaScript
In the previous two parts we managed to use twice JavaScript code from Swift, and even though the examples we practiced on have been quite simple, it's also clear how that process works. But we have to admit that being able to handle JavaScript code from Swift and not the opposite, seems like the one side of a coin only, so here we'll meet the other side too; we'll expose Swift code to JavaScript.
Regardless of the task we're trying to accomplish each time, the steps required to pass Swift code into the JavaScript runtime consist of a quite standard technique. That was quite obvious in the last two parts where we were accessing JS code from Swift. Before we jump into the how-to, let me outline the entire process in the form of general steps:
- We create a code block (let's say a closure) that will be "passed" to the JavaScript runtime. This is the Swift code that is exposed to the "other side" (JavaScript), therefore in its body we write whatever we want to be executed when it gets called.
- We convert that block into a AnyObject object.
- We set that object to the JSContext and we specify a name that that JavaScript will use.
- Evaluate that object in the JSContext.
We'll meet all the steps above by simulating a lottery game of our own. We'll ask from a JavaScript function to generate six random numbers, but we won't get them back to Swift as a JSValue upon the function's call (similarly to what we've seen so far). Instead, we'll create a block which will be called in the JavaScript runtime environment when the six numbers have been generated.
The way such blocks are written is quite specific. What you see next is actually an Objective-C block written in a Swift-like way, and it'll be passed in the JavaScript environment in a while.
let luckyNumbersHandler: @convention(block) ([Int]) -> Void = { luckyNumbers in

}
One important thing: Take care of the parameter values, they represent the kind of data you want to be returned after the JavaScript code execution. We expect here to receive an array of integer values, and the the [Int] parameter in the block states that. The luckyNumbers on the other hand is what it's actually returned, in this case the array of integers (it's what we'll use inside the block's body). To make it totally clear, the number of parameters declared inside the parenthesis (like the ([Int]) in this case), must be present after the curly bracket ({) symbol.
For example, let's suppose that we create a block that will give us back a String value and a Dictionary. In that case we would write something similar to this:
let something: @convention(block) (String, [String: String]) -> Void = { stringValue, dictionary in

}
Let's continue now to the next steps. We are creating a new method as shown next, and we convert the above block into a AnyObject object:
func jsDemo3() {
    let luckyNumbersObject = unsafeBitCast(self.luckyNumbersHandler, to: AnyObject.self)

}
Next, we pass luckyNumbersObject to jsContext always in a fashion similar to the next one:
func jsDemo3() {
    let luckyNumbersObject = unsafeBitCast(self.luckyNumbersHandler, to: AnyObject.self)

    self.jsContext.setObject(luckyNumbersObject, forKeyedSubscript: "handleLuckyNumbers" as (NSCopying & NSObjectProtocol)!)

}
The handleLuckyNumbers in the forKeyedSubscript parameter is the name that the JS runtime will use to access our block. It's similar to providing a function name. Also, the as (NSCopying & NSObjectProtocol)! suffix is always required.
Lastly, let's evaluate our code using the jsContext object:
func jsDemo3() {
    let luckyNumbersObject = unsafeBitCast(self.luckyNumbersHandler, to: AnyObject.self)

    self.jsContext.setObject(luckyNumbersObject, forKeyedSubscript: "handleLuckyNumbers" as (NSCopying & NSObjectProtocol)!)

    _ = self.jsContext.evaluateScript("handleLuckyNumbers")

}
The above three lines consist of a standard technique, and that practically means that you only need to change the object names when using it in your code. Having done the previous steps, we can eventually say that we've passed Swift code into the JavaScript environment!
Switch now to the jssource.js file, and add the following new function:
function generateLuckyNumbers() {
    var luckyNumbers = [];

    while (luckyNumbers.length != 6) {
        var randomNumber = Math.floor((Math.random() * 50) + 1);

        if (!luckyNumbers.includes(randomNumber)) {
            luckyNumbers.push(randomNumber);
        }
    }

    handleLuckyNumbers(luckyNumbers);
}
That snippet creates six random integer numbers ranging from 1 to 50. Every generated number is added to the luckyNumbers array. When the code exits the while loop, it calls handleLuckyNumbers (our Swift block) passing luckyNumbers as an argument.
Back to the jsDemo3() method in the BasicsViewController.swift file again, where we will call the above JS function. Right after all the existing code there, add the next lines:
func jsDemo3() {
    ...

    if let functionGenerateLuckyNumbers = self.jsContext.objectForKeyedSubscript("generateLuckyNumbers") {
        _ = functionGenerateLuckyNumbers.call(withArguments: nil)
    }
}
There are a few more steps needed to be done before we manage to test our own lottery game. First off, we must add some code in the luckyNumbersHandler block's body. Note now that whatever else exists out of that block is not visible inside it, so the best option is to post a Notification that will contain the random numbers (alternatively, we could just return the value). Let's see it:
let luckyNumbersHandler: @convention(block) ([Int]) -> Void = { luckyNumbers in
    NotificationCenter.default.post(name: NSNotification.Name("didReceiveRandomNumbers"), object: luckyNumbers)
}
Of course, we have to add an observer for that notification, so update the viewDidLoad() method:
override func viewDidLoad() {
    super.viewDidLoad()

    NotificationCenter.default.addObserver(self, selector: #selector(BasicsViewController.handleDidReceiveLuckyNumbersNotification(notification:)), name: NSNotification.Name("didReceiveRandomNumbers"), object: nil)
}
Before we implement the handleDidReceiveLuckyNumbersNotification(_:) method that we specify to be called when that notification arrives, let's declare an array of the numbers that we guess, so we can check them against the randomly generated ones. Add the following to the beginning of the class (or use any six numbers that make you feel lucky!):
var guessedNumbers = [5, 37, 22, 18, 9, 42]
Finally, let's pass to the implementation of the handler method:
func handleDidReceiveLuckyNumbersNotification(notification: Notification) {
    if let luckyNumbers = notification.object as? [Int] {
        print("\n\nLucky numbers:", luckyNumbers, "   Your guess:", guessedNumbers, "\n")

        var correctGuesses = 0
        for number in luckyNumbers {
            if let _ = self.guessedNumbers.index(of: number) {
                print("You guessed correctly:", number)
                correctGuesses += 1
            }
        }

        print("Total correct guesses:", correctGuesses)

        if correctGuesses == 6 {
            print("You are the big winner!!!")
        }
    }
}
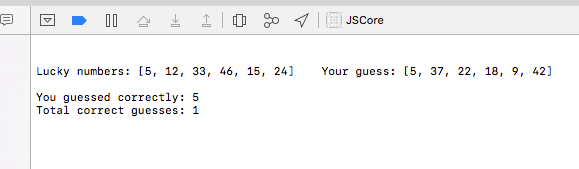
The above method displays the contents of the arrays that hold the randomly generated numbers and the guessed numbers, those numbers that have been guessed correctly, the total correct guesses and a message if all numbers are the same (so you're the big winner!).
Now we can test, but before doing that, don't forget to call the jsDemo3() method:
override func viewDidAppear(_ animated: Bool) {
    ...

    self.jsDemo3()
}
Here's a sample of what you'll get on the console when you run it:
Now you know how to pass Swift code to JavaScript, and that obviously gives you more possibilities. One of them is to create a way to print output from JavaScript in Xcode's console and simulate that way the console.log() native JavaScript command. As you might guess, we'll create a block that will be called from JavaScript every time we want to log something. Then we'll perform all the appropriate tasks to pass it to the JS runtime, and finally we'll see it working. Let's go through all these:
Initially, the block that is the essence of what we want to achieve:
private let consoleLog: @convention(block) (String) -> Void = { logMessage in
    print("\nJS Console:", logMessage)
}
In the initializeJS() method now, append the following:
func initializeJS() {
    ...

    let consoleLogObject = unsafeBitCast(self.consoleLog, to: AnyObject.self)
    self.jsContext.setObject(consoleLogObject, forKeyedSubscript: "consoleLog" as (NSCopying & NSObjectProtocol))
    _ = self.jsContext.evaluateScript("consoleLog")
}
That's all! To see it working, open the jssource.js file and in the generateLuckyNumbers() function add the line shown next right before the call of the handleLuckyNumbers:
function generateLuckyNumbers() {
    ...

    consoleLog(luckyNumbers);

    handleLuckyNumbers(luckyNumbers);
}
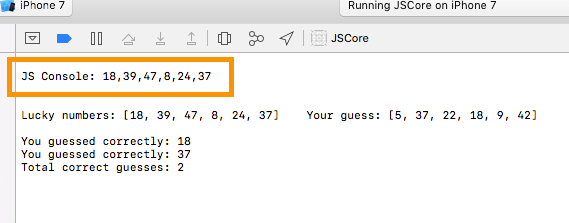
Run again, and watch the contents of the luckyNumbers array being displayed prior to all the other messages that take place in the Swift part. That means that we successfully managed to find a workaround regarding native JavaScript console.log() function.
A Real Example
Knowing how to use Swift and Javascript together and write code in both languages that will run in one single app, it's time to take a step further and see a more realistic example. The simple demos that we've gone through so far have been good enough to let us get the basic knowledge, but why not to see something that could be potentially used in a real-world app?
So, in this example we're about to learn how to integrate a third-party library written in JavaScript in our Swift project, and we'll put in motion whatever we've learned up until now. For our purposes, we're going to use the Snowdown library, which performs a quite specific task: It converts a Markdown text into HTML. If you want, you can see a live demo here. To keep our post in the proper scope, we'll stick to basic conversion only, but feel free to proceed on your own and use all the programming options given by Snowdown to fine-tune the results, or gain greater control over the conversion.
In this part we'll be working in the MDEditorViewController.swift file, so let's open it. There's already some initial implementation in the starter project, so we can focus on what we're interested in only. We'll get started by importing the JavaScriptCore framework:
import JavaScriptCore
And then we'll declare a JSContext property:
var jsContext: JSContext!
Similarly to the previous parts, we'll implement the initializeJS() method that will be used to initialise the jsContext object, to add the JS exception handler, and to evaluate any JS script that we're going to use here. Regarding the first two:
func initializeJS() {
    self.jsContext = JSContext()

    // Add an exception handler.
    self.jsContext.exceptionHandler = { context, exception in
        if let exc = exception {
            print("JS Exception:", exc.toString())
        }
    }

}
If you want to play a little, then you could also observe for console messages coming from your JS code. In the above method, make the following addition:
func initializeJS() {
    ...

    let consoleLogObject = unsafeBitCast(self.consoleLog, to: AnyObject.self)
    self.jsContext.setObject(consoleLogObject, forKeyedSubscript: "consoleLog" as (NSCopying & NSObjectProtocol))
    _ = self.jsContext.evaluateScript("consoleLog")

}
And of course, don't forget to add the consoleLog block in the MDEditorViewController class:
let consoleLog: @convention(block) (String) -> Void = { logMessage in
    print("\nJS Console:", logMessage)
}
Let's proceed to the evaluation of the scripts that we'll make use of. We need two scripts: Our own jssource.js file, and the Snowdown library. The first one is a local file, while the second is a remote one. Here's how we evaluate both of them in the jsContext (we continue working in the initializeJS() method):
func initializeJS() {
    ...

    if let jsSourcePath = Bundle.main.path(forResource: "jssource", ofType: "js") {
        do {
            let jsSourceContents = try String(contentsOfFile: jsSourcePath)
            self.jsContext.evaluateScript(jsSourceContents)


            // Fetch and evaluate the Snowdown script.
            let snowdownScript = try String(contentsOf: URL(string: "https://cdn.rawgit.com/showdownjs/showdown/1.6.3/dist/showdown.min.js")!)
            self.jsContext.evaluateScript(snowdownScript)
        }
        catch {
            print(error.localizedDescription)
        }
    }

}
Next, let's jump to the jssource.js file, where we add the following new function:
function convertMarkdownToHTML(source) {
    var converter = new showdown.Converter();
    var htmlResult = converter.makeHtml(source);

    consoleLog(htmlResult);
}
The above is all we need to convert a markdown text to HTML. A new Snowdown object is pulling out all the heavy work behind the scenes right after we call the makeHTML function. For the records, the source parameter is the original markdown text that we pass upon that function's call. Note that we use the consoleLog function imported in Swift, and we print the converted results to the console.
There's a missing part in the above function; we have to send back to our normal program (Swift) the produced HTML code. For that reason, we'll call a new function as shown next:
function convertMarkdownToHTML(source) {
    ...

    handleConvertedMarkdown(htmlResult);
}
The handleConvertedMarkdown function is Swift code exposed to JavaScript, and it's waiting for us to implement it. Regarding the convertMarkdownToHTML function, the last addition we just made finishes our work on it, so just make sure you save all changes and go back to the MDEditorViewController.swift file.
Let's work now on how to expose the handleConvertedMarkdown function from Swift to JavaScript. Initially, add the next block into the MDEditorViewController class:
let markdownToHTMLHandler: @convention(block) (String) -> Void = { htmlOutput in
    NotificationCenter.default.post(name: NSNotification.Name("markdownToHTMLNotification"), object: htmlOutput)
}
We'll deal with the above notification later. For now, our goal is to convert that block into an object, and pass it and evaluate it in the jsContext object. We already know how to do that, so head to the initializeJS() method and append the following at the end:
func initializeJS() {
    ...

    let htmlResultsHandler = unsafeBitCast(self.markdownToHTMLHandler, to: AnyObject.self)
    self.jsContext.setObject(htmlResultsHandler, forKeyedSubscript: "handleConvertedMarkdown" as (NSCopying & NSObjectProtocol))
    _ = self.jsContext.evaluateScript("handleConvertedMarkdown")
}
Nice, the handleConvertedMarkdown function will be available from now on to JavaScript. At this point, make sure you call the initializeJS() method as shown here:
override func viewDidAppear(_ animated: Bool) {
    super.viewDidAppear(animated)

    initializeJS()
}
Our next task is to call the JavaScript convertMarkdownToHTML function, so let's create a new method to do that in the MDEditorViewController class:
func convertMarkdownToHTML() {
    if let functionConvertMarkdownToHTML = self.jsContext.objectForKeyedSubscript("convertMarkdownToHTML") {
        _ = functionConvertMarkdownToHTML.call(withArguments: [self.tvEditor.text!])
    }
}
Remember that the convertMarkdownToHTML function expects the markdown text as a parameter, so that's what we're providing it with upon its call. By having that method ready, search for the convert(_:) IBAction method, and add the next call to it:
@IBAction func convert(_ sender: Any) {
    self.convertMarkdownToHTML()
}
The above will trigger the conversion to HTML every time we tap on the Convert button in the toolbar.
Are we done now? Not yet, we still have to handle the notification that is sent whenever a conversion is made. In the viewDidLoad() add the next observer:
override func viewDidLoad() {
    super.viewDidLoad()

    NotificationCenter.default.addObserver(self, selector: #selector(MDEditorViewController.handleMarkdownToHTMLNotification(notification:)), name: NSNotification.Name("markdownToHTMLNotification"), object: nil)
}
Then, implement the handleMarkdownToHTMLNotification(_:) method. In it, load the content of the web view using the HTML code we receive each time:
func handleMarkdownToHTMLNotification(notification: Notification) {
if let html = notification.object as? String {
let newContent = "\(html)"
self.webResults.loadHTMLString(newContent, baseURL: nil)
}
}
And that concludes our effort in this part. Run the app now, and go to the markdown editor section. Write some text using the markdown syntax and then use the Convert button to see the respective HTML results. I recommend you run it on an iPad, or the iPad Simulator.
Custom Classes and JavaScript
In the previous parts we learnt how to expose Swift code to JavaScript, but the power of the JavaScriptCore framework does not stop there. It also provides a mechanism to expose custom classes, and use objects of those classes with their properties and functions straight into JavaScript. That mechanism is called JSExport, it's a protocol, and the proper usage of it can enable us to combine Swift and JavaScript in more powerful ways.
To demonstrate how everything works and how the JSExport protocol is used, we'll create a custom class named DeviceInfo. That class will represent iOS devices (iPhone devices specifically) containing the following properties:
- Model name
- Initial OS
- Latest OS
- Image URL
For the demonstration purposes, there's a file contained called iPhone_List in the starter project. It's a csv file that contains information regarding all the iPhone devices that have been released so far. The original source of that data is this page in Wikipedia.
Our ultimate goal is to pass the DeviceInfo class and the iPhone_List.csv file's data into the JavaScript runtime, and get back an array with DeviceInfo objects. Once the data has been processed and we get them back, we'll display everythinga in a tableview (we'll use the image URLs to download the iPhone images on the fly).
One last important comment: We'll use a third-party JavaScript library to process the csv file and extract the data from it. This library is called Papa Parse, and it exists already in the starter project (papaparse.min.js file in the Project Navigator). You can find details and all the documentation you need if you want to explore it more here. It's a quite useful and powerful tool that reliefs us from any additional work required to parse the original csv file.
To get started, open the DeviceInfo.swift file. We'll implement the DeviceInfo class and a required protocol that will allow us to use it in JavaScript. For now, the class contains no implementation at all, so add the following content in it:
class DeviceInfo: NSObject {
    var model: String!
    var initialOS: String!
    var latestOS: String!
    var imageURL: String!

    init(withModel model: String) {
        super.init()

        self.model = model
    }

    class func initializeDevice(withModel: String) -> DeviceInfo {
        return DeviceInfo(withModel: withModel)
    }

    func concatOS() -> String {
        if let initial = initialOS {
            if let latest = latestOS {
                return initial + " - " + latest
            }
        }

        return ""
    }
}
At the beginning we declare the four aforementioned properties that describe a device. Next, we have a custom initialiser (init(withModel:)) where we pass the model name as an argument upon the initialisation of an object. And then, here it comes a new and important detail:
The initializeDevice(withModel:) class method will be used as the initializer of the class in JavaScript, for one simple reason: The JavaScriptCore framework does not bridge class initialisers between Swift and JavaScript. In simple words, this means that the init(withModel:) initialiser shown in the previous snippet is not recognisable by JavaScript, so creating a new object of the DeviceInfo class and returning it in the initializeDevice(withModel:) class method consists of the most proper way to work that around.
Lastly, there's a method that simply concatenates the initial and latest operating system string values. If any of them is nil, we just return an empty string.
The next vital step is to extend the JSExport protocol, and to add there all the properties and methods we want to expose to the JS environment. The following snippet shows that protocol, which should be placed before the class's definition:
@objc protocol DeviceInfoJSExport: JSExport {
    var model: String! {get set}
    var initialOS: String! {get set}
    var latestOS: String! {get set}
    var imageURL: String! {get set}

    static func initializeDevice(withModel: String) -> DeviceInfo
}
As you see, we expose all of our properties, but regarding the methods, we exclude the concatOS() method by just not writing it here. It's not going to be used at all in JavaScript, so there's no reason to make it available there. However, we apparently need initializeDevice(withModel:) class method, so we include it in the protocol extension as shown above.
Modify now the DeviceInfo class's header line, so it conforms to the DeviceInfoJSExport protocol:
class DeviceInfo: NSObject, DeviceInfoJSExport {
   ...
}
Now that we have our brand new class implemented and the JSExport protocol extension defined and adopted, let's see how we make use of them. Go to the DevicesViewController.swift file, and for starters declare a JSContext object right after the IBOutlet property being already there:
var jsContext: JSContext!
Also, add the following array declaration as well:
var deviceInfo: [DeviceInfo]!
That array will be the datasource for our tableview, and it will be populated with DeviceInfo objects once the iPhone_List.csv file has been processed by the JavaScript code that we'll write in a while.
Remember the initializeJS() method that we implemented in the previous parts? Well, we'll have such a method here too, and for the exact same reasons. Further than initialising the jsContext object and loading the contents of the jssource.js file with our custom JavaScript code, we'll also:
- Load and evaluate the papaparse.min.js script.
- Pass our DeviceInfo class to the JS runtime through the jsContext object.
Here's the initializeJS() method that does all the above:
func initializeJS() {
    self.jsContext = JSContext()

    // Add an exception handler.
    self.jsContext.exceptionHandler = { context, exception in
        if let exc = exception {
            print("JS Exception:", exc.toString())
        }
    }

    // Load the PapaParse library.
    if let papaParsePath = Bundle.main.path(forResource: "papaparse.min", ofType: "js") {
        do {
            let papaParseContents = try String(contentsOfFile: papaParsePath)
            self.jsContext.evaluateScript(papaParseContents)
        }
        catch {
            print(error.localizedDescription)
        }
    }

    // Load the Javascript source code from the jssource.js file.
    if let jsSourcePath = Bundle.main.path(forResource: "jssource", ofType: "js") {
        do {
            let jsSourceContents = try String(contentsOfFile: jsSourcePath)
            self.jsContext.evaluateScript(jsSourceContents)
        }
        catch {
            print(error.localizedDescription)
        }
    }

    // Set the DeviceInfo class to the JSContext.
    self.jsContext.setObject(DeviceInfo.self, forKeyedSubscript: "DeviceInfo" as (NSCopying & NSObjectProtocol)!)

}
Let's make a small detour now, and let's open the jssource.js file. We're going to add a new function which will accept the original data (in this case the contents of the iPhone_List.csv file), and once the process is finished it'll return an array with DeviceInfo objects, or null if something has gone wrong and there's no data to return. Here's the implementation:
function parseiPhoneList(originalData) {
    var results = Papa.parse(originalData, { header: true });
    if (results.data) {
        var deviceData = [];

       for (var i=0; i < results.data.length; i++) {
        var model = results.data[i]["Model"];

        var deviceInfo = DeviceInfo.initializeDeviceWithModel(model);

        deviceInfo.initialOS = results.data[i]["Initial OS"];
        deviceInfo.latestOS = results.data[i]["Latest OS"];
        deviceInfo.imageURL = results.data[i]["Image URL"];

        deviceData.push(deviceInfo);
    }

    return deviceData;
}

return null;
}
I really recommend to visit the Para Parse's documentation and read about the expected parameters and return values. In the first line we trigger the csv file's parsing with the following:
Papa.parse(originalData, { header: true })
The { header: true } indicates that the first row in the csv file contains headers, and these headers will become keys in the parsed results. The results variable will contain the following three arrays once the parsing is finished:
{
    data:   // array of parsed data
    errors: // array of errors
    meta:   // object with extra info
}
What we are interested in is the data array, and for simplicity purposes we just ignore the other two. By knowing that now, we can continue discussing on the parseiPhoneList function's implementation and underlying the importance of making sure that the data array is not null (if for example an error has occurred because the csv file is not formatted properly). Supposing that there's actual data after the csv parsing, we proceed by initialising an array called deviceData. That array will be returned at the end to the Swift code, but first we have to fill it with data. Inside a loop we go through all the returned data, and for each item in the results.data array we create a DeviceInfo object. Note two important facts now:
- Remember that the parsed data is an array of dictionaries, and that's why we access each single property using the following syntax:
results.data[i]["PROPERTY_NAME"]. - JavaScript does not support named parameters in functions, so the
initializeDevice(withModel:)becomesinitializeDeviceWithModel(). Each parameter name is appended to the function's name following the CamelCase pattern (the withModel turns to WithModel when it's appended to the function's name).
For each device, the model name is passed to the created object upon initialisation, while the values for the rest of the properties are just assigned to them. But further than that, whatever happens inside the for loop is the real magic we wanted originally to achieve in this part. The initializeDeviceWithModel function creates and returns a DeviceInfo object which is stored to the deviceInfo variable. Accessing its properties and assigning values is as simple as in Swift, and above all, we use a structure and its properties created in Swift in combination to the powerfulness of a tool in Javascript! How cool is that?
Back to the DevicesViewController.swift file now, we have to make use of that new JavaScript function we just created. For that reason, we'll create a new method called parseDeviceData(). In it we'll perform four distinct tasks:
- We'll load the contents of the iPhone_List.csv file into a String variable, so we can pass them to the JS function.
- We'll access the parseiPhoneList function using the jsContext object, and we'll call it using the contents from step 1.
- We'll copy the returned data into the deviceInfo array.
- We'll reload the tableview to force the parsed data to be displayed.
Here's that new method that does all the above:
func parseDeviceData() {
    if let path = Bundle.main.path(forResource: "iPhone_List", ofType: "csv") {
        do {
            let contents = try String(contentsOfFile: path)

            if let functionParseiPhoneList = self.jsContext.objectForKeyedSubscript("parseiPhoneList") {
                if let parsedDeviceData = functionParseiPhoneList.call(withArguments: [contents]).toArray() as? [DeviceInfo] {
                    self.deviceInfo = parsedDeviceData
                    self.tblDeviceList.reloadData()
                }
            }

        }
        catch {
            print(error.localizedDescription)
        }
    }
}
Implement now the viewDidAppear(_:) method, and call both this and the initializeJS() methods:
override func viewDidAppear(_ animated: Bool) {
    super.viewDidAppear(animated)

    initializeJS()
    parseDeviceData()
}
A couple of final touches, and we'll be soon ready to see it working. Initially, specify the number of rows in the tableview:
func tableView(_ tableView: UITableView, numberOfRowsInSection section: Int) -> Int {
    return (self.deviceInfo != nil) ? self.deviceInfo.count : 0
}
Next, use the DeviceInfo objects existing in the deviceInfo array, and display the details for each device in the tableview cells:
func tableView(_ tableView: UITableView, cellForRowAt indexPath: IndexPath) -> UITableViewCell {
    let cell = tableView.dequeueReusableCell(withIdentifier: "idDeviceCell") as! DeviceCell

    let currentDevice = self.deviceInfo[indexPath.row]

    cell.textLabel?.text = currentDevice.model
    cell.detailTextLabel?.text = currentDevice.concatOS()

    (URLSession(configuration: URLSessionConfiguration.default)).dataTask(with: URL(string: currentDevice.imageURL)!, completionHandler: { (imageData, response, error) in
        if let data = imageData {
            DispatchQueue.main.async {
                cell.imageView?.image = UIImage(data: data)
                cell.layoutSubviews()
            }
        }
    }).resume()

    return cell
}
Further than noticing how we use the properties of each DeviceInfo object, also note two other things: We make use of the concatOS() method to get a concatenated string of the initial and latest OS versions for each device, and we download the image specified by the imageURL property on the fly.
We're now good to go, so run the app and tap on the iPhone Devices List button. The data from the csv file will be presented nicely in the tableview:
Summary
Whatever we've seen in all the previous parts of this post demonstrate what you can do using the JavaScriptCore framework. Being able to exchange and use code between two different languages in such an easy way is a big advantage, so you should seriously think if using JavaScript in your next project can be a real case. But despite the JavaScriptCore's great features, there is a limitation that prevents the ultimate power to be unleashed. That limitation is the fact that we cannot make HTTP requests from JavaScript using the JavaScriptCore framework, as there's no option available for that (quite unfortunately). The workaround here would be to make all the web requests in Swift, and pass all the received data to the JavaScript environment for processing. But yet, that would probably work for custom JS code, but what about third-party libraries, that either we don't want to modify, or we just can't (for example, minified versions of libraries, like the papaparse.min.js we used in this post)?
Well, there's actually a way to make web requests through JavaScript, but it's not officially supported, so I intentionally did not add a special section about that to this post (I played by the rules). However, I'll shed some light to the path you should take, and proceed at your own risk after that. That solution requires to access the JSContext property of a UIWebView. If you do so, and you don't just initialise a JSContext object manually as we did in this tutorial several times, then there's nothing to stop you. And about how to access the JSContext of a webview? Just make a Google search and you'll find many results to show you how!
So, after that sneaky ending, I hope you enjoyed this tutorial, and that you appreciated the advantages of using Swift and JavaScript in the same project. If you don't really care about web requests, and there are tools in JavaScript that can help you, or you are quite familiar with that language with desire to use it, then there's no reason to hesitate anymore. JavaScriptCore framework is your way to go up to the top. Happy scripting!
For reference, you can download the Xcode project on GitHub.


