

Last year, iOS 15 came with a very useful feature known as Live Text. You may have heard of the term OCR (short for Optical Character Recognition), which is the process for converting an image of text into a machine-readable text format. This is what Live Text is about.
Live Text is built-into the camera app and Photos app. If you haven’t tried out this feature, simply open the Camera app. When you point the device’s camera at an image of text, you will find a Live Text button at the lower-right corner. By tapping the button, iOS automatically captures the text for you. You can then copy and paste it into other applications (e.g. Notes).
This is a very powerful and convenient features for most users. As a developer, wouldn’t it be great if you can incorporate this Live Text feature in your own app? In iOS 16, Apple released the Live Text API for developers to power their apps with Live Text. In this tutorial, let’s see how to use the Live Text API with SwiftUI.
Enable Live Text Using DataScannerViewController
In the WWDC session about Capturing Machine-readable Codes and Text with VisionKit, Apple’s engineer showed the following diagram:
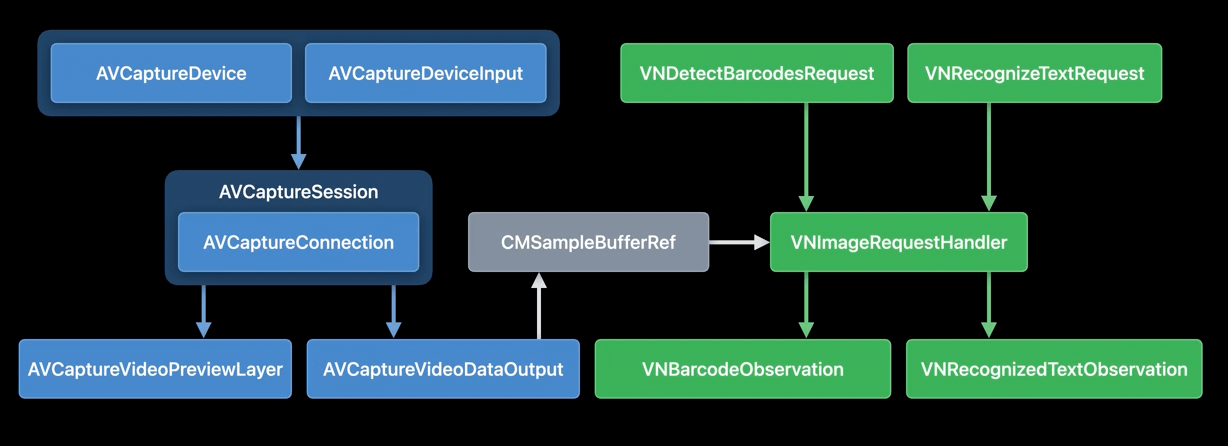
Text recognization is not a new feature on iOS 16. On older version of iOS, you can use APIs from the AVFoundation and Vision framework to detect and recognize text. However, the implementation is quite complicated, especially for those who are new to iOS development.
In the next release of iOS, all the above is simplified to a new class called DataScannerViewController in VisionKit. By using this view controller, your app can automatically display a camera UI with the Live Text capability.
To use the class, you first import the VisionKit framework and then check if the device supports the data scanner feature:
DataScannerViewController.isSupportedThe Live Text API only supports devices released in 2018 or newer with Neural engine. On top of that, you also need to check the availability to see if the user approves the use of data scanner:
DataScannerViewController.isAvailableOnce both checks come back with positive results, you are ready to start the scanning. Here is the sample code to launch a camera with Live Text:
let dataScanner = DataScannerViewController(
                     recognizedDataTypes: [.text()],
                     qualityLevel: .balanced,
                     isHighlightingEnabled: true
                  )

present(dataScanner, animated: true) {
    try? dataScanner.startScanning()
}
All you need is create an instance of DataScannerViewController and specify the recognized data types. For text recognition, you pass .text() as the data type. Once the instance is ready, you can present it and start the scanning process by calling the startScanning() method.
Working with DataScannerViewController in SwiftUI
The DataScannerViewController class now only supports UIKit. For SwiftUI, it needs a bit of work. We have to adopt the UIViewControllerRepresentable protocol to use the class in SwiftUI projects. In this case, I create a new struct named DataScanner like this:
struct DataScanner: UIViewControllerRepresentable {
  .
  .
  .
}
This struct accepts two binding variables: one for triggering the data scanning and the other is a binding for storing the scanned text.
@Binding var startScanning: Bool
@Binding var scanText: String
To successfully adopt the UIViewControllerRepresentable protocol, we need to implement the following methods:
func makeUIViewController(context: Context) -> DataScannerViewController {
    let controller = DataScannerViewController(
                        recognizedDataTypes: [.text()],
                        qualityLevel: .balanced,
                        isHighlightingEnabled: true
                    )

    return controller
}

func updateUIViewController(_ uiViewController: DataScannerViewController, context: Context) {

    if startScanning {
        try? uiViewController.startScanning()
    } else {
        uiViewController.stopScanning()
    }
}
In the makeUIViewController method, we return an instance of DataScannerViewController. For updateUIViewController, we start (or stop) the scanning depending on the value of startScanning.
To capture the scanned text, we have to adopt the following method of DataScannerViewControllerDelegate:
func dataScanner(_ dataScanner: DataScannerViewController, didTapOn item: RecognizedItem) {
  .
  .
  .
}
The method is called when the user taps the detected text, so we will implement it like this:
class Coordinator: NSObject, DataScannerViewControllerDelegate {
    var parent: DataScanner

    init(_ parent: DataScanner) {
        self.parent = parent
    }

    func dataScanner(_ dataScanner: DataScannerViewController, didTapOn item: RecognizedItem) {
        switch item {
        case .text(let text):
            parent.scanText = text.transcript
        default: break
        }
    }

}

func makeCoordinator() -> Coordinator {
    Coordinator(self)
}
We check the recognized item and store the scanned text if any text is recognized. Lastly, insert this line of code in the makeUIViewController method to configure the delegate:
controller.delegate = context.coordinatorThis controller is now ready for use in SwiftUI views.
Capturing Text Using DataScanner
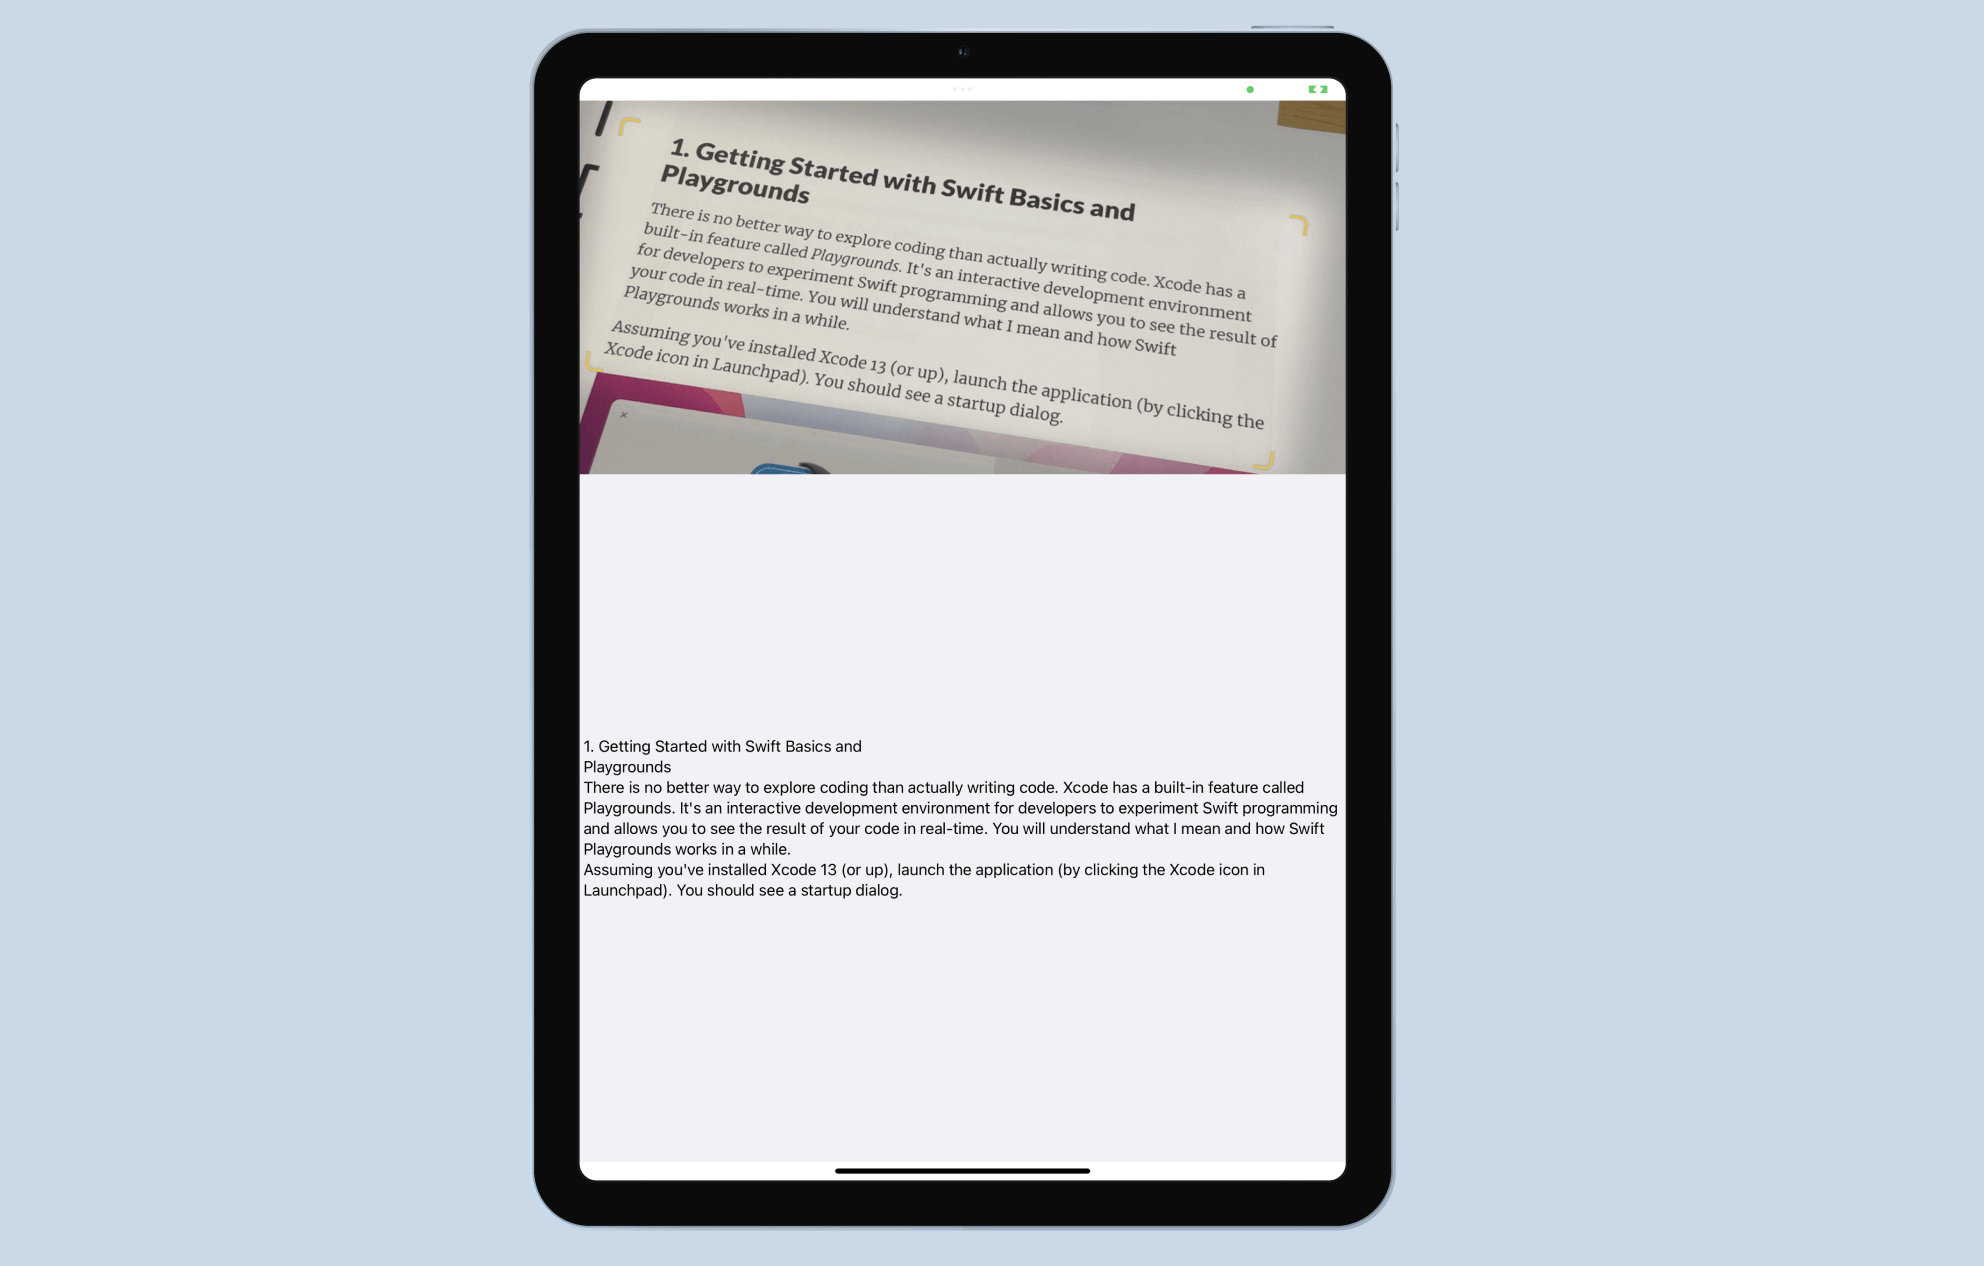
As an example, we will build a text scanner app with a very simple user interface. When the app is launched, it automatically displays the camera view for live text. When text is detected, users can tap the text to capture it. The scanned text is displayed in the lower part of the screen.
Assuming you’ve created a standard SwiftUI project, open ContentView.swift and the VisionKit framework.
import VisionKitNext, declare a couple of state variables to control the operation of the data scanner and the scanned text.
@State private var startScanning = false
@State private var scanText = ""
For the body part, let’s update the code like this:
VStack(spacing: 0) {
    DataScanner(startScanning: $startScanning, scanText: $scanText)
        .frame(height: 400)

    Text(scanText)
        .frame(minWidth: 0, maxWidth: .infinity, maxHeight: .infinity)
        .background(in: Rectangle())
        .backgroundStyle(Color(uiColor: .systemGray6))

}
.task {
    if DataScannerViewController.isSupported && DataScannerViewController.isAvailable {
        startScanning.toggle()
    }
}
We start the data scanner when the app launches. But before that, we call DataScannerViewController.isSupported and DataScannerViewController.isAvailable to ensure Live Text is supported on the device.
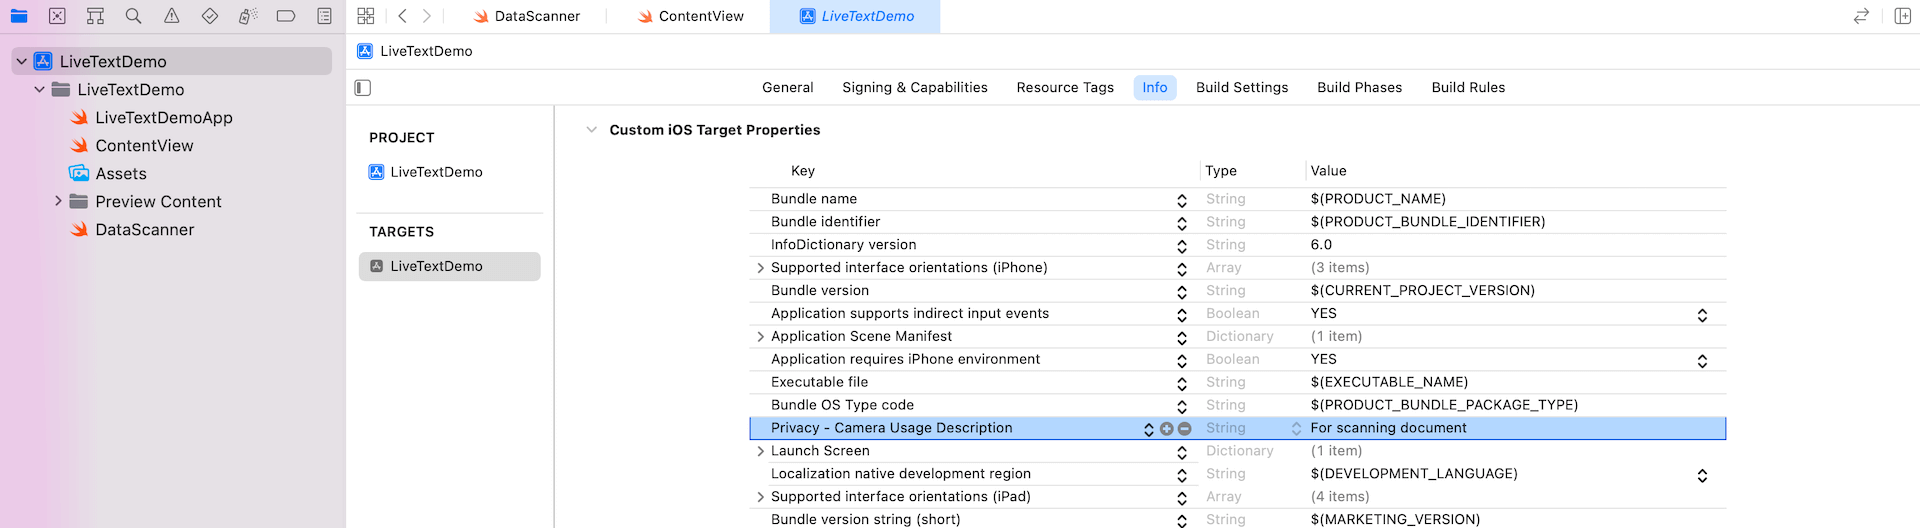
The demo app is almost ready to test. Since Live Text requires Camera access, please remember to go to the project configuration. Add the key Privacy – Camera Usage Description in the Info.plist file and specify the reason why your app needs to access the device’s camera.
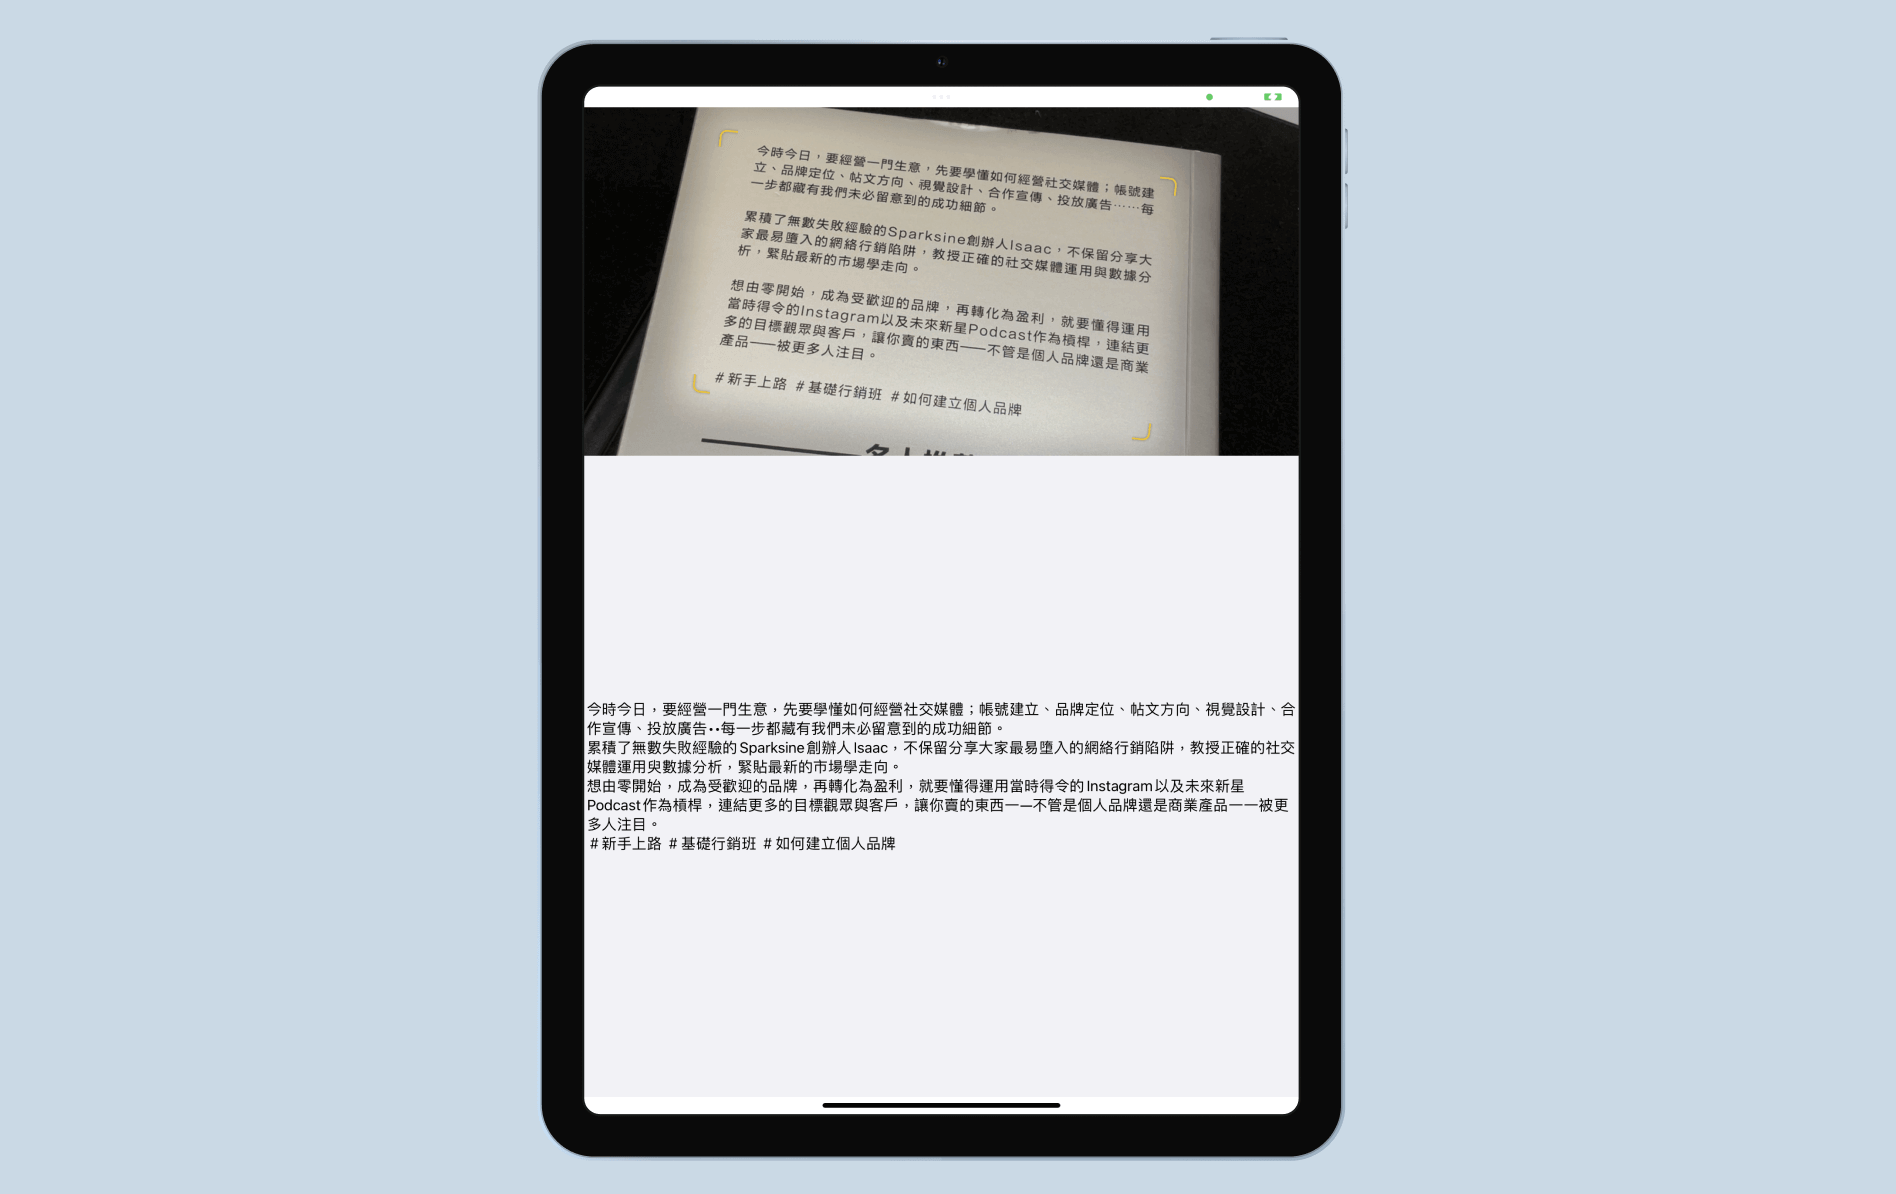
After the changes, you can deploy the app to a real iOS device and test the Live Text function.
Other than English, Live Text also supports French, Italian, German, Spanish, Chinese, Portuguese, Japanese, and Korean.
For the source code of this demo project, you can check it out on GitHub.
Note: We are updating our Mastering SwiftUI book for iOS 16. If you want to start learning SwiftUI, check out the book here. You will receive a free update later this year.


