

One of the most important tasks that a developer has to deal with when creating applications is the data handing and manipulation. Data can be expressed in many different formats, and mastering at least the most known of them consists of a key ability for every single programmer. Speaking for mobile applications specifically now, it’s quite common nowadays for them to exchange data with web applications. In such cases, the way that data is expressed may vary, but usually is preferred either the JSON or the XML format.
iOS SDK provides classes for handling both of them. For managing JSON data, there is the NSJSONSerialization class. This one allows to easily convert a JSON data into a Foundation object (NSArray, NSDictionary), and the other way round. For parsing XML data, iOS offers the NSXMLParser class, which takes charge of doing all the hard work, and through some useful delegate methods gives us the tools we need for handling each step of the parsing.
Focusing a bit on each class separately, there’s not much to say about the NSJSONSerialization class, except for the fact that is very simple and straightforward to be used. There are some simple rules that should follow, but further than that it takes all the hassle away from us when some JSON conversion is needed. In order to convert a JSON value into a Foundation form, it has to be a NSData object. The returned converted object is either an array (NSArray), or a dictionary (NSDictionary). Their contained objects however can be instances of NSString, NSNumber, NSNull, and of course NSArray and NSDictionary. The NSJSONSerialization class provides ways for checking if a JSON data is valid before doing any conversion, so you can use it in order to make sure before performing any conversion. On the other hand now, when you need to turn a Foundation object into JSON, you should have in mind that the produced object is always of NSData type. As you assume from what I said until now, it looks like managing JSON as a string doesn’t seem to be an option, but that’s not true. As you’ll find out later in this tutorial, we can have the JSON expressed as a NSString object, simply by doing a small kind of trick.
Going to NSXMLParser class now, I have to say that is a very convenient one and makes the parsing of XML data a piece of cake. It’s responsible for doing the actual parsing work, and it lets us know about each item that is found during parsing through delegate methods. It provides a great number of such methods, but that doesn’t mean that all of them must be implemented to an app. The ones that will be selected for implementation depend on how the parsed data should be handled.
So, as you guess my goal in this tutorial is to teach you how to work with JSON and XML data, and how to handle it so you can use it in your applications. At this point, I should point out two facts: At first, I presume that you know what JSON and XML is, and how data is formed in both formats. If you don’t feel very confident about any of them, then this is a good time to find and read a bit more about them. At second, even though I’m going to show you the basics on both of them, be sure that what you’ll learn is going to be more than enough to help you in your apps and to put you on the right track when you’ll need to find extra support or assistance.
Furthermore, in this tutorial you’ll see a couple of other interesting things too: How to easily fetch data from the web using the NSURLSession class, and how to use the MFMailComposeViewController class to present the standard mail view controller of iOS for sending e-mails. In the rest of this tutorial you will find out why and how we will use them.
Lastly, as always I recommend and encourage you to visit the official documentation by Apple to get more info on every topic we’ll discuss here. Having said that, let’s go to see an overview of the demo app that we’ll implement in this tutorial, as we have a lot of stuff to do next.
Demo App Overview
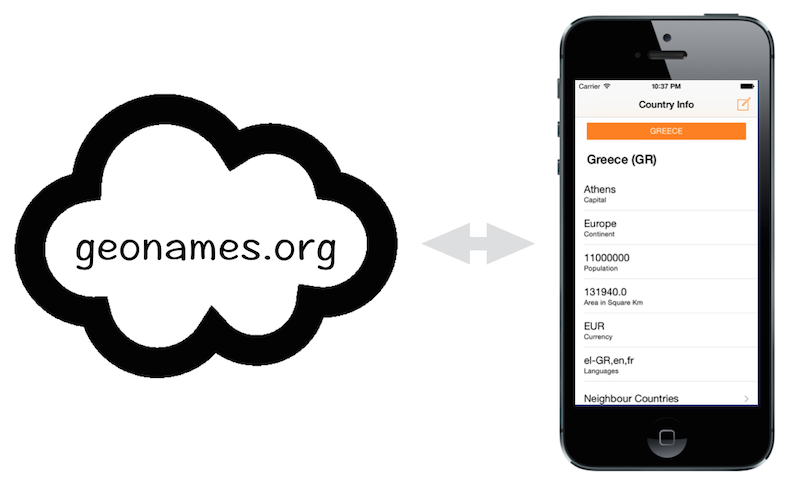
While I was trying to decide where I should get JSON and XML data from for the purpose of this tutorial, I ended up to a website that could provide me with both kind of data, so I considered it as the best option. That is the GeoNames website. It contains an enormous geographical database, an API for accessing its web services, and all that for free. Personally, I think of it as the #1 source when dealing with geographical data, so we’ll work with it. If you are not aware about it yet, then take a few minutes and pay a visit to it.
From this website we’ll get two different kind of data. The first one, is detailed information about a country. Not for a specific country, but for any country we’ll set in our app (we’ll talk more about that in a while). The data we’ll fetch will be in JSON format. The second, is the neighbour countries of the one we pick for getting its details, but this time the data will be in XML format. Both cases is what exactly we need for this tutorial. Examples of the JSON and XML data we’ll get through our demo app you can find here (country details) and here (neighbour countries).
Let me say a couple of things now regarding the app itself. First of all, we won’t create a new project from scratch. Instead, you’ll download a starter app where I’ve done some basic implementation. That app contains two view controllers, plus the standard iOS email view controller which we’ll present it through code. In the first one we will display the details of a country, while in the second we will list the neighbour countries. We will use the mail view controller (MFMailComposeViewController class) just to make our application more complete, but no e-mail is required to be actually sent.
More specifically now, in the first view controller (named ViewController) already exists a textfield, in which you’ll write the name of the country you want to get information for. I already have implemented the functionality of the textfield, so our work will begin by the time you want to download data after having tapped the Search button on the keyboard. Because the URL we’ll use for downloading the data regarding the typed country requires a two-letter country code parameter and not the whole name of the country, I’ve added to the project two text files. In the first one you’ll find all country names, while in the second one you’ll see the respective two-letter country code (for example, country name=ITALY, country code=IT). When tapping on the Search button, in the textFieldShouldReturn: delegate method of the textfield I have already added the logic for looking up the country code based on the given country. In case that no country matching to the typed one is found, then an alert view with a respective message appears. Beyond all that, there are also two more subviews in the first view controller: A label (UILabel) in which we’ll display the country name and its code after having retrieved and converted the data, and a table view for showing some details regarding the country.
The last cell of the above table view won’t contain any piece of information regarding the selected country, but it will be used to take us to the second view controller. Before loading it, we will pass a unique id value regarding the country, and using that id we will get the neighbour countries. The second view controller (named NeighboursViewController) contains just a table view which we’ll use to list the fetched data.
In the first view controller the data we’ll download will be in JSON format. Using the NSJSONSerialization class we’ll convert and add it to a dictionary (NSDictionary) object, and also we will convert some data back to JSON that we will set as the e-mail body in the mail view controller. In the second view controller we will get the data in XML format, and using the NSXMLParser class of the iOS SDK we will parse them and we will add them into an array.
As I have already said in the beginning of the tutorial, through the next parts you will be acquainted with both classes and you’ll see how to handle both JSON and XML data.
Register an Account on GeoNames
Let’s get started by paying a visit to the GeoNames website for creating a new account. If you want to know more about that, feel free to navigate yourself around and see what it offers. A very interesting part of it, is the Web Services Overview where you can find a list all of the provided services. By clicking on a service you can see details about it and how to use it, while you can have live examples of JSON and XML data returned to you by clicking on the respective links.
Anyway, after having seen the website, go and click on the Login link at the top-right side of the index page:

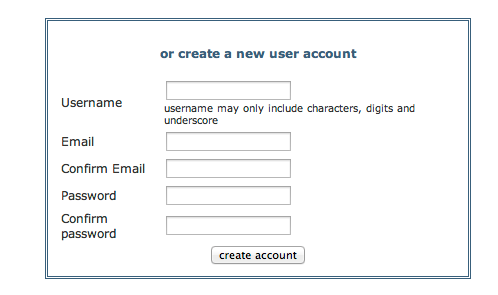
In the next page you’ll find two forms, one for logging in and one for creating a new account. The second one is what we need. Fill the form in, and then click on the create account button. Make sure to remember the user name you provide, as we’ll need it in a while.
A confirmation e-mail will be sent to your e-mail address. Wait a couple of minutes until you receive it, and then open it to activate your account. A page similar to the next one will open:
There’s one more step required before you’re finished here. That is to enable your account for using the free web services, and in order to do that, you must login to your GeoNames account. So, log yourself in, locate the respective link and just click it. You can now log out and go straight ahead to the project.
In order to do any call on the GeoNames API, it’s necessary to provide a valid username, such as the one you just created. Without it, no results will be returned when querying the GeoNames database, instead you’ll receive just an error message back from the server. To avoid that, simply open the AppDelegate.m file, and at the top of it locate the next lines:
#warning Set your Geonames username in the kUsername constant.
NSString *const kUsername = @"YOUR_USERNAME_HERE";
Remove or comment my custom warning that exists there, and set your username in place of the “YOUR_USERNAME_HERE” value. After doing so, you’re ready to use the GeoNames services properly.
A Convienient Class Method
The data that will be displayed in our sample app are going to be downloaded in real time using the GeoNames web services. To perform all downloads, we’ll use the NSURLSession class, which was first introduced on iOS 7 and tends to replace the NSURLConnection class. The downloading process is going to be repeated in two different view controllers, and it would be a really bad programming practice if we would write the same code twice. Instead, we’ll create a small, class method, in which we’ll add all the code needed to fetch the data we want, and we’ll call it every time we need it. We are going to make it a class method, so we can instantly call it without initializing extra objects. I should note that I purposely didn’t include this method in the starter app, as I believe that working with the NSURLSession class is a very important task, and always beneficial, even if we won’t focus on it too much.
So, let’s get started by going to the AppDelegate.h file first, and by declaring the method as shown below:
@interface AppDelegate : UIResponder

@property (strong, nonatomic) UIWindow *window;


+(void)downloadDataFromURL:(NSURL *)url withCompletionHandler:(void(^)(NSData *data))completionHandler;

@end
There are three noticeable things here. The first one is that we begin with the plus (+) symbol instead of the minus, as this is a class method. Next, as you can see it accepts two parameters: The first one is the URL that we’ll get the data from. The second one, is a completion handler that the method will invoke after having fetched the desired data.
In order to get the data we need, we’ll use a NSURLSessionDataTask task. That class, which is a child of the NSURLSessionTask abstract class, it requires two preliminary steps before putting it in action: To instantiate a NSURLSessionConfiguration and a NSURLSession object. In that task, we’ll provide the URL of the method’s parameter. Also, the method we’ll use has a completion handler block which is called after the data has been downloaded or if any error has occurred. In there we’ll handle the error if exists (we’ll simply log it to the console), and we’ll also show the HTTP status code if is other than 200 (meaning that something went wrong). In any case though, we’ll invoke the completion handler of the parameter, and we’ll pass the returned data as a NSData object. Let’s see all that in code now, in the AppDelegate.m file:
+(void)downloadDataFromURL:(NSURL *)url withCompletionHandler:(void (^)(NSData *))completionHandler{
    // Instantiate a session configuration object.
    NSURLSessionConfiguration *configuration = [NSURLSessionConfiguration defaultSessionConfiguration];

    // Instantiate a session object.
    NSURLSession *session = [NSURLSession sessionWithConfiguration:configuration];

    // Create a data task object to perform the data downloading.
    NSURLSessionDataTask *task = [session dataTaskWithURL:url completionHandler:^(NSData *data, NSURLResponse *response, NSError *error) {

        if (error != nil) {
            // If any error occurs then just display its description on the console.
            NSLog(@"%@", [error localizedDescription]);
        }
        else{
            // If no error occurs, check the HTTP status code.
            NSInteger HTTPStatusCode = [(NSHTTPURLResponse *)response statusCode];

            // If it's other than 200, then show it on the console.
            if (HTTPStatusCode != 200) {
                NSLog(@"HTTP status code = %d", HTTPStatusCode);
            }

            // Call the completion handler with the returned data on the main thread.
            [[NSOperationQueue mainQueue] addOperationWithBlock:^{
                completionHandler(data);
            }];
        }
    }];

    // Resume the task.
    [task resume];
}
Even though everything is quite easy to be understood, and the comments help even more on that, I would just like to underline the use of the next couple of lines:
[[NSOperationQueue mainQueue] addOperationWithBlock:^{
                completionHandler(data);
            }];
The task runs asynchronously in a background thread, but it’s necessary to call our completion handler on the main thread of the app and not on the thread of the task, so as we ensure that any visual updates after having fetched the data will occur on the proper time. Therefore, we add the completion handler call as an operation to the main thread, using the NSOperationQueue class. If you’re curious about what could happen if we wouldn’t use that operation block, then try to make the completion handler call out of that block after we have the app implemented. You’ll find out that the interface doesn’t get updated properly, and unpredictable delays in the app execution occur.
Finally, notice that we use this command:
[task resume];
for making the task start working.
Now that we have this useful method ready, we can see how we can handle JSON data and convert it to a manageable form.
Downloading a Country’s Info as JSON Data
In this part we are going to do one of the most important tasks in this tutorial: We are going to download the data for a country of which the name we type in the textfield of on the ViewController view controller, and then we are going to convert the returned JSON from a NSData object into to a NSDictionary object.
We’ll see everything in details, but first, let’s declare a private method in the ViewController.m file. Go to the private class section and add the next line:
@interface ViewController ()

...

-(void)getCountryInfo;

@end
Before its implementation, let’s call it. The point that we should do that, is right after the user has tapped on the Search button of the keyboard, and the two-letter country representation has been found. So, go to the textFieldShouldReturn: delegate method, and locate the next line:
self.countryCode = [self.arrCountryCodes objectAtIndex:index];
Then, right below it, add the method call:
[self getCountryInfo];
The if clause that contains the first line should now look like this:
if (index != -1) {
        // Get the two-letter country code from the arrCountryCodes array.
        self.countryCode = [self.arrCountryCodes objectAtIndex:index];

        // Download the country info.
        [self getCountryInfo];
    }
Now, let’s move ahead to the implementation of the getCountryInfo method. At first, we must specify the URL that we’ll get the data from. The URL is this:
http://api.geonames.org/countryInfoJSON
and we’re going to use it for making a GET request. We must provide two parameter values in the above URL, the username of the GeoNames services, and the country we want to look up info for, expressed as a two-letter string (for that we’ll use the countryCode property already existed in the ViewController class). Let’s see that:
-(void)getCountryInfo{
    // Prepare the URL that we'll get the country info data from.
    NSString *URLString = [NSString stringWithFormat:@"http://api.geonames.org/countryInfoJSON?username=%@&country=%@", kUsername, self.countryCode];
    NSURL *url = [NSURL URLWithString:URLString];


}
If you NSLog the above URLString value now, you’ll see something like this:
http://api.geonames.org/countryInfoJSON?username=XXXXXXXX&country=GR
(Where XXXXXXXX is your username)
Now, we can call the downloadDataFromURL:withCompletionHandler: class method we previously implemented. In this, we’ll provide the URL we formed in the above code snippet, and we’ll implement the completion handler block:
-(void)getCountryInfo{
    ...

    [AppDelegate downloadDataFromURL:url withCompletionHandler:^(NSData *data) {
        // Check if any data returned.
        if (data != nil) {

        }
    }];

}
Notice that is always necessary to check if the returned data is other than nil. In case of error, no data will exist and the data object will be nil, so be careful.
For first time, we are about to use the NSJSONSerialization class in order to convert the fetched JSON data into a Foundation object, so we can handle it. Usually, a JSON converted object matches either to a NSArray object, or to a NSDictionary object. In the most cases you can know and tell what object the JSON will be converted to, as in almost every app you can find out the form of the JSON data you’ll fetch. In the rare cases you don’t know how the JSON data is formed and what Foundation object to expect after the conversion, see right next how to determine this.
Before I show you how to find out the class of the converted JSON, let me introduce the method that does all the magical work. That is the JSONObjectWithData:options:error:. The first parameter of that method, is the NSData data downloaded from the web. What this method returns, is an id Foundation type.
Returning to what I was saying before and using this method, simply by writing this (in any app):
NSLog(@"%@", [[NSJSONSerialization JSONObjectWithData:data options:kNilOptions error:&error] class]);
you can see in the console the actual class of the converted JSON data. In our case, if we run the app using the above NSLog command, we’ll see the following:
__NSCFDictionary
That means that by converting the returned JSON data we’ll get a NSDictionary object. That’s great and really interesting!
There’s one more way to determine the kind of the returned data. We can open a browser (Safari, Chrome or anything else you use), and set the URL in the address line:

By pressing the Return key, you’ll see the JSON string right in front of you:

The above screenshot might not be so clear, therefore I’m copying-pasting the returned JSON here as well:
{"geonames":[{"continent":"EU","capital":"Athens","languages":"el-GR,en,fr","geonameId":390903,"south":34.8020663391466,"isoAlpha3":"GRC","north":41.7484999849641,"fipsCode":"GR","population":"11000000","east":28.2470831714347,"isoNumeric":"300","areaInSqKm":"131940.0","countryCode":"GR","west":19.3736035624134,"countryName":"Greece","continentName":"Europe","currencyCode":"EUR"}]}
The initial curly brace ({) indicates a dictionary object. The bracket ([) indicates an array. Next, there’s another curly brace, meaning another dictionary. In simple words, the above JSON says: We have a dictionary, in which there’s an array with one object only, and that object is another dictionary containing all the data we want (dictionary > array > dictionary).
So, what we have to do is this: First, we’ll convert the returned JSON data into a NSDictionary object. Then, we will check if any error has occurred during conversion, and if not we’ll extract the array from that dictionary using the key geonames. Finally, we’ll extract the second, desired dictionary from the first index of that array. Speaking in code this time, here’s what I just said:
-(void)getCountryInfo{
    ...

    [AppDelegate downloadDataFromURL:url withCompletionHandler:^(NSData *data) {
        // Check if any data returned.
        if (data != nil) {
            // Convert the returned data into a dictionary.
            NSError *error;
            NSMutableDictionary *returnedDict = [NSJSONSerialization JSONObjectWithData:data options:kNilOptions error:&error];

            if (error != nil) {
                NSLog(@"%@", [error localizedDescription]);
            }
            else{
                self.countryDetailsDictionary = [[returnedDict objectForKey:@"geonames"] objectAtIndex:0];
            }
        }
    }];

}
Initially, we convert the JSON data to the returnedDict dictionary. Next, we get the array and the dictionary of the first index of that array, and we assign it to the countryDetailsDictionary property. Regarding the error object in the above implementation, it’s our duty to check if it’s nil or not, and to take the proper actions. For the sake of the simplicity, we just log the description of the error, if any occurs of course.
For now, it would be nice if we could see the fetched data even on the console, therefore complete the above method as shown right next:
-(void)getCountryInfo{
    ...

    [AppDelegate downloadDataFromURL:url withCompletionHandler:^(NSData *data) {
        // Check if any data returned.
        if (data != nil) {
            // Convert the returned data into a dictionary.
            NSError *error;
            NSMutableDictionary *returnedDict = [NSJSONSerialization JSONObjectWithData:data options:kNilOptions error:&error];

            if (error != nil) {
                NSLog(@"%@", [error localizedDescription]);
            }
            else{
                self.countryDetailsDictionary = [[returnedDict objectForKey:@"geonames"] objectAtIndex:0];
                NSLog(@"%@", self.countryDetailsDictionary);
            }
        }
    }];

}
Running the app now, will return something like the next output:
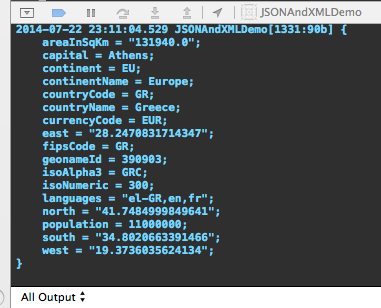
{
    areaInSqKm = "131940.0";
    capital = Athens;
    continent = EU;
    continentName = Europe;
    countryCode = GR;
    countryName = Greece;
    currencyCode = EUR;
    east = "28.2470831714347";
    fipsCode = GR;
    geonameId = 390903;
    isoAlpha3 = GRC;
    isoNumeric = 300;
    languages = "el-GR,en,fr";
    north = "41.7484999849641";
    population = 11000000;
    south = "34.8020663391466";
    west = "19.3736035624134";
}
So, we’ve successfully managed to download JSON data and to convert it to a NSDictionary object. That was a very important job, but we have more to do. Next, we’ll display all that data.
Populating the Converted JSON Data
Now that we have the data we want on our hands, it’s time to display it. There are two subviews for showing data: A label for the country title along with its two-letter code, and a table view for the rest of it. As you see, there’s a lot of data that is being returned, but we are not going to use all of it. Actually, we will show only the following (besides the country name):
- Capital
- Continent
- Population
- Area in Square Km
- Currency
- Languages
Let’s get started by the easy one, the country name. While being in the getCountryInfo method and in the else case, add the next line to display the country name to the label existing right below the textfield:
// Set the country name to the respective label.
                self.lblCountry.text = [NSString stringWithFormat:@"%@ (%@)", [self.countryDetailsDictionary objectForKey:@"countryName"], [self.countryDetailsDictionary objectForKey:@"countryCode"]];
This will display something like: ITALY (IT).
In the same else case, add the next two lines as well, in order to reload the data in the table view and make it appear (initially the table view is hidden):
// Reload the table view.
                [self.tblCountryDetails reloadData];

                // Show the table view.
                self.tblCountryDetails.hidden = NO;
After the above couple of modifications, your else case in the completion handler block should look like this:
 else{
                // Set the country name to the respective label.
                self.lblCountry.text = [NSString stringWithFormat:@"%@ (%@)", [self.countryDetailsDictionary objectForKey:@"countryName"], [self.countryDetailsDictionary objectForKey:@"countryCode"]];

                // Reload the table view.
                [self.tblCountryDetails reloadData];

                // Show the table view.
                self.tblCountryDetails.hidden = NO;
            }
Our work in this method is over, so let’s focus on the table view. Initially, go to the tableView:numberOfRowsInSection: and change the return 0; command to this:
-(NSInteger)tableView:(UITableView *)tableView numberOfRowsInSection:(NSInteger)section{
    return 7;
}
We want 7 rows to exist in our table view. We’ll use the first six rows to display the data I mentioned above, and in the last row we’ll have a cell that will let us get navigated into a new view controller, where we’ll get the neighbour countries of the selected one.
Next, we’ll work in the tableView:cellForRowAtIndexPath: method. As you see, there’s the following initial implementation, where the cell is dequeued or created if it does not exist:
-(UITableViewCell *)tableView:(UITableView *)tableView cellForRowAtIndexPath:(NSIndexPath *)indexPath{
    UITableViewCell *cell = [tableView dequeueReusableCellWithIdentifier:@"cell"];
    if (cell == nil) {
        cell = [[UITableViewCell alloc] initWithStyle:UITableViewCellStyleSubtitle reuseIdentifier:@"Cell"];
        cell.accessoryType = UITableViewCellAccessoryNone;
        cell.selectionStyle = UITableViewCellSelectionStyleNone;
    }

    return cell;
}
Notice that both the accessory type and the selection style are set to None for all cells.
Our work here is quite easy. We’ll use a switch statement, in which we will check the index of each row. Depending on this value, we will extract the proper data from the countryDetailsDictionary dictionary and we’ll assign it to the cell’s text label. At the same time, we’ll add a short descriptive text as a subtitle on each cell. Let’s see it:
-(UITableViewCell *)tableView:(UITableView *)tableView cellForRowAtIndexPath:(NSIndexPath *)indexPath{
    UITableViewCell *cell = [tableView dequeueReusableCellWithIdentifier:@"cell"];
    if (cell == nil) {
        cell = [[UITableViewCell alloc] initWithStyle:UITableViewCellStyleSubtitle reuseIdentifier:@"Cell"];
        cell.accessoryType = UITableViewCellAccessoryNone;
        cell.selectionStyle = UITableViewCellSelectionStyleNone;
    }

    switch (indexPath.row) {
        case 0:
            cell.detailTextLabel.text = @"Capital";
            cell.textLabel.text = [self.countryDetailsDictionary objectForKey:@"capital"];
            break;
        case 1:
            cell.detailTextLabel.text = @"Continent";
            cell.textLabel.text = [self.countryDetailsDictionary objectForKey:@"continentName"];
            break;
        case 2:
            cell.detailTextLabel.text = @"Population";
            cell.textLabel.text = [self.countryDetailsDictionary objectForKey:@"population"];
            break;
        case 3:
            cell.detailTextLabel.text = @"Area in Square Km";
            cell.textLabel.text = [self.countryDetailsDictionary objectForKey:@"areaInSqKm"];
            break;
        case 4:
            cell.detailTextLabel.text = @"Currency";
            cell.textLabel.text = [self.countryDetailsDictionary objectForKey:@"currencyCode"];
            break;
        case 5:
            cell.detailTextLabel.text = @"Languages";
            cell.textLabel.text = [self.countryDetailsDictionary objectForKey:@"languages"];
            break;
        case 6:
            cell.textLabel.text = @"Neighbour Countries";
            cell.accessoryType = UITableViewCellAccessoryDisclosureIndicator;
            cell.selectionStyle = UITableViewCellSelectionStyleDefault;
            break;

        default:
            break;
    }

    return cell;
}
Pay special attention to the last case, where we add the cell that will take us to the neighbour countries list. For this cell only, we set the disclosure indicator as the accessory type and the default selection style. That’s because we want it to prompt us to tap it, and to be highlighted when is tapped.
Now you can run the app and see it functioning properly for the first time. Type a country’s name in the text field, and wait until you see its details on the table view. Always remember that these details are fetched in real time from a web server as JSON data, and our app is the one that makes it possible to view that data!

Creating a JSON
Further than just converting JSON data into a Foundation object (NSArray, NSDictionary), the NSJSONSerialization class can also help us convert data stored in Foundation objects to JSON format. In the previous sections we managed to implement the first case and make our app work great. Now, we will see how to produce JSON data.
If you look closely in the view controller when running the app, there is a Compose bar button item at the right side of the navigation bar:
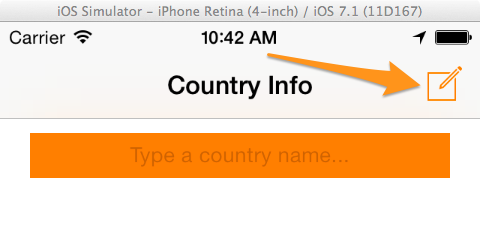
Using this button we will perform two things: The first one is to create a JSON string using the NSJSONSerialization class. This string will contain just the country data displayed on our view controller, excluding all the data that we don’t use. The second is to send that string via e-mail, so we’ll make the standard iOS mail view controller appear.
Our work will take place in the sendJSON: IBAction method. We’ll begin by creating a new dictionary (NSDictionary) that will contain only the values we want:
- (IBAction)sendJSON:(id)sender {
    // Create a dictionary containing only the values we care about.
    NSDictionary *dictionary = @{@"countryName": [self.countryDetailsDictionary objectForKey:@"countryName"],
                                 @"countryCode": [self.countryDetailsDictionary objectForKey:@"countryCode"],
                                 @"capital": [self.countryDetailsDictionary objectForKey:@"capital"],
                                 @"continent": [self.countryDetailsDictionary objectForKey:@"continentName"],
                                 @"population": [self.countryDetailsDictionary objectForKey:@"population"],
                                 @"areaInSqKm": [self.countryDetailsDictionary objectForKey:@"areaInSqKm"],
                                 @"currency": [self.countryDetailsDictionary objectForKey:@"currencyCode"],
                                 @"languages": [self.countryDetailsDictionary objectForKey:@"languages"]
                                 };

}
Now the most important part: We’ll convert that dictionary into JSON data. That’s just a matter of one line:
- (IBAction)sendJSON:(id)sender {
    ...

    // Convert the dictionary into a JSON data object.
    NSData *JSONData = [NSJSONSerialization dataWithJSONObject:dictionary options:NSJSONWritingPrettyPrinted error:nil];

}
The above does all the magical work. However, we have a problem here: The converted object is a NSData object, and if you try to display its contents you’ll get something like that:
<7b0a2020 22636f75 6e747279 436f6465 22203a20 22475222 2c0a2020 226c616e 67756167 65732220 3a202265 6c2d4752 2c656e2c 6672222c 0a202022 636f756e 7472794e 616d6522 203a2022 47726565 6365222c 0a202022 636f6e74 696e656e 7422203a 20224575 726f7065 222c0a20 20226375 7272656e 63792220 3a202245 5552222c 0a202022 706f7075 6c617469 6f6e2220 3a202231 31303030 30303022 2c0a2020 22617265 61496e53 714b6d22 203a2022 31333139 34302e30 222c0a20 20226361 70697461 6c22203a 20224174 68656e73 220a7d>
Of course, this is not readable by humans, so how can we show and send the actual JSON string? Well, we’ll do a small trick, which is shown below:
- (IBAction)sendJSON:(id)sender {
    ...

    // Convert the JSON data into a string.
    NSString *JSONString = [[NSString alloc] initWithData:JSONData encoding:NSUTF8StringEncoding];

}
As you see, we simply convert the NSData object into a NSString object using the above way. This is safe to do, as we already know that a JSON value is a string value. If we use a NSLog command at this point, here’s what we’ll see on the console:
{
  "countryCode" : "GR",
  "languages" : "el-GR,en,fr",
  "countryName" : "Greece",
  "continent" : "Europe",
  "currency" : "EUR",
  "population" : "11000000",
  "areaInSqKm" : "131940.0",
  "capital" : "Athens"
}
That’s great! It’s what exactly we want, and by seeing this we can be sure that our dictionary was successfully converted into a JSON string. Now, let’s make our example more complete, by making it capable of sending the above JSON string via e-mail. To make our work easier, I’ve already imported the necessary library (MFMailComposeViewController), and have adopted the respective protocol (MFMailComposeViewControllerDelegate) regarding the e-mail view controller, so we just need to present it here.
One basic thing you should always have in mind when using the MFMailComposeViewController class for displaying the e-mail view controller, is that you should check if the device can actually send e-mails. We’ll perform that check here, and then we’ll do these:
- We’ll initialize a MFMailComposeViewController object and we’ll make the ViewController class its delegate.
- We’ll set the subject of the e-mail.
- We’ll set the body of the e-mail, which obviously is the JSON string we earlier produced.
- We’ll present the view controller.
Let’s see all that:
- (IBAction)sendJSON:(id)sender {
    ...

    if ([MFMailComposeViewController canSendMail]) {
        MFMailComposeViewController *mailViewController = [[MFMailComposeViewController alloc] init];
        mailViewController.mailComposeDelegate = self;

        [mailViewController setSubject:@"Country JSON"];

        [mailViewController setMessageBody:JSONString isHTML:NO];

        [self presentViewController:mailViewController animated:YES completion:nil];
    }
}
The IBAction method is now ready. Notice that the mailComposeController:didFinishWithResult:error: delegate method of the * MFMailComposeViewControllerDelegate* protocol has already been implemented, so no more action is required from us.
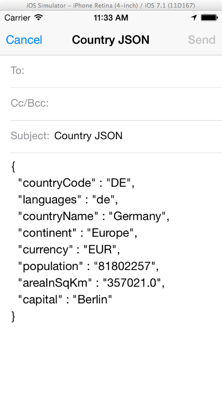
Go and test the app once again. You’ll find out that the mail view controller is appeared (modally), and the JSON string is automatically set as the body of the e-mail.
Downloading the Neighbour Countries
As you have seen up to here, handling JSON data is really easy with the NSJSONSerialization class. Now, it’s time to move to the second part of the app, where we’ll download data regarding the neighbour countries of the selected one, but this time it’s going to be in XML format. Through the next sections you’ll see how you can use the NSXMLParser class for parsing XML data, and you’ll find out how easy it is to end up with the needed logic for extracting the data.
In order to download the neighbours of the selected country, it’s necessary to provide to the URL that we’ll call a unique value regarding the country, named geonameId. That value was returned along with the rest of the data, and if you look closely to the dictionary contents we previously logged in the debugger, you’ll find it there. So, first of all, we must make the ViewController class send the geonameId value to the NeighboursViewController, and then proceed to the rest of the work. Open the NeighboursViewController.h and declare the following property:
@interface NeighboursViewController : UIViewController

...

@property (nonatomic, strong) NSString *geonameID;

@end
As you assume, in this property we’ll pass the value we want. Now, back to the ViewController.m file, go to the prepareForSegue:sender: method. This one is called before the new view controller actually gets loaded, so it’s the best place to set the geonameId value to the geonameID property. Add the next code segment:
-(void)prepareForSegue:(UIStoryboardSegue *)segue sender:(id)sender{
    if ([segue.identifier isEqualToString:@"idSegueNeighbours"]) {
        NeighboursViewController *neighboursViewController = [segue destinationViewController];
        neighboursViewController.geonameID = [self.countryDetailsDictionary objectForKey:@"geonameId"];
    }
}
Having this property set, we are able to proceed to our work. Let’s continue by downloading the neighbour countries data, as we previously did with the country’s details data. Go to the NeighboursViewController.m file, in the private class section, and declare the next method:
@interface NeighboursViewController ()

-(void)downloadNeighbourCountries;

@end
We want the neighbour countries data to be downloaded when the view controller gets loaded, so go to the viewDidLoad method and call it:
- (void)viewDidLoad
{
    ...

    // Download the neighbour countries data.
    [self downloadNeighbourCountries];
}
Now, let’s see its implementation. The first thing we have to do is to specify the URL that we’ll get the data from. Once we have it formed, we’ll call the downloadDataFromURL:withCompletionHandler: class method to perform the actual download. Let’s see everything up to this point:
-(void)downloadNeighbourCountries{
    // Prepare the URL that we'll get the neighbour countries from.
    NSString *URLString = [NSString stringWithFormat:@"http://api.geonames.org/neighbours?geonameId=%@&username=%@", self.geonameID, kUsername];

    NSURL *url = [NSURL URLWithString:URLString];

    // Download the data.
    [AppDelegate downloadDataFromURL:url withCompletionHandler:^(NSData *data) {
        // Make sure that there is data.
        if (data != nil) {

        }
    }];
}
Simple as that! In the next part we are going to begin parsing the data in the above if clause, and we’ll implement all the necessary delegate methods of the parser that will help us to extract the exact data we need.
Parsing the XML Data
In order to parse an XML file or XML data in general, iOS SDK provides the NSXMLParser class. This one performs all the hard work on the background by going through all the data (by parsing them), and it provides us with some really useful delegate methods. Using them, we can have full control over parsing and handle any data found, in any way we want. In this example, we’ll use some of those delegate methods, and we’ll add all the data we are interested in to an array.
Being more specific, let me introduce you the delegate methods of the NSXMLParser class we’ll use, and what each of them is for. For clarification reasons only, I need to say that every XML data that’s about to be parsed, is considered as an XML document by iOS. Keep that in mind when reading next.
The delegate methods now:
- parserDidStartDocument: This one is called when the parsing actually starts. It’s obvious that is called just once per XML document.
- parserDidEndDocument: This one is the complement of the first one, and is called when the parser reaches the end of the XML data.
- parser:parseErrorOccurred: This delegate method is called when an error occurs during the parsing. The method contains an error object, which you can use to define the actual error.
- parser:didStartElement:namespaceURI:qualifiedName:attributes: This one is called when the opening tag of an element is found.
- parser:didEndElement:namespaceURI:qName: On the contrary to the above method, this is called when the closing tag of an element is found.
- parser:foundCharacters: This method is called during the parsing of the contents of an element. Its second argument is a string value containing the character that was just parsed.
Now that you know the delegate methods we’re about to use in our sample app, let’s discuss a bit about the logic that we’ll follow. Well, as it’s quite possible that multiple results will be returned after a call on the GeoNames API, it’s obvious that we’ll have to insert the parsed data into an array. But, what exactly are we going to add to this array?
To answer the above question, we just have to pay a visit to the GeoNames website and perform an API call using the browser, so we see what is being returned when asking for neighbour countries. There’s no simpler option than using the example link of the website, which takes us to a page with the following results:
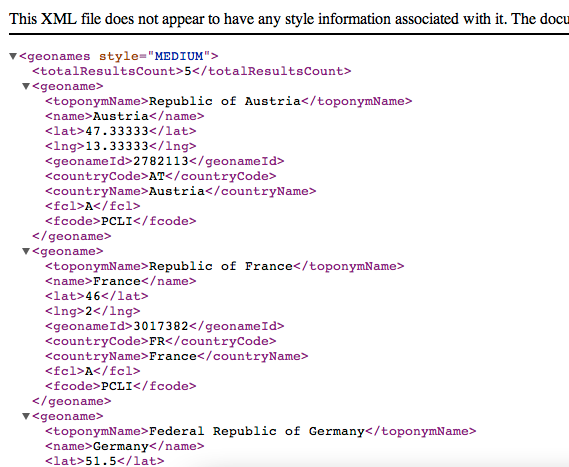
Among all the values that been returned, we are going to use just two of them in our app: The toponymName and the name of the neighbour country.
With that in mind, we could say that for every neighbour country that will be parsed, we could add the above two values into a dictionary, and then add each dictionary to the array. In order to make this general idea more specific, let me say what we’ll do in each delegate method, in the order they were previously presented:
- parserDidStartDocument: In this one we’ll initialize the array that will contain all the data regarding the neighbour countries.
- parserDidEndDocument: As this method signals the end of the parsing, we’ll simply reload the table view, and we will display our data.
- parser:parseErrorOccurred: This is just a sample app, so we won’t handle the error, we’ll only log it on the console.
- parser:didStartElement:namespaceURI:qualifiedName:attributes: A quite important method, as we will initialize the dictionary in which we’ll store the toponym and the country name when the element is equal to the “
” value. Moreover, we’ll assign the name of the current element to a property, as we’ll need to know it when parsing characters. - parser:didEndElement:namespaceURI:qName: When the closing “” tag is found, the dictionary containing the two values of interest will be added to the array. Besides that, when parsing either the “” or the “” closing tags, the respective found values will be added to the dictionary.
- parser:foundCharacters: When the current element is equal to “
” or to “ ” then we’ll store the found characters into a mutable string. The value of that string is the one we’ll add to the dictionary when the closing tag of the respective element is parsed.
Enough with theory though, let’s start writing some code. At the private section of the class, add the following properties:
@interface NeighboursViewController ()

...

@property (nonatomic, strong) NSXMLParser *xmlParser;

@property (nonatomic, strong) NSMutableArray *arrNeighboursData;

@property (nonatomic, strong) NSMutableDictionary *dictTempDataStorage;

@property (nonatomic, strong) NSMutableString *foundValue;

@property (nonatomic, strong) NSString *currentElement;


@end
- The xmlParser property is the one that we’ll use to parse the XML data.
- The arrNeighboursData property is the array that will contain all of the desired data after the parsing has finished.
- The dictTempDataStorage property is the dictionary in which we’ll temporarily store the two values we seek for each neighbour country until we add it to the array.
- The foundValue mutable string will be used to store the found characters of the elements of interest.
- The currentElement string will be assigned with the name of the element that is parsed at any moment.
Now, go to the downloadNeighbourCountries method, and add the code shown below in the completion handler block:
-(void)downloadNeighbourCountries{
    // Prepare the URL that we'll get the neighbour countries from.
    NSString *URLString = [NSString stringWithFormat:@"http://api.geonames.org/neighbours?geonameId=%@&username=%@", self.geonameID, kUsername];

    NSURL *url = [NSURL URLWithString:URLString];

    // Download the data.
    [AppDelegate downloadDataFromURL:url withCompletionHandler:^(NSData *data) {
        // Make sure that there is data.
        if (data != nil) {
            self.xmlParser = [[NSXMLParser alloc] initWithData:data];
            self.xmlParser.delegate = self;

            // Initialize the mutable string that we'll use during parsing.
            self.foundValue = [[NSMutableString alloc] init];

            // Start parsing.
            [self.xmlParser parse];
        }
    }];
}
With these four lines in the block, we initialize the parser object, we set our class as its delegate, we initialize the mutable string that we’ll use for storing the parsed values and finally we start parsing. Note that I have already adopted a required protocol, the NSXMLParserDelegate.
Let’s start working on the delegate methods now, and let’s see them in the order the were presented above. The first one:
-(void)parserDidStartDocument:(NSXMLParser *)parser{
    // Initialize the neighbours data array.
    self.arrNeighboursData = [[NSMutableArray alloc] init];
}
As I have already said, this delegate method signals the beginning of the parsing, so we initialize our array. The next one:
-(void)parserDidEndDocument:(NSXMLParser *)parser{
    // When the parsing has been finished then simply reload the table view.
    [self.tblNeighbours reloadData];
}
After the parsing has finished, we simply reload the data on the table view. For the time being nothing happens, but we’ll work on that at the next section. Next:
-(void)parser:(NSXMLParser *)parser parseErrorOccurred:(NSError *)parseError{
    NSLog(@"%@", [parseError localizedDescription]);
}
Nothing difficult here too, as we simply display the error description on the console.
-(void)parser:(NSXMLParser *)parser didStartElement:(NSString *)elementName namespaceURI:(NSString *)namespaceURI qualifiedName:(NSString *)qName attributes:(NSDictionary *)attributeDict{

    // If the current element name is equal to "geoname" then initialize the temporary dictionary.
    if ([elementName isEqualToString:@"geoname"]) {
        self.dictTempDataStorage = [[NSMutableDictionary alloc] init];
    }

    // Keep the current element.
    self.currentElement = elementName;
}
Two things happen here: If the parser is about to start parsing the data of a new country, then we initialize the dictionary. The second is that we store the current element name (you’ll see why in the last delegate method).
-(void)parser:(NSXMLParser *)parser didEndElement:(NSString *)elementName namespaceURI:(NSString *)namespaceURI qualifiedName:(NSString *)qName{

    if ([elementName isEqualToString:@"geoname"]) {
        // If the closing element equals to "geoname" then the all the data of a neighbour country has been parsed and the dictionary should be added to the neighbours data array.
        [self.arrNeighboursData addObject:[[NSDictionary alloc] initWithDictionary:self.dictTempDataStorage]];
    }
    else if ([elementName isEqualToString:@"name"]){
        // If the country name element was found then store it.
        [self.dictTempDataStorage setObject:[NSString stringWithString:self.foundValue] forKey:@"name"];
    }
    else if ([elementName isEqualToString:@"toponymName"]){
        // If the toponym name element was found then store it.
        [self.dictTempDataStorage setObject:[NSString stringWithString:self.foundValue] forKey:@"toponymName"];
    }

    // Clear the mutable string.
    [self.foundValue setString:@""];
}
This delegate method is called when the closing tag of an element has been parsed. If the element is equal to the “geoname” value, then we know that the data of a country was parsed, so we can add the dictionary to the array. Also, if the element is any of the two we care about, then we store the found value to the dictionary. At the end, we clear the mutable string from any contents, so it will be ready for new values to be appended to it. The last one:
-(void)parser:(NSXMLParser *)parser foundCharacters:(NSString *)string{
    // Store the found characters if only we're interested in the current element.
    if ([self.currentElement isEqualToString:@"name"] ||
        [self.currentElement isEqualToString:@"toponymName"]) {

        if (![string isEqualToString:@"\n"]) {
            [self.foundValue appendString:string];
        }
    }
}
Here you can see why the currentElement property is needed for. In case that the current element is any of the two we are interested in, then we keep the actual values found between the opening and closing tags. If you notice, you’ll see that I check for the new line string (“\n”), and if the found string is other than that, then I’m appending it to the foundValue property. That’s because after having tested the app, I noticed that a new line string was parsed before the country name, so this is just a workaround to that problem.
Our app now is capable to download XML data, and to parse it successfully. What we have only left, is to display it.
Populating the Parsed Data
In the starter app you downloaded, there’s already a table view with an initial implementation, waiting for us to do the proper modifications and display our data. As you may have guessed, the datasource of the table view is going to be the arrNeighboursData array. We’ll begin working on the data display by going first to the tableView:numberOfRowsInSection: method. In this one, replace this:
-(NSInteger)tableView:(UITableView *)tableView numberOfRowsInSection:(NSInteger)section{
    return 0;
}
With this:
-(NSInteger)tableView:(UITableView *)tableView numberOfRowsInSection:(NSInteger)section{
    return self.arrNeighboursData.count;
}
By doing that, the table view will return as many rows as the neighbour countries are.
Next, let’s go to the tableView:cellForRowAtIndexPath: method and let’s display our data. Before I give you the implementation, let me remind you that a dictionary object exists in every single position of the array. Let’s see the method now:
-(UITableViewCell *)tableView:(UITableView *)tableView cellForRowAtIndexPath:(NSIndexPath *)indexPath{
    UITableViewCell *cell = [tableView dequeueReusableCellWithIdentifier:@"cell"];
    if (cell == nil) {
        cell = [[UITableViewCell alloc] initWithStyle:UITableViewCellStyleSubtitle reuseIdentifier:@"Cell"];
        cell.accessoryType = UITableViewCellAccessoryNone;
        cell.selectionStyle = UITableViewCellSelectionStyleNone;
    }

    cell.textLabel.text = [[self.arrNeighboursData objectAtIndex:indexPath.row] objectForKey:@"name"];
    cell.detailTextLabel.text = [[self.arrNeighboursData objectAtIndex:indexPath.row] objectForKey:@"toponymName"];

    return cell;
}
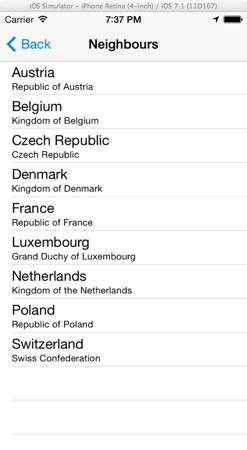
As you see, in the text label of the cell we assign the name of the country, and we set the toponym name to the subtitle label.
Everything is ready now, so you can go and try the app. After you have typed a country name in the initial view controller, tap on the Neighbour Countries cell to make the app download and parse the neighbour countries of the one you chose. Then, wait until the new data appear on the table view we just set up.
Summary
Performing simple but crucial operations over JSON and XML data, is proved to be a relatively simple job. NSJSONSerialization and NSXMLParser classes are both very handy and powerful, and once you know how to use them you can work with the two respective data formats fast and painlessly. As you found out while you were reading this tutorial, I didn’t get into many, hard details of each class. I did this on purpose, as my primary target was to give you a way to start working with them, not to turn you into experts at once. In many cases, what I showed you here is just enough to let you handle any data your app is about to manage, but even in the opposite case, you now know the tools you should use.
For your reference, you can download the complete Xcode project from here.
As always, I hope you found this tutorial useful. Until next time, leave us your thoughts or anything else you wish to share with us!


