

Mobile augmented reality has been a trend recently and it’s been implemented in many applications to provide more interactive, fun experiences to share with people. Hence, major augmented reality frameworks, such as ARKit, enable developers to easily implement complex computer vision features into their apps and make AR a reality on mobile 😉.
However, ARKit and similar frameworks do not simplify the process of recording videos with augmented reality components, although users LOVE sharing their funny experiences while using augmented reality features (referring to face filters & trends like the AR hot dog), which led developers to go with alternative solutions such as screen record or screenshots.
In this tutorial, we will demonstrate how to record videos and GIFs that contain augmented reality components without the use of screen record or screenshots. To do so, we will be using a framework built specifically to simplify the process of rendering and recording ARKit videos, called ARVideoKit. This framework is built using Apple’s ARKit, AVFoundation, Metal and CoreMedia to take away the complex parts of rendering an ARSCNView or ARSKView content with the device’s camera stream.
Let’s Get Started!
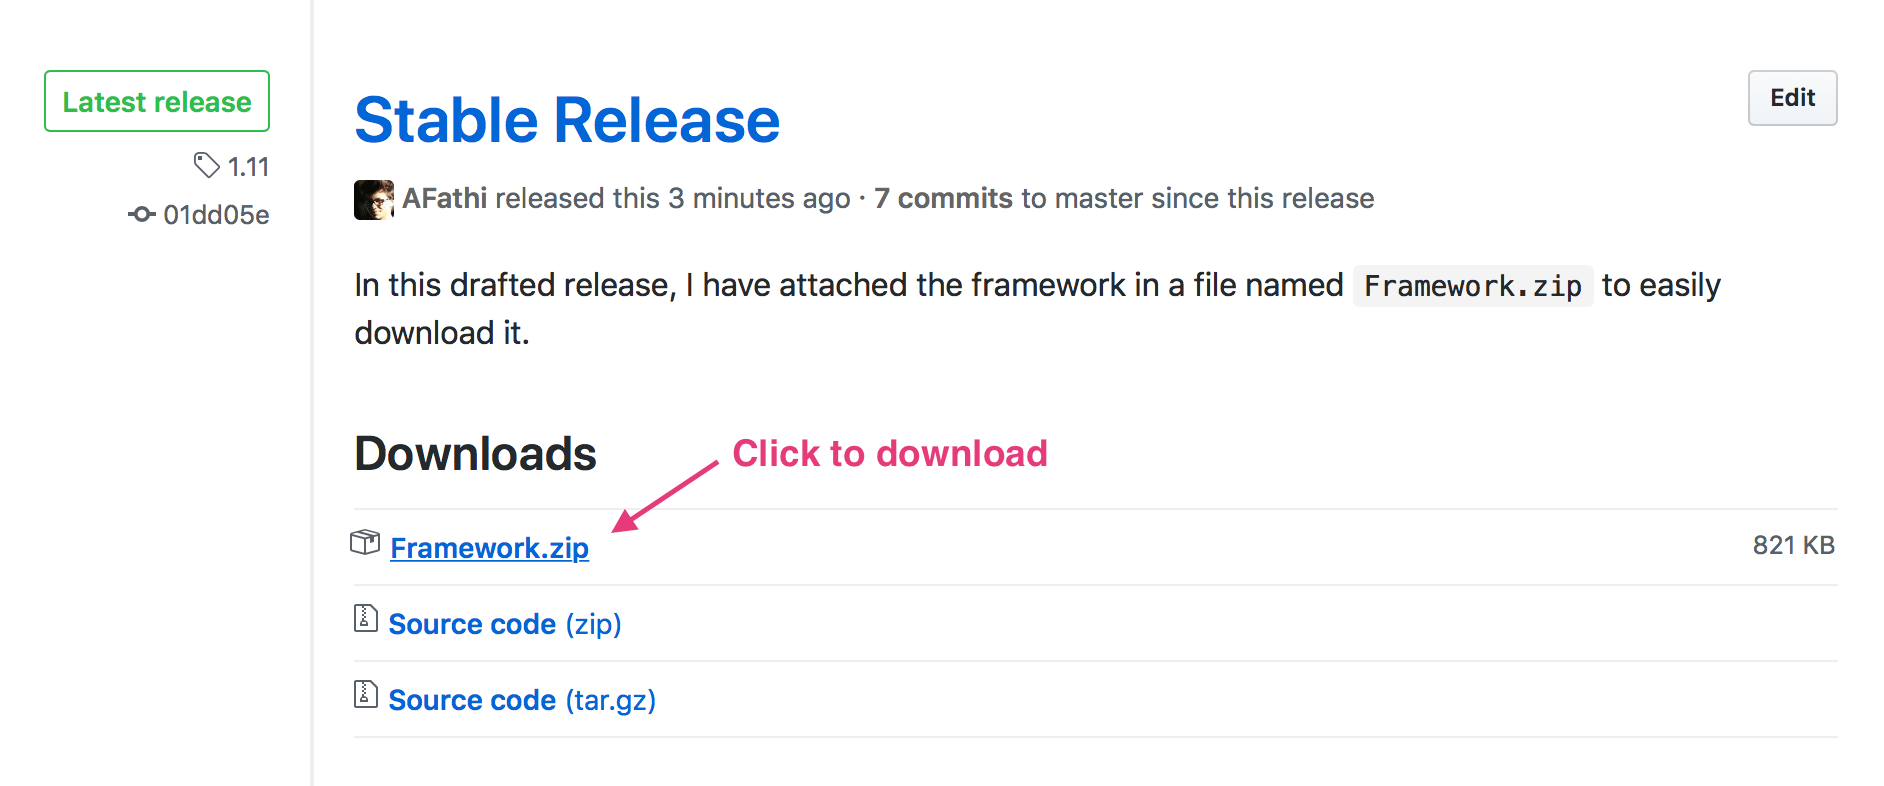
To begin, we will first download the latest release of ARVideoKit by going to the repository releases page and download Framework.zip file.
Then we will create a new ARKit project on Xcode. For this tutorial, we are creating ARKit + SpriteKit project.
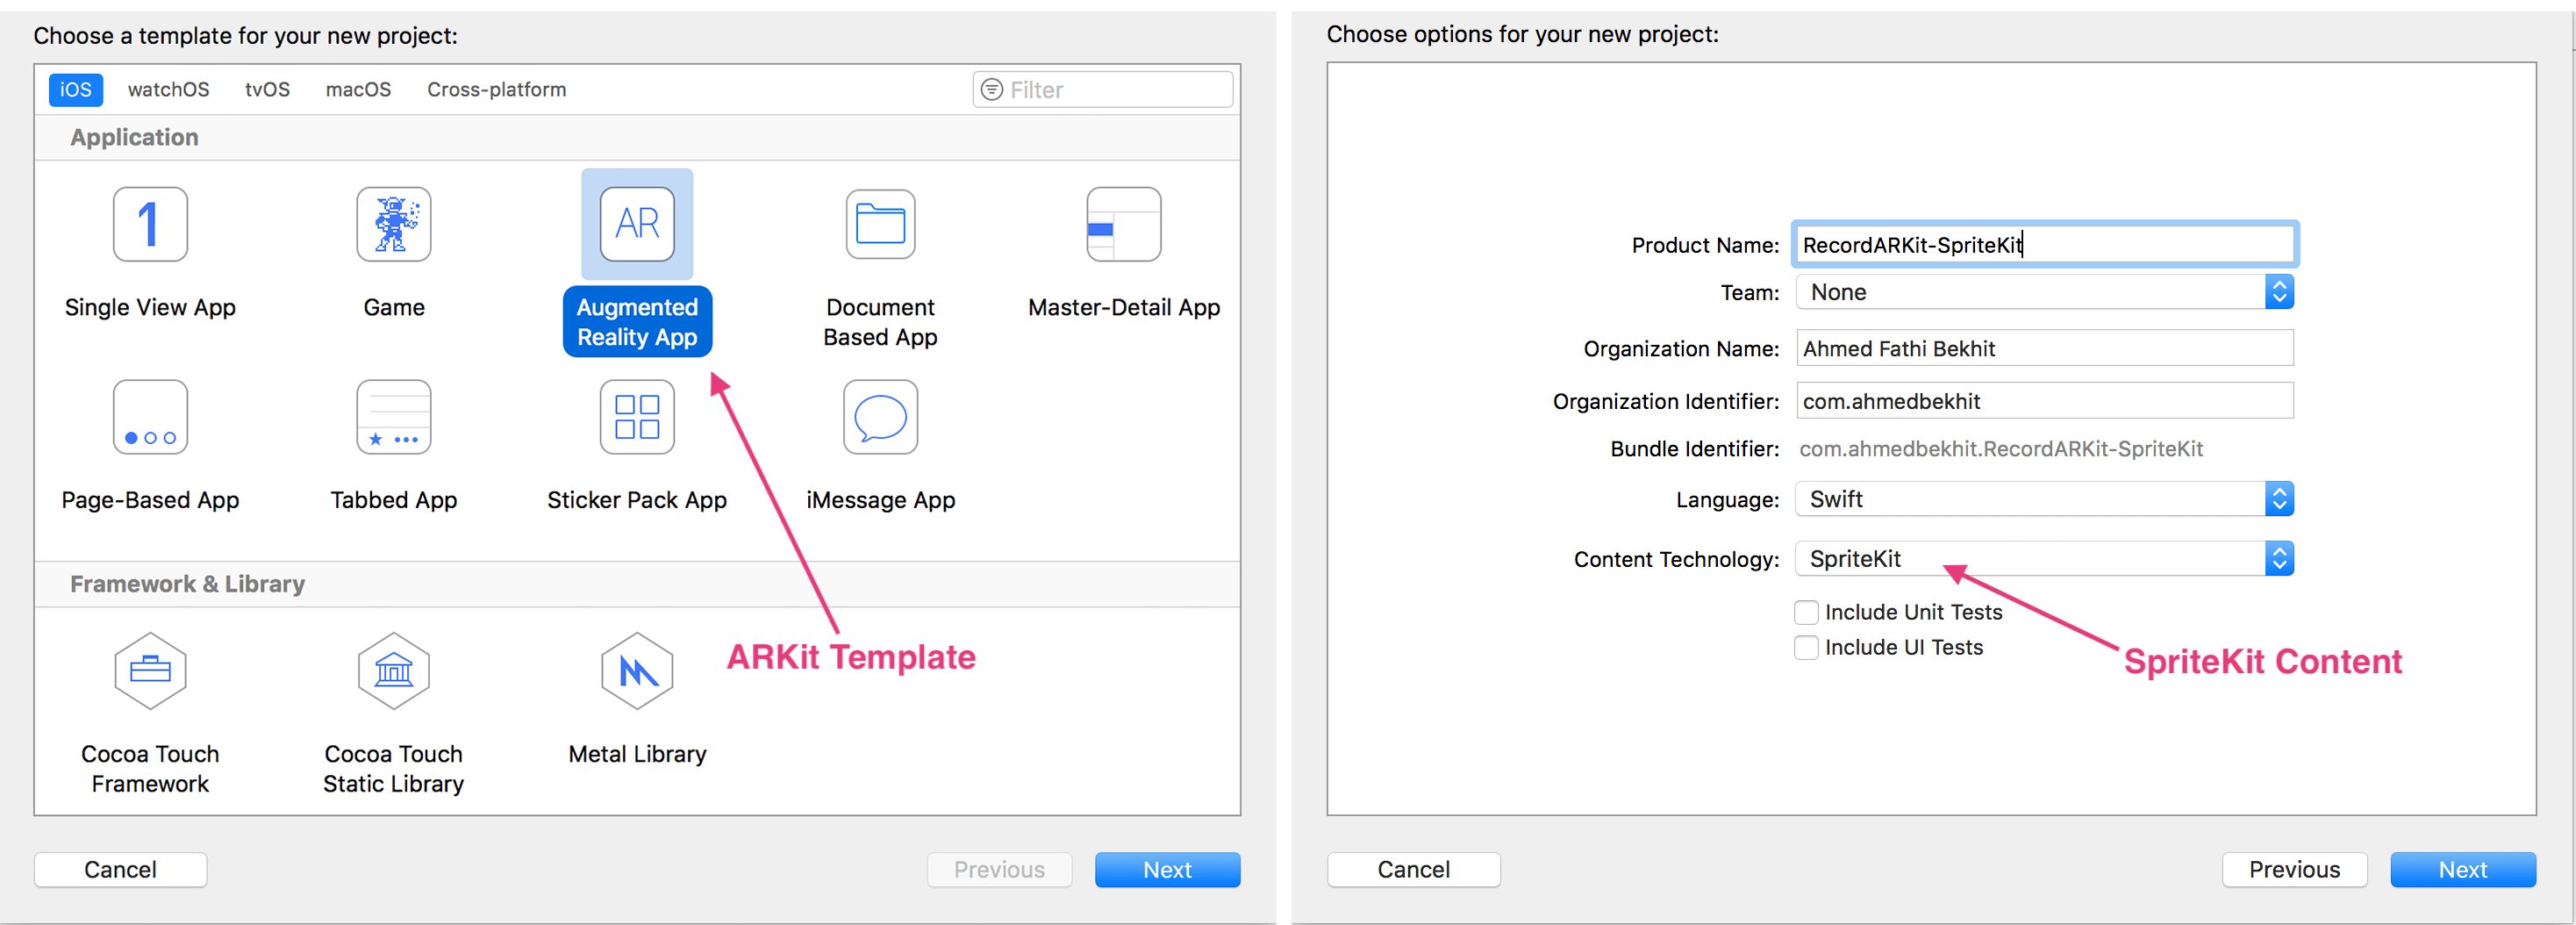
When the project is created, Xcode will automatically generate a sample SpriteKit code to use. Although it’s good for a demo, but we will modify it a little bit to add our user interface, video recorder, GIF recorder, and display more different emojis 😇!
Adding the Framework
We will start off by adding ARVideoKit to our project! To add the framework properly, do the following steps:
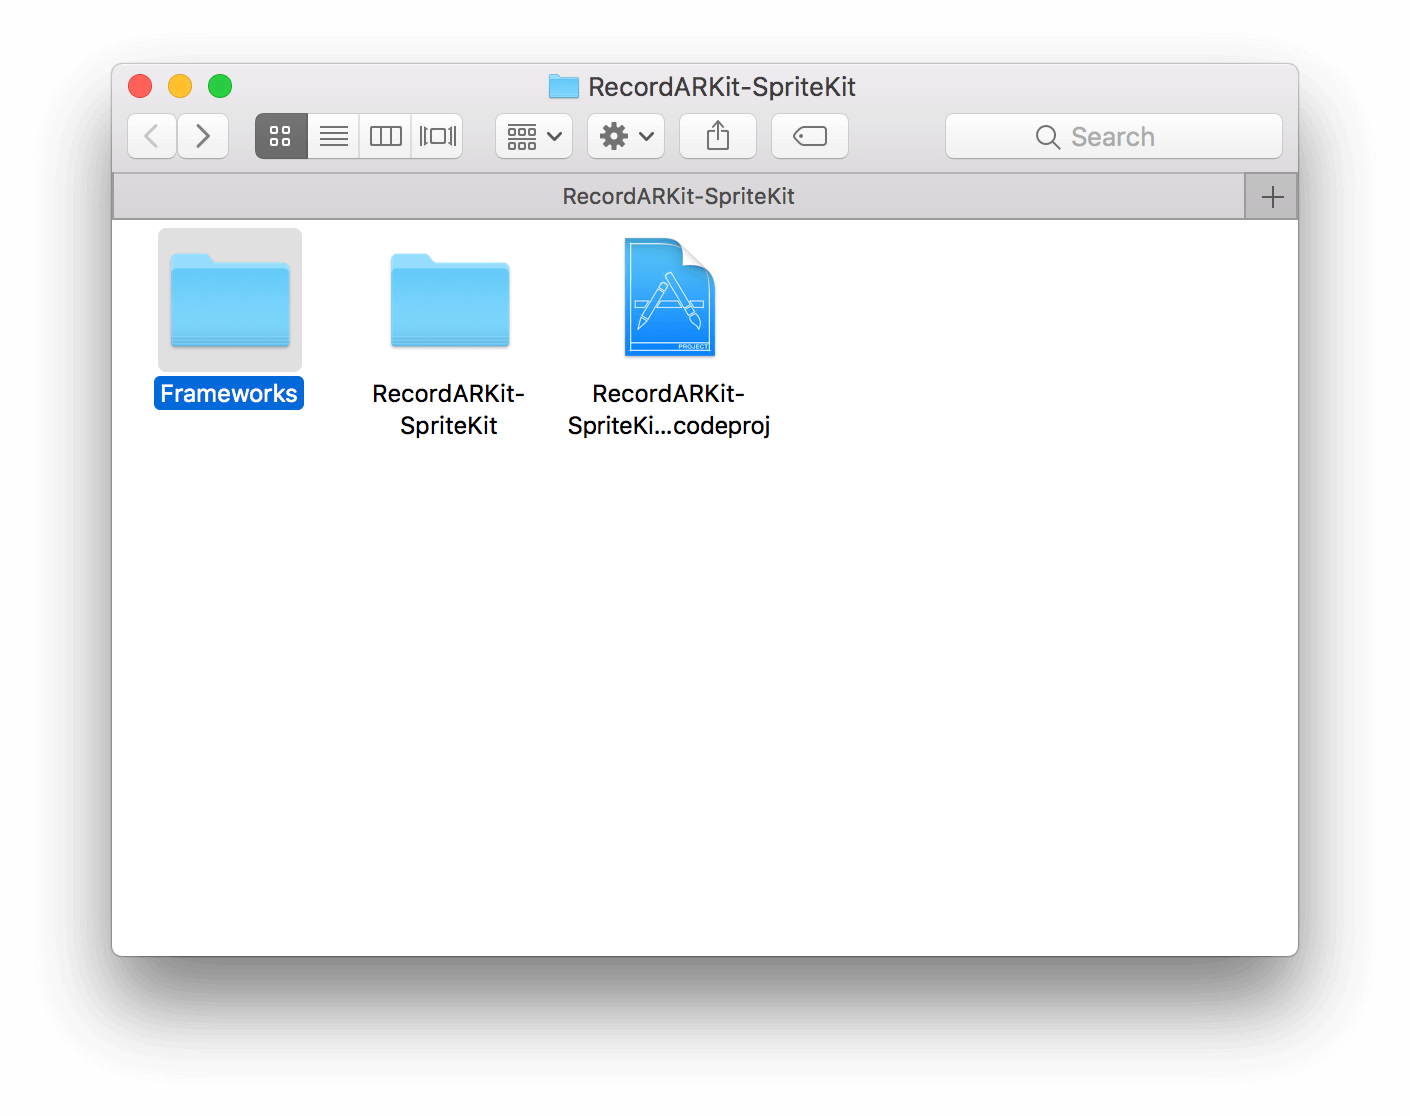
- Create a folder in your project folder called Frameworks.
- Copy the downloaded ARVideoKit.framework into the Frameworks folder
- Drag ARVideoKit.framework into your project target’s embedded binaries. Make sure to check “Copy items if needed”.

Now let’s configure the framework in our application delegate, by taking the following steps:
- Import
ARVideoKitinAppDelegate.swiftby adding the following statement: - Add the following method in
AppDelegate.swiftclass to allow recording videos & GIFs in different orientations.
import ARVideoKit
func application(_ application: UIApplication, supportedInterfaceOrientationsFor window: UIWindow?) -> UIInterfaceOrientationMask {
    return ViewAR.orientation
}
Your application delegate file should look like this:
import UIKit
import ARVideoKit

@UIApplicationMain
class AppDelegate: UIResponder, UIApplicationDelegate {

    var window: UIWindow?


    func application(_ application: UIApplication, didFinishLaunchingWithOptions launchOptions: [UIApplicationLaunchOptionsKey: Any]?) -> Bool {
        // Override point for customization after application launch.
        return true
    }

    func applicationWillResignActive(_ application: UIApplication) {
        // Sent when the application is about to move from active to inactive state. This can occur for certain types of temporary interruptions (such as an incoming phone call or SMS message) or when the user quits the application and it begins the transition to the background state.
        // Use this method to pause ongoing tasks, disable timers, and invalidate graphics rendering callbacks. Games should use this method to pause the game.
    }

    func applicationDidEnterBackground(_ application: UIApplication) {
        // Use this method to release shared resources, save user data, invalidate timers, and store enough application state information to restore your application to its current state in case it is terminated later.
        // If your application supports background execution, this method is called instead of applicationWillTerminate: when the user quits.
    }

    func applicationWillEnterForeground(_ application: UIApplication) {
        // Called as part of the transition from the background to the active state; here you can undo many of the changes made on entering the background.
    }

    func applicationDidBecomeActive(_ application: UIApplication) {
        // Restart any tasks that were paused (or not yet started) while the application was inactive. If the application was previously in the background, optionally refresh the user interface.
    }

    func applicationWillTerminate(_ application: UIApplication) {
        // Called when the application is about to terminate. Save data if appropriate. See also applicationDidEnterBackground:.
    }


    func application(_ application: UIApplication, supportedInterfaceOrientationsFor window: UIWindow?) -> UIInterfaceOrientationMask {
        return ViewAR.orientation
    }

}
Adding User Interface
We will build the user interface programmatically instead of using Interface Builder. To keep things simple, we will create 3 simple buttons: Record/Stop, Pause/Resume, and Capture GIFs.
To do that, declare the following properties in ViewController class:
// Recorder UIButton. This button will start and stop a video recording.
var recorderButton:UIButton = {
    let btn = UIButton(type: .system)
    btn.setTitle("Record", for: .normal)
    btn.setTitleColor(.black, for: .normal)
    btn.backgroundColor = .white
    btn.frame = CGRect(x: 0, y: 0, width: 110, height: 60)
    btn.center = CGPoint(x: UIScreen.main.bounds.width/2, y: UIScreen.main.bounds.height*0.90)
    btn.layer.cornerRadius = btn.bounds.height/2
    btn.tag = 0
    return btn
}()

// Pause UIButton. This button will pause a video recording.
var pauseButton:UIButton = {
    let btn = UIButton(type: .system)
    btn.setTitle("Pause", for: .normal)
    btn.setTitleColor(.black, for: .normal)
    btn.backgroundColor = .white
    btn.frame = CGRect(x: 0, y: 0, width: 60, height: 60)
    btn.center = CGPoint(x: UIScreen.main.bounds.width*0.15, y: UIScreen.main.bounds.height*0.90)
    btn.layer.cornerRadius = btn.bounds.height/2
    btn.alpha = 0.3
    btn.isEnabled = false
    return btn
}()

// GIF UIButton. This button will capture a GIF image.
var gifButton:UIButton = {
    let btn = UIButton(type: .system)
    btn.setTitle("GIF", for: .normal)
    btn.setTitleColor(.black, for: .normal)
    btn.backgroundColor = .white
    btn.frame = CGRect(x: 0, y: 0, width: 60, height: 60)
    btn.center = CGPoint(x: UIScreen.main.bounds.width*0.85, y: UIScreen.main.bounds.height*0.90)
    btn.layer.cornerRadius = btn.bounds.height/2
    return btn
}()
Next, add the buttons as subviews of the View Controller. Insert the following lines of code in the viewDidLoad() method:
self.view.addSubview(recorderButton)
self.view.addSubview(pauseButton)
self.view.addSubview(gifButton)
In order to handle the button actions, we then create three action methods:
// Record and stop method
@objc func recorderAction(sender:UIButton) {

}
// Pause and resume method
@objc func pauseAction(sender:UIButton) {

}
// Capture GIF method
@objc func gifAction(sender:UIButton) {

}
Now, back in viewDidLoad(), add buttons’ targets and connect them to the methods created above:
recorderButton.addTarget(self, action: #selector(recorderAction(sender:)), for: .touchUpInside)
pauseButton.addTarget(self, action: #selector(pauseAction(sender:)), for: .touchUpInside)
gifButton.addTarget(self, action: #selector(gifAction(sender:)), for: .touchUpInside)
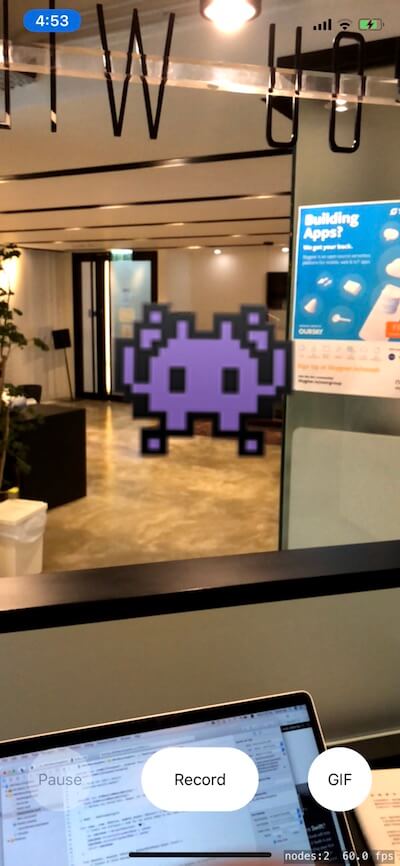
Before we moving to the next section, let’s run the app and see what you’ve built so far. If you’ve followed me correctly, you will have a simple ARKit app with three buttons on screen. Remember that you have to test the app on a real device instead of the simulator.
Implementing the ARVideoKit Framework
Now it’s time to enable the recording feature! We will implement the ARVideoKit framework into ViewController.swift. The very first step is to import the framework:
import ARVideoKit
Next, create a variable of the type RecordAR. RecordAR is an ARView sub-class that renders an ARSCNView or ARSKView content with the device’s camera stream to generate a video, photo, live photo or GIF.
var recorder: RecordAR?
In the viewDidLoad() method, initialize RecordAR with ARSKView and specify the supported orientations:
// Initialize with SpriteKit scene
recorder = RecordAR(ARSpriteKit: sceneView)

// Specifiy supported orientations
recorder?.inputViewOrientations = [.portrait, .landscapeLeft, .landscapeRight]
To prepare the recorder, insert the following statement in the viewWillAppear(_ animated: Bool) method:
recorder?.prepare(configuration)
Lastly, to “rest” the recorder when the view disappears, insert the following line of code in the viewWillDisappear(_ animated: Bool) method:
recorder?.rest()
Developing the Record/Stop and Pause/Resume Functions
Now that the preparation of the RecordAR variable is ready, let’s move on to the implementation of record and stop features.
For the recording action method, update the method like this:
@objc func recorderAction(sender:UIButton) {

    if recorder?.status == .readyToRecord {
        // Start recording
        recorder?.record()

        // Change button title
        sender.setTitle("Stop", for: .normal)
        sender.setTitleColor(.red, for: .normal)

        // Enable Pause button
        pauseButton.alpha = 1
        pauseButton.isEnabled = true

        // Disable GIF button
        gifButton.alpha = 0.3
        gifButton.isEnabled = false
    }else if recorder?.status == .recording || recorder?.status == .paused {
        // Stop recording and export video to camera roll
        recorder?.stopAndExport()

        // Change button title
        sender.setTitle("Record", for: .normal)
        sender.setTitleColor(.black, for: .normal)

        // Enable GIF button
        gifButton.alpha = 1
        gifButton.isEnabled = true

        // Disable Pause button
        pauseButton.alpha = 0.3
        pauseButton.isEnabled = false
    }

}
In the block of code above, we are checking if the video recorder status is ready to record. The app would start recording a video of your ARKit scene. Otherwise, if the recorder is currently recording or paused, the app would stop the video recorder and export the fully rendered video to the camera roll.
Next, we will implement the pause/resume feature into the pauseAction(sender:UIButton) method, by update the pauseAction method like this:
@objc func pauseAction(sender:UIButton) {
    if recorder?.status == .recording {
        // Pause recording
        recorder?.pause()

        // Change button title
        sender.setTitle("Resume", for: .normal)
        sender.setTitleColor(.blue, for: .normal)
    } else if recorder?.status == .paused {
        // Resume recording
        recorder?.record()

        // Change button title
        sender.setTitle("Pause", for: .normal)
        sender.setTitleColor(.black, for: .normal)
    }
}
The block of code above is pretty straight forward. We first check if the recorder is currently in the recording state. Then the app will pause the video when the user selects the pause button. Otherwise, it resumes recording.
Now we have something to test! Before running the application on your iOS device, we need to make sure to add the usage description of the camera, microphone, and photo library in the app’s Info.plist.
To do so, add the following to the plist source code:
NSCameraUsageDescription
AR Camera
NSPhotoLibraryAddUsageDescription
Export AR Media
NSPhotoLibraryUsageDescription
Export AR Media
NSMicrophoneUsageDescription
Audiovisual Recording
Alternatively, you can add the properties using the Property Editor:

Now let’s run it!!! 📲🎊 Tap to record button and start recording your AR video.
Capture GIFs
Finally, let’s implement the GIFs function so that you can capture animated GIFs. Update the gifAction method like this:
    @objc func gifAction(sender:UIButton) {
        self.gifButton.isEnabled = false
        self.gifButton.alpha = 0.3
        self.recorderButton.isEnabled = false
        self.recorderButton.alpha = 0.3

        recorder?.gif(forDuration: 1.5, export: true) { _, _, _ , exported in
            if exported {
                DispatchQueue.main.sync {
                    self.gifButton.isEnabled = true
                    self.gifButton.alpha = 1.0
                    self.recorderButton.isEnabled = true
                    self.recorderButton.alpha = 1.0
                }
            }
        }
    }
Modifying the SpriteKit Content
In this final part we will modify the SpriteKit content to show some different emojis in the AR space 🤗🤓🧐🔥.
We will first create a variable that returns a random emoji from an array of emojis. By using the C-based arc4random_uniform() function, we will be able to retrieve a random number from 0 to the count of the array.
To do so, create the following variable as a global variable (place it after gifButton) in the ViewController class:
var randoMoji: String {
    let emojis = ["👾", "🤓", "🔥", "😜", "😇", "🤣", "🤗", "🧐", "🛰", "🚀"]
    return emojis[Int(arc4random_uniform(UInt32(emojis.count)))]
}
Next, edit the view(_ view: ARSKView, nodeFor anchor: ARAnchor) -> SKNode? method like this:
func view(_ view: ARSKView, nodeFor anchor: ARAnchor) -> SKNode? {
    // Create and configure a node for the anchor added to the view's session.
    let labelNode = SKLabelNode(text: randoMoji)
    labelNode.horizontalAlignmentMode = .center
    labelNode.verticalAlignmentMode = .center
    return labelNode;
}
We just replace the static text of the SKLabelNode with the newly created randoMoji.
That’s it! Have Fun
You can now run the application on your device and use it to record ARKit videos and GIFs! To download the full project, you can download it on GitHub.
![]()
What do you thing about this tutorial? Please leave me comment below and share your thought.


