

In WWDC 2015, Apple announced that Swift would be open source. Shortly after that, in December 2015, Swift’s codebase was public on GitHub.
Open sourcing the Swift codebase introduces developers to a multitude of opportunities and expand the use of Swift worldwide.
As expected, developers swiftly explored the various new applications of Swift (no pun intended). One such application is using swift code to power a web app which we will explore in this tutorial.
Why Should I Care?
There are many benefits to having a strictly typed language on the server. If you are creating a backend for your iOS app, it’s easier to stay consistent by sticking to one language and style.
There are three excellent server-side Swift services out there: Perfect, Kitura, and Vapor. In this tutorial, I will explore the interesting world of Swift on the server with Vapor.
I will teach you how to install Vapor and Swift 3, learn the basics of Server-Side Swift, and deploy your website/backend on Heroku.
Prerequisites
In this tutorial, we will be using a lot of bash commands, so it is important to have a basic knowledge of bash and the Terminal. Vapor runs on Swift 3, thus Xcode 8 is required.
Vapor and any Swift (Swift Package Manager) project needs to run on Swift 3, so I recommend you to learn more about the changes in Swift 3 in this AppCoda article.
Towards the end of the tutorial, I will explain how to host your Vapor server on Heroku, a popular cloud hosting provider, so it is recommended to have some experience using it.
Now let’s get started!
Installing Vapor
Vapor requires Swift 3, and the latest version of Xcode 8 beta. You can download the new Xcode GM here.
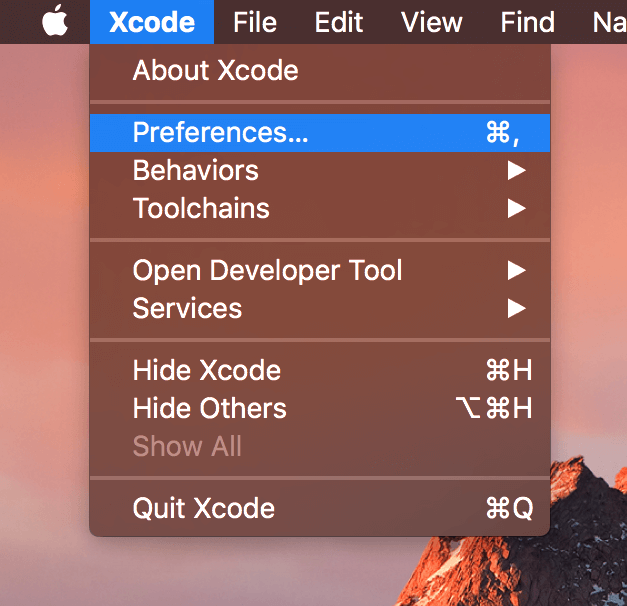
First, you have to choose the latest command line tools. Open you Xcode preferences.
Next, navigate to Locations.
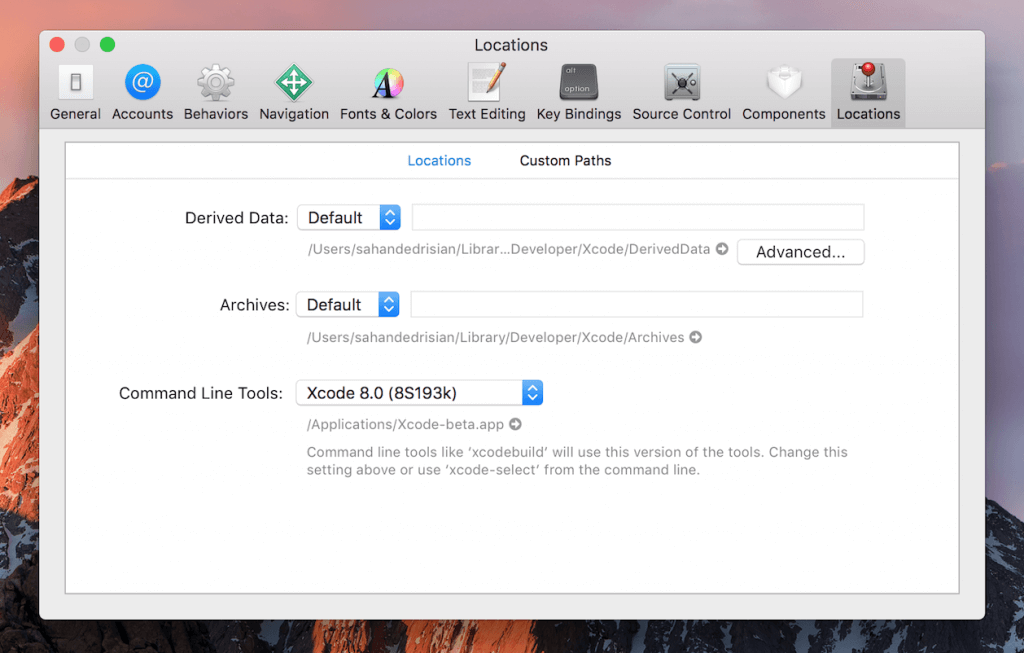
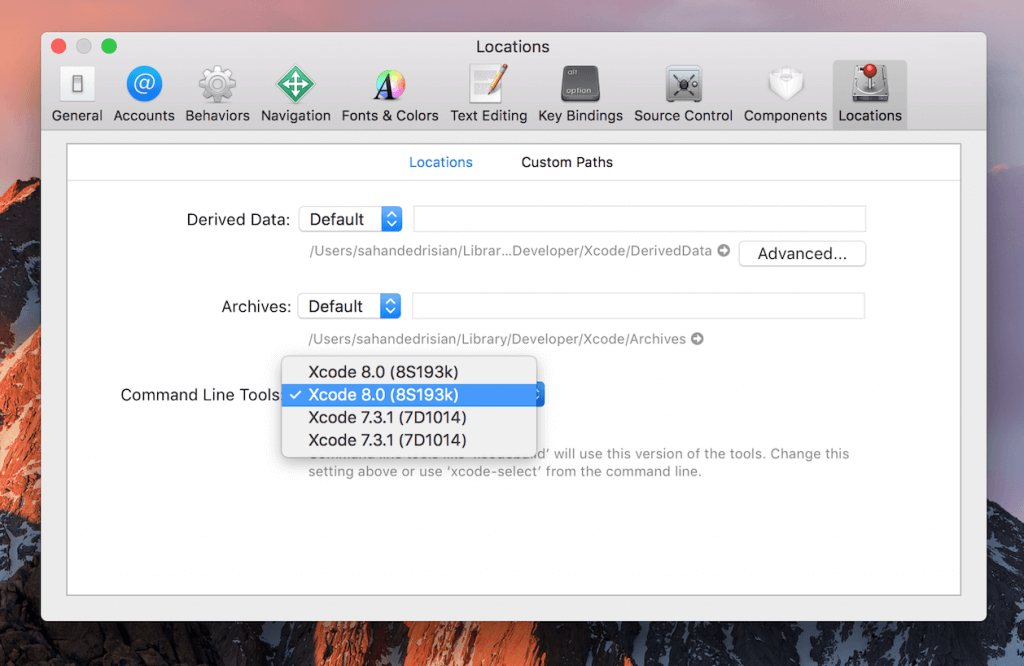
Lastly, choose the latest Xcode 8 command line toolset.
Installing Swiftenv
Now it’s time to install Swift 3. First, install Swiftenv. Swiftenv allows you to easily install and switch between multiple versions of Swift. To install Swiftenv, clone the respective repository from Github by running the following code on your terminal:
git clone https://github.com/kylef/swiftenv.git ~/.swiftenv
Then, initialize Swiftenv in your bash profile. The bash profile is where your bash properties and settings reside. Open your bash profile by running the following command in terminal:
open ~/.bash_profile
The open command will open your bash profile in TextEdit. If you don’t have a bash profile, create it with the following command:
touch ~/.bash_profile
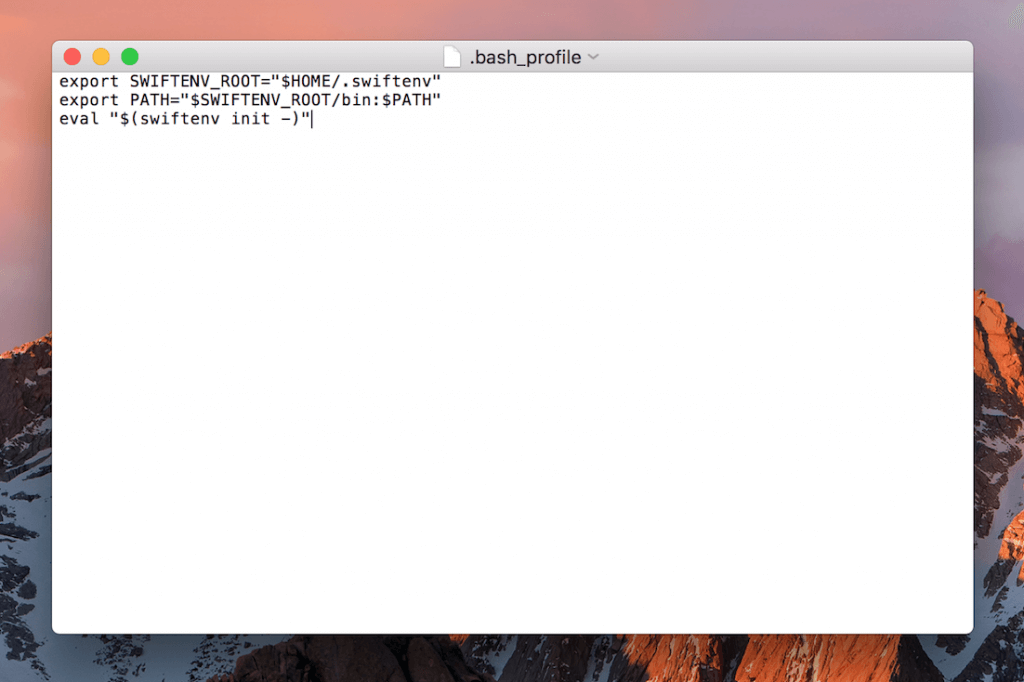
When you see your bash profile, paste the following commands. These commands initialize Swiftenv.
export SWIFTENV_ROOT="$HOME/.swiftenv"
export PATH="$SWIFTENV_ROOT/bin:$PATH"
eval "$(swiftenv init -)"
Your bash profile (opened in TextEdit) should now contain these commands. Note that in some cases your bash profile might contain other commands. Do not remove the previously placed commands, just append the new ones at the end of the file.
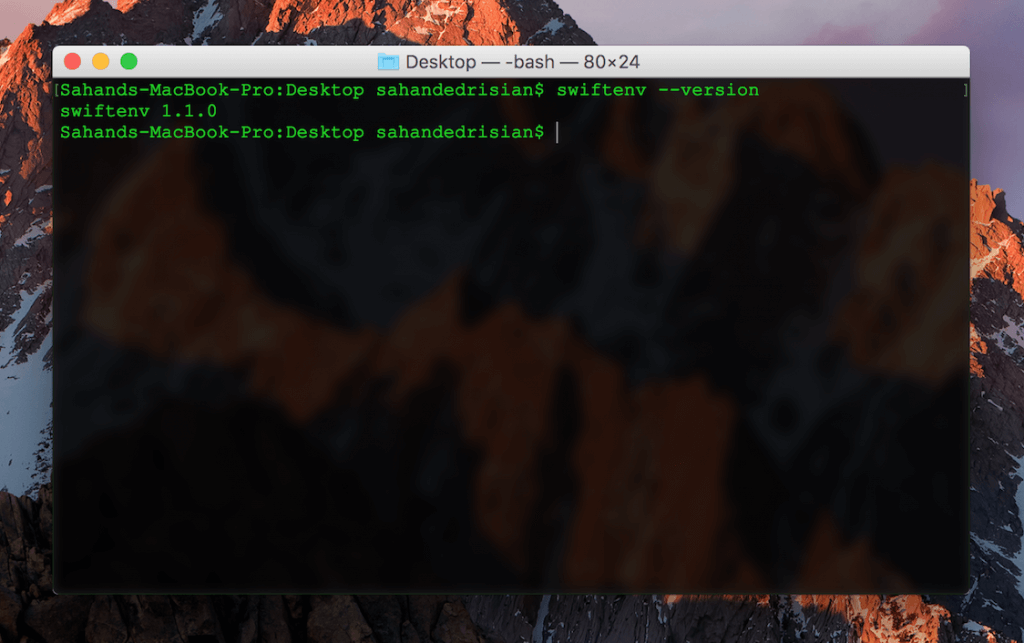
Save the bash profile, and restart terminal. After terminal restarts, type in the following command to verify that Swiftenv was installed successfully:
swiftenv --version
You should see the following result in your terminal:
Downloading the Swift 3 Snapshot
Now that Swiftenv has been installed, you must download the newest Swift 3 Snapshot. A Swift Snapshot is the Swift language in a package ready to be installed. Run the following command:
swiftenv install 3.0-GM-CANDIDATE
It will take a while to download the snapshot. Once the download is complete, set the snapshot as the main Swift version on the terminal. This will make this particular version global. Run the following command:
swiftenv global 3.0-GM-CANDIDATE
Check to see that 3.0-GM-CANDIDATE is being used by running the following command:
swiftenv versions
You should see an asterisk next to 3.0-GM-CANDIDATE.
Compatibility Checking
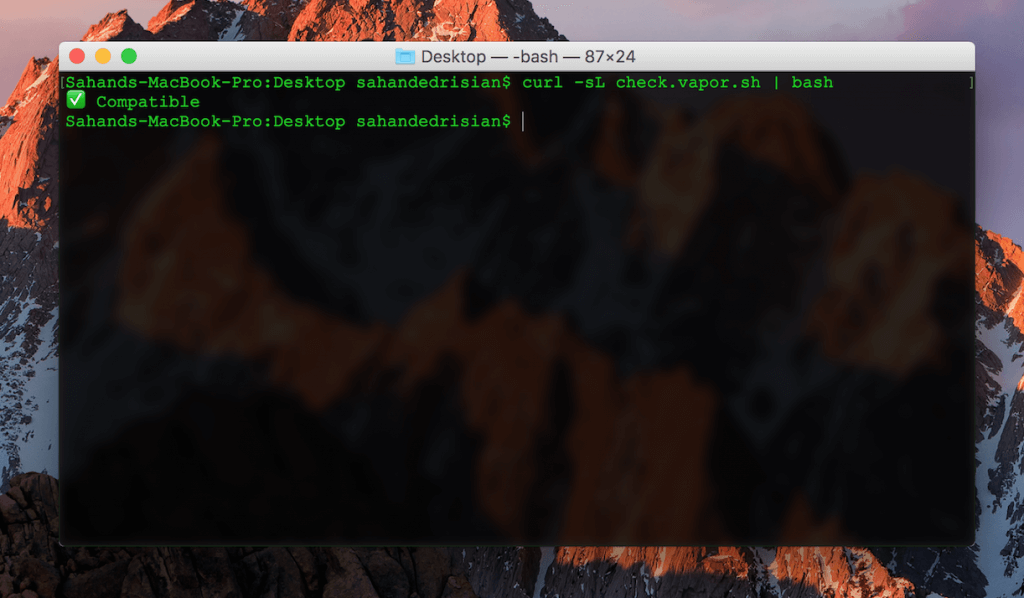
Vapor needs to have the suitable Swift version to be able to run correctly. Vapor offers a shell script to check that for you. Run the following command to verify that everything is ok:
curl -sL check.vapor.sh | bash
If you get the green checkmark emoji, that means that you are set to install Vapor!
Installing the Vapor Toolbox
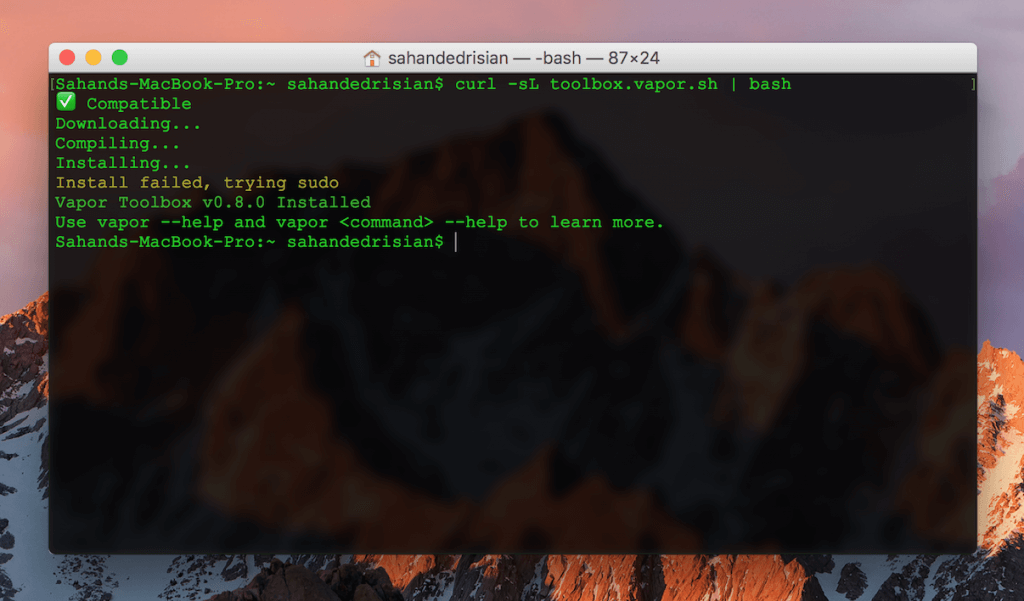
Let’s download and install Vapor by running the following command:
curl -sL toolbox.vapor.sh | bash
Ok, this might take a while. You might encounter an error, e.g.: "Install failed, trying sudo". As long as you finally get the "Vapor Toolbox v0.10.4 Installed" message, you are all set up.
To verify that Vapor is working, simply enter the following in your terminal:
vapor
You should encounter a list of commands like the following:
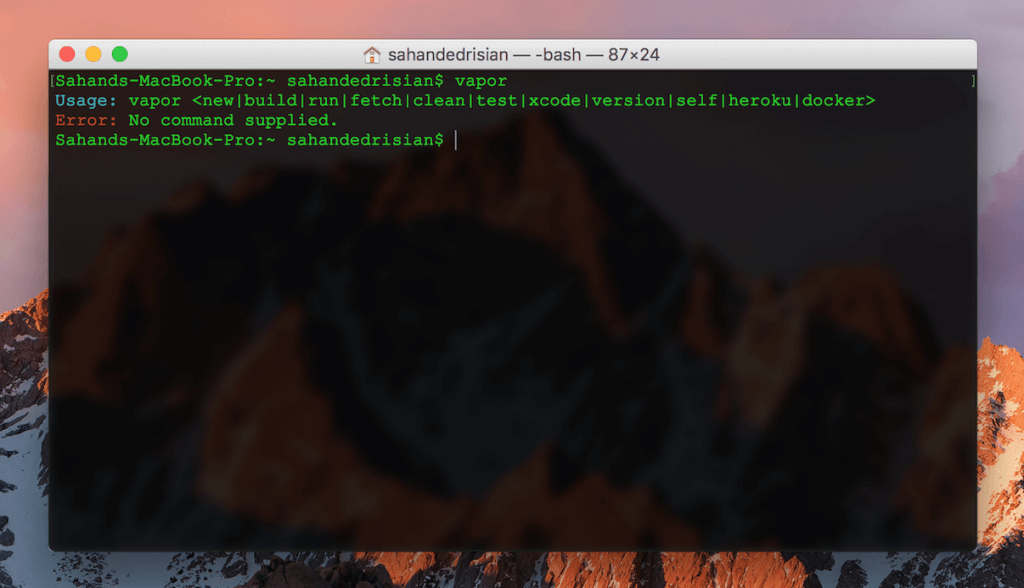
If you get this result, congratulations! You have completed the most challenging part of this tutorial.
Starting a new Vapor Project
Every Swift project uses the Swift Package Manager (SPM). Every SPM project requires a Package.json, a main.swift file, etc. The Swift Package Manager will look for the Package.swift file in your Swift project to download the necessary dependencies. SPM is similar to NPM (Node Package Manager). Vapor creates the Swift project, and adds the required dependencies to the Package.swift file.
To create a new project, you must provide Vapor with a project name. First, navigate to a directory where you would want to create the new project, then run the following command:
vapor new HelloWorld
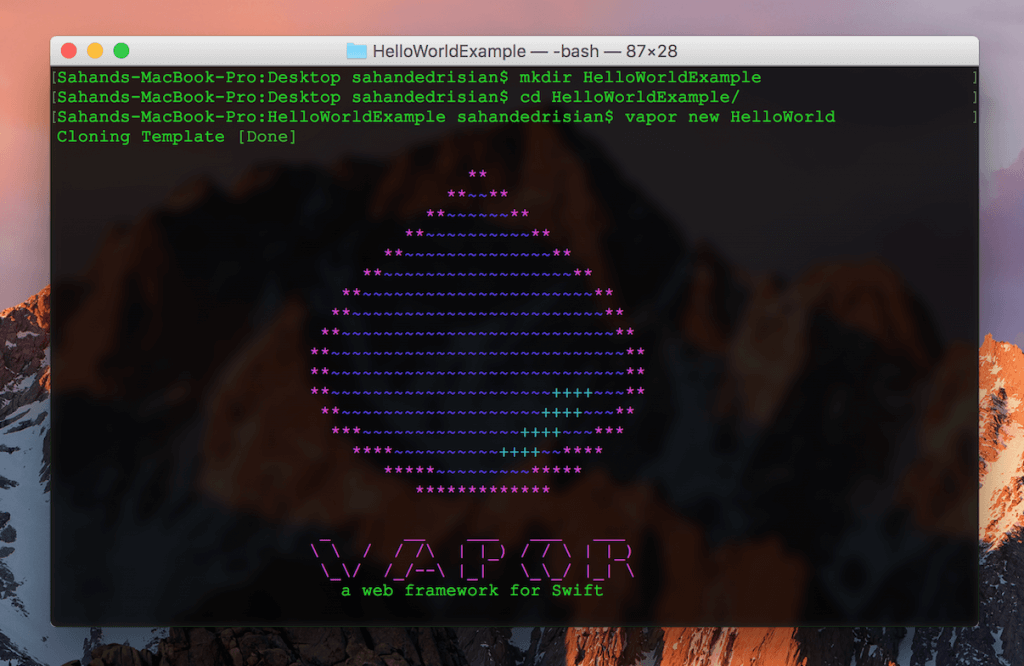
Vapor will create a project called HelloWorld in your current directory. Navigate to your new project directory, which is the same as the name of the project. In this case, run the following:
cd HelloWorld
You should see a directory similar to the following:
├── Package.swift
├── App
│   ├── main.swift
│   ├── Controllers
│   ├── Middleware
│   └── Models
├── Resources
 |    └── Views
├── Config
├── Localization
└── Public
Vapor follows and enforces the MVC (Model, View, Controller) pattern. It creates the folders where Models, Views, and Controllers are located in. If you are not familiar with the MVC design pattern, click here to learn more.
First, Vapor creates the Package.swift file. There is no need to modify it. Then there is the App folder, which contains the Models, Controllers, Middleware, and the main.swift file. The main.swift file is our main app file, and where we initialize our server. Vapor will run this file first.
The Resources folder contains the Views folder, where our HTML files and templates are stored. The Public folder is where our images and styles must go. We won’t be working with the rest of the folders for now.
The Droplet
Vapor automatically creates an example project for us. It will create a Controller, Model, Middleware, and main.swift file. Open the main.swift file (under /Sources/App), and remove all the code inside it.
A Droplet is the heart of a Vapor server. It contains a plethora of functions that will be the backbone of our server. First, import Vapor in our main.swift file:
import Vapor
Then, let’s create a Droplet:
let drop = Droplet()
A Droplet has a lot of customizable properties. It accepts a ton of arguments, all cited in the Vapor Docs. For this instance we don’t need to customize our Droplet.
Now let’s try to handle the main '/' or index request to our web page:
drop.get("/") { request in
    return "Hello World!"
}
Finally, you need to call the serve() function. The serve function runs the server.
drop.run()
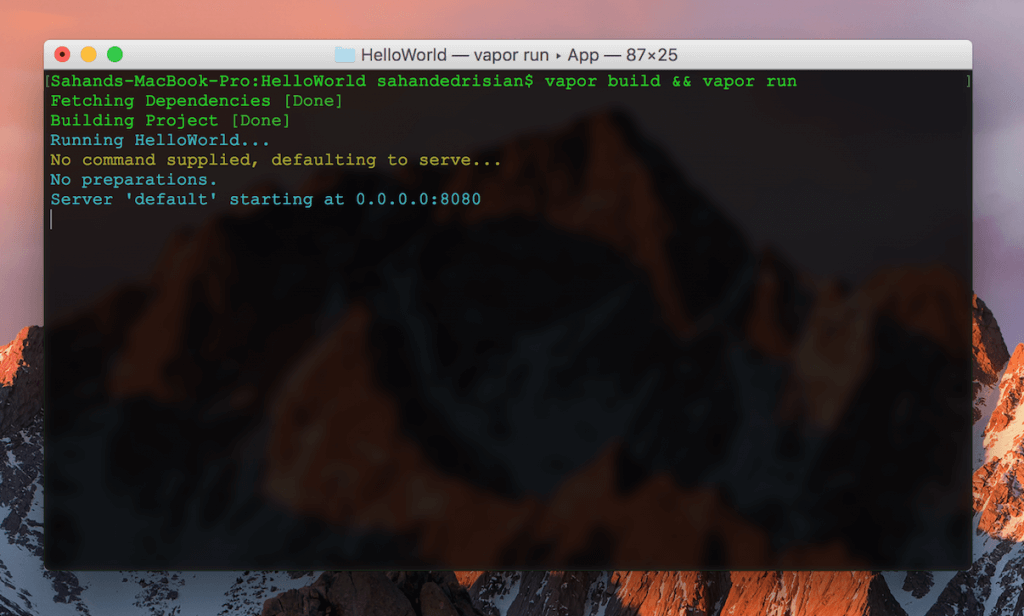
Now save the main.swift file. Vapor can build and run the server for you. Run the following commands:
vapor build
vapor run
Vapor doesn’t have a ‘special’ build or execution. Running the vapor build command simply does a swift build . Entering the vapor run command will run the builds created in the .build/debug/ directory.
This operation might take a while for the first time. After a successful build and execution, you should see something like this:
Vapor initially runs the server on the 8080 port. If you would like to change the port, you must change the configuration by modifying the servers.json file here:
├── Package.swift
├── App
├── Resources
├── Config
  |    └── servers.json  <--
├── Localization
└── Public
Assuming you haven't changed the port from 8080, navigate to this link to where the server is running:
0.0.0.0:8080
or
localhost:8080
You should see your incredible "Hello World" String!
Handling HTTP Requests
Handling an HTTP request is similar to other frameworks such as Express, Flask, etc. We will cover GET in this tutorial.
For instance if you want to output the string "Hello John!" when you open "localhost:8080/name/John". Let's look at this piece of code:
drop.get("/name",":name") { request in
    if let name = request.parameters["name"]?.string {
        return "Hello \(name)!"
    }
    return "Error retrieving parameters."
}
Our Droplet has a GET handler function called get(). The get() function can take multiple arguments. The first argument will be the name of the GET request parameter. The argument that follows will be the key of the that parameter. E.g. :
drop.get("route", ":key", "route2", ":key2")
This way you could access the value of that parameter by supplying the key to a dictionary. The key, or the second argument, must start with a colon, which indicates that the name is the key of the parameter.
The get() function provides us a request object. This object contains everything related to our GET request. To access the parameter which was submitted, use the parameters dictionary of our request object:
request.parameters["key"]
We ensure that the parameter has a value by using the if let statement:
if let name = request.parameters["name"].string {
    // Do something
}
The HTTP request needs a response from the server. The response can be returned by just returning the function. In this case, we will return the name string, which was taken from our parameters dictionary.
Try building and running the project. Then go to the following example link to test the GET request:
http://localhost:8080/name/John
You should see the message "Hello John!"
Note that routing is different from other services such as Express. In Vapor, you cannot access the parameters using the URI format:
http://localhost:8080/name?name=John&age=18
A parameter must be supplied using forward slashes:
http://localhost:8080/name/John/age/18
However if you intend to use the URI format, you could do so using the uri property of the request object. To learn more, visit the documentation for the request object.
Returning a View
Our Droplet can return a view to the client. A view is an HTML file stored in the /Resources/Views folder. Download the sample view.html file linked here. It is a very simple HTML file that renders a simple web page. After you have downloaded the file, move it to /HelloWorld/Resources/Views:
├── Package.swift
├── App
├── Resources
 |    └── Views     <--
├── Config
├── Localization
└── Public
This directory is where our Droplet will look for views. Now let's implement the code. Open the main.swift file. Let's handle the /view route:
drop.get("/view") { request in
    return try drop.view("view.html")
}
A Droplet has a view() function that take a string parameter. The parameter is the name of our HTML file.
The view() function throws an exception, therefore it is necessary to mark it with the try keyword. If the view does not exist, the function will throw an exception. You can catch the exception with the catch keyword, but it is not necessary in this case because already we know the file exists.
Let's build and run:
vapor build
vapor run
Now navigate to this link:
http://localhost:8080/view
You should now be able to see the "Hello World" HTML file. To learn more about Templating and Rendering, visit the documentations.
Deploying to Heroku
Heroku can build and host Swift projects. This is the best, and easiest way to deploy your Vapor project. This tutorial expects you to have some basic knowledge in regards to Heroku. You can use the Heroku toolbelt in order to deploy this project, but in this tutorial, we will push the project to Github and link the two.
First, create a new Github repository. In this case, I will call my repository VaporExample. Navigate to your Vapor project. Initialize the git:
git init
Then, set the remote origin:
git remote set origin < Your Github Repo Here >
Add, commit, and push the repo to Github:
git add .
git commit -m "Init"
git push -u origin master
Alright, now that you have finished pushing the repo to Github, go to your Heroku dashboard. Now create a new app, and name it whatever you want. First, navigate to your settings.
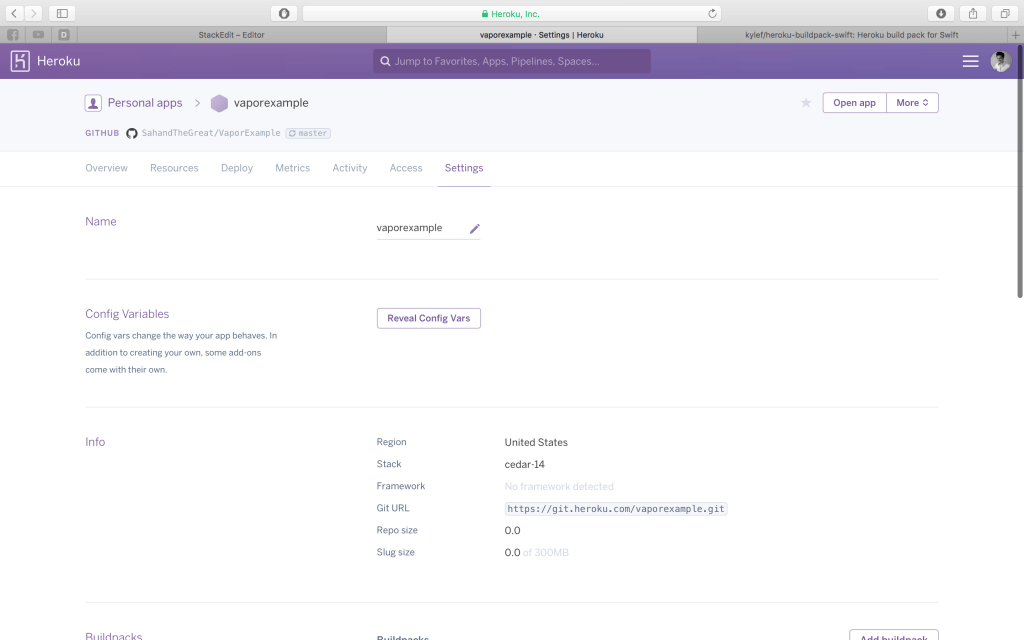
Next, scroll down until you see the "Buildpacks" option.
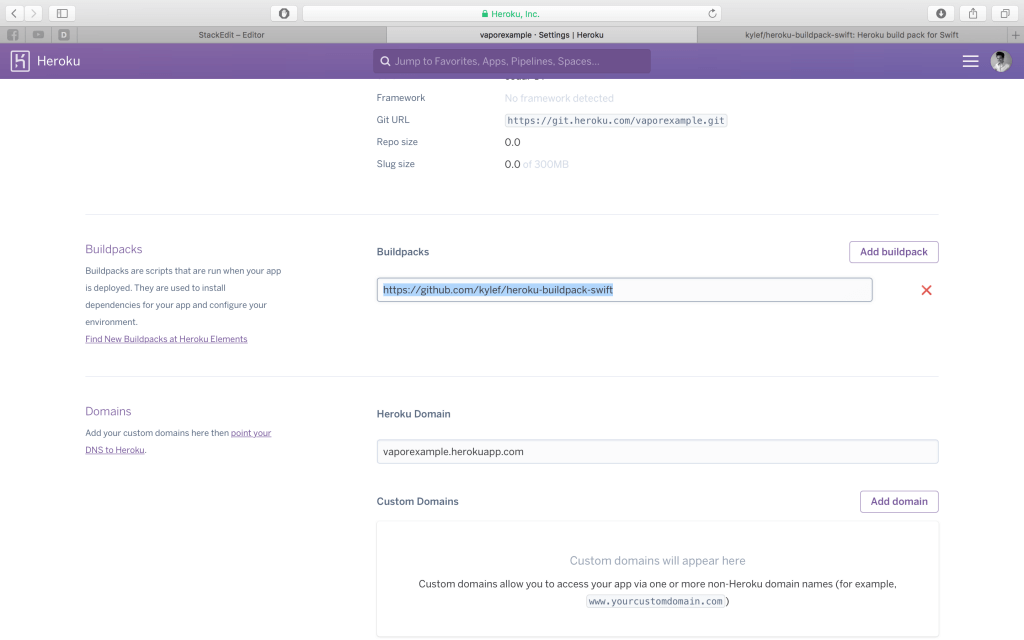
Then add a Buildpack with the link: https://github.com/kylef/heroku-buildpack-swift. The Buildpack builds your Swift project and tells Heroku what language it is in.
Next, navigate to the Deploy section.
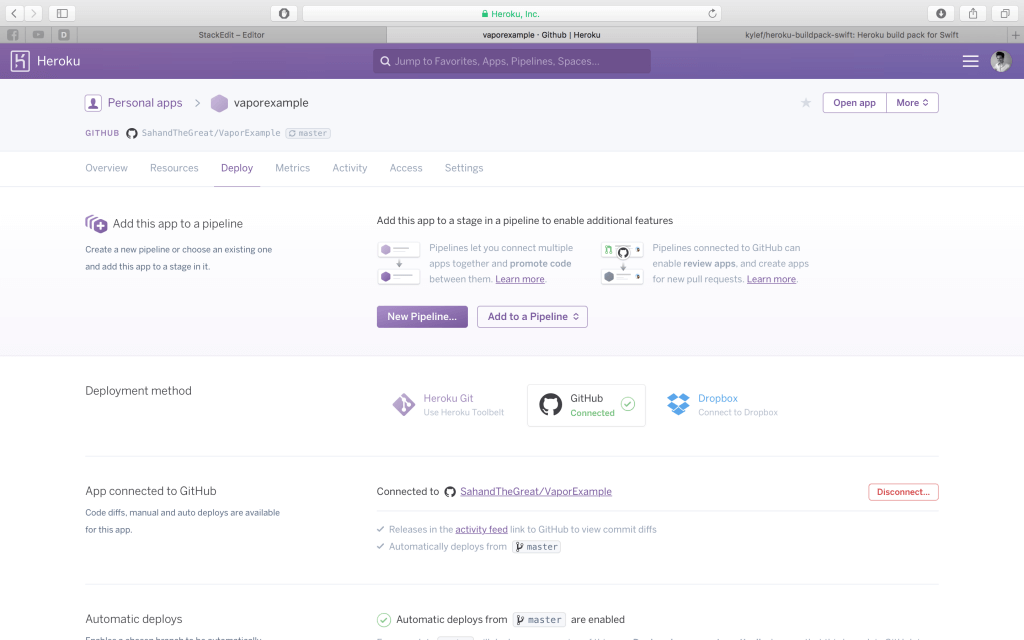
Change the deployment method to GitHub, and add your GitHub Repository name to the app. This connects your Repo to Heroku. Scroll down to Manual Deploy and hit Deploy Branch. Building might take a while.
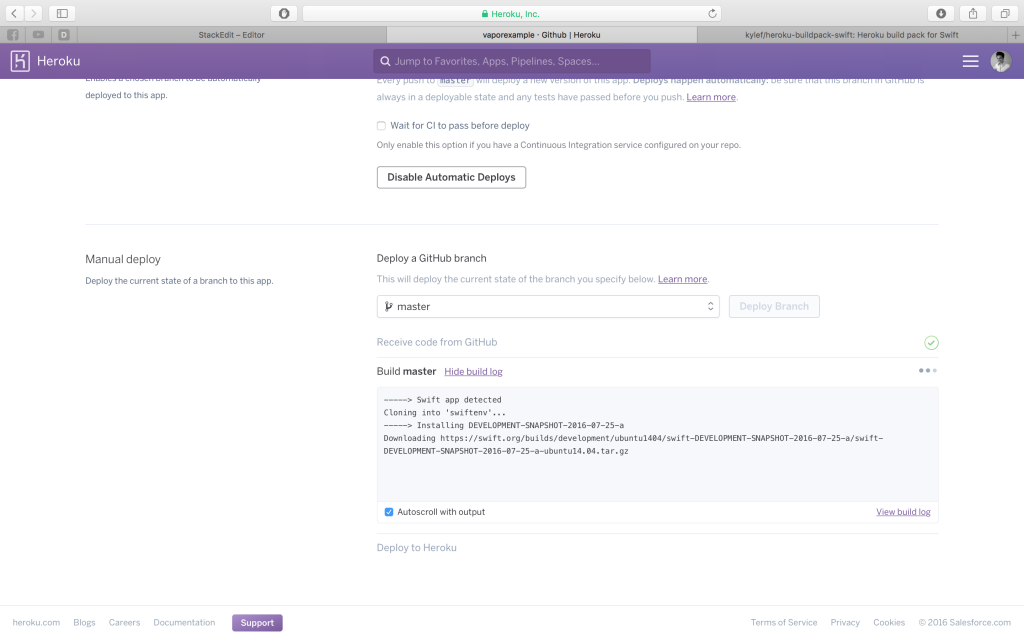
After it's built, view your website from the link provided by Heroku!

Conclusion
In this tutorial we covered how to install Vapor, create a Swift server, and deploy it on Heroku. First, we had to install Xcode 8. Then, we installed Swiftenv to easily download and install Swift 3. Next, we downloaded the Vapor toolbox. After that, I showed you the basics of routing and handling HTTP requests, and returning views. Finally, I taught you how to deploy your Vapor server to Heroku.
I love Vapor. Comparing it to the other Swift-On-The-Servers out there, I think Vapor is the most useful and hassle-free service. IBM's Kitura is a single dependency, meaning it forces you to work with other Swift dependencies out there that aren't updated by the their own team, causing major problems. Perfect, on the other hand, is very large and bulky. Vapor relies on nothing but itself and maintains it's ease of use.
Vapor has many different features. I have only taught you the basics. The next steps should be to visit the Vapor documentations. The documentations include information on features such as:
- Templating: Similar to handlebars or angular.
- Database-agnostic models: SQL, noSQL, Mongo, you name it, Vapor covers it.
- Sockets: Vapor uses web sockets to make real-time connections.
- JSON Serialization: Similar to SwiftyJSON.
- MVC Pattern: Ability to create Controllers and Models.
- Middlewares: To add any parameters to HTTP requests. This is useful for APIs.
- Hashing: Vapor can hash almost anything for you.
And much more...
I hope you enjoyed learning the basics of Vapor! For your reference, you can download the full project on GitHub. There are many example projects made by the creators of Vapor, you can view them over here.


