

In the hand of the clerk at the local grocer’s checkout line, helping to check in bags and passengers at the airport, or assisting in the tedious inventory process at a major retailer, a barcode scanner is simply a handy tool. In fact, they have even made their way to the consumer for smart shopping, cataloging, and other purposes. So, let’s make one for the iPhone!
Fortunately for us, Apple has made the barcode scanning process a breeze to implement. We will be diving into the world of AV Foundation Framework to build a neat little iPhone app that reads barcodes on CDs, gets some important information about the Album, and prints it to the app’s view. Reading the barcodes is cool and important, but we’ll take it a step further and do something neat with the barcode number that we receive.
It should probably go without saying, but a barcode scanning app will only work on a device equipped with a camera. With that in mind, let’s grab our camera-equipped iOS devices and get started!
About CDBarcodes
The name of the app we’re building today is CDBarcodes – pretty clever. When our device detects a barcode, we will clean up the code and send it to the Discogs database to get the album’s name and artist in addition to the year of its release. Discogs has a monstrously large database of recorded music, so it’s pretty likely we will get the information that we seek.
Download the starter project for CDBarcodes.
Along with their impressive database, Discogs has a useful API that we will query. We will only be touching a little piece of what Discogs offers for developers, however, but it’ll be plenty to get a fun little app running.
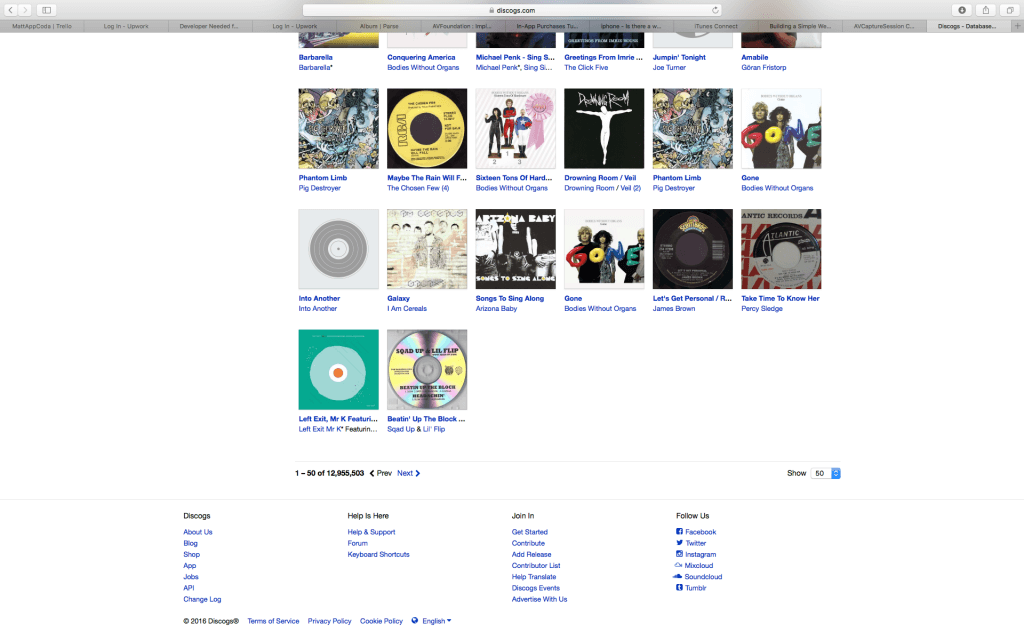
Discogs
Let’s navigate to Discogs and get rolling. First, we’ll need to log in or register for a Discogs account. After logging in, scroll to the bottom of the screen. In the footer, in the left-most column, click API.
In the Discogs API, again, in the column on the left side, in the Database section, click Search.
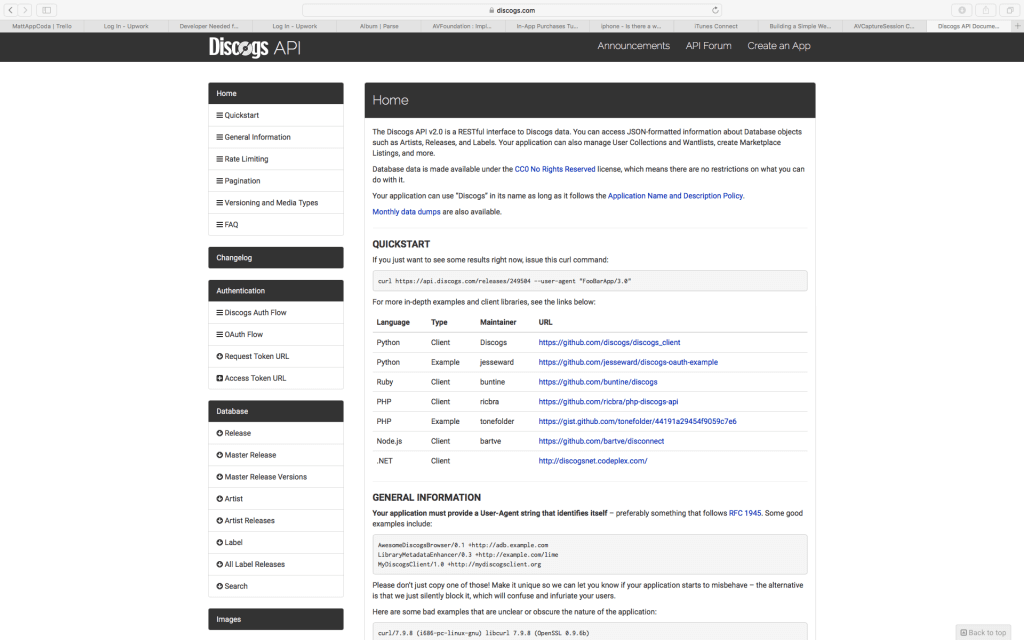
This is the endpoint from which we will query. We’ll be getting album information from both the “title” and “year” parameters.
Now would be a good time to record the URL for our query into CDBarcodes. In Constants.swift, add https://api.discogs.com/database/search?q= to DISCOGS_AUTH_URL as a constant value.
let DISCOGS_KEY = "your-discogs-key"
Now, well be able to access the URL using our handy DISCOGS_AUTH_URL throughout the app.
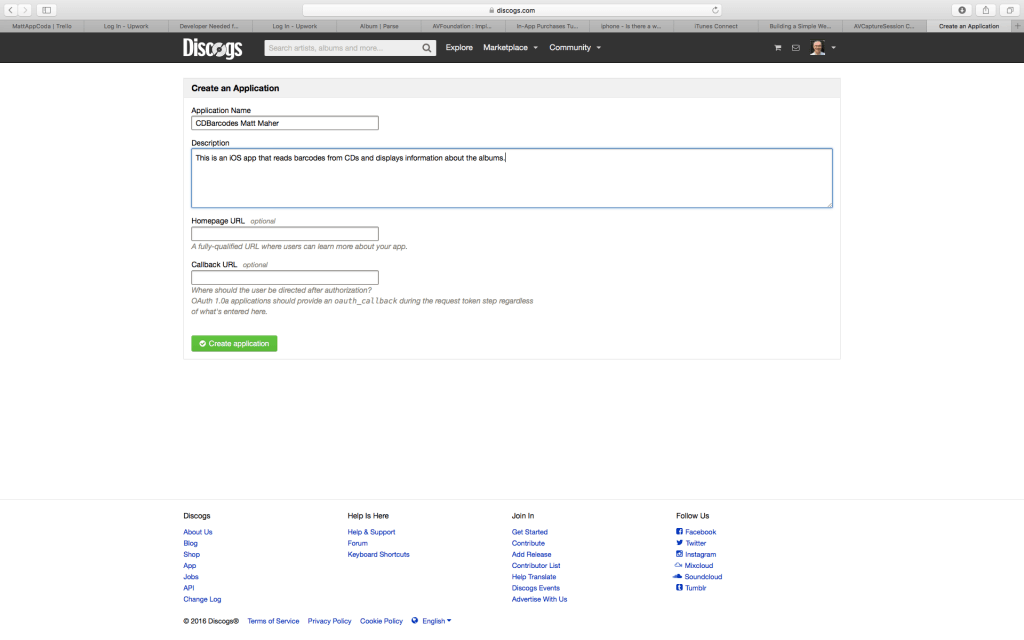
Back in the Discogs API, lets make a new app and get some credentials. In the navigation bar, at the top of the page, tap Create an App. Then, tap the Create an Application button.
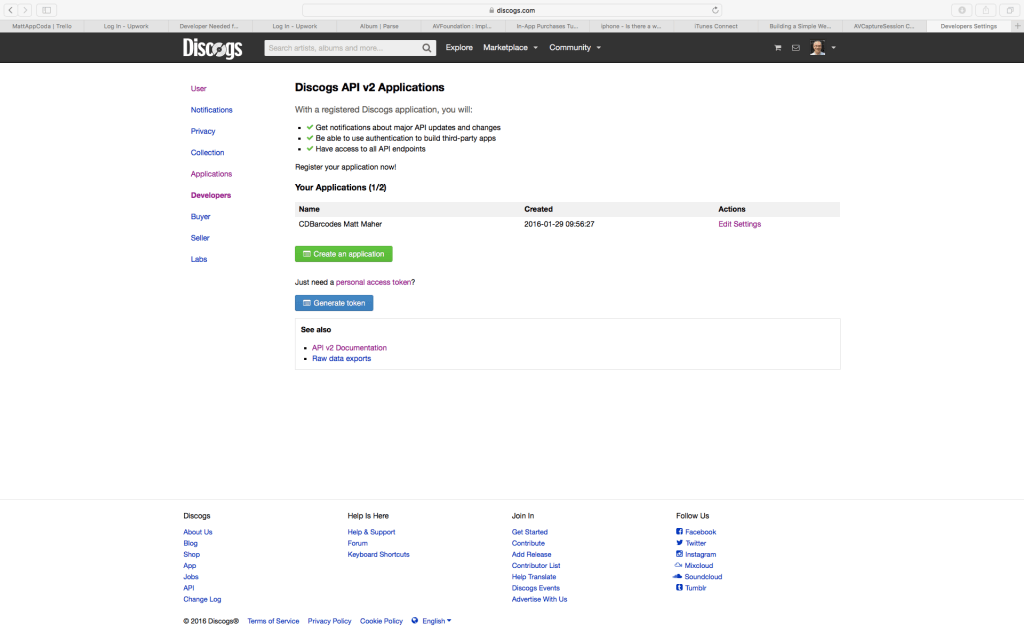
For the Application Name, enter “CDBarcodes Your Name”, or some suitable variation. For the description, the following will suffice:
“This is an iOS app that reads barcodes from CDs and displays information about the albums.”
Then, click the Create Application button.
On the resulting screen, we will find the credentials that will allow us to make use of our barcode number.
Copy the Consumer Key, and paste it into DISCOGS_KEY in Constants.swift.
Then, copy the Consumer Secret, and paste it into DISCOGS_SECRET in Constants.swift.
As with the URL, we’ll have convenient access to these values throughout CDBarcodes.
CocoaPods
To communicate with the Discogs API, we’ll be using the fantastic dependency manager, CocoaPods. For more information on CocoaPods, and for instructions on installing it, have a peek at CocoaPods’ site.
Through CocoaPods, we’ll be leveraging Alamofire for networking and SwiftyJSON to handle the JSON returned from Discogs.
Let’s introduce them to CDBarcodes!
With CocoaPods installed, and an open Terminal, navigate to CDBarcodes and initialize CocoaPods in the Xcode project with the following:
cdpod init
Open the Podfile in Xcode:
open -a Xcode Podfile
Type or paste the following into the Podfile so it appears as below:
source 'https://github.com/CocoaPods/Specs.git'
platform :ios, '8.0'
use_frameworks!

pod 'Alamofire', '~> 3.0'

target ‘CDBarcodes’ do
pod 'SwiftyJSON', :git => 'https://github.com/SwiftyJSON/SwiftyJSON.git'
end
Finally, run the following command to download Alamofire and SwiftyJSON:
pod install
It’s time to get back to Xcode! Be sure to open CDBarcodes.xcworkspace whenever working on the app.
The Barcode Reader
The AV Foundation Framework provides the tools that we will use to build our barcode reader. Here’s a little rundown of what’s involved in the process.
- AVCaptureSession will manage data form the camera – input to output.
- The AVCaptureDevice is the physical device and its properties. AVCaptureSession receives input data from the AVCaptureDevice.
- AVCaptureDeviceInput captures data from the input device.
- AVCaptureMetadataOutput forwards metadata objects to be processed by a delegate object.
In BarcodeReaderViewController.swift, our first step is to import AVFoundation.
import UIKit
import AVFoundation
We’ll need to conform to AVCaptureMetadataOutputObjectsDelegate.
In viewDidLoad(), we’ll get our barcode reading engine running.
First, create an AVCaptureSession object and set the AVCaptureDevice. Then, we’ll create an input object and add it to the AVCaptureSession.
class BarcodeReaderViewController: UIViewController, AVCaptureMetadataOutputObjectsDelegate {

var session: AVCaptureSession!
var previewLayer: AVCaptureVideoPreviewLayer!

override func viewDidLoad() {
    super.viewDidLoad()

    // Create a session object.
    session = AVCaptureSession()

    // Set the captureDevice.
    let videoCaptureDevice = AVCaptureDevice.defaultDeviceWithMediaType(AVMediaTypeVideo)

    // Create input object.
    let videoInput: AVCaptureDeviceInput?

    do {
        videoInput = try AVCaptureDeviceInput(device: videoCaptureDevice)
    } catch {
        return
    }

    // Add input to the session.
    if (session.canAddInput(videoInput)) {
        session.addInput(videoInput)
    } else {
        scanningNotPossible()
    }
If, by chance, the device doesn’t have a camera, scanning isn’t possible. As such, we’ll need a failure method. Here, we’ll alert the user to look around for an iOS device with a camera so we can scan and research some CD barcodes.
func scanningNotPossible() {
    // Let the user know that scanning isn't possible with the current device.
    let alert = UIAlertController(title: "Can't Scan.", message: "Let's try a device equipped with a camera.", preferredStyle: .Alert)
    alert.addAction(UIAlertAction(title: "OK", style: .Default, handler: nil))
    presentViewController(alert, animated: true, completion: nil)
    session = nil
}
Back in viewDidLoad(), after adding the input to the session, we create the AVCaptureMetadataOutput and add it to the session. We will send the captured data to the delegate object via a serial queue.
The next step is to state the type of barcodes for which we should scan. For our purposes, we will be looking for EAN-13 barcodes. Interestingly, not all barcodes that we will scan will be EAN-13 barcodes; some will be UPC-A. This can cause a problem.
Apple converts UPC-A barcodes to EAN-13 by adding a 0 at the front. UPC-A barcodes are only 12 digits; whereas, EAN-13 barcodes are, as one would imagine, 13 digits. The great thing about this automatic conversion is that we can look for metadataObjectTypes AVMetadataObjectTypeEAN13Code, and both EAN-13 and UPC-A barcodes will be read. The tricky part is that this conversion technically changes the barcode and will thoroughly confuse Discogs. We’ll be handling this situation shortly, however.
Yet again, if there is an issue with the camera, we’ll need to send the user to scanningNotPossible().
    // Create output object.
    let metadataOutput = AVCaptureMetadataOutput()

    // Add output to the session.
    if (session.canAddOutput(metadataOutput)) {
        session.addOutput(metadataOutput)

        // Send captured data to the delegate object via a serial queue.
        metadataOutput.setMetadataObjectsDelegate(self, queue: dispatch_get_main_queue())

        // Set barcode type for which to scan: EAN-13.
        metadataOutput.metadataObjectTypes = [AVMetadataObjectTypeEAN13Code]

    } else {
        scanningNotPossible()
    }
Now that we have this wonderful functionality, we need to see it! We’ll use AVCaptureVideoPreviewLayer to display the video in the full size of the screen.
Finally, we can start the capture session.
// Add previewLayer and have it show the video data.
previewLayer = AVCaptureVideoPreviewLayer(session: session);
previewLayer.frame = view.layer.bounds;
previewLayer.videoGravity = AVLayerVideoGravityResizeAspectFill;
view.layer.addSublayer(previewLayer);
// Begin the capture session.
session.startRunning()
In captureOutput:didOutputMetadataObjects:fromConnection, we celebrate, as our barcode reader found something!
First, we will get the first object from the metadataObjects array and convert it into machine readable code. Then, we will send that readableCode, as a string, to barcodeDetected().
Before we move on to barcodeDetected(), however, we will provide some user feedback in the form of vibration and stop the capture session. If, by chance we forget to stop the session, get ready for a lot of vibrating. That’s a good reason for a case!
func captureOutput(captureOutput: AVCaptureOutput!, didOutputMetadataObjects metadataObjects: [AnyObject]!, fromConnection connection: AVCaptureConnection!) {

    // Get the first object from the metadataObjects array.
    if let barcodeData = metadataObjects.first {
        // Turn it into machine readable code
        let barcodeReadable = barcodeData as? AVMetadataMachineReadableCodeObject;
        if let readableCode = barcodeReadable {
            // Send the barcode as a string to barcodeDetected()
            barcodeDetected(readableCode.stringValue);
        }

        // Vibrate the device to give the user some feedback.
        AudioServicesPlaySystemSound(SystemSoundID(kSystemSoundID_Vibrate))

        // Avoid a very buzzy device.
        session.stopRunning()
    }
}
We have some work to perform in barcodeDetected(). Our first task is to follow up our vibration with an alert to state that we’ve found a barcode. Then, we turn our find into something we can really use.
The spaces must be removed from the code. After it is free of white space, we need to determine if the barcode is of the EAN-13 or UPC-A format. If it is EAN-13, we’re already in good shape. If it is a UPC-A barcode, it has been converted to EAN-13, and we need to return it to its original format.
As we’ve discussed, Apple adds a 0 to the front of UPC-A barcodes to convert them to EAN-13, so we should start by determining if there is a 0 at the beginning of the code. If so, we need to remove it. Without this step, Discogs won’t recognize the number, and we won’t get our data.
After we get our cleaned-up barcode strings, we ship them off to DataService.searchAPI() and pop BarcodeReaderViewController.swift.
func barcodeDetected(code: String) {
// Let the user know we've found something.
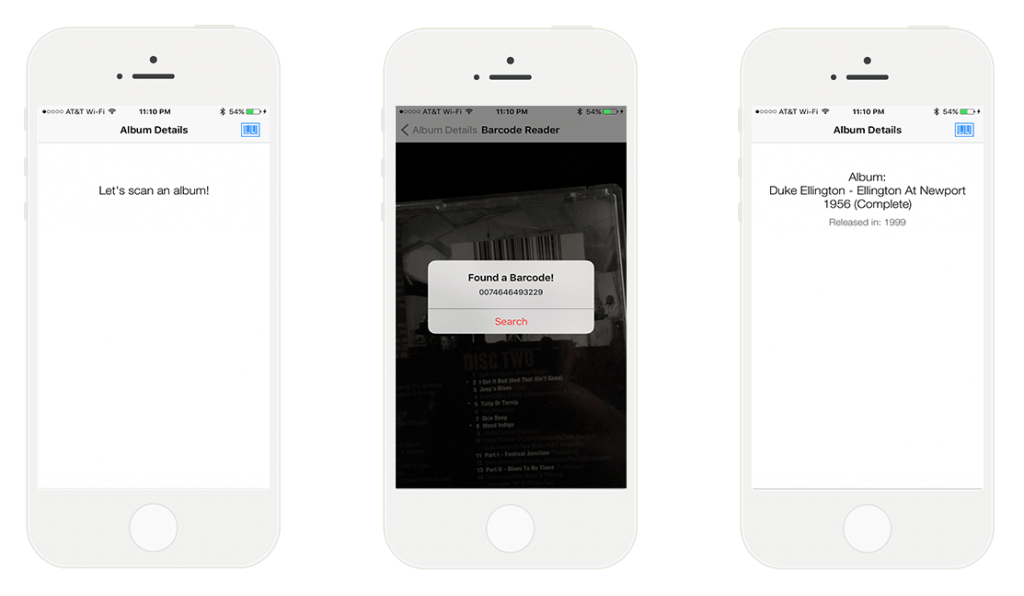
let alert = UIAlertController(title: "Found a Barcode!", message: code, preferredStyle: UIAlertControllerStyle.Alert)
alert.addAction(UIAlertAction(title: "Search", style: UIAlertActionStyle.Destructive, handler: { action in
// Remove the spaces.
let trimmedCode = code.stringByTrimmingCharactersInSet(NSCharacterSet.whitespaceCharacterSet())
// EAN or UPC?
// Check for added "0" at beginning of code.
let trimmedCodeString = "\(trimmedCode)"
var trimmedCodeNoZero: String
if trimmedCodeString.hasPrefix("0") && trimmedCodeString.characters.count > 1 {
trimmedCodeNoZero = String(trimmedCodeString.characters.dropFirst())
// Send the doctored UPC to DataService.searchAPI()
DataService.searchAPI(trimmedCodeNoZero)
} else {
// Send the doctored EAN to DataService.searchAPI()
DataService.searchAPI(trimmedCodeString)
}
self.navigationController?.popViewControllerAnimated(true)
}))
self.presentViewController(alert, animated: true, completion: nil)
}
Before moving on from BarcodeReaderViewController.swift, below viewDidLoad(), we will add viewWillAppear() and viewWillDisappear(). viewWillAppear() will start the capture session; whereas, viewWillDisappear() will stop the session.
override func viewWillAppear(animated: Bool) {

    super.viewWillAppear(animated)
    if (session?.running == false) {
        session.startRunning()
    }
}

override func viewWillDisappear(animated: Bool) {
    super.viewWillDisappear(animated)

    if (session?.running == true) {
        session.stopRunning()
    }
}
The Data Service
In DataService.swift, we’ll first import Alamofire and SwiftyJSON.
Next, we will declare some variables to store our raw data, as returned from Discogs. As thoughtfully suggested by Bionik6, we’ll use the handy private(set) approach to avoid clogging up the works with getters.
Then, we build our Alamofire GET request. Here, the JSON is parsed, and we get our album’s title and year. We’ll assign the raw title and year strings to ALBUM_FROM_DISCOGS and YEAR_FROM_DISCOGS, which we will use shortly to initialize our Album.
Now that we have data from Discogs, we want to let the world know; well, we really only want to let AlbumDetailsViewController.swift know. That calls for a notification.
import Foundation
import Alamofire
import SwiftyJSON

class DataService {

static let dataService = DataService()

private(set) var ALBUM_FROM_DISCOGS = ""
private(set) var YEAR_FROM_DISCOGS = ""

static func searchAPI(codeNumber: String) {

    // The URL we will use to get out album data from Discogs
    let discogsURL = "\(DISCOGS_AUTH_URL)\(codeNumber)&?barcode&key=\(DISCOGS_KEY)&secret=\(DISCOGS_SECRET)"

    Alamofire.request(.GET, discogsURL)
        .responseJSON { response in

            var json = JSON(response.result.value!)

            let albumArtistTitle = "\(json["results"][0]["title"])"
            let albumYear = "\(json["results"][0]["year"])"

            self.dataService.ALBUM_FROM_DISCOGS = albumArtistTitle
            self.dataService.YEAR_FROM_DISCOGS = albumYear

            // Post a notification to let AlbumDetailsViewController know we have some data.
            NSNotificationCenter.defaultCenter().postNotificationName("AlbumNotification", object: nil)
    }
}

}
The Album Model
In our Album model, Album.swift, we’ll craft the Album to suit our needs. The model will take the raw artistAlbum and albumYear strings and add a touch of user friendly to them. We’ll be able to access the perfected album and year variables for display in our AlbumDetailsViewController.swift.
import Foundation

class Album {

private(set) var album: String!
private(set) var year: String!

init(artistAlbum: String, albumYear: String) {

    // Add a little extra text to the album information
    self.album = "Album: \n\(artistAlbum)"
    self.year = "Released in: \(albumYear)"
}

}
Time to Show Album Data!
In viewDidLoad(), let’s set the labels to point us toward the barcode reader. Then, we need to add the observer for the NSNotification, so our posted notification can be herd. We’ll also remove the observer in deinit.
deinit {
    NSNotificationCenter.defaultCenter().removeObserver(self)
}

override func viewDidLoad() {
    super.viewDidLoad()

    artistAlbumLabel.text = "Let's scan an album!"
    yearLabel.text = ""

    NSNotificationCenter.defaultCenter().addObserver(self, selector: #selector(setLabels(_:)), name: "AlbumNotification", object: nil)
}
When the notification is observed, setLabels() will be called. Here, we’ll initialize the Album with the raw strings from DataService.swift. The labels will display the perfected strings from the Album.
func setLabels(notification: NSNotification){

    // Use the data from DataService.swift to initialize the Album.
    let albumInfo = Album(artistAlbum: DataService.dataService.ALBUM_FROM_DISCOGS, albumYear: DataService.dataService.YEAR_FROM_DISCOGS)
    artistAlbumLabel.text = "\(albumInfo.album)"
    yearLabel.text = "\(albumInfo.year)"
}
Testing CDBarcodes
We have an app! Sure, we could have just flipped the CD over a couple of times to determine the album name, artist, and year of release, but this is way more fun! To best test CDBarcodes, we should find several CDs or records (vinyl). This way, it is more likely that we will encounter examples that have EAN-13 and UPC-A barcodes. We can handle both of them!
When navigating to BarcodeReaderViewController in CDBarcodes, look out for glares and be sure to let the camera focus on the barcode.
Here is the completed version of CDBarcodes.
In Conclusion
The barcode reader is a very useful tool for business people, savvy shoppers, and regular people. For this reason, it’s good for developers to have some experience working with them.
As we’ve seen, though, the fun only starts with the scanner. After the data is received, there can be funny little issues for which we much account in order to use the data, for example, EAN-13 versus UPC-A. We found a way to manipulate the data to suit our needs, and we were good to go.
A great next step would be to explore some other metadataObjectTypes and some new APIs. The possibilities are limitless and the experience is priceless.


