

Dear readers, it’s been a long time since my last post, so I’m happy to come back with a new tutorial, which I truly believe you’ll find quite interesting. Today I’d like to tell you about a third-party API that can make your life easier when using autolayout constraints. It’s called SnapKit.
We all create constraints one way or another. Constraints can be made in Interface Builder, or programmatically with pure code. Not all developers have the same preferences; part of developers like using Interface Builder, part of developers like coding the constraints. There are also people who are doing both. The discussion in this post has to do with making constraints in code, but even if you’re an Interface Builder enthusiast, please keep reading. You might find the following content interesting. Also, and for your reference, here’s an older post about making constraints in code.
So, talking about creating constraints programmatically, it’s not that difficult to specify them as far as you know the kind of constraints you need and how they should be combined. But this is often proved to be a cumbersome work because a lot of stuff is needed to be written in order to set all constraints up properly. At the end, it’s easy to end up with big fragments of code that configure constraints which describe the relationship between views, offsets, constants, and so on, but it’s hard to read and modify them. And here’s where SnapKit gets into play.
With SnapKit it’s extremely easy to create and setup constraints, as the technique that it offers to do that is quite simple, and on top of that the amount of code required is way less compared to the traditional way. This inevitably leads to a great advantage; we have a cleaner, easier to review code, which is better manageable than before in most cases. Moreover, it’s easier to focus on the constraints only, without bothering to provide arguments to built-in functions that we don’t really care about. To have a first taste of SnapKit, just pay a visit to its website, otherwise keep on reading here.
It’s my true belief that if you are used to making constraints in code, then most definitely you’ll become a SnapKit fan. In the next parts of this post we’ll examine how to setup constraints based on different requirements, but not just that. We’ll also see how to animate them. Before I present the demo project of this post, I find it useful to mention that you can combine SnapKit with constraints made in the traditional way, but you’re not encouraged to do so for two reasons. Firstly, SnapKit can cover all of your needs, and secondarily there’s high risk of messing things up. Now, let’s see what we’re about to discuss in the following parts.
About the Demo Project
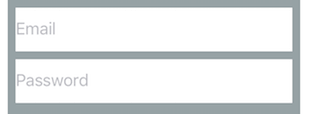
To demonstrate how SnapKit can be used, we’re going to create the following login screen:
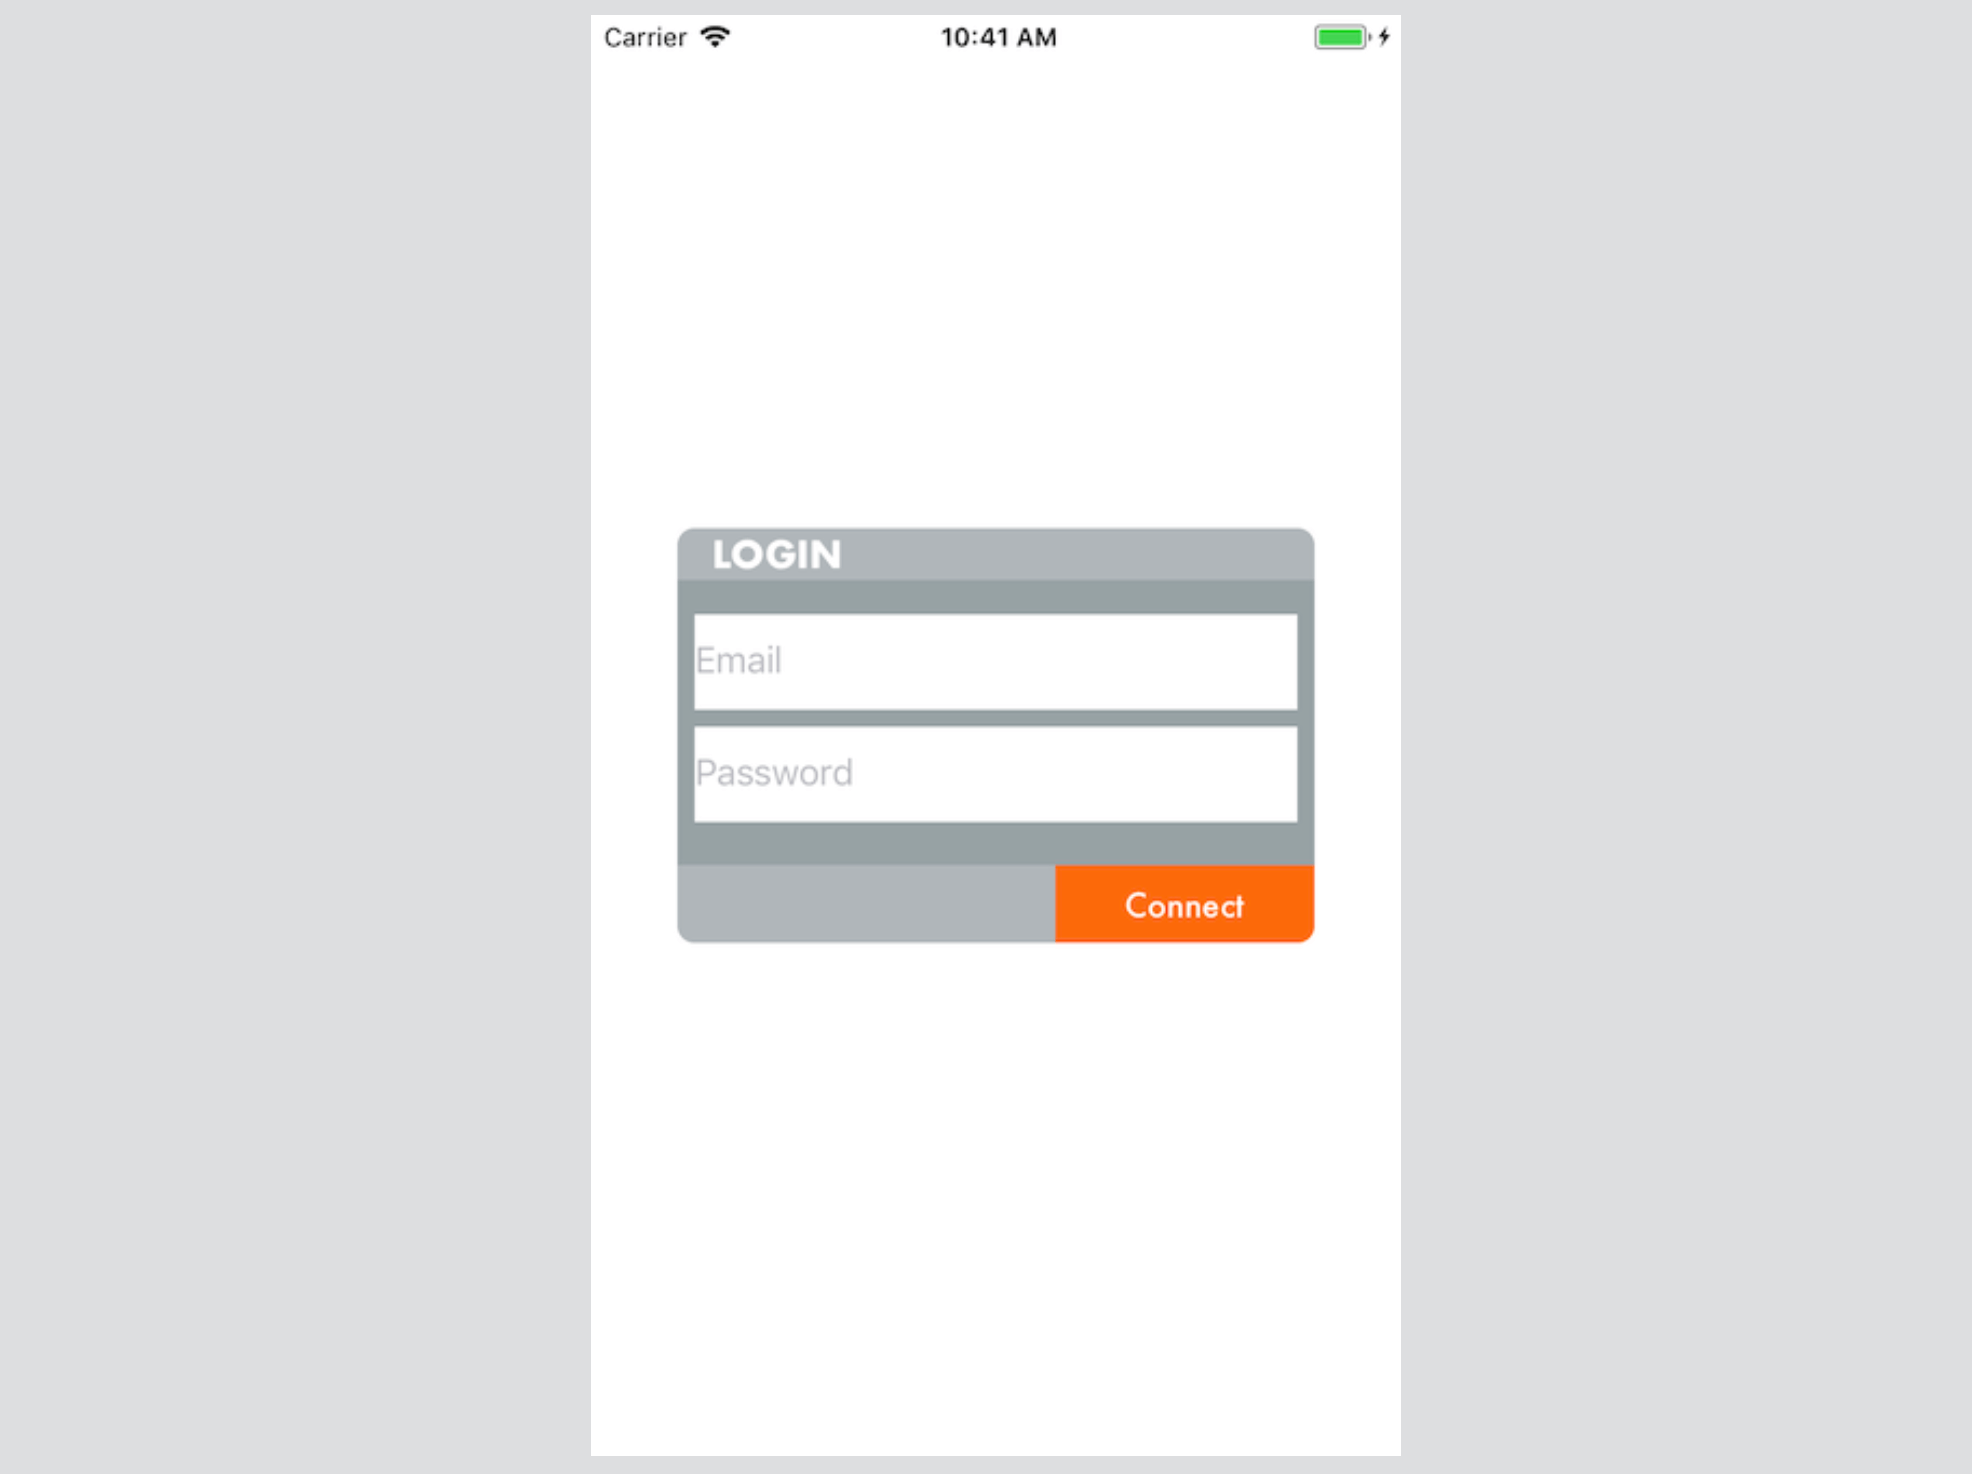
Even though the obvious elements in the above figure are the title, the email and password textfields, and the Connect button, there are more views that compose the final result. In details:
- There is a container view in the center of the screen that contains everything else as its subviews.
- The title label is contained to an inner container view, which in turn is added as a subview to the main container view.
- Similarly, the Connect button is contained to another view that is added as a subview to the main container view.
- The two textfields are added as subviews directly to the main container view.
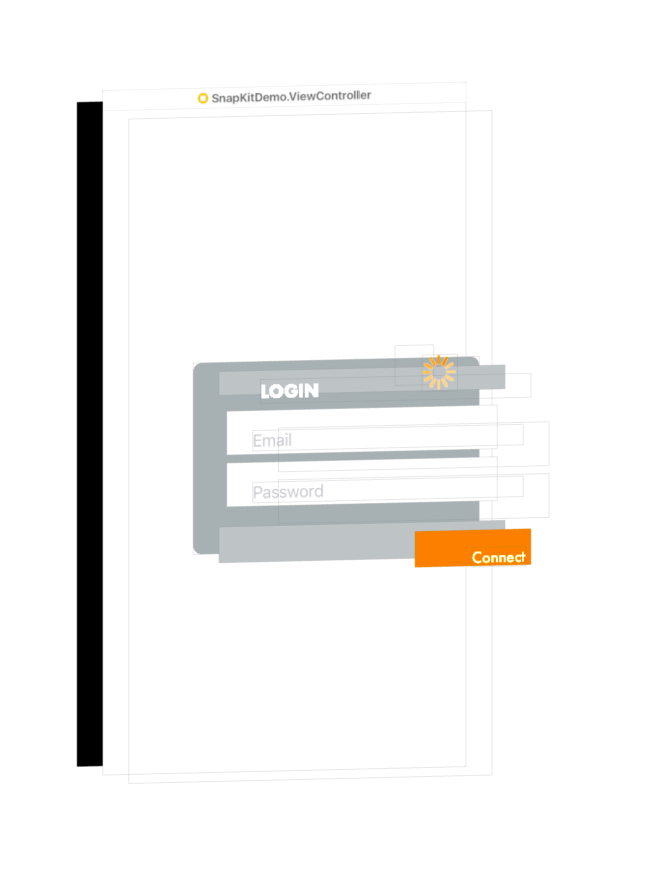
The following illustrates the view hierarchy in a better point of view:
For your convenience, but to save time as well, there is a starter project for you to download. Once you get it, open it in Xcode and go to the LoginView.swift file, where you will find a UIView subclass, called LoginView. The implementation that we’ll be doing in the following parts will give us the final login screen. All the properties we’re going to need are already declared, with the most important being:
viewContainer: It’s the view shown to the center of the screen.viewTop: It’s the view that contains the title label, positioned to the top of theviewContainerview.viewBottom: It’s the view that contains the Connect button, positioned to the bottom of theviewContainerview.txtEmail: The email textfield.txtPassword: The password textfield.btnConnect: The Connect button.activityIndicator: An activity indicator that will appear when the Connect button is tapped (more about that in a while).
There are also several constants that describe color values, widths and heights. For example, the containerViewBGColor and the innerViewBGColor constants represent the background color of the viewContainer and the two other views to top and bottom (viewTop and viewBottom) respectively. The containerViewHeight specifies the height of the viewContainer view, while the textfieldHeight is the desired height of the two textfields. The topInnerViewHeight and bottomInnerViewHeight are the height values that we’ll use for the viewTop and the viewBottom views, and the connectButtonWidth represents the width of the Connect button.
Besides the properties, there’s an init() method that we’ll use to initialise a LoginView object in the ViewController class later. In it, our class declares itself as an observer for two notifications regarding the keyboard: UIKeyboardWillShow that is sent by the system when the keyboard is about to appear, and UIKeyboardDidHide that is sent by the system when the keyboard has been dismissed. The handler method stubs for these two notifications also exist in the class, called handleKeyboardWillShow(notification:) and handleKeyboardDidHide(notification:) respectively. For the time being there’s no code in these two methods, but that’s something we’re going to change when the time comes.
Finally, there’s one last method declared too, called connect(). This one will be called when the Connect button is tapped.
Our work won’t stop in just creating the login view by setting up the views and their constraints. We’ll go one step further and we’ll learn how to animate SnapKit constraints using two different approaches. In the first one, we’ll move the login view when the keyboard appears and disappears by moving it towards top and then back to its original position again. In this case, we’ll learn how to animate by modifying a single constraint only. Here’s what our goal is:
The second animation is going to be a bit more complicated and it will be triggered when the Connect button is tapped. In this case the email textfield will move to the right side, the password to the left, and the activity indicator will come to the center of the view from the top:

Three seconds later the textfields and the activity indicator will be put back in their original positions, following the opposite direction in an animated way again. This animation will give us the opportunity to learn how to re-create the entire set of constraints of a view, and how the new constraints configuration can be applied animated.
Now that you know what the demo project is all about, let’s proceed in integrating SnapKit in the starter project.
Integrating SnapKit
There are three ways available that allow us integrate SnapKit into an Xcode project:
- Download and import the source files into the project.
- Use CocoaPods.
- Use Carthage.
Here we’ll make use of the CocoaPods. If you have downloaded the starter project and opened it in Xcode, then please close it before you proceed.
On your Mac, open Finder and go to the starter project’s folder. In it, create a file called Podfile and add the following contents using a text editor:
source 'https://github.com/CocoaPods/Specs.git'
platform :ios, '11.0'
use_frameworks!

target 'SnapKitDemo' do
    pod 'SnapKit', '~> 4.0'
end
Save the file and close it. Note that if you’re going to integrate SnapKit in a project of yours, you should not forget to replace the SnapKitDemo name with your project’s one in the target line.
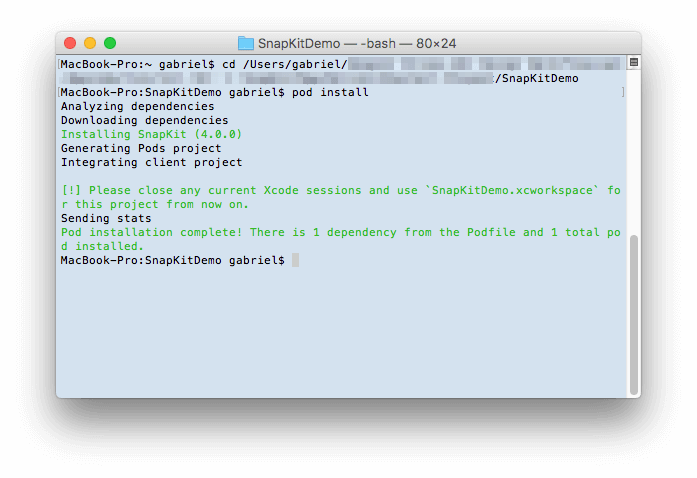
Next, open Terminal and type the following commands:
cd PATH_OF_THE_STARTER_PROJECT

pod install
Replace the PATH_OF_THE_STARTER_PROJECT with the real path to the starter project you just downloaded. If you don’t meet any problem, at the end you should be able to see something like that:
In case the pod install command doesn’t work for you, then most probably CocoaPods is not installed on your system, so search on the web for a solution like this one.
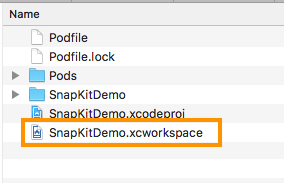
Now, instead of opening the original project file, double click on the workspace file that was just created (SnapKitDemo.xcworkspace) from the above process:
Creating the Container View
Having integrated SnapKit to our project and knowing what our goal is, it’s about time to start making some real work and explore the SnapKit’s usage.The first step we have to take is to create the container view that will “host” the textfields, the title and the connect button. As demonstrated previously, this container view will occupy just a portion of the screen, placed on its center.
Open the LoginView.swift file, where we’re going to spend most of our time in this tutorial. A UIView object named viewContainer is already declared as a property to the class, so now we’re going to initialise and configure it. Let’s begin by creating a new method named setupContainerView():
func setupContainerView() {
    viewContainer = UIView()
    self.addSubview(viewContainer)

}
The above two lines:
- Initialize the container view.
- Add it to the main view (
self) as a subview.
Let’s configure the container view’s constraints now, using SnapKit for first time. To create them, we have to access a property named snp in the viewContainer object, and call the makeConstraints(closure:) method. Inside the closure we’ll setup the constraints:
func setupContainerView() {
    ...

    viewContainer.snp.makeConstraints { (make) in

    }
}
Most probably, at this point Xcode is complaining about the snp property by displaying an error message. To overcome this, go to the beginning of the file and add the next line:
import SnapKit
If the error is still there, try to clean and build the project, by going to menu Product -> Clean and Product -> Build respectively. If the error persists, then close Xcode, reopen it, and repeat the clean and build steps.
Let’s set some rules now about the constraints of the container view. What we want from that view is:
- To have an offset from the left and right side of 40px, but at the same time not to be greater than 500px.
- To be centered on the screen.
- To limit its height to the value of the
containerViewHeightconstant (192px).
Here’s the first sample of creating constraints using SnapKit:
func setupContainerView() {
    ...

    viewContainer.snp.makeConstraints { (make) in
        make.left.equalTo(self).offset(40)
        make.right.equalTo(self).offset(-40)

        make.width.lessThanOrEqualTo(500)

        make.center.equalTo(self)

        make.height.equalTo(containerViewHeight)
    }
}
With the first two lines we make the left and right sides of the container view equal to the left and right of the parent view; the equalTo() method can accept a number of different arguments: View objects, actual values (CGFloat values), or other SnapKit constraint objects. In our case, we provide the parent view as an argument. SnapKit will automatically match the left and right sides of the two views. However, as we need to add some padding, we call the offset() method in both lines and we specify the amount of offset we desire. Note that for the right side the offset must be a negative number, otherwise the view will extend to the right and out of the visible area of the screen.
An additional requirement regarding the width of the container view is that it should not be greater than 500px. So, we limit it in the third line by calling the lessThanOrEqualTo() method, and we set an actual value as its argument. Now, the container view won’t become more than 500px in devices with big screen.
After that, we center the container view to the parent view. By using the center property SnapKit will automatically create constraints for both X and Y axises. However, for demonstrating reasons that you’ll understand later, it’s better to replace the fourth line (make.center.equalTo(self)) with the next two:
make.centerX.equalTo(self)
make.centerY.equalTo(self)
The two single constraints that are being created with the above two lines will have the same result as if we would have used the center property only.
Lastly, we specify the desired height of the container view. This time, we pass the containerViewHeight constant value as an argument to the equalTo() method.
Now that we have seen for first time how constraints are specified using SnapKit, it’s easy to say that creating the UI in code becomes a fast process. Behind the scenes, SnapKit will create real constraints (NSLayoutConstraint objects), but we’ll almost never need to access them; this high-level approach that SnapKit offers is all we need to handle layout.
As a side note, if you’re experienced enough with constraints, you might realise that the above constraints definition might cause some problems when the app will run. Don’t mind for now though, we’ll deal with that in a while.
To finish our work in this method, let’s add a few more properties regarding the container view:
func setupContainerView() {
    ...


    // Set the background color of the container view.
    viewContainer.backgroundColor = containerViewBGColor

    // Make the corners of the container view rounded.
    viewContainer.layer.cornerRadius = 8.0

    // Set the following flag to true to allow clipping of the subviews if they exceed the container view's bounds.
    viewContainer.clipsToBounds = true
}
The comments explain what the above lines are all about. The containerViewBGColor is a constant describing the background color of the container view.
Let’s jump to the init() method now to call the above one:
init() {
    ...

    setupContainerView()
}
Time to switch file, and go to the ViewController.swift. We’ll create a LoginView view, we’ll add it to the view controller’s view as a subview, and then we’ll run the app to see the first results. Let’s override the viewWillAppear(animated:) method and let’s make some preparation for the constraints that will keep the login view into place:
override func viewWillAppear(_ animated: Bool) {
    super.viewWillAppear(animated)

    let loginView = LoginView()
    view.addSubview(loginView)
    loginView.snp.makeConstraints { (make) in

    }
}
Note: Don’t forget to import SnapKit module in this file too!
As we want the login view to cover the entire screen, let’s stick it to the bounds of the view controller’s view by setting the left, top, right and bottom constraints:
override func viewWillAppear(_ animated: Bool) {
    super.viewWillAppear(animated)

    ...

    loginView.snp.makeConstraints { (make) in
        make.left.equalTo(self.view)
        make.top.equalTo(self.view)
        make.right.equalTo(self.view)
        make.bottom.equalTo(self.view)
    }
}
Easy to understand what the above new four lines do, but wait… there’s a better way to do that! Let’s make the edges of the login view equal to the edges of the parent view. Comment out or delete the above lines, and use the last line shown next instead:
override func viewWillAppear(_ animated: Bool) {
    super.viewWillAppear(animated)

    ...

    loginView.snp.makeConstraints { (make) in
        // make.left.equalTo(self.view)
        // make.top.equalTo(self.view)
        // make.right.equalTo(self.view)
        // make.bottom.equalTo(self.view)

        make.edges.equalTo(self.view)
    }
}
What we just did is pretty awesome! With one line only we managed to specify the position and height of the login view!
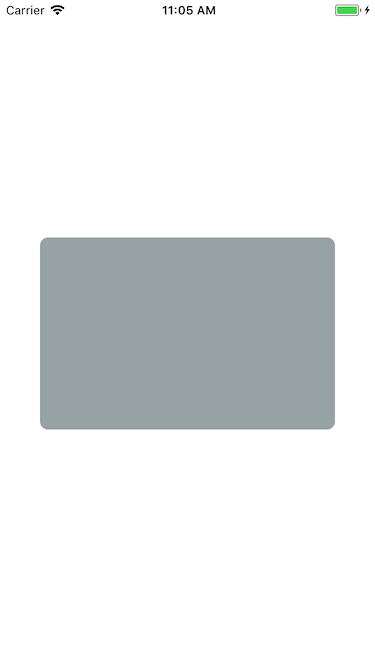
Let’s run the app now, either on the Simulator or a real device. When the view appears you’ll see the container view showing up. However, at the same time Xcode will report an error regarding unsatisfied constraints in the debugger (if you don’t see it, try to change the device orientation):
SnapKitDemo[35586:496540] [LayoutConstraints] Unable to simultaneously satisfy constraints.
    Probably at least one of the constraints in the following list is one you don't want.
    Try this:
        (1) look at each constraint and try to figure out which you don't expect;
        (2) find the code that added the unwanted constraint or constraints and fix it.
(
    "",
    "",
    "",
    "",
    "",
    ""
)

Will attempt to recover by breaking constraint
Look carefully, and you’ll realise that the left and right constraints of the container view in the LoginView.swift file conflict with the constraint that limits the width to 500px. Actually, the left and right constraints are specifying the width of the container view in an indirect way. That means that in runtime iOS will try to satisfy two different constraints regarding the width, and of course this is impossible to happen. The result is a message like the one shown above and a layout that doesn’t match to what we really want. So, what’s the solution?
To set priorities! This is what we have to do. If we tell the system which constraint(s) are the most important one(s), then it won’t try to satisfy conflicting constraints all together at once, and it will layout the view correctly. So, back to the LoginView.swift file, let’s spot the conflicting constraints:
make.left.equalTo(self).offset(40)
make.right.equalTo(self).offset(-40)
make.width.lessThanOrEqualTo(500)
By default, all constraints have a priority value of 1000, so let’s lower that value to the constraint (or constraints) we don’t consider as the most important one (or ones). But which one is the most important constraint that should come first? This:
make.width.lessThanOrEqualTo(500)
Why? Because if the screen width is big enough this constraint will limit the container view’s width and we don’t need the other two (most probably padding will be more than 40px from the left and right edges, so they’ll be practically useless). On the other hand, if the screen width is not that big then this constraint is satisfied (width <= 500), so the left and right constraints will apply and we’ll have the minimum offset on left and right.
So, let’s make the necessary update to our constraints, and let’s see how we set priorities using SnapKit:
make.left.equalTo(self).offset(40).priority(750)
make.right.equalTo(self).offset(-40).priority(750)

make.width.lessThanOrEqualTo(500)
Now that the first two constraints have a lower priority iOS will meet no problem to layout our view, so no error messages anymore. Let’s run again and let’s see if we get the desired results:

Our first meet with SnapKit just came to its end. In this part not only we learnt how to deal with constraints in a fast and simple way, but we also met some of its details, like for example how to set priorities, or how to set a constraint that is not just equal to another value. In the next part we’ll keep on going by creating all the other subviews of the login view, and at the same time we’ll discover more SnapKit features.
Adding the Subviews
Keeping on building our UI for the login view, the Login title is what we’re going to add next. The UILabel that we’ll use to show the title won’t be added directly as a subview to the container view. Instead, we’ll add it to another, smaller container view, which in turn will be added to the viewContainer. This view is already declared in the LoginView class and is named viewTop.
Let’s create a new method, called setupTitle(), and let’s initialise and configure the viewTop view:
func setupTitle() {
    viewTop = UIView()
    viewContainer.addSubview(viewTop)

    viewTop.backgroundColor = innerViewBGColor
}
Nothing special is taking place above; we just initialise the viewTop, we add it to the container view, and we specify its background color.
Time to set its constraints. What rules do we want to apply? We want the left, top and right edges to be equal to the container view’s respective edges, but we want its height to be an explicit value, and equal to the value of the topInnerViewHeight property. Based on what we’ve learnt so far, that should be as simple as that:
func setupTitle() {
    ...

    viewTop.snp.makeConstraints { (make) in
        make.left.equalTo(viewContainer)
        make.top.equalTo(viewContainer)
        make.right.equalTo(viewContainer)
        make.height.equalTo(topInnerViewHeight)
    }
}
And that’s it, the top container view is ready!
Now, we need a label for the title. In the same method, we append the following code which creates a UILabel object and configures it. The comments are explaining what’s taking place there:
func setupTitle() {
    ...

    let lblTitle = UILabel()
    viewTop.addSubview(lblTitle)

    // Set the label's text.
    lblTitle.text = "LOGIN"

    // Make the text color white.
    lblTitle.textColor = UIColor.white

    // No background color for the label.
    lblTitle.backgroundColor = UIColor.clear

    // Set the font.
    lblTitle.font = UIFont(name: "Futura-Bold", size: 17.0)

}
Setting the constraints for the label is going to take one line only, as we want the label to have the same frame as the viewTop view, except for the left side where we will add a padding of 16px. For this purpose we’ll create a new edge inset as shown next:
func setupTitle() {
    ...

    lblTitle.snp.makeConstraints { (make) in
        make.edges.equalTo(viewTop).inset(UIEdgeInsetsMake(0.0, 16.0, 0.0, 0.0))
    }
}
What we just did is another new thing about SnapKit; how to set up constraints by specifying the edge insets of a view and custom offset values.
Jump now to the init() method and call the setupTitle():
init() {
    ...

    setupTitle()
}
The Email And Password Textfields
Next, we’re going to add the two textfields for the user’s email address and password respectively.
Starting from the email textfield, and before we set its constraints, let’s initialise it, and let’s configure some of its properties. Of course, we’re going to create a brand new method for setting up the two textfields. The comments explain enough about the properties of the email textfield in the next snippet:
func setupTextfields() {
    // Initialise the email textfield and add it to viewContainer.
    txtEmail = UITextField()
    viewContainer.addSubview(txtEmail)


    // Set self as the delegate of the textfield so we can handle the Return button.
    txtEmail.delegate = self

    // Set a placeholder that will be visible when there's no text typed in the textfield.
    txtEmail.placeholder = "Email"

    // No border around the textfield.
    txtEmail.borderStyle = .none

    // Set white background color.
    txtEmail.backgroundColor = UIColor.white

    // Set the proper keyboard type so it's easy to write email addresses.
    txtEmail.keyboardType = .emailAddress

    // Show the Next button instead of the default Return key on the keyboard.
    txtEmail.returnKeyType = .next

    // Prevent the first letter of the email from being capitalized.
    txtEmail.autocapitalizationType = .none
}
Regarding the email textfield’s frame, therefore its constraints, what we want is:
- To have a padding of 16px from the bottom side of the
viewTopview. - To have a padding of 8px from the left and right edges of the
viewContainerview. - To have a height equal to the
textFieldHeightconstant.
For the first requirement we have to relate the textfield’s top edge to the viewTop view’s bottom; however, this is a kind of a constraint setup that we haven’t seen so far. So, how can we create a constraint that will relate different sides of different views? The answer is given right next:
func setupTextfields() {
    ...

    txtEmail.snp.makeConstraints { (make) in
        make.top.equalTo(viewTop.snp.bottom).offset(16)
    }
}
Look at the contents of the first parenthesis. We’re referring to the snp property of the viewTop view, and then we’re accessing the bottom constraint. At the end, we’re adding an offset of 16px.
Let’s add the missing constraints (left, right, and height).
func setupTextfields() {
    ...

    txtEmail.snp.makeConstraints { (make) in
        ...
        make.left.equalTo(viewContainer).offset(8)
        make.right.equalTo(viewContainer).offset(-8)
        make.height.equalTo(textfieldHeight)
    }
}
The configuration of the password textfield is going to be quite similar to what we just did right above. First, let’s initialise it and set its properties:
func setupTextfields() {
    ...

    txtPassword = UITextField()
    viewContainer.addSubview(txtPassword)

    // The following properties are almost identical to the email textfield's properties.
    txtPassword.delegate = self
    txtPassword.placeholder = "Password"
    txtPassword.borderStyle = .none
    txtPassword.backgroundColor = UIColor.white
    txtPassword.autocapitalizationType = .none

    // Show the Done title instead of the default Return key on the keyboard.
    txtPassword.returnKeyType = .done

    // Indicate that this is a password field by making the following flag true.
    txtPassword.isSecureTextEntry = true
}
Regarding its constraints, we need to have the similar constraints to the email textfield, except the top one: For this one we’ll be having a padding of 8px between the email textfield’s bottom and the password textfield’s top:
func setupTextfields() {
    ...

    txtPassword.snp.makeConstraints { (make) in
        make.top.equalTo(txtEmail.snp.bottom).offset(8.0)
        make.left.equalTo(txtEmail)
        make.right.equalTo(txtEmail)
        make.height.equalTo(textfieldHeight)
    }
}
Notice that we make the left and right constraints equal to the email textfield’s, which means that if we ever change them for the email, then they’ll automatically get changed for the password too.
While configuring the two textfields we set the LoginView class as their delegate, but as it’s still not conforming to the UITextFieldDelegate protocol Xcode is complaining. So, go to the end of the file, right after the class’s closing bracket, and add the following extension. In it, we implement the textFieldShouldReturn(_:) delegate method as shown here:
extension LoginView: UITextFieldDelegate {
    func textFieldShouldReturn(_ textField: UITextField) -> Bool {
        if textField == txtEmail {
            txtPassword.becomeFirstResponder()
        }
        else {
            txtPassword.resignFirstResponder()
        }

        return true
    }
}
When the email textfield has the focus and the Next button is tapped on the keyboard, the password textfield will become the first responder. If the password has the focus, then the keyboard will be dismissed when the Done button is tapped.
Before we get to the end of this section, don’t forget to call the method we just created in the init():
init() {
    ...

    setupTextfields()
}
The Connect Button
The Connect button is going to be contained to a parent view called viewBottom which in turn will be contained to the viewContainer view.

To start setting it up, we are creating a new method, called setupBottomView():
func setupBottomView() {
    // Initialize the viewBottom view and add it to viewContainer.
    viewBottom = UIView()
    viewContainer.addSubview(viewBottom)

    // Set its background color.
    viewBottom.backgroundColor = innerViewBGColor
}
The innerViewBGColor specifies the background color of the viewBottom view and it is already declared in the LoginView class. The bottom view has to obviously snap to the bottom side of the containerView, and the same should happen to the left and right sides of it. We already know how to do that:
func setupBottomView() {
    ...

    viewBottom.snp.makeConstraints { (make) in
        make.left.equalTo(viewContainer)
        make.right.equalTo(viewContainer)
        make.bottom.equalTo(viewContainer)
    }
}
The only missing part is the height of the bottom view; there’s nothing above that specifies it. Simply enough, we want the bottom view to have a height equal to the bottomInnerViewHeight constant value which is declared in the LoginView class:
func setupBottomView() {
    ...

    viewBottom.snp.makeConstraints { (make) in
        ...
        make.height.equalTo(bottomInnerViewHeight)
    }
}
Now that the bottom view has been added to its place, let’s configure the Connect button. Let’s get started with its initialisation and properties setup:
func setupBottomView() {
    ...

    // Initialize the Connect button and add it to viewBottom view.
    btnConnect = UIButton(type: .custom)
    viewBottom.addSubview(btnConnect)

    // Set its title.
    btnConnect.setTitle("Connect", for: .normal)

    // Set the white color as the button's text color.
    btnConnect.setTitleColor(UIColor.white, for: .normal)

    // Set the light gray color as the button's text color when highlighted.
    btnConnect.setTitleColor(UIColor.lightGray, for: .highlighted)

    // Make the background color orange.
    btnConnect.backgroundColor = UIColor.orange

    // Set the title font.
    btnConnect.titleLabel?.font = UIFont(name: "Futura", size: 15.0)

    // Specify the method that should be called when it's tapped.
    btnConnect.addTarget(self, action: #selector(self.connect), for: .touchUpInside)
}
According to the previous screenshot, the Connect button must snap to the right side of the bottom view but have a specific width. This width is specified in the connectButtonWidth constant, and that makes setting the constraints easy enough:
func setupBottomView() {
    ...

    btnConnect.snp.makeConstraints { (make) in
        make.top.equalTo(viewBottom)
        make.right.equalTo(viewBottom)
        make.bottom.equalTo(viewBottom)
        make.width.equalTo(connectButtonWidth)
    }
}
To be totally correct, let’s head back to the init() method to call the setupBottomView():
init() {
    ...

    setupBottomView()
}
The Activity Indicator
Being almost a step away from having finished the login screen’s setup, there’s one last subview we have to create. That is the activity indicator view that will appear animated when the Connect button is tapped. For starters, let’s initialise the activityIndicator property and let’s configure it in a new method that we create:
func setupActivityIndicator() {
    activityIndicator = UIActivityIndicatorView(activityIndicatorStyle: .whiteLarge)
    viewContainer.addSubview(activityIndicator)

    activityIndicator.color = UIColor.orange
    activityIndicator.startAnimating()
}
We want the activity indicator to be placed to the center of the viewContainer view when it’s visible, therefore that makes it easy to understand that the centerX and centerY constraints are those two that we set up in order to specify its position. However, when it’s hidden, it should be positioned to the top and out of the visible area of the viewContainer view. That means we have to apply a negative offset to the centerY constraint by providing a value that ensures that the activity indicator will be fully out of any visible area. Supposing that its width and height should be 40px, let’s set its constraints up:
func setupActivityIndicator() {
    ...

    activityIndicator.snp.makeConstraints { (make) in
        make.centerX.equalTo(viewContainer)
        make.centerY.equalTo(viewContainer).offset(-containerViewHeight/2 - 20)
        make.width.equalTo(40)
        make.height.equalTo(self.activityIndicator.snp.width)
    }
}
The last line above has something new to teach us: When a SnapKit constraint has to be equal to another constraint of the same view, then we can access that constraint by using the snp property as shown here. The above makes sure that even if we set a different value for the width, we don’t care for the height; it will always be equal to the width.
The setupActivityIndicator() method is ready, so as usually let’s call it in the init():
init() {
    ...

    setupActivityIndicator()
}
It’s a good time now to test the demo app. The login view is ready and contains all of its subviews. While testing, change the device orientation from portrait to landscape, and see that all sizes and positions are being respected when the orientation gets changed.
Animating Constraints: Update a Single Constraint
As we’ll see right next, animating a SnapKit constraint is an easy thing to do. In most cases, including what we are about to do here, changing the offset value of the target constraint or constraints is just enough; other times the constraint should become equal to another value or constraint, different than the original one. No matter how a constraint will be animated, the first thing you should always have in mind is that you need to access the target constraint out of the closure where it’s being originally created.
Regarding our demo app specifically, our goal is to change the centerY constraint animated, so the viewContainer view is moved towards up if it’s overlapped by the keyboard when any of the textfields gets the focus. That centerY constraint is defined in the setupContainerView() method, where we configure the viewContainer view, as follows:
make.centerY.equalTo(self)
As there’s no way to have access to that constraint out of the closure where it’s made as it is right now, it’s necessary to change it a bit and keep it to a property that we can refer to later. So, please comment out the above line (or delete it), and replace it with the next one:
self.centerYConstraint = make.centerY.equalTo(self).constraint
The centerYConstraint is a class property, and it’s a Constraint object, a custom type that SnapKit defines. Accessing the constraint after setting the centerY constraint at the end of the above line and assigning it to the centerYConstraint is the only way to keep a reference to the centerY and use it at a later time. The above change might look strange, however since it’s a requirement for us to have access to the centerY constraint, there’s no other way.
Let’s leave the setupContainerView() method now, and let’s go to the handleKeyboardWillShow(notification:) which is called when the keyboard is about to appear. As a reminder, there are two lines of code in the init() method that enable the LoginView class to observe for two notifications regarding the keyboard: UIKeyboardWillShow and UIKeyboardDidHide. The first one is sent by the system right before the keyboard appears. The other right after it disappears.
Since we need to determine if the viewContainer view is overlapped by the keyboard, the first thing we have to do in the handleKeyboardWillShow(notification:) method is to get the keyboard frame. The following code does exactly that:
@objc func handleKeyboardWillShow(notification: Notification) {
    if let userInfo = notification.userInfo as? Dictionary {
        if let keyboardFrameValue = userInfo[UIKeyboardFrameEndUserInfoKey] as? NSValue {
            let keyboardFrame = keyboardFrameValue.cgRectValue

        }
    }
}
Next, let’s calculate the point where the viewContainer view ends:
@objc func handleKeyboardWillShow(notification: Notification) {
    if let userInfo = notification.userInfo as? Dictionary {
        if let keyboardFrameValue = userInfo[UIKeyboardFrameEndUserInfoKey] as? NSValue {
            let keyboardFrame = keyboardFrameValue.cgRectValue

            let containerViewOriginPlusHeight = viewContainer.frame.origin.y + viewContainer.frame.size.height
        }
    }
}
Having both the above values it’s easy to check if the keyboard overlaps the viewContainer view. All we have to do is to check if the containerViewOriginPlusHeight value is greater than the y origin point of the keyboard. After that, we can calculate the overlapped space:
@objc func handleKeyboardWillShow(notification: Notification) {
    if let userInfo = notification.userInfo as? Dictionary {
        if let keyboardFrameValue = userInfo[UIKeyboardFrameEndUserInfoKey] as? NSValue {
            ...

            if containerViewOriginPlusHeight > keyboardFrameValue.cgRectValue.origin.y {
                let overlappedSpace = containerViewOriginPlusHeight - keyboardFrame.origin.y

            }
        }
    }
}
And now the magical lines that will make the viewContainer view move animated. Our goal is to change the offset of the centerY constraint through the centerYConstraint property and apply a value equal to the calculated overlappedSpace. The offset will have a negative sign which indicates a movement towards top.
@objc func handleKeyboardWillShow(notification: Notification) {
    if let userInfo = notification.userInfo as? Dictionary {
        if let keyboardFrameValue = userInfo[UIKeyboardFrameEndUserInfoKey] as? NSValue {
            ...

            if containerViewOriginPlusHeight > keyboardFrameValue.cgRectValue.origin.y {
                let overlappedSpace = containerViewOriginPlusHeight - keyboardFrame.origin.y

                centerYConstraint.update(offset: -overlappedSpace)
                self.setNeedsLayout()

                UIView.animate(withDuration: 0.4, animations: {
                    self.layoutIfNeeded()
                })
            }
        }
    }
}
At first, we change the offset as said. Then we call the setNeedsLayout() of self to invalidate the current layout. Finally, and inside a UIView animation block, we call the layoutIfNeeded() method that forces our view to apply the new layout we want.
If we run the app at this point, we’ll see that the container view is repositioned animated when the keyboard appears. Feel free to go ahead and try it out. However, it’s important to revert the changes made above, because we don’t want the viewContainer view to stay in a position other than the center when the keyboard is dismissed. Let’s head to the handleKeyboardDidHide(notification:) method, and let’s set the original value to the offset of the centerY constraint: Zero. The combination of commands shown above remains the same:
@objc func handleKeyboardDidHide(notification: Notification) {
    centerYConstraint.update(offset: 0.0)
    self.setNeedsLayout()

    UIView.animate(withDuration: 0.4, animations: {
        self.layoutIfNeeded()
    })
}
That’s it. Let’s test again to see if the view returns back to its original position when the keyboard disappears:
Animating Constraints: Remaking and Updating
Sometimes updating one constraint only is not enough to give you the desired result, and remaking or updating the full set of constraints of a view is one-way road. With SnapKit we can easily recreate or update existing constraints, and if we combine such changes with an animated update of the layout we can produce beautiful effects.
In this part we’re going to learn how to remake constraints, and how to update them. The process for both is quite similar to what we’ve learnt already about making new constraints, with one exception only: We need to call different methods of the SnapKit API.
Note: In the following examples we are going to recreate all constraints of the two textfields, even though that’s not necessary. We would be fully covered by simply animating one constraint only as we did in the last part. However, and just for educational purposes, we’re going to stick to that approach so it’s possible to meet some additional features of SnapKit.
Before we proceed, let’s specify what our goal is. We want:
- The email textfield to move towards right and out of the visible area of the
viewContainerview. - The password textfield to move towards left and out of the visible area of the view.
- The activity indicator to move towards bottom and stay to the center of the
viewContainerview.
In terms of constraints, for each item of the above list that means:
- For the email textfield, the
leftconstraint must become equal to therightconstraint of theviewContainerview. - For the password textfield, the
rightconstraint must become equal to theleftof theviewContainerview. - For the activity indicator, the
centerYmust become equal to thecenterYof theviewContainerview.
All the rest of the constraints will remain as they currently are, but as underlined before, for the two textfields we’ll recreate them just to see the way this can be done.
We’ll work on the connect() method, and we’ll start implementing it by adding a necessary condition that checks if an animation is already in progress. If so, we’ll just return from the method and we won’t proceed to any further actions:
@objc func connect() {
    if isAnimating {
        return
    }

}
The isAnimating property is already declared in the LoginView class, and its default value has been set to false.
Let’s meet a new feature of the SnapKit API now, how to remake constraints that have been previously defined once. We’ll do that for both textfields:
@objc func connect() {
    ...

    txtEmail.snp.remakeConstraints { (make) in
        make.top.equalTo(viewTop.snp.bottom).offset(16)
        make.left.equalTo(viewContainer.snp.right)
        make.width.equalTo(txtEmail.snp.width)
        make.height.equalTo(textfieldHeight)
    }

    txtPassword.snp.remakeConstraints { (make) in
        make.right.equalTo(viewContainer.snp.left)
        make.top.equalTo(txtEmail.snp.bottom).offset(8.0)
        make.width.equalTo(txtPassword.snp.width)
        make.height.equalTo(textfieldHeight)
    }

}
In the above code we’re using a new method called remakeConstraints(). This one removes any previous constraints and adds the new ones to the target view. Look closely one by one each constraint, it’s fairly easy to understand what the new layout of the textfields should eventually be. Note something important: Use the remakeConstraints() if only you have previously created constraints, and if it’s necessary to remove all the existing ones. If you want to update some of the constraints but not all, right next you can see how to do that (alternatively follow what you learnt in the previous part):
@objc func connect() {
    ...

    activityIndicator.snp.updateConstraints { (make) in
        make.centerY.equalTo(viewContainer)
    }

}
With that addition in our method, we call the updateConstraints() and we update the centerY constraint of the activity indicator. In this particular case, we make it equal to the centerY of the viewContainer view. In our example we update one constraint only, however it would be totally possible to update more of the same view in the same closure if it was necessary to do so.
At this point we’ve specified the new layout rules we’d like to apply for the two textfields and the activity indicator when the Connect button is tapped. Animating the changes is already known from the last part:
@objc func connect() {
    ...

    self.setNeedsLayout()

    UIView.animate(withDuration: 0.5, animations: {
        self.layoutIfNeeded()
    }) { (finished) in

    }
}
Since we’re not going to perform a real login here, let’s add a Timer that will revert the changes we just made and will bring the login view to its original state 3 seconds later:
@objc func connect() {
    ...

    UIView.animate(withDuration: 0.5, animations: {
        self.layoutIfNeeded()
    }) { (finished) in
        if finished {
            self.timer = Timer.scheduledTimer(timeInterval: 3.0, target: self, selector: #selector(self.revertLoginView), userInfo: nil, repeats: false)
        }
    }
}
timer is a property already declared in the LoginView class. The above addition initialises it and makes it invoke the revertLoginView() after the period of 3 seconds.
There’s one last thing remaining to be done here, and that is to make the isAnimating flag true and indicate that an animation is in progress:
@objc func connect() {
    ...

    isAnimating = true
}
The app cannot be tested yet, because we have to implement the method we called right above, the revertLoginView(). In this one we’ll proceed in the exact way as we just did, meaning that we’ll recreate the constraints for the textfields setting their initial, original values, and we’ll update the centerY constraint of the activity indicator so it goes back to its original place. Next we’ll trigger the animation, and when it’s finished we’ll invalidate and make nil our timer. Finally, we’ll update the value of the isAnimating flag.
Here’s everything in one piece:
@objc func revertLoginView() {
    txtEmail.snp.remakeConstraints { (make) in
        make.top.equalTo(viewTop.snp.bottom).offset(16)
        make.left.equalTo(viewContainer).offset(8)
        make.right.equalTo(viewContainer).offset(-8)
        make.height.equalTo(textfieldHeight)
    }

    txtPassword.snp.remakeConstraints { (make) in
        make.top.equalTo(txtEmail.snp.bottom).offset(8.0)
        make.left.equalTo(txtEmail)
        make.right.equalTo(txtEmail)
        make.height.equalTo(textfieldHeight)
    }

    activityIndicator.snp.updateConstraints { (make) in
        make.centerY.equalTo(viewContainer).offset(-containerViewHeight/2 - 20)
    }

    self.setNeedsLayout()

    UIView.animate(withDuration: 0.5, animations: {
        self.layoutIfNeeded()
    }) { (finished) in
        if finished {
            self.timer.invalidate()
            self.timer = nil

            self.isAnimating = false
        }
    }
}
Run the app now and tap on the Connect button. The result should be similar to this:
Summary
Reaching to the end of this post, I hope you appreciated the benefits of using SnapKit for setting up your UI programmatically. From my point of view, the less and clearer code, as well as the simplicity it offers in combination to the final results consist of a well working recipe. On the other hand, that doesn’t mean that we should forget forever how to make constraints programmatically using any of the available iOS APIs. And there’s always the constant risk: It’s a third-party API, so one day may not be maintained any longer. But for as long as it’s there, it’s a really cool, developer friendly tool. And focusing on what we learnt here today, I can safely say that most of your needs are going to be covered. So, enjoy!
For your reference, you can download a final version of the demo project from GitHub.


