

Amongst all the features Xcode 7 incorporates, there is one that admittedly distinguishes; that is the new revolutionary, much better way to write code documentation. With the introduction of Xcode 7, developers can use the powerful Markdown syntax to apply rich text formatting to the text of their documentation, which in combination to specific keywords that indicate special parts (like parameters, function results, etc) can result to an amazing outcome. The new Markdown-enabled documentation style, as the new one has several advantages: It provides greater level for customizing the text, it’s more flexible, and of course, more interesting. However, if you’re still interested in the old-style documenting style, take a look in our previous tutorial.
Documenting the code is an extremely important task for every developer. Even though it seems that it stalls the development process, it’s actually a part of it. I won’t disagree that writing proper and comprehensive documentation for every single property, function, class, struct, or anything else that exists in a project is not an easy job. However by writing the proper documentation you can:
- Describe the purpose of the properties, functions and classes up to the level of detail that you desire. Moreover, it’s the best place to highlight specific conditions, cases or requirements for your functions that have to be noted somewhere.
- Highlight the input and output (parameters and return values) of your methods.
- Remember without any hassle what each function is meant to do and what each property is for when you revisit a project months after its initial implementation.
- Make it easy for other developers to understand how to use your code when you share it or make your own libraries.
- Produce professional-looking manuals using tools made for this reason (for example Jazzy).
The code documentation you write in Xcode can be previewed and accessed in three different ways:
- By Option/Alt-Clicking to the name of a property, method, class, etc. The Quick Look preview will pop up right above or below the name.
- By placing the cursor in the property, method or class name, and opening the Quick Help Inspector.
- By using third-party tools that will produce a manual for you. For example, Jazzy is such a tool, and we’ll discuss about it later on. By using it, your documentation is compiled in webpages and all together consist of a standalone website that is being created as a subfolder inside your project’s folder.
Code documentation is not made of stone; it has to be fluid and change according to modifications being made in the respective entities (properties, methods, classes, structs, enums). It’s almost a rule that if you don’t add the documentation by the time of the implementation of a new entity, then it’s almost certain that you’ll never do it. Therefore, try to get used to the habit of documenting your code in the proper timing, and give it any additional time it requires so you make it proper. It worths it.
The Markdown Syntax Basics
For making the best usage of the new documentation style it’s important that you have the bare minimum knowledge of the Markdown syntax. If you already know about it, you’re good to go, and of course to skip this step. You can find a lot of information about Markdown around the web and definitely your first search will return back to you several related results. For example, here and here you’ll find excellent sources to read about.
Although you can find other resources regarding the Markdown syntax, I find it necessary to mention at least the basics. It’s not my intention of course to provide a full guide on it; it’s just an effort to present the most common stuff of that specific syntax.
So, you probably know (or you just learn it right now) that the Markdown syntax is using special characters for formatting a text, for adding resources (like links and images) and for having special blocks of text (like ordered or unordered lists, or code blocks). Those characters are easy to remember, but you can always refresh your memory by searching the Internet or using the following list. It’d be interesting to underline here that if you get used to the Markdown syntax (and it’s actually easy to do that), then by using the proper editor you can produce documents in different formats, for example HTML pages, PDF documents and more. Speaking of HTML, Markdown supports inline HTML, meaning that you can type HTML tags directly into your text, and they will be rendered properly. However, using HTML is not the essence of Markdown, so let’s stick to its own syntax.
Getting into the point now, here’s a list of the most common Markdown syntax:
- #text#: It makes the text a header, equal to the <H1> in HTML. Two # characters will result in <H2> header, and so on until the <H6> header. The ending # character(s) is (are) optional.
- **text**: It turns the text between the asterisks in bold.
- *text*: It turns the text between the asterisks in italics.
- * text: It creates an unordered list of items, also known as a bullet list (note that there’s a space character between the asterisk and the text). Alternatively, you can use either the “+” or the “-” character instead of the asterisk. To wrap list items with hanging indent use up to three spaces after the asterisk (or any of the other two) symbol.
- 1. text: It creates an ordered list of items (numbered list).
- [linked text](http://some-url.com): It converts the text into a link.
- > text: It creates a blockquote.
- Use four (4) spaces or one tab to indicate that you’re writing a code block. It’s the equal of the <pre></pre> tag in HTML. If you want to add indentation then add another set of 4 space characters or 1 tab character.
- If you don’t want to mess with spaces or tabs, then include your code in “`” (back ticks) characters. For example, `var myProperty` will result to this:
var myProperty. - Another way to create code blocks is to add four back tick symbols (“`”), then start in the following line to write the code, and after the last line of code add another set of four back ticks (“`”).
- Use the backslash to avoid using a special character as part of the Markdown syntax. For example, /**this/** will not result in a bold word.
The above represent the most important elements you need to know about the Markdown syntax. However, there are more than those, and on top of that, there are additional details for each one of those shown above. It’s up to you to look up for more information, but what I just gave you is sufficient to let you get started using the Markdown syntax.
If you find Markdown interesting, then for starters fetch a free editor (online or a Mac app) and go for a try. If the editor you’ll find provides a real-time preview, then you’ll be watching whatever you type being converted into HTML straight away, so you’ll be able to see the outcome instantly.
Using Markdown
There are specific rules that should be followed when documenting any kind of entity in Swift. You can document properties (variables and constants), methods, functions, classes, structs, enums, protocols, extensions, and any other code structure or entity you can think of. The documentation block should be always written right before the declaration or the header line of the entity, and each row shall start either with 3 slashes (///) or everything should be included in a code block like the one shown below:
/**

*/
Double slashes (//) will result in a commented line too, but they’ll be ignored by Xcode and they won’t render any documentation at all. Use double slashes inside your various code blocks (for example, the body of a method), but for documenting an entire entity use what I mentioned above.
Let’s see the first simple example using the Markdown syntax. In the following snippet we’re documenting a single property, and right after you see a screenshot of the quick help for that property. I’d advice you to open a new Playground in Xcode and try out there all the examples you’ll find here.
/// This is an **awesome** documentation line for a really *useful* variable.
var someVar = "This is a variable"
The above will lead to this:
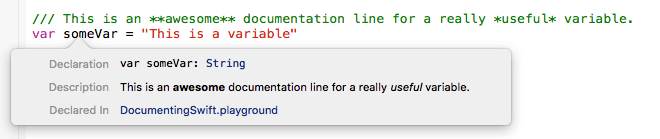
Note that the word “awesome” is in bold because it’s surrounded by double asterisks, while the word “useful” is in italics because a simple set of asterisks surround it.
Let’s go to another example, this time using a function:
/**
    It calculates and returns the outcome of the division of the two parameters.

    ## Important Notes ##
    1. Both parameters are **double** numbers.
    2. For a proper result the second parameter *must be other than 0*.
    3. If the second parameter is 0 then the function will return nil.

*/
func performDivision(number1: Double, number2: Double) -> Double! {
    if number2 != 0 {
        return number1 / number2
    }
    else {
        return nil
    }
}
If you copy-paste the above in your playground and then you Option-Click on the function’s name, here’s what the Quick Help will show:
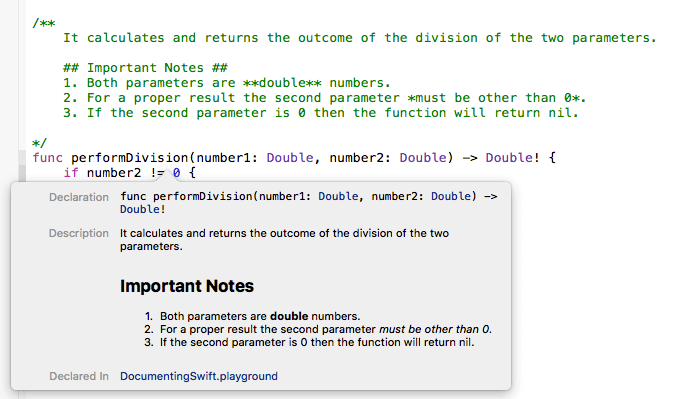
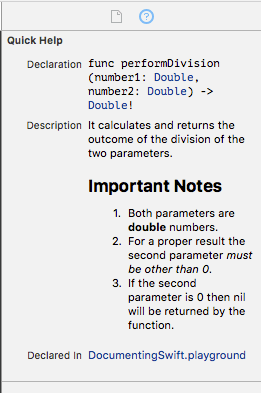
Here we are using two new Markdown elements, the header and the ordered list. Also, we have words in bold and italics in the items of the ordered list. Notice how easy it is to have rich text format in your documentation just by using the special characters that the Markdown requires. Here’s how the above is shown in the Quick Help Inspector:
In the next one, we’re adding a code block as part of the documentation for our function. Note that except for just creating a block, the back tick symbol (`) is used to mark the function’s name inline.
/**
    It doubles the value given as a parameter.

    ### Usage Example: ###
    ````
    let single = 5
    let double = doubleValue(single)
    print(double)
    ````

    * Use the `doubleValue(_:)` function to get the double value of any number.
    * Only ***Int*** properties are allowed.
*/
func doubleValue(value: Int) -> Int {
    return value * 2
}
And here’s the outcome:

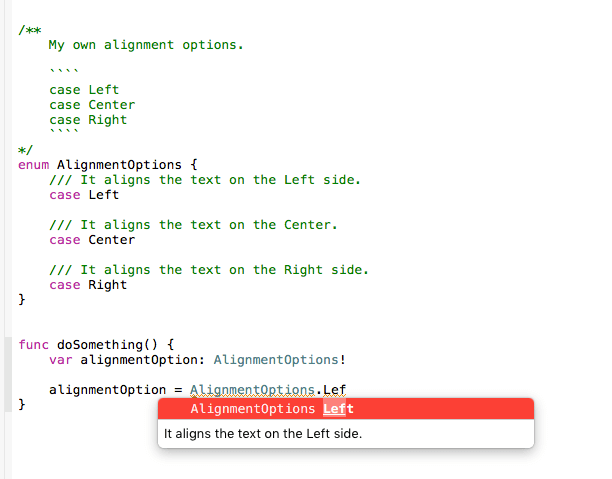
Finally, let’s add some documentation to an enum and then let’s use it in the body of another function. The interesting in this case is the way each case of the enum gets documented:
/**
    My own alignment options.

    ````
    case Left
    case Center
    case Right
    ````
*/
enum AlignmentOptions {
    /// It aligns the text on the Left side.
    case Left

    /// It aligns the text on the Center.
    case Center

    /// It aligns the text on the Right side.
    case Right
}


func doSomething() {
    var alignmentOption: AlignmentOptions!

    alignmentOption = AlignmentOptions.Left
}
Now, when using any of the enum’s cases, Xcode will show the documentation we wrote for the respective case:
Using Keywords
Using the Markdown syntax is just the one side of the coin when documenting your Swift code. Obviously, rich text format is awesome and can result to a nice documentation but definitely there’s something missing if we stop there. So now we are coming to the other side of the coin, which is the use of keywords.
When using a keyword, Xcode automatically applies a default formatting to the it when renders the documentation (the same happens with third-party libraries that produce documentation). Keywords are useful to point out common parts for the code structures you write documentation for, and to make them distinguish. For example, there are keywords for highlighting the parameters of a method, the returning value, the author of a class, or the version of a function. The list is big, and of course not all keywords are equally handful. Most probably, some of them will be used rarely. However, the most common ones are those that you should definitely keep in mind, and as for the rest, you can always look them up.
By having said the above, it’s about time to get started exploring some keywords through simple examples. The first one regards the parameters (arguments) that a method or function can accept:
/**
    This is an extremely complicated method that concatenates the first and last name and produces the full name.

    - Parameter firstname: The first part of the full name.
    - Parameter lastname: The last part of the fullname.
*/
func createFullName(firstname: String, lastname: String) {
    let fullname = "\(firstname) \(lastname)"
    print(fullname)
}
The above will look like this:
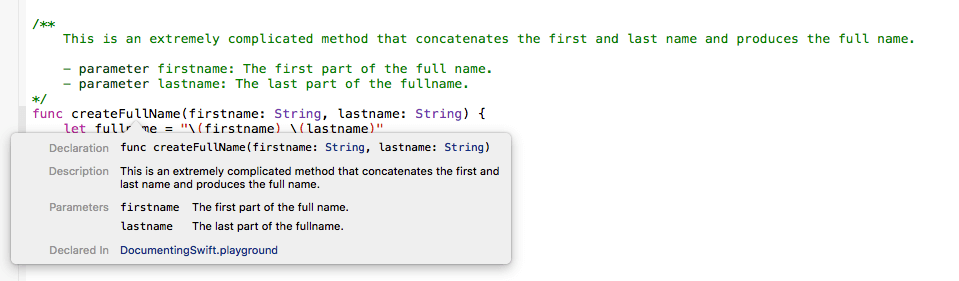
Notice that the dash (-) symbol precedes the keyword, and a space character exists between the dash and the keyword itself. What follows is the name of the actual parameter with a description regarding it. Note that you should mandatorily write as many parameter keywords as the actual parameters in the method exist (along with the proper descriptions).
Let’s modify a little bit the above function now, and let’s make it return the full name instead of just printing it. For that case, we are adding a new keyword to the documentation that describes the value that the function returns:
/**
    This is an extremely complicated method that concatenates the first and last name and produces the full name.

    - Parameter firstname: The first part of the full name.
    - Parameter lastname: The last part of the fullname.
    - Returns: The full name as a string value.
*/
func createFullName(firstname: String, lastname: String) -> String {
    return "\(firstname) \(lastname)"
}
And here’s the result:
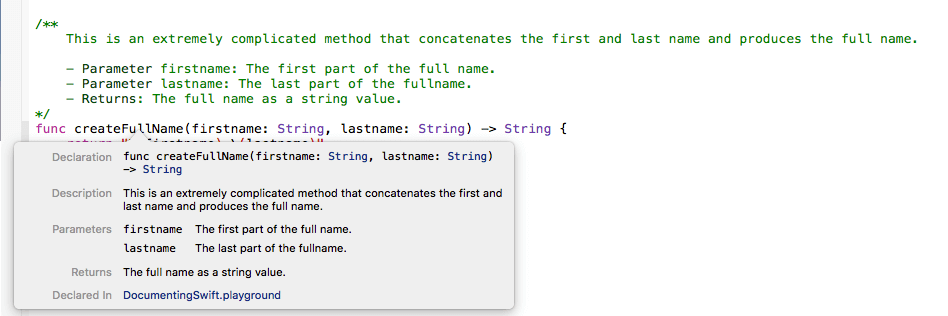
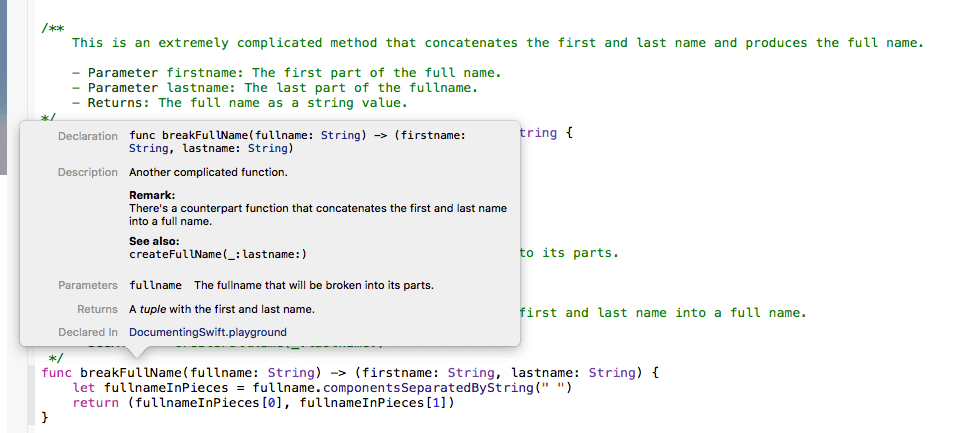
The above two different keywords (parameter and returns) are those that you’ll be using the most, but let’s don’t stop here. The following function performs the exact opposite operation than the previous one, and breaks a full name into its components (first and last name):
/**
    Another complicated function.

    - Parameter fullname: The fullname that will be broken into its parts.
    - Returns: A *tuple* with the first and last name.

    - Remark:
        There's a counterpart function that concatenates the first and last name into a full name.

    - SeeAlso:  `createFullName(_:lastname:)`

*/
func breakFullName(fullname: String) -> (firstname: String, lastname: String) {
    let fullnameInPieces = fullname.componentsSeparatedByString(" ")
    return (fullnameInPieces[0], fullnameInPieces[1])
}
The new elements above are the Remark and the SeeAlso keywords. By using the first one you can highlight any important or special points regarding the code you document and you want to attract the reader’s attention (or your attention at a later time). The SeeAlso keyword is used mostly to make references to other parts of code (for example, in this example we make a reference to the previous function), or to provide links with real URLs. The Quick Help in Xcode will display this:
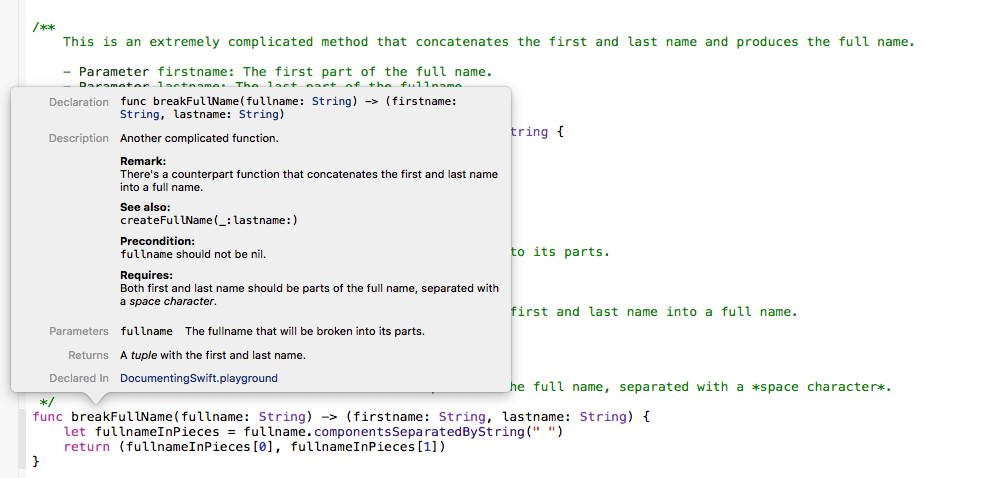
Imagine now that the above function is part of a library that you share with other developers. Trying to be as good as possible to you job, you want to let anybody who’ll use that function know two facts (or requirements): That the fullname parameter should not be nil, and that both first and last name should be included in the full name, separated with a space character, so the function to properly work. In that case you can use two other keywords, called Precondition and Requires. Let’s update the documentation of the above function as shown next:
/**
    Another complicated function.

    - Parameter fullname: The fullname that will be broken into its parts.
    - Returns: A *tuple* with the first and last name.

    - Remark:
        There's a counterpart function that concatenates the first and last name into a full name.

    - SeeAlso:  `createFullName(_:lastname:)`

    - Precondition: `fullname` should not be nil.
    - Requires: Both first and last name should be parts of the full name, separated with a *space character*.

*/
func breakFullName(fullname: String) -> (firstname: String, lastname: String) {
    let fullnameInPieces = fullname.componentsSeparatedByString(" ")
    return (fullnameInPieces[0], fullnameInPieces[1])
}
Looking into the future, you might be willing to note down changes that you plan to do in the future:
- Todo: Support middle name in the next version.
You can also add warnings, version, author, even notes when documenting your code:
/**
    Another complicated function.

    - Parameter fullname: The fullname that will be broken into its parts.
    - Returns: A *tuple* with the first and last name.

    - Remark:
        There's a counterpart function that concatenates the first and last name into a full name.

    - SeeAlso:  `createFullName(_:lastname:)`

    - Precondition: `fullname` should not be nil.
    - Requires: Both first and last name should be parts of the full name, separated with a *space character*.

    - Todo: Support middle name in the next version.

    - Warning: A wonderful **crash** will be the result of a `nil` argument.

    - Version: 1.1

    - Author: Myself Only

    - Note: Too much documentation for such a small function.
 */
func breakFullName(fullname: String) -> (firstname: String, lastname: String) {
    let fullnameInPieces = fullname.componentsSeparatedByString(" ")
    return (fullnameInPieces[0], fullnameInPieces[1])
}
And here’s the output in the Quick Help:

You understand from the above that the detail level you can go up to depends on you. Important and vital parts of code should be definitely documented like the function shown in the previous snippet, however for less significant segments writing just the basics could be enough.
Apple provides a really wonderful documentation page where all the available keywords are listed, but not only; If you follow the links and the sections provided there, you’ll find detailed guidelines regarding the Markdown syntax as well. Don’t miss it, definitely pay a visit here.
Producing Documentation Pages With Jazzy
Jazzy is great tool that can produce an Apple-style documentation for your code written either in Swift or in Objective-C. Actually, Jazzy creates a stand-alone website that can contain every part of your code along with the documentation you’ve written in it. It’s command-line utility, but yet really easy to be used.
I’m not going into the details of how Jazzy works; just visit its page on the GitHub and you’ll find all the information you need. You’ll also find its requirements, and the installation method. It’s actually a straightforward process: All you have to do is to:
- Open your Terminal.
- Type:
[sudo] gem install jazzy. - Enter your password.
- Wait…
To make it easy to you to try Jazzy out, I’ve prepared a small app that you can download here. It’s a really, simple (and not that useful at the same time) app, that is based on our examples in the previous part. It composes a first and last name into the full name, and it breaks a full name into its parts.
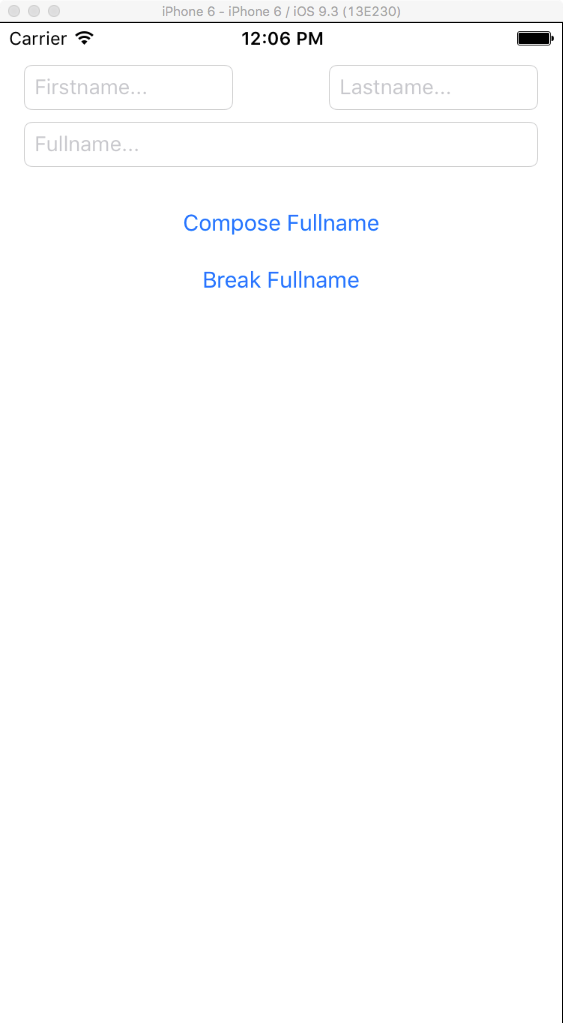
In that app I’ve added code documentation similarly to what we were discussing previously. Even though that app is just for demonstration, whatever you see here applies in a greater scale as well, and not only to classes, methods and properties. It also applies to structs, enums, extensions, protocols and more.
Supposing that you’ve downloaded the app by now, let’s see how Jazzy is used. Initially, go to the project’s folder in terminal using the cd command:
cd path_to_project_folder
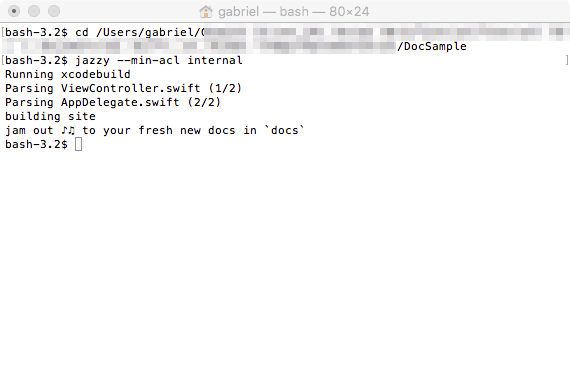
In the simplest case scenario, all you have to do is to type Jazzy, and sit back to wait until Jazzy finishes its job. However, this will not include classes or other structures that have not been marked as public. Therefore, if you want to include everything, just type this:
jazzy --min-acl internal
Additionally, if you don’t have the most recent version of Swift and you see no results by Jazzy, then you can simply specify the Swift version your Xcode supports by adding another parameter to the above:
jazzy --swift-version 2.1.1 --min-acl internal
I’d strongly advice to type jazzy —help and see all the available parameters that you can use with Jazzy. Definitely you’ll find some useful switches there that will enable you to bring the final result to your own preferences.
Proceeding to the generation of the documentation pages, here’s what you should see once the whole process has finished.
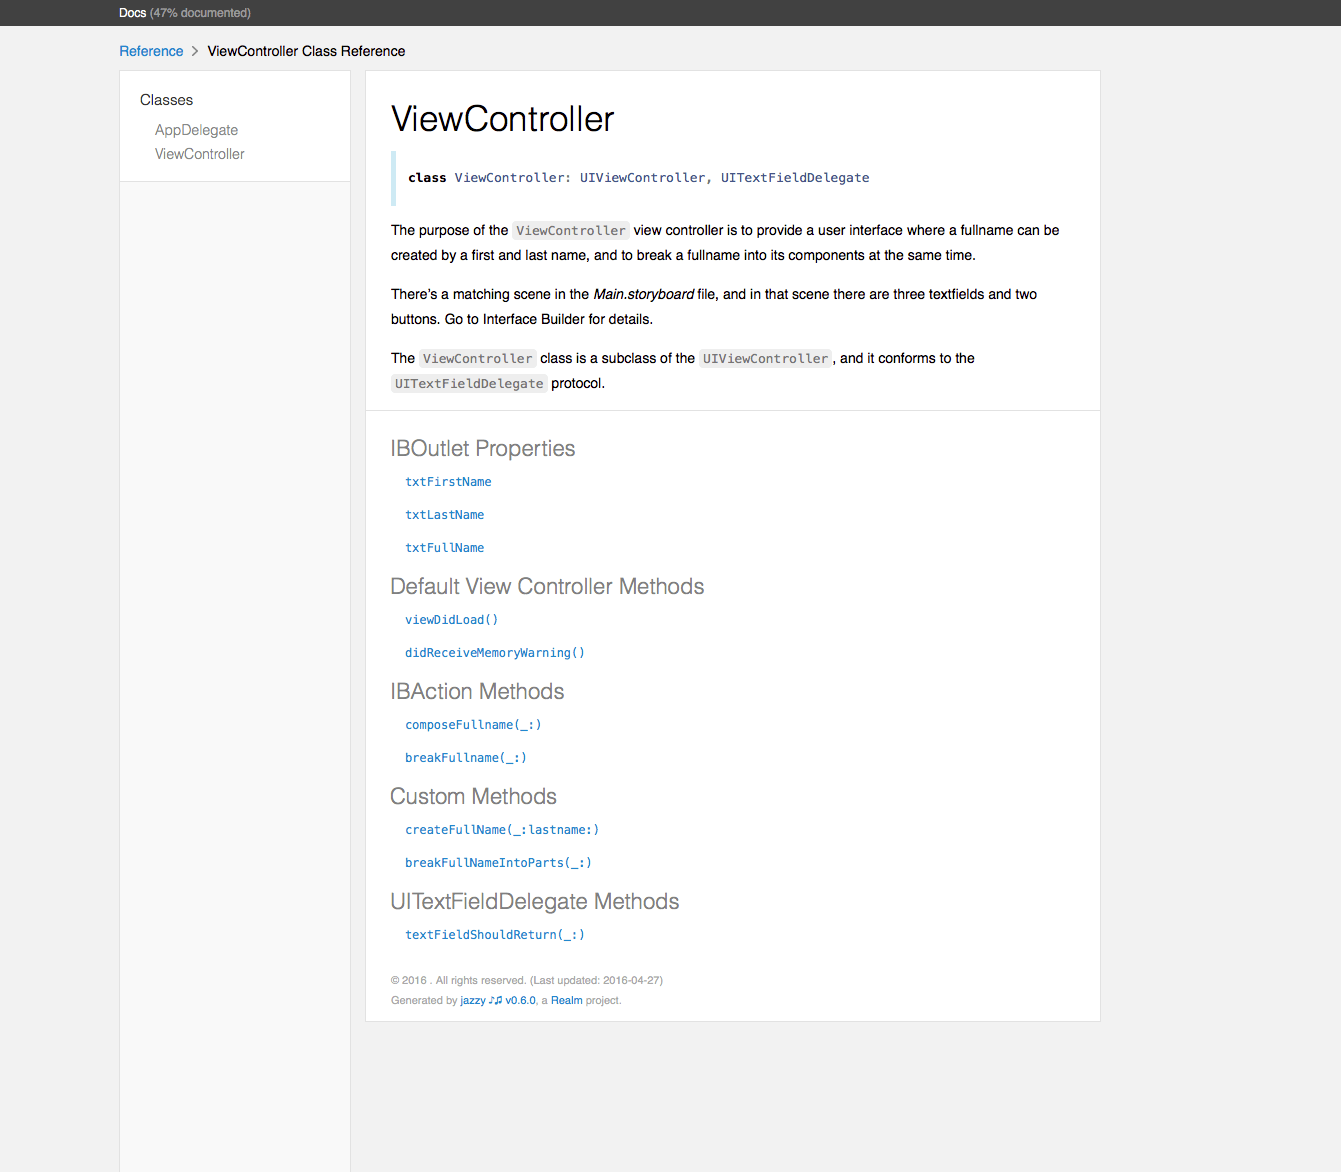
The default output folder is called docs and resides in the project’s root folder (you can change that if you want).
Use Finder to go there, and open the index.html page in your browser. You will immediately notice that the default style of the generated pages is similar to Apple’s documentation. Navigate yourself around by clicking to the links and see how the documentation is being displayed. After that, try to use Jazzy in your own projects.
Summary
Documenting the code is a necessary and important task, but it’s easily overlooked mostly due to the lack of time most developers face. When there are deadlines regarding the project delivery, and when there are bugs that have to be fixed in a short period of time it’s hard to have the chance to properly document each part of the project. However, I hope through this post that you’ve realized the importance of it, so try to keep writing documentation as much as possible. You don’t have to write down the maximum amount of possible details, but at least highlight the important information that another developer or you after some period of time would need to know so you can continue building upon the existing code. And besides that don’t forget that you there is Jazzy to generate professional-looking documentation for your code. Maybe that would work as a motivation too! Happy code documenting to all!


