

I recently received a question from a friend regarding barcode generation using Swift. The CoreImage framework provides convenient built-in APIs for creating various types of barcodes, including QR codes. In this tutorial, we’ll explore how you can leverage SwiftUI and these powerful APIs to develop your very own barcode generator.
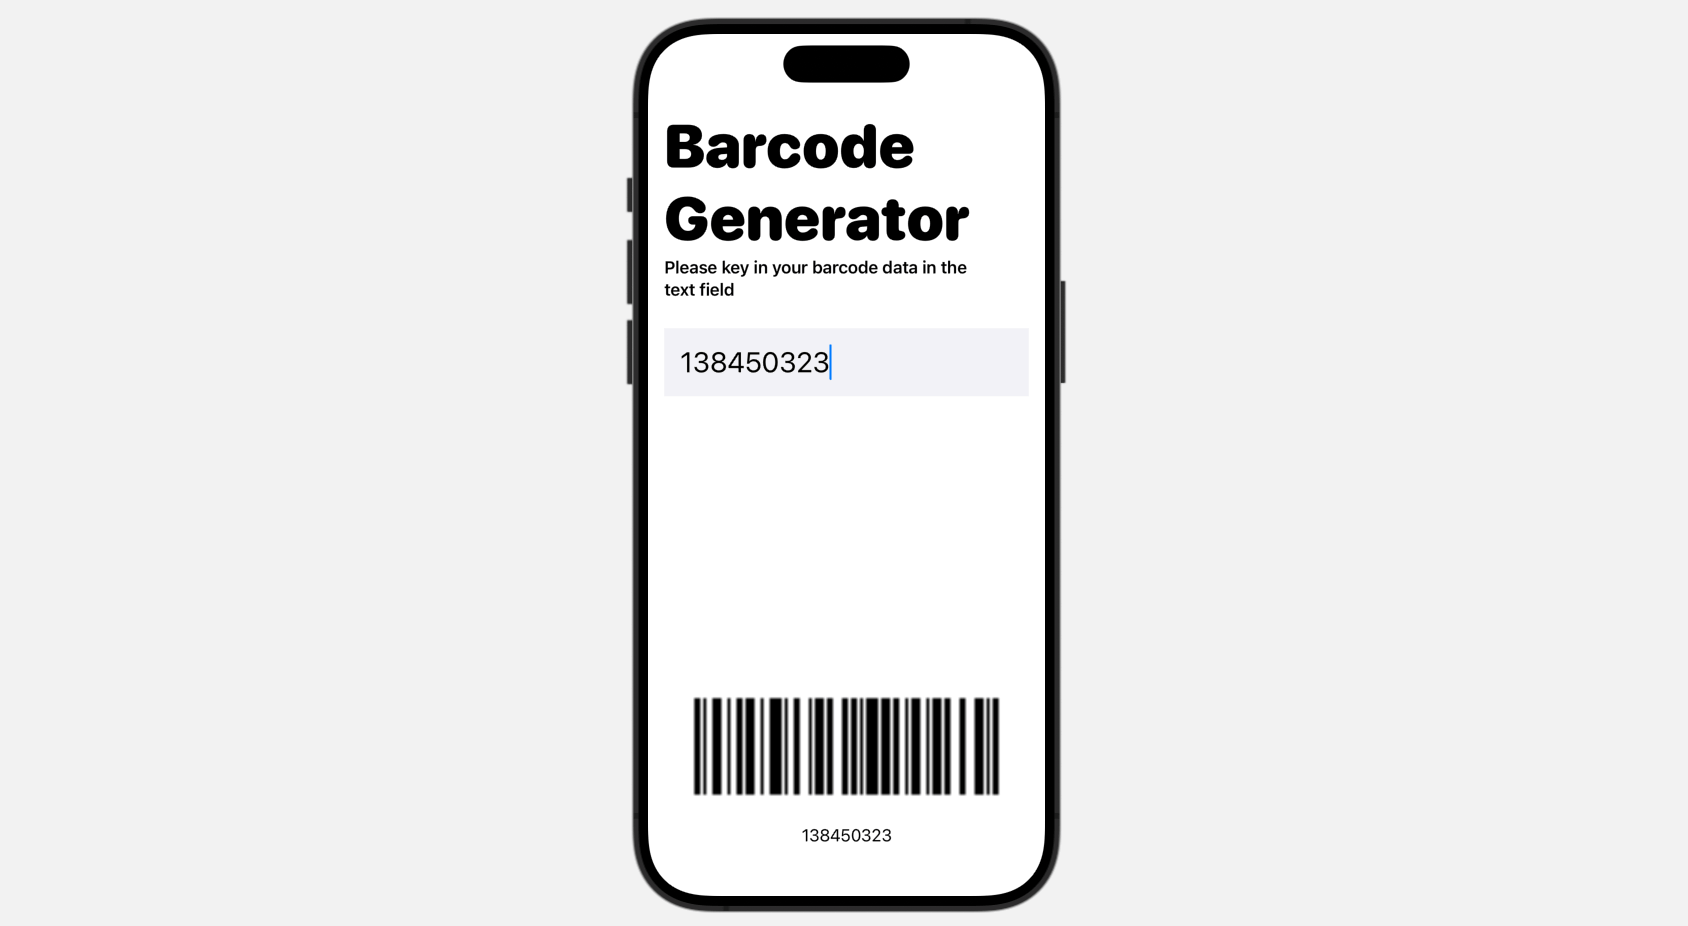
Let’s first take a look at the final result. It’s a very elementary barcode generation app with simple UIs. When you enter text into the designated field, the app instantly generates the corresponding barcode using the Code 128 format, which is used for alphanumeric or numeric-only barcodes.
Creating the Barcode Generator
Assuming you have created a new SwiftUI project in Xcode, open the ContentView.swift file. Start by importing the required package for using the filters:
import CoreImage.CIFilterBuiltinsNext, we create a BarcodeGenerator struct for generating the barcode:
struct BarcodeGenerator {
    let context = CIContext()
    let generator = CIFilter.code128BarcodeGenerator()

    func generateBarcode(text: String) -> Image {
        let generator = CIFilter.code128BarcodeGenerator()
        generator.message = Data(text.utf8)

        if let outputImage = generator.outputImage,
           let cgImage = context.createCGImage(outputImage, from: outputImage.extent) {

            let uiImage = UIImage(cgImage: cgImage)

            return Image(uiImage: uiImage)
        }

        return Image(systemName: "barcode")

    }
}
To create the barcode, we declare two variables: the context and the Code 128 generator. If you explore the CIFilter class, you will discover other code generators such as the QR code generator and the Aztec code generator. However, for this demonstration, we will focus on using the Code 128 barcode generator.
The generateBarcode method accepts a string input and returns the generated barcode image. Within the method, we first initialize the code128BarcodeGenerator and assign the input text to its message property. As the message property expects Data, we convert the input text to Data. Subsequently, we retrieve the generated barcode image from the outputImage property of the generator.
Since the resulting image is of type CIImage, we utilize the createCGImage method of the context to convert it to a CGImage. We then proceed with additional steps to convert it into an Image.
Building the User Interface
Now that we have finished building the barcode generator, let’s move on to developing the user interface for displaying the barcode image.
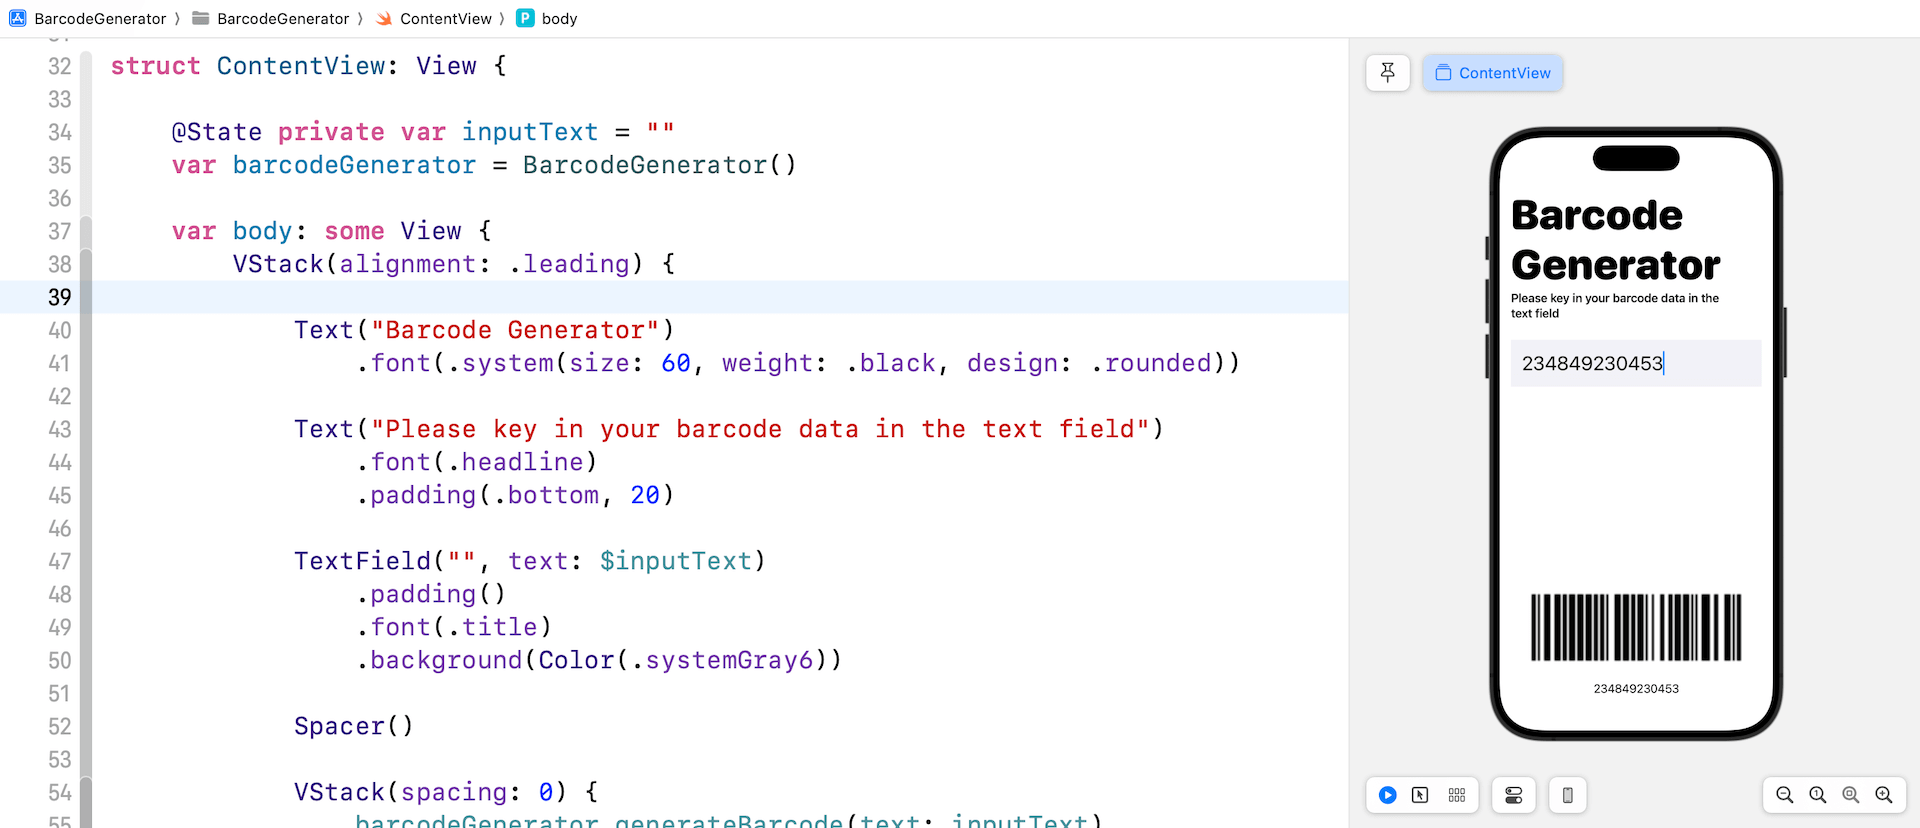
First, declare the following properties in ContentView for the input text and the barcode generator:
@State private var inputText = ""
var barcodeGenerator = BarcodeGenerator()
For the user interface, let’s keep it simple and lay out all the views in a VStack like this:
VStack(alignment: .leading) {

    Text("Barcode Generator")
        .font(.system(size: 60, weight: .black, design: .rounded))

    Text("Please key in your barcode data in the text field")
        .font(.headline)
        .padding(.bottom, 20)

    TextField("", text: $inputText)
        .padding()
        .font(.title)
        .background(Color(.systemGray6))

    Spacer()

    VStack(spacing: 0) {
        barcodeGenerator.generateBarcode(text: inputText)
            .resizable()
            .scaledToFit()

        Text(inputText.isEmpty ? "Unknown data" : inputText)
    }

}
.padding()
On the screen, we have a text field that captures user input. Towards the bottom of the screen, the app displays the generated barcode. In case there is no user input, we show a default image with the caption “Unknown data.”
That’s it! You should now be able to test the app in the preview pane. Simply enter any text in the text field, and the app will automatically generate the barcode on the fly.
Summary
This tutorial provides a comprehensive guide on building a barcode generator using the CoreImage framework and SwiftUI. While the focus is on creating a Code 128 barcode, you can easily modify the code to support multiple types of barcodes including QR codes.


