

Earlier, we showed you how to use ImageRenderer to capture a SwiftUI view and save it as an image. This new class, introduced in iOS 16, can also let you convert a view into a PDF document.
In this tutorial, we will build on the top of the previous demo and add the Save to PDF function. To follow this tutorial, please use Xcode 14 beta 3 (or up).
Revisit the Demo App
If you haven’t read the previous tutorial, I suggest you to check it out first. It already covered the basics of ImageRenderer and explained the implementation of the demo app.
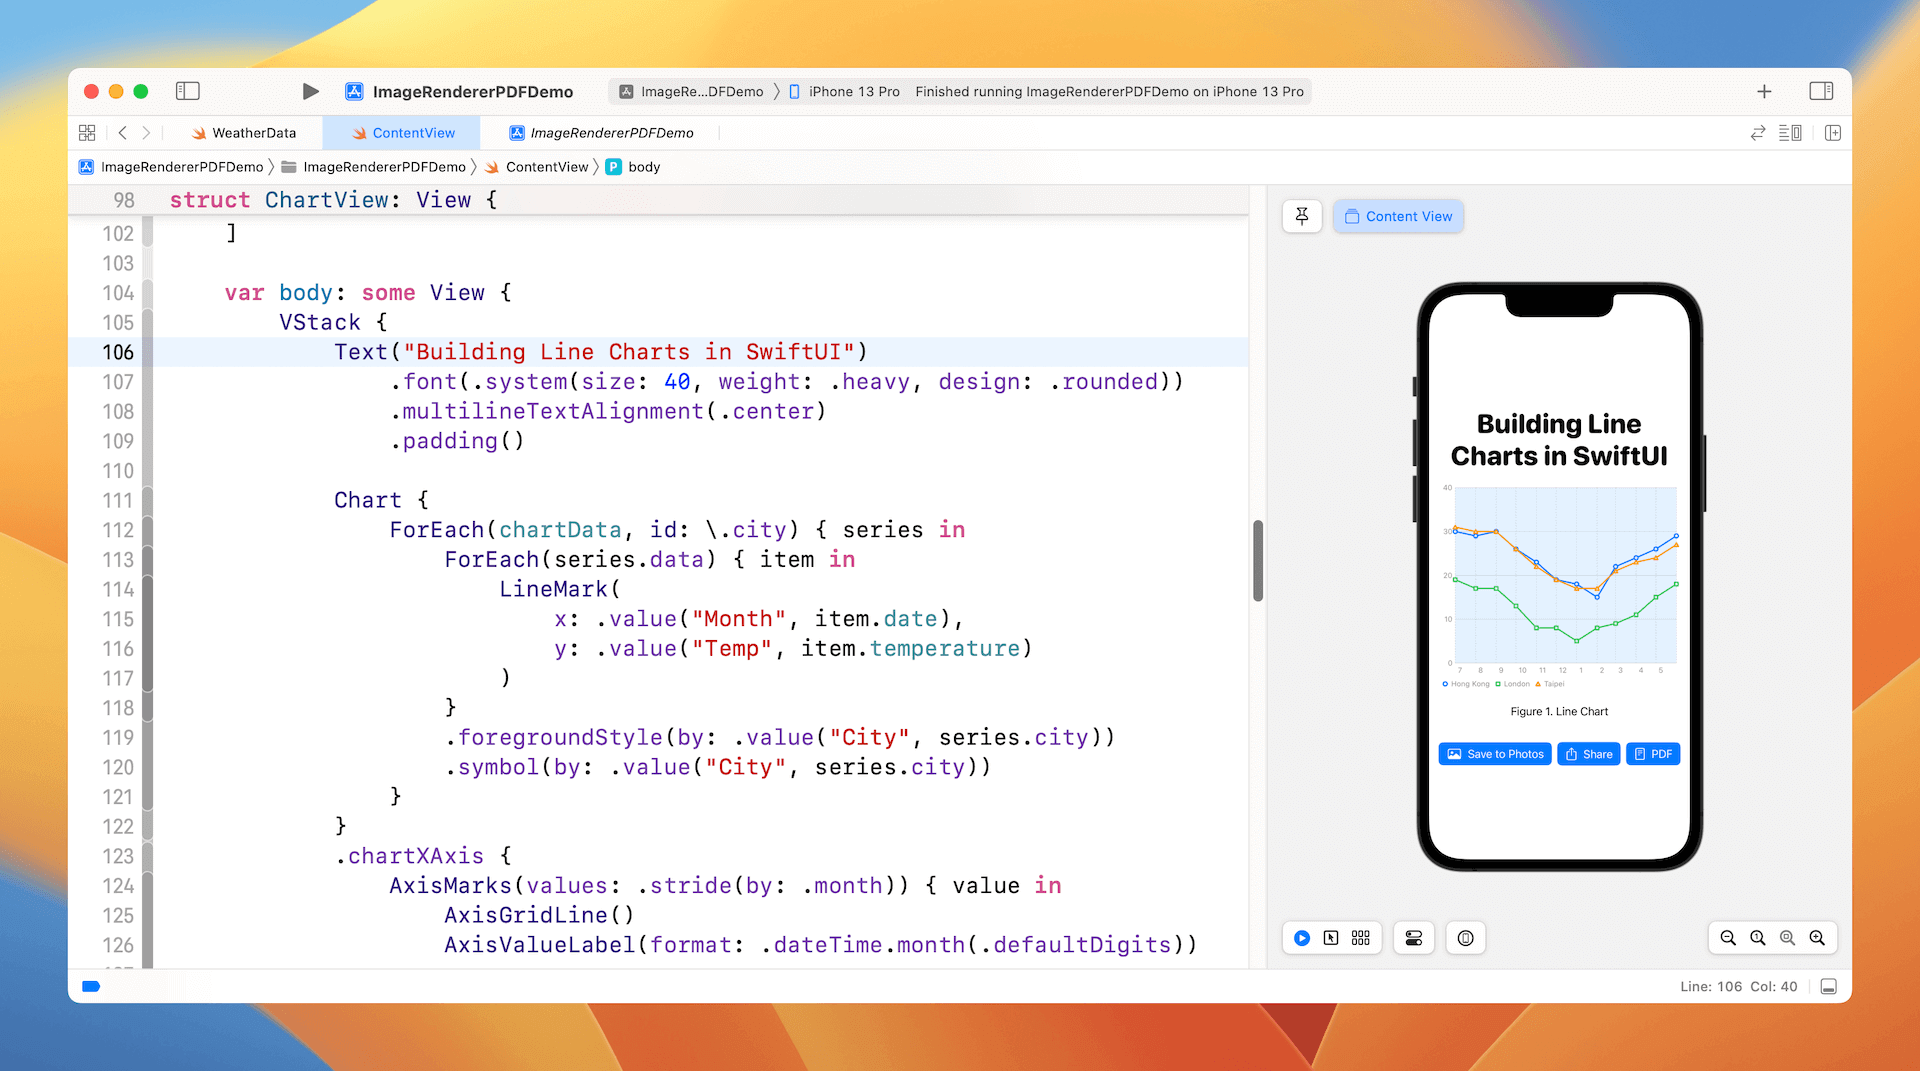
I have made some modifications to the demo app by adding a heading and a caption for the line chart. The demo app now also comes with a PDF button for saving the chart view in a PDF document. You can refer to the code of the ChartView struct below:
struct ChartView: View {
    let chartData = [ (city: "Hong Kong", data: hkWeatherData),
                      (city: "London", data: londonWeatherData),
                      (city: "Taipei", data: taipeiWeatherData)
    ]

    var body: some View {
        VStack {
            Text("Building Line Charts in SwiftUI")
                .font(.system(size: 40, weight: .heavy, design: .rounded))
                .multilineTextAlignment(.center)
                .padding()

            Chart {
                ForEach(chartData, id: \.city) { series in
                    ForEach(series.data) { item in
                        LineMark(
                            x: .value("Month", item.date),
                            y: .value("Temp", item.temperature)
                        )
                    }
                    .foregroundStyle(by: .value("City", series.city))
                    .symbol(by: .value("City", series.city))
                }
            }
            .chartXAxis {
                AxisMarks(values: .stride(by: .month)) { value in
                    AxisGridLine()
                    AxisValueLabel(format: .dateTime.month(.defaultDigits))

                }

            }
            .chartPlotStyle { plotArea in
                plotArea
                    .background(.blue.opacity(0.1))
            }
            .chartYAxis {
                AxisMarks(position: .leading)
            }
            .frame(width: 350, height: 300)

            .padding(.horizontal)

            Text("Figure 1. Line Chart")
                .padding()

        }
    }
}
Saving the Chart View as a PDF Document Using ImageRenderer
What we are going to do is to create a PDF document for the ChartView using ImageRenderer. While it only takes a couple lines of code to convert a SwiftUI view into an image, we need a little more work for PDF rendering.
For image conversion, you can access the uiImage property to get the rendered image. To draw the chart into a PDF, we will use the render method of ImageRenderer. Here is what we are going to implement:
- Look for the document directory and prepare the rendered path for the PDF file (e.g. linechart.pdf).
- Prepare an instance of
CGContextfor drawing. - Call the
rendermethod of the renderer to render the PDF document.
For the implementation, we create a new method named exportPDF. Below is the code of the method :
@MainActor
private func exportPDF() {
    guard let documentDirectory = FileManager.default.urls(for: .documentDirectory, in: .userDomainMask).first else { return }

    let renderedUrl = documentDirectory.appending(path: "linechart.pdf")

    if let consumer = CGDataConsumer(url: renderedUrl as CFURL),
       let pdfContext = CGContext(consumer: consumer, mediaBox: nil, nil) {

        let renderer = ImageRenderer(content: chartView)
        renderer.render { size, renderer in
            let options: [CFString: Any] = [
                kCGPDFContextMediaBox: CGRect(origin: .zero, size: size)
            ]

            pdfContext.beginPDFPage(options as CFDictionary)

            renderer(pdfContext)
            pdfContext.endPDFPage()
            pdfContext.closePDF()
        }
    }

    print("Saving PDF to \(renderedUrl.path())")
}
The first two lines of the code retrieves the document directory of the user and set up the file path of the PDF file (i.e. line chart.pdf). We then create the instance of CGContext. The mediaBox parameter is set to nil. In this case, Core Graphics uses a default page size of 8.5 by 11 inches (612 by 792 points).
The renderer closure receives two parameters: the current size of the view, and a function that renders the view to the CGContext. To begin the PDF page, we call the context’s beginPDFPage method. The renderer method draws the chart view. And remember that you need to close the PDF document to complete the whole operation.
To call this exportPDF method, we create a PDF button like this:
Button {
    exportPDF()
} label: {
    Label("PDF", systemImage: "doc.plaintext")
}
.buttonStyle(.borderedProminent)
You can run the app in a simulator to have a test. After you tap the PDF button, you should see the following message in the console:
Saving PDF to /Users/simon/Library/Developer/CoreSimulator/Devices/CA9B849B-36C5-4608-9D72-B04C468DA87E/data/Containers/Data/Application/04415B8A-7485-48F0-8DA2-59B97C2B529D/Documents/linechart.pdfIf you open the file in Finder, you should see a PDF document like below.
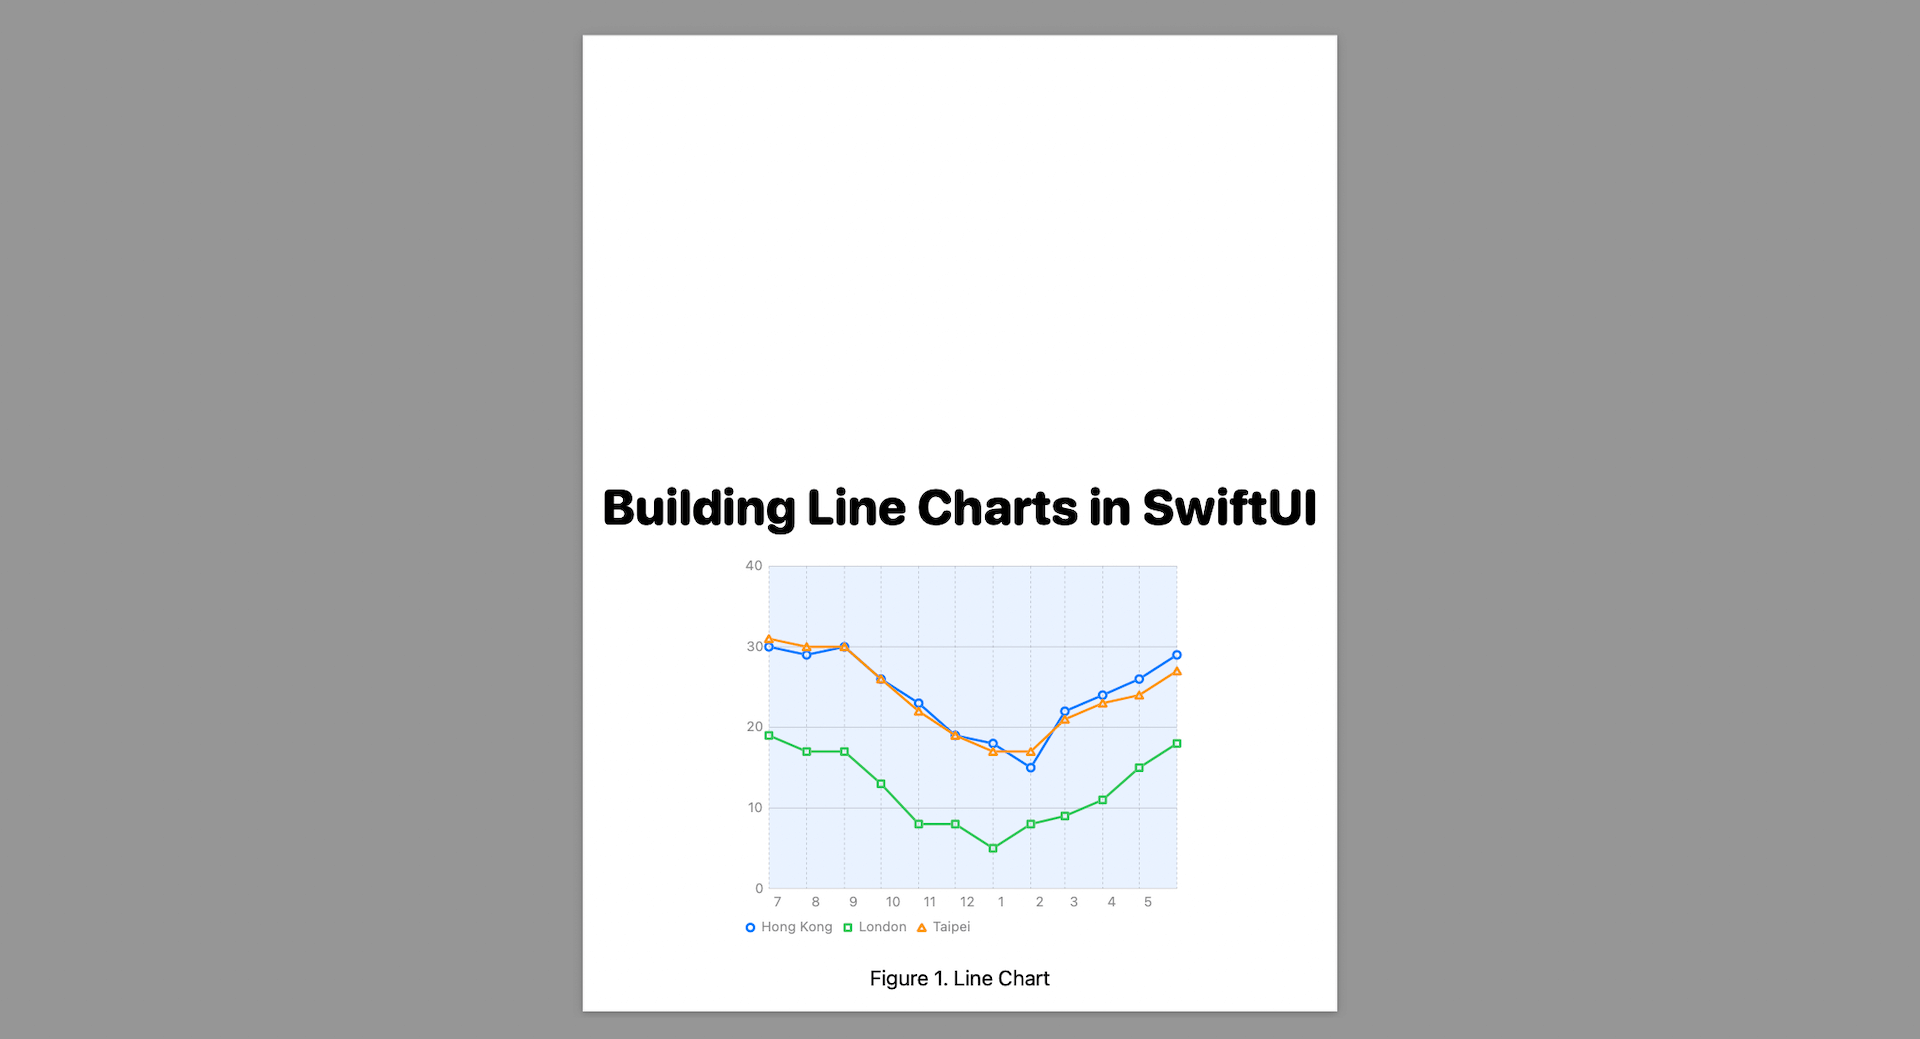
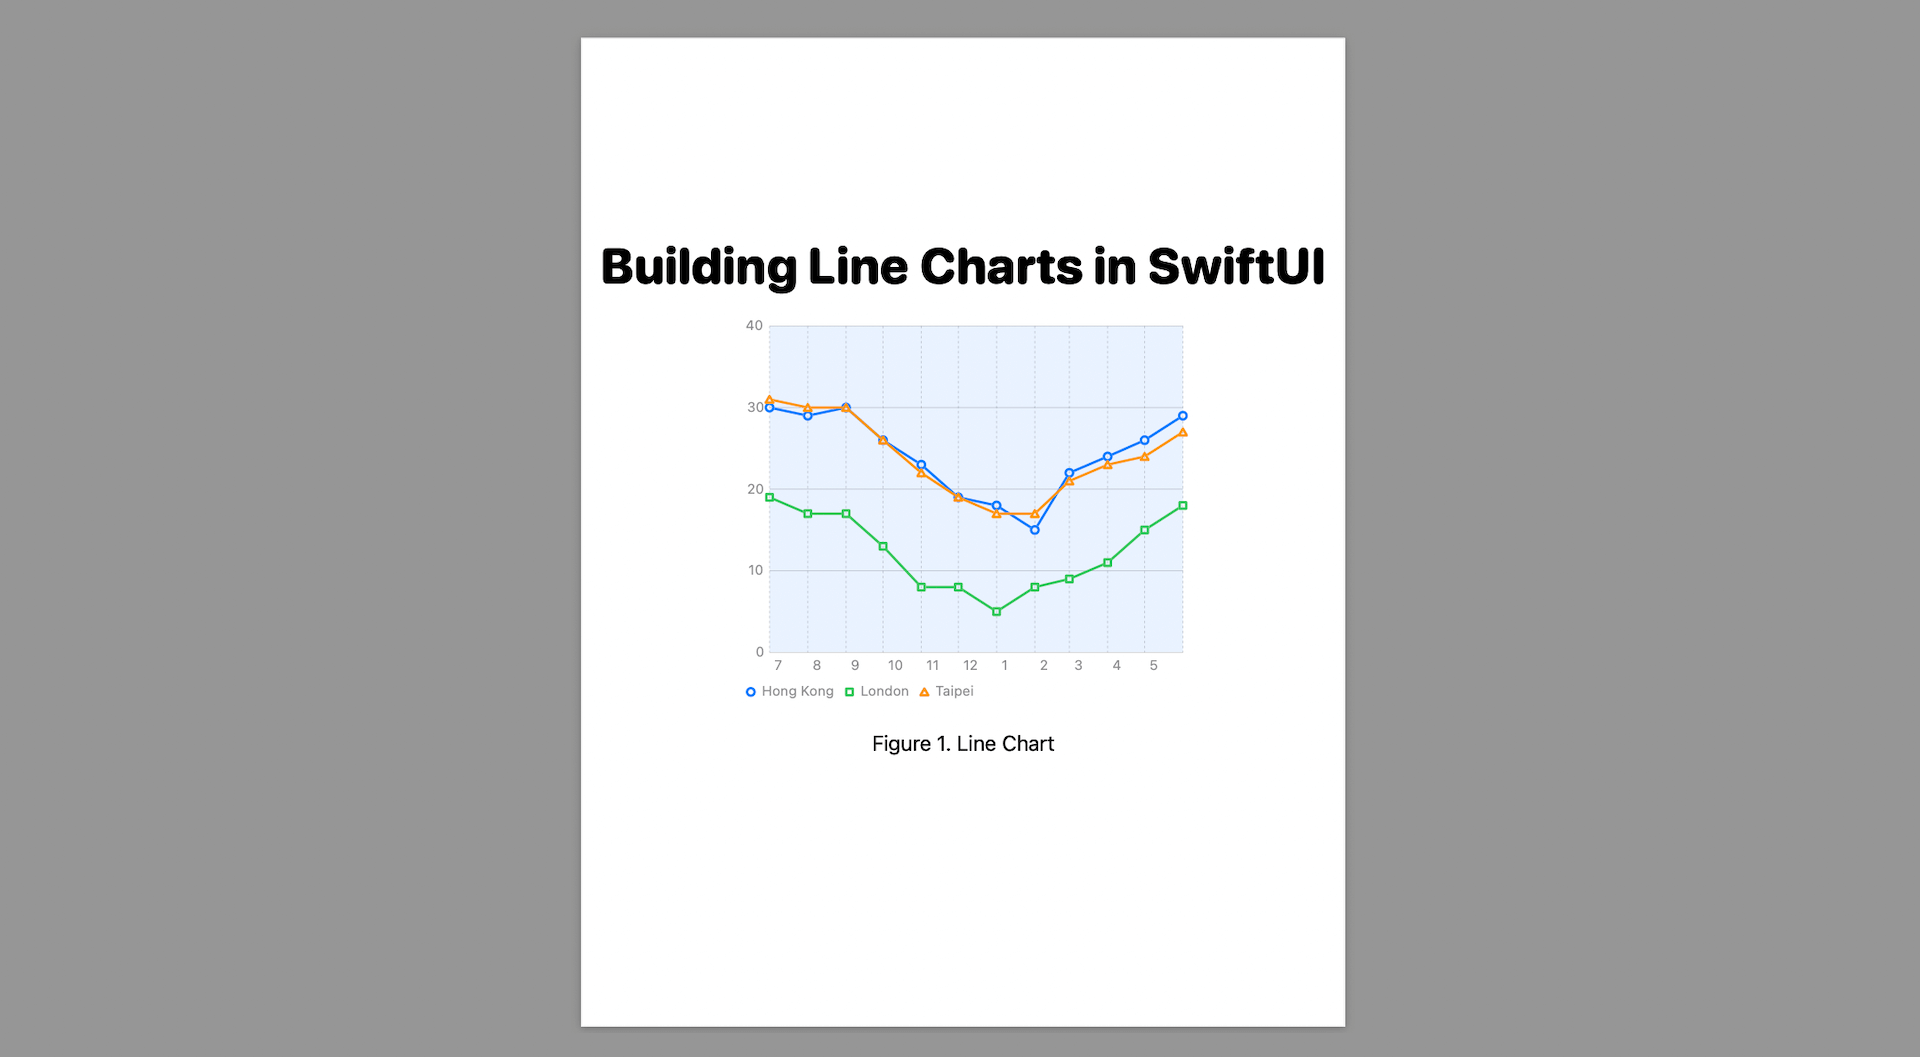
To adjust the position of the drawing, you can insert this line of code before calling renderer:
pdfContext.translateBy(x: 0, y: 200)This will move the chart to the upper part of the document.
Make the PDF file available to the Files app
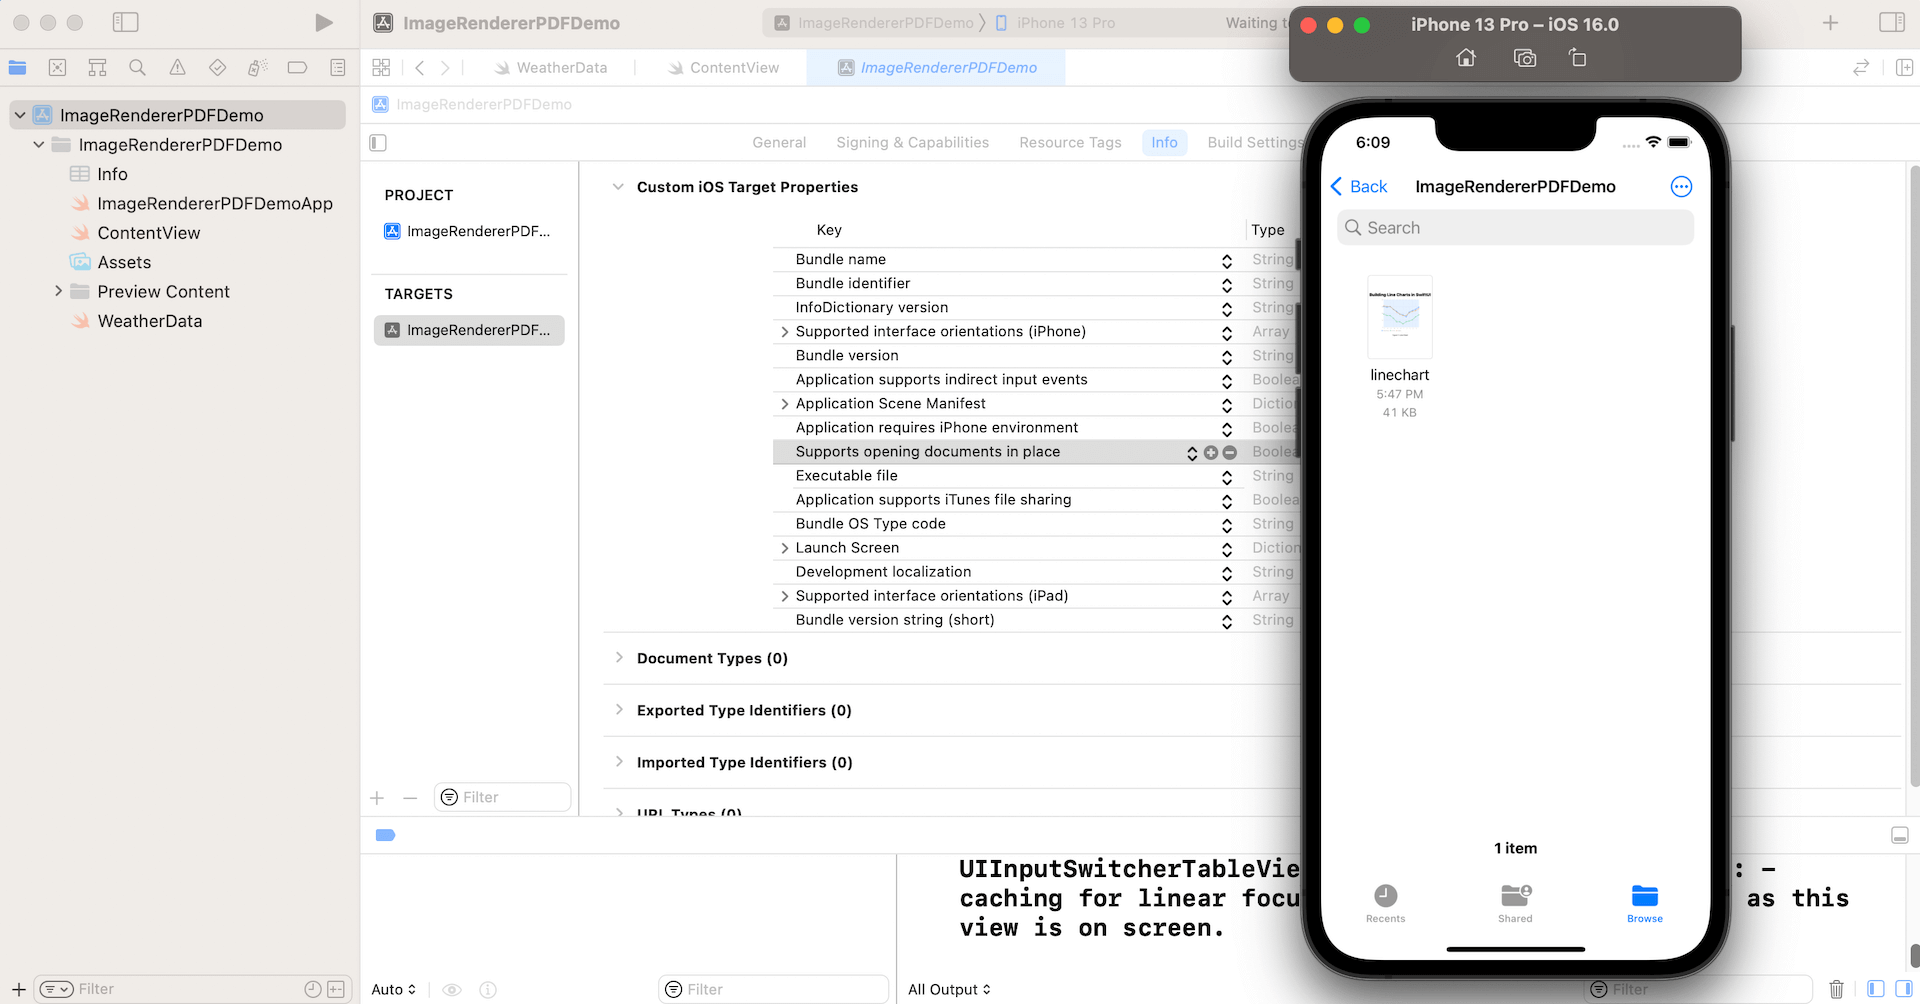
You may wonder why the PDF file can’t be found in the Files app. Before you can make the file available to the built-in Files app, you have to change a couple of the settings in Info.plist. Switch to Info.plist and add the following keys:
UIFileSharingEnabled– Application supports iTunes file sharingLSSupportsOpeningDocumentsInPlace– Supports opening documents in place
Set the value of the keys to Yes. Once you enable both options, run the app on the simulator again. Open the Files app and navigate to the On My iPhone location. You should see the app’s folder. Inside the folder, you will find the PDF document.
If you are interested in diving deeper into SwiftUI, check out our Mastering SwiftUI book.


