

When the SwiftUI framework was first released, developers are required to wrap the MKMapView class in order to embed a map in a SwiftUI application. With the release of Xcode 12, the latest version of SwiftUI provides a native SwiftUI Map view for you to display a map interface . Optionally, you can display annotations using the built-in annotation views such as MapMarker.
In this tutorial, I will show you how to use the Map structure in SwiftUI and create annotations at a specific locations on the map.
Displaying a Map View in SwiftUI
By referring the documentation of Map, you should find the following init method of the structure:
init(coordinateRegion: Binding<MKCoordinateRegion>, interactionModes: MapInteractionModes = .all, showsUserLocation: Bool = false, userTrackingMode: Binding<MapUserTrackingMode>? = nil) where Content == _DefaultMapContentTo work with Map, you need to provide a binding of MKCoordinateRegion that keeps track of the region to display on the map. The MKCoordinateRegion structure lets you specify a rectangular geographic region centered around a specific latitude and longitude.
Here is an example:
MKCoordinateRegion(center: CLLocationCoordinate2D(latitude: 40.75773, longitude: -73.985708), span: MKCoordinateSpan(latitudeDelta: 0.05, longitudeDelta: 0.05))The coordinates in the above sample is the GPS coordinates of Times Square in New York. The value of span is used to define your desired zoom level of the map. The smaller the value, the higher is the zoom level.
To embed a map in SwiftUI, you first need to import the MapKit framework:
import MapKitAnd then declare a state variable to keep track of the map region like this:
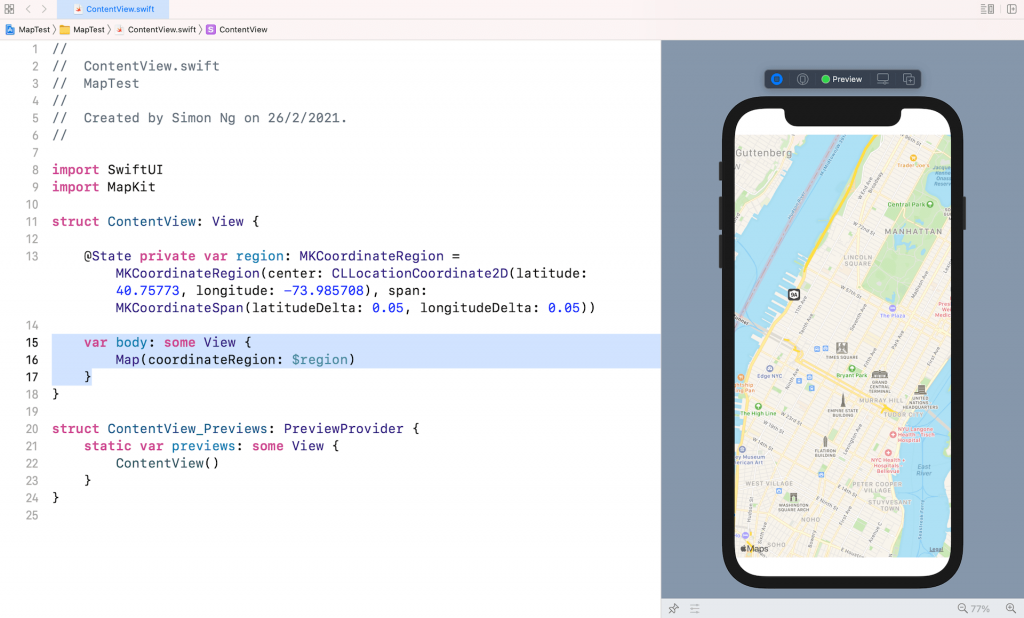
@State private var region: MKCoordinateRegion = MKCoordinateRegion(center: CLLocationCoordinate2D(latitude: 40.75773, longitude: -73.985708), span: MKCoordinateSpan(latitudeDelta: 0.05, longitudeDelta: 0.05))Lastly, you use the Map structure and pass it with the binding of region:
var body: some View {
    Map(coordinateRegion: $region)
}
The preview should show render a map interface that centered around Times Square in New York.
If you want to display a full screen map, you can attach the following modifier to Map:
Map(coordinateRegion: $region)
    .edgesIgnoringSafeArea(.all)
The init method provides several optional parameters. By default, the map allows users to pan and zoom. If you want to disable user interactions of the map, you can pass an empty array for the interactionModes parameter like this:
Map(coordinateRegion: $region, interactionModes: [])To display the user’s location on the map, you can set the value of showsUserLocation to true:
Map(coordinateRegion: $region, interactionModes: [], showsUserLocation: true)The map even lets you follow the user’s location by passing a binding of MapUserTrackingMode like this:
Map(coordinateRegion: $region, interactionModes: [], showsUserLocation: true, userTrackingMode: .constant(.follow))Displaying an Annotation on Maps
Let’s read the API documentation of Map. You will find another initializer for displaying a map with annotations:
init<Items, Annotation>(coordinateRegion: Binding<MKCoordinateRegion>, interactionModes: MapInteractionModes = .all, showsUserLocation: Bool = false, userTrackingMode: Binding<MapUserTrackingMode>? = nil, annotationItems: Items, annotationContent: @escaping (Items.Element) -> Annotation) where Content == _DefaultAnnotatedMapContent<Items>, Items : RandomAccessCollection, Annotation : MapAnnotationProtocol, Items.Element : IdentifiableIt’s very similar to the previous initializer but this one accepts a collection of annotations that each annotation should conform to the Identifiable protocol.
Now let’s first define a structure for the annotation item:
struct AnnotatedItem: Identifiable {
    let id = UUID()
    var name: String
    var coordinate: CLLocationCoordinate2D
}
This structure is used to hold the name and the coordinate of the annotation. Most importantly, it conforms to the Identifiable protocol.
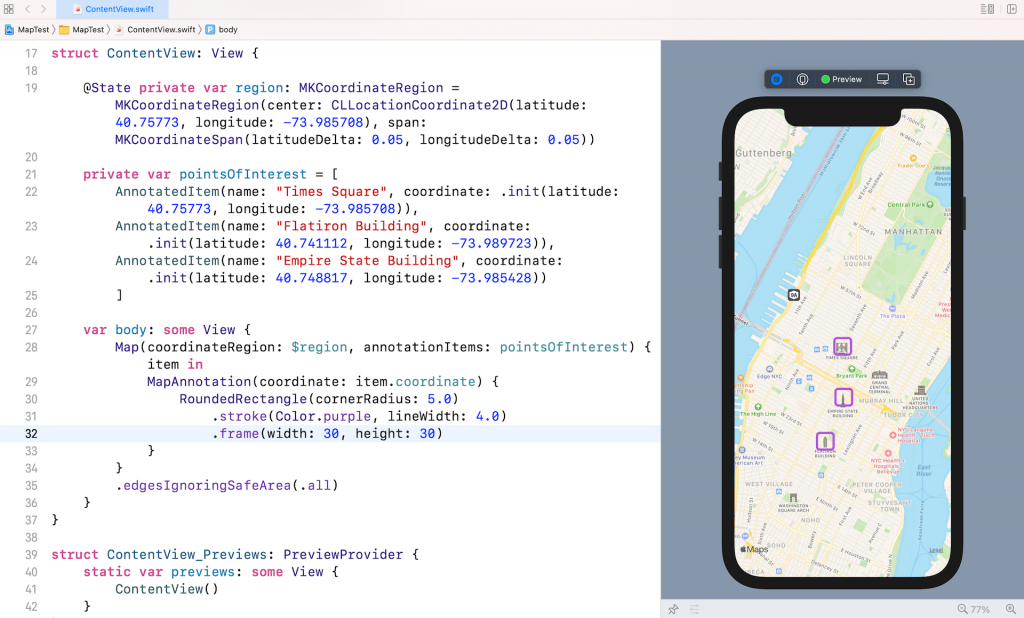
As an example, we define an array of point of interests in ContentView:
private var pointsOfInterest = [
    AnnotatedItem(name: "Times Square", coordinate: .init(latitude: 40.75773, longitude: -73.985708)),
    AnnotatedItem(name: "Flatiron Building", coordinate: .init(latitude: 40.741112, longitude: -73.989723)),
    AnnotatedItem(name: "Empire State Building", coordinate: .init(latitude: 40.748817, longitude: -73.985428))
    ]
To display the annotations, you just need to specify the array when instantiating the map like this:
Map(coordinateRegion: $region, annotationItems: pointsOfInterest) { item in
    MapMarker(coordinate: item.coordinate, tint: .red)
}
.edgesIgnoringSafeArea(.all)
MapMarker is one of the built-in annotation views that marks a specific location using a balloon-shaped. Alternatively, you can use MapPin to pinpoint the location.

You can even create your custom annotation by using MapAnnotation. Here is an example:
MapAnnotation(coordinate: item.coordinate) {
    RoundedRectangle(cornerRadius: 5.0)
        .stroke(Color.purple, lineWidth: 4.0)
        .frame(width: 30, height: 30)
}
The annotations appear as a rounded rectangle. The possibilities are endless. You are free to create your own annotation view.
Where to go from here
It’s great to see Apple to bring a native Map view to SwiftUI. I hope you now understand how to embed a map interface in your iOS app. If you want to dive deeper into the SwiftUI framework, you can further check out our Mastering SwiftUI book.


