

Prior to iOS 16, if you need to display a photo picker for users to choose photos from Photo library, you have to rely on PHPickerViewController or the older UIImagePickerController of UIKit. It’s not difficult to use it as you can integrate UIKit components with UIViewControllerRepresentable. That said, it would be great if the SwiftUI framework comes with a native view for photo picker.
In iOS 16, Apple finally brings PhotosPicker to SwiftUI that it has the same functionalities as its UIKit counterpart. If your app will only support device running iOS 16 or up, you can use this new view for handling photo selections.
Let’s see how it works with some sample code. Please note that you need to use Xcode 14 beta 4 to follow this tutorial.
Using PhotosPicker in SwiftUI
The PhotosPicker view is bundled in the PhotosUI framework. Before using it, you have to first import the framework:
import PhotosUINext, we declare a state variable to hold the selected photo:
@State private var selectedItem: PhotosPickerItem?It’s pretty easy to bring up the photos picker. Here is the basic usage of PhotosPicker:
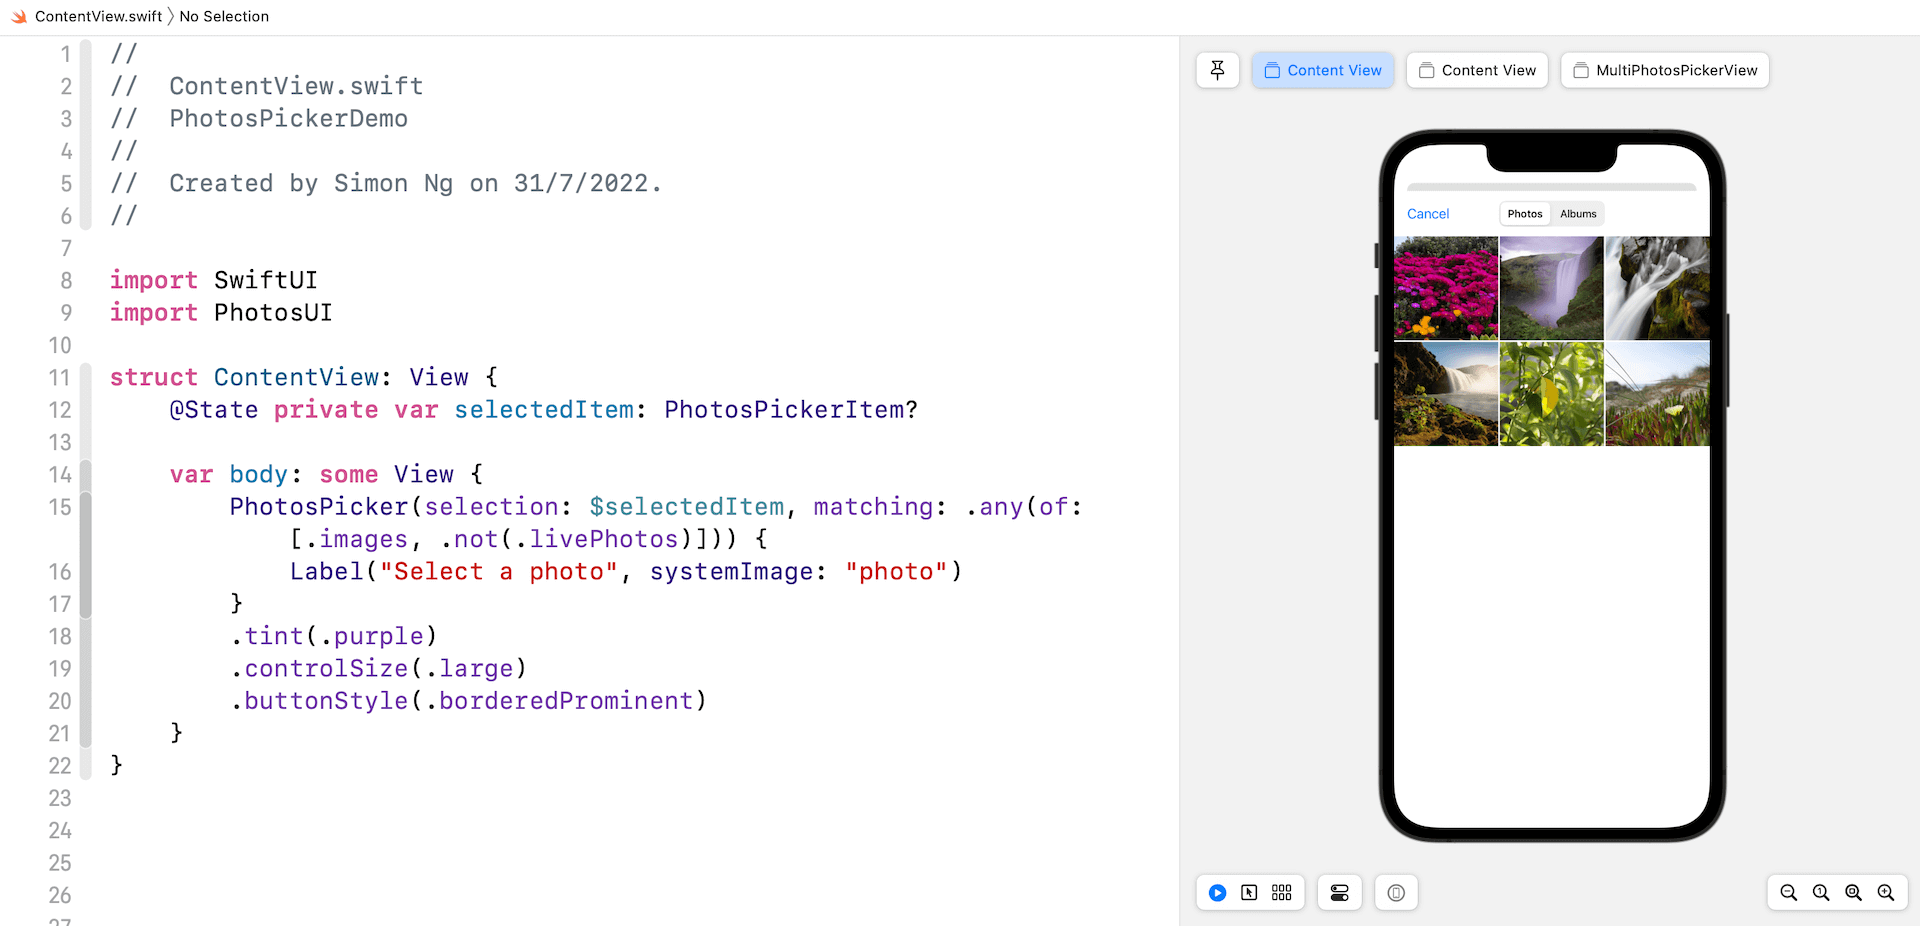
PhotosPicker(selection: $selectedItem, matching: .images)) {
    Label("Select a photo", systemImage: "photo")
}
.tint(.purple)
.controlSize(.large)
.buttonStyle(.borderedProminent)
You instantiate PhotosPicker by passing it a binding to the selected item and a photo filter. In the closure, you describe the appearance of the button. With a few lines of code, Xcode should show you a button in the preview.

If you click the button, it displays a Photos picker for choosing images from the photo library. When you choose a photo, the photo picker automatically dismisses and the selected photo item is stored in the selectedItem variable.
Filtering the Photos
The matching parameter lets you specify the photo filter to apply to the photo library. In the code above, we set its value to .images to show images only. If you want to display both images and videos, set the value of the parameter to the following:
.any(of: [.images, .videos])The .images filter includes all images in the user’s photo library. What if you want to exclude live photos from the image set? You can set the value like this:
.any(of: [.images, .not(.livePhotos)])You use the .not filter to exclude Live Photos.
Handling the Photo Selection
As mentioned earlier, the selected photo is automatically stored in the selectedItem variable, which has a type of PhotoPickerItem. So, how can we load the photo and display it on screen?
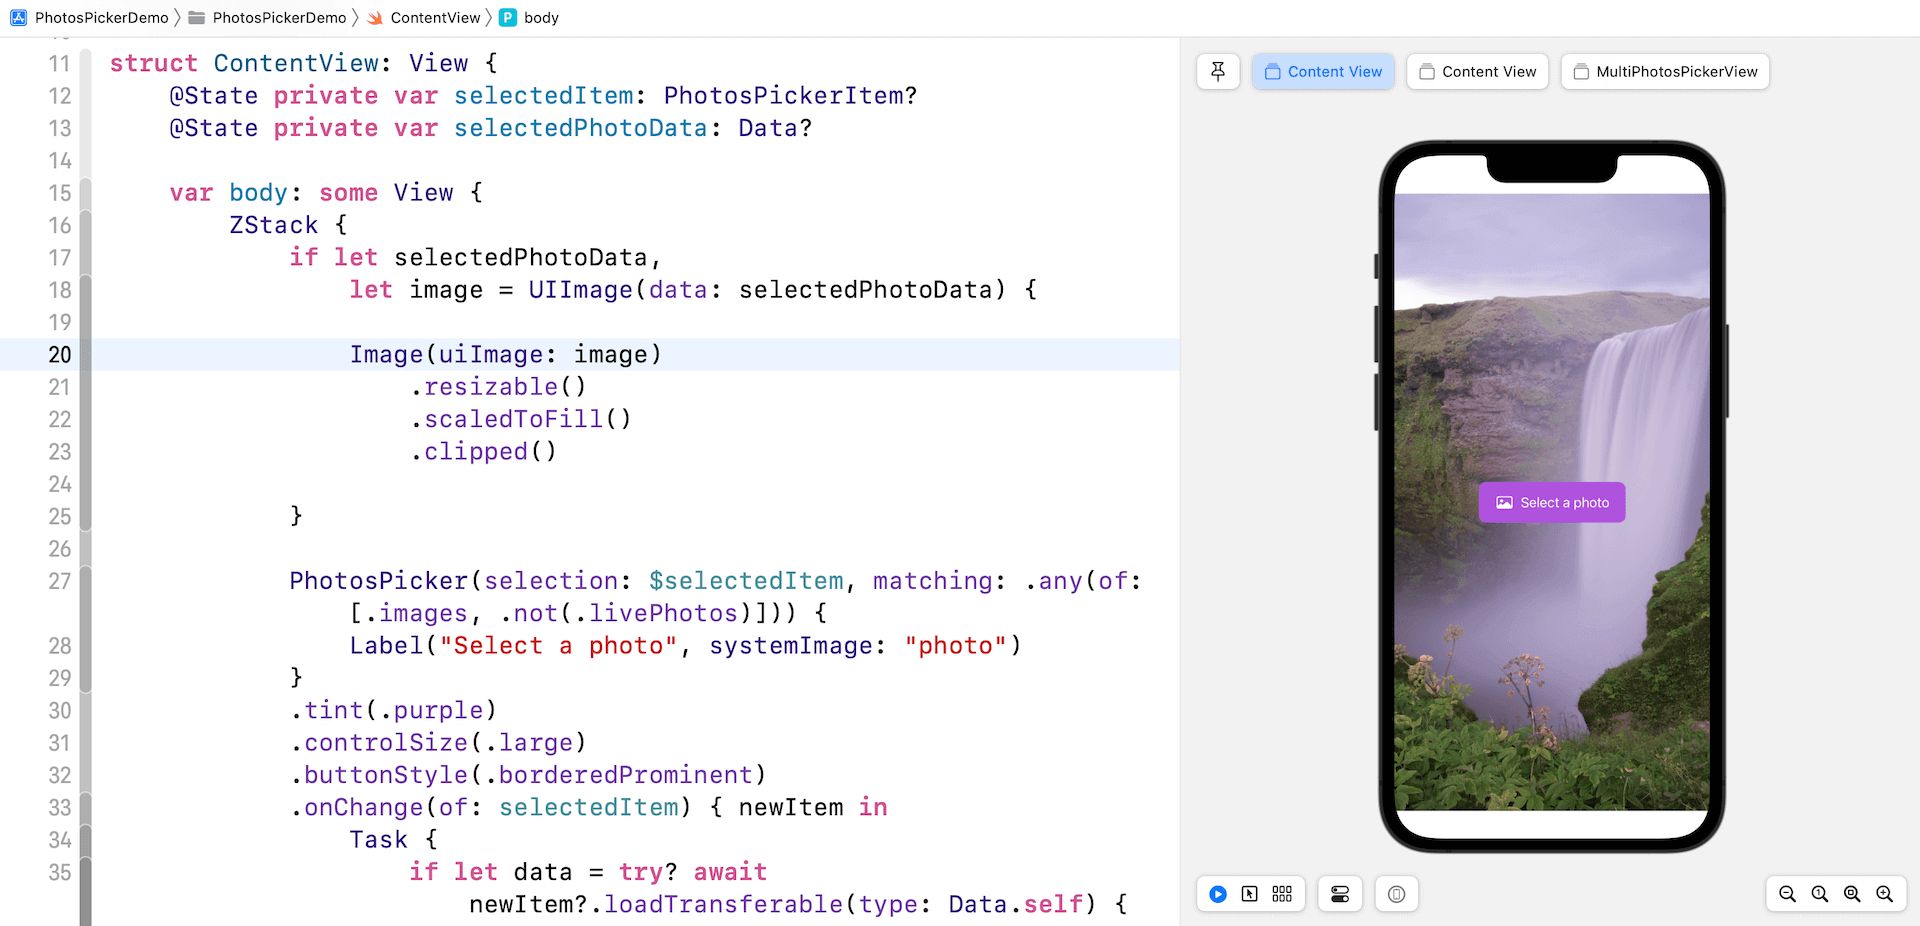
First, we attach the onChange modifier to listen to the update of the selectedItem variable. Whenever there is a change, we call the loadTransferable method to load the asset data.
.onChange(of: selectedItem) { newItem in
    Task {
        if let data = try? await newItem?.loadTransferable(type: Data.self) {
            selectedPhotoData = data
        }
    }
}
In the WWDC22 session (What’s new in the Photos picker), Apple’s engineer showed us to specify the type as Image.self. This is to instruct loadTransferable to return an instance of Image. However, I couldn’t make it work on Xcode 14 beta 4. This is why I used Data.self instead. Later, we can convert the data into an UIImage object for displaying in an Image view.
The selectedPhotoData variable is another state variable that is used to hold the data object:
@State private var selectedPhotoData: Data?To display the selected image in an image view, we create an instance of UIImage using the image data and then pass it to the Image view:
if let selectedPhotoData,
    let image = UIImage(data: selectedPhotoData) {

    Image(uiImage: image)
        .resizable()
        .scaledToFill()
        .clipped()

}
This is how you handle the image selection. To recap, we retrieve the image data when a user selects an image from the built-in Photos library. We save the image data to a state variable (i.e. selectedPhotoData). SwiftUI detects the value change and triggers a UI update to render the photo on screen.
Selecting Multiple Photos
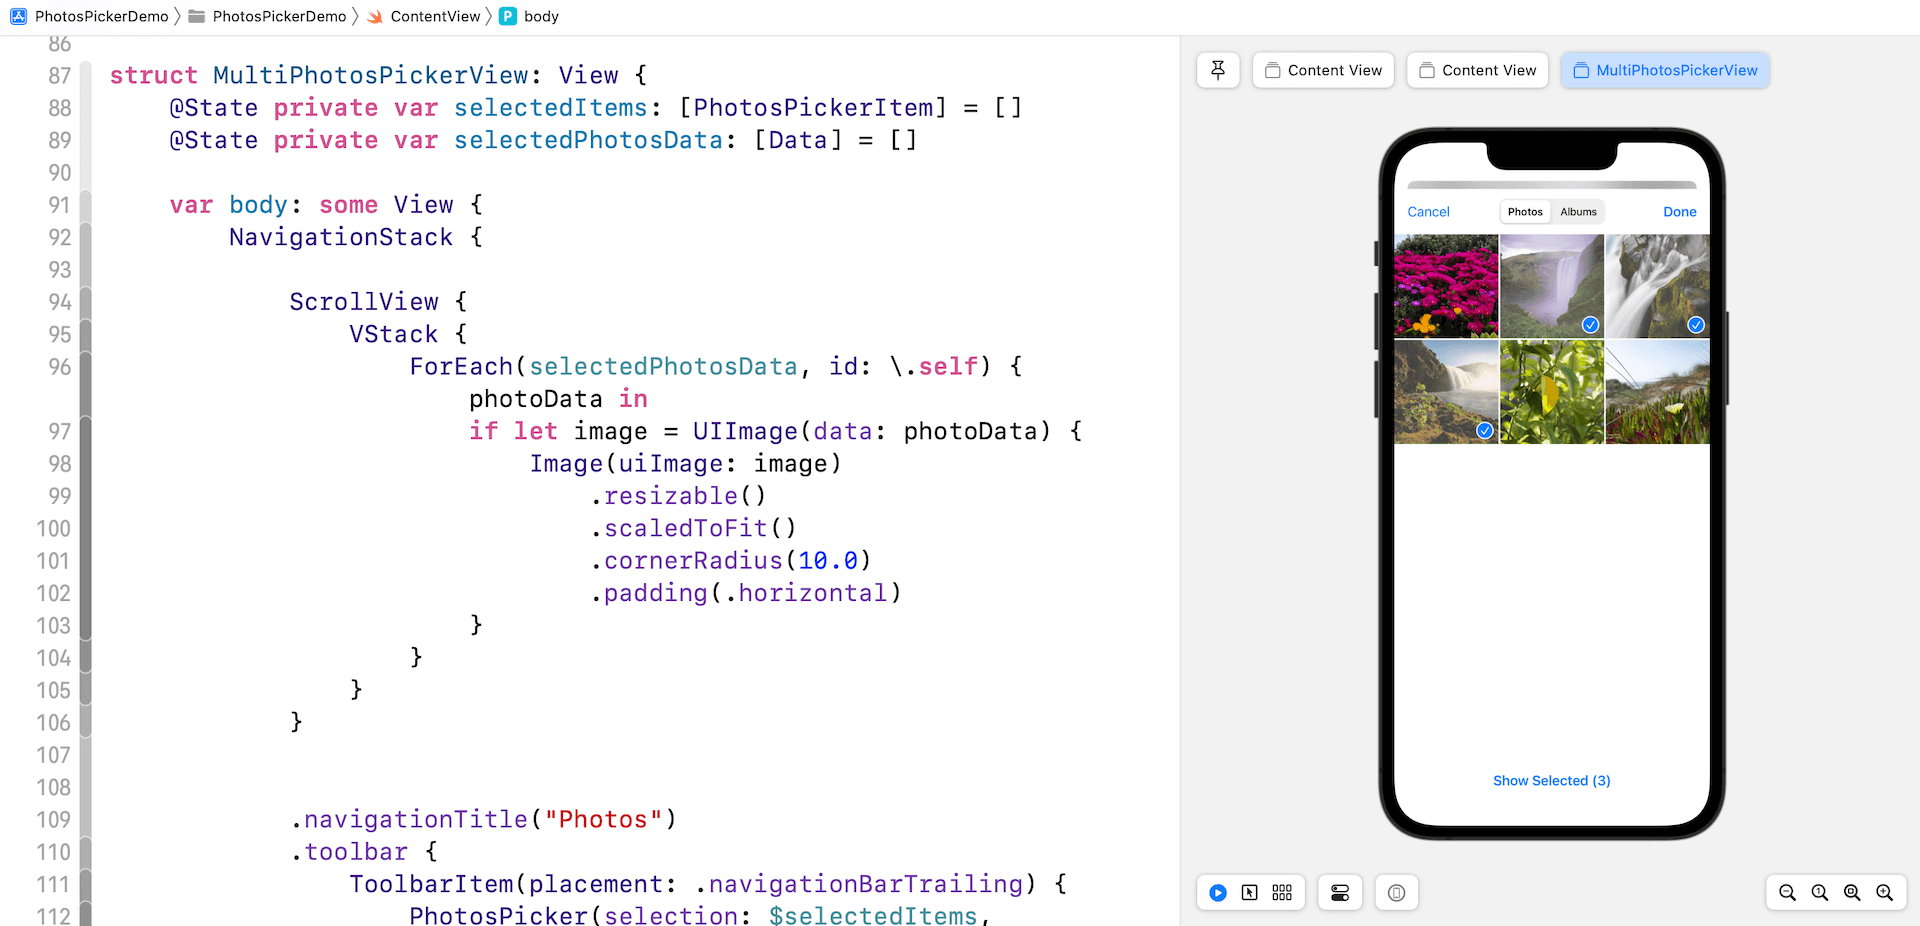
The PhotosPicker view can also support multiple photo selection. Let’s build another quick demo to see how it works. Again, we have two state variables to hold the PhotosPickerItem objects and Data object. Since the user may select more than one photos, both variables become an array:
@State private var selectedItems: [PhotosPickerItem] = []
@State private var selectedPhotosData: [Data] = []
To support multiple photo selection, the trick is to use another initialization method of PhotosPicker:
PhotosPicker(selection: $selectedItems, maxSelectionCount: 5, matching: .images) {
    Image(systemName: "photo.on.rectangle.angled")
}
.onChange(of: selectedItems) { newItems in
    for newItem in newItems {

        Task {
            if let data = try? await newItem.loadTransferable(type: Data.self) {
                selectedPhotosData.append(data)
            }
        }

    }
}
This method has an additional parameter named maxSelection. We set the value to 5, which means the user is allowed to support up to 5 photos. In this case, we may capture more than one photos in the onChange closure. What we did is to load each of the photo items and add it to the data array (i.e. selectedPhotosData).
For this demo view, instead of creating a button at the centre of the screen, we put the button in the navigation bar. Here is the full code snippet:
NavigationStack {

    ScrollView {
        VStack {
            ForEach(selectedPhotosData, id: \.self) { photoData in
                if let image = UIImage(data: photoData) {
                    Image(uiImage: image)
                        .resizable()
                        .scaledToFit()
                        .cornerRadius(10.0)
                        .padding(.horizontal)
                }
            }
        }
    }


    .navigationTitle("Photos")
    .toolbar {
        ToolbarItem(placement: .navigationBarTrailing) {
            PhotosPicker(selection: $selectedItems, maxSelectionCount: 5, matching: .images) {
                Image(systemName: "photo.on.rectangle.angled")
            }
            .onChange(of: selectedItems) { newItems in
                for newItem in newItems {

                    Task {
                        if let data = try? await newItem.loadTransferable(type: Data.self) {
                            selectedPhotosData.append(data)
                        }
                    }

                }
            }
        }
    }
}
When there is any changes of the selectedPhotosData variable, SwiftUI will refresh the UI and display the photos in the scroll view.
If you enjoy this article and want to dive deeper into SwiftUI, you may check out our Mastering SwiftUI book.


