

The Preview feature in SwiftUI allows developers to see what their app will look like in real-time, without having to run the app on a device or simulator. This feature is incredibly useful for developers who want to quickly iterate on their designs and make sure everything looks and functions as intended. With the introduction of Macros in iOS 17, the Preview feature has become even more powerful and versatile, allowing for even more customization and flexibility. In this article, we’ll explore how to use the new Preview Macro in SwiftUI and take a look at some of its exciting new features.
The SwiftUI #Preview Macro
Prior to the introduction of the new #Preview macro, you define a structure that conforms to the PreviewProvider protocol to create a preview of a view. Here is an example:
struct ContentView_Previews: PreviewProvider {
    static var previews: some View {
        ContentView()
    }
}
With the #Preview macros, you tell Xcode to create a preview like this:
// The basic syntax
#Preview {
    ContentView()
}

// Configure the preview's name
#Preview("Pie Chart View") {
    PieChartView()
}
As you can see, #Preview simplifies the way we define previews. Optionally, you can pass the #Preview macro a name to configure the preview’s name.
You can use this to set up a preview for any view as needed. Xcode will then render the preview, which will appear directly in the canvas.
Previewing Multiple Views

When using PreviewProvider, you can embed several views to preview using Group.
struct ArticleView_Previews: PreviewProvider {
    static var previews: some View {
        Group {
            ArticleListView()
                                .previewDisplayName("Article List View")

                        ArticleView()
                .previewDisplayName("Article View")
        }
    }
}
If you use the #Preview macro, you can define multiple blocks of #Preview sections. For example, to preview both ArticleListView and ArticleView, you can create two #Preview code blocks as follows:
#Preview("Article List View") {
    ArticleListView()
}

#Preview("Article View") {
    ArticleView()
}
Preview Views in Landscape Orientation
The #Preview macro has an optional traits parameter that allows developers to customize the orientation of the simulator. To preview views in landscape mode, you can pass .landscapeLeft or .landscapeRight to the traits parameter. Here is an example:
#Preview("Article List View", traits: .landscapeLeft) {
    ArticleListView()
}
Preview without Device Frame and Fixed Layout
The traits parameters can take another value named .sizeThatFitsLayout so that you can preview the view without any device frame.

On top of .sizeThatFitsLayout, you can also use .fixedLayout to preview the view in a specific size.
#Preview("Article List View", traits: .fixedLayout(width: 300, height: 300)) {
ArticleListView()
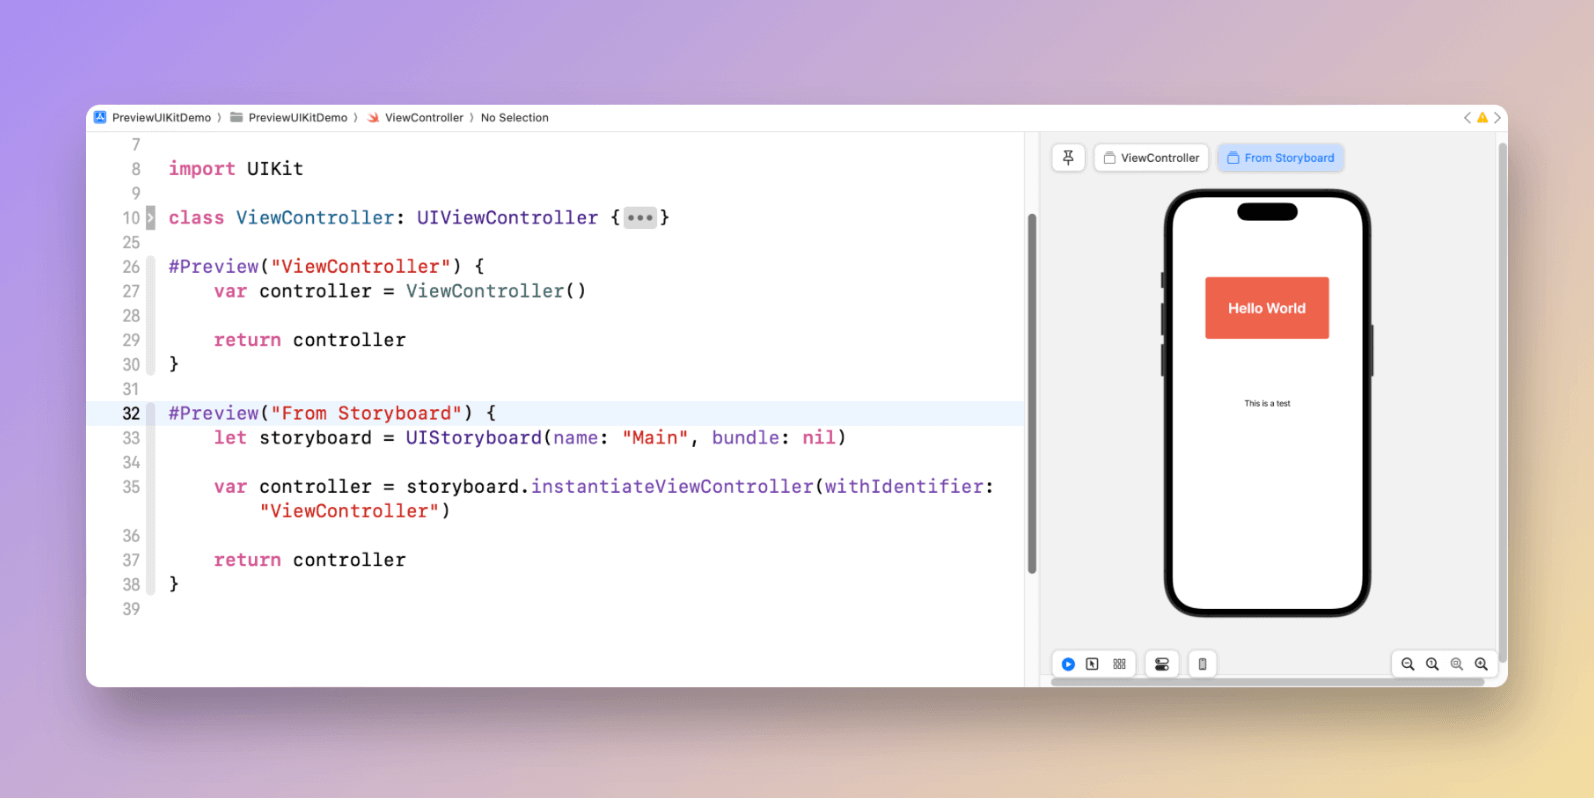
}Writing UIKit Previews
The Preview feature is no longer limited to SwiftUI. Even if you use UIKit, you can set up a preview for your UIKit views or view controllers using the #Preview macro. To preview a view controller, you can instantiate it in the code block:
#Preview {
    var controller = ViewController()

    return controller
}
If your view controller is designed in the storyboard, you can also preview it using the macro. Here is the sample code snippet:
#Preview("From Storyboard") {
    let storyboard = UIStoryboard(name: "Main", bundle: nil)

    var controller = storyboard.instantiateViewController(withIdentifier: "ViewController")

    return controller
}
Assuming you have assigned a storyboard ID for the view controller, you can create the view controller using the instantiateViewController method. This is how you use #Preview to preview a UIKit view controller.
Summary
The Preview feature in SwiftUI allows developers to see what their app will look like in real-time, without having to run the app on a device or simulator. The #Preview macro introduced in iOS 17 makes the preview code cleaner and simpler. It has become even more powerful and versatile, allowing you to preview views developed in UIKit.
If you enjoy reading this tutorial, don’t forget to check out our Mastering SwiftUI book.


