

The process of making an app includes various parts, with the code implementation being the most important one. However, programming is not just about writing code; it’s also about testing using the available tools each programming environment provides.
The first and foremost thing we all need to understand is the importance of testing. Writing automated tests should be considered a task equal to writing code, but unfortunately that’s quite often neglected. Lack of time, the need to meet a deadline, or the the fact that one person is the only developer of an app are common reasons behind that. Making extensive use of an app to verify that it’s working as expected can reveal issues, but not all, especially if the app’s logic or interface change over time. In the worst case, end users are becoming testers who report issues usually with negative feedback.
Obviously, not all problems or bugs can be detected by simply writing tests. But definitely most of them can be found early and eliminated before they reach at users’ hands. Edge or rare cases can be predicted that way much easier too. Automated testing is really important, and for that reason there is an entire programming philosophy around that, called TDD; test-driven development. The logic there lies on writing tests first, and then the code that will make those tests pass. Of course, I’m not suggesting to adopt TDD, unless you want to, or the usual way of coding is not correct. All I want is to stress out the importance of writing tests, even if you can’t cover the entire codebase but the most vital parts of your program.
Becoming more specific now, there are two kinds of automated tests we can write in Xcode. Unit tests, and UI (user interface) tests. The former help to verify that the logic implemented throughout the app is correct, and that will work properly when applied under different use cases.
The latter, UI testing, also the topic of this post, ensures that the interface that users will interact with actually contains all expected elements and controls, with the proper content, it is usable, and that the workflow is smooth and without any issues.
You may find all that a bit reduntant, given that we see UI behavior in action each time we run an app. However, consider the impact of one or more small or big changes to the UI; will the app still keep behaving and responding the way it’s supposed to be? Are you willing to manually test each and every single aspect of the app under all possible use cases to verify that there is nothing broken? And how many times will you repeat that until you feel bored, or time pressure appears? Here is the significance of automated UI testing; we need additional time in order to write tests, but we save time by not trying to manually make sure that everything is working fine.
I hope I make my point with this short introduction. In this tutorial, we will explore together the basics of UI testing in Xcode using the XCTest framework. If you have not written UI tests in the past, then you will definitely find new and interesting things to learn about. And most probably you will enjoy implementing tests and see them successfully pass.
About The Demo App
In order to get a taste of UI testing in Xcode, we are going to implement a simple app scenario from scratch. In a nutshell, the purpose is to build a fake login process, and on success to present a short form in order to configure a few dummy settings.
More specifically now, we are going to start with a welcome message and a login button. A modal sheet will appear by tapping on the button, containing two fields for typing in a username and a password. In addition, there will be a login and a dismiss button available to use. By going back after a fake successful login, we’ll have:
- the welcome message updated so it contains the given username,
- the login button becoming a logout button,
- a settings form that will give us the chance to test some specific views; slider, segmented control and wheel picker.
The goal here is to focus on testing and not the demo app itself. For that reason, I’ll be providing all the necessary implementation code while moving on to the next parts.
What we want to achieve by writing UI tests is:
- To make sure that all UI elements actually exist in our view and the sheet.
- UI elements contain or display the proper content.
- Content is updated properly when logged in or logged out.
- The workflow of the app is the expected one.
So, let’s get started.
Creating A New App
Create a new Xcode project, choosing the iOS App template at the first step. Next, type UITestingDemo as the Product Name, and make sure that SwiftUI is the selected interface, SwiftUI App is the selected life cycle value and Swift is the language.
The most important option here is to turn on the Include Tests checkbox, so Xcode creates test targets automatically for us.
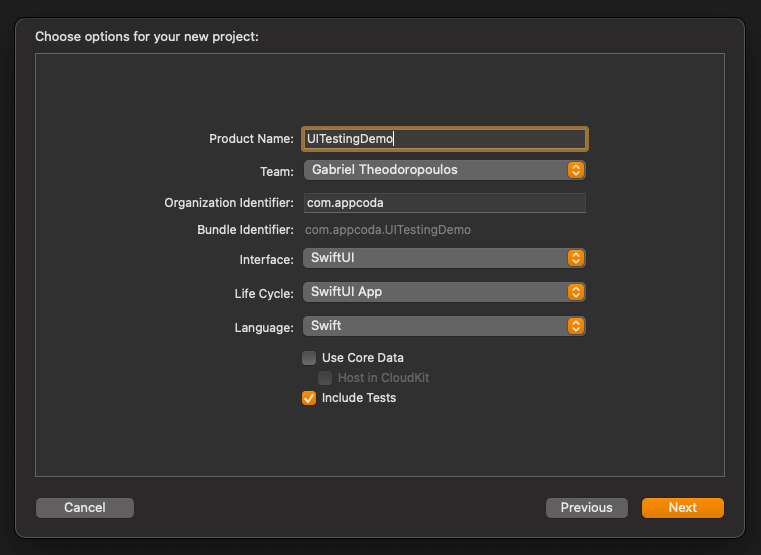
Lastly, select a place on your disk to save the project, and let Xcode create it.
Open now the ContentView.swift file, and delete the boilerplate “Hello, world!” text. Add the following code instead:
var body: some View {
    VStack {
        Text("Welcome!")
            .font(.title)

        Spacer().frame(height: 20)

        Button(action: {
            showLogin = true
        }, label: {
            Text("Login")
        })
    }
}
We are adding a vertical stack that contains a Text that displays a welcome message, a button that displays the “Login” title, and a spacer between them.
In the button’s action closure you see a showLogin value becoming true. This is a @State property that indicates whether the sheet to login should be presented or not, and we are going to declare it in the ContentView struct right now:
struct WelcomeView: View {
    @State private var showLogin = false

    var body: some View {
        ...
    }
}
The sheet is still missing, but we won’t get to that yet. The above few lines of code are good enough in order to let us write our first UI tests!
Writing The First tests
In the Project navigator you will see two groups called UITestingDemoTests and UITestingDemoUITests respectively. The first one contains a file to write unit tests; we won’t bother with it here. The second contains a similarly named Swift file, called UITestingDemoUITests.swift, and here’s where we’ll write UI tests.
By opening that file, you’ll see that there is already some code added automatically by Xcode. There are a few things to notice here:
- The XCTest framework is the one that provides us with the necessary programming tools in order to write tests.
- Tests are actually small methods in a class that inherits from XCTestCase.
- There are some predefined methods in the UITestingDemoUITests class:
setUpWithError(): Consider this as the place to initialize properties and values that are common to tests. It’s called before executing any test.tearDownWithError(): It’t called after a test has finished running, and it’s the place to add code that releases any resources or instances created in the previous method.testExample(): Just a demonstrative test method. Note that methods starting with the “test” keyword are considered to be tests.testLaunchPerformance(): A method to measure how the UI performs.
In this tutorial we are not going to use the last three methods, so feel free to go ahead and delete them.
Testing The Welcome Label
Let’s write now our first, pretty simple UI test. We are going to do two things in it; to check if the welcome Text exists in the view, and whether its content is the one we want.
Add the following test method:
func testWelcome() throws {
    let app = XCUIApplication()
    app.launch()

    let welcome = app.staticTexts["Welcome!"]

    XCTAssert(welcome.exists)
}
Four lines of code above, each one with its meaning and importance. Let’s see them one by one:
- The first one initializes a XCUIApplication object. That’s probably the most important object when talking about testing for two reasons; firstly, we are going to access all UI elements through that. Secondly, we will use it in order to launch an app instance and run UI tests.
- The second line launches the app instance.
- In the third line we’re accessing all static tests in the running app instance. We’re asking for the one having the “Welcome!” content. The returned value is a XCUIElement object assigned to the
welcomeconstant. - When creating tests, we actually make assertions regarding the underlying element. We claim here that the Text view with the content specified in the previous line exists indeed, and that the above assertion will make the test pass successfully. There are more methods like
XCTAssert()with different purposes; i.e. to check for nil values, equality, true or false values, and so on, some of which we’ll use in this post.
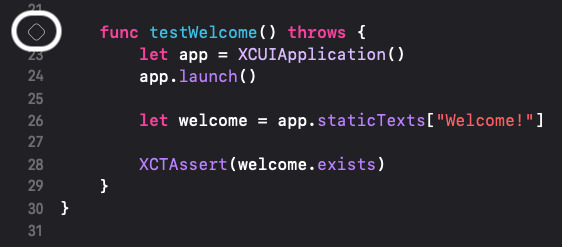
To run the test, first select either a target simulator or a device. Then, either click on the rhombus icon next to the test method’s name, or open the Test navigator, expand the UITestingDemoUITests group and move the mouse over the testWelcome() test; then click on the button that will appear.
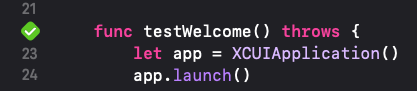
Wait for a few seconds until the test is finished. In the meantime, you will see that an instance of the app is launched in the selected simulator or device, and then it terminates. At that moment you’ll also see the test results; a green checkmark on success, a red x-mark on failure. If you followed everything step by step so far, then your first test should be successful:
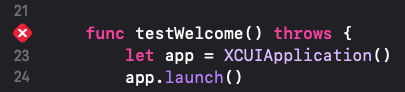
To make the test fail and see that case too, modify the requested static text. Simply remove the exclamation mark so it becomes like this:
let welcome = app.staticTexts["Welcome"]Run the test again, and this time you’ll see it becoming red. It failed because no static text with the given value was found, so the assertion resulted to false.
In the above test we accessed the Text view using the contained text value as a subscript to the staticTexts array. However, that is the only Text view existing in the app right now. In such a case, we can get it like so:
let welcome = app.staticTexts.elementThe above works for all kinds of UI elements, and we’ll see that later as well.
If we run the test now, it will succeed once again. However, this time we can’t really tell if the Text view’s content is “Welcome!”, or it has changed to something else. We knew that previously, because the only way to get a successful test result was by providing the correct text value in the staticTexts array.
In order to check the text we will add another assert method to the test:
XCTAssertEqual(welcome.label, "Welcome!")XCTAssertEqual() asserts that the two values given as arguments are equal. That label property above is the accessibility label of the Text view, which by default is the same to its content.
After the above two changes the test now is this:
func testWelcome() throws {
    let app = XCUIApplication()
    app.launch()

    let welcome = app.staticTexts.element

    XCTAssert(welcome.exists)
    XCTAssertEqual(welcome.label, "Welcome!")
}
If both assertions are true, the test will pass. If you go back to ContentView.swift and change the “Welcome!” text to something else, then the two values in the second assertion will not be equal the test will fail.
Testing The Login Button
Let’s write one more test to verify the login button’s existence:
func testLoginButton() throws {
    let app = XCUIApplication()
    app.launch()

    let login = app.buttons["Login"]

    XCTAssert(login.exists)
}
The test is pretty simple and it will pass if you run it. Notice that we access the button in a similar fashion as we did for the Text in the first test; we use the default accessibility label to query the buttons array of the app object.
Even though the above is a simple and straightforward test that will undoubtedly succeed, there is no guarantee that things will remain the same in the future in real world conditions. For example, the button’s text might change, or even more, to be replaced by an image, or by both an image and a text.
To make tests more robust and unaffected by changes that may happen on the button’s label, we can set an explicit accessibility identifier to the button, and use that as a subscript in order to access the button in the buttons array.
Note: UI testing is based on accessibility, so the more accessibility features you add to your app, the easier will be to write UI tests.
Let’s do that, so open the ContentView.swift file and add the next line right after the button’s implementation:
Button(
    ...
)
.accessibilityIdentifier("loginButton")
We can now uniquely identify the button using the “loginButton” identifier instead of its label. To see that, let’s jump back to the UITestingDemoUITests.swift file, where we’ll replace this:
let login = app.buttons["Login"]with this:
let login = app.buttons["loginButton"]The test will remain successful even if you change the button’s title. However, it won’t happen the same if we add the following assert method in order to verify the button’s label, and the label gets changed later:
func testLoginButton() throws {
    ...

    XCTAssertEqual(login.label, "Login")
}
If the test fails to pass, that will be an alert to check if the button was removed, or its label was changed intentionally or accidentally.
A Global XCUIApplication Object
Both the above tests started with the same two lines:
let app = XCUIApplication()
app.launch()
These are necessary in order to run an app instance, and here we’ll do a couple of changes in order to avoid repeating them on every single test.
The first one is to declare an app property in the UITestingDemoUITests class. It will be globally accessible by all tests in the class that way:
class UITestDemoUITests: XCTestCase {
    let app = XCUIApplication()

    ...
}
The next thing we need is to launch the app before running any test. We’ll do that in the setUpWithError() method:
override func setUpWithError() throws {
    continueAfterFailure = false
    app.launch()
}
We can now delete those two lines from the tests we wrote. In turn, test methods will become like the following:
func testWelcome() throws {
    let welcome = app.staticTexts.element
    XCTAssert(welcome.exists)
    XCTAssertEqual(welcome.label, "Welcome!")
}


func testLoginButton() throws {
    let login = app.buttons["loginButton"]
    XCTAssert(login.exists)
    XCTAssertEqual(login.label, "Login")
}
The Login Form
Now that we’ve created a couple of simple tests and discussed about some interesting details, it’s time to go on with the demo app and explore more aspects on that topic. The next step is to create the login form, but before that, let’s implement a simple model to store user related data.
For starters, press the Cmd+N key combination to create a new Swift file (not a SwiftUI file!). Name it User.swift.
Once it’s ready, open it and import the Combine framework; we need it because the class we’ll add right next will confom to the ObservableObject protocol:
import CombineNext, add the following implementation:
class User: ObservableObject {
    @Published var isLoggedIn = false
    @Published var username = ""
    @Published var password = ""

    func login() -> Bool {
        guard username == "test" && password == "pass" else {
            return false
        }

        password = ""
        isLoggedIn = true
        return true
    }
}
There are three properties marked with the @Published property wrapper. The first one indicates whether a user is logged in or not, and the other two are string properties that will be keeping the username and password that will be typed in the login form.
There is also a login() method; a fake mechanism to mimic a login process. It returns true if the username and password match to the values shown above, false otherwise. On success, it clears out the password value, and changes the isLoggedIn value to true.
We want an instance of the User class to be available throughout the app, therefore we have to append it to the SwiftUI views’ environment. In order to do that, we have to create a User instance in the UITestingDemoApp structure of the app, in the UITestingDemoApp.swift file:
@main
struct UITestingDemoApp: App {
    var user = User()

    var body: some Scene {
        ...
    }
}
We can now pass the user property in the views environment:
@main
struct UITestDemoApp: App {
    var user = User()

    var body: some Scene {
        WindowGroup {
            ContentView()
                .environmentObject(user)
        }
    }
}
Time to turn to the login form. It will be parted by the following:
- A text field to type in a username.
- A secure text field to type in a password.
- A login button to perform the (fake) login.
- A dismiss button to cancel the login process.
The two text fields with the login button will embedded in a Form view. All together will be the content of a navigation view. The dismiss button will be a bar button to the navigation bar.
We are going to implement that login form in a new SwiftUI file, but we’ll present it modally in a sheet later when the login button gets tapped. That said, press once again the Cmd+N keys, and this time create a new SwiftUI file. Name it LoginView.swift.
The first thing we’ll do in that view, is to declare the following environment object property so we can access the User instance in the environment:
struct LoginView: View {
    @EnvironmentObject private var user: User

    var body: some View {
        ...
    }
}
In addition, we’ll also declare the next environment property so we can dismiss the sheet later:
struct LoginView: View {
    @Environment(\.presentationMode) var presentationMode
    ...

    var body: some View {
        ...
    }
}
Let’s add the actual view’s body implementation now; make sure to delete the default content first:
var body: some View {
    NavigationView {
        Form {
            Section {
                TextField("Username", text: $user.username)
                SecureField("Password", text: $user.password)
            }

            Button {
                if user.login() {
                    presentationMode.wrappedValue.dismiss()
                }
            } label: {
                Text("Login")
            }
            .accessibilityIdentifier("loginNow")
        }
        .navigationTitle(Text("Login"))
        .navigationBarItems(trailing: Button {
            presentationMode.wrappedValue.dismiss()
        } label: {
            Image(systemName: "xmark.circle")
                .accessibilityLabel("Dismiss")
        })
    }
}
A few noteworthy words:
- Anything that will be typed in to the text field and secure text field, will be assigned to the
usernameandpasswordproperties of theuserenvironment object respectively. - When the login button gets tapped, the
login()method in the User class is called to perform the fake login. On success, the sheet is dismissed. - Notice that this is the second button in the app with the “Login” text as its label. The best way to refer to it in our tests is by setting its accessibility identifier, which in this case is “loginNow”. That way we’ll avoid any conflicts with the previous login button and wrong test results.
- For the dismiss button’s label we are using an SF Symbol as an image. In that case, the button’s accessibility label is the name of the given SF Symbol (“xmark.circle”). That’s definitely not a name to remember easily in tests, and an absolutely wrong label to be read by VoiceOver if necessary. We explicitly change that with the
accessibilityLabel()modifier.
We’ll make one more small addition in this view later, but at the time being it’s good enough to use it. Before we start testing what we did here, let’s make one last stop to the ContentView.swift file.
We’ll apply the sheet(isPresented:content:) view modifier on the VStack, so the sheet to be presented on the login button’s tap. A LoginView instance will be the sheet’s content:
var body: some View {
    VStack {
        ...
    }
    .sheet(isPresented: $showLogin) {
        LoginView()
    }
}
Testing The Login Form
Back to the UITestingDemoUITests.swift file to keep writing UI tests. The first one that we’ll begin with is going to check if the login form appears or not when tapping on the login button in the content view.
Even though it’s going to take three lines only (we could write it in two), it introduces two new important details regarding UI testing; how to perform gestures and how to wait until a UI element becomes available.
Let’s start with the following that triggers a tap gesture to the login button in the content view:
func testLoginFormAppearance() throws {
    app.buttons["loginButton"].tap()
}
See the tap() method? It will trigger a tap gesture as if we were to tap with the finger. All real gestures have similar matching methods to call if necessary, such as doubleTap(), swipeUp(), swipeDown(), pinch(withScale:velocity:), and more.
Next, we’ll get the “Login” title of the navigation bar as a static text through the app property:
func testLoginFormAppearance() throws {
    ...

    let loginNavBarTitle = app.staticTexts["Login"]
}
There’s nothing new to explain here. In fact, we could have skipped that line and use the app.staticTexts["Login"] directly next in the following expression, but it’s more clear to keep it that way.
The second new thing we’re going to meet, is how to expect for a UI element to become available after a specific period of time. In that case, that element is the loginNavBarTitle above. For the sake of the example, we will wait its appearance for 0.5 seconds. If that won’t happen, then our test will fail:
func testLoginFormAppearance() throws {
    ...

    XCTAssert(loginNavBarTitle.waitForExistence(timeout: 0.5))
}
Here’s the full test method’s implementation:
func testLoginFormAppearance() throws {
    app.buttons["loginButton"].tap()
    let loginNavBarTitle = app.staticTexts["Login"]
    XCTAssert(loginNavBarTitle.waitForExistence(timeout: 0.5))
}
Run the test and watch; the login button will be tapped automatically, and when the sheet will appear, the test will pass successful.
Testing For All Elements In Login Form
The previous test actually verifies that the sheet will appear by checking if a static text with the “Login” content will appear after a small period of time. However, it doesn’t tell us if the navigation bar is there, or the textfields and the buttons have been added to the form.
To cover all that, we’ll create the following new test:
func testLoginForm() throws {
    app.buttons["Login"].tap()

    let navBar = app.navigationBars.element
    XCTAssert(navBar.exists)

    let username = app.textFields["Username"]
    XCTAssert(username.exists)

    let password = app.secureTextFields["Password"]
    XCTAssert(password.exists)

    let login = app.buttons["loginNow"]
    XCTAssert(login.exists)
    XCTAssertEqual(login.label, "Login")

    let dismiss = app.buttons["Dismiss"]
    XCTAssert(dismiss.exists)
}
Based on what we have seen so far, it’s easy to understand what the code in the above snippet does. See that for each kind of UI element we are quering the respective collection. Also, regarding the login button, we are making an additional assertion about the label of the button.
You may run the test and see if it will finish successfully or not. To get a better understanding on all the above, feel free to open the LoginView.swift file and change any of the values used in the checks.
Testing The Dismiss Button
Previously we added a bar button to dismiss the sheet, and already added the necessary code that will make that happen. However, that’s an untested functionality, so here we are going to focus on that.
We already met the tap() method that performs a tap gesture programmatically. We’ll use it here once again with the dismiss button. But what are we going to test exactly?
That’s the interesting and new thing in this test; with the help of another XCTAssert method, we’ll make sure that the dismiss button is not present anymore after a specific period of time has elapsed.
Here’s the new test:
func testLoginDismiss() throws {
    app.buttons["Login"].tap()
    let dismiss = app.buttons["Dismiss"]
    dismiss.tap()
    XCTAssertFalse(dismiss.waitForExistence(timeout: 0.5))
}
See that we start by triggering a tap gesture initially so we present the sheet. Then we access the dismiss button using the accessibility identifier we set to it, and then we perform a tap gesture on it in order to force the sheet to go away.
The XCTAssertFalse() asserts that the dismiss button won’t exist after 0.5 seconds. If the dismiss button is still there after that time frame, then the test will fail, and that’s an indication that there is something wrong with the button’s implementation.
Testing Username And Password
The next two tests that we are going to write in this part have little practical, but significant educational value. Therefore, it worths having a quick look at them.
In the test that we’ll implement now, we are going to meet a quite specific aspect of UI testing; how to programmatically type text in a text field.
Let’s get to the code first:
func testUsername() throws {
    app.buttons["Login"].tap()

    let username = app.textFields["Username"]
    username.tap()
    username.typeText("test")

    XCTAssertNotEqual(username.value as! String, "")
}
Focusing on the three lines in the middle of the snippet, firstly we access the username text field using its label. However, given that this is the only text field in the app, we could have used the element property in the textFields collection (app.textFields.element) to do the same.
Next, we make a tap gesture on it, so it becomes the first responder and also make the keyboard appear.
Finally, with the typeText() method we simulate a typing process. We use this method when it’s necessary to test text typing, passing as argument the text value.
In the last line of the test method we assert that the value of the username text field is not equal to the empty string, and we verify that way that the text was really typed in. The value property of the username text field is of Any type, so casting to string is necessary.
In order to test the password entry we can do pretty much the same stuff as above. However, I’ll show you an alternative way to provide text input, as it might be useful sometimes. You can use this one instead of the typeText() method if you notice that the latter fails to enter text properly.
Let’s see the test implementation:
func testPassword() throws {
    app.buttons["Login"].tap()

    app.secureTextFields.element.tap()
    app.keys["p"].tap()
    app.keys["a"].tap()
    app.keys["s"].tap()
    app.keys["s"].tap()
    app.keyboards.buttons["Return"].tap()

    XCTAssertNotEqual(app.secureTextFields.element.value as! String, "")
}
Once again we tap on the secure text field right after the sheet has been presented, so it becomes the first responder. However, instead of providing the full text we want to type in this time, we simulate taps on the keyboard keys one by one. See that we query the proper key using its text representation to the keys collection first, and then we call the tap() method. We do that as many times as the characters in the string are.
The last tap above demonstrates how to simulate that gesture on the Return key.
Similarly to the previous test, the last line in this one too verifies that the text given to the password is not empty.
Important Note: If you are testing on simulator, then make sure that the keyboard is actually showing up when the secure text field becomes the first responder. If not, then toggle its appearance by pressing Cmd+K after having selected the simulator. If you avoid doing so, the above test will fail.
Testing Login
Time to put everything together and test the login process. In this example we are going to present the sheet, programmatically type values in the username and password fields, and eventually tap on the login button in the sheet. What we expect to see in this test is the sheet being dismissed.
All techniques used in this test have already been presented and explained, so here it is:
func testLogin() throws {
    app.buttons["Login"].tap()

    app.textFields.element.tap()
    app.textFields.element.typeText("test")

    app.secureTextFields.element.tap()
    app.secureTextFields.element.typeText("pass")
    app.keyboards.buttons["Return"].tap()

    let loginButton = app.buttons["loginNow"]
    loginButton.tap()

    XCTAssertFalse(loginButton.waitForExistence(timeout: 0.5))
}
Describing in fast forward speed what goes on here:
- A tap gesture is performed on the login button in the content view in order to present the sheet with the login form.
- A tap gesture is performed on the username text field.
- The “test” value is typed in automatically.
- A tap gesture is performed on the password textfield.
- The “pass” value is typed in programmatically.
- A tap on the Return button of the keyboard happens programmatically so the keyboard gets dismissed.
- The login button in the sheet is accessed using its accessibility identifier.
- A tap gesture is performed on that login button.
- The assertion that the login button in the sheet won’t exist after 0.5 seconds is made.
You can run the test and see the full login process being simulated and tested.
Testing Failed Login
The previous test is useful to verify the successful login process. However, what if the login fails? What if either the username or the password has not been provided, or they have wrong values?
To test this scenario, we will add an alert that will be presented to the user saying that the login has failed. In fact, demonstrating how to deal with alerts and interacting with them through a UI test is what I aim to achieve in this part.
Before we write a new test, it’s necessary to make a couple of additions to the LoginView.swift file, so click to open it in the Project navigator.
Start by adding the following view modifier to the NavigationView in order to show an alert:
NavigationView {
    ...
}
.alert(isPresented: $showAlert) {
    Alert(title: Text("Login Failed"),
          message: Text("Either username or password is missing, or they are wrong."),
          dismissButton: Alert.Button.default(Text("OK"), action: {
            showAlert = false
          }))
}
The presented state of the alert is determined by the showAlert binding value, where showAlert is a state property that we have to declare to the LoginView struct:
struct SignInView: View {
    ...

    @State private var showAlert = false

    var body: some View {
        ...
    }
}
Finally, it’s also necessary to update the login button’s action closure, and make the showAlert true when the login fails:
if user.login() {
    ...
} else {
    showAlert = true
}
Time to write a new test in the UITestingDemoUITests.swift file. In order to cause the alert’s appearance, we will simply skip providing any values to the text fields. We’ll just trigger a tap gesture to the login button of the sheet.
The next and most interesting part of the test is to verify that the alert has been presented. For that, we’ll assert that the alert will exist within a few moments, and if not, the test will fail.
But we won’t stop there; we’ll interact with the alert and we’ll dismiss it by tapping programmatically on its OK button. After that, we’ll assert once again that the alert does not exist.
All that sounds more complicated than what it actually is, so here is the new test:
func testFailedLoginAlert() throws {
    app.buttons["Login"].tap()
    app.buttons["loginNow"].tap()

    XCTAssert(app.alerts.element.waitForExistence(timeout: 0.5))

    app.alerts.element.buttons["OK"].tap()
    XCTAssertFalse(app.alerts.element.exists)
}
If you run the test, you should see this:
Updating ContentView After Successful Login
At this point the simple, fake login works in our demo app and it has been tested, however the content view does not get updated after a successful login attempt.
We need three distinct things to happen in such a case:
- The “Welcome!” message to change to “Welcome test!”, where “test” is the username.
- The “Login” text in the button to be updated to “Logout” and eventually trigger a logout.
- To show a form with various arbitrary settings in order to test a few more UI elements.
We’ll deal with the last one in a while; we’ll focus on the first two in this part.
To make all these changes happen, there are certain modifications we must do in the ContentView.swift file, so open to edit it. The first step is to declare a User environment object property, just like we did in the LoginView earlier:
struct WelcomeView: View {
    ...

    @EnvironmentObject private var user: User

    var body: some View {
        ...
    }
}
Next, let’s display the proper welcome message, depending on the value of the isLoggedIn property in the user object. Replace this:
Text("Welcome!")with this:
Text(!user.isLoggedIn ? "Welcome!" : "Welcome \(user.username)!")A similar change must take place in the login button’s label, but it’s not just that. The action that the button will trigger now also depends on the isLoggedIn value. So, replace the current button’s implementation:
Button(action: {
    showLogin = true
}, label: {
    Text("Login")
})
with the following:
Button(action: {
    if !user.isLoggedIn {
        showLogin = true
    } else {
        user.logout()
    }
}, label: {
    Text(!user.isLoggedIn ? "Login" : "Logout")
})
Notice that in case the user is logged in, the button changes to “Logout”. But more importantly, it triggers the user’s logout by calling the logout() method through the user object. This method does not exist yet; to add it simply switch to the User.swift file and append the following in the User class:
class User: ObservableObject {
    ...

    func logout() {
        isLoggedIn = false
        username = ""
    }
}
Time to test!
Testing The Welcome And Login Button Label
Back to the UITestingDemoUITests.swift file, where we’ll begin by implementing a custom method. In its body we’ll include all those steps that are necessary to perform a succesful login operation. We do that because we’ll need those steps repeateadly in quite a few tests, so let’s group them together in order to save time and space.
Here is the login() method:
func login() throws {
    app.buttons["Login"].tap()

    app.textFields.element.tap()
    app.textFields.element.typeText("test")

    app.secureTextFields.element.tap()
    app.secureTextFields.element.typeText("pass")
    app.keyboards.buttons["Return"].tap()

    app.buttons["loginNow"].tap()
}
We’ve seen all those steps already in previous parts, so I’m not going to make any comment here.
Next, let’s create a new test where we’ll do a simple thing; we’ll check the welcome text value before and after login. What we expect to happen is for the test to be successful once the “Welcome test!” is the existing one after login.
Using the login() method implemented above, here’s the test:
func testWelcomeAfterLogin() throws {
    XCTAssert(app.staticTexts["Welcome!"].exists)

    try login()

    XCTAssert(app.staticTexts["Welcome test!"].exists)
}
If you want to be 1000% sure, you can also add the following assertion at the end:
XCTAssertFalse(app.staticTexts["Welcome!"].exists)Run the test; if you followed along up until this point, you should see it succeeding:
We can create a similar test to check the login button’s label. It should be “Login” before login, “Logout” after login. Here is the test implementation without any further details, as it’s quite simple:
func testLoginLogoutLabel() throws {
    XCTAssertEqual(app.buttons["loginButton"].label, "Login")

    try login()

    XCTAssertEqual(app.buttons["loginButton"].label, "Logout")
}
Testing Logout
There is also one more test left to do regarding the login and logout operations, and that is to verify that the user interface of the content view is updated properly after logout. We’ll write a new test where we’ll trigger the login at first, and then we’ll check the values of the welcome text and the login button using the proper assertions. Then we’ll tap on the logout button programmatically, and we’ll make the same assertions once again.
This test is a combination of expressions we have already met in the previous parts, so here it is:
func testLogout() throws {
    try login()

    XCTAssert(app.staticTexts["Welcome test!"].exists)
    XCTAssertEqual(app.buttons["loginButton"].label, "Logout")

    app.buttons["loginButton"].tap()

    XCTAssert(app.staticTexts["Welcome!"].exists)
    XCTAssertEqual(app.buttons["loginButton"].label, "Login")
}
Adding Fake Settings For Logged In Users
In addition to what we have already done, here we are going to add a form with a few fake settings. This will give us the chance to test a few more UI elements. In particular, the goal in this last part of the tutorial is to see how to test and update the value a segmented control, a slider, and a wheel picker.
Of course, it’s necessary to add the missing implementation that will include those elements in the app before we create any tests. To get started, open the User.swift file, and append the next three properties to the User class:
class User: ObservableObject {
    ...

    @Published var colorTheme = 0
    @Published var textSize: Double = 14
    @Published var font = "Arial"

    ...
}
The settings we are going to present are supposed to regard preferences about:
- color theme,
- text size,
- font
We are going to use the binding values of the above properties in the UI elements that we’ll test. The matching between settings and views will go as follows:
- For the color theme we’ll add a segmented control.
- For the text size we’ll add a slider.
- For the font we’ll add a wheel picker.
Let’s go now to the ContentView.swift file. In the VStack and after all the current implementation add the next lines:
VStack {
    ...

    if user.isLoggedIn {
        Form {
            Section {
                VStack {
                    Text("Color Theme")
                    Picker("", selection: $user.colorTheme) {
                        Text("Light").tag(0)
                        Text("Dark").tag(1)
                    }
                    .pickerStyle(SegmentedPickerStyle())
                    .accessibilityIdentifier("colorTheme")
                }
            }

            Section {
                HStack {
                    Text("Text Size")
                    Slider(value: $user.textSize, in: 1...100)
                        .accessibilityIdentifier("slider")
                }
            }

            Section {
                VStack {
                    Text("Font")
                    Picker("", selection: $user.font) {
                        Text("Arial").tag("Arial")
                        Text("Avenir Next").tag("Avenir Next")
                        Text("Noteworthy").tag("Noteworthy")
                        Text("Futura").tag("Futura")
                    }
                    .pickerStyle(WheelPickerStyle())
                    .accessibilityIdentifier("fontPicker")
                }
            }
        }
    }
}
It’s necessary to check first if the user is logged in or not, and if so, we are adding a Form view. There are three sections in it:
- The first one regards the color scheme and presents a picker using the segmented style.
- The second contains a slider to change text size preferences. For simplicity, slider values range from 1 to 100.
- The last section contains a picker with the wheel style, presenting a small variety of fonts to choose from. Notice that the font names are also used as values to the
tag()modifier.
If you want, you can create your own tests to verify that the form is appearing only when the user is logged in, and not otherwise. I’m not going to show that here, as we’ve already implemented tests like that. Also, I’m not going to check the values of the Text views in the new, additional code above. We’ll focus on the segmented control, slider and wheel picker only.
Testing The Segmented Control
Go back to the UITestingDemoUITests.swift file, where we are going to write the next test. This one will regard the segmented control that presents the available fake color theme options.
Similarly to what we did with all the last few tests we created, we’ll start by performing all login steps here too. Then, we’ll proceed like so:
- We’ll access the segmented control using its accessibility identifier, and we’ll assert that it exists.
- After that we’ll assert that the currently selected value is the one with the “Light” title.
- Then we’ll switch to “Dark” value.
- Finally, we’ll assert once again that the selected value is the “Dark” one.
Here’s all that in code:
func testColorTheme() throws {
    try login()

    let colorTheme = app.segmentedControls["colorTheme"]
    XCTAssert(colorTheme.exists)
    XCTAssert(colorTheme.buttons["Light"].isSelected)

    colorTheme.buttons["Dark"].tap()
    XCTAssert(colorTheme.buttons["Dark"].isSelected)
}
First of all, notice that we access the segmented control by quering the segmentedControls collection, no matter that in SwiftUI we create it as a picker.
On top of that, it’s quite interesting how we get the selected segment; in fact, a segment is a button that we access using its displayable label, and then with the isSelected property we determine if it’s selected or not.
To change the current selection, all we need is to perform a tap gesture on the button with the desired label. The last assert confirms that the selected segment has changed indeed.
Testing The Slider
In the next test that we’ll implement, we will meet how to change the value of a slider from a UI test. There is a specific method available to that, and once we do so, I’ll show you how to assert the new value of the slider.
Right next you can see the test implementation:
func testTextSize() throws {
    try login()

    let textSize = app.sliders["slider"]
    XCTAssert(textSize.exists)

    textSize.adjust(toNormalizedSliderPosition: 0.75)
    XCTAssertGreaterThanOrEqual(textSize.value as! String, "0.7")
}
The first thing to notice is that we query the sliders collection of the app object in order to get the slider. Since it’s the only one in the app, we could have used the element property to fetch it instead (app.sliders.element).
Once we make sure it exists, we change the current value using the adjust(toNormalizedSliderPosition:) method. Regardless of the human readable range of values we may display or use in the app, the provided value here must be in the 0.0…1.0 range. That’s why we set it to 0.75 in the above test.
There is a small detail to notice here. Let’s say that we wanted to verify that the new value is really 0.75 like so:
XCTAssertEqual(textSize.value as! String, "0.75")Even though we expect for the above to pass, this assertion will fail if we make it and run the test. In fact, the error message will say the following:
“XCTAssertEqual failed: (“0.746”) is not equal to (“0.75″)”
The slider’s value is an approximation to what we set, not the exact value we provide in the adjust(toNormalizedSliderPosition:) method. That’s the reason why we use the XCTAssertGreaterThanOrEqual() method to verify that the slider has been updated.
Testing The Wheel Picker
The last test we’ll write in this post is about the wheel picker that displays a few fonts to choose from. Even though both the wheel picker and the segmented control are both pickers in SwiftUI with different styles, the way to get them programmatically in tests and change their values is not the same. Therefore, it makes it interesting to have a look at how we can test the wheel picker too.
Let’s begin with the test implementation:
func testFontPicker() throws {
    try login()

    let wheel = app.pickerWheels.element
    XCTAssert(wheel.exists)
    XCTAssertEqual(wheel.value as! String, "Arial")

    wheel.adjust(toPickerWheelValue: "Futura")
    XCTAssertEqual(wheel.value as! String, "Futura")
}
In order to keep it simple, we access the wheel picker using the element property in the pickerWheels collection. However, the following is equally correct, making use if the “fontPicker” accessibility identifier set to the picker:
let wheel = app.pickers["fontPicker"].pickerWheels.elementSee in the above test that first we assert that the wheel exists, then that its current value is set to “Arial”. After that, we change its value using the adjust(toPickerWheelValue:) method; as argument we must provide the value of the tag() view modifier matching to the selection we want to make. Finally, we check if the wheel’s value has been updated or not.
Summary
In this long post, we went through various interesting and significant concepts of UI testing in Xcode using the XCTest framework. Obviously it would be impossible to cover how to test all UI elements, but we focused on the most important ones which you can use as the ground to explore furthermore. As I said in the beginning, UI testing is the best way to ensure that the interface will be working as it’s expected to be, and changes made to it won’t break its usability. So, I would recommend to write some UI tests, even if that’s to cover the most important or “hot” parts of your apps; don’t let users be your testers. In any case, I wish you’ve found valuable things to learn here today. Thank you for reading and take care!


