
Editor’s note: For the very first time you launch an app, you’ll probably find a series of tutorial screens to walk you through the basic features. It’s a common practice to explain how the app works. This week, we’ll show you how to build a similar type of tutorials by using UIPageViewController.
The UIPageViewController class was introduced into the iOS 5 SDK as a mechanism to implement a page turning style of user interface in iOS applications. The UIPageViewController is a highly configurable class that it lets developers to configure:
- the orientation of the page views – vertical or horizontal
- the transition style – page turning style or a dot based style
- the axis (spine) on which the page will turn
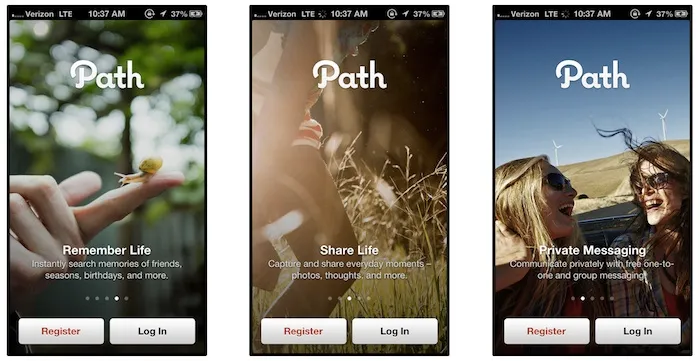
In this tutorial we are going to show how to use the UIPageViewController to implement an app that allows users to scroll between multiple screens. You can find examples of this type of page view implementation in games like Angry Birds to show the available levels or in apps that include tutorial/walkthrough screens.

Sample Walkthrough Screens from Path
Prior to iOS 5 we had to use the UIPageControl class and explicitly control the animations, as well as, transitions between pages. This procedure has been highly simplified with the introduction of the UIPageViewController. We’ll keep the demo app very simple and focus to demonstrate the usage of UIPageViewController. However, with the basic understanding of the page view controller, you can easily build the tutorial screens in your app.
A Glance at the Demo App
The application we are going to create is very simple: it consists of five different screens that each page displays a unique screen label. You’re allowed to navigate between pages by swiping through the screen.

Creating the Project
Open Xcode and create a new Project by using the Single View Application template. It might seem a little bit strange to select the Single View Application template as Xcode already comes with a Page-Based Application template, which contains a fully functional app based on the UIPageViewController. However, this template is a little bit complex and it will take us more time to clean-up the code of the template than to start from scratch. Needless to say, we can better grasp the concept behind the UIPageViewController when we start from scratch.

Creating a new project using Single View Application template
Okay, let’s move on. In the next screen enter PageApp as the product name and set com.appcoda in the company identifier field. Select the Use Authomatic Reference Counting option, but unselect the Use Storyboard since we’re not going to use storyboards for this project. Press next and create the project. Then, select the APPViewController.xib file and change the background of the view to black color.
Creating the Tutorial Screen
The next step is to implement the view controller class that we use to display our five tutorial screens. Select File -> New -> File … and from the list of available templates, select the “Objective-C class” template. Name the class APPChildViewController and make it a subclass of UIViewController. Also, check the box labeled “With XIB for user interface” in order to create the corresponding user interface.
Select the APPChildViewController.xib file just created. Change the background of the view to Black and reduce the vertical size of the view to 512 points to leave some free space for the dots of the page controller (which has a default height of 36 points). Finally add a white UILabel centered on the screen, with a big font size, and change its content to “Screen #n”. The resulting view should look something like:

User Interface for the main screen
Next, we have to create an IBOutlet for that label. In order to do that, change the Editor to the Assistant mode meanwhile the APPChildViewController.xib file is selected. The APPChildViewController.h file should be opened. Control and drag from the UILabel to the APPViewController.h and create an IBOutlet. Set the name as screenNumber. Finally, create a new property of type NSInteger called index. The resulting APPChildViewControl.h file should be something like:
#import

@interface APPChildViewController : UIViewController

@property (assign, nonatomic) NSInteger index;
@property (strong, nonatomic) IBOutlet UILabel *screenNumber;

@end
The index property allows us to control which screen is currently shown. In order to do that, once we have created a child screen, we have to set up its index through the index property. At the same time, we update the text of the label as well. Add the following line of code to the end of the viewDidAppear: method in the file APPChildViewController.m:
self.screenNumber.text = [NSString stringWithFormat:@"Screen #%d", self.index];
Handling the View Controllers
The UIPageViewController class highlights the distinction between a view controller and a container controller. The container controller is used to contain and manage multiple view controllers shown in the app, as well as, controlling the way one view controller switches to another. Here the UIPageViewController is the container controller that lets the user navigate between pages of content, where each page is managed by its own view controller object.
In order to make UIPageViewController work, our APPViewController has to adopt the UIPageViewControllerDataSource protocol. By implementing the data source protocol, we tell the page view controller what to display for each page.
Open the APPViewController.h file and modify the @interface declaration, and add a new property to hold the UIPageViewController:
#import

@interface APPViewController : UIViewController

@property (strong, nonatomic) UIPageViewController *pageController;

@end
Next, we have to implement at least two methods of the protocol:
- viewControllerAfterViewController – provides the view controller after the current view controller. In other words, we tell the app what to display for the next screen.
- viewControllerBeforeViewController – provides the view controller before the current view controller. In other words, we tell the app what to display when user switches back to the previous screen.
Add the following lines of code before the end of the APPViewController.c file:
- (UIViewController *)pageViewController:(UIPageViewController *)pageViewController viewControllerBeforeViewController:(UIViewController *)viewController {

    NSUInteger index = [(APPChildViewController *)viewController index];

    if (index == 0) {
        return nil;
    }

    index--;

    return [self viewControllerAtIndex:index];

}

- (UIViewController *)pageViewController:(UIPageViewController *)pageViewController viewControllerAfterViewController:(UIViewController *)viewController {

    NSUInteger index = [(APPChildViewController *)viewController index];


    index++;

    if (index == 5) {
        return nil;
    }

    return [self viewControllerAtIndex:index];

}
The above methods are very straightforward. We simply increase/decrease the screen number and return the view controller to display. However, please note that we have to check if we have reached the boundaries of the pages and return nil in that case. In the demo app, we have a maximum of five pages. So we’ll return nil if user has come to the end of the pages.
As you may wonder, there are two ways to create the view controllers for the container. We can either create them all at once and put them into the container. However, this way is not recommended as it takes up too much resources. Another way is to create the view controller only when they are needed. Here, the “viewControllerAtIndex” method is designed for this purpose. It takes in the index parameter and creates the corresponding view controller (i.e. APPChildViewController) on the fly.
Add the following method at the end of the APPViewController.m file:
- (APPChildViewController *)viewControllerAtIndex:(NSUInteger)index {

    APPChildViewController *childViewController = [[APPChildViewController alloc] initWithNibName:@"APPChildViewController" bundle:nil];
    childViewController.index = index;

    return childViewController;

}
Finally, you have to tell iOS the number of dots to display in the page view controller and which dot must be selected at the beginning. Add the following two methods at the end of the APPViewController.m file:
- (NSInteger)presentationCountForPageViewController:(UIPageViewController *)pageViewController {
    // The number of items reflected in the page indicator.
    return 5;
}

- (NSInteger)presentationIndexForPageViewController:(UIPageViewController *)pageViewController {
    // The selected item reflected in the page indicator.
    return 0;
}
Again the above code is very straightforward. We simply tell iOS that we have 5 pages to display in the page view controller and the first page should be selected by default.
Initializing the UIPageViewController
The final step is to create and initialize the UIPageViewController. The best place to do that is in the viewDidLoad method. Open the APPViewController.m file and change the method to:
- (void)viewDidLoad {

    [super viewDidLoad];

    self.pageController = [[UIPageViewController alloc] initWithTransitionStyle:UIPageViewControllerTransitionStyleScroll navigationOrientation:UIPageViewControllerNavigationOrientationHorizontal options:nil];

    self.pageController.dataSource = self;
    [[self.pageController view] setFrame:[[self view] bounds]];

    APPChildViewController *initialViewController = [self viewControllerAtIndex:0];

    NSArray *viewControllers = [NSArray arrayWithObject:initialViewController];

    [self.pageController setViewControllers:viewControllers direction:UIPageViewControllerNavigationDirectionForward animated:NO completion:nil];

    [self addChildViewController:self.pageController];
    [[self view] addSubview:[self.pageController view]];
    [self.pageController didMoveToParentViewController:self];

}
Let’s see what the method does. We first create the UIPageViewController object and specify the navigation style, as well as, the navigation orientation. Here we use UIPageViewControllerTransitionStyleScroll as the transition and UIPageViewControllerNavigationOrientationHorizontal as orientation. Please note that the transition using dots is only available if we use an horizontal orientation and a scroll style. Other orientations or transitions styles will default the switch to a page turning style.
Next we specify the data source, in this case it is the class itself. We also modify the frame of the controller in order to opt for the full screen. We then create the first child screen and add that screen to an array of controllers. We do not add more controllers to the array of controllers as we have opted to create them on demand.
And finally, we have to replace the current controller by our new page controller, and to add the page controller view to the current view.
Compile and Run the App
And there we go, start the application and see how the UIPageViewController works. You should be able to test the page view controller by using the iPhone Simulator. Try to swipe through the screen to navigate between pages.
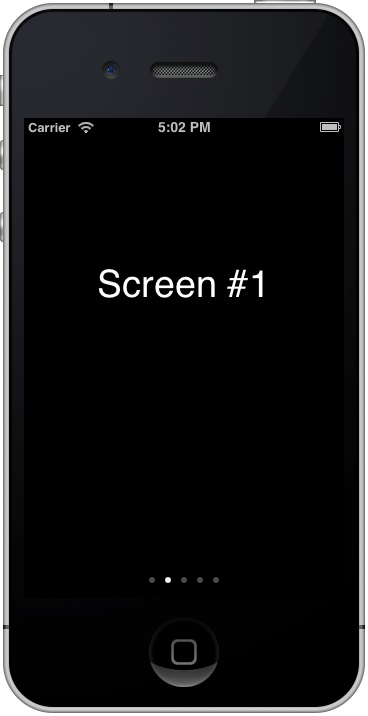
PageView Demo App
Download Full Source Code
In this tutorial, we have given a basic introduction of UIPageViewController. This is a very handy class for implementing tutorials in your app. Try to modify the sample app and build a more elegant tutorials.
For your complete reference, you can download the full source code from here. As always, leave us comment and share your thought.
Stay tuned. We’ll have a few more tutorials in the coming weeks.


