

Editor’s note: Apple Watch is expected to release in the coming months. But as you know, the company already released WatchKit, the SDK that allows developers to create apps for its upcoming Apple Watch, along with Xcode 6.2 beta. So you may have already played around with it and started building Watch apps. If not, this beginner tutorial is for you. This week Julian from Julo’s development will give you an introduction to WatchKit and show you how to build a simple guess game using the SDK. You’ll learn how to create a Watch app, layout the app UI and test the app.
Enter the WatchKit tutorial.
WatchKit was first released by Apple on November 18th, 2014, along with Xcode 6.2 beta. The SDK allows developers to create and develop apps for the Apple Watch. To develop applications for the Apple Watch, you’ll need to have a paid developer account to download Xcode 6.2 beta. The demo app will be written in Swift. So I expect you have some basic knowledge of Swift programming.

Okay, let’s get started.
Understanding WatchKit Apps
For now, Apple isn’t allowing developers to create native Watch apps. There are three types of Apple Watch experience you can build today: WatchKit apps, Glances, and actionable notifications. I will not go into Glances and notification in this tutorial but just focus on WatchKit apps.
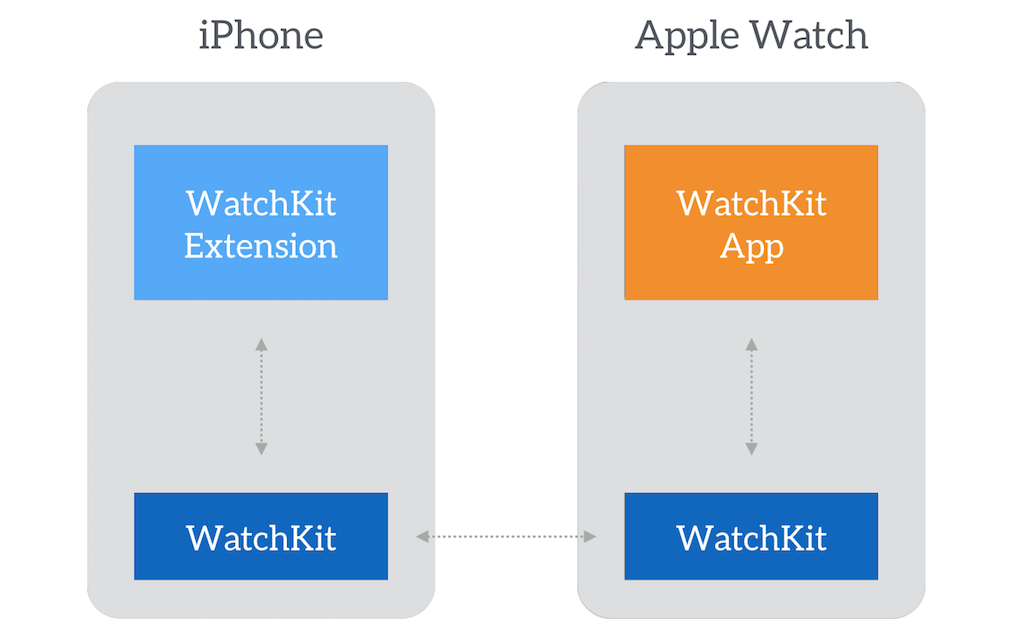
Firstly, Watch apps are not standalone apps, meaning that they require to pair with an iOS app running on the user’s iPhone. The Watch app you’re going to build will just be an extension of iPhone app. The iPhone app is responsible for installing and managing the Watch app. Further, the iPhone app can communicate with the Watch App, but we will not cover this in the tutorial.
The Apple watch will come in two screen sizes: 38mm and 42mm. When designing the user interface for the Apple Watch, you do not need to design for both screen sizes. Xcode will automatically adapt the layout to fit screen size. There is no auto layout, however. Instead Apple WatchKit uses its own layout system.
The Demo App
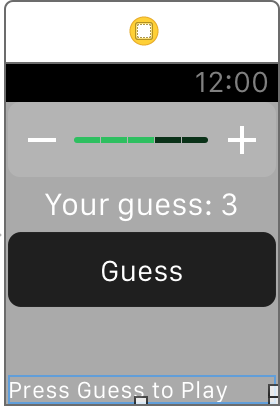
Today we will create a simple game for the Apple Watch based on the principle of the child game “How Many Fingers”. The player takes a guess about how many fingers (i.e. a number between 0 and 5) the watch app is holding up. The app will check if the player made a right guess or not and display a message accordingly. The app UI will look like below:
Creating the WatchKit Demo App
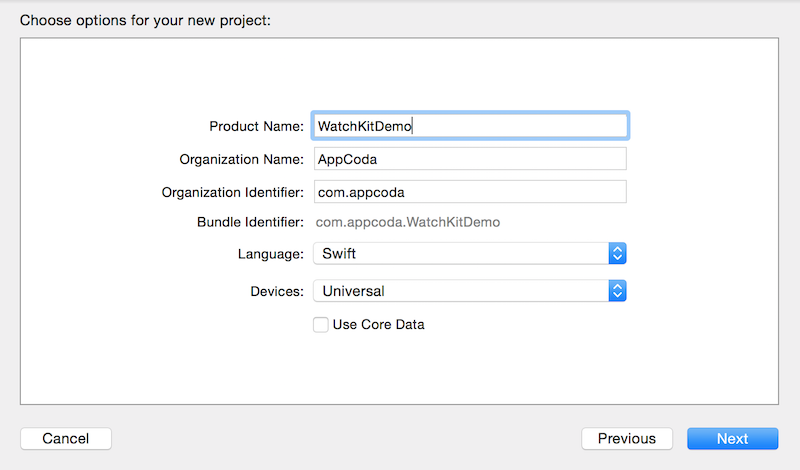
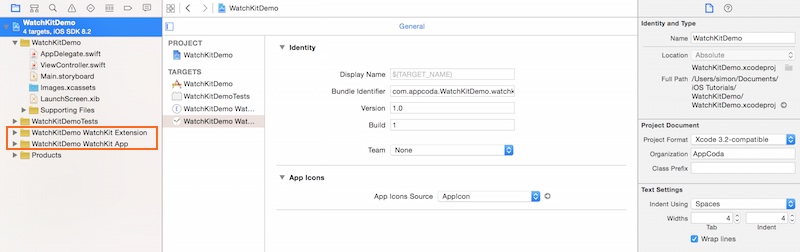
Assuming you’ve installed Xcode 6.2 beta 4 (or up), create a new project using the Single View Application template and name it WatchKitDemo (or whatever you like). Leave the other details as they are and make sure the language is set to Swift. Save the project where it suits you best.
As mentioned, Watch apps are extensions of iPhone apps. To create a Watch app, go up to the Xcode menu and select Editor > Add Target. Choose Apple Watch > WatchKit App. By using the WatchKit App template, it will generate everything you need to build a Watch app.

Deselect “Include Notification Scene” and leave other details as they are and then press finish. Now you will get a warning to ask if you want to activate the new scheme.
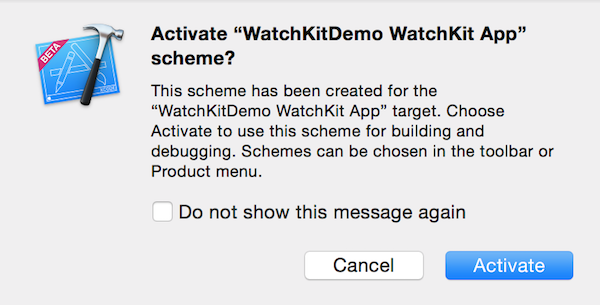
Just press Activate. This will add a scheme to your Xcode project, which will allow you to test your app on the Apple Watch simulator. In the project navigator, you should see two new folders added – WatchKit Extension and WatchKit App.
The WatchKit app contains only the storyboards and resource files associated with your app’s user interface. The WatchKit extension is where you put your code for managing the logic and updating the user interface. Simply put, the Watch app provides a view to display information and interact with users. It is actually the iPhone app that handles the heavy lifting.
Designing the User Interface
Firstly, we will start to design our User Interface of the Watch app. To do that, you have to navigate to “WatchKitDemo WatchKit App” and select the Interface.Storyboard File. Like an iOS app, Xcode provides a storyboard for designing the UI of a Watch app.
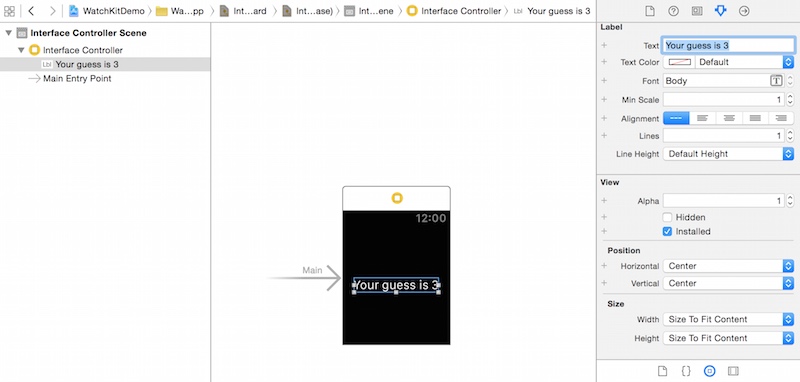
Start off by dragging and dropping a label into the Interface Controller. You will see that it will automatically pop to the top of the controller. This is because the Interface Controller is separated into three main areas: TOP, CENTER and BOTTOM. This is due to the small screen size of the Apple Watch. Now, if you select the label, in the Attribute Inspector, under the position tab you will see that there are positions for the Vertical and Horizontal Axis. Set Horizontal to Center and Vertical to Center.
Next, let’s change the text of the Label to “Your guess is: 3”. The final result should look like this:
Now let’s move on to create the slider which will allow users to change the guess. Drag and drop a slider into the Interface. Here, we have to change a few attributes of the slider. The attributes should look like below:
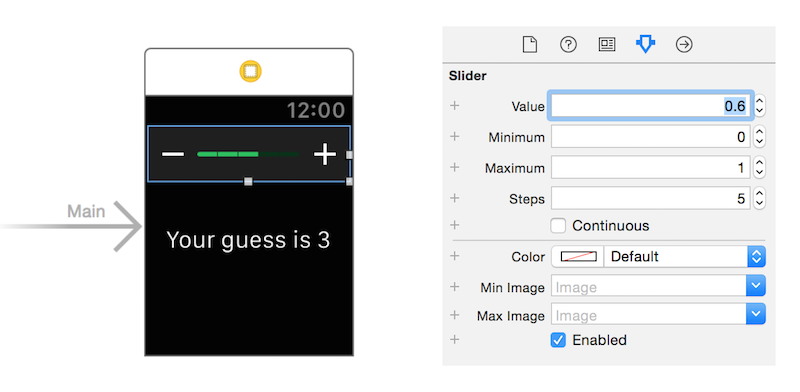
As the user will guess a number between 0 and 5, we set the steps to 5. This will separate the slider into 5 parts, each represents a number. As we want to set the default number to 3, we change the value to 0.6. The minimum value is set to 0 and the maximum value is set to 1.
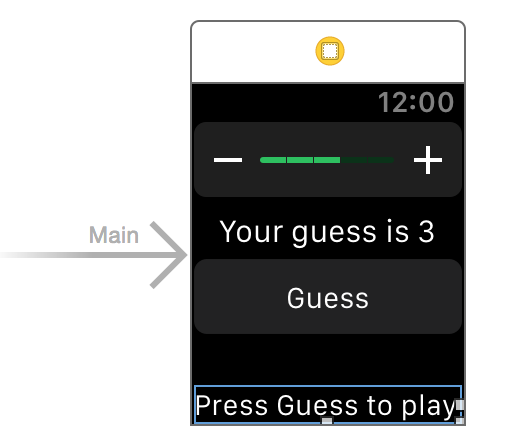
Once the slider is configured, drag a button from the Object Library to the interface and set its title to Guess. Also change its vertical position to Center.
To finish up the UI, we need a Label that shows the user if his/her guess is correct or not. To do that, drag a Label into the View and set its title to “Press Guess to play”. Next, change its vertical position to Bottom and set the min scale of the font to 0.5 such that the text can fit properly. The final design should look like that:
Diving into the Code
Okay. Now that we have the user interface set up, let’s start to code. As mentioned, the programming logic should be put in the WatchKit Extension. The InterfaceController.swift has been associated with the Interface Controller we just designed.
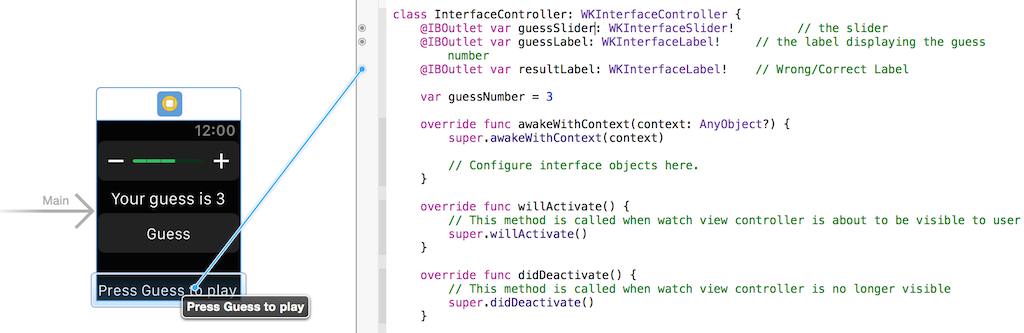
Open that file and create three outlets for the labels and the slider. Insert the following code below in the InterfaceController class:
@IBOutlet var guessSlider: WKInterfaceSlider!         // the slider
@IBOutlet var guessLabel: WKInterfaceLabel!     // the label displaying the guess number
@IBOutlet var resultLabel: WKInterfaceLabel!    // Wrong/Correct Label
Next we have to create a variable for the number. Add the following line of code:
var guessNumber = 3
We have now created the basic setup of our project, so let’s hook up the UI elements with their respective outlets. To do that, switch back to the Interface.storyboard and select the assistant editor. This will display the Interface.swift file we have just been working on. Now connect the outlets with the slider and the labels accordingly.
Now, control-drag from the slider to your code. Instead of selecting IBOutlet, select IBAction and name it updateGuess.
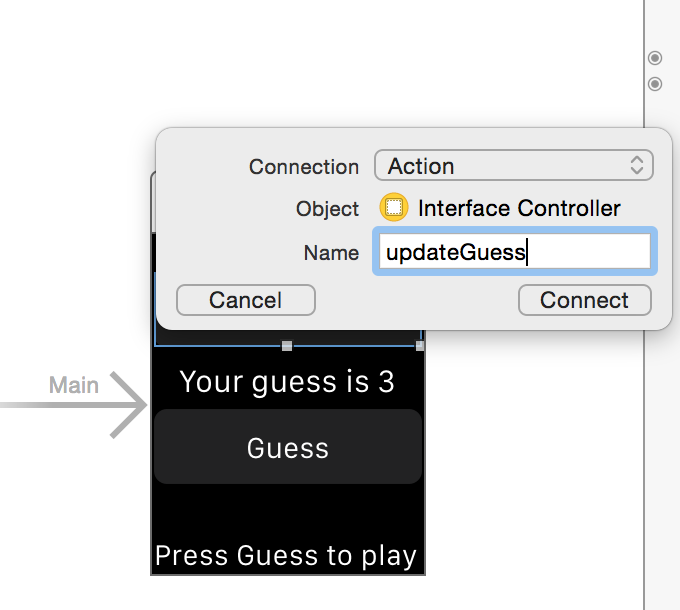
You should get a new function that looks like this:
@IBAction func updateGuess(value: Float) { }
We use this method to get the user’s number and update the guess label. Insert the following lines of code in the method:
guessNumber = Int(value * 5)
guessLabel.setText("Your guess: \(guessNumber)")
As the slider goes from 0 to 1, we have to multiply the slider value by 5 in order to get the actual number. We then update the text label accordingly.
Now control-drag from the button to create another action method. Name it startGuess. This is the method that generates a random number and compares it with the guess. Update the method like this:
@IBAction func startGuess() {
    var randomNumber = Int(arc4random_uniform(6))

    if(guessNumber == randomNumber) {
        resultLabel.setText("Correct. You win!")

    } else {
        resultLabel.setText("Wrong. The number is \(randomNumber)")
    }

}
Firstly we used the arc4random_uniform(6) to generate a random number between 0 and 5. Then we compare the guess with the random number and display the result on screen.
That’s it. It is now ready to test the app.
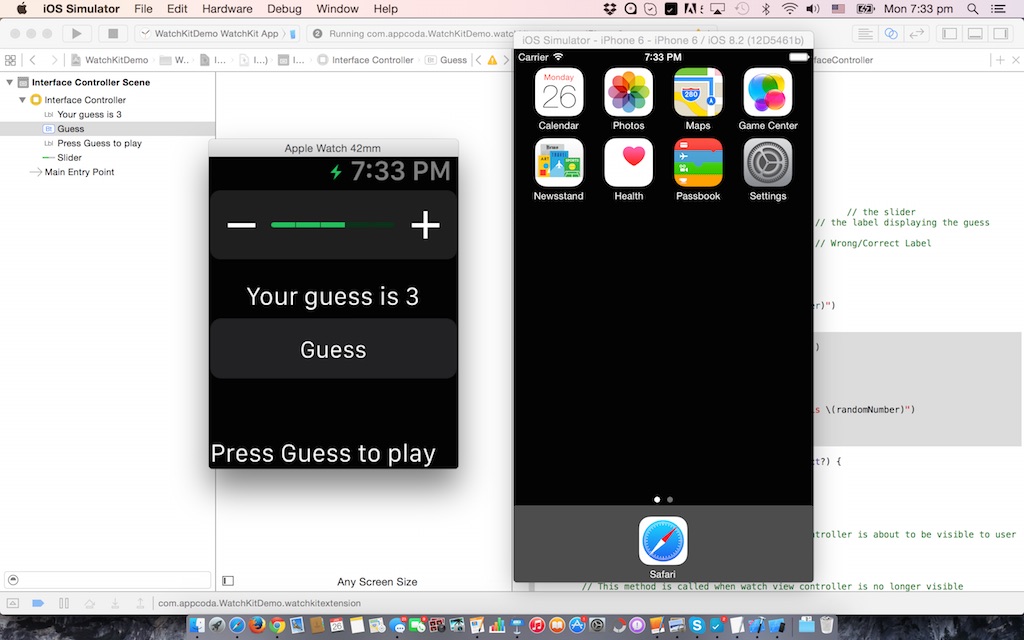
Running the Watch App
To run the app, select the “WatchKitDemo WatchKit App” scheme and choose your preferable device. Then click the run button to test the Watch app. Optionally, you can change the display size of the watch simulator by selecting Hardware > External Displays > Apple Watch – 38mm.
Cool, right? What do you think about WatchKit and the tutorial? Leave me comment and share your thought.
For your reference, you can download the final project here.


