I recently got a question from a reader about how to animate gradient or create an animated gradient background using SwiftUI. The SwiftUI framework provides a number of built-in components such as LinearGradient and AngularGradient for developers to render a gradient. And, SwiftUI also makes it very easy to create animation using the .animation modifier. The question is how we can combine the gradient component and the .animation modifier to create animated gradients?
In this tutorial, we will discuss three approaches to implement an animated gradient including:
- Animate the gradient by changing the start and end point
- Animate the gradient using the
.hueRotationmodifier - Animate the gradient using
AnimatableModifier
I use Xcode 13 (beta) to write this tutorial, but the code should also work on Xcode 12.
Animate gradients by changing the start and end point
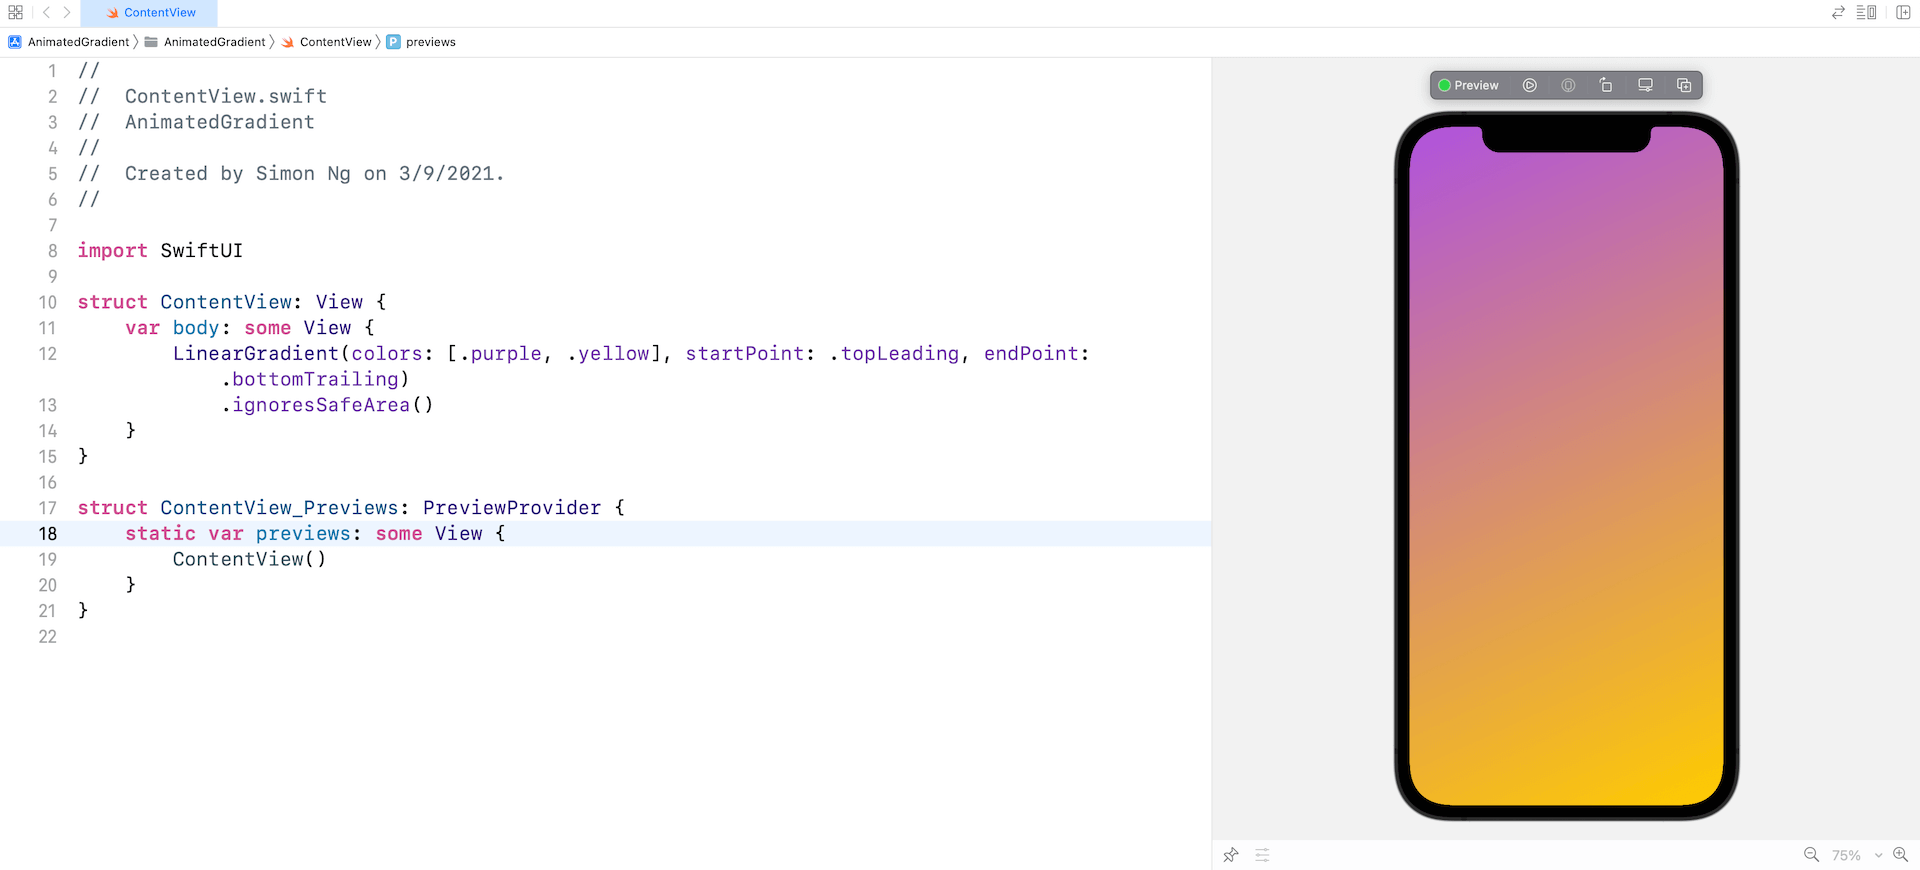
First, let’s start with a simple linear gradient. Assuming you’ve created a SwiftUI project in Xcode, you can insert the following code in ContentView:
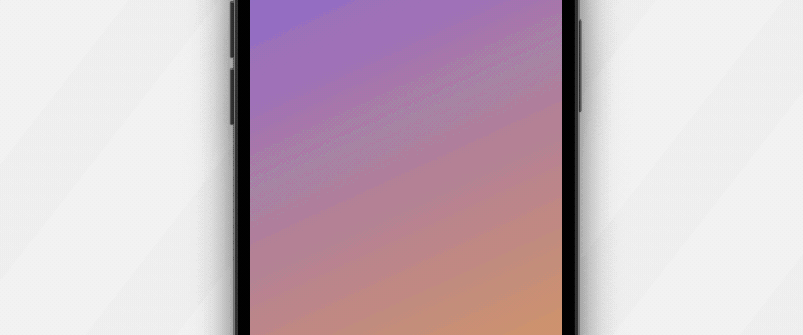
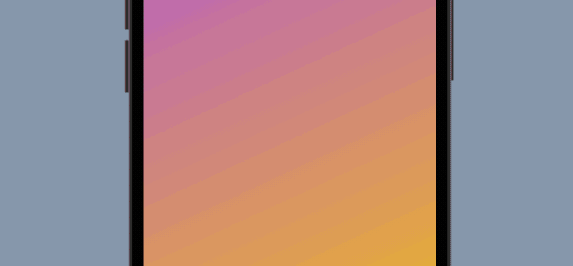
LinearGradient(colors: [.purple, .yellow], startPoint: .topLeading, endPoint: .bottomTrailing)
    .ignoresSafeArea()
This creates a gradient of purple and yellow from the top-left corner to the bottom-right corner.
What I want to do next is to animate the gradient color by changing the value of the start and end points. When the animation starts, the start point will change from top-left corner to bottom-left corner, while the end point will change from bottom-right corner to top-right corner. To implement the animation, let’s declare a state variable to hold the status of the animation:
@State private var animateGradient = falseFor the LinearGradient view, update the code like this:
LinearGradient(colors: [.purple, .yellow], startPoint: animateGradient ? .topLeading : .bottomLeading, endPoint: animateGradient ? .bottomTrailing : .topTrailing)
    .ignoresSafeArea()
    .onAppear {
        withAnimation(.linear(duration: 2.0).repeatForever(autoreverses: true)) {
            animateGradient.toggle()
        }
    }
When the view appears, we start the animation to render the change of start & end point. For demo purpose, we just use the linear animation and set it to run continuously.
Now in the preview pane, run the demo to see the animated gradient.
The same technique can apply to other gradients like RadialGradient. You can modify the code like below to try it out:
RadialGradient(colors: [.purple, .yellow], center: .center, startRadius: animateGradient ? 400 : 200, endRadius: animateGradient ? 20 : 40)
    .ignoresSafeArea()
    .onAppear {
        withAnimation(.linear(duration: 2.0).repeatForever(autoreverses: true)) {
            animateGradient.toggle()
        }
    }
Animate gradients using Hue Rotation
Unlike the first approach, this approach creates an animated gradient by applying changes to the hue rotation angle. SwiftUI has a built-in modifier called .hueRotation for shifting all of the colors in a view based on the angle you specify.
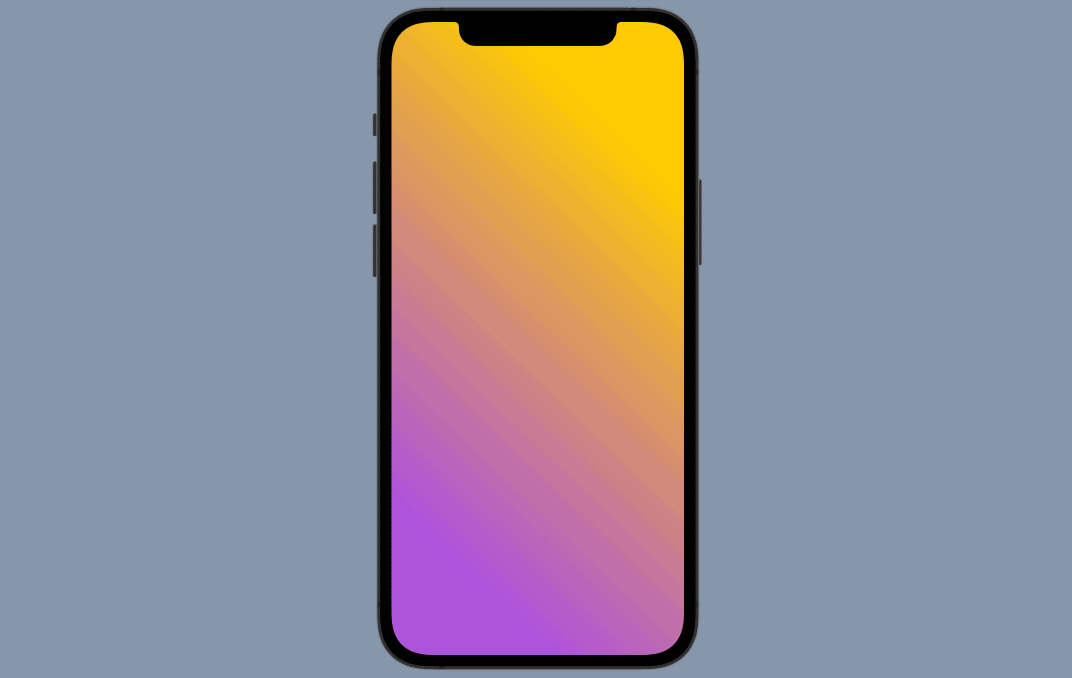
For example, if you attach the .hueRotation modifier to the linear gradient and shift the angle by 45 degrees like this:
LinearGradient(colors: [.purple, .yellow], startPoint: .topLeading, endPoint: .bottomTrailing)
    .hueRotation(.degrees(45))
    .ignoresSafeArea()
The gradient color will be adjusted accordingly as shown in the figure below.
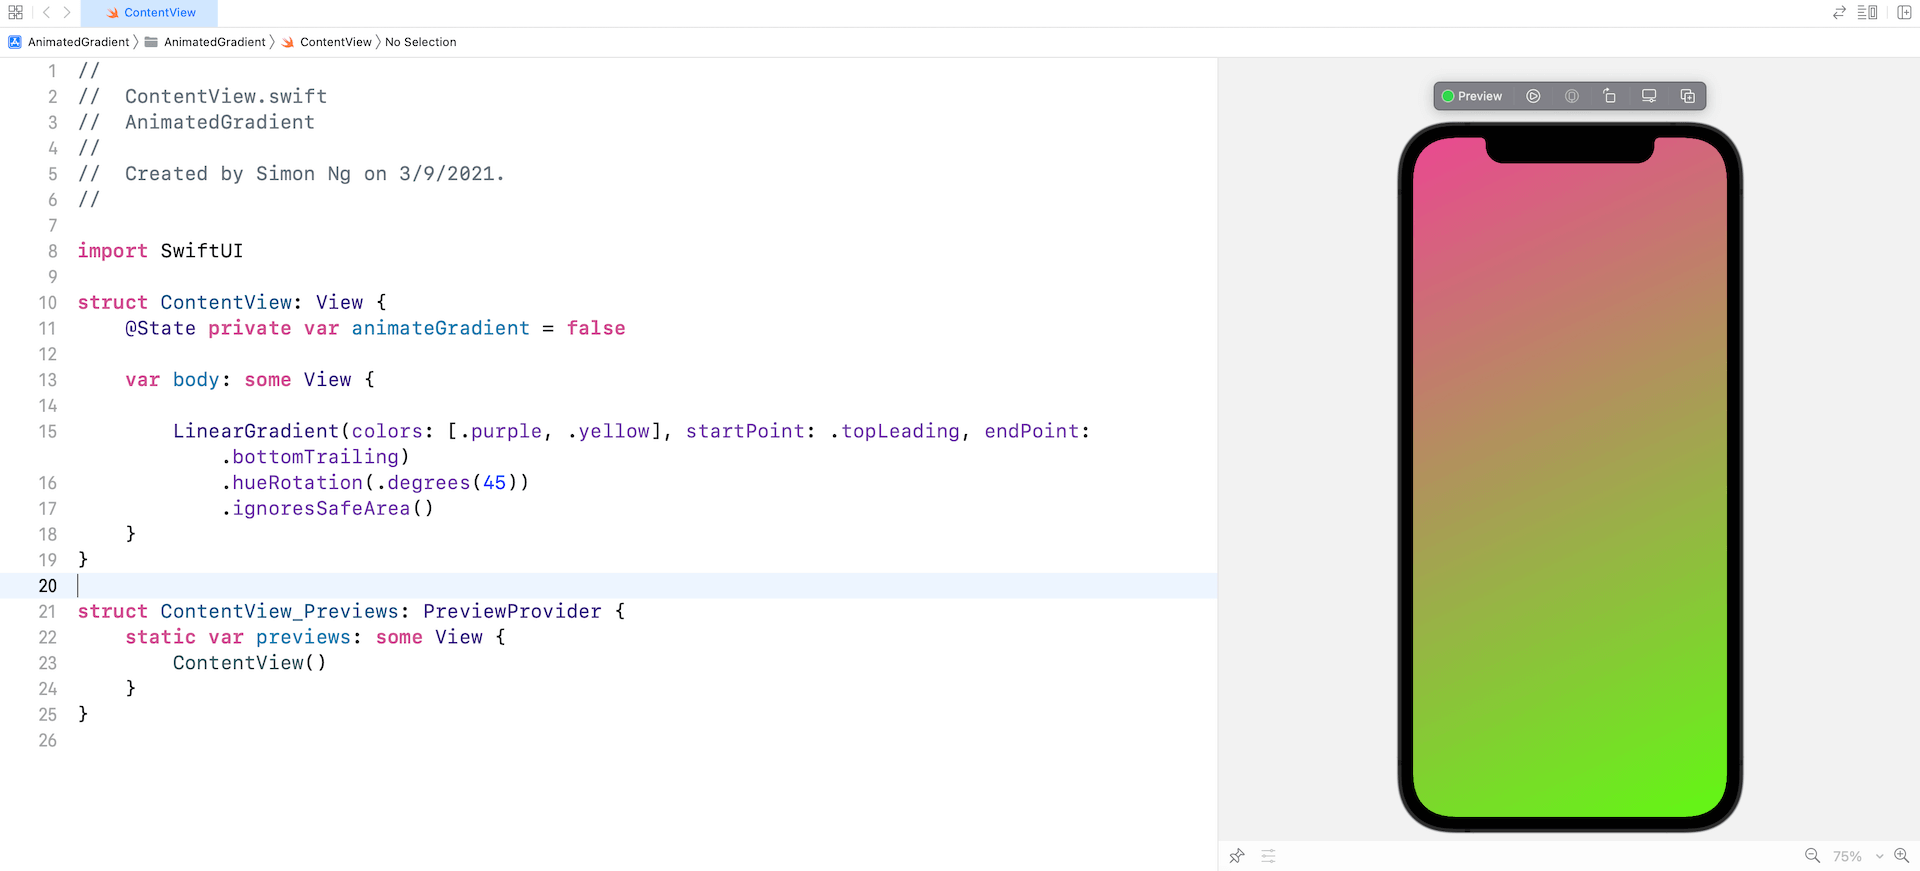
As you may notice, by animating the change of the hue rotation angle, we can also create an animated gradient. Assuming you already declared the animateGradient state variable, you can modify the .hueRotation modifier like this:
LinearGradient(colors: [.purple, .yellow], startPoint: .topLeading, endPoint: .bottomTrailing)
    .hueRotation(.degrees(animateGradient ? 45 : 0))
    .ignoresSafeArea()
    .onAppear {
        withAnimation(.easeInOut(duration: 5.0).repeatForever(autoreverses: true)) {
            animateGradient.toggle()
        }
    }
When we toggle the state variable to true, SwiftUI will animate the change of the hue rotation angle and render the gradient animation.
Animate gradients using AnimatableModifier
Let’s say, your view initially displays a gradient of purple and yellow from top to bottom. You want to change the gradient color to another set of color. How can you animate the change?
If you need to this kind of gradient animation, this approach will fit you but it needs more works than the other two approaches we just discussed.
In Swift, you can define a gradient using the Gradient struct. Here is an example:
let gradient1 = Gradient(colors: [.purple, .yellow])
let gradient2 = Gradient(colors: [.blue, .purple])
SwiftUI can’t automatically animate the gradient change from one set of colors to another set of color. We have to create our own implementation by adopting the AnimatableModifier protocol. If you are new to the protocol, we have an in-depth discussion in our Mastering SwiftUI book.
Now let’s create a struct called AnimatableGradientModifier which adopts the AnimatableModifier protocol to animate the gradient change:
struct AnimatableGradientModifier: AnimatableModifier {
    let fromGradient: Gradient
    let toGradient: Gradient
    var progress: CGFloat = 0.0

    var animatableData: CGFloat {
        get { progress }
        set { progress = newValue }
    }

    func body(content: Content) -> some View {
        var gradientColors = [Color]()

        for i in 0..<fromGradient.stops.count {
            let fromColor = UIColor(fromGradient.stops[i].color)
            let toColor = UIColor(toGradient.stops[i].color)

            gradientColors.append(colorMixer(fromColor: fromColor, toColor: toColor, progress: progress))
        }

        return LinearGradient(gradient: Gradient(colors: gradientColors), startPoint: .topLeading, endPoint: .bottomTrailing)
    }

    func colorMixer(fromColor: UIColor, toColor: UIColor, progress: CGFloat) -> Color {
        guard let fromColor = fromColor.cgColor.components else { return Color(fromColor) }
        guard let toColor = toColor.cgColor.components else { return Color(toColor) }

        let red = fromColor[0] + (toColor[0] - fromColor[0]) * progress
        let green = fromColor[1] + (toColor[1] - fromColor[1]) * progress
        let blue = fromColor[2] + (toColor[2] - fromColor[2]) * progress

        return Color(red: Double(red), green: Double(green), blue: Double(blue))
    }
}
This struct takes in the initial gradient (i.e. fromGradient) and the target gradient (i.e. toGradient) as input parameters. The progress variable keeps track of the change of gradient. The initial value is set to 0. When the value is set to 1, this means the gradient color completely changes to the color set of toGradient.
I mentioned before that it’s our responsibility to have our own implementation for the color change. In the code above, we created a function named colorMixer (ref: thanks to SwiftUI-lab) to compute the resulting color based on fromColor, toColor, and the given progress.
As the progress value changes over time, the body part creates the LinearGradient view using the computed colors.
This is how we animate the change from one set of gradient color to another set. For convenience purposes, create a view extension to apply the AnimatableGradientModifier:
extension View {
    func animatableGradient(fromGradient: Gradient, toGradient: Gradient, progress: CGFloat) -> some View {
        self.modifier(AnimatableGradientModifier(fromGradient: fromGradient, toGradient: toGradient, progress: progress))
    }
}
Now you can update ContentView like this to use the animatableGradient modifier:
struct ContentView: View {
    @State private var progress: CGFloat = 0
    let gradient1 = Gradient(colors: [.purple, .yellow])
    let gradient2 = Gradient(colors: [.blue, .purple])

    var body: some View {

        Rectangle()
            .animatableGradient(fromGradient: gradient1, toGradient: gradient2, progress: progress)
            .ignoresSafeArea()
            .onAppear {
                withAnimation(.linear(duration: 5.0).repeatForever(autoreverses: true)) {
                    self.progress = 1.0
                }
            }
    }
}
I tried to run the app in the preview pane but it didn’t render the animation properly. To test the gradient animation, you better use the iPhone simulator.