

One of the most innovative inventions Apple has come up with in the past year is its True Depth camera. An ode to hardware and software engineers, the True Depth camera is what powers its secure facial recognition system, FaceID. As developers, the True Depth camera opens up a world of possibilities for us, especially in the field of face-base interactions.
Before we begin this ARKit tutorial, let me quickly brief you on the different parts of the camera. Like most iPhone/iPad front cameras, the True Depth camera comes with a microphone, a 7 megapixel camera, an ambient light sensor, a proximity sensor, and a speaker. What makes the True Depth camera itself is the addition of a dot projector, flood illuminator, and infrared camera.
The dot projector projects more than 30,000 invisible dots onto your face to build a local map (you’ll see this later in the tutorial). The infrared camera reads the dot pattern, captures an infrared image, then sends the data to the Secure Enclave in the A12 Bionic chip to confirm a match. Finally, the flood illuminator allowed invisible infrared light to identify your face even when it’s dark.
These parts come together to create some magical experiences like Animojis and Memojis. Special effects that require a 3D model of the user’s face and head can rely on the True Depth Camera.
Introduction to the Demo Project
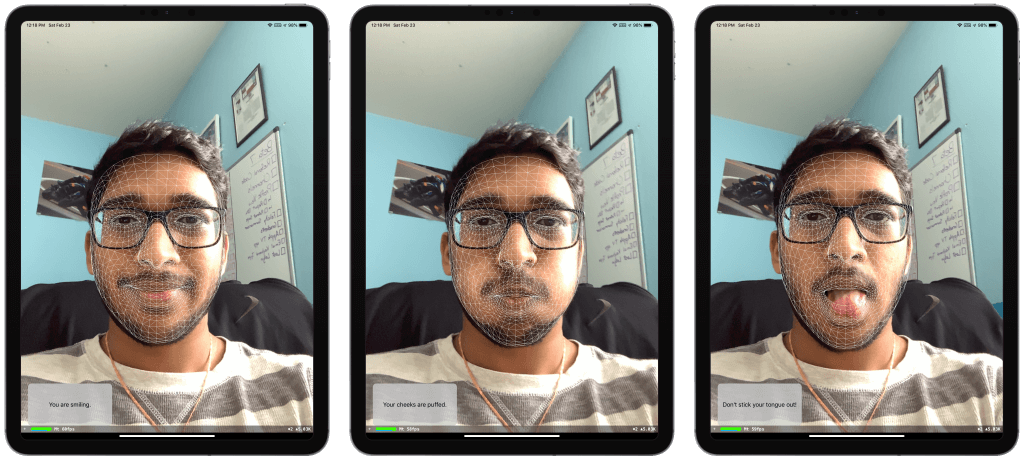
I believe that it’s important for developers to learn how to utilize the True Depth camera so they can perform face tracking and create amazing face-based experiences for users. In this tutorial, I will show you how we can use the 30,000 dots to recognize different facial movements using ARFaceTrackingConfiguration, that comes with the ARKit framework.
The final result will look like this:
Let’s get started!
You will need to run this project on either an iPhone X, XS, XR, or iPad Pro (3rd gen). This is because these are the only devices which have the True Depth camera. We will also be using Swift 5 and Xcode 10.2.
Editor’s Note: If you’re new to ARKit, you can refer to our ARKit tutorials.
Creating a ARKit Demo for Face Tracking
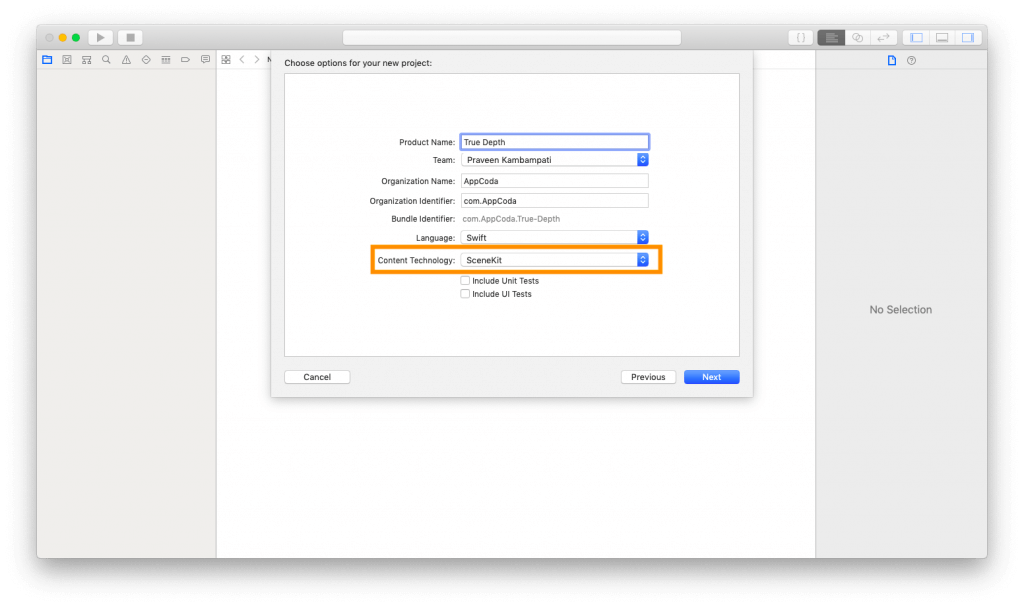
First, open Xcode and create a new Xcode project. Under templates, make sure to choose Augmented Reality App under iOS.
Next, set the name of your project. I simply named mine True Depth. Make sure the language is set to Swift and Content Technology to SceneKit.
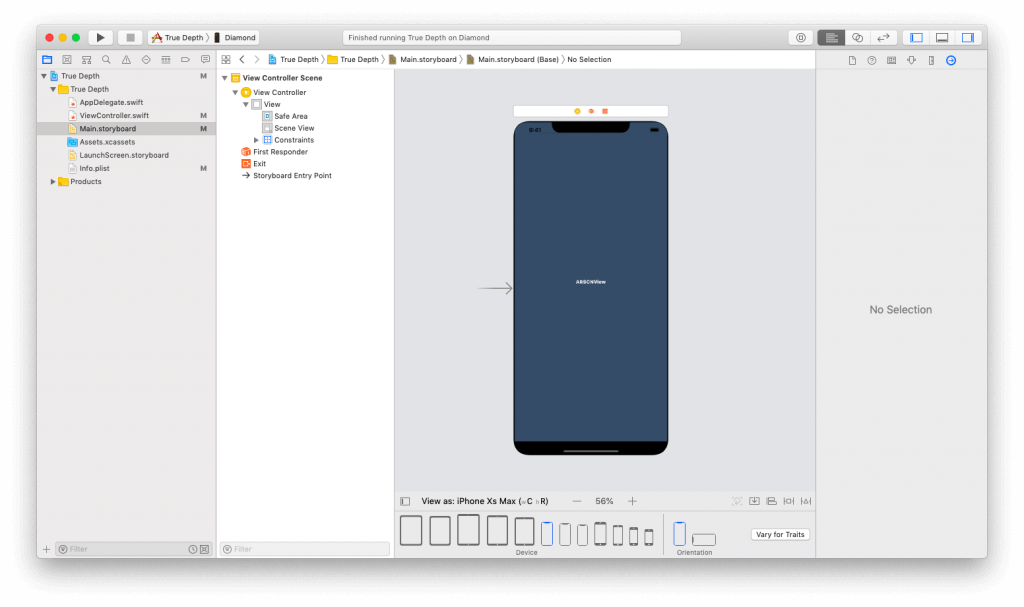
Head over to Main.storyboard. There should be a single view with an ARSCNView already connected to an outlet in your code.
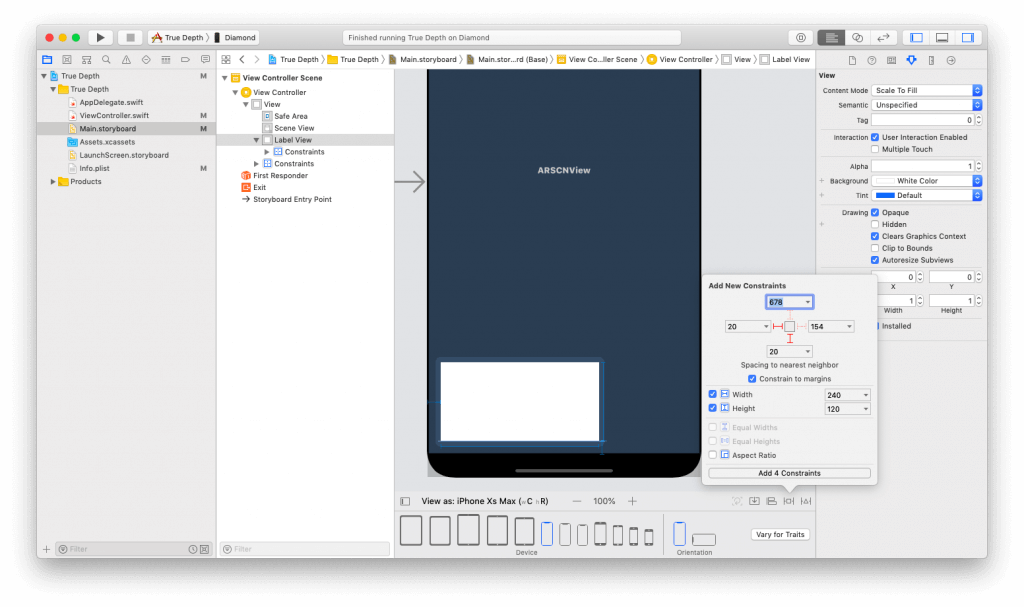
What we have to do is really simple. All we need to do is add a UIView and a UILabel inside that view. This label will inform the user of the face expressions they are making.
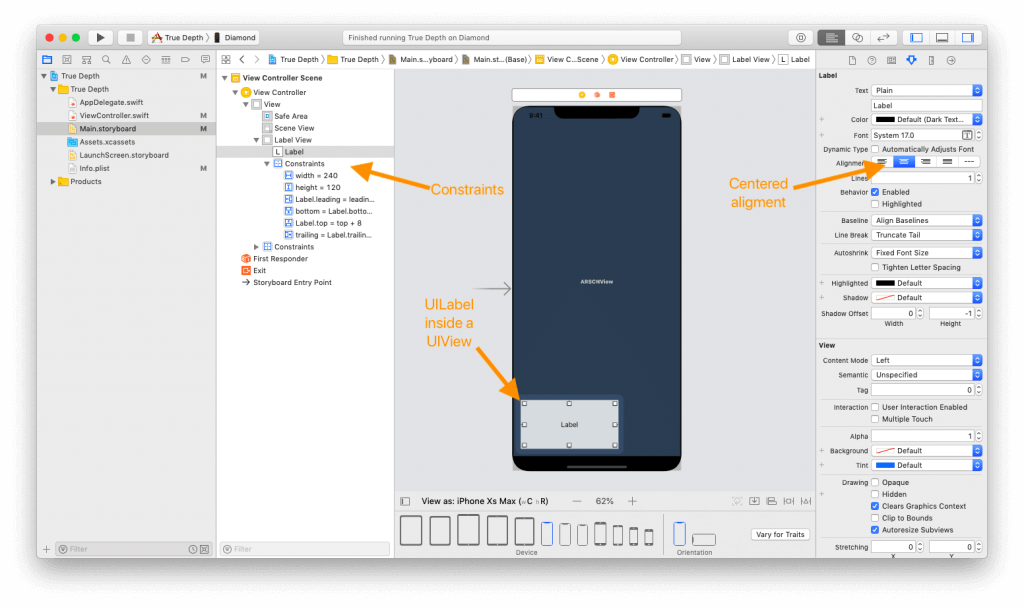
Drag and drop a UIView into the ARSCNView. Now, let’s set the constraints. Set the width to 240pt and height to 120pt. Set the left and bottom constraints to 20pt.
For design purpose, let’s set the alpha of the view to 0.8. Now, drag a UILabel into the view you just added. Set the constraints to 8 points all around as shown below.
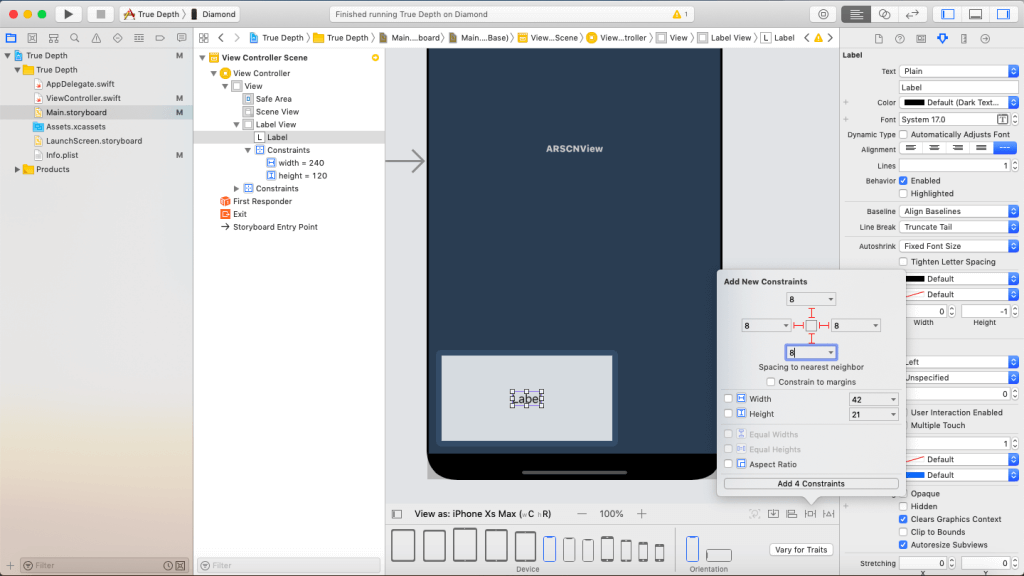
Finally, set the alignment of the label to centralized. Your final storyboard should look like this.
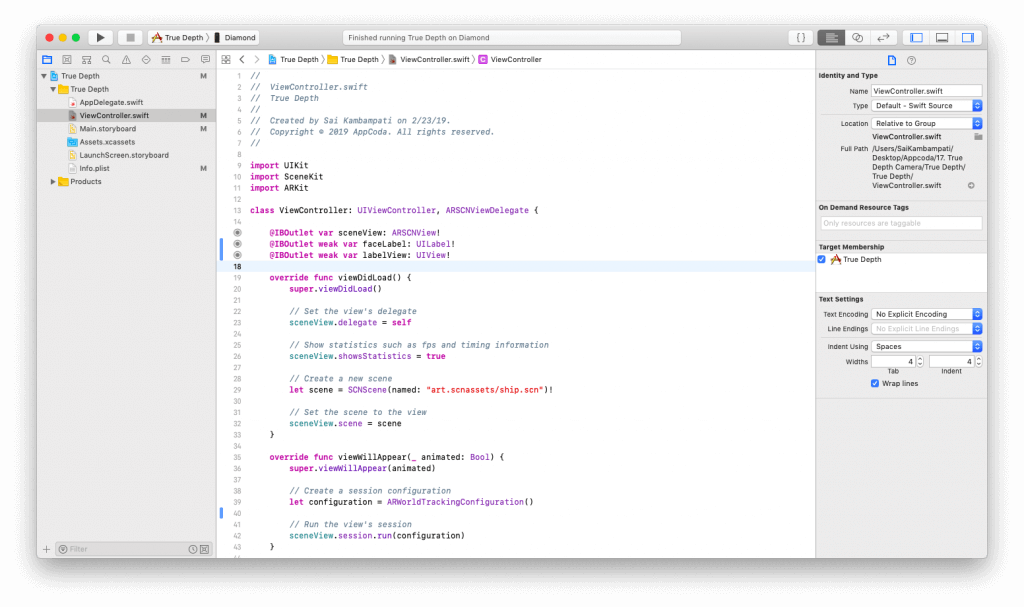
Now, let’s set the IBOutlets to our ViewController.swift file. Switch to the Assistant editor. Control and click on the UIView and UILabel and drag it over to ViewController.swift to create the IBOutlets.
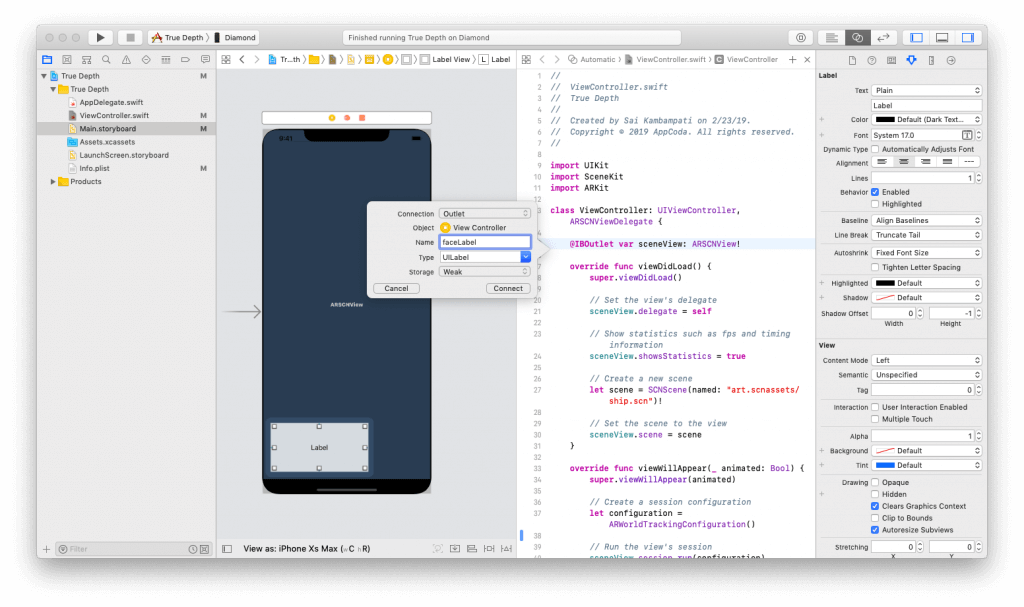
You should create two outlets: faceLabel and labelView.
Creating a Face Mesh
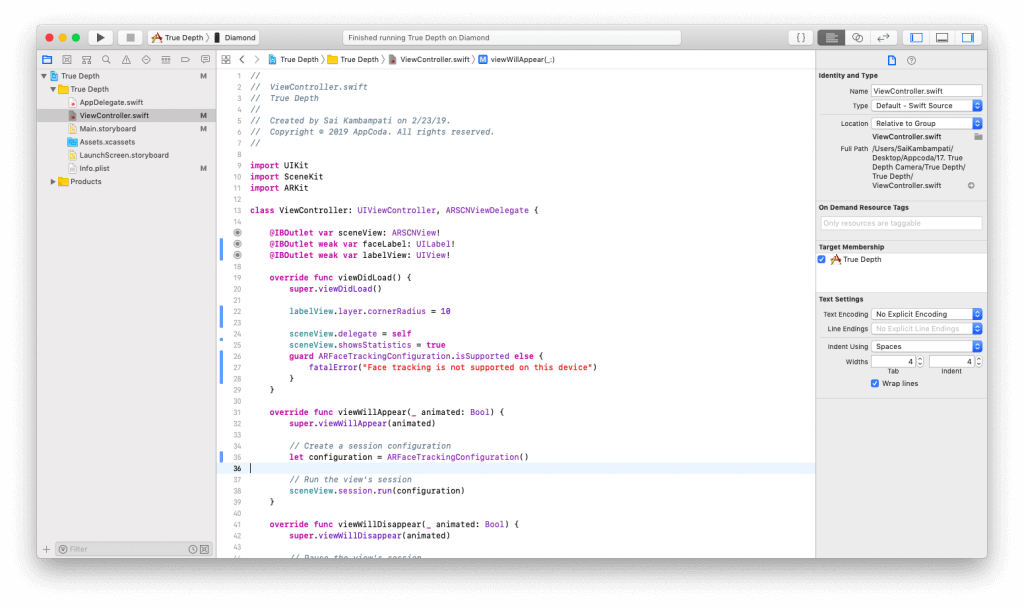
Let’s clean up the code a little bit. Because we chose the Augmented Reality App as our template, there’s some code which we don’t need. Change your viewDidLoad function to this:
override func viewDidLoad() {
    super.viewDidLoad()

    // 1
    labelView.layer.cornerRadius = 10

    sceneView.delegate = self
    sceneView.showsStatistics = true

    // 2
    guard ARFaceTrackingConfiguration.isSupported else {
        fatalError("Face tracking is not supported on this device")
    }
}
With the template, our code loads a 3D scene. However, we don’t need this scene, so we delete it. At this point, you can delete the art.scnassets folder in the project navigator. Finally, we add two pieces of code to our viewDidLoad method.
- First, we round the corners of the
labelView. This is more of a design choice. - Next, we check to see if the device supports the
ARFaceTrackingConfiguration. This is the AR tracking setting we’ll be using to create a face mesh. If we don’t check to see if a device supports this, our app will crash. If the device does not support the configuration, then we will present an error.
Next, we’ll change one line in our viewWillAppear function. Change the constant configuration to ARFaceTrackingConfiguration(). Your code should look like this now.
Next, we need to add the ARSCNViewDelegate methods. Add the following code below // MARK: - ARSCNViewDelegate.
func renderer(_ renderer: SCNSceneRenderer, nodeFor anchor: ARAnchor) -> SCNNode? {
    let faceMesh = ARSCNFaceGeometry(device: sceneView.device!)
    let node = SCNNode(geometry: faceMesh)
    node.geometry?.firstMaterial?.fillMode = .lines
    return node
}
This code runs when the ARSCNView is rendered. First, we create a face geometry of the sceneView and set it to the constant faceMesh. Then, we assign this geometry to an SCNNode. Finally, we set the material of the node. For most 3D objects, the material is usually the color or texture of a 3D object.
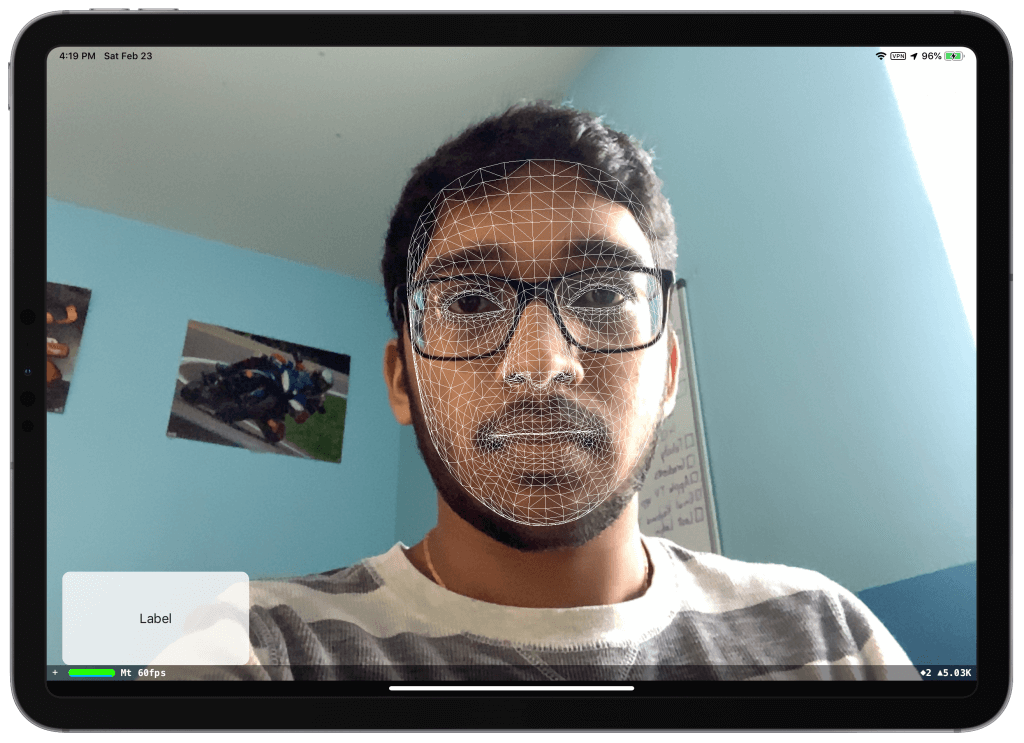
For the face mesh, you can use two materials- either a fill material or a lines material. I prefer the lines which is why I set fillMode = .lines, but you can use what you prefer. Your code should look like this now.

If we run the app, you should see something like this.
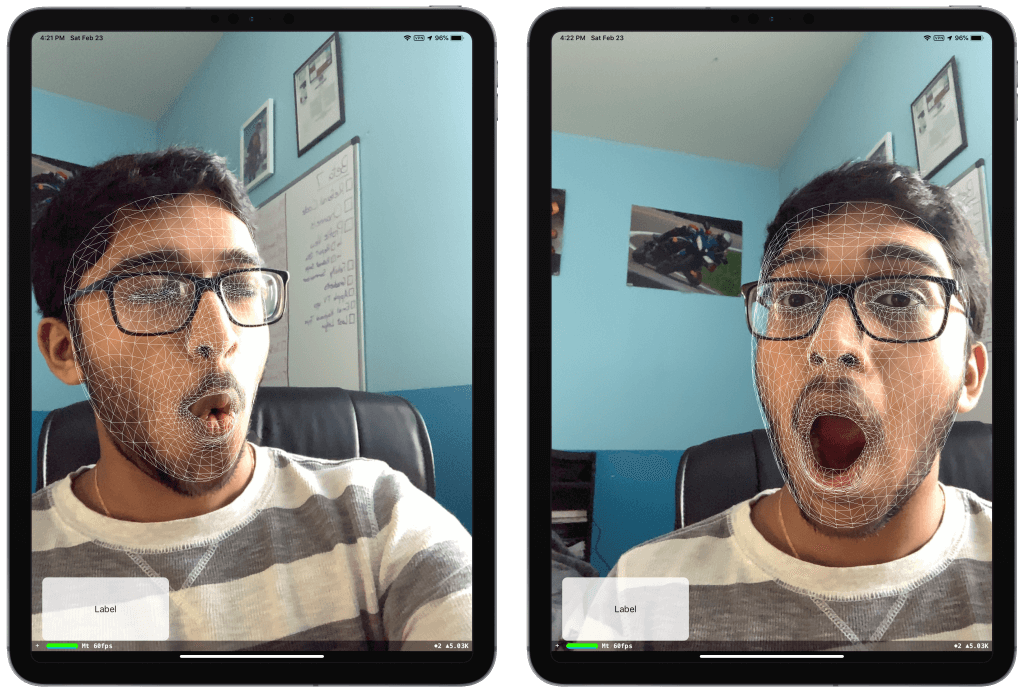
Updating the Face Mesh
You may notice that the mesh does not update when you change your facial features (blinking, smiling, yawning, etc.). This is because we need to add the renderer(_didUpdate:) under the renderer(_nodeFor) method.
func renderer(_ renderer: SCNSceneRenderer, didUpdate node: SCNNode, for anchor: ARAnchor) {
    if let faceAnchor = anchor as? ARFaceAnchor, let faceGeometry = node.geometry as? ARSCNFaceGeometry {
        faceGeometry.update(from: faceAnchor.geometry)
    }
}
This code runs every time the sceneView updates. First, we define a faceAnchor as the anchor for the face it detects in the sceneView. The achor is the information about the pose, topology, and expression of a face detected in the face-tracking AR session. We also define the constant faceGeometry which is a topology of the face detected. Using these two constants we update the faceGeometry every time.
Run the code again. Now, you’ll see the mesh updating every time you change your facial features, all running at 60 fps.
Analyzing the features
First, let’s create a variable at the top of the file.
var analysis = ""Next, type the following function at the end of the file.
func expression(anchor: ARFaceAnchor) {
// 1
let smileLeft = anchor.blendShapes[.mouthSmileLeft]
let smileRight = anchor.blendShapes[.mouthSmileRight]
let cheekPuff = anchor.blendShapes[.cheekPuff]
let tongue = anchor.blendShapes[.tongueOut]
self.analysis = ""
// 2
if ((smileLeft?.decimalValue ?? 0.0) + (smileRight?.decimalValue ?? 0.0)) > 0.9 {
self.analysis += "You are smiling. "
}
if cheekPuff?.decimalValue ?? 0.0 > 0.1 {
self.analysis += "Your cheeks are puffed. "
}
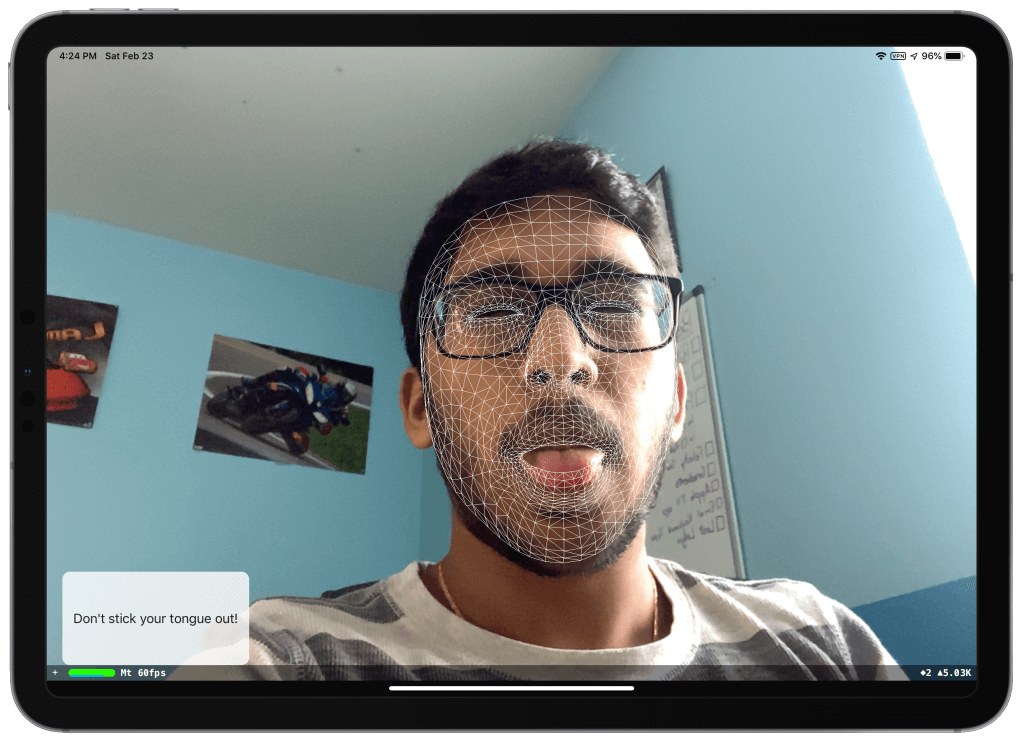
if tongue?.decimalValue ?? 0.0 > 0.1 {
self.analysis += "Don't stick your tongue out! "
}
}The above function takes an ARFaceAnchor as a parameter.
- The
blendShapesare a dictionary of named coefficients representing the detected facial expression in terms of the movement of specific facial features. Apple provides over 50 coefficients which detect various different facial features. For our purpose we’re using only 4:mouthSmileLeft,mouthSmileRight,cheekPuff, andtongueOut. - We take the coefficients and check the probability of the face performing these facial features. For detecting a smile, we add the probabilities of both the right and left side of the mouth. I found that the 0.9 for the smile and 0.1 for the cheek and tongue work best.
We take the possible values and add the text to the analysis string.
Now that we have our function created, let’s update our renderer(_didUpdate:) method.
func renderer(_ renderer: SCNSceneRenderer, didUpdate node: SCNNode, for anchor: ARAnchor) {
    if let faceAnchor = anchor as? ARFaceAnchor, let faceGeometry = node.geometry as? ARSCNFaceGeometry {
        faceGeometry.update(from: faceAnchor.geometry)
        expression(anchor: faceAnchor)

        DispatchQueue.main.async {
            self.faceLabel.text = self.analysis
        }

    }
}
We run the expression method every time the sceneView is updated. Since the function is setting the analysis string, we can finally set the text of the faceLabel to the analysis string.
Now, we’re all done coding! Run the code and you should get the same result as we saw in the beginning.
Conclusion
There is a lot of potential behind developing face-based experiences using ARKit. Games and apps can utilize the True Depth camera for a variety of purposes. One of my favorite apps is Hawkeye Access, a browser you can control using your eyes.
For more information on the True Depth camera, you can check out Apple’s video Face Tracking with ARKit. You can download the final project here.


