

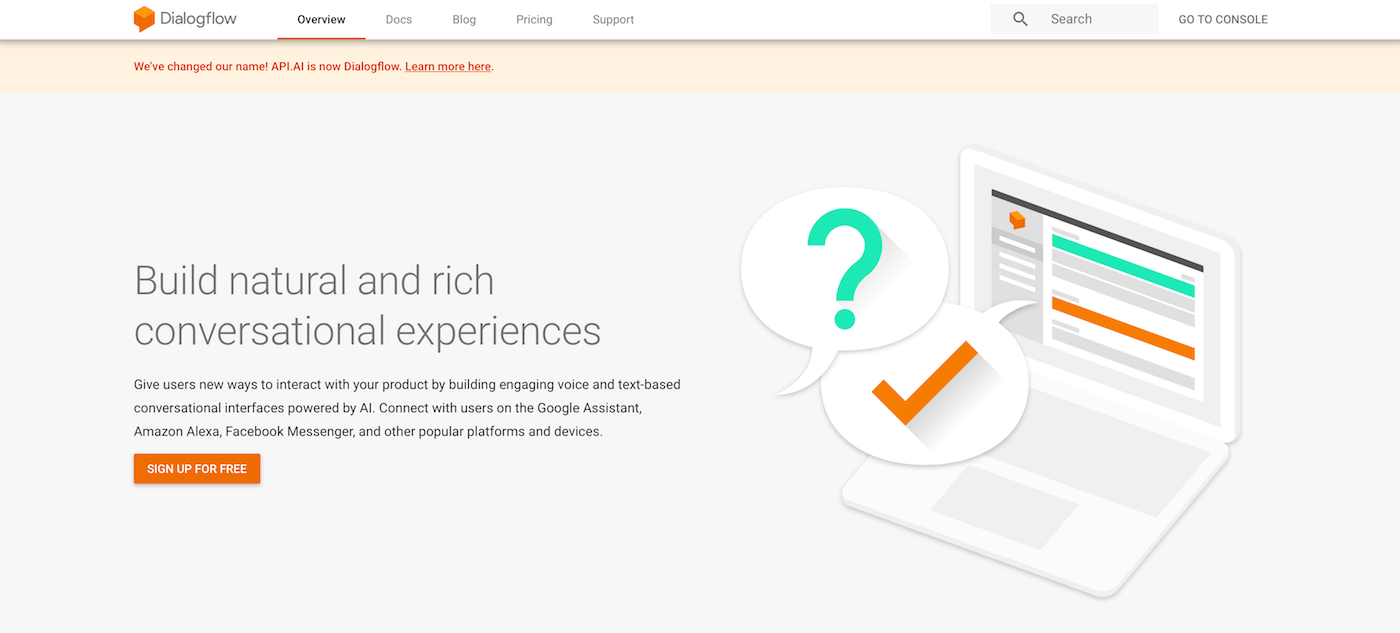
With the latest release of Apple’s Core ML, developers are one step closer to building Artificial Intelligence apps with ease. While image recognition and text detection are great examples of apps that utilize AI, another type of app which exemplifies the power of Machine Learning is chatbots. In this tutorial we will be using Dialogflow (formerly called API.AI) from Google to build a chatbot app running on iOS!
Sounds cool, right? Let’s get started.
A Quick Overview of Intents and Entities
Before we begin, I will explain the basics of Dialogflow and chatbots in general. There are two terms that you have to know when building chatbots: Intents and Entities.
An entity represents a term or object in the user’s input that provides clarification or specific context for a particular intent.
An intent, on the other hand, represents something that the user wants to do. If intents represent verbs, then entities represent nouns.
Let’s take a look at an example. In our project, we might tell our bot the following statement:
“Book me a room at the La Grande Hotel”
In this sentence, our intent is “Book me a room” and the entity is “La Grande Hotel.” Now, there are two different types of conversations that Natural Language Processing (NLP) algorithms can compute.
- Intent-Based Conversations: This is when the NLP algorithms uses intents and entities to carry out a conversation. By recognizing the nouns and verbs in a user’s statement and then cross-referencing it to its dictionary, the bot can perform a valid action. This type of conversation is what Dialogflow uses.
-
Flow-Based Conversations: Flow-Based Conversations are the next level of intelligent communication. Here, we feed a RNN (Recurrent Neural Network) of many diiferent samples of conversations between two people. The bot that is created will respond based on the ML model you trained it off of. Wit.ai is one of the few sites making a huge progress in this field. Don’t worry though, we do not need to do this.
In this tutorial, we will create a bot that can help you book a hotel.
One of the most important rules when developing a chatbot is that it MUST have a personna. This means that it must behave like a real person. Therefore, let’s name out bot – Chip!
And, on that note, let’s begin!
Familiarizing yourself with Dialogflow
Head over to Dialogflow and in the upper right corner, click on “Go to Console”.
You will be asked to sign in with your Google account. Sign in and authorize Dialogflow to view and manage your data across Google Cloud Platform services. Accept the terms and you should be greeted with an inital startup page.
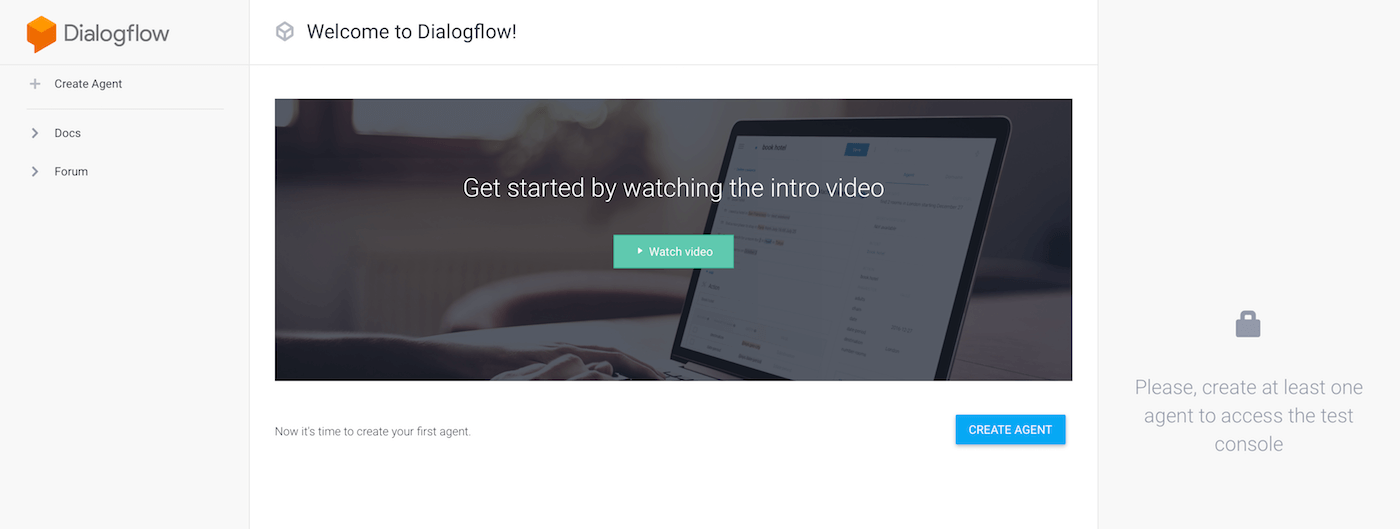
Watching the intro video can get you up to speed about Dialogflow but if you don’t feel like watching, that’s fine! Click on the “Create Agent” button. In Dialogflow, an agent means the chatbot which the iOS app will use to communicate over the air to receive responses.
Fill in the agent name (say, Chip) and click on the Create button to proceed. Dialogflow will create the agent for you. Now, take a look at what you have. You should have 2 default intents: a “Default Welcome Intent” and a “Default Fallback Intent”. In the left hand pane, you should see tabs for Intents and Entities.
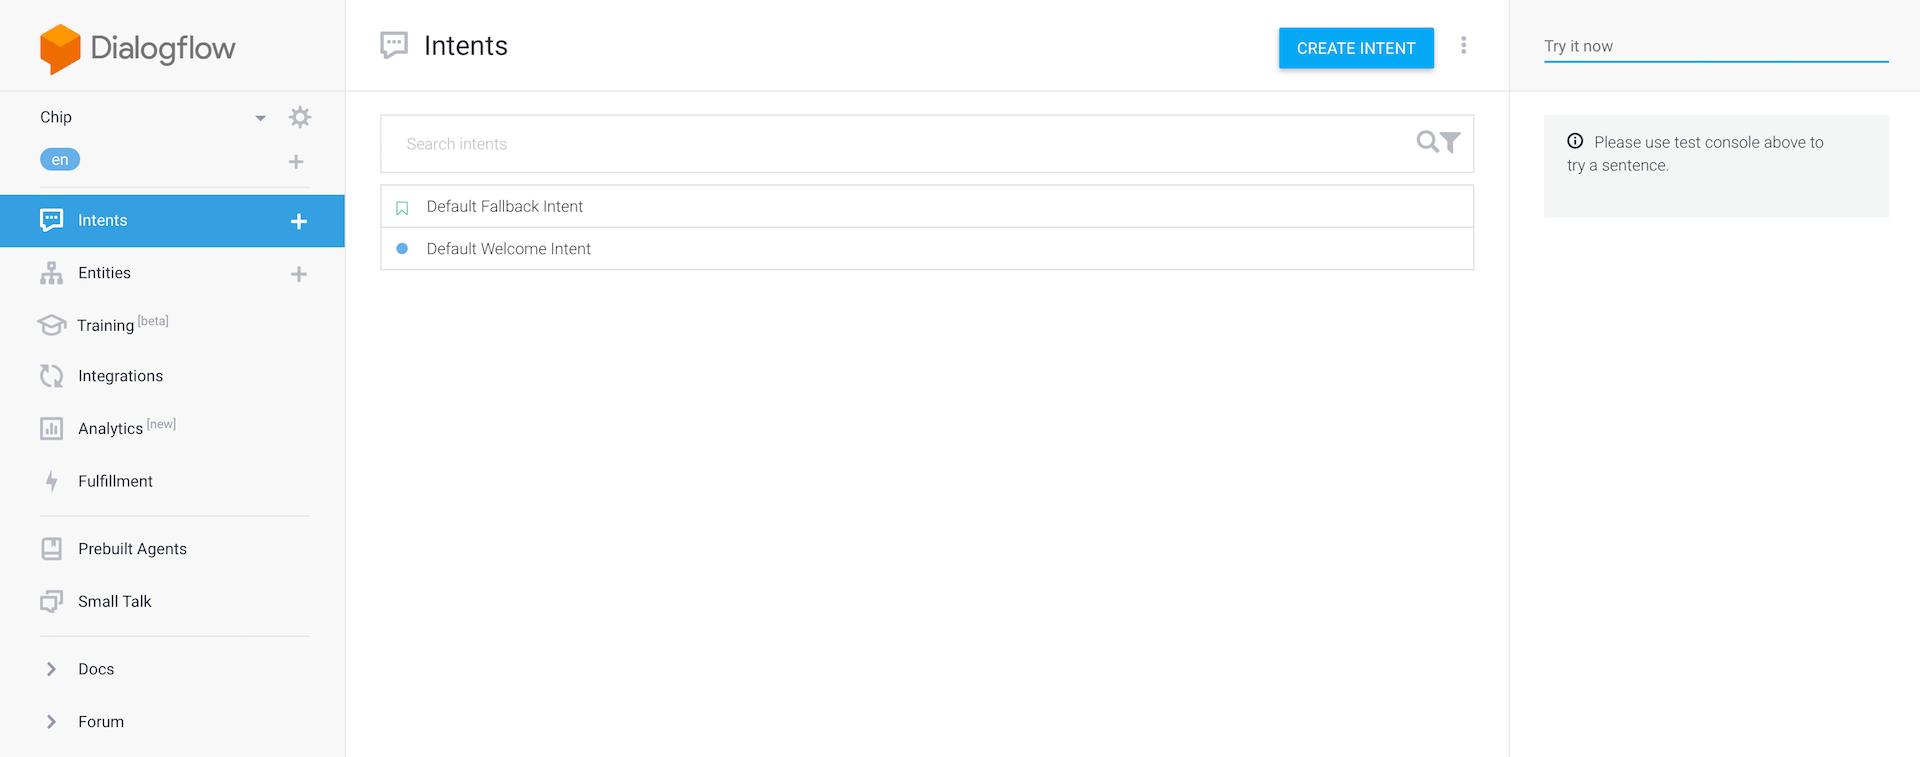
We’ll get to the other tabs at the end. Now, it’s time to begin creating the bot!
Adding the Entities
First, let’s start by adding the entities. If you recall, entities are like the nouns which an NLP algorithm can understand. Let’s come up with a list of nouns that might be used regularly with our bot. I have put my list below but feel free to add on to it.
- Hotel
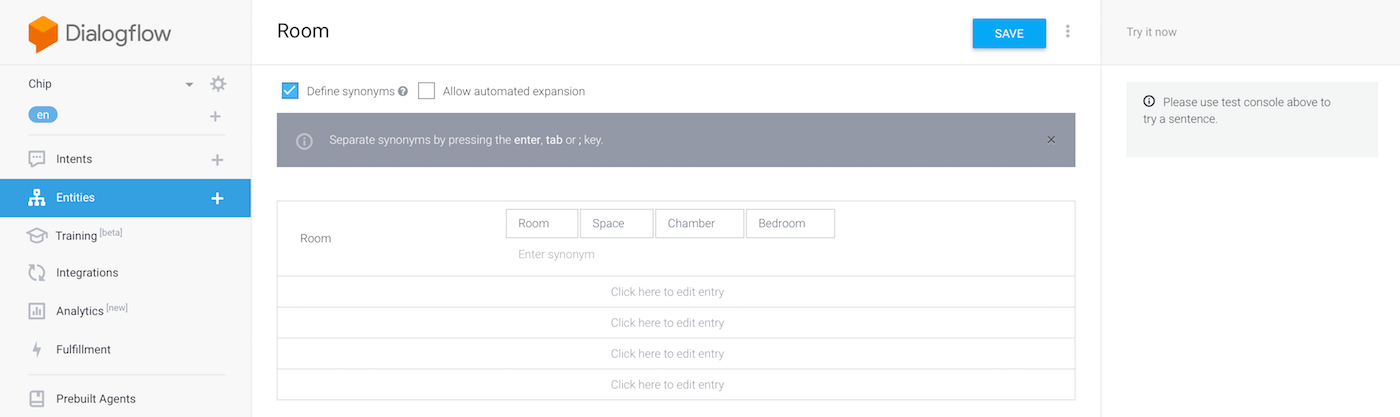
- Room
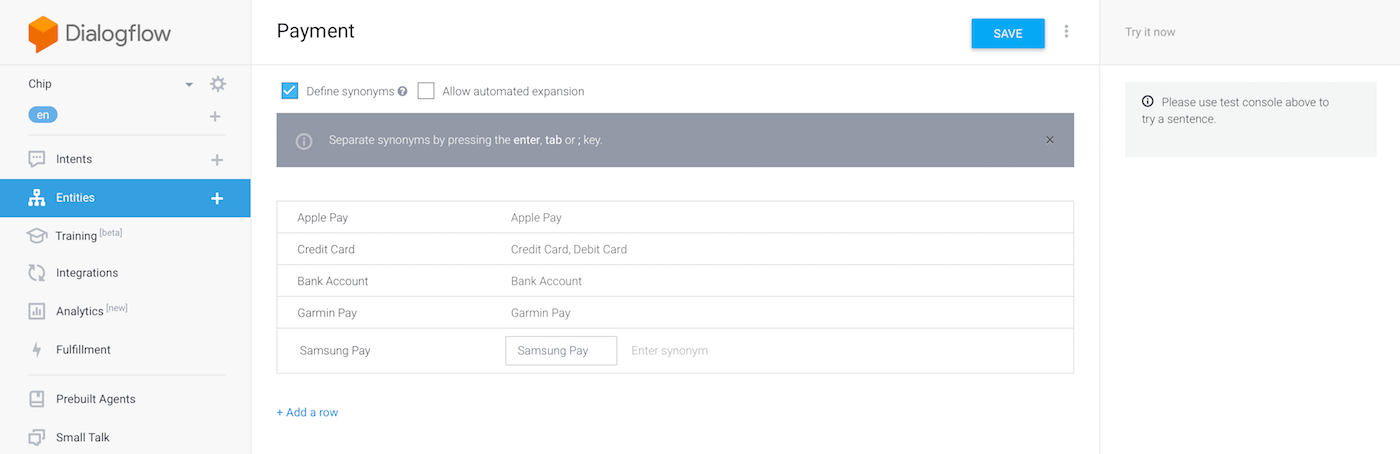
- Payment
Select the entities tab and click on the “Create Entity” button. Name this entity “Hotel” and click on the first row. Enter the reference value as “Hotel”. When a user uses your bot, they may use names other than hotel. Therfore, you should enter some synonyms of that entity so even if a user uses a word other than “Hotel”, the bot can still understand what the user is saying. Look at the picture below for some of the synonyms I used.
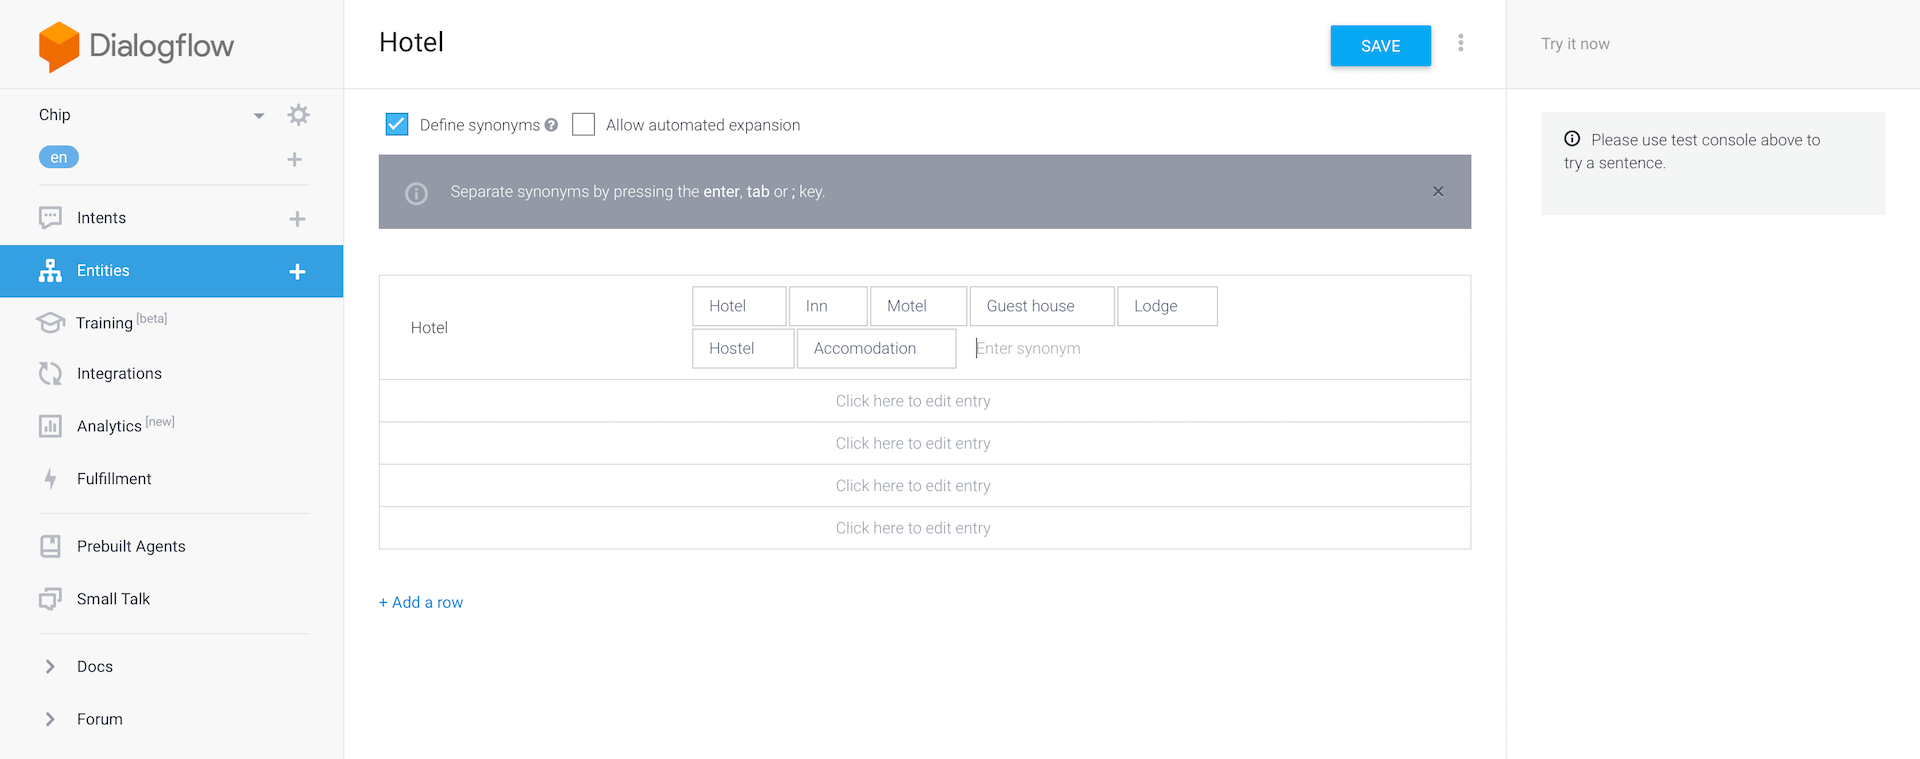
Now, save your entity and create the following entities similar to how we created the Hotel entity.
Now that we’ve created the entities, let’s move on to the intents.
Adding the Intents
Head over to the Intents page and click on the Default Welcome Intent. This intent is what our bot will capture when it is first fired up. You should be greeted with a page like this:
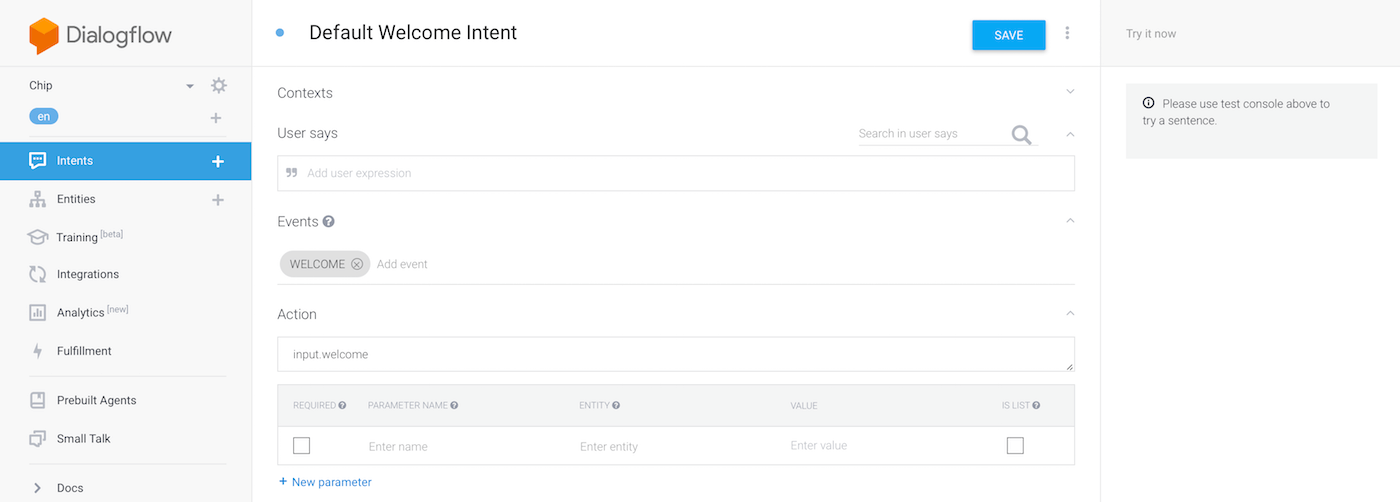
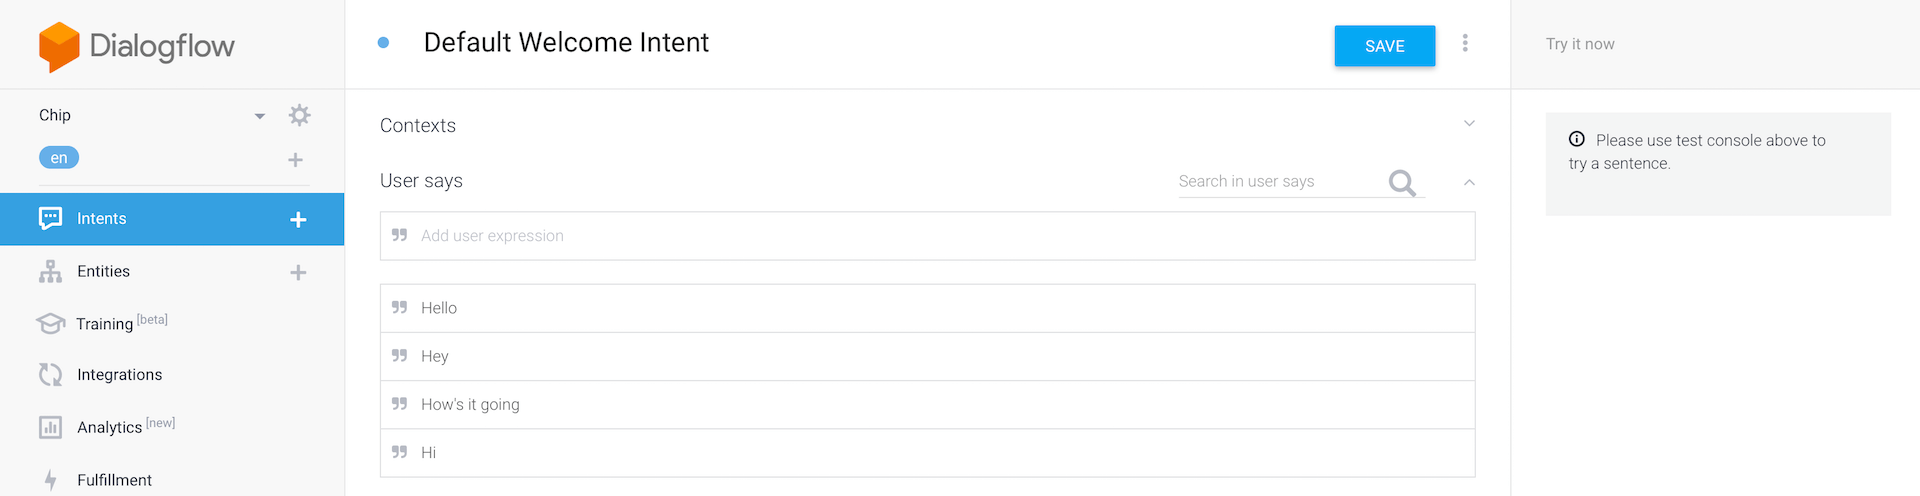
We can customize what the user should say for the intent to be triggered. At the bottom of the page, we can also customize what the text response should be. Since this is a Welcome intent, the user would probably say something like “Hello!” or “How’s it going?” Therfore, let’s add these phrases (and any similar ones) to the ‘User says’ section. Below are some samples. You are free to add even more messages that your users will possibly say to the bot.
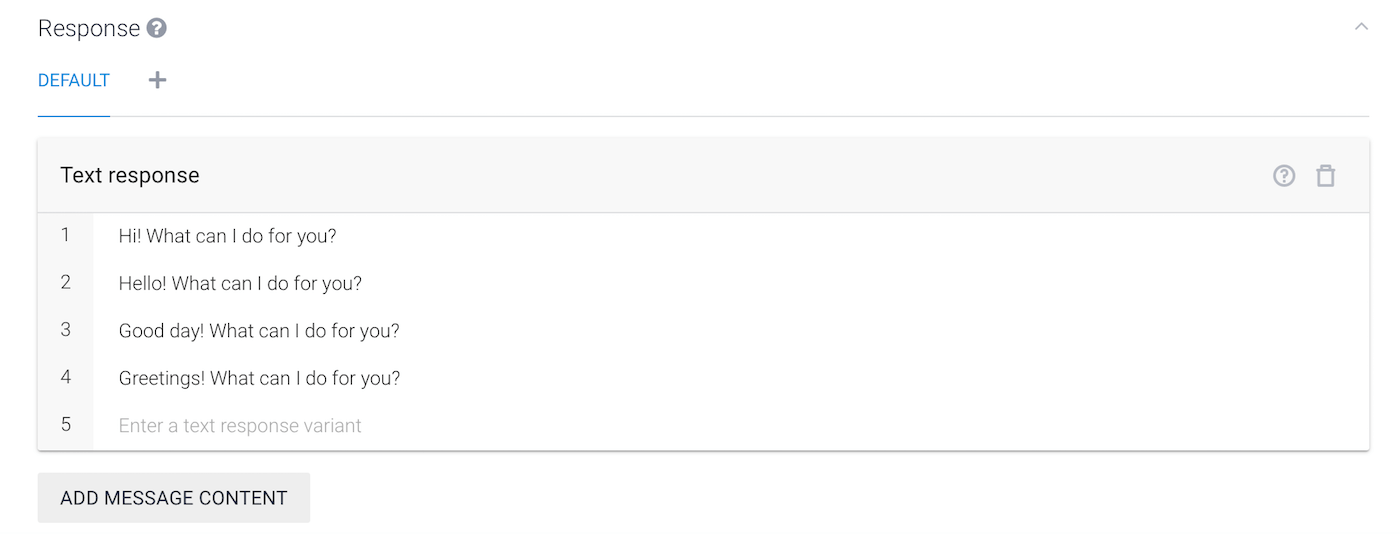
If you scroll down, you will find the Response section. The intent comes with some built-in responses. They are all fine but at the end of each one, let’s add a follow up question: “What can I do for you?” This is what our final Welcome intent should look like:
Before we move on to creating the next intent, if at any time you want to test out your agent, take a look at the right hand pane. In that pane, you can type whatever you want and see your agent respond accordingly. Type in “Hello” and check to see if your agent responds with the expected response.
So far, the agent has only one intent. Since our bot is designed to handle hotel reservation, we have to create another intent to handle those queries. The user will probably ask, “Can you book me a hotel?” or something like that.
Let’s create a new intent and name it Begin Order. In the User says section, add the above expression and press enter. Once you have entered this expression, you will see that the agent has recognized a @Hotel entity in that statement. Similar to entities, a user won’t just use that question to book a hotel. Add in a few variations so that the agent can understand the user. The more variations you add, the more intelligent is the agent. But as a demo, here is what I use.

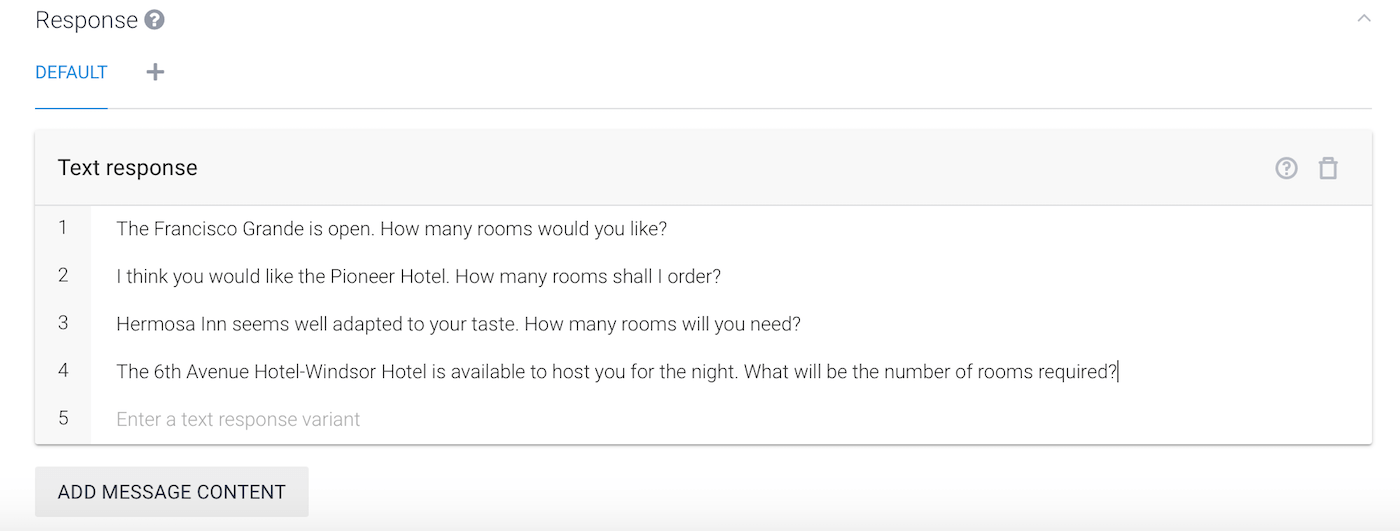
The next thing that the agent should do is search for nearby hotels and ask the user how many rooms does he/she wants. However, if we were to actually scan for nearby hotels, we would need to call an API and use JavaScript to integrate the webhook with api.ai. This is beyond the scope of the tutorial so let’s create some fake hotels in the Response section. Here is the response I created:
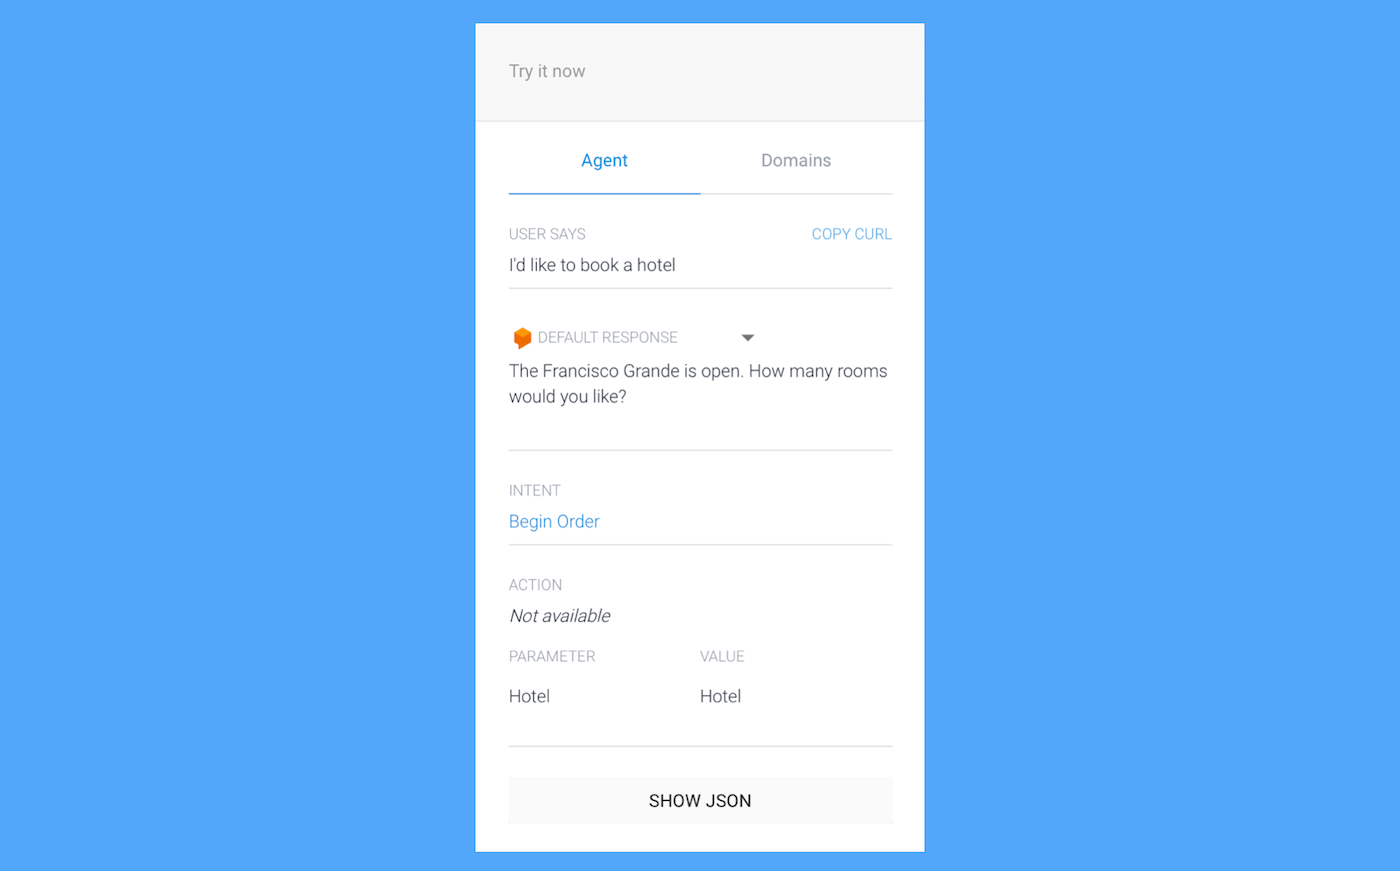
Save the intent and go back to the main page. Test your agent in the right hand pane. If you followed everything so far, it should work as expected! As you can see, you don’t have to ask the exact question. Dialogflow will learn from your given statements and understand the variations.
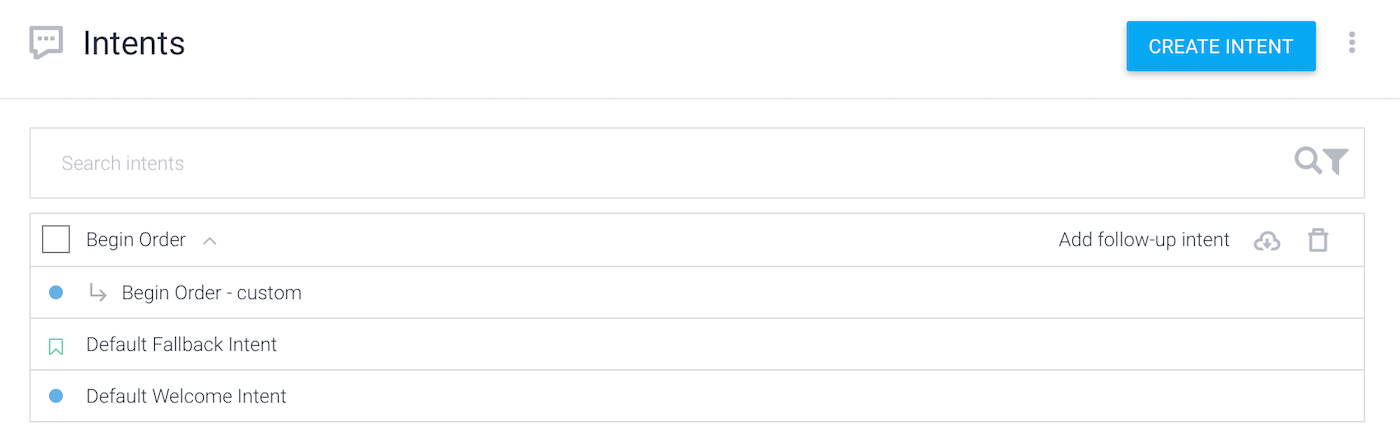
Now, let’s add some follow-up intents. Hover your cursor over the intent you just created. You should see an option which says “Add follow-up intent”. Select that and click on Custom. A new intent will be generated which should say “Begin Order – custom”. Let’s edit this intent!
Remember that the last thing our agent said to us was “How many rooms do we want?” The user will probably respond with a number. He/she may say, “I would like 1 room” or simply answer “4”. You should predict what the user might say and fill in all the possible answers. For demo purpose, here is what I filled in:
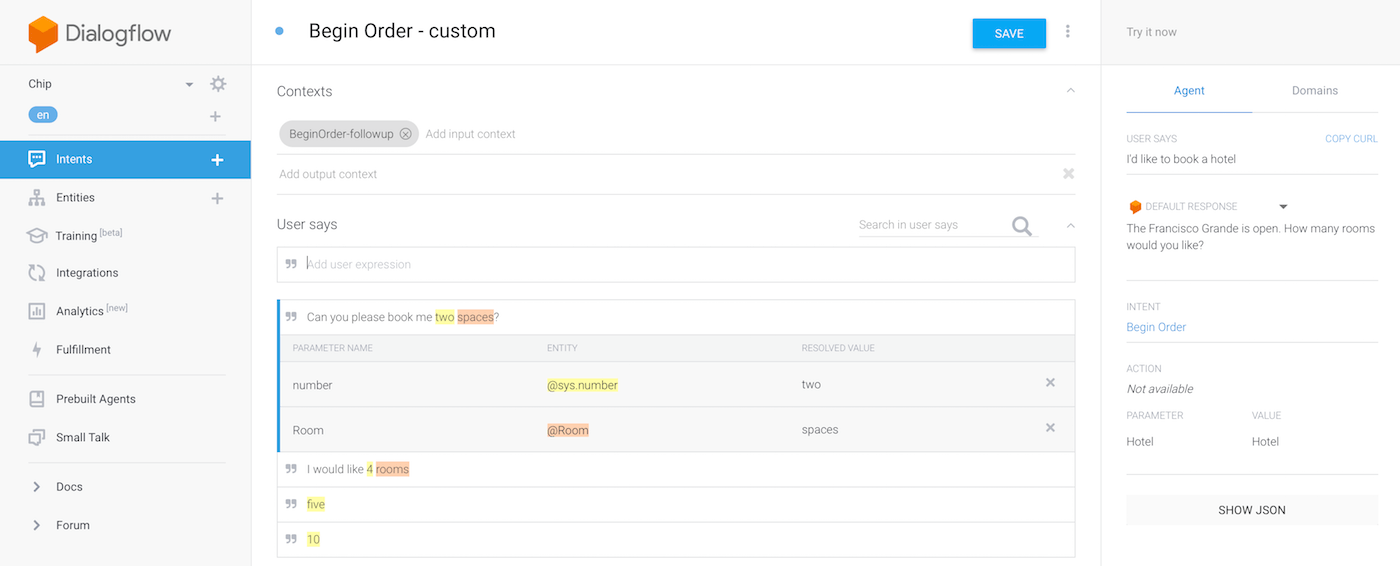
As you can see, Dialogflow has a built-in entity for numbers. Whether you enter a digit or a word, it will be able to handle it and understand its meaning.
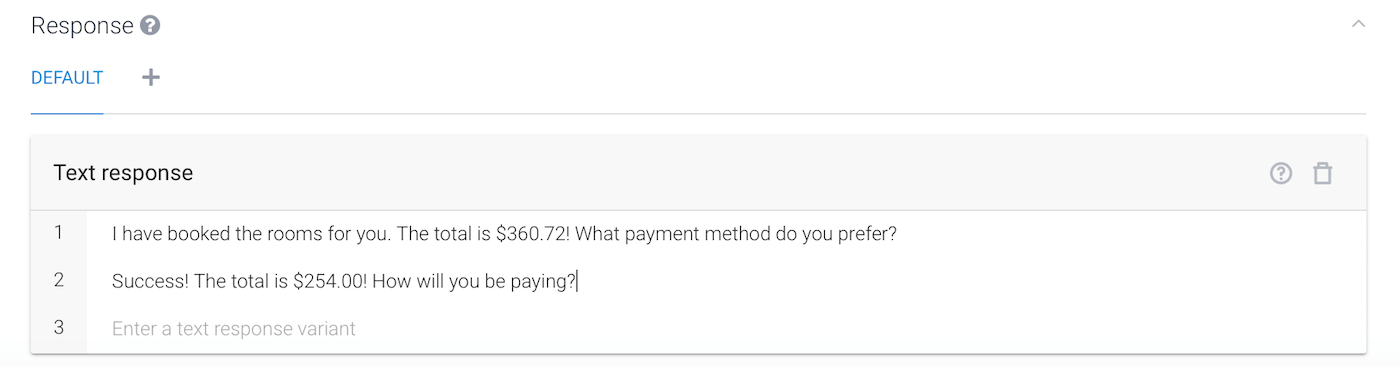
Next, we have the bot respond with a confirmation and the total price. The bot may also ask what payment method the user might prefer. Again, since these are fake hotels, we can add in fake prices to the bot responses.
Save the intent. Now I challenge you to create the last intent which is to just ask the user what payment method they will use to pay. This should be very easy as we have done it twice already!
I hope you were able to do that. If not, follow me below! So we will go back to the main intent page and click on Create Intent.
Name this intent Payment and add in what the user might say. This is where our Payment entity comes to use!
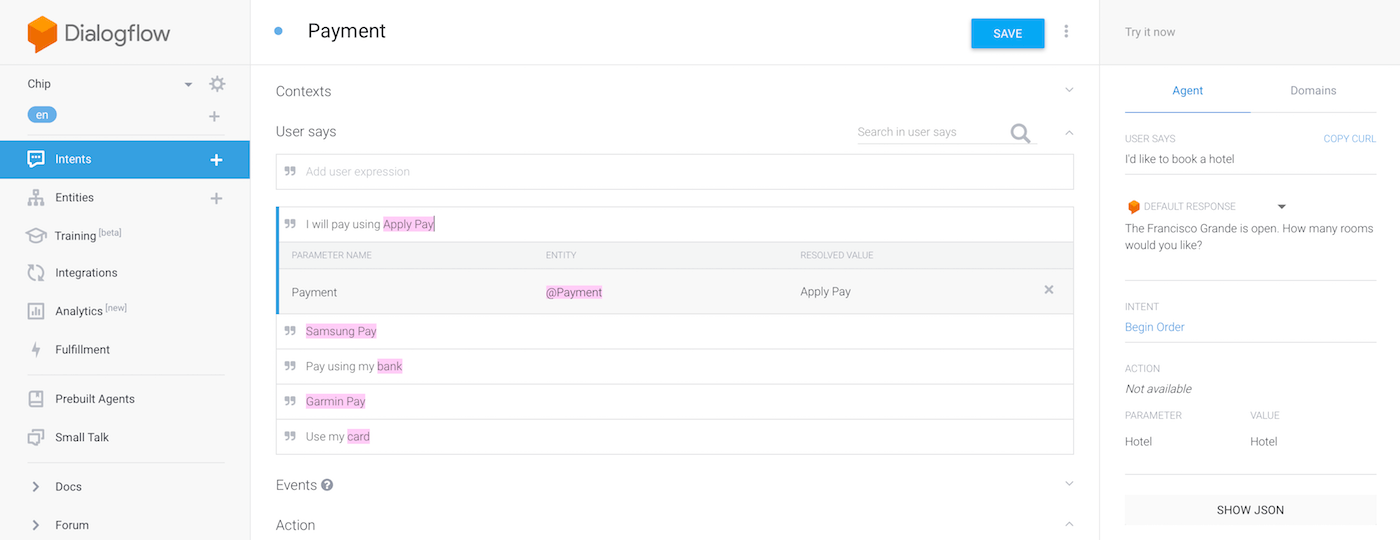
Finally, make the bot respond with some sort of confirmation message. Here is some sample messages:
- Done! You have rent the rooms!
- Success! We received your payment.
And that’s it! Remember to save the Payment intent. Chip is now ready to be used. You can test it out in the right hand pane before we move on to the iOS side of this tutorial.
A Couple More Things
Before we begin the real programming, let me take a moment to explain the other tabs on the left hand pane in the Dialogflow console. Under Entities, you have a tab called Training. If you click on this tab, you will receive a log of all the reponses sent to your agent and what the agent responded in return. This is very useful if you tell your agent something and it responds with an output you don’t like. It can also be helpful if you realize later on that you forgot a synonym of an entity and users are using that a lot, then you can go and tell your agent what to do in that case.
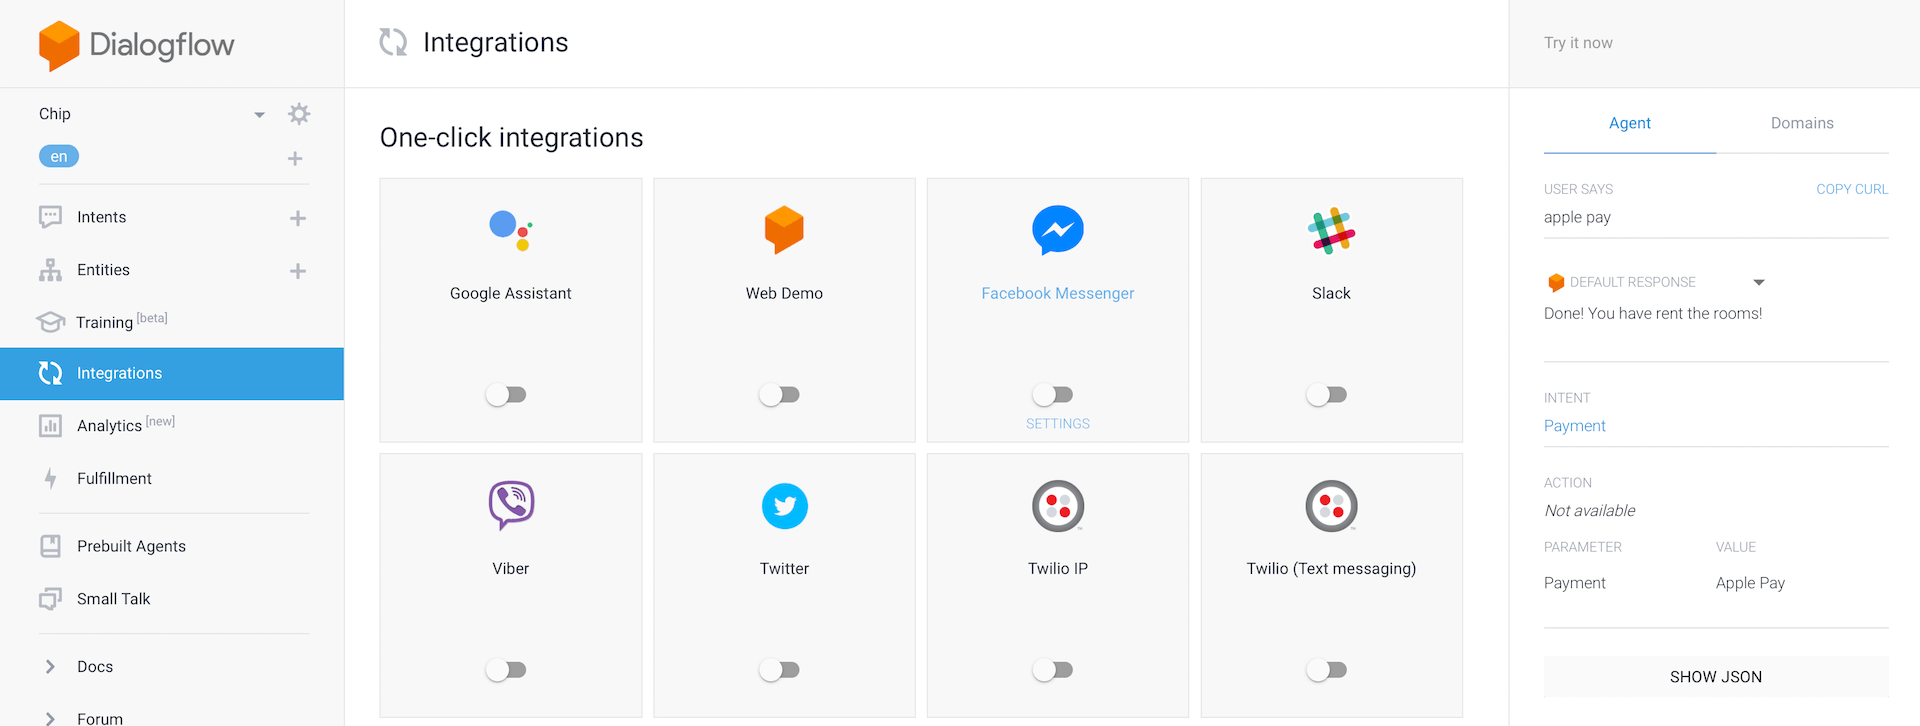
Right below Training, you have Integrations. Here, you can manage the different services your agent can be available on such as Google Assistant, Twitter, Slack, Messenger, Cortana, Alexa, and lots more! After Integrations, you have Analytics which basically shows what the name suggests. Then, you have Fulfillment. This is where you would come if you were to call an API and implement a webhook.
The last 2 tabs are pretty simple, but useful. The first is Prebuilt Agents and here, you can import a pre-existing framework of an agent. There are many examples like a food delivery bot, a music bot, and even a (sorry, but you really needed to learn this) hotel booking bot! The final tab is Small Talk and this is useful if you are designing your agent to be a daily companion like Siri or Google Assistant. Small Talk allows you to add responses for common questions we all like to ask our bots like “How old are you?”, “Where do you live?”, and the ever popular “Will you marry me?”
Now that you have a fairly good idea of what Dialogflow is and how eveything works, it’s time to move to the other side of the equation and start to code in Swift!
Connecting to Dialogflow using the API.AI SDK
Now that we’re on the Swift portion of this tutorial, first download the starter project. I’ve already built the basics UI and bundled the API.AI SDK. If you build the app from scratch, you can install the API.AI SDK (which is the SDK for connecting to Dialogflow) using CocoaPods. All you need to do is to add the following pod in your Podfile:
pod 'ApiAI'
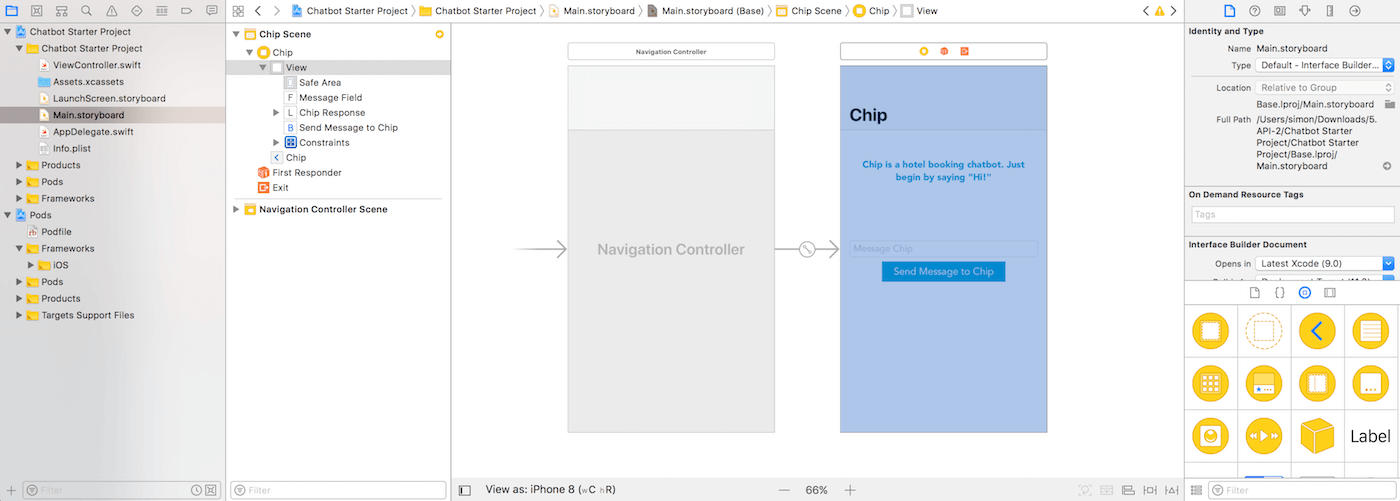
Once you unzip the starter project, make sure you open the Chatbot Starter Project.xcworkspace file. Going over to Main.storyboard, there is already a UILabel, UIButton, and UITextField. Their connecting outlets are also hooked up to ViewController.swift.
Let’s begin by heading over to AppDelegate.swift. We need to get our app to connect to the Dialogflow servers. Right under import UIKit, type in the following statement to import the framework:
import ApiAI
Now, we need to initialize a configuration using our client access token. Update the didFinishLaunchingWithOptions method like this:
func application(_ application: UIApplication, didFinishLaunchingWithOptions launchOptions: [UIApplicationLaunchOptionsKey: Any]?) -> Bool {

    let configuration = AIDefaultConfiguration()
    configuration.clientAccessToken = "YOUR_CLIENT_ACCESS_TOKEN"

    let apiai = ApiAI.shared()
    apiai?.configuration = configuration

    return true
}
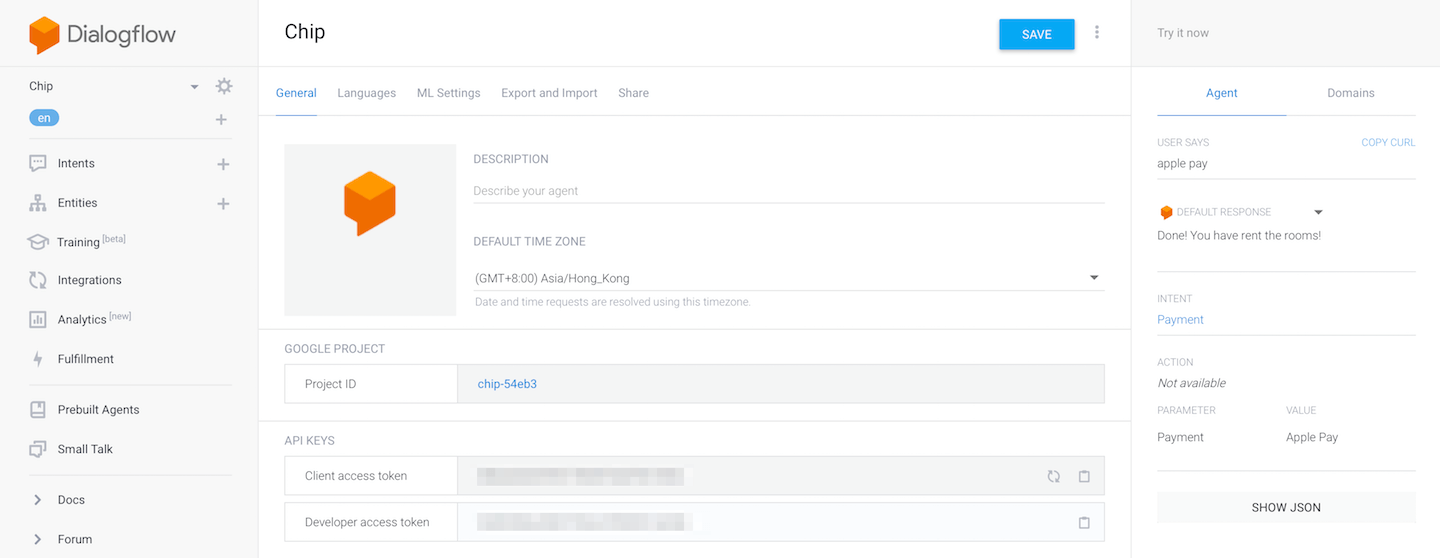
Replace the string “YOUR_CLIENT_ACCESS_TOKEN” with the client access token assigned to your bot. If you do not know where to find this, head over to your chatbot settings in Dialogflow. Under the “General” tab, you should find the client access token under the “API keys” section.
Now when our app launches, it will connect to the Chip bot using the client access token.
Getting our Device to Talk
Head on over to ViewController.swift and under the import UIKit statement, import both ApiAI and AVFoundation frameworks:
import ApiAI
import AVFoundation
We need to import the AVFoundation framework because we want our bot to talk to the user. The framework comes with the AVSpeechSynthesizer class which is capable to produce synthesized speech from text. To get our device to talk to our users, insert the following lines of code in the ViewController class:
let speechSynthesizer = AVSpeechSynthesizer()

func speechAndText(text: String) {
    let speechUtterance = AVSpeechUtterance(string: text)
    speechSynthesizer.speak(speechUtterance)
    UIView.animate(withDuration: 1.0, delay: 0.0, options: .curveEaseInOut, animations: {
        self.chipResponse.text = text
    }, completion: nil)
}
Let me tell you what the above lines of code perform. First, we begin by defining a constant speechSynthesizer and initiate an instance of AVSpeechSynthesizer. AVSpeechSynthesizer is an object that provides speech from a text and gives you access to control over ongoing access. Then we create a new function, speechAndText(text: String), to perform changes based on whatever the user inputs.
Inside the function, we create an instance of AVSpeechUtterance which, in the most simple terms, is a chunk of text to be spoken. We then ask the device to speak the text. At the same time, we want to present our users what the bot responded. This is why we set the label’s text to the bot’s response.
I use the UIView.animate method to apply a subtle animation for the label. When you are developing your own apps and don’t have a lot of knowledge on how to create high quality animations, this method can deliver that effect.
Sending the Requests
We only have one final part left. When the user taps on the button, the request should be sent to our agent. Let’s see how we should do that! Inside the sendMessage action method, insert the following lines of code:
let request = ApiAI.shared().textRequest()

if let text = self.messageField.text, text != "" {
    request?.query = text
} else {
    return
}
This code is self-explanatory but for those of you who can’t read it, let me explain. Basically, we prepare an API.AI text request with the query provided by the user. We retrieve the text from messageField and perform a basic validation, making sure that the text field is not empty. Once we got the text, we assign it to the query property of the request.
Okay, the text request is now ready. The next step is to initiate the request and send it to the bot. Of course, we need to handle whatever the API.AI agent responds with. There are 2 possibilities: success or failure. If the agent returns with a successful response, then we want our app to speak the response and show it on the screen. If it was a failure, then the app simply prints the error to the console. We can achieve this by using the lines of code below:
request?.setMappedCompletionBlockSuccess({ (request, response) in
    let response = response as! AIResponse
    if let textResponse = response.result.fulfillment.speech {
        self.speechAndText(text: textResponse)
    }
}, failure: { (request, error) in
    print(error!)
})
What does the app need to do after the request is completed, you can call the setMappedCompletionBlockSuccess method and specify the action in a closure. Once the request is completed, the completion handler is called with the response passed as a parameter. In the closure, we call the speechAndText(text: ) method that we created earlier to speak and display the response. If the response is a failure, we simply print it to the logs.
One last thing left. We haven’t initiated the request to API.AI. To do that, we call the enqueue method and specify the request. This can be accomplished by using the following code:
ApiAI.shared().enqueue(request)
messageField.text = ""
We send the request to API.AI and clear the text present in text field. Your entire sendMessage method should look like this
@IBAction func sendMessage(_ sender: Any) {
    let request = ApiAI.shared().textRequest()

    if let text = self.messageField.text, text != "" {
        request?.query = text
    } else {
        return
    }

    request?.setMappedCompletionBlockSuccess({ (request, response) in
        let response = response as! AIResponse
        if let textResponse = response.result.fulfillment.speech {
            self.speechAndText(text: textResponse)
        }
    }, failure: { (request, error) in
        print(error!)
    })

    ApiAI.shared().enqueue(request)
    messageField.text = ""
}
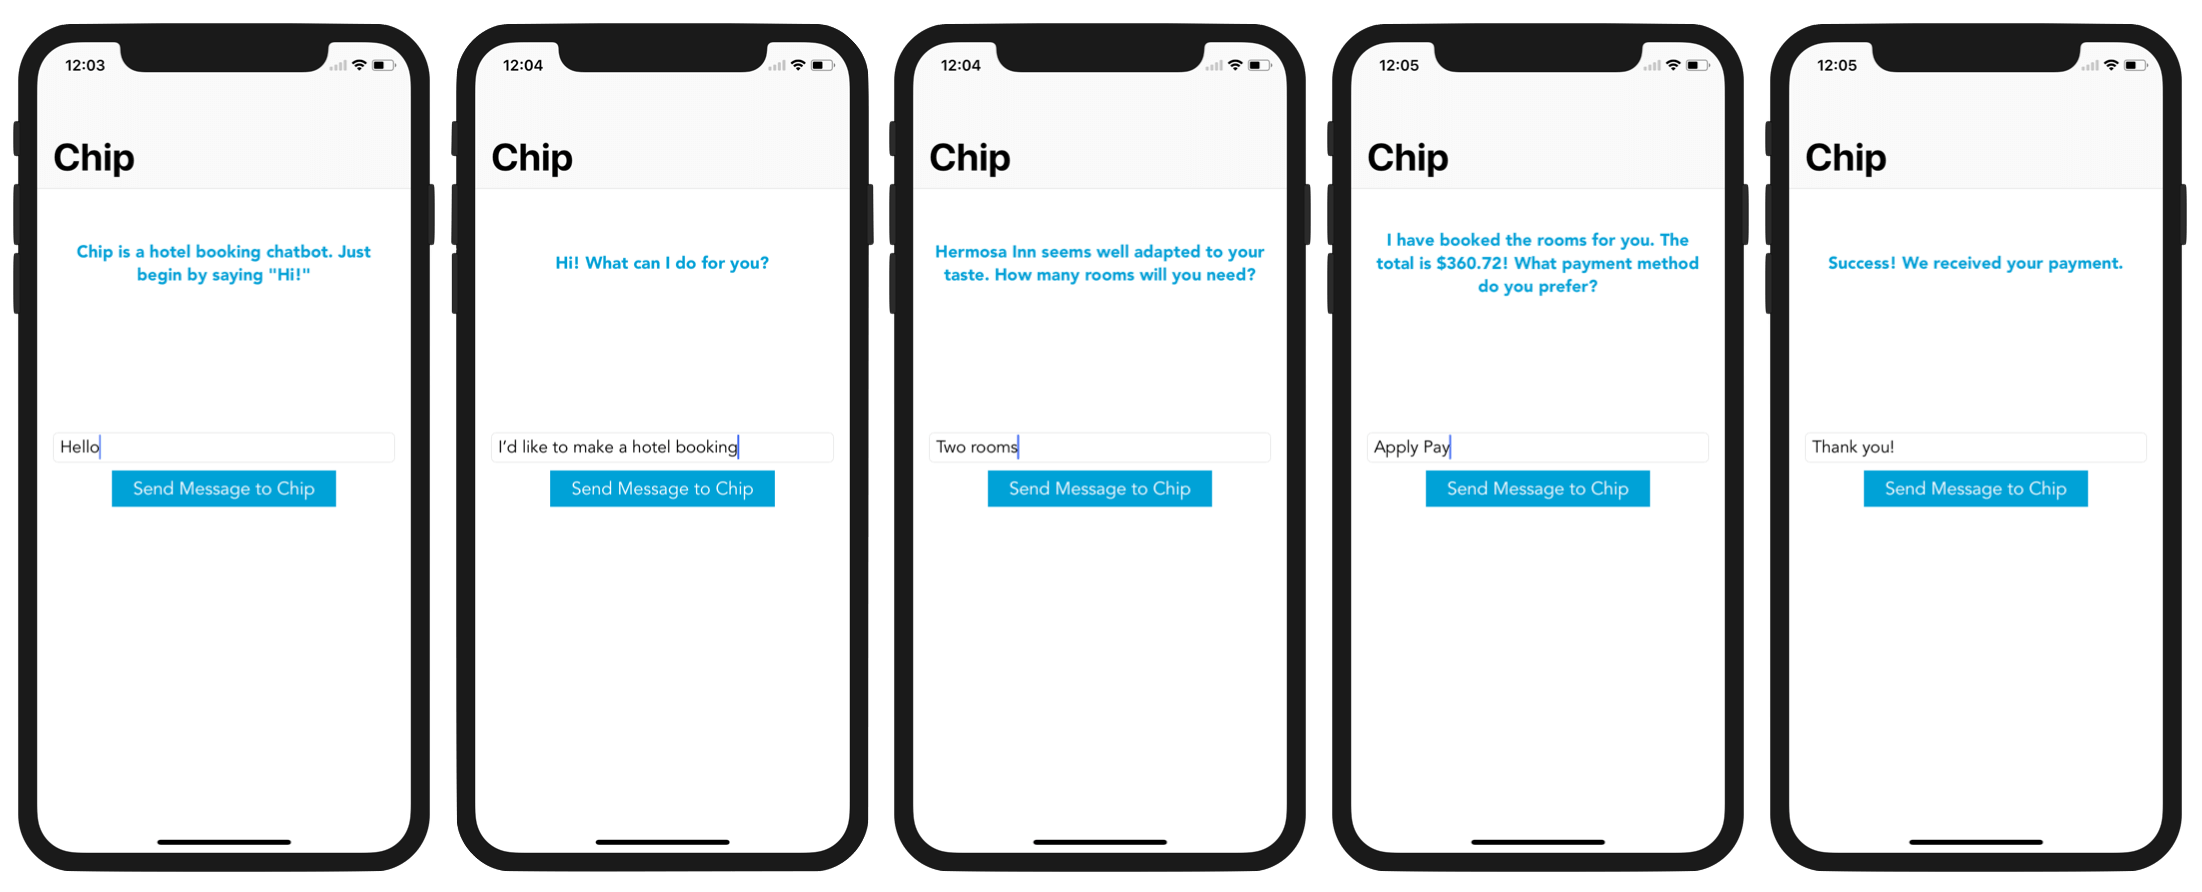
Now, it’s time for the moment of truth! Run the app (on an iPhone X because we’re finally here!). Everything should work as expected!
What’s Next
This was a lot of information but hopefully, it was very rewarding. So, what should you do next? I would encourage you to continue to expand upon this bot and even create your own bot. Tell me how you have created your own bot by posting in the comments below!
For reference, you can refer to the complete Xcode project on Github.
For more information about Dialogflow, you can refer to their documentation.
For the brave and bold, you can create your own chatbot on Dialogflow and put it on Google Assistant! If you want to give it a try, check out this video. You can test the chatbot I made with Dialogflow by opening Google Assistant (for iOS users, it would be the app) and asking Google Assistant, “Talk to Max the Programmer”! I would encourage you all to continue pursuing Dialogflow as you can deploy your chatbots on Google Assistant, Alexa, Twitter, Cortana, Facebook Messenger, Telegram, and much more!


