
In the past few years, the use of machine learning approaches to solve problems and perform complex tasks have been increasing. Machine learning enables us to use big data to perform complex tasks, such as image classification and speech recognition.
Furthermore, Apple recently announced a framework built to simplify the process of integrating machine learning models into macOS, iOS, tvOS and watchOS devices, called Core ML. Apple also provided sample Core ML models to test the framework.
When Core ML was first announced, it was quite a challenge for software developers to create their own custom Core ML models because it required previous experience in machine learning.
However, thanks to GraphLab and Apple, now we have Turi Create, a framework that enables us to easily create Core ML models. Turi Create provides us with essential machine learning algorithms, such as k-nearest neighbor, and advanced deep learning algorithms, such as Residual Networks (ResNet), in order to create our own machine learning models.
In this tutorial, we will demonstrate how to create a custom image classification Core ML model and integrate it into an iOS application. To do so, we will use Python 2.7, Turi Create, Swift 4.0 and Core ML.
Before getting started, we will need the following:
- A computer with a 64-bit processor (x86_64 architecture)
- Python, version 2.7: Download here
Let’s Get Started!
To begin, we will first install Turi Create using the Python package manager, pip. The package manager comes with Python when you install it on your machine.
To install Turi Create, go to Terminal.app and type the following command:
$ pip install turicreate
After installing the Python package, we will create a new Python project, by doing the following steps:
- Create a folder named
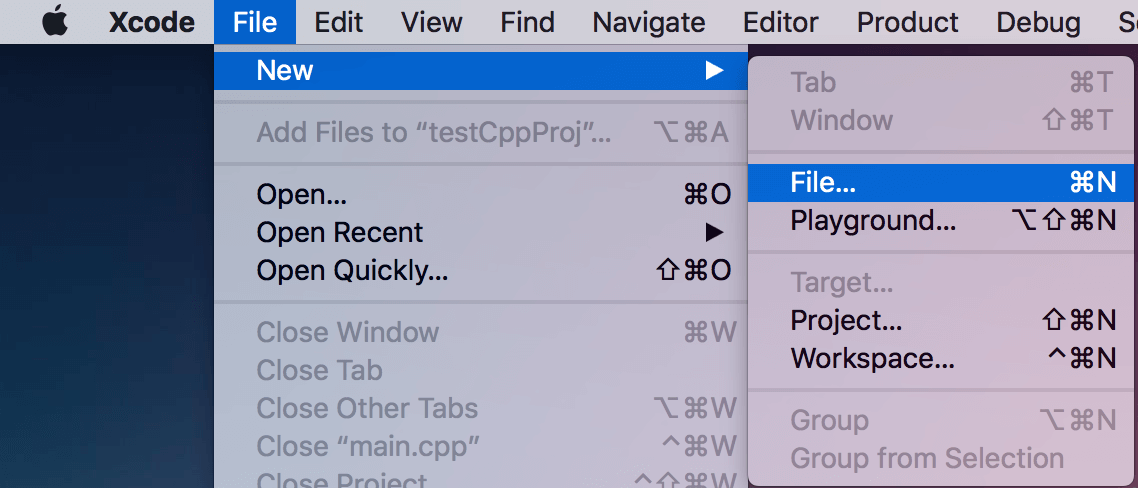
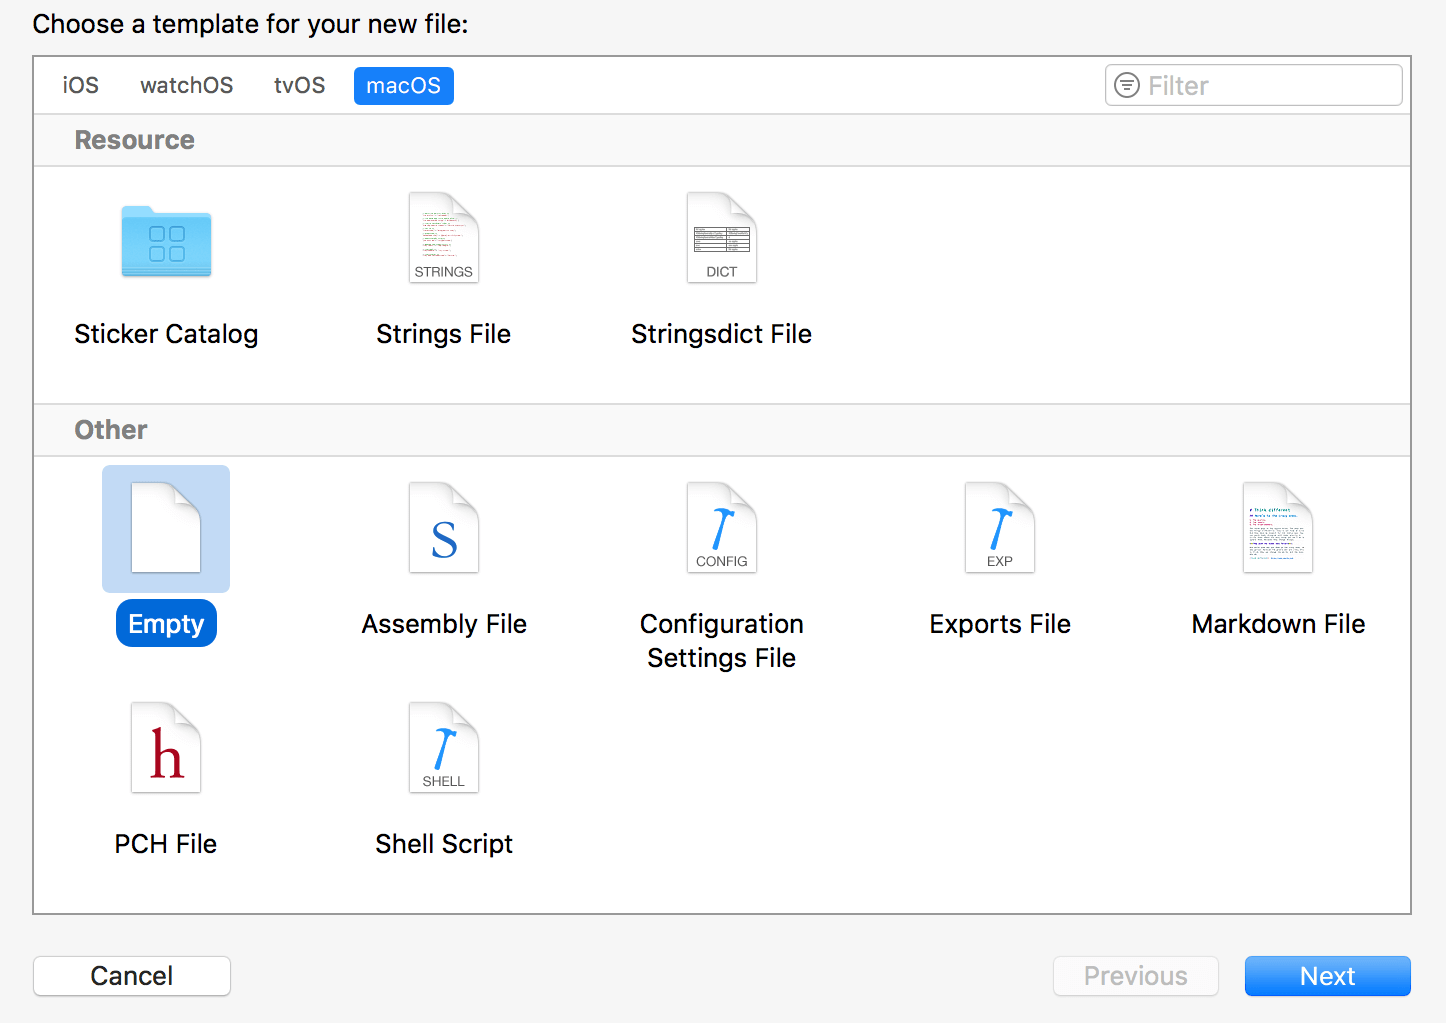
MLClassifier - Open Xcode and create a new file
- Select an Empty file from any section
- Name the file:
classifier.py - Save it to the
MLClassifierfolder
Creating a Dataset
In this example, we will create a machine learning model that classifies whether an image contains rice or soup. To do so, we will have to create a dataset that contains images of both categories. This data set is used to train our own model. You can download the dataset I am using and save it to the MLClassifier folder. Or you can create a custom dataset by following the next steps:
- In the
MLClassifierfolder, create a new folder nameddataset. - Inside the
datasetfolder, create 2 empty folders namedriceandsoup. - Inside the
ricefolder, add at least 100 different images of rice. - Inside the
soupfolder, add at least 100 different images of soup.
The dataset folder contents should look like this:

Implementing Turi Create
Turi Create simplifies the development of custom machine learning models. You don’t have to be a machine learning expert to add recommendations, object detection, image classification, image similarity or activity classification to your app.
– the official documentation of Turi Create (https://github.com/apple/turicreate)
In this part, we will implement turicreate into our Python project and label each of the images from the dataset we created in the previous step. Let’s implement and configure the framework by doing the following:
- Open the
classifier.pyfile and import `turicreate` by adding this line: - Next, let’s define the dataset path:
- And then add the following line to find and load images from the dataset folder:
- Continue to add the following line of code. We define image categories based on its folder path:
- Lastly, save the new labeled dateset as
rice_or_soup.sframe. We will use it to train the model - Preview the new labeled dataset on Turi Create
import turicreate as turi
url = "dataset/"
data = turi.image_analysis.load_images(url)
data["foodType"] = data["path"].apply(lambda path: "Rice" if "rice" in path else "Soup")
> Given an image, the goal of an image classifier is to assign it to one of a pre-determined number of labels.
data.save("rice_or_soup.sframe")
data.explore()
Training & Exporting the Machine Learning model
It’s time to train and export the machine learning model for production use!
To do so, we will train our machine learning model using SqueezeNet architecture option provided by turicreate.
We will be using the SqueezeNet architecture because it takes less time to train; however, it’s recommeneded to use ResNet-50 for more accurate results. In the following steps, I will demonstrate examples of both architectures:
- In the
classifier.pyfile, we first load the previously savedrice_or_soup.sframefile. Insert the following line of code in the file: - Next, create training data using 90% of the
dataBufferobject we just created and test data using the remaining 10%. - Continue to insert the following code to create the image classifier using the training data and
SqueezeNetarchitecture: - Next, we will evaluate the test data to determine the model accuracy:
- Lastly, insert the following code to save the model and export the image classification model as a CoreML model:
dataBuffer = turi.SFrame("rice_or_soup.sframe")
trainingBuffers, testingBuffers = dataBuffer.random_split(0.9)
model = turi.image_classifier.create(trainingBuffers, target="foodType", model="squeezenet_v1.1")
Alternatively, you can use `ResNet-50` for more accurate results:
model = turi.image_classifier.create(trainingBuffers, target="foodType", model="resnet-50")
evaluations = model.evaluate(testingBuffers)
print evaluations["accuracy"]
model.save("rice_or_soup.model")
model.export_coreml("RiceSoupClassifier.mlmodel")
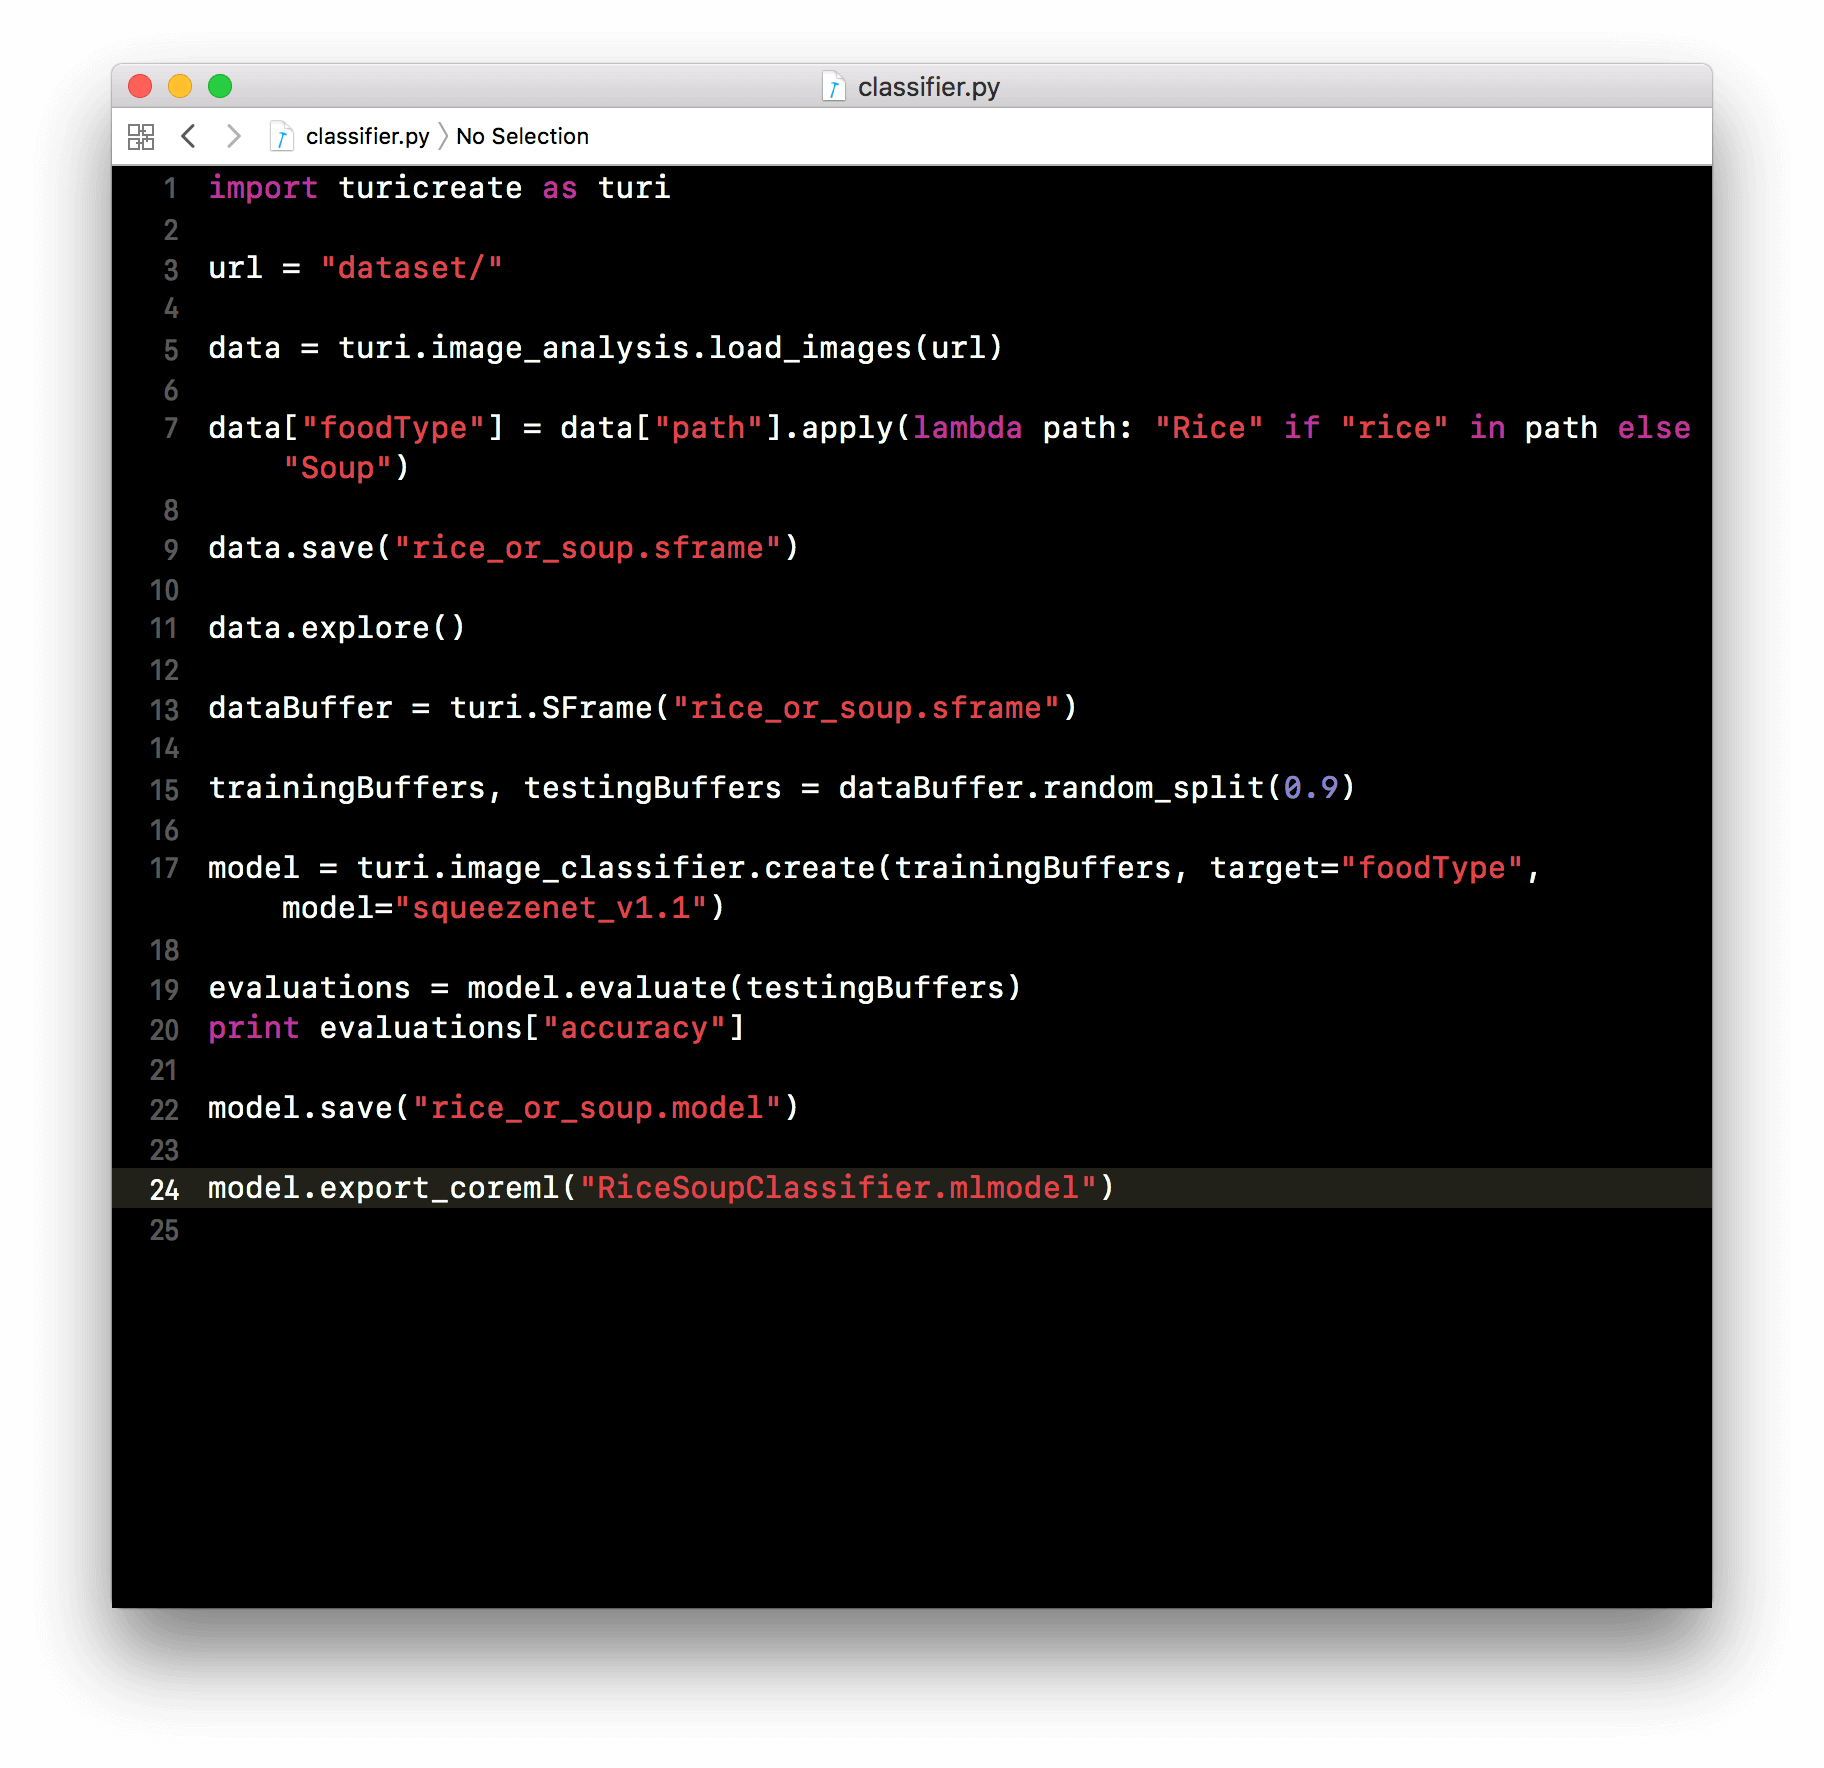
Your classifier.py file should look like this:
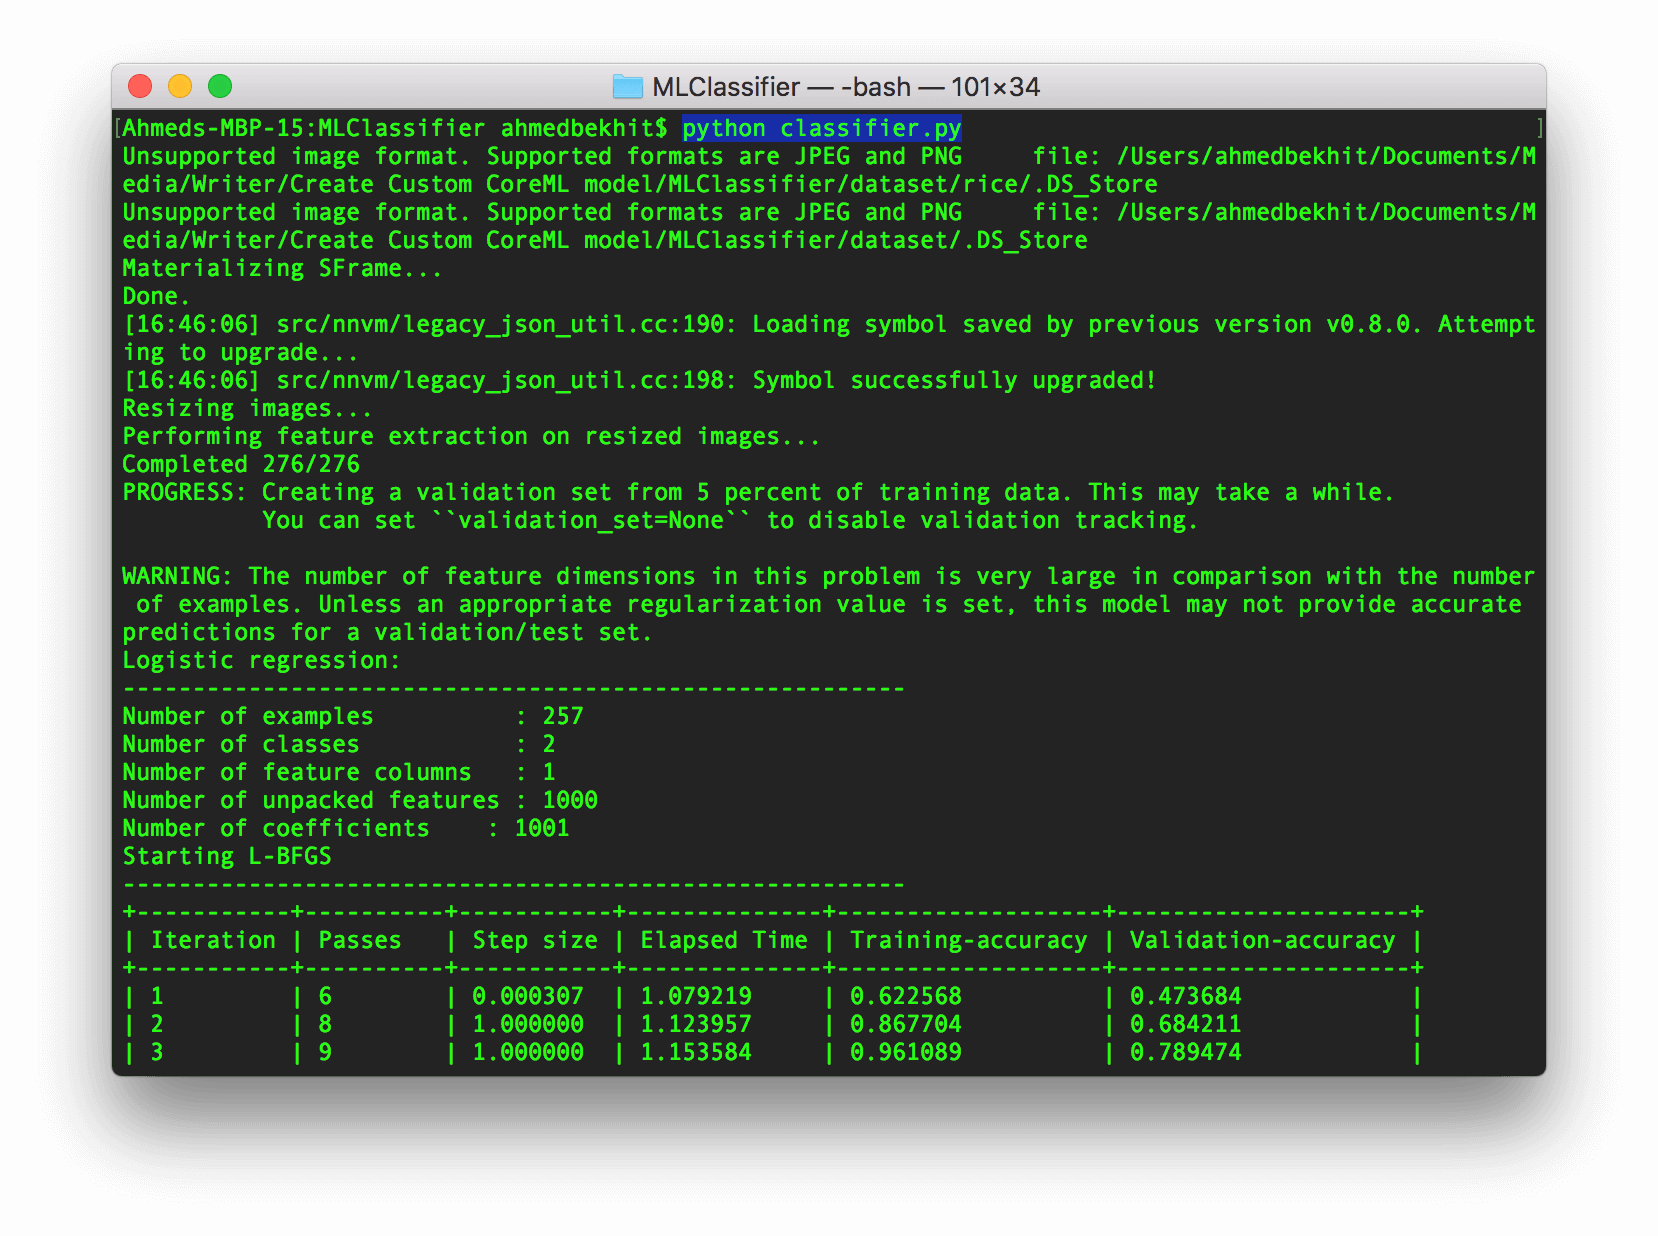
Now it’s time to run our code! To do so, go to Terminal.app and change to the MLClassifier folder. Then run the classifier.py file like this:
python classifier.py
You should see the following message. Just be patient and wait.
A few minutes later… You will have the CoreML model ready to implement into any iOS, macOS, tvOS, or watchOS application!
Integrating the Core ML model into an iOS app
Now we’re ready to integrate the custom CoreML model we have just created into an iOS app. If you’ve read our introductory tutorial of Core ML before, you should have some ideas about how to integrate the CoreML model into an iOS app. Therefore, I will keep this part short and sweet.
- First, create a new iOS project using the Single Application template. Name the project to whatever name you like but make sure you use Swift in this example.
- To use the model we just created, drag the trained CoreML model (
RiceSoupClassifier.mlmodelfile) into the project. - Import
CoreMLframework into our project then add the following line in theViewController.swiftfile: - Create the `CoreML` model object:
- Create the user interface of the application:
- Add
UIImagePickerControllerprotocol calls to theViewControllerclass: - Create an `importFromCameraRoll` method:
- In the `viewDidLoad` method, connect the import button to the import method and add the button the subview:
- Next, create a
UIImageextension and add the following function to convert aUIImageobject intoCVPixelBuffer: - Analyze the imported image and display the result in a
UILabelby adding the following method into theViewControllerclass:

import CoreML
let mlModel = RiceSoupClassifier()
    var importButton:UIButton = {
        let btn = UIButton(type: .system)
        btn.setTitle("Import", for: .normal)
        btn.setTitleColor(.white, for: .normal)
        btn.backgroundColor = .black
        btn.frame = CGRect(x: 0, y: 0, width: 110, height: 60)
        btn.center = CGPoint(x: UIScreen.main.bounds.width/2, y: UIScreen.main.bounds.height*0.90)
        btn.layer.cornerRadius = btn.bounds.height/2
        btn.tag = 0
        return btn
    }()

    var previewImg:UIImageView = {
        let img = UIImageView()
        img.frame = CGRect(x: 0, y: 0, width: 350, height: 350)
        img.contentMode = .scaleAspectFit
        img.center = CGPoint(x: UIScreen.main.bounds.width/2, y: UIScreen.main.bounds.height/3)
        return img
    }()

    var descriptionLbl:UILabel = {
        let lbl = UILabel()
        lbl.text = "No Image Content"
        lbl.frame = CGRect(x: 0, y: 0, width: 350, height: 50)
        lbl.textColor = .black
        lbl.textAlignment = .center
        lbl.center = CGPoint(x: UIScreen.main.bounds.width/2, y: UIScreen.main.bounds.height/1.5)
        return lbl
    }()
class ViewController: UIViewController, UIImagePickerControllerDelegate, UINavigationControllerDelegate
@objc func importFromCameraRoll() {
    if UIImagePickerController.isSourceTypeAvailable(.photoLibrary) {
        let imagePicker = UIImagePickerController()
        imagePicker.delegate = self
        imagePicker.sourceType = .photoLibrary;
        imagePicker.allowsEditing = true
        self.present(imagePicker, animated: true, completion: nil)
    }
}
importButton.addTarget(self, action: #selector(importFromCameraRoll), for: .touchUpInside)
self.view.addSubview(previewImg)
self.view.addSubview(descriptionLbl)
self.view.addSubview(importButton)
extension UIImage {
    func buffer(with size:CGSize) -> CVPixelBuffer? {
        if let image = self.cgImage {
            let frameSize = size
            var pixelBuffer:CVPixelBuffer? = nil
            let status = CVPixelBufferCreate(kCFAllocatorDefault, Int(frameSize.width), Int(frameSize.height), kCVPixelFormatType_32BGRA , nil, &pixelBuffer)
            if status != kCVReturnSuccess {
                return nil
            }
            CVPixelBufferLockBaseAddress(pixelBuffer!, CVPixelBufferLockFlags.init(rawValue: 0))
            let data = CVPixelBufferGetBaseAddress(pixelBuffer!)
            let rgbColorSpace = CGColorSpaceCreateDeviceRGB()
            let bitmapInfo = CGBitmapInfo(rawValue: CGBitmapInfo.byteOrder32Little.rawValue | CGImageAlphaInfo.premultipliedFirst.rawValue)
            let context = CGContext(data: data, width: Int(frameSize.width), height: Int(frameSize.height), bitsPerComponent: 8, bytesPerRow: CVPixelBufferGetBytesPerRow(pixelBuffer!), space: rgbColorSpace, bitmapInfo: bitmapInfo.rawValue)
            context?.draw(image, in: CGRect(x: 0, y: 0, width: image.width, height: image.height))
            CVPixelBufferUnlockBaseAddress(pixelBuffer!, CVPixelBufferLockFlags(rawValue: 0))

            return pixelBuffer
        }else{
            return nil
        }
    }
}
func imagePickerController(_ picker: UIImagePickerController, didFinishPickingMediaWithInfo info: [String : Any]) {
    if let image = info[UIImagePickerControllerOriginalImage] as? UIImage {
        previewImg.image = image
        if let buffer = image.buffer(with: CGSize(width:224, height:224)) {
            guard let prediction = try? mlModel.prediction(image: buffer) else {fatalError("Unexpected runtime error")}
            descriptionLbl.text = prediction.foodType
            print(prediction.foodTypeProbability)
        }else{
            print("failed buffer")
        }
    }
    dismiss(animated:true, completion: nil)
}
Ready to Test
That’s it! Have fun. Run the app and click the Import button to test it out. Now you should understand how to create custom machine learning models and implement them into your applications!
To download the full project, you can find it on GitHub. If you have any questions or thoughts on this tutorial, please leave me comment below and let me know.


