

If you’ve been following Apple’s announcements from the past year, you know that they are heavily invested in machine learning. Ever since they introduced Core ML last year at WWDC 2017, there are tons of apps which have sprung up which harness the power of machine learning.
However, one challenge developers always faced was how to create the models? Luckily, Apple solved our question last winter when they announced the acquisition on Turi Create from GraphLab. Turi Create is Apple’s tool which can help developers simplify the creation of their own custom models. With Turi Create, you can build your own custom machine learning models.
A Quick Introduction to Turi Create
If you’ve been following the other machine learning tutorials, you’re probably wondering, “Didn’t Apple announced Create ML this year? What are the advantages to Turi Create over CreateML?”
While Create ML is a great tool for people just getting started with ML, it is severely limited in terms of usage. With Create ML, you are limited to text or image data. While this does constitute for a majority of projects, it can be rendered useless for slightly more complex ML applications (like Style Transfer!).
With Turi Create, you can create all the same Core ML models as you can with Create ML but more! Since Turi Create is much more complex than Create ML, it is heavily integrated with other ML tools like Keras and TensorFlow. In our tutorial on CreateML, you saw the types of Core ML models we could make with Create ML. Here are the types of algorithms you can make with Turi Create:
- Recommender systems
- Image classification
- Image similarity
- Object detection
- Activity classifier
- Text classifier
You can see that this list consists of classifiers and regressors which can be accomplished with either Create ML, or mostly Turi Create. This is why Turi Create is preferred by more experienced data scientists as it offers a level of customizability simply not available in Create ML.
What is Style Transfer?
Now that you have a fair understanding of Turi Create, let’s look at what Style Transfer is. Style transfer is the technique of recomposing images in the style of other images. What do I mean by this? Take a look at the image below created by using Prisma:
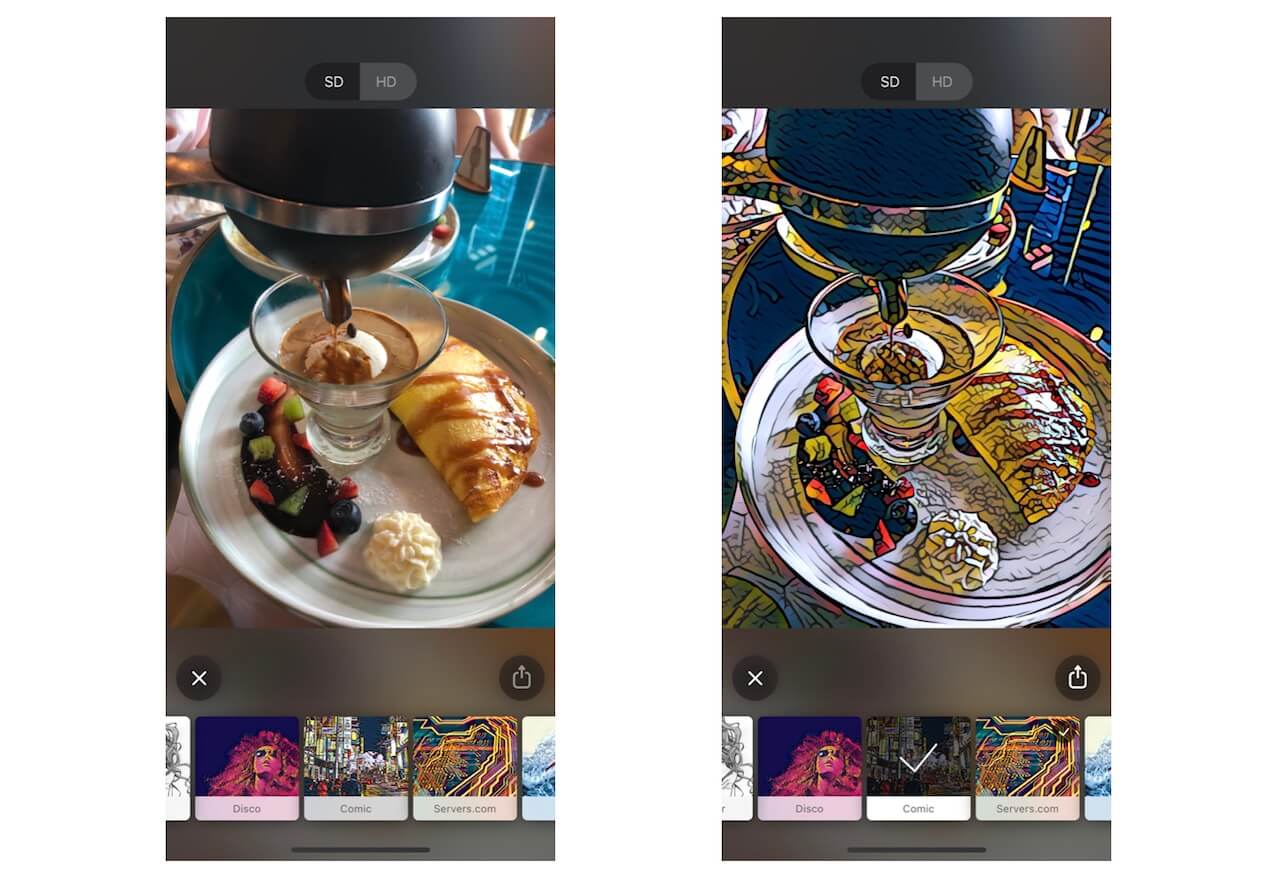
As you can see, the image of the breakfast plate above is transformed into the style of a comic book. Style Transfer began when Gatys et al. published a paper on how it was possible to use convolutional neural networks to transfer artistic style from one image to another.
Convolutional Neural Networks (CNNs) are a type of neural network in machine learning that are commonly used in areas such as image recognition and classification. CNNs have been successful in computer vision related problems like identifying faces, objects and more. This is fairly complex ideas so I wouldn’t worry too much about it.
Building our own Style Transfer Demo
Now that you have an understanding of the tools and concepts that we’ll examine in the tutorial, it is finally time to get started! We’ll be building our own Style Transfer model using Turi Create and import it to a sample iOS project to see how it’ll work!
First, download the starter project here. In this tutorial, we’ll be using Python 2, Jupyter Notebook, and Xcode 9.
Training the Style Transfer Model
Turi Create is a Python package, but it is not built into macOS. Therefore, let me go over how to install this really quick. Your macOS should have Python installed. In case you don’t have Python or pip installed on your device, you can learn the installation procedures over here.
Installing Turi Create and Jupyter
Open Terminal and type the following command:
pip install turicreate==5.0b2
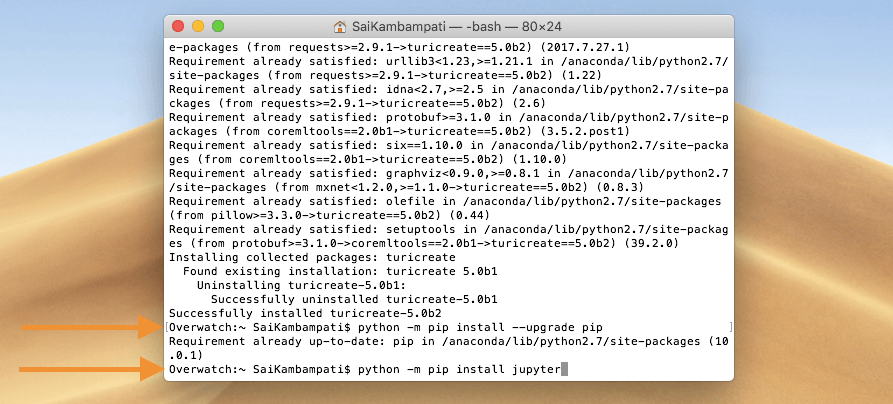
Wait for a minute or two for the Python package to get installed. In the meantime, download Jupyter Notebook. Jupyter Notebook is a compiler for many languages used by developers because of its rich and interactive output visualization. Since Turi Create only supports Python 2, enter the following commands in Terminal to install Jupyter Notebook for Python 2.
python -m pip install --upgrade pip
python -m pip install jupyter
Once you have all the packages installed, it’s time to start creating our algorithm!
Coding with Turi Create
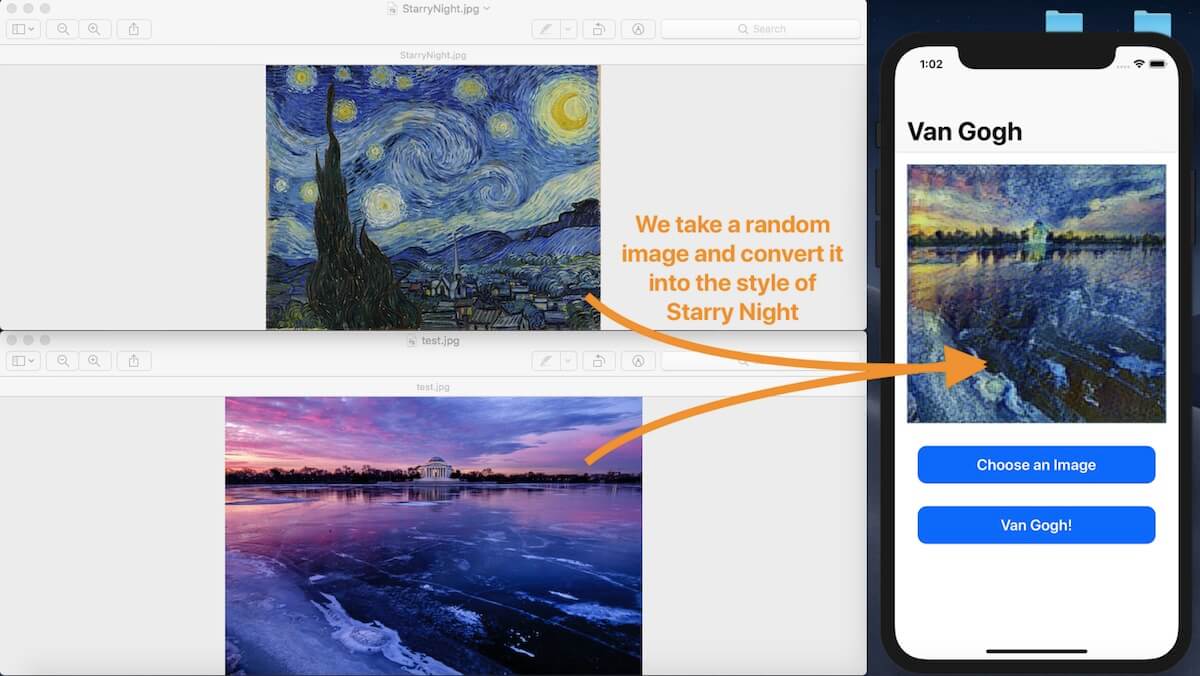
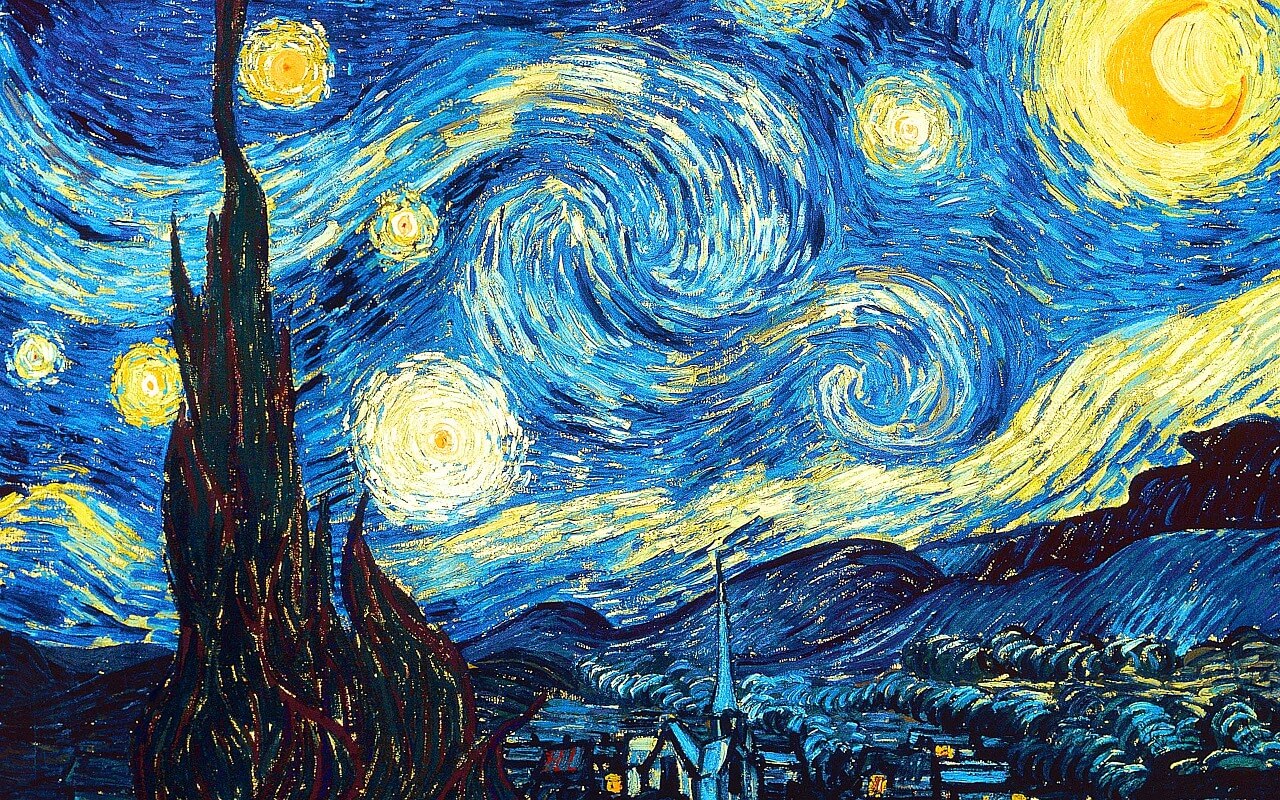
The style transfer model we’ll be creating is from Vincent van Gogh’s Starry Night. Basically, we’ll create a model which can transform any image into a replica of Starry Night.
First, download the training data and unzip it. One folder should be named content and the other should be named style. If you open content, you’ll see roughly 70 images with different subjects. This folder contains varied images so our algorithm knows what type of images to apply the style transfer to. Since we want the transformation on all images, we will have a variety of images.
Style, on the other hand, simply contains only one image: StarryNight.jpg. This folder contains the image we want the artistic style to transfer from.
Now, let’s start our coding session by opening Jupyter Notebook. Enter the following into Terminal.
jupyter notebook
This will open up Safari with the page like below.
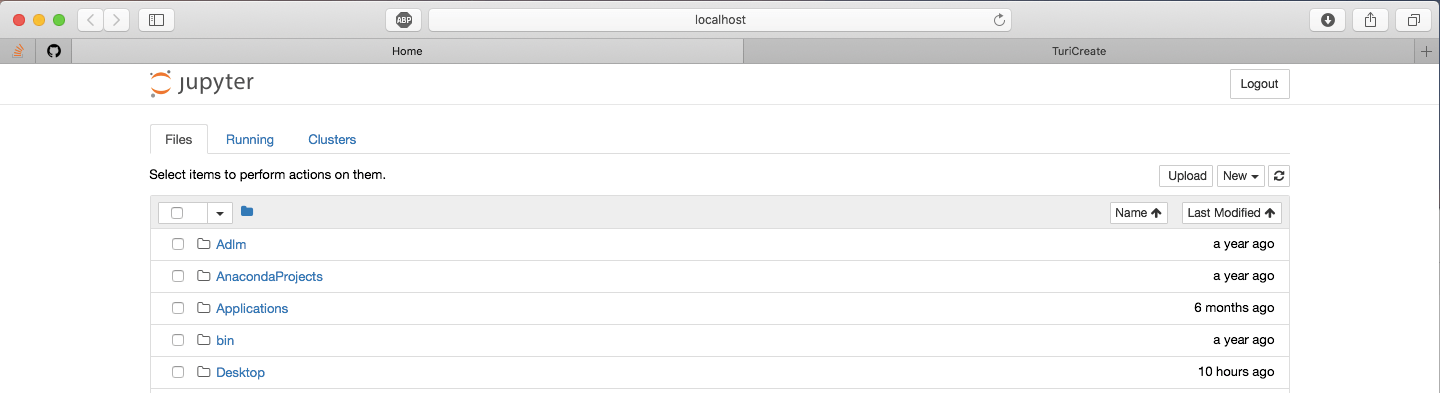
Select the New button and click on Python 2!
Once you click on that button, a new screen should open. This is where we will create our model. Click on the first cell and begin by importing the Turi Create package:
import turicreate as tc
Press SHIFT+Enter to run the code in that cell. Wait until the package is imported. Next, let’s create a reference to the folders which contain our images. Please make sure you change the parameters to your own folder paths.
style = tc.load_images('/Path/To/Folder/style')
content = tc.load_images('/Path/To/Folder/content')
Run the code in the text field and you should receive an output like this:
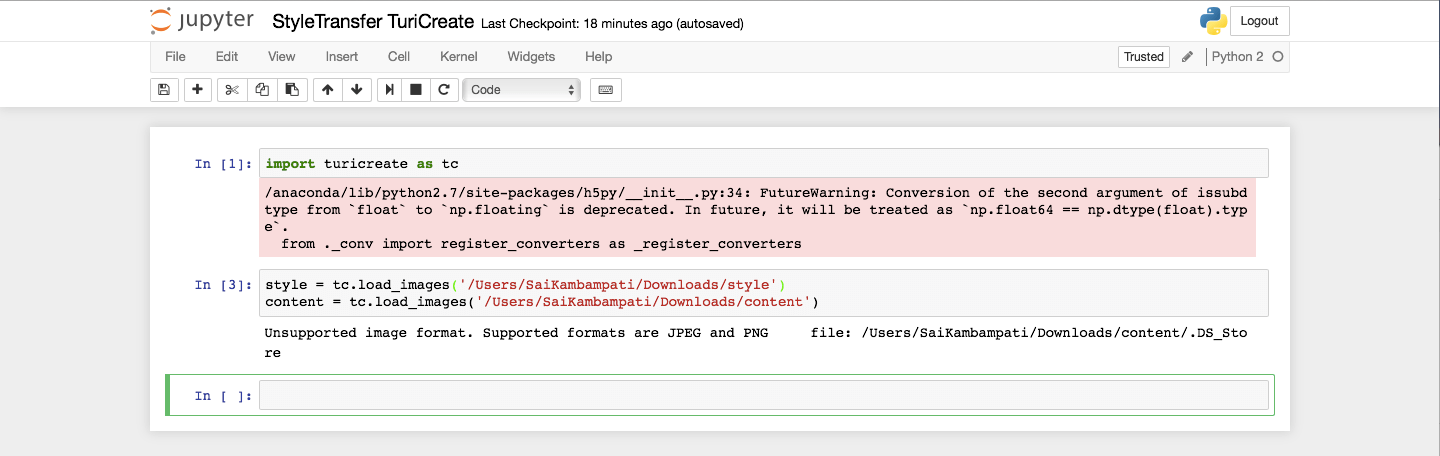
Don’t worry too much about the warnings. Next, we’ll type in the command to create the style transfer model. It is highly advised that you run the following code on a Mac with a very powerful GPU! This would mean most of the latest MacBook Pros as well as the iMacs. If you choose to run the code on a MacBook Air, for example, the computations would run on the CPU and could take days!
model = tc.style_transfer.create(style, content)
Run the code. This could take a very long time to finish based on the device you are running this on. On my MacBook Air, it took 3.5 days since the computations were running on the CPU! If you don’t have enough time, no worries. You can download the final Core ML model here. However, you can always let the whole function run to get a feel for what it is like!
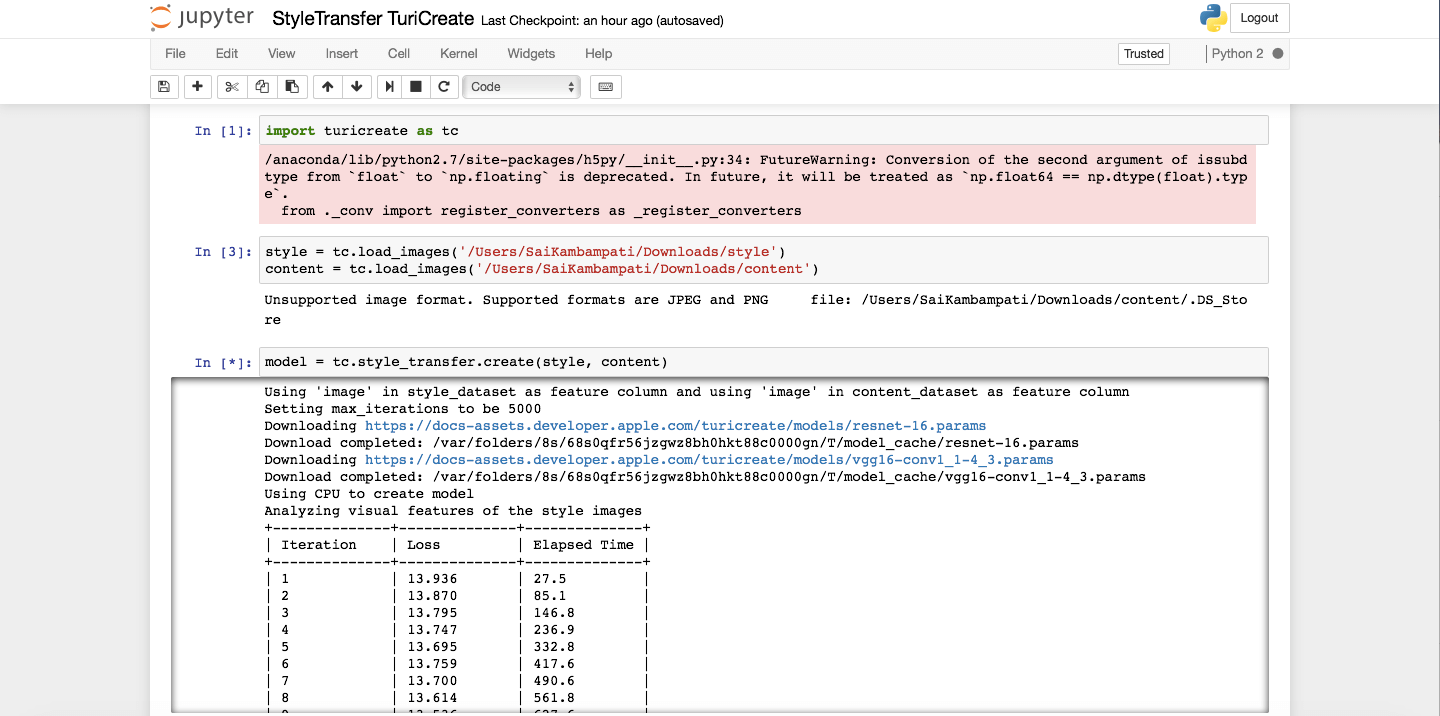
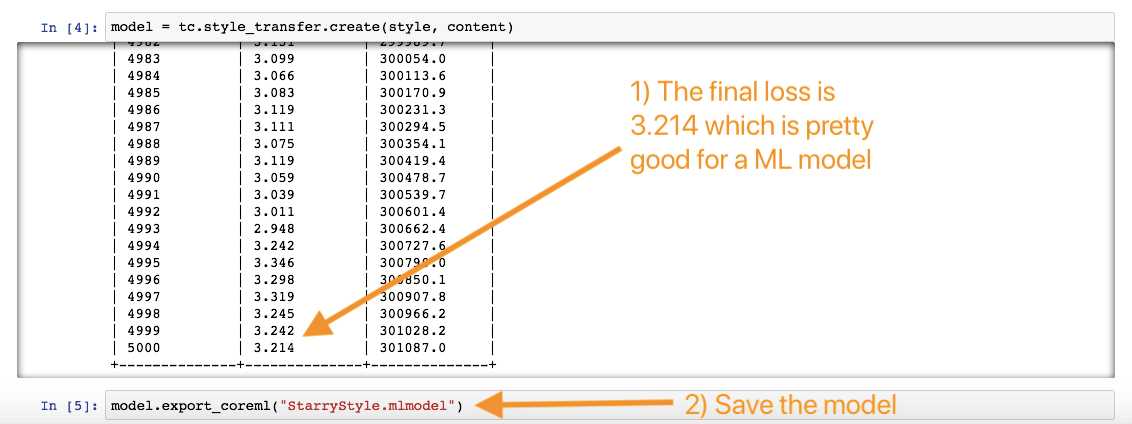
The table you see contains three columns: Iteration, Loss, and Elapsed Time. In Machine Learning, there will be a function which runs back and forth several times. When the function runs forward, this is known as cost. When it goes back, it is known as loss. Each time the function runs, the goal is to tweak the parameters to reduce the loss. So each time the parameters are altered, this adds one more iteration. The goal is to have a small number for the loss. As the training progresses, you can see the loss slowly reduces. Elapsed time refers to how long it has been.
When the model has finished training, all that’s left is saving it! This can be achieved with a simple line of code!
model.export_coreml("StarryStyle.mlmodel")
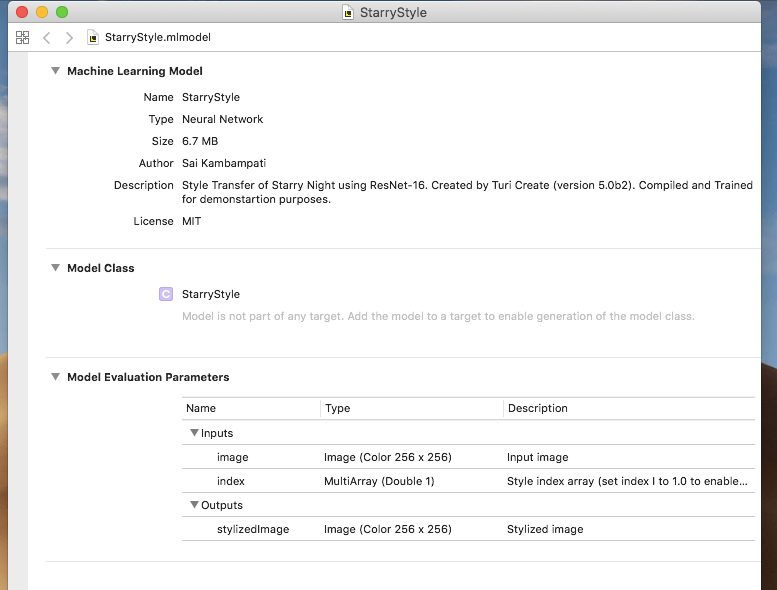
That’s all! Head over to your Library to view the final model!
A Quick Look at the Xcode Project
Now that we have our model, all that’s left is importing it to our Xcode project. Open Xcode 9 and take a look at the project.
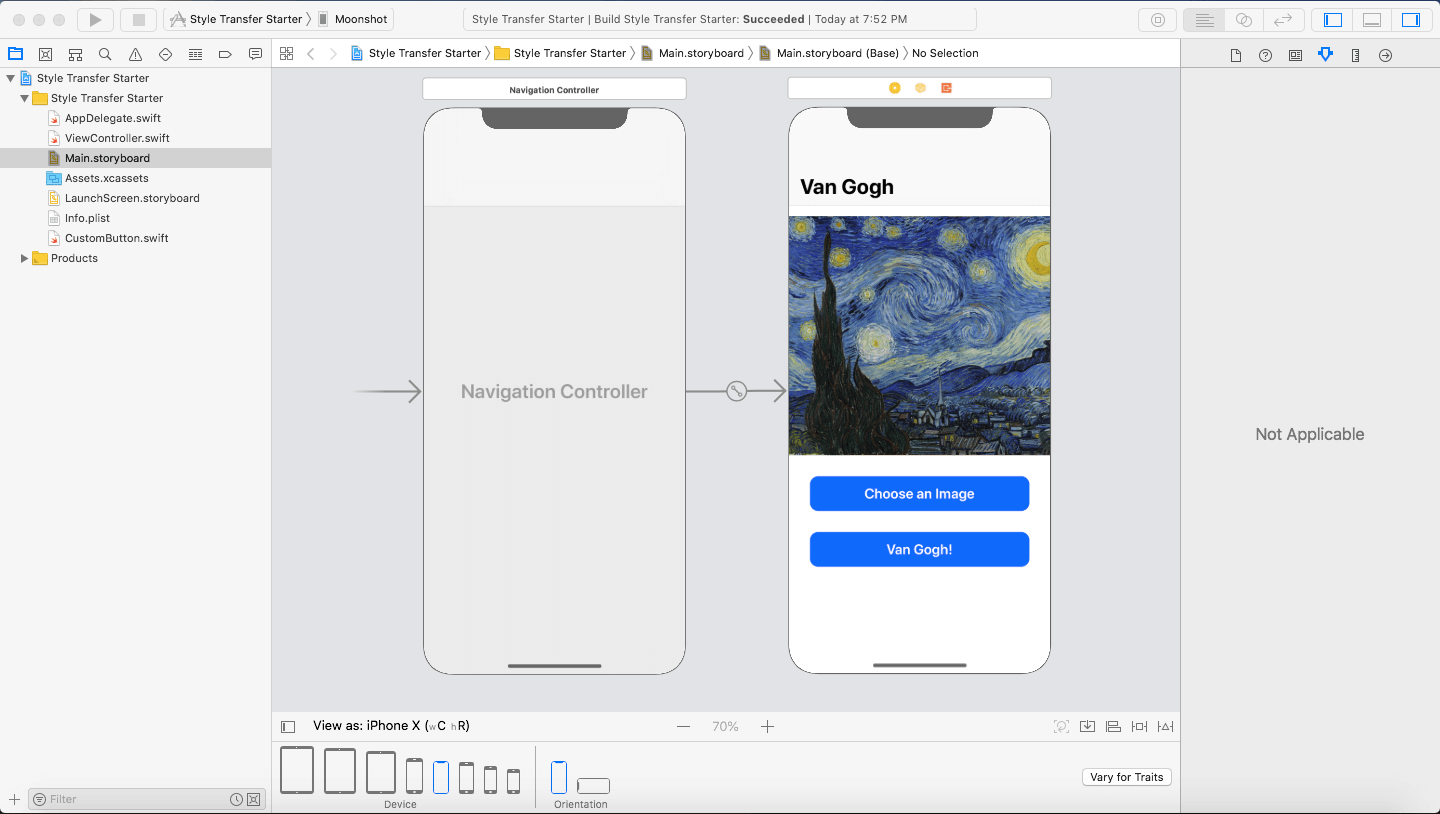
Build and run the project to make sure you can compile the project. The app is not working right now. When we press the Van Gogh! button, nothing happens! It’s up to us to write the code. Let’s get started!
Implementing Machine Learning
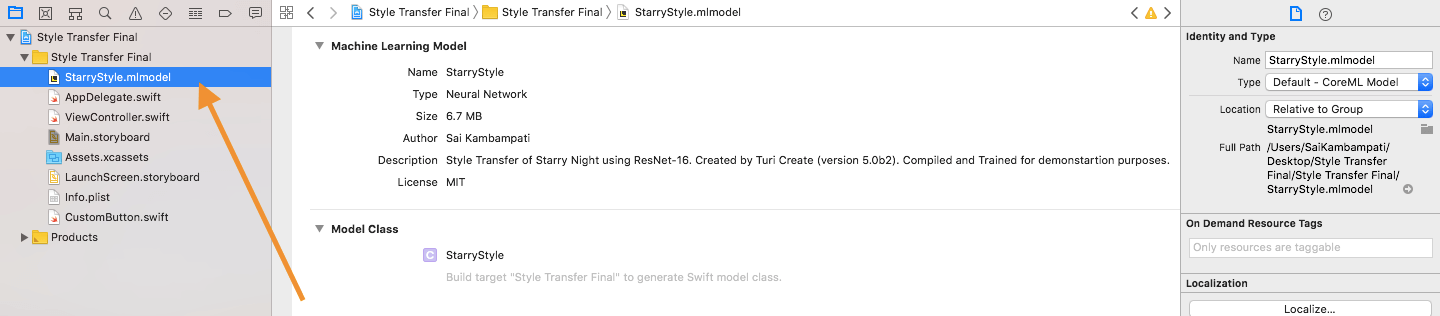
The first step is to drag and drop the model file (i.e. StarryStyle.mlmodel) into the project. Make sure that Copy Items If Needed is checked and the project target is selected.
Next, we have to add the code to process the machine learning in ViewController.swift. Most of the code will be written in our transformImage() function. Let’s begin by importing the Core ML package and calling the model.
import CoreML
...
@IBAction func transformImage(_ sender: Any) {
    // Style Transfer Here
    let model = StarryStyle()
}
This line simply assigns our Core ML model to a constant called model.
Converting the Image
Next, we have to convert an image which a user chooses into some readable data. If you look into the StarryStyle.mlmodel file again, you should find that it takes in an image of size 256×256. Therefore, we have to perform the conversion. Right below our transformImage() function, add a new function.
func pixelBuffer(from image: UIImage) -> CVPixelBuffer? {
    // 1
    UIGraphicsBeginImageContextWithOptions(CGSize(width: 256, height: 256), true, 2.0)
    image.draw(in: CGRect(x: 0, y: 0, width: 256, height: 256))
    let newImage = UIGraphicsGetImageFromCurrentImageContext()!
    UIGraphicsEndImageContext()

    // 2
    let attrs = [kCVPixelBufferCGImageCompatibilityKey: kCFBooleanTrue, kCVPixelBufferCGBitmapContextCompatibilityKey: kCFBooleanTrue] as CFDictionary
    var pixelBuffer : CVPixelBuffer?
    let status = CVPixelBufferCreate(kCFAllocatorDefault, 256, 256, kCVPixelFormatType_32ARGB, attrs, &pixelBuffer)
    guard (status == kCVReturnSuccess) else {
        return nil
    }

    // 3
    CVPixelBufferLockBaseAddress(pixelBuffer!, CVPixelBufferLockFlags(rawValue: 0))
    let pixelData = CVPixelBufferGetBaseAddress(pixelBuffer!)

    // 4
    let rgbColorSpace = CGColorSpaceCreateDeviceRGB()
    let context = CGContext(data: pixelData, width: 256, height: 256, bitsPerComponent: 8, bytesPerRow: CVPixelBufferGetBytesPerRow(pixelBuffer!), space: rgbColorSpace, bitmapInfo: CGImageAlphaInfo.noneSkipFirst.rawValue)

    // 5
    context?.translateBy(x: 0, y: 256)
    context?.scaleBy(x: 1.0, y: -1.0)

    // 6
    UIGraphicsPushContext(context!)
    image.draw(in: CGRect(x: 0, y: 0, width: 256, height: 256))
    UIGraphicsPopContext()
    CVPixelBufferUnlockBaseAddress(pixelBuffer!, CVPixelBufferLockFlags(rawValue: 0))

    return pixelBuffer
}
This is a helper function, similar to the same function used in the earlier Core ML tutorial. In case you don’t remember, don’t worry. Let me go step by step to explain what this function does.
- Since our model only accepts images with dimensions of
256 x 256, we convert the image into a square. Then, we assign the square image to another constantnewImage. - Now, we convert
newImageinto aCVPixelBuffer. If you’re not familiar withCVPixelBuffer, it’s basically an image buffer which holds the pixels in the main memory. You can find out more aboutCVPixelBuffershere. - We then take all the pixels present in the image and convert them into a device-dependent RGB color space. Then, by creating all this data into a
CGContext, we can easily call it whenever we need to render (or change) some of its underlying properties. This is what we do in the next two lines of code by translating and scaling the image. - Finally, we make the graphics context into the current context, render the image, and remove the context from the top stack. With all these changes made, we return our pixel buffer.
This is really some advanced Core Image code, which is out of the scope of this tutorial. Don’t worry if you didn’t understand most of it. The gist is that this function takes an image and extracts its data by turning it into a pixel buffer which can be read easily by Core ML.
Applying Style Transfer to the Image
Now that we have our Core ML helper function in place, let’s go back to transformImage() and implement the code. Below the line where we declare our model constant, insert the following code:
let styleArray = try? MLMultiArray(shape: [1] as [NSNumber], dataType: .double)
styleArray?[0] = 1.0
Turi Create allows you to package more than one “style” into a model. For this project, we only have one style: Starry Night. However, if you wanted to add more styles, you could add more pictures to the style folder. We declare styleArray as an MLMultiArray. This is a type of array used by Core ML for either an input or an output of a model. Since we have one style, we only have one shape and one data element. This is why we set the number of data elements to 1 for our styleArray.

Finally, all that’s left is making a prediction using our model and setting it to the imageView.
if let image = pixelBuffer(from: imageView.image!) {
    do {
        let predictionOutput = try model.prediction(image: image, index: styleArray!)

        let ciImage = CIImage(cvPixelBuffer: predictionOutput.stylizedImage)
        let tempContext = CIContext(options: nil)
        let tempImage = tempContext.createCGImage(ciImage, from: CGRect(x: 0, y: 0, width: CVPixelBufferGetWidth(predictionOutput.stylizedImage), height: CVPixelBufferGetHeight(predictionOutput.stylizedImage)))
        imageView.image = UIImage(cgImage: tempImage!)
    } catch let error as NSError {
        print("CoreML Model Error: \(error)")
    }
}
This function first checks if there is an image in imageView. In the code block, it defines a predictionOutput to save the output of the model’s prediction. We call the model’s prediction method with the user’s image and the style array. The predicted result is a pixel buffer. However, we can’t assign set a pixel buffer to a UIImageView so we come up with a creative way to do so.
First, we set the pixel buffer, predictionOutput.stylizedImage, to an image of type CIImage. Then, we create a variable tempContext which is an instance of CIContext. We call upon a built-in function of the context (i.e. createCGImage) which generates a CGImage from ciImage. Finally, we can set imageView to tempImage. That’s all! If there is an error, we gracefully handle it by printing the error.
Build and run your project. Choose an image from your photo library and test how the app works!

You may notice that the model may not look too close to Starry Night and this can be due to a variety of reasons. Maybe we need more training data? Or perhaps we need to train the model for a higher (or lower) number of iterations? I highly encourage you to go back and play around with the numbers until you get a satisfactory result!
Conclusion
This sums up the tutorial! I have given you an introduction to Turi Create and created your own Style Transfer model, a feat that would have been impossible for a single person to create just 5 years ago. You also learned how to import this Core ML model into an iOS app and use it for creative purposes!
However, Style Transfer is just the beginning. As I mentioned earlier, Turi Create can be used for a variety of applications. Here are some great resources on where to go next:
- Apple’s Gitbook on Turi Create Applications
- A Guide to Turi Create – WWDC 2018
- Turi Create Repository
For the full project, please download it from GitHub. If you have any comments or feedback, please leave me comment and share your thought below.


