

In a world that there are extremely so many mobile applications, there is no doubt that it’s tremendously difficult to create new ones that will attract users’ attention and will make their way among all others up to the top successfully. Definitely, one could say that a secret ingredient that turns simple apps to outstanding apps is the customization touches that development teams (developers and designers) apply to small details that usually most programmers don’t deal with. One of them, as you assume from the tutorial’s title, is the pull-to-refresh control, and through this post I am about to show you the way to override its default appearance.
As you know, the pull-to-refresh control is the activity view indicator (often along with some short message) that appears on top of a tableview when data loading is in progress, and the tableview’s contents have not been refreshed yet. Actually, the pull-to-refresh control is something like a “Please, wait…” message shown to the users while they’re awaiting for new content to be fetched and displayed. The most well-known app that uses it is the Mail, where by dragging towards bottom the emails tableview leads to refreshing them. The debut of that control was made in iOS 6, and since then it has been used thousand times in countless applications.
If you have ever desired to use the pull-to-refresh control in any of your apps and you’ve searched around for information on how to do that, then you’ve definitely come across to the Simon’s tutorial that perfectly explains all you need to know. In this post we are going to see another aspect of the pull-to-refresh though; how to create a custom one, so you can apply a different style to this small but important detail that will attach a different perspective to your apps.
So, finishing this quick prelude, in the next few parts you are going to see a technique that enables you to add any custom content and animation you want so you can “replace” the default pull-to-refresh control. Note that what you will see next is just to demonstrate the logic you should follow; the actual custom content it totally up to you, or more precisely, is up to your imagination. Let’s get started, and in a pretty short amount of time you’ll be able to create custom pull-to-refresh content!
Demo App Overview
The next animated graphic illustrates the custom pull-to-refresh control that we are about to create in this tutorial:

As you can see, the tableview contains some dummy data, as our purpose here is not to retrieve actual data from a web server. The important part is that during the refresh progress, the activity indicator view is not appeared; instead, the “APPCODA” word is animated in a custom fashion as long as the refresh lasts.
In case you’re wondering when the fake refresh ends, all I have to say is that a timer (NSTimer) object is used, which after a period of four seconds it stops the refreshing and therefore hides the custom pull-to-refresh control. The four seconds of the example consists of a randomly picked time duration. Of course this is just for demonstrating the custom control in this tutorial. In many cases the data refreshing lasts less than this time duration (especially when having fast Internet connection), so don’t use a timer in a real application just to show your custom pull-to-refresh control and impress your users. Be sure that they will have many opportunities to see it, especially if your app is so great and it’s being used quite often.
As you understand we are about to develop a quite easy project. However, we won’t get started from scratch. As usually, you can download a starter project to begin. All you’ll find in there is the interface design in the storyboard, and one more Interface Builder file, called RefreshContents.xib. In it, I have added the custom contents that will be displayed instead of the normal pull-to-refresh control. Actually, it contains seven label objects (UILabels) that all together form the “APPCODA” word, and a custom view (UIView) that is used as a container for the labels. All the necessary font formatting has been done, and the constraints have been properly set. Later on, all we’ll have to do is to load those controls in our view controller, and handle them in an appropriate manner.
So, go ahead and download the starter project. Open it in Xcode and keep reading!
The Default Pull-To-Refresh
The first thing we have to do in our demo application is to display the dummy data to our tableview. In the starter project that you have downloaded, there is already an IBOutlet property named tblDemo connected to the tableview in the storyboard, therefore we have to write the required tableview delegate and datasource methods. However, before doing that we have to specify the data that we will display in the tableview. So, in the ViewController.swift file, go to the top of the class and add the next line which is good enough for our purpose:
var dataArray: Array = ["One", "Two", "Three", "Four", "Five"]
Now, modify a bit the header line of the class by adding the UITableViewDelegate and UITableViewDataSource protocols as shown next:
class ViewController: UIViewController, UITableViewDelegate, UITableViewDataSource
After that, we must set the ViewController class instance as the delegate and datasource of the tableview. We’ll do that in the viewDidLoad:
override func viewDidLoad() {
    ...

    tblDemo.delegate = self
    tblDemo.dataSource = self
}
Now, let’s add the missing tableview methods that will display the fake data:
func numberOfSectionsInTableView(tableView: UITableView) -> Int {
    return 1
}

func tableView(tableView: UITableView, numberOfRowsInSection section: Int) -> Int {
    return dataArray.count
}

func tableView(tableView: UITableView, cellForRowAtIndexPath indexPath: NSIndexPath) -> UITableViewCell {
    let cell = tableView.dequeueReusableCellWithIdentifier("idCell", forIndexPath: indexPath) as! UITableViewCell

    cell.textLabel!.text = dataArray[indexPath.row]

    return cell
}

func tableView(tableView: UITableView, heightForRowAtIndexPath indexPath: NSIndexPath) -> CGFloat {
    return 60.0
}
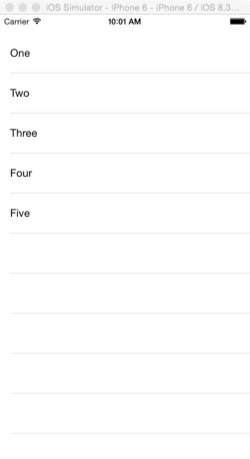
That’s all. There’s nothing difficult in the above implementation, and if you run the application you’ll see the “One, Two, …” being shown in the tableview:
Let’s focus now on how to display and use the default pull-to-refresh control. In cases like this one, where your class is a subclass of the ViewController class, or any other class, but not of the UITableViewController, the pull-to-refresh control must be added as a subview to the tableview (see Simon’s tutorial on how to do that in UITableViewController cases). Initially, we have to declare the refresh control at the top of the class:
var refreshControl: UIRefreshControl!
Don’t forget that even though the refresh control consists of a special control, it must be declared and handled like any other property or object, so doing the above declaration is necessary.
In the viewDidLoad method again, at first we will initialize the refresh control,and then we’ll add it to the tableview:
override func viewDidLoad() {
    ...

    refreshControl = UIRefreshControl()
    tblDemo.addSubview(refreshControl)
}
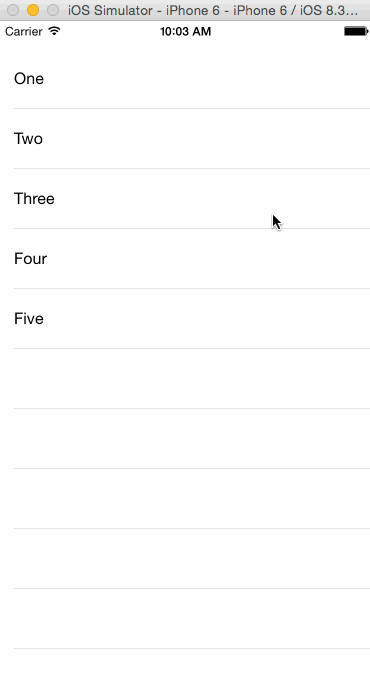
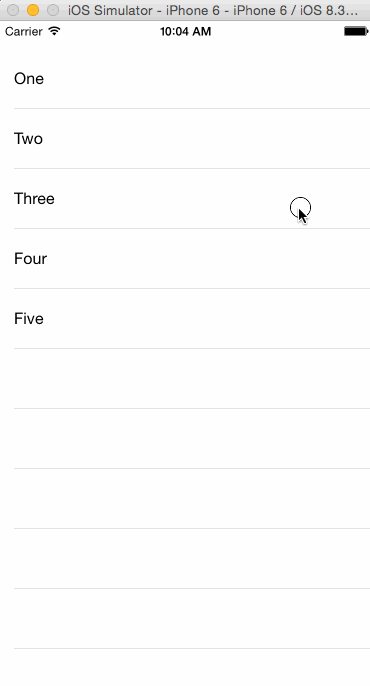
By running the app once again, you’ll notice that the default spinner appears when dragging towards bottom the tableview (when pulling). Don’t expect the refresh control to become hidden again though; this doesn’t happen automatically. We have to explicitly end the refreshing progress, but that’s something we’ll do later. For now, the good news is that the refresh indication is being shown just fine:
As a tip, notice that you can change both the background and tint colors of the refresh control. For example, the following two lines will result to a pull-to-refresh control with a red background and a yellow spinner:
override func viewDidLoad() {
    ...

    refreshControl = UIRefreshControl()

    refreshControl.backgroundColor = UIColor.redColor()
    refreshControl.tintColor = UIColor.yellowColor()

    tblDemo.addSubview(refreshControl)
}
Custom Refresh Contents
The main idea behind the customization of the pull-to-refresh control is to add any extra content we want as a subview to the control itself. In our example, this extra content is what the RefreshContents.xib file contains. More specifically, that Interface Builder file’s contents are those shown below:
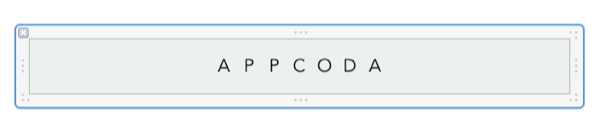
As you see, there is a view object that contains in turn seven labels. Each label matches to a letter of the “APPCODA” word.
In this part we are going to do something really simple: We’ll access programmatically that .xib file, and we’ll assign all of its contents to properties. Being more precise, the view object will be assigned to a UIView property, while all labels will be appended into an array. By doing what I just described, we’ll be able later to apply any kind of custom animation we desire on those views (we’ll see more in a while).
Let’s see everything in details now. At first, add the following couple of declarations to the top of the class:
var customView: UIView!

var labelsArray: Array = []
With the above two new properties available on our hands, let’s create a new custom function where we’ll load all the .xib file contents:
func loadCustomRefreshContents() {
    let refreshContents = NSBundle.mainBundle().loadNibNamed("RefreshContents", owner: self, options: nil)
}
We’ll keep writing code in the above custom function. The next step is to assign to the customView property the view object that has been loaded by the above line. Notice that when fetching subviews from an external .xib file similarly to the above way, what you get back is an array containing all of them. In our case, this array will contain just the custom view object, as the labels are subviews of it and not separate views existing in the .xib. Also note in the following new lines of code that we set the frame of the custom view by making it equal to the bounds of the default refresh control:
func loadCustomRefreshContents() {
    ...

    customView = refreshContents[0] as! UIView
    customView.frame = refreshControl.bounds
}
The last line above in conjunction to the constraints that have already been set will make the custom view to change its size automatically and according to how long the tableview has been pulled when the refresh progress is triggered.
Now, let’s load all the labels into the labelsArray array. You may have noticed in the RefreshContents.xib file that each label has been assigned with a tag number. Starting from left, the tag values begin from 1 up to 7. We’ll use those tag values to access each label separately:
func loadCustomRefreshContents() {
...
for var i=0; i
Lastly, let's add the custom view as a subview to the refresh control:
func loadCustomRefreshContents() {
...
refreshControl.addSubview(customView)
}
That's it! All we have to do now is to call the above function, and of course we'll do that in the viewDidLoad method:
override func viewDidLoad() {
...
loadCustomRefreshContents()
}
There's one final touch, but important one that we have to add. While being in the viewDidLoad method, set both the background and tint color of the refresh control to clear (transparent). Here's how your viewDidLoad should eventually look like:
override func viewDidLoad() {
super.viewDidLoad()
// Do any additional setup after loading the view, typically from a nib.
tblDemo.delegate = self
tblDemo.dataSource = self
refreshControl = UIRefreshControl()
refreshControl.backgroundColor = UIColor.clearColor()
refreshControl.tintColor = UIColor.clearColor()
tblDemo.addSubview(refreshControl)
loadCustomRefreshContents()
}
Go and test the app now. You'll see that the custom view with the labels is being shown when you pull to refresh, instead of the default spinner. Of course, there is no animation yet, so let's go ahead for it.

Initiating Custom Animations
Right next I give you once again the final animations we want to achieve in this demo:

If you look carefully, you'll notice that the whole animation process is composed by two sub-animations:
- In the first one, each label is being rotated a bit (45 degrees) and at the same time its text color is altered. Everything is reverted before the next animation.
- Once all labels have been rotated and returned back in place, all together are scaled up and then scaled down again.
We'll keep things as simple as possible, by implementing each animation part to a separate custom function. Before doing anything though, let me give you some new properties we'll need next. Here they are:
var isAnimating = false
var currentColorIndex = 0
var currentLabelIndex = 0
Here's a quick description for each one:
- The isAnimating flag (obviously) indicates whether the custom animation is taking place or not. We'll use it so we know if we can start a new animation or not (apparently, we don't want a second animation process to begin while another one has already started).
- The currentColorIndex will be used to another custom function we'll implement. In this function, we'll have an array of colors (the text colors actually), and this property will indicate the next color that should be applied to the appropriate label.
- The currentLabelIndex property is indicating the index of the label that the first animation part is being applied to. With it not only we'll be able to know what's the next label that should be rotated and re-colored, but also to tell for sure when the second part of the animation (scale up) should begin.
At this point, we are ready to see the first part of the animation. Right next I'm giving you a new function called animateRefreshStep1() fully implemented:
func animateRefreshStep1() {
isAnimating = true
UIView.animateWithDuration(0.1, delay: 0.0, options: UIViewAnimationOptions.CurveLinear, animations: { () -> Void in
self.labelsArray[self.currentLabelIndex].transform = CGAffineTransformMakeRotation(CGFloat(M_PI_4))
self.labelsArray[self.currentLabelIndex].textColor = self.getNextColor()
}, completion: { (finished) -> Void in
UIView.animateWithDuration(0.05, delay: 0.0, options: UIViewAnimationOptions.CurveLinear, animations: { () -> Void in
self.labelsArray[self.currentLabelIndex].transform = CGAffineTransformIdentity
self.labelsArray[self.currentLabelIndex].textColor = UIColor.blackColor()
}, completion: { (finished) -> Void in
++self.currentLabelIndex
if self.currentLabelIndex < self.labelsArray.count {
self.animateRefreshStep1()
}
else {
self.animateRefreshStep2()
}
})
})
}
Let's discuss now the most important parts of it. At first, the isAnimating flag becomes true, so we make sure that no new animation will begin. We'll see later where and how we'll check that. Next, as you notice, there are two animation blocks where the second one is starting in the completion handler of the first one. That's because:
- In the first animation block we perform the rotation and text color changing for the current label (see the currentLabelIndex property).
- When that sub-animation is over, we want to revert the label to its initial state and this must happen gracefully, not instantly. Obviously, that's why we need the second animation block.
In the completion handler of the inner animation block, we check the value of the currentLabelIndex property. If it still has a valid value, we make a recursion and we call the same function once again, so the next label to be animated. Otherwise, if all labels have been animated, we call the next custom method that implements the second part of the whole animation (animateRefreshStep2()).
Definitely you have noticed the call to the getNextColor() function (inside the first animation block). I've already mentioned about it; it will give us the text color for the label that is being animated. We'll see it really soon.
Now, let's go to the second part of the animation, and let's implement the animateRefreshStep2() function:
func animateRefreshStep2() {
UIView.animateWithDuration(0.35, delay: 0.0, options: UIViewAnimationOptions.CurveLinear, animations: { () -> Void in
self.labelsArray[0].transform = CGAffineTransformMakeScale(1.5, 1.5)
self.labelsArray[1].transform = CGAffineTransformMakeScale(1.5, 1.5)
self.labelsArray[2].transform = CGAffineTransformMakeScale(1.5, 1.5)
self.labelsArray[3].transform = CGAffineTransformMakeScale(1.5, 1.5)
self.labelsArray[4].transform = CGAffineTransformMakeScale(1.5, 1.5)
self.labelsArray[5].transform = CGAffineTransformMakeScale(1.5, 1.5)
self.labelsArray[6].transform = CGAffineTransformMakeScale(1.5, 1.5)
}, completion: { (finished) -> Void in
UIView.animateWithDuration(0.25, delay: 0.0, options: UIViewAnimationOptions.CurveLinear, animations: { () -> Void in
self.labelsArray[0].transform = CGAffineTransformIdentity
self.labelsArray[1].transform = CGAffineTransformIdentity
self.labelsArray[2].transform = CGAffineTransformIdentity
self.labelsArray[3].transform = CGAffineTransformIdentity
self.labelsArray[4].transform = CGAffineTransformIdentity
self.labelsArray[5].transform = CGAffineTransformIdentity
self.labelsArray[6].transform = CGAffineTransformIdentity
}, completion: { (finished) -> Void in
if self.refreshControl.refreshing {
self.currentLabelIndex = 0
self.animateRefreshStep1()
}
else {
self.isAnimating = false
self.currentLabelIndex = 0
for var i=0; i
Once again, we use two animation blocks. In the first one, we scale up all labels. Note that we can't use a loop to do that (for example a for statement). The loop would be executed regardless of the animation duration, and it would have finished a lot before all labels to have been scaled up.
Upon completion, we set the initial transformation to all labels, so they get their initial state once again. On the completion handler of the inner animation block, there's an if statement. There, if the refresh is still in progress we get prepared to re-run the whole animation. This is done simply by setting the initial value (0) to the currentLabelIndex property, and by calling the first custom function to perform the animation. We will deal with the end of the refreshing in the next part. However, if the refresh process has already ended, then we indicate that we are not animating any more by changing the isAnimating flag value, and of course, we set the initial values to all properties (and views) that take part in the animation process. This is necessary, so the animation to properly start over in the next pull of the tableview.
The question that now arises is where exactly the custom animation should begin. If you look closely to the animated graphic in the beginning of this part, you'll find out that it starts once the tableview dragging is over. Programmatically speaking, and considering that the tableview is a subclass of the scroll view, the delegate method we are interested in is the scrollViewDidEndDecelerating(_:). This one is called every time the tableview scrolling gets stopped. In this one, initially we'll check if a refresh is in progress or not. In case it is, we'll check the value of the isAnimating flag, and if no animation is taking place, we'll initiate it by calling the first function we implemented before. Here's what I just said converted in code:
func scrollViewDidEndDecelerating(scrollView: UIScrollView) {
if refreshControl.refreshing {
if !isAnimating {
animateRefreshStep1()
}
}
}
Note that using the above scrollview delegate method is not mandatory. Depending always on the logic of your custom pull-to-refresh control, you might be also interested in other delegate methods, such as the scrollViewDidScroll(_:).
There's one missing part here, and that is the implementation of the getNextColor() function. Let' see it:
func getNextColor() -> UIColor {
var colorsArray: Array = [UIColor.magentaColor(), UIColor.brownColor(), UIColor.yellowColor(), UIColor.redColor(), UIColor.greenColor(), UIColor.blueColor(), UIColor.orangeColor()]
if currentColorIndex == colorsArray.count {
currentColorIndex = 0
}
let returnColor = colorsArray[currentColorIndex]
++currentColorIndex
return returnColor
}
It's quite simple what we do here. At first, we prepare an array with some predefined colors (the order is totally random). Then, we make sure that the currentColorIndex property has a valid value, and if not, we set its initial value (0). We keep the color that is indicated by that property, and we increase its value, so the next time that this function will be called we won't get the same color. At the end, the selected color is returned.
Now you can try the app once again. Pull to refresh, and see the animation taking place. Of course, the refresh control will never go away, as this part is still not implemented. Feel free to play with it, and change any part of the animation you want.
Beyond Custom Animations
Creating custom animations for the pull-to-refresh control is funny and interesting, but we should not forget that users don't refresh just to see how beautiful our control is. They refresh because they need to fetch new content, and that should always be your primary thought when you're making your custom pull-to-refresh. So, after having finished with all the stuff we went through in the previous parts, the next step is to implement the real data fetching process.
Obviously in this tutorial we are not going to fetch any data at all, nor to update the contents of the tableview. However, that fact won't prevent us from applying the logic I described right before. So, continuing our work, we are about to create a new custom function named doSomething() (it's quite ironic the name I chose, if you think that it'll do almost nothing). In this one, we'll instantiate and fire a timer (NSTimer) object, which after a period of 4 seconds will signal the end of the refreshing process. In a real application you don't need something like that. The end of the refreshing comes when the data fetching is over.
First things first, so back to the top of the class for one (last) declaration:
var timer: NSTimer!
And now, let's "do something":
func doSomething() {
timer = NSTimer.scheduledTimerWithTimeInterval(4.0, target: self, selector: "endOfWork", userInfo: nil, repeats: true)
}
The 4 seconds are good enough so we see the animation occurring more than once. As it's shown in the one and only line existing in the above function, the endOfWord() function is the one that will be called after the predefined period of time has been reached. In this one, we'll stop the refreshing process, and we'll invalidate the timer.
func endOfWork() {
refreshControl.endRefreshing()
timer.invalidate()
timer = nil
}
At this point, we are almost ready. All we need to do is to call the doSomething() function. This should happen right before the animation gets started, so let's update the scrollview delegate method. Here it is once again:
func scrollViewDidEndDecelerating(scrollView: UIScrollView) {
if refreshControl.refreshing {
if !isAnimating {
doSomething()
animateRefreshStep1()
}
}
}
Our demo app is now complete! Go ahead and give it the final try!
Summary
So, as you see creating a custom pull-to-refresh control is not difficult at all. All you need is a nice idea that you'll turn into graphics, and that's all. As I've said in the last part, your primary target must always be the real data fetching and not the showing off of the visual effects you've created. Also, be careful and don't be tempted to delay the refresh control hiding just to display it longer once your data has been updated. This will end up to a real bad user experience, and you don't want that. Undoubtably if your app is useful to users, they'll have many opportunities to admire your custom work, so there's no reason to force them to do so. Regarding the demo app of this tutorial, the custom pull-to-refresh contents were simple, but good enough to let me make my point clear. As you understand, this is a programming aspect that can accept a lot of customization and improvisation, and of course, even between your apps probably the final result will never be the same. The custom pull-to-refresh control must always match to the design of each app. Anyway, once again we've come to the end, and I really hope you found this tutorial helpful. And until next time, have fun by making custom pull-to-refresh controls!
For reference, you can download the Xcode project here.


