

Earlier, we published a SwiftUI tutorial showing you how to create perspective text using the framework. It’s very much like Star Wars’ perspective text but without animation. This week, Priyans Brahmbhatt will teach you how to add animations to the perspective text. Since this article was built on the top of the perspective text tutorial, I highly recommend you to check it out first.
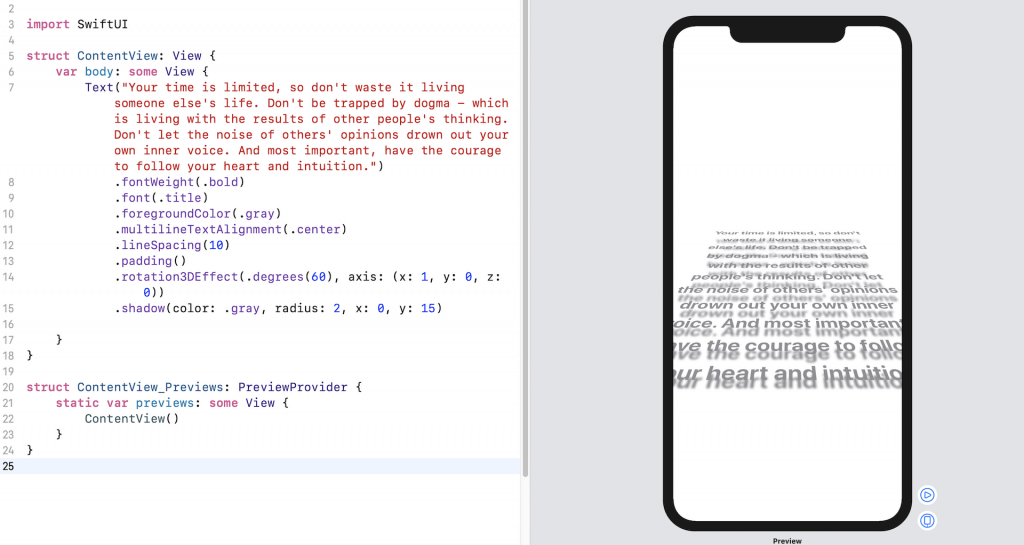
We will start from where the previous tutorial ended. Let’s have a look at the code again:
Animating the Text Using SwiftUI
Before writing the code, let’s think about how we can achieve the animation. I guess everyone know how the Star Wars’ text animation looks like. But anyway, here is the animation we want to build:
What we want to do is to add a text animation which displays text coming from the bottom of the screen. Also, remember the animation should start when view appears.
There are many ways to realize the animation. But one way to achieve it is by tracking the height of the text view. As soon as the view appears, we set the height of the text view to zero and then gradually increase it. At the same time, we ask SwiftUI to handle the animation.
First, the question is how can we define the height for the view?
In SwiftUI, we can define a frame for the view using the .frame modifier and that allows you to modify the width and height properties. Let’s see how it works.
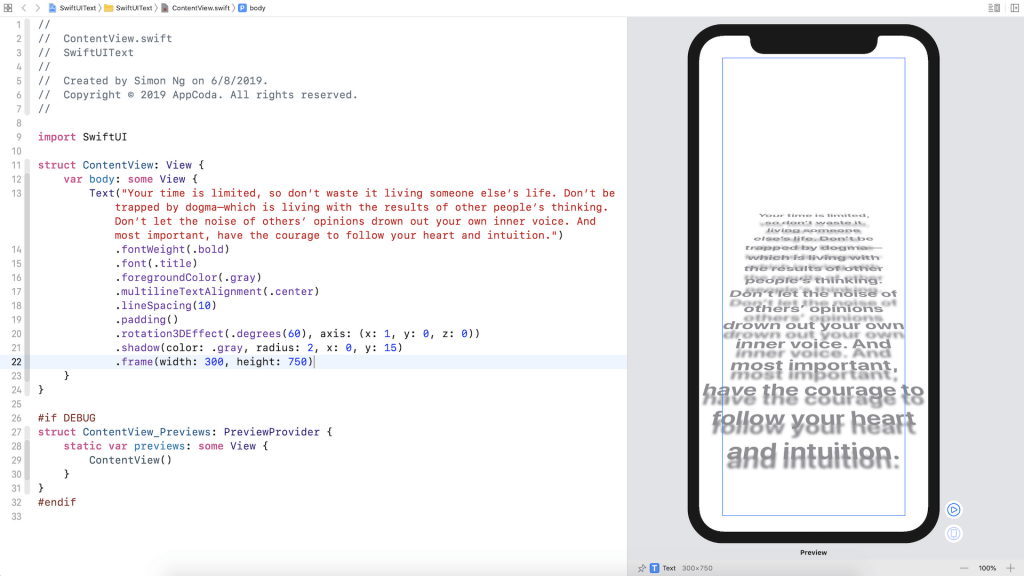
In the Text view, add a frame modifier and give it a width of 300 and height of 750 like this:
.frame(width: 300, height: 750)You’re free to play around with the numbers. After modifying the code, the preview should show you something like this:
Next, to keep track of the animation, we need a State property. We will define a property called animationStart and we set its value to false by default. When the view appears, we will toggle it so that view knows that it is a time to start the animation.
Insert the state variable like this:
@State private var animationStart = falseWhen the view appears, we need to set it true in order to trigger the animation. To do that, add the onAppear block after the frame modifier:
.onAppear() {
    self.animationStart.toggle()
}
In the code, we simply toggle the state variable and trigger the animation.
Next, let’s change the height property inside the frame modifier. This is how we animate the height of the frame. When animationStart is set to true, the height of the text view is set to 750. Conversely, the height of the Text View is set to zero. Here is the line of code:
.frame(width: 300, height: animationStart ? 750 : 0)Nothing changes so far. If you run the app by clicking on play button in the preview, the text view is still the same. The reason is that we have not added the animation modifier.
Okay, let’s add animation.
First, define the duration for the animation by declaring another property:
private let startAnimationDuration = 11.0Next, attach the .animation modifier to the text view like this:
.animation(Animation.linear(duration: startAnimationDuration))Here I am using a linear animation with a duration of 11 seconds. The default duration seems to be ok to present the text but feel free to modify it if you like. SwiftUI comes with many built-in animations. But I found the linear animation works great for this case as we don’t want to vary the animation speed.
Now if you press play, you should see the animation in its full glory. Try it!
Looks cool, right?
The animation works but I think we can make it even better. Wouldn’t it be great if we can let users read the text normally by turning the text upright when the animation ends?

Let’s add another state property named animationEnd to track the status of the animation:
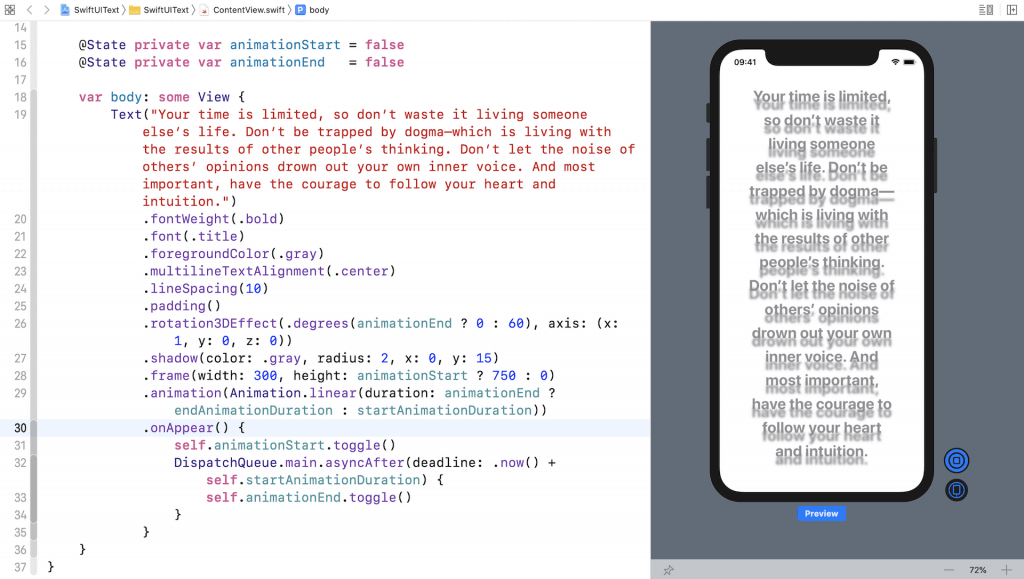
@State private var animationEnd = falseBy default, its value is set to false. At some point, we need to toggle it to indicate the animation has ended. Obviously, we want to set the variable to true after 11 seconds, which is the duration of the animation defined earlier. So, update the onAppear block like this:
.onAppear() {
    self.animationStart.toggle()
    DispatchQueue.main.asyncAfter(deadline: .now() + self.startAnimationDuration) {
        self.animationEnd.toggle()
    }
}
Here I set the animationEnd property to true after the text animation ends. For the rotation animation that is run when animationedEnd is toggled, I want to set the duration to 1.5 seconds. So, let’s declare another variable for that.
private let endAnimationDuration = 1.5To rotate the text view and make it flat on screen, we need to change the degree parameter in the rotation3DEffect modifier. When animationEnd is set to true, its value should be 0. So, change the code for the rotation3DEffect modifier like this:
.rotation3DEffect(.degrees(animationEnd ? 0 : 60), axis: (x: 1, y: 0, z: 0))If you test the app, the rotation animation already works. But the app still has a problem. The animation duration is still set to 11s instead of 1.5s that we just defined. To fix that, let’s modify the animation modifier like this:
.animation(Animation.linear(duration: animationEnd ? endAnimationDuration : startAnimationDuration))Now if you run the app again, the rotation animation is now much faster and better.
That’s it! I hope you enjoy this tutorial. As you can see, SwiftUI has made developers’ life easier when dealing with animation. If you have any questions about the tutorial, please leave me comment below.


