

In the introductory tutorial, we gave you an overview of SwiftUI and walked you through how to build a simple user interface. After exploring the framework for around a week, I really enjoy developing user interface with SwiftUI, even though it’s still buggy at this stage. The framework provides developers with a new way to develop a UI, allowing you to build the same UI with much less code.
The declarative syntax may be new to some developers. It’ll take some time to get used to it. But just like the time when we switched from Objective-C to Swift, you’ll enjoy writing the UI code in the declarative syntax once you manage it. You’ll feel more natural to describe the app layout you want. Together with the new instant preview feature, that lets you write code and preview the visual changes at real-time, the whole development experience is faster and more interactive.
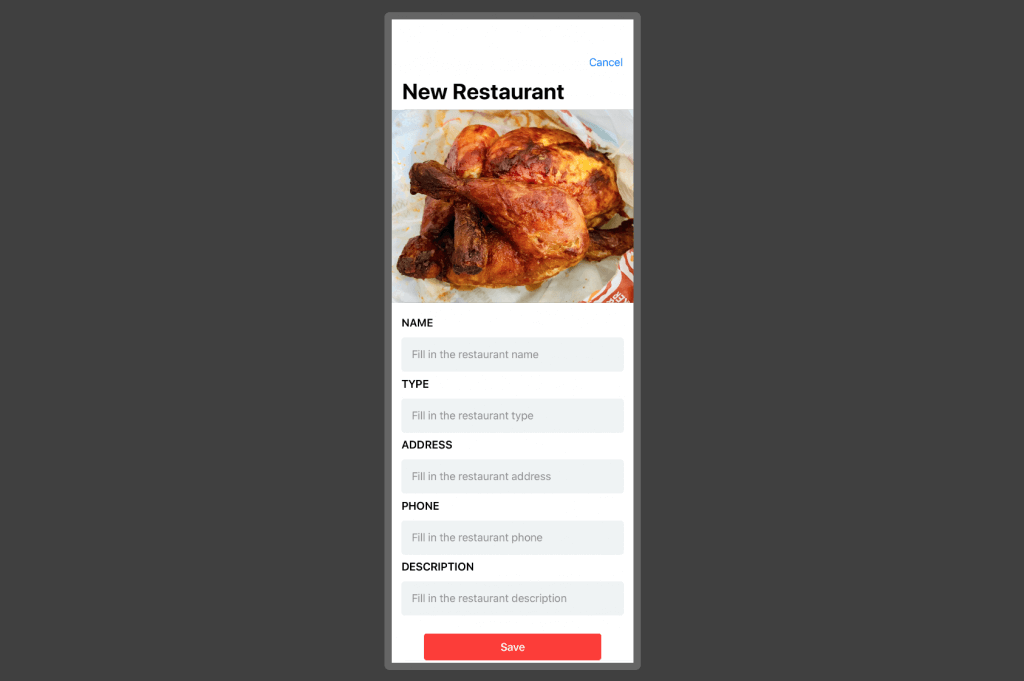
Previously, you learned how to build a table view app and handle navigation. Today, I’d like to show you to build a simple form using SwiftUI. Below is the screen you’ll work on.
Prerequisites of Using SwiftUI and Design Canvas
To follow this tutorial, you will need to have Xcode 11 installed on your Mac. Since the design canvas, that is the instant preview feature, can only work on macOS Catalina. You have to upgrade your macOS to macOS Catalina if you haven’t. At the time of this writing, both Xcode 11 and macOS Catalina (aka macOS 10.15) are currently in beta.
I also assume you have some basic knowledge of Swift. If not, you can check out this free starter guide to learn the basics.
Creating a New Project
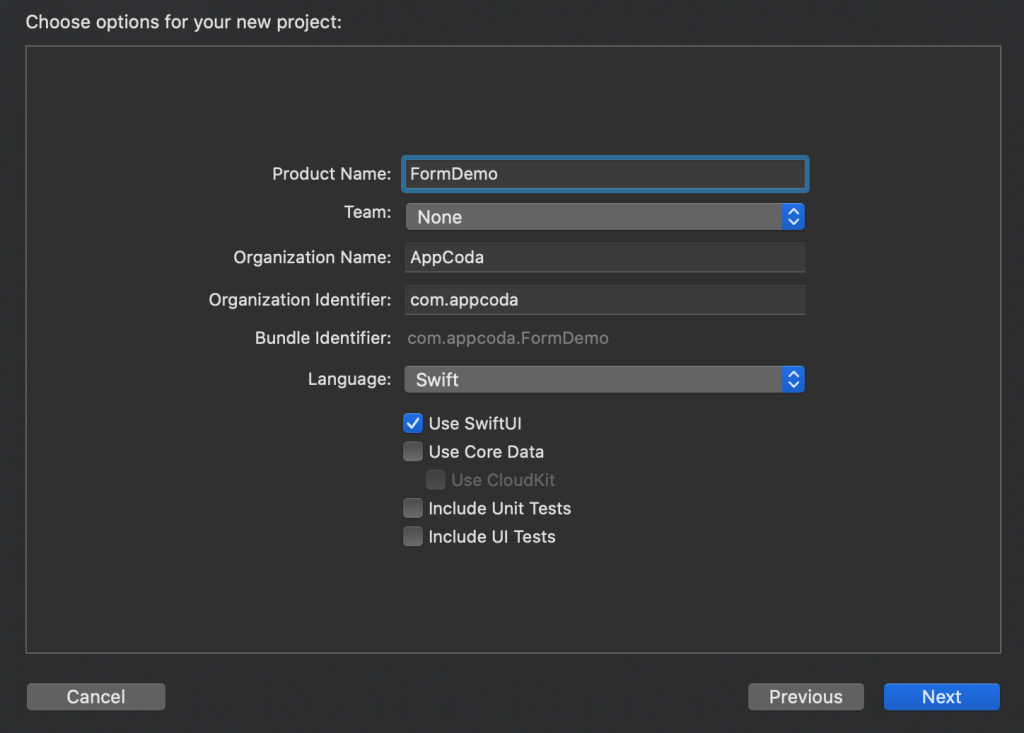
We’ll build this screen from scratch. First, create a new project in Xcode 11 using the Single View Application template and name it FormDemo (or whatever name you like). Please make sure you enable the Use SwiftUI option.
Designing the Text Fields
We’ll begin with the implementation of the text fields and the label placing right above each of the text fields. To create a label, use the Text component and write the code like this:
Text("NAME").font(.headline)We set the label’s value to NAME and change its font type to headline. Like UIKit, the SwiftUI framework comes with a built-in text field component. To create a text field with a placeholder, you can write the code like this:
TextField(.constant(""), placeholder: Text("Fill in the restaurant name"))To place the label above the text field, you can use a VStack to arrange both components. Your final code should be like this:
struct ContentView : View {
var body: some View {
VStack(alignment: .leading) {
Text("NAME")
.font(.headline)
TextField(.constant(""), placeholder: Text("Fill in the restaurant name"))
}
}
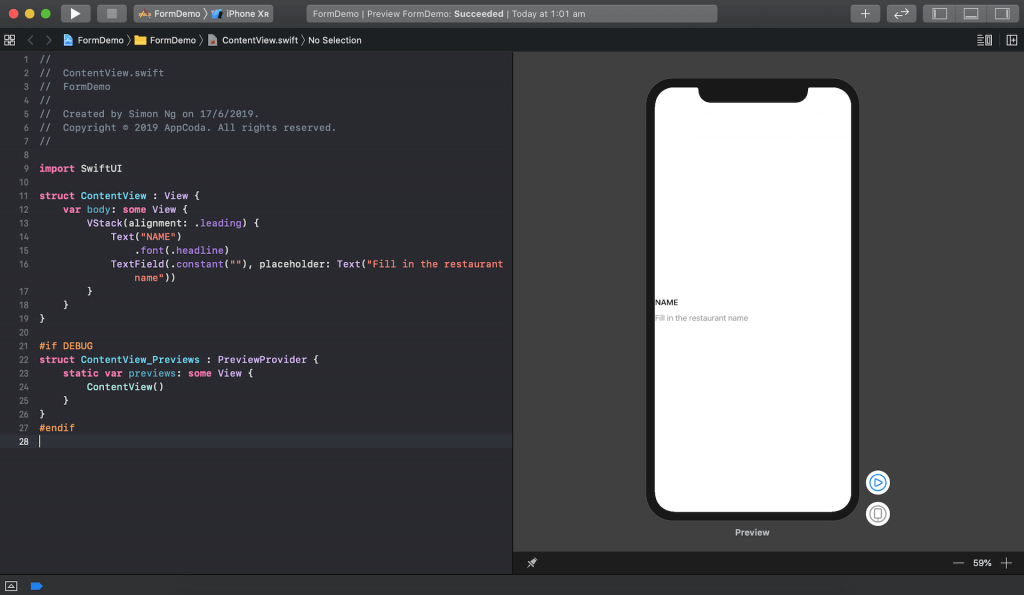
}In the design canvas, it should show you the preview of the changes in a simulator (depending on your selected model in Xcode).
If you compare the current design of the text fields with the final screen I showed you earlier, we need to make a few changes:
- Change the background color to light gray
- Make the text field rounded corner
- Also, we need to add some paddings
So, update the code like this:
struct ContentView : View {
var body: some View {
VStack(alignment: .leading) {
Text("NAME")
.font(.headline)
TextField(.constant(""), placeholder: Text("Fill in the restaurant name"))
.padding(.all)
.background(Color(red: 239.0/255.0, green: 243.0/255.0, blue: 244.0/255.0, opacity: 1.0), cornerRadius: 5.0)
}
}
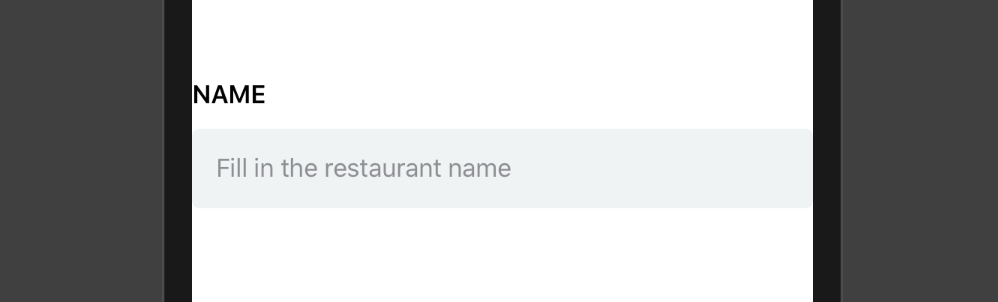
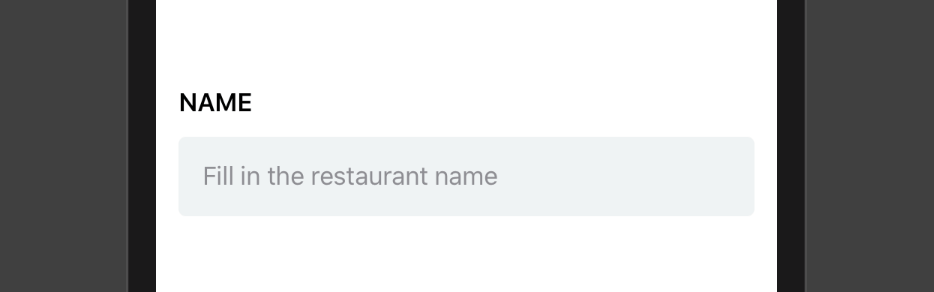
}In the code, we updated the TextField by adding paddings for all sides (.padding(.all)) and changing its background color. We also set the corner radius to 5.0 to round the corners. Now your text field should look like this:
Both the text field and the label are too close to the left and right edges. To fix that, we can add some horizontal spaces for the vertical stack (VStack) using the padding property. So, update the code like this:
struct ContentView : View {
    var body: some View {
        VStack(alignment: .leading) {
            .
            .
            .
        }
        .padding(.horizontal, 15)
    }
}
Once changed, the text field should look better:
Extracting the Text Field for Reuse
As you can see in the final design, all text fields share the same layout and design. Instead of duplicating the code we just wrote for other text fields, it’s better to extract the code to create a separate view for reuse.
Let’s name the struct LabelTextField and move the VStack code block to this struct like this:
struct LabelTextField : View {
var body: some View {
VStack(alignment: .leading) {
Text("NAME")
.font(.headline)
TextField(.constant(""), placeholder: Text("Fill in the restaurant name"))
.padding(.all)
.background(Color(red: 239.0/255.0, green: 243.0/255.0, blue: 244.0/255.0, opacity: 1.0), cornerRadius: 5.0)
}
.padding(.horizontal, 15)
}
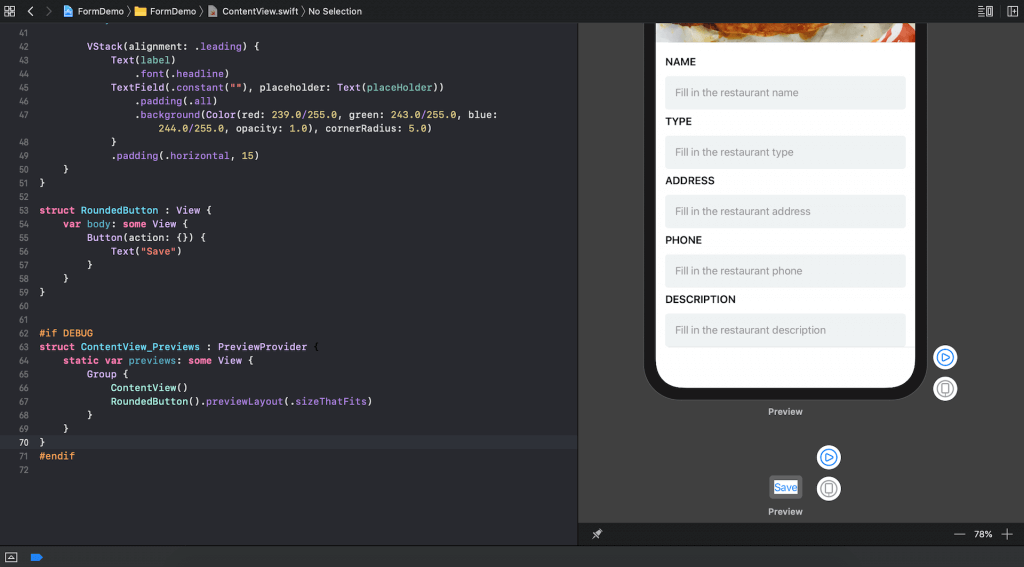
}For reuse purpose, we’ll further modify the struct to accept two variables: label and placeholder. The LabelTextField should now look like this:
struct LabelTextField : View {
    var label: String
    var placeHolder: String

    var body: some View {

        VStack(alignment: .leading) {
            Text(label)
                .font(.headline)
            TextField(.constant(""), placeholder: Text(placeHolder))
                .padding(.all)
                .background(Color(red: 239.0/255.0, green: 243.0/255.0, blue: 244.0/255.0, opacity: 1.0), cornerRadius: 5.0)
            }
            .padding(.horizontal, 15)
    }
}
Now going back the ContentView. You can create a text field by constructing a LabelTextField with the specified label name and place holder like below:
struct ContentView : View {
    var body: some View {
        LabelTextField(label: "NAME", placeHolder: "Fill in the restaurant name")
    }
}
The preview should still show you the same label design. But internally we now easily create a text field with different label and placeholder value.
Creating Multiple Text Fields Using List
The final form has multiple text fields for user input. To present multiple text fields in vertical arrangement, you can use VStack to layout the text fields. However, since we can’t display all the information in a single view, we will make the form scrollable by embedding the stack using List. In SwiftUI, it provides a container called List that allows developers to quickly build a table or present rows of data in a single column.
Now update ContentView like this:
struct ContentView : View {
    var body: some View {
        List {
            VStack(alignment: .leading) {
                LabelTextField(label: "NAME", placeHolder: "Fill in the restaurant name")
                LabelTextField(label: "TYPE", placeHolder: "Fill in the restaurant type")
                LabelTextField(label: "ADDRESS", placeHolder: "Fill in the restaurant address")
                LabelTextField(label: "PHONE", placeHolder: "Fill in the restaurant phone")
                LabelTextField(label: "DESCRIPTION", placeHolder: "Fill in the restaurant description")
                }

        }

    }
}
As soon as you make the changes, you will see the preview updated like this:
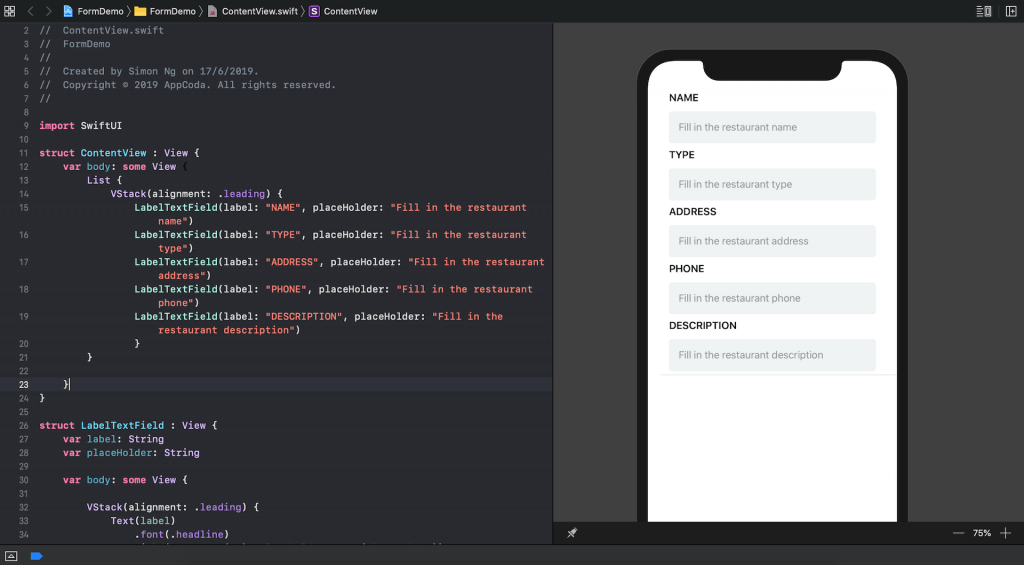
If you want to adjust the space between the left/right edge of the text field and the display, you can insert a line of code after VStack:
List {
VStack(alignment: .leading) {
...
}
.listRowInsets(EdgeInsets())
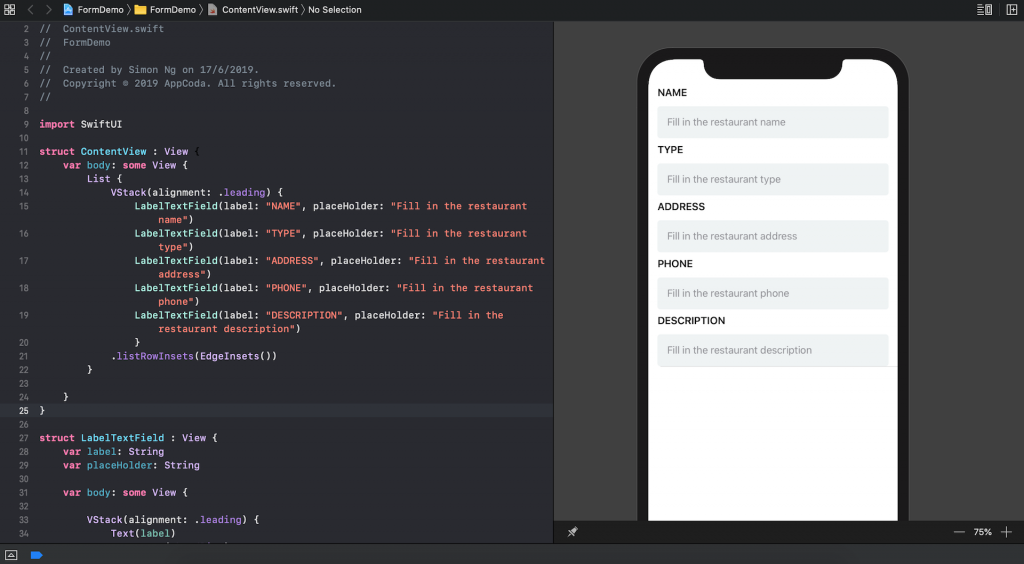
}By using listRowInsets, you can extend the text field closer to the edges of the display.
Adding Featured Photo
You can first download the sample photo here or use whatever photo you like. Before using the photo, import it to the asset catalog.

SwiftUI provides a component called Image for you to present an image like this:
Image("chicken")If you’ve placed the line of code before the creation of the vertical stack (VStack), you’ll end up with a huge photo that takes up the whole screen. To scale it down, you can write the code like this:
Image("chicken")
.resizable()
.scaledToFill()
.frame(height: 300)
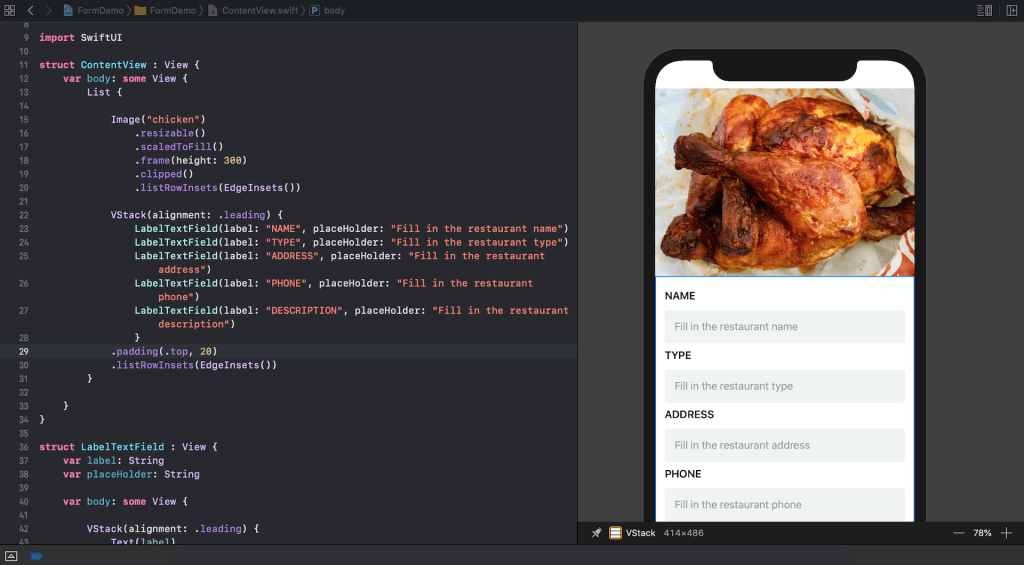
.clipped()The code declares the image as a resizable view and set the content mode to Scale to fill. Also, we set the height of the frame to a fixed value. Lastly, we clip the view to its bounding frame. Your result should be like this:

To extend the photo to the edges of the display, you can call listRowInsets and set its value to EdgeInsets(). Update the Image like this:
Image("chicken")
    .resizable()
    .scaledToFill()
    .frame(height: 300)
    .clipped()
    .listRowInsets(EdgeInsets())
Now the featured photo should be perfectly displayed. Lastly, you may notice that the Name field is very close to the bottom edge of the image. Insert the following line of code after the declaration of VStack to give it some space:
.padding(.top, 20)If you’ve followed the tutorial correctly, your screen should look like this:
Creating a Rounded Button
Now that you’ve created a simple form, let’s see how to implement the Save button. The SwiftUI framework provides a component called Button to create a button. The simplest way of constructing a button can be written like this:
Button(action: {}) {
  Text("Save")
}
Here, we define a standard button named Save. The action parameter takes in a closure, which will be triggered when the button is tapped. For this demo, the button performs nothing.
To better organize our code, we will create another struct and name it RoundedButton :
struct RoundedButton : View {
    var body: some View {
        Button(action: {}) {
            Text("Save")
        }
    }
}
But how can you preview this rounded button? You can create the RoundedButton in ContentView to preview the design in the current simulator. Xcode 11’s Previews feature lets developers write code to add multiple previews in the design canvas. Modify the ContentView_Previews struct to generate the preview of the rounded button:
struct ContentView_Previews : PreviewProvider {
    static var previews: some View {
        Group {
            ContentView()
            RoundedButton().previewLayout(.sizeThatFits)
        }
    }
}
The Group allows you to group multiple previews. In the code above, we still generate the preview of the ContentView in your selected simulator. For the rounded button, we call the previewLayout method to alter the preview approach. Instead of rendering the rounded button on another simulator, we set the value to .sizeThatFits. This instructs Xcode to generate the preview in a container view like below:
Now update the code of RoundedButton to the following:
struct RoundedButton : View {
    var body: some View {
        Button(action: {}) {
            HStack {
                Spacer()
                Text("Save")
                    .font(.headline)
                    .color(Color.white)
                Spacer()
            }
        }
        .padding(.vertical, 10.0)
        .background(Color.red, cornerRadius: 4.0)
        .padding(.horizontal, 50)
    }
}
We simply change the button’s font type and font color. As you can see in the final deliverable, I want to make the button to look more like a button. So, we give the button a nice background by changing its background color and adding some paddings.

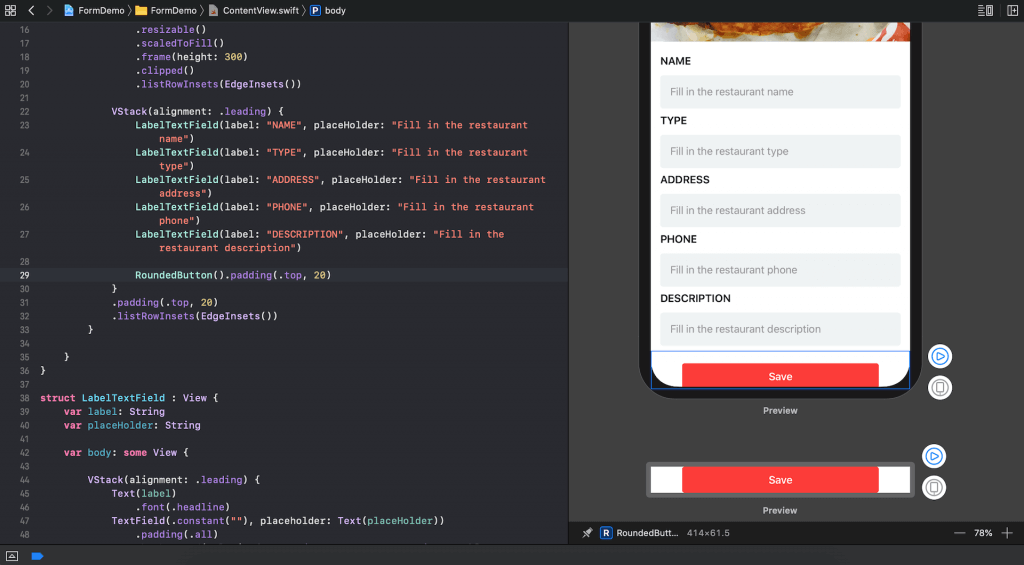
To use this button and add it to the form, you can insert the following line of code in ContentView and put it after the last text field:
RoundedButton().padding(.top, 20)We call the padding function to add some extra space between the text field and the Save button. Now your design canvas will show something like this:
Embedding the View in a Navigation View
We’re almost done with the implementation. The final step is to embed the entire form in a navigation view. If you’ve read our introductory tutorial, you know SwiftUI provides a container view named NavigationView for creating a navigation interface. All you need to do is embed the whole list in ContentView in a NavigationView like this:
struct ContentView : View {
var body: some View {
NavigationView {
List {
Image("chicken")
.resizable()
.scaledToFill()
.frame(height: 300)
.clipped()
.listRowInsets(EdgeInsets())
VStack(alignment: .leading) {
LabelTextField(label: "NAME", placeHolder: "Fill in the restaurant name")
LabelTextField(label: "TYPE", placeHolder: "Fill in the restaurant type")
LabelTextField(label: "ADDRESS", placeHolder: "Fill in the restaurant address")
LabelTextField(label: "PHONE", placeHolder: "Fill in the restaurant phone")
LabelTextField(label: "DESCRIPTION", placeHolder: "Fill in the restaurant description")
RoundedButton().padding(.top, 20)
}
.padding(.top, 20)
.listRowInsets(EdgeInsets())
}
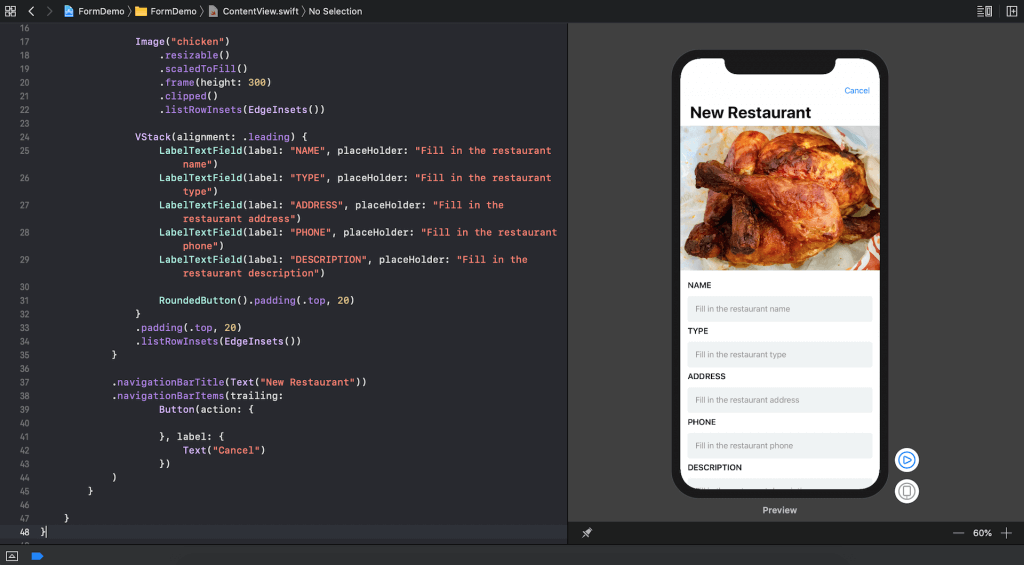
.navigationBarTitle(Text("New Restaurant"))
.navigationBarItems(trailing:
Button(action: {
}, label: {
Text("Cancel")
})
)
}
}
}To configure the title of the navigation bar, we call the navigationTitle function and specify the text component. If you need to set the bar items, you can call the navigationBarItems function to configure the view appeared on the leading/trailing edge of the navigation bar. In the code above, we configure the trailing edge with a Cancel button.
Previewing the UI with Fixed Layout
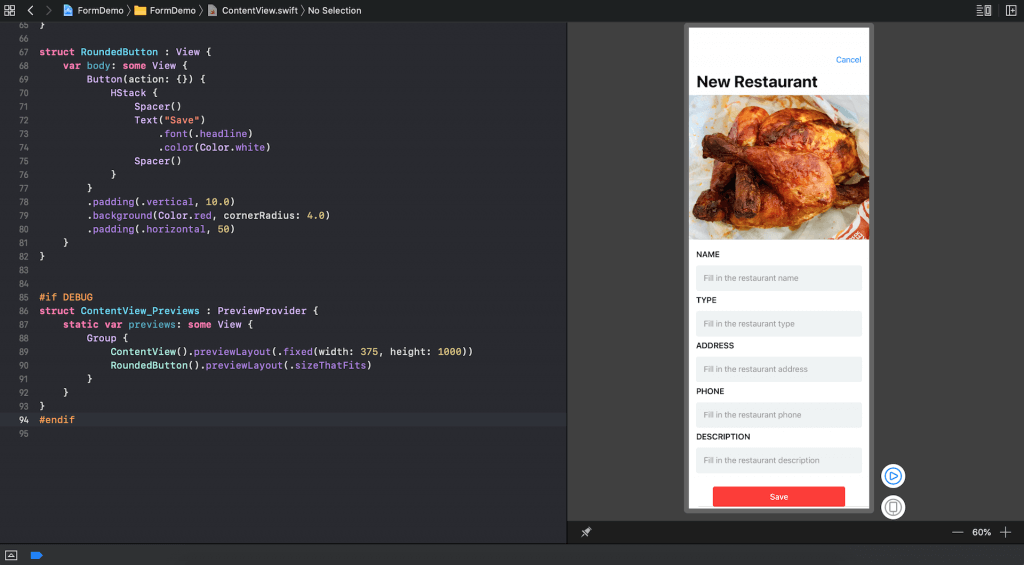
That’s how you lay out a form using SwiftUI. One last thing I want to show is the power of Xcode Previews. As you can see, the form is too long for the screen. To view the entire form, you can hit the Play button to run the app and then you can scroll through the form. Xcode 11 offers an alternative way to preview the entire form. Edit the ContentView_Previews struct and initiate the ContentView like this:
ContentView().previewLayout(.fixed(width: 375, height: 1000))Instead of previewing the layout on a simulated device, we tell Xcode to render the preview in a fixed rectangular frame. By doing that, you can preview the entire form without running the app.
What’s Next
After playing around SwiftUI for a week, I really enjoy building UI using this brand new framework. With SwiftUI, it makes UI development a breeze and allows you to write much less code. I’m still exploring the framework, so please let me know if you find any errors in the tutorial.
In the future tutorials, we will cover other features of SwiftUI such as animations and complex layouts. Please stay tuned and let me know if you have any feedback. Love to read your comment.


