

I enjoy so much working with the SwiftUI framework. Like most new frameworks, however, one drawback is that it doesn’t come with all UI controls which are available in UIKit. For example, you can’t find a SwiftUI counterpart of text view. Thankfully, Apple provided a protocol called UIViewRepresentable that allows you easily wrap a UIView and make it available to your SwiftUI project.
In this article, we will show you how to create a text view by wrapping the UITextView class from UIKit using UIViewRepresentable.
Editor’s note: If you are new to SwiftUI, you can check out our introductory tutorial.
Using UIViewRepresentable
To use a UIKit view in SwiftUI, you can wrap the view with the UIViewRepresentable protocol. Basically, you just need to create a struct in SwiftUI that adopts the protocol to create and manage a UIView object. Here is the skeleton of the custom wrapper for a UIKit view:
struct CustomView: UIViewRepresentable {

    func makeUIView(context: Context) -> some UIView {
        // Return the UIView object
    }

    func updateUIView(_ uiView: some UIView, context: Context) {
        // Update the view
    }
}
In the actual implementation, you replace some UIView with the UIKit view you want to wrap. Say, for creating a custom wrapper for UITextView, you can write the code like this:
struct TextView: UIViewRepresentable {

    func makeUIView(context: Context) -> UITextView {

        return UITextView()
    }

    func updateUIView(_ uiView: UITextView, context: Context) {

        // Update the view
    }
}
In the makeUIView method, we return an instance of UITextView. This is how you wrap a UIKit view and make it available to SwiftUI. To use the TextView, you can treat like any SwiftUI view and create it like this:
struct ContentView: View {
    var body: some View {
        TextView()
    }
}
Creating a Text View for SwiftUI
Now that you should have a basic understanding of UIViewRepresentable, let’s implement a custom text view in a SwiftUI project. This custom text view is flexible for you to change the text style.
Assuming you’ve created a SwiftUI project in Xcode, you can first create a new file named TextView. To create a custom wrapper for UITextView, you can write the code like this:
import SwiftUI

struct TextView: UIViewRepresentable {

    @Binding var text: String
    @Binding var textStyle: UIFont.TextStyle

    func makeUIView(context: Context) -> UITextView {
        let textView = UITextView()

        textView.font = UIFont.preferredFont(forTextStyle: textStyle)
        textView.autocapitalizationType = .sentences
        textView.isSelectable = true
        textView.isUserInteractionEnabled = true

        return textView
    }

    func updateUIView(_ uiView: UITextView, context: Context) {
        uiView.text = text
        uiView.font = UIFont.preferredFont(forTextStyle: textStyle)
    }
}
The code is very similar to that discussed in the previous section. But we take one step further to let the caller customize the text view:
- It accepts two bindings: one is for the text input and the other one is for the font style.
- In the
makeUIViewmethod, instead of returning a standardUITextView, we initialize a text view with the preferred text style. - We have added a binding to hold the text input. While the
makeUIViewmethod is responsible for creating and initializing the view object, theupdateUIViewmethod is responsible for updating the state of the UIKit view. Whenever there is a state change in SwiftUI, the framework automatically calls theupdateUIViewmethod to update the configuration of the view. In this case, while you are typing in the text view, the method will be called and we will update the text ofUITextView. On top of that, if the caller makes any changes to the text style, the text view will be refreshed and updated with the new text style.
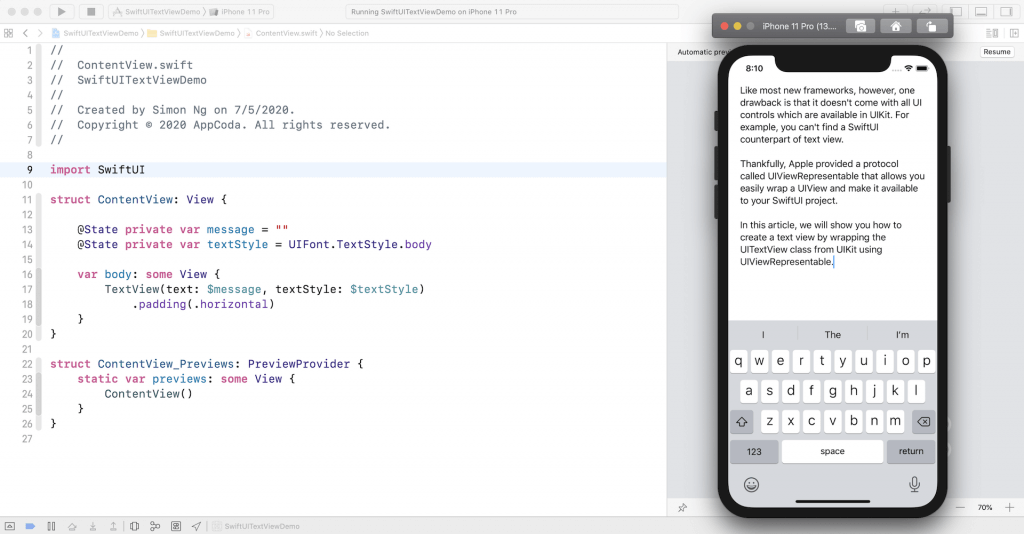
Now switch over to ContentView.swift. Declare two state variables to hold the text input and text style:
@State private var message = ""
@State private var textStyle = UIFont.TextStyle.body
To present the text view, insert the following line of code in the body:
TextView(text: $message, textStyle: $textStyle)
    .padding(.horizontal)
The TextView is just like any other SwiftUI views. You can apply modifiers like padding to adjust the layout. If you run the app in a simulator, you should be able to type in the text view.
Capturing the Text Input
It’s pretty easy to present a UIKit view in a SwiftUI app. However, the text view is not done yet. For now, you can type in the text view and it shows you what you type. But if you’ve tried to print out the value of the message variable, it’s empty. We haven’t synchronized the text stored in UITextView back to the message variable.
UITextView has a companion protocol named UITextViewDelegate, that defines a set of optional methods you can use to receive edit changes for the corresponding UITextView object. In particular, the following method is called whenever the user types in the text view:
optional func textViewDidChange(_ textView: UITextView)In order to keep track of the text change, the UITextView object should adopt the UITextViewDelegate protocol and implement the method.
So far, we have only discussed a couple of the methods in the UIViewRepresentable protocol. If you need to work with delegate in UIKit and communicate back to SwiftUI, you have to implement the makeCoordinator method and provide a Coordinator instance. This Coordinator acts as a bridge between UIView’s delegate and SwiftUI. Let’s see the code, so you will understand what it means.
In the TextView struct, create a Coordinator class and implement the makeCoordinator method like this:
func makeCoordinator() -> Coordinator {
    Coordinator($text)
}

class Coordinator: NSObject, UITextViewDelegate {
    var text: Binding<String>

    init(_ text: Binding<String>) {
        self.text = text
    }

    func textViewDidChange(_ textView: UITextView) {
        self.text.wrappedValue = textView.text
    }
}
The makeCoordinator method simply returns an instance of Coordinator. For the Coordinator, it adopts the UITextViewDelegate protocol and implement the textViewDidChange method. As mentioned, this method is called every time a user changes the search text. Therefore, we capture the updated text and pass it back to SwiftUI by updating the text binding.
Now that we have a Coordinator that adopts the UITextViewDelegate protocol, we need to make one more change. In the makeUIView method, insert the following line of code to assign the coordinator to the text view:
textView.delegate = context.coordinatorThat’s it! This is how you can communicate the change of a UITextView object with SwiftUI.
Handling the Text Style Change
As mentioned at the very beginning, the custom text view can manage the change of the text style. Right now, the text style is default to body. Let’s add a button to let users toggle between two different text styles.
In ContentView.swift, update the body property like this:
var body: some View {
    ZStack(alignment: .topTrailing) {
        TextView(text: $message, textStyle: $textStyle)
            .padding(.horizontal)

        Button(action: {
            self.textStyle = (self.textStyle == .body) ? .title1 : .body
        }) {
            Image(systemName: "textformat")
                .imageScale(.large)
                .frame(width: 40, height: 40)
                .foregroundColor(.white)
                .background(Color.purple)
                .clipShape(Circle())

        }
        .padding()
    }
}
We added a button at the top-right corner of the screen. When you tap the button, it will toggle the text style between .body and .title1.
Now it’s ready to test the app again. Tap the size button to toggle the text style of the text view.
Summary
In this tutorial, you’ve learned how to use the UIViewRepresentableprotocol to integrate UIKit views with SwiftUI. While SwiftUI is still very new and doesn’t come with all the standard UI components, this backward compatibility allows you to tap into the old framework and utilize any views you need.
For reference, you can download the complete project on GitHub.
If you want to dive deeper into SwiftUI, you can check out our Mastering SwiftUI book.


