

When iOS 7 was first released, one of the many visual changes that particularly interested me was the swipe-to-delete gestures in the Mail app. By now you should be very familiar with the feature. After you swipe a table cell, you’ll see the Trash button, plus a new button named More. The More button will bring up an action sheet that shows a list of options such as Reply, Flag, etc.
I thought it’s a great feature to provide additional options for manipulating a table record. However, as you know, Apple didn’t make this feature available to developers in iOS 7. You can only create the swipe-to-delete option in table cell. The More feature is only limited to the stock Mail app. I have no idea why Apple keeps such great feature to its own app. Fortunately, some developers have created free solutions (such as UITableView-Swipe-for-Options, MCSwipeTableViewCell) and made them available freely.
In this tutorial, I’ll use SWTableViewCell and see how to implement swipe-to-show-options feature in your app. SWTableViewCell is pretty to easy to use. If you understand how to implement UITableView, you shouldn’t have any problem with SWTableViewCell. On top of that, it supports utility buttons on both swipe directions. You’ll understand what it means in a minute.
Let’s get started and build our demo app.
Xcode Project Template for Demo App
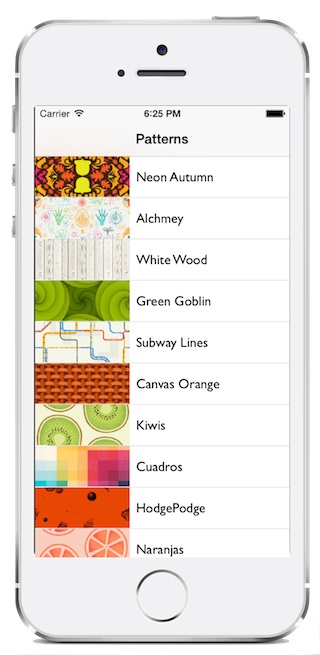
I encourage you to create the project from scratch. The demo app is simply a table view app showing a list of custom table cell. However, as the focus of this tutorial is on SWTableViewCell, I have pre-built the project for you. You can download the project template from here. If you know how to create a custom table view, you should understand how the template works. After downloading the template, you can compile it and have a trial run. The app should display a list of pattern images (courtesy of ThePatternLibrary.com).
Adding the SWTableViewCell Library
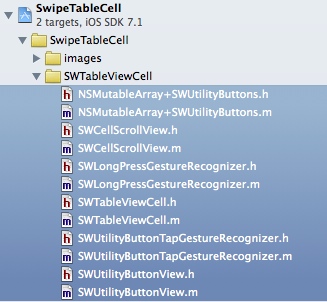
The SWTableViewCell library is developed by Chris Wendel. It’s freely available on GitHub. To use the library, first download it from the GitHub, extract the zipped archive and add the files under SWTableViewCell/PodFiles to your Xcode project. For better organization, you may create a new group and put the files there.
Using SWTableViewCell
SWTableViewCell is very easy to integrate. If you’re familiar with UITableView and UITableViewCell, you shouldn’t have any problem with the integration. In general, here are the few things you need to do to use SWTableViewCell:
- Extend your custom table view cell from SWTableViewCell class instead of UITableViewCell – the SWTableViewCell is actually a subclass of UITableView Cell but provides additional utility buttons when user swipes across a table cell.
- Update the cellForRowAtIndexPath: method to create the utility buttons – the SWTableViewCell comes with two properties named leftUtilityButtons and rightUtilityButtons. These two properties represent the utility buttons to display depending on the swipe direction. You’ll need to create an array of buttons and assign it to the property. It’s not required to create both leftUtilityButtons and rightUtilityButtons.
- Implement the SWTableViewCellDelegate protocol – optional methods of the protocol allow developers to manage the actions of the utility buttons. When user swipes a table view cell, the cell will reveal a set of utility buttons. Depending on the direction of the swipe, the didTriggerRightUtilityButtonWithIndex: or didTriggerLeftUtilityButtonWithIndex: method will be called when the utility button is tapped. You’ll need to implement these methods to trigger the action of the utility buttons.
Okay, let’s modify the project template to use SWTableViewCell.
Extend Custom Table View Cell from SWTableViewCell Class
First, open the CustomTableViewCell.h and change the parent class to SWTableViewCell. Your code should look like this after the change:
#import
#import "SWTableViewCell.h"

@interface CustomTableViewCell : SWTableViewCell
@property (weak, nonatomic) IBOutlet UIImageView *patternImageView;
@property (weak, nonatomic) IBOutlet UILabel *patternLabel;

@end
Creating Utility Buttons
Next, we’ll update the cellForRowAtIndexPath: method in the SwipeTableViewController.m to create the utility buttons. But before we do, add the following import statement and implement the SWTableViewCellDelegate protocol in the SwipeTableViewController.h. We’ll talk about the protocol in the next section but let’s update the code first. Your code should look like this after the change:
#import
#import "SWTableViewCell.h"

@interface SwipeTableViewController : UITableViewController

@end
Open the SwipeTableViewController.m and update the cellForRowAtIndexPath: method:
- (UITableViewCell *)tableView:(UITableView *)tableView cellForRowAtIndexPath:(NSIndexPath *)indexPath
{
    static NSString *cellIdentifier = @"Cell";

    CustomTableViewCell *cell = (CustomTableViewCell *)[tableView dequeueReusableCellWithIdentifier:cellIdentifier forIndexPath:indexPath];

    // Add utility buttons
    NSMutableArray *leftUtilityButtons = [NSMutableArray new];
    NSMutableArray *rightUtilityButtons = [NSMutableArray new];

    [leftUtilityButtons sw_addUtilityButtonWithColor:
     [UIColor colorWithRed:1.0f green:1.0f blue:0.35f alpha:0.7]
                                                icon:[UIImage imageNamed:@"like.png"]];
    [leftUtilityButtons sw_addUtilityButtonWithColor:
     [UIColor colorWithRed:1.0f green:1.0f blue:0.35f alpha:0.7]
                                                icon:[UIImage imageNamed:@"message.png"]];
    [leftUtilityButtons sw_addUtilityButtonWithColor:
     [UIColor colorWithRed:1.0f green:1.0f blue:0.35f alpha:0.7]
                                                icon:[UIImage imageNamed:@"facebook.png"]];
    [leftUtilityButtons sw_addUtilityButtonWithColor:
     [UIColor colorWithRed:1.0f green:1.0f blue:0.35f alpha:0.7]
                                                icon:[UIImage imageNamed:@"twitter.png"]];

    [rightUtilityButtons sw_addUtilityButtonWithColor:
     [UIColor colorWithRed:0.78f green:0.78f blue:0.8f alpha:1.0]
                                                title:@"More"];
    [rightUtilityButtons sw_addUtilityButtonWithColor:
     [UIColor colorWithRed:1.0f green:0.231f blue:0.188 alpha:1.0f]
                                                title:@"Delete"];

    cell.leftUtilityButtons = leftUtilityButtons;
    cell.rightUtilityButtons = rightUtilityButtons;
    cell.delegate = self;

    // Configure the cell...
    cell.patternLabel.text = [patterns objectAtIndex:indexPath.row];
    cell.patternImageView.image = [UIImage imageNamed:[patternImages objectAtIndex:indexPath.row]];

    return cell;
}
Here we create two sets of utility buttons. One will be revealed when user swipes the cell from left to right. The other set will be displayed when the cell is swiped in the opposite direction. We create a set of sharing buttons for the leftUtilityButtons, while we just create a “More” and “Delete” button for the rightUtilityButtons. As you can see from the above code, you can simply create a NSMutableArray and add the button using the sw_addUtilityButtonWithColor: method.
You’re now ready to compile and test the app. Once launched, try to swipe any of the table cell and you should see the utility buttons. However, the buttons do not work properly. It’s a known issue as we haven’t implemented any methods of the SWTableViewCellDelegate protocol. Let’s move on.
Implementing the SWTableViewCellDelegate Protocol
The SWTableViewCellDelegate protocol provides optional methods to manage the action of the utility buttons. If you read the code in the previous section carefully, you should notice the SwipeTableViewController is assigned as the delegate of the SWTableViewCell. We’ll then implement these two methods in the SwipeTableViewController.m:
- didTriggerLeftUtilityButtonWithIndex: method – triggered when any of the left utility buttons is tapped.
- didTriggerRightUtilityButtonWithIndex: method – triggered when any of the right utility buttons is tapped.
Add the following code in the SwipeTableViewController.m:
- (void)swipeableTableViewCell:(SWTableViewCell *)cell didTriggerLeftUtilityButtonWithIndex:(NSInteger)index {

    switch (index) {
        case 0:
        {
            UIAlertView *alertView = [[UIAlertView alloc] initWithTitle:@"Bookmark" message:@"Save to favorites successfully" delegate:nil cancelButtonTitle:@"OK" otherButtonTitles: nil];
            [alertView show];
            break;
        }
        case 1:
        {
            UIAlertView *alertView = [[UIAlertView alloc] initWithTitle:@"Email sent" message:@"Just sent the image to your INBOX" delegate:nil cancelButtonTitle:@"OK" otherButtonTitles: nil];
            [alertView show];
            break;
        }
        case 2:
        {
            UIAlertView *alertView = [[UIAlertView alloc] initWithTitle:@"Facebook Sharing" message:@"Just shared the pattern image on Facebook" delegate:nil cancelButtonTitle:@"OK" otherButtonTitles: nil];
            [alertView show];
            break;
        }
        case 3:
        {
            UIAlertView *alertView = [[UIAlertView alloc] initWithTitle:@"Twitter Sharing" message:@"Just shared the pattern image on Twitter" delegate:nil cancelButtonTitle:@"OK" otherButtonTitles: nil];
            [alertView show];
        }
        default:
            break;
    }
}
To keep thing simple, we’ll just display an alert message whenever any of the sharing button is tapped. In real app, you may need to implement Facebook and Twitter sharing.
For the right utility buttons, we implement the didTriggerRightUtilityButtonWithIndex: method with the following code:
- (void)swipeableTableViewCell:(SWTableViewCell *)cell didTriggerRightUtilityButtonWithIndex:(NSInteger)index {
    switch (index) {
        case 0:
        {
            // More button is pressed
            UIActionSheet *shareActionSheet = [[UIActionSheet alloc] initWithTitle:@"Share" delegate:nil cancelButtonTitle:@"Cancel" destructiveButtonTitle:nil otherButtonTitles:@"Share on Facebook", @"Share on Twitter", nil];
            [shareActionSheet showInView:self.view];

            [cell hideUtilityButtonsAnimated:YES];
            break;
        }
        case 1:
        {
            // Delete button is pressed
            NSIndexPath *cellIndexPath = [self.tableView indexPathForCell:cell];
            [patterns removeObjectAtIndex:cellIndexPath.row];
            [patternImages removeObjectAtIndex:cellIndexPath.row];
            [self.tableView deleteRowsAtIndexPaths:@[cellIndexPath] withRowAnimation:UITableViewRowAnimationLeft];
            break;
        }
        default:
            break;
    }
}
Again, the code is simple and straightforward. When the More button is tapped, the app brings up an action sheet showing a list of social sharing options. For the delete action, we simply remove the item from the patterns and patternImages arrays, followed by calling the deleteRowsAtIndexPaths: method to remove the record from table view.
That’s it! You can now compile and run the app again. The utility buttons should work now.
Summary
The SWTableViewCell makes it really easy to implement the swipe-for-option feature in table view. When you develop your next app, consider to add this feature. I believe it’ll take the user experience to the next level.
Though we can develop our own solution or use some third-party solutions, I truly hope that Apple will consider to open up such feature to all developers in the next iOS update.
For your reference, you can download the final Xcode project from here. As always, leave me comment and share your thought.


