Chapter 3
Build Your First App in Swift and SwiftUI

Learn by doing. Theory is nice but nothing replaces actual experience.
– Tony Hsieh
By now, you should have installed Xcode and gained some understanding of Swift. If you have skipped the first two chapters, I urge you to pause here and go back to read them. It is essential to have Xcode installed to complete all the exercises in this book.
In the previous chapter, you experimented with creating UI components using SwiftUI. In this chapter, we will delve deeper and provide you with a comprehensive introduction to the SwiftUI framework. Additionally, you will have the opportunity to develop your very first iOS app.
An Introduction to SwiftUI
In WWDC 2019, Apple surprised every developer by announcing a completely new framework called SwiftUI. It doesn't just change the way you develop iOS apps. This is the biggest shift in the Apple developer's ecosystem (including iPadOS, macOS, tvOS, and watchOS) since the debut of Swift.
SwiftUI is an innovative, exceptionally simple way to build user interfaces across all Apple platforms with the power of Swift. Build user interfaces for any Apple device using just one set of tools and APIs.
Developers have been debating for a long time whether we should visually design the app UI or write the UI in code. Apple has responded to this discussion with the introduction of SwiftUI. With this innovative framework, Apple presents developers with a fresh method for crafting user interfaces. Please refer to the figure below for a visual representation and take a moment to examine the accompanying code.

With the release of SwiftUI, you can now develop the app's UI with a declarative Swift syntax. This signifies that the process of writing UI code becomes simpler and more intuitive. In comparison to established UI frameworks such as UIKit, you can achieve the same UI design with significantly less code.
Declarative vs Imperative Programming
Similar to Java, C++, PHP, and C#, Swift is an imperative programming language. However, SwiftUI distinguishes itself proudly as a declarative UI framework, allowing developers to create UI in a declarative manner. But what exactly does "declarative" mean? How does it differ from imperative programming? More importantly, how does this change impact your coding approach?
For those who are new to programming, the distinction may not be of immediate concern, as everything is new to you. However, if you have experience in object-oriented programming or have previously worked with UIKit, this paradigm shift significantly influences your approach to building user interfaces. It may require unlearning certain old concepts and acquiring new ones.
So, what's the difference between imperative and declarative programming? If you go to Wikipedia and search for the terms, you will find these definitions:
In computer science, imperative programming is a programming paradigm that uses statements that change a program's state. In much the same way that the imperative mood in natural languages expresses commands, an imperative program consists of commands for the computer to perform.
In computer science, declarative programming is a programming paradigm—a style of building the structure and elements of computer programs—that expresses the logic of a computation without describing its control flow.
It's pretty hard to understand the actual difference, especially without a background in computer science. Let me explain the difference using a relatable analogy.
Rather than delving into programming directly, let's consider the process of cooking a pizza (or any dish of your preference). Suppose you are providing instructions to someone else (say, your helper) to prepare the pizza. In this scenario, you have the option to guide them either imperatively or declaratively. When cooking the pizza imperatively, you would provide your helper with explicit instructions, akin to a step-by-step recipe like this:
- Heat the over to 550°F or higher for at least 30 minutes
- Prepare one-pound of dough
- Roll out the dough to make a 10-inch circle
- Spoon the tomato sauce onto the center of the pizza and spread it out to the edges
- Place toppings (including onions, sliced mushrooms, pepperoni, cooked sausage, cooked bacon, diced peppers and cheese) on top of the sauce
- Bake the pizza for 5 minutes
On the other hand, if you opt to cook the pizza in a declarative manner, you wouldn't need to provide step-by-step instructions. Instead, you would simply describe how you want the pizza to be cooked. Would you prefer a thick or thin crust? Do you want toppings like pepperoni and bacon, or a classic Margherita with tomato sauce? Should the pizza be 10 inches or 16 inches in diameter? By conveying your preferences, the helper can take care of the rest and cook the pizza accordingly.
That's the core difference between the term imperative and declarative. Now back to UI programming. Imperative UI programming requires developers to write detailed instructions to layout the UI and control its states. Conversely, declarative UI programming enables developers to describe the appearance of the UI and how it should respond to state changes.
The declarative way of coding would make the code much easier to read and understand. Moreover, the SwiftUI framework empowers you to write considerably less code when creating a user interface. For instance, imagine you are tasked with building a heart-shaped button in an app. This button should be positioned at the center of the screen and be responsive to user touches. When a user taps the heart button, its color should transition from red to yellow. Additionally, when the user taps and holds the heart, it should scale up with an animation.
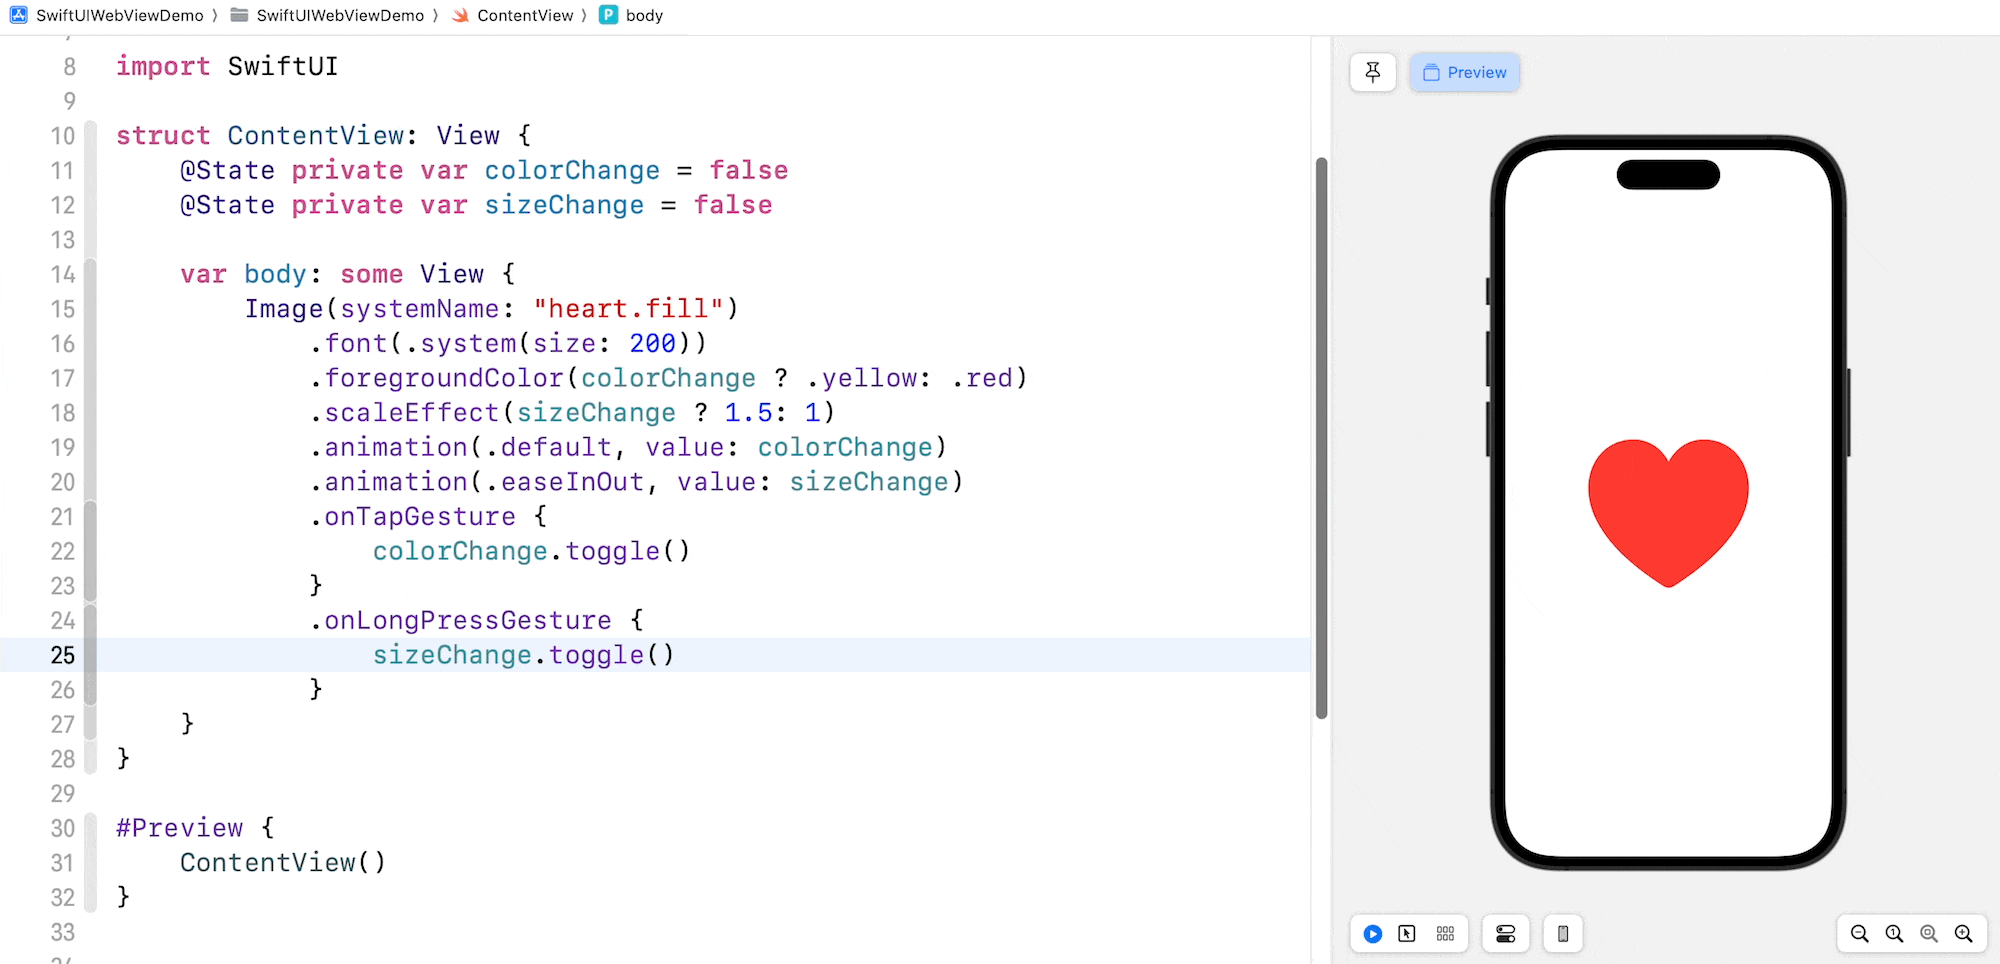
Take a look at figure 3-2. That's the code you need to implement the heart button. In around 20 lines of code, you create an interactive button with a scale animation. This is the power of the SwiftUI declarative UI framework.
Building Your First App Using SwiftUI
That's enough for the background information of the SwiftUI framework. As I always said, you have to get your hands dirty to learn programming. Now it's time to fire up Xcode and write your first iOS app in SwiftUI. For the rest of the chapter, you will write code to try out different UI components such as Text, Image, Stack Views. Furthermore, you will learn how to detect tap gesture. By combining all the techniques, you will eventually build your first app.
First, fire up Xcode and create a new project using the App template under the iOS category. Choose Next to proceed to the next screen.
Next, set the name of the project to HelloWorld. Hello World is a program for the first-time programmer to create. It's a very simple program that outputs "Hello, World" on the screen of a device. While your first app will be more complicated than that, let's follow the programming tradition and name the project "HelloWorld".
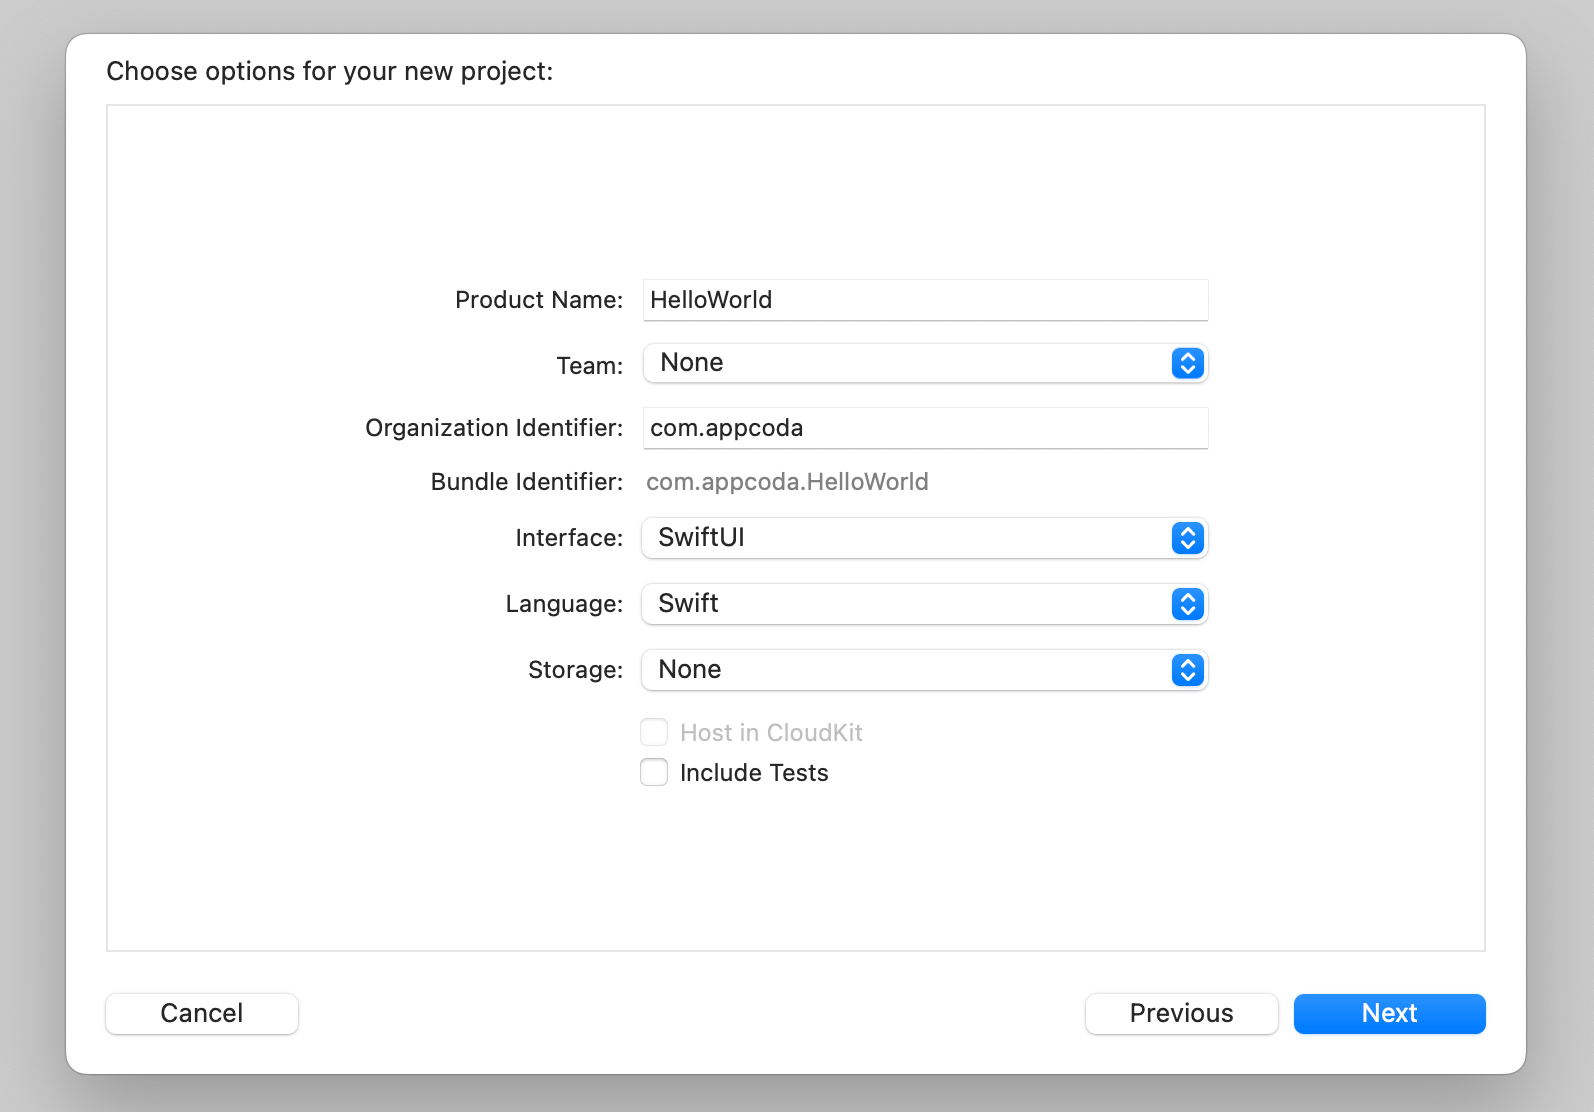
The organization identifier is a unique identifier of your app. Here I use com.appcoda but you should set it to your own value. If you have a website, set it to your domain in reverse domain name notation. Otherwise, you may use "com.
Xcode now supports two ways to build user interface. Since this book is about SwiftUI, please set the Interface option to SwiftUI. For the programming language, you can set it to Swift.
For the Testing System and Storage options, you can leave it to None. We don't need to use them in this project.
Click "Next" to continue. Xcode then asks you where to save the "HelloWorld" project. Pick any folder (e.g. Desktop) on your Mac. You may notice there is an option for source control. Just deselect it. Meanwhile, we do not need to use the option. Click "Create" to continue.
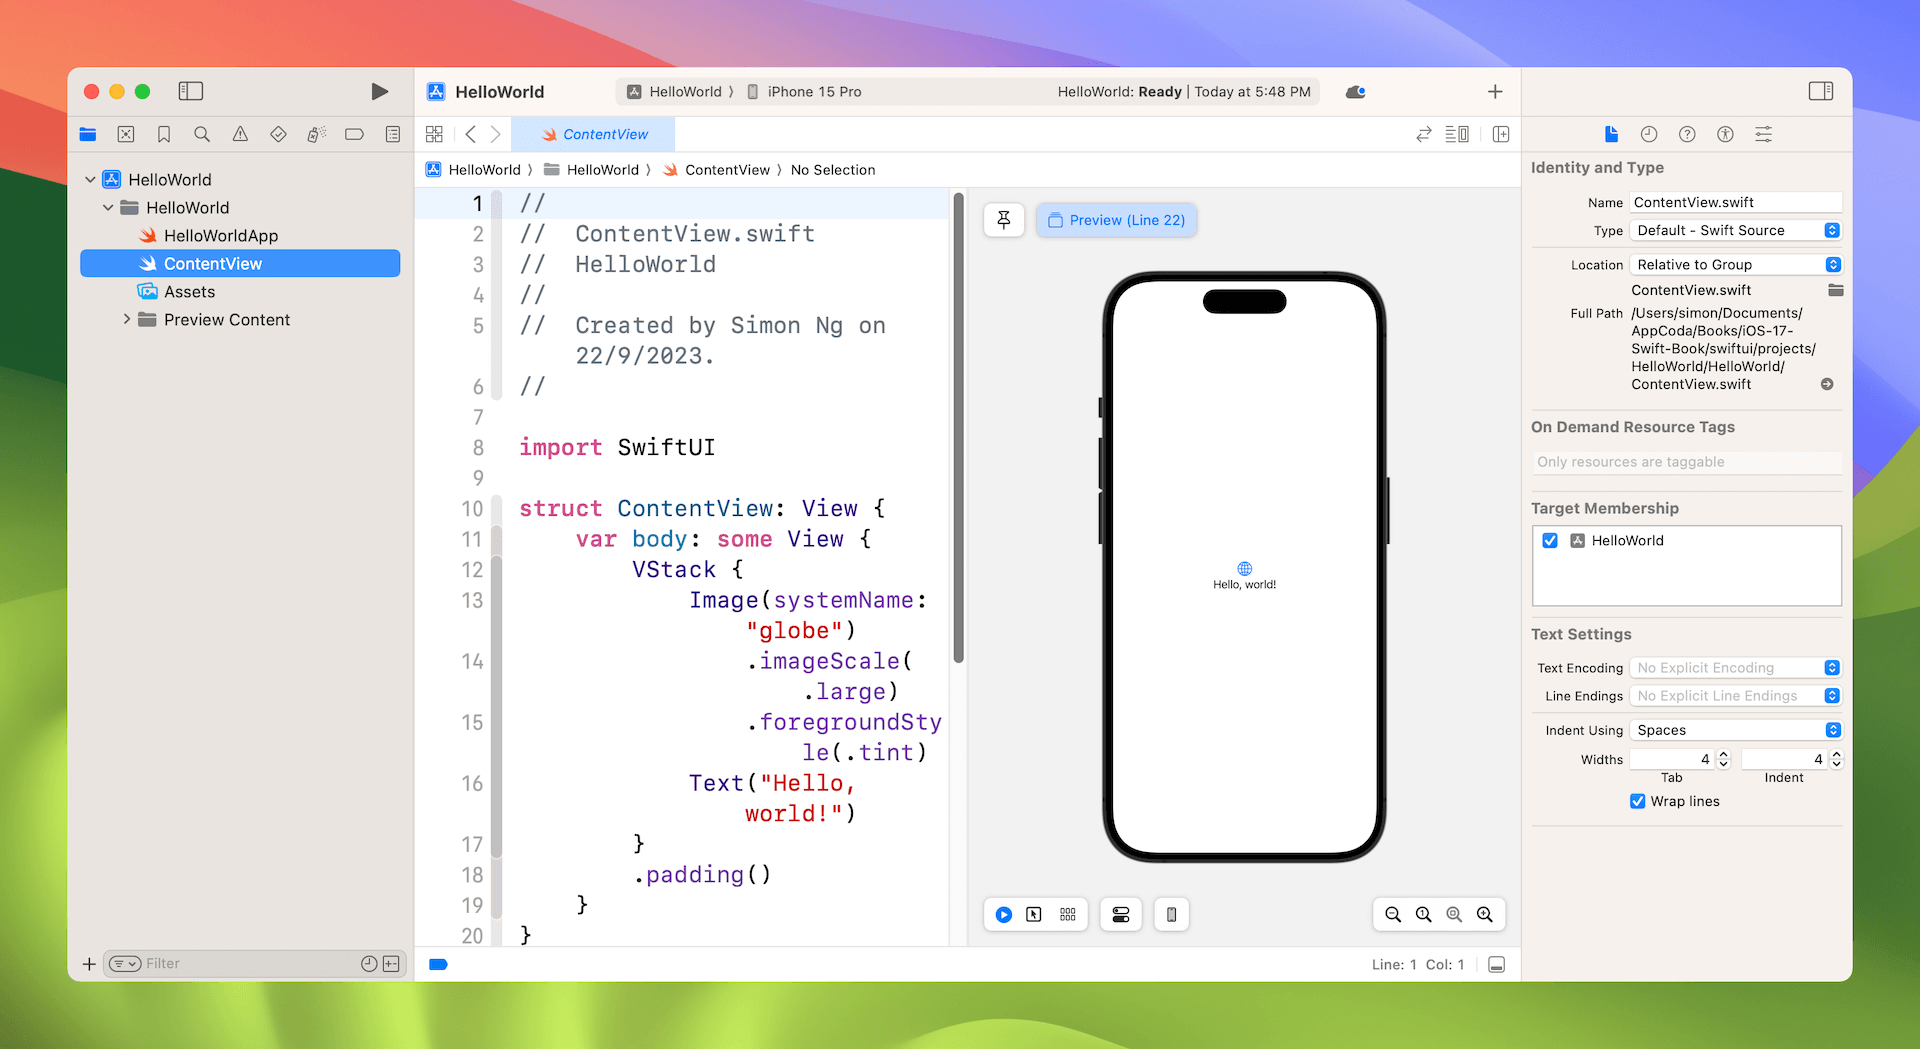
After you confirm, Xcode automatically creates the "Hello World" project. The screen will look like the screenshot shown in figure 3-5.
Familiarize Yourself with Xcode Workspace
Before we start to implement the Hello World app, let's take a few minutes to have a quick look at the Xcode workspace environment. In the left pane is the project navigator. You can find all your project files in this area. The center part of the workspace is the editor area. You do all the editing stuff here (such as editing the project setting, source code file, user interface) in this area.
Depending on the type of file, Xcode shows you different interfaces in the editor area. For instance, if you select HelloWorldApp.swift in the project navigator, Xcode displays the source code in the center area. Xcode comes with several themes for you to choose from. Say, if you prefer dark themes, you can go up to the menu and choose Xcode > Preferences > Themes to change it.
If you select the ContentView.swift file, Xcode automatically resizes the code editor and displays an extra pane right next to it. This extra pane is the preview pane for the ContentView. If you can't see the design canvas, you can go up to the Xcode menu and choose Editor > Canvas to enable it.
The design canvas shows you the preview of your SwiftUI code. Xcode renders the preview in a simulator that you choose in the simulator selection (e.g. iPhone 17 Pro).
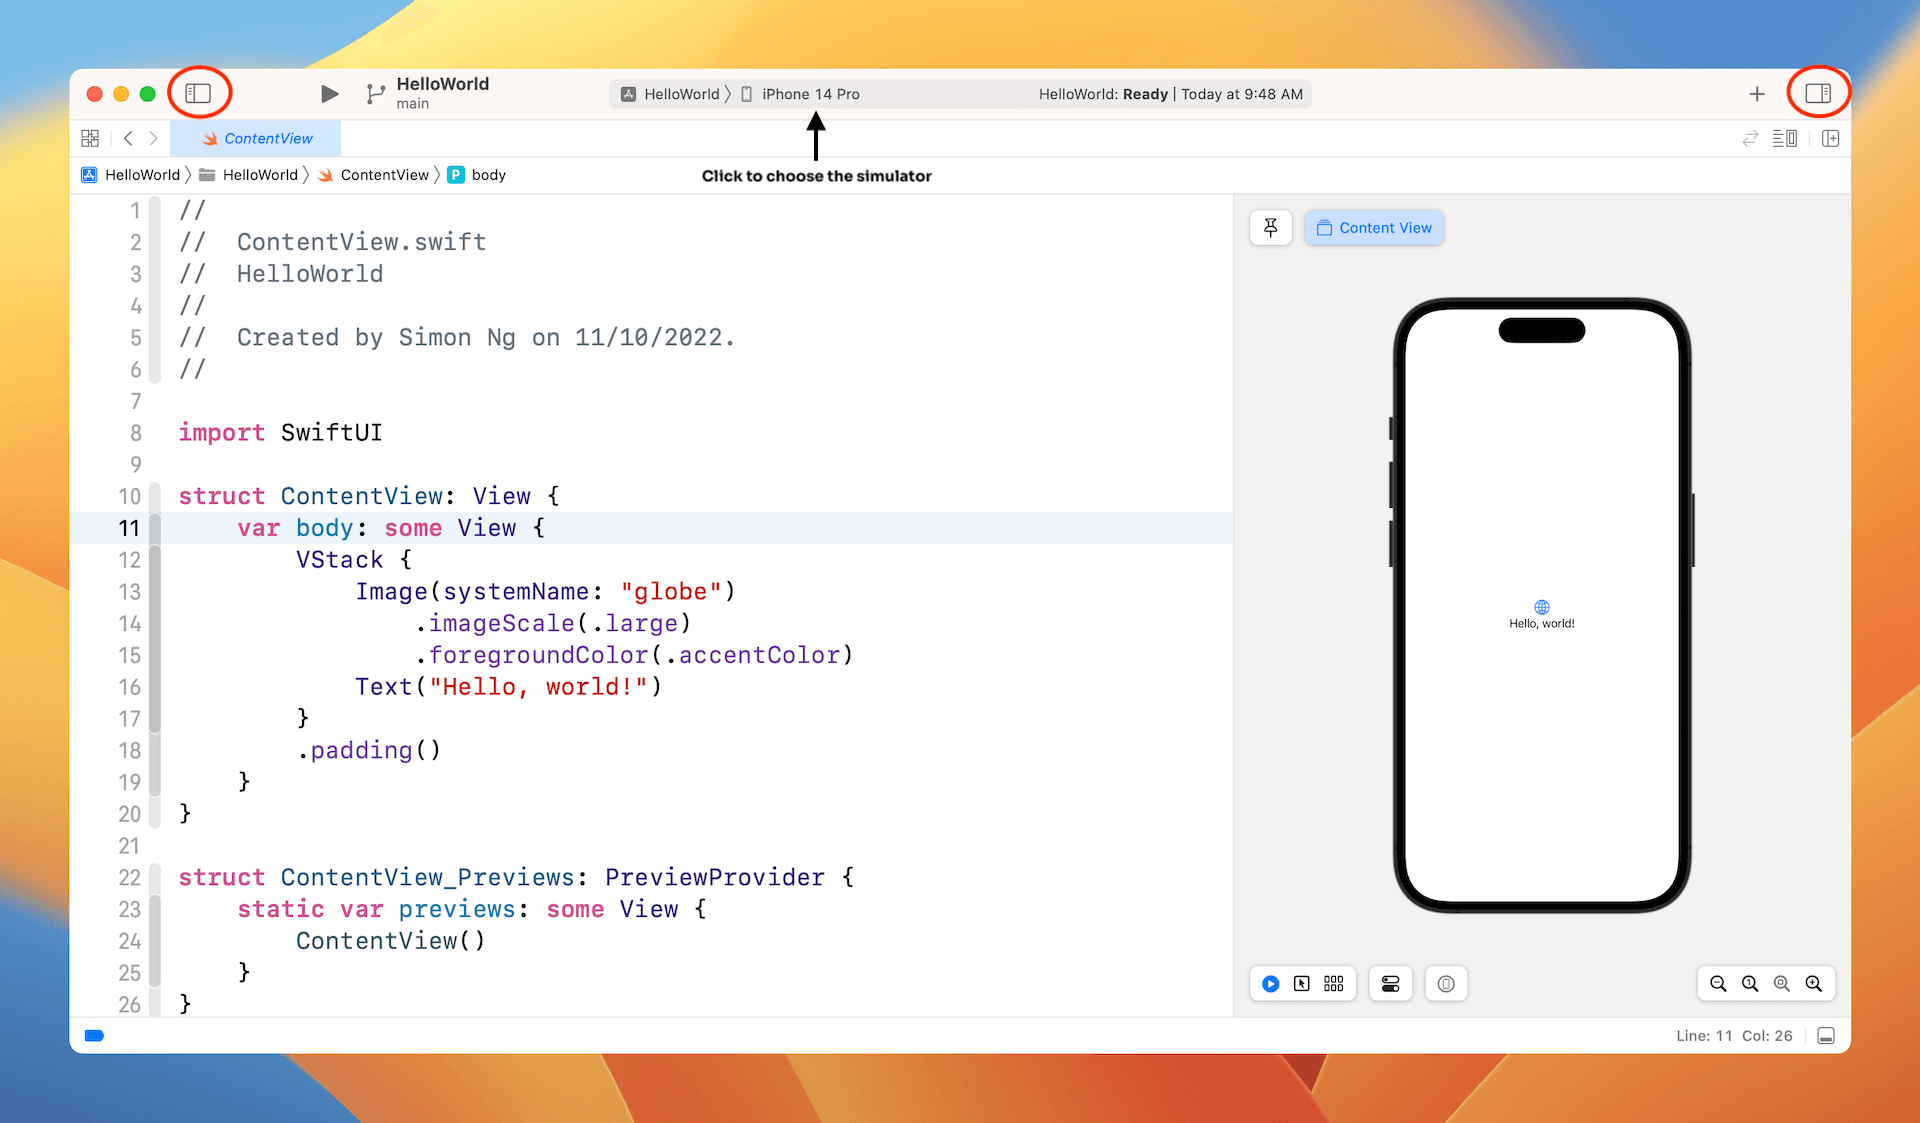
To give yourself more space for writing code, you can hide both the project navigator and the inspector (see figure 3-6). If you want to resize the preview, use the magnifying icons at the bottom-right corner.
Run Your App for the First Time
Until now, we haven't written a single line of code. The code in ContentView is generated by Xcode. Before we write our own code, let's try to run the app using the built-in simulator. This will give you an idea how to build and test your app in Xcode. In the toolbar, you should see the Run button (i.e. Play button).
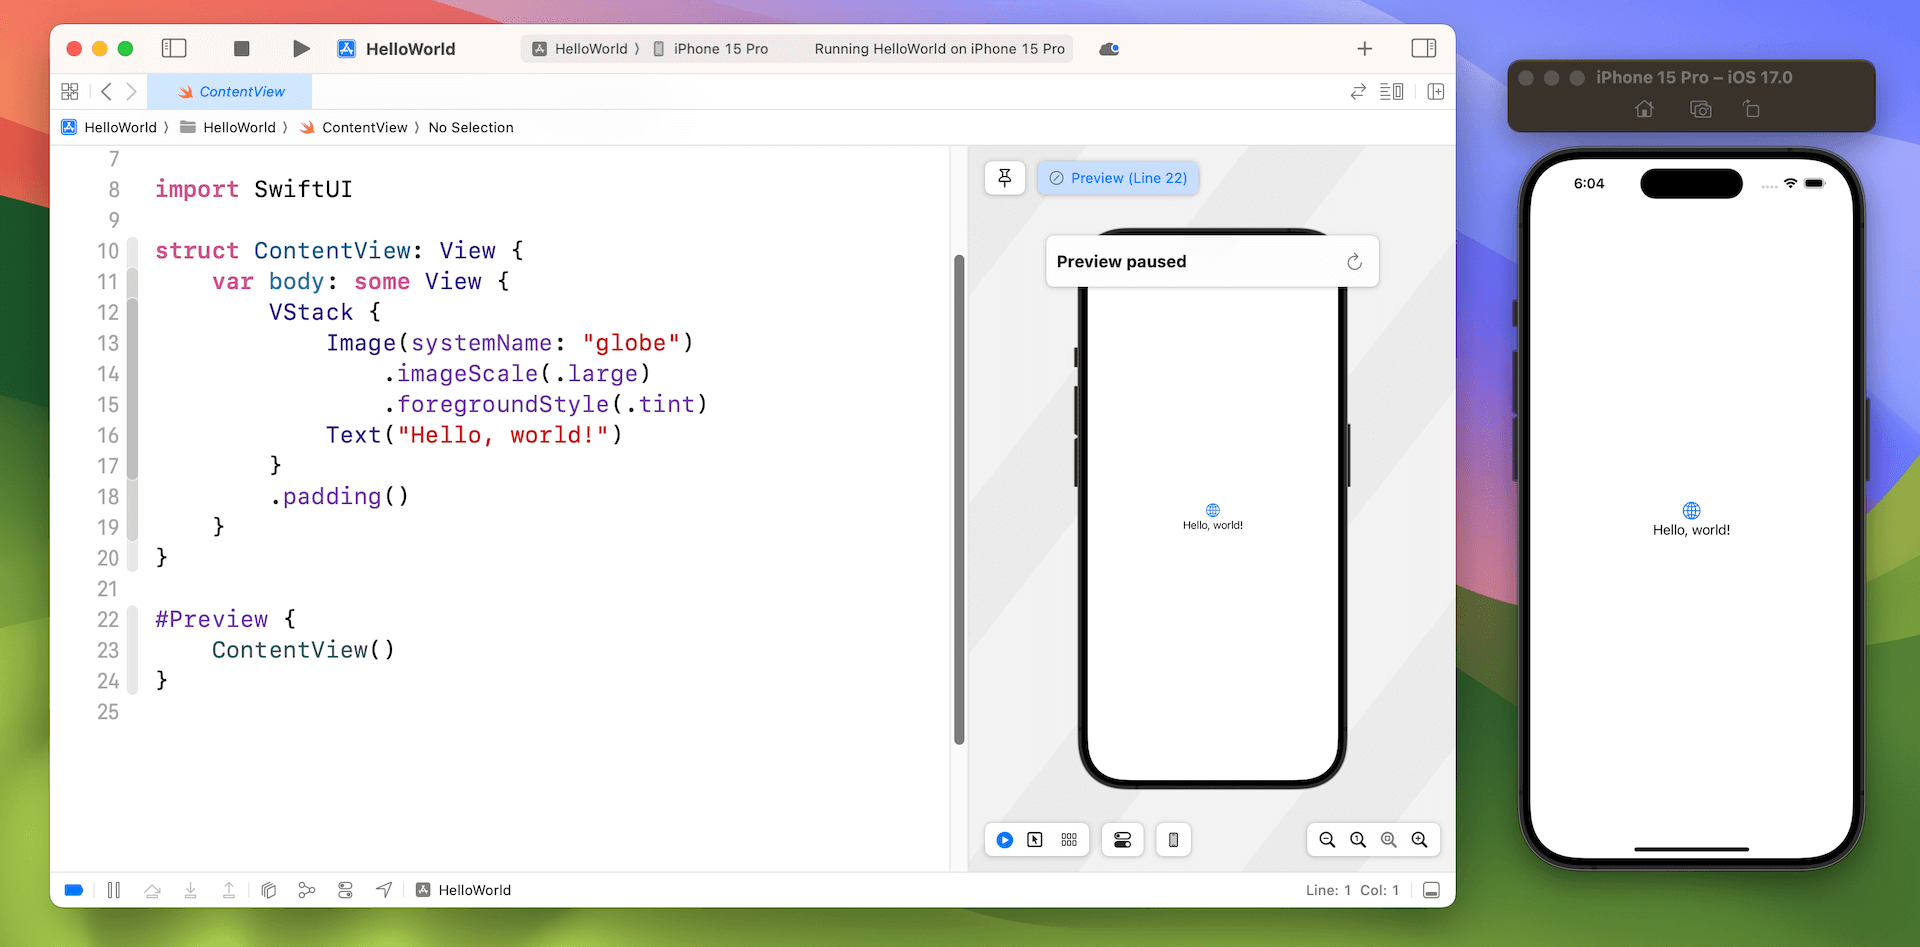
The Run button in Xcode is used to build an app and run it in the selected simulator. In the example above, the Simulator is set to iPhone 17 Pro. If you click the iPhone 17 Pro button, you'll see a list of available simulators such as iPhone SE and iPhone 17 Pro Max. Let's use iPhone 17 Pro as the simulator and give it a try.
Once selected, you can click the Run button to load your app in the simulator. Figure 3-7 shows the simulator of an iPhone 17 Pro. To terminate the app, simply hit the Stop button in the toolbar.
Try to select another simulator (e.g. iPhone Air) and run the app. You will see another simulator showing up on screen. The latest version of Xcode allows developers to run multiple simulators simultaneously.
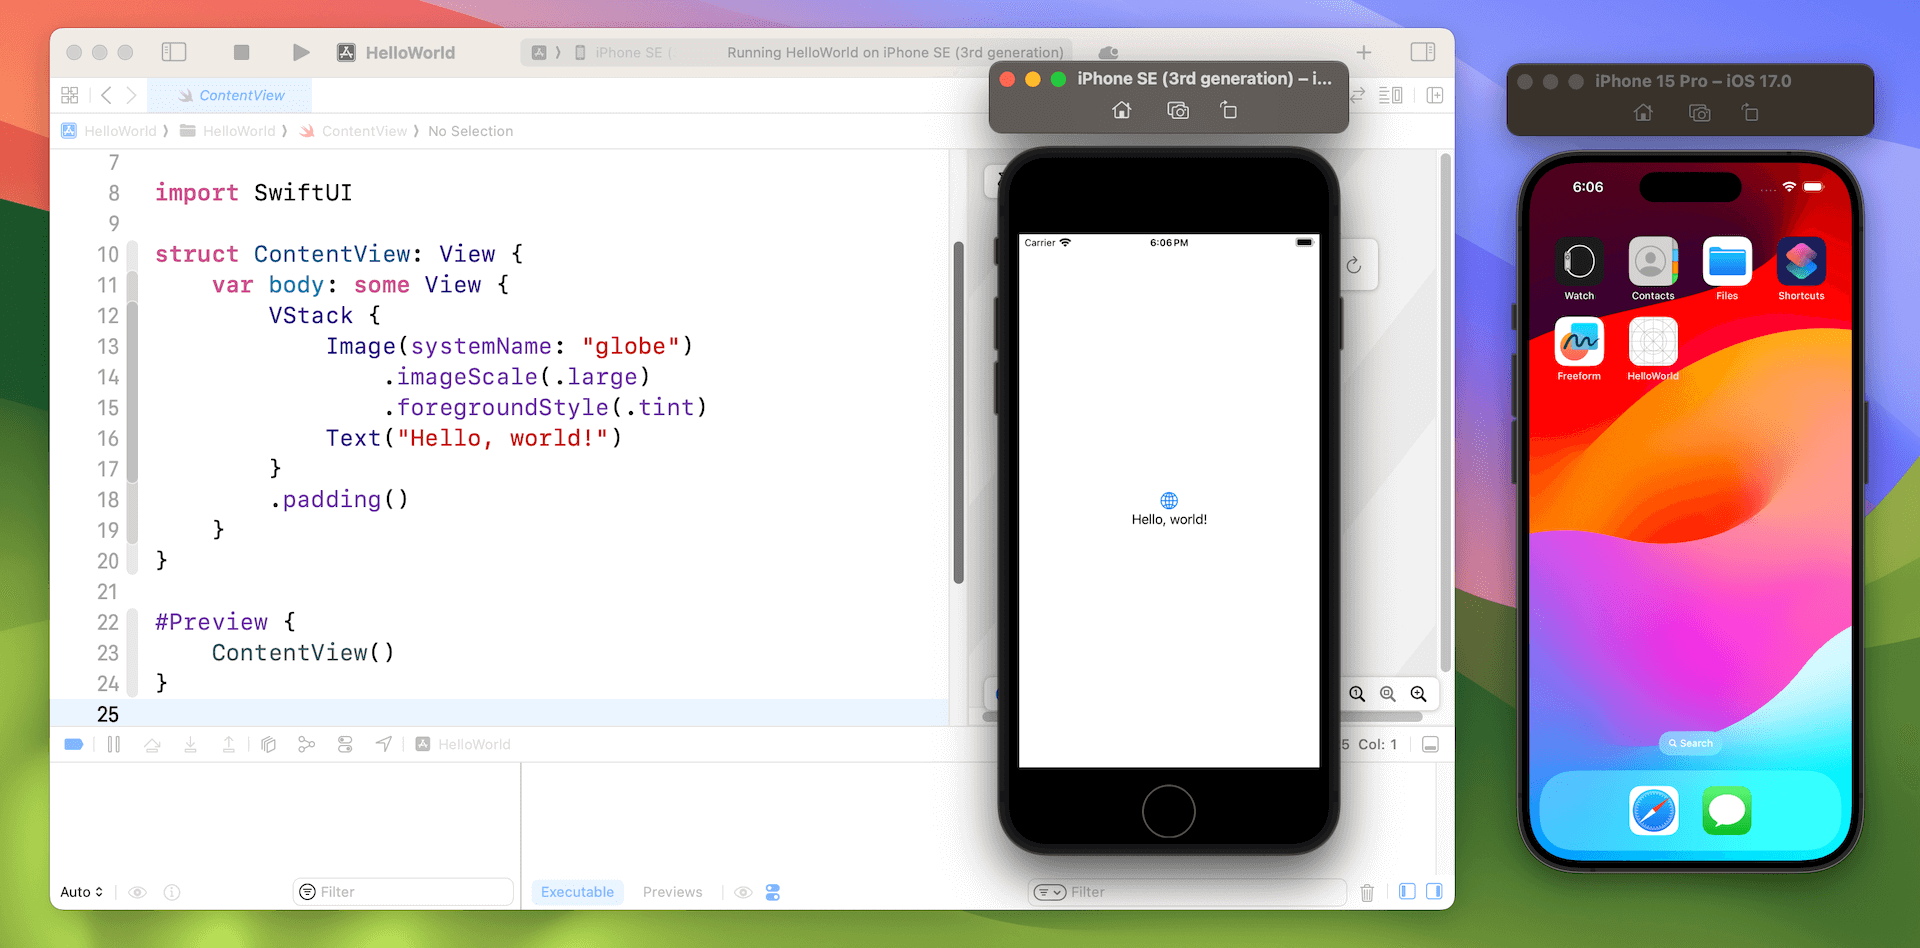
The simulator works pretty much like a real iPhone. You can click the home button (or press shift-command-h) to bring up the home screen. It also comes with some built-in apps. Just play around with it to familiarize yourself with Xcode and simulator environment.
Working with Text
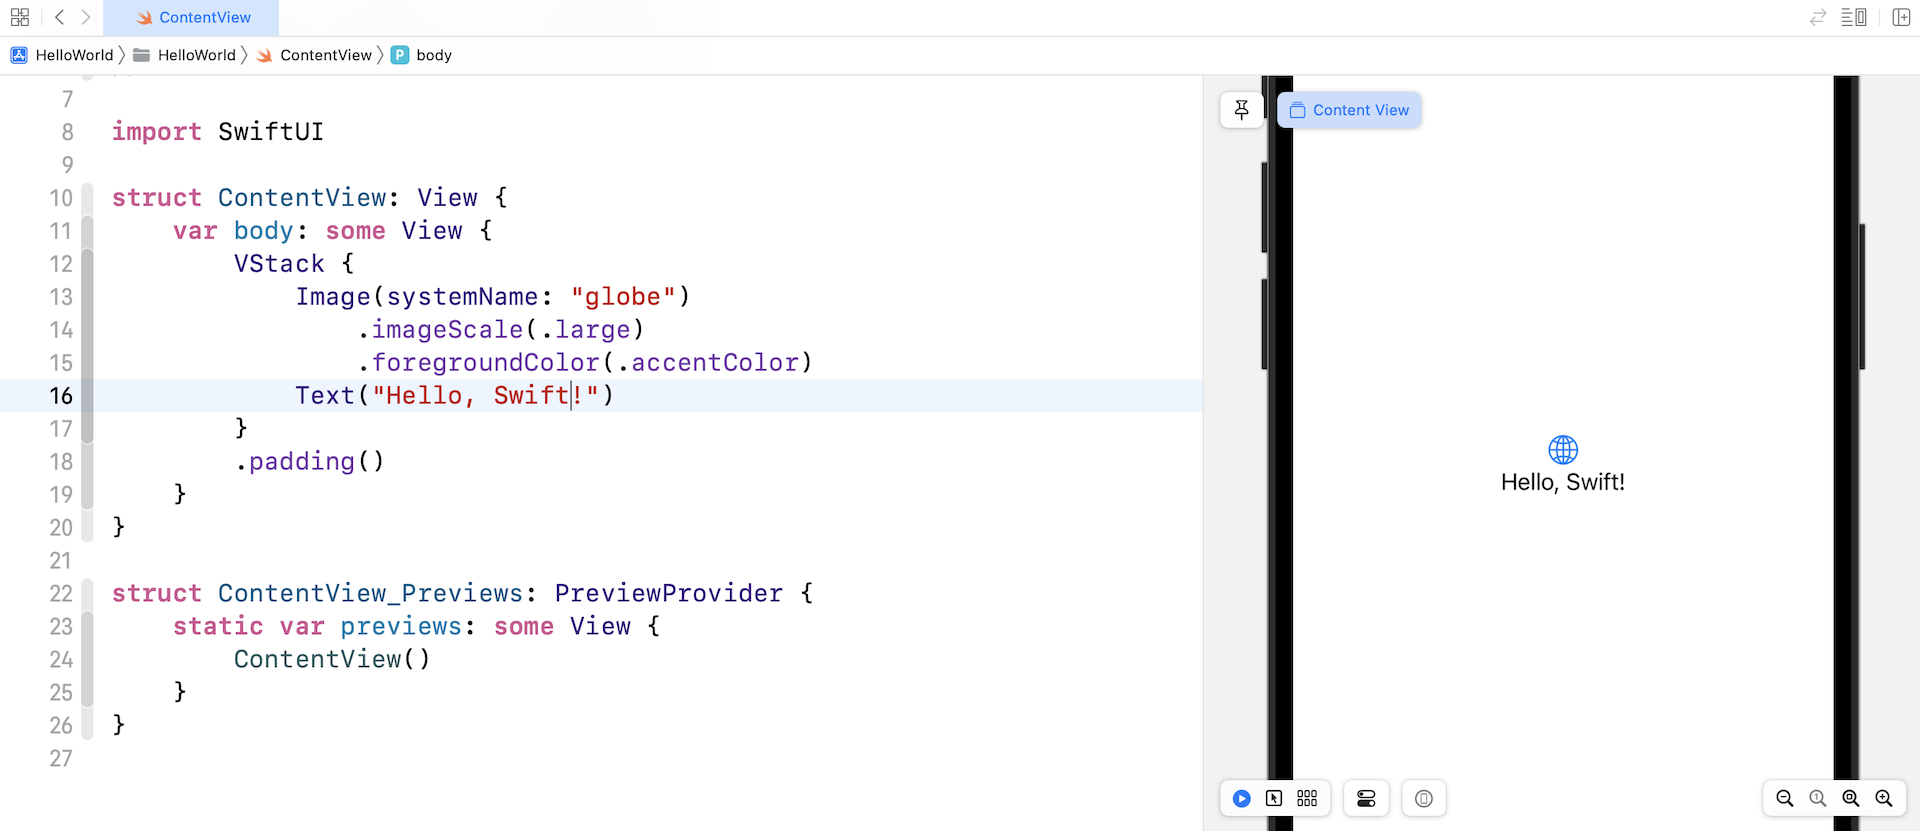
Now that you should be familiar with the Xcode workspace, it's time to check out the SwiftUI code. The sample code generated in ContentView already shows you how to display a single line of text. You initialize a Text object and pass to it the text (e.g. Hello World) to display like this:
Text("Hello World")
The preview canvas then displays Hello World on screen. This is the basic syntax for creating a text view. You're free to change the text to whatever value you want and the canvas should show you the change instantaneously.
Changing the Font Type and Color
In SwiftUI, you can change the properties (e.g. color, font, weight) of a control by calling methods that are known as Modifiers. Let's say, you want to bold the text. You can use the modifier fontWeight and specify your preferred font weight (e.g. .bold) like this:
Text("Stay Hungry. Stay Foolish.").fontWeight(.bold)
You access the modifier by using the dot syntax. Whenever you type a dot, Xcode will show you the possible modifiers or values you can use. For example, you will see various font weight options when you type a dot in the fontWeight modifier. You can choose bold to bold the text. If you want to make it even bolder, use heavy or black.
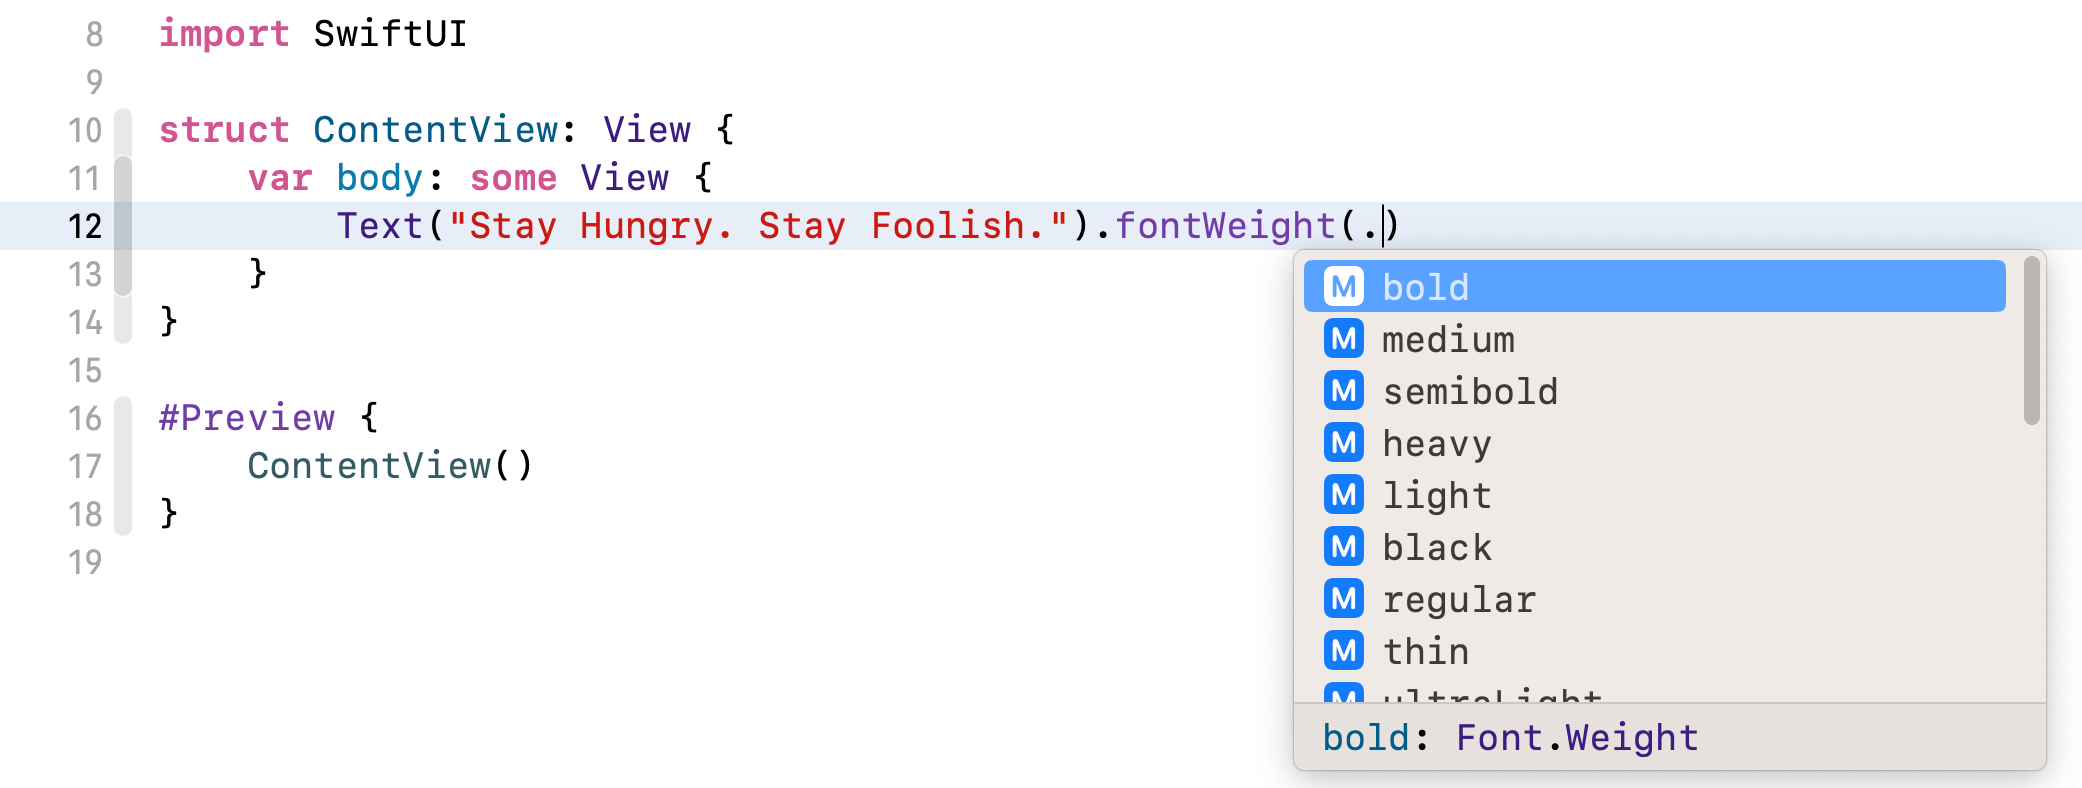
By calling fontWeight with the value .bold, it actually returns you a new view that has the bolded text. What is interesting in SwiftUI is that you can further chain this new view with other modifiers. Say, if you want to make the bolded text a little bit bigger, you write the code like this:
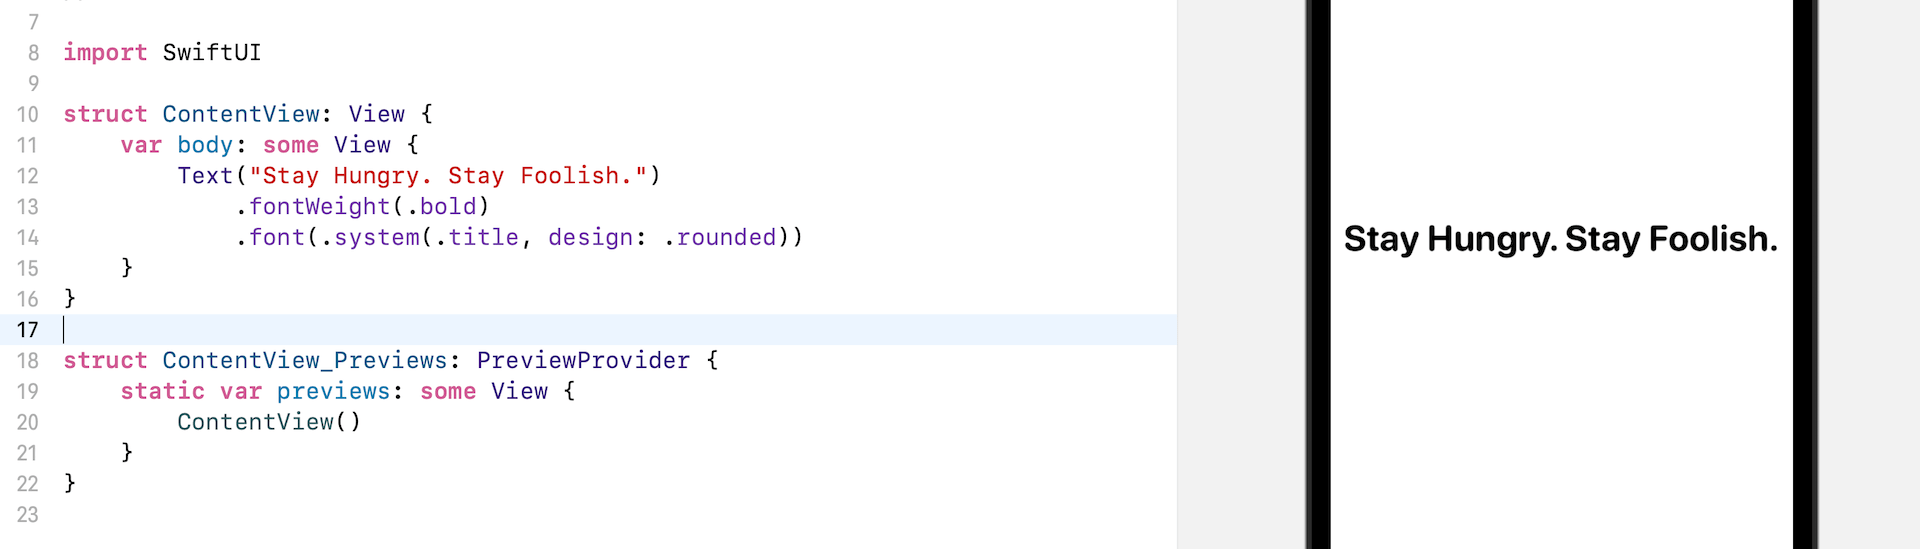
Text("Stay Hungry. Stay Foolish.").fontWeight(.bold).font(.title)
The font modifier lets you change the font properties. In the code above, we specify the title font type in order to enlarge the text. SwiftUI comes with several built-in text styles including title, largeTitle, body, etc. If you want to further increase the font size, replace .title with .largeTitle.
The code will be hard to read if we continue to chain more modifiers in the same line of code. Therefore, we usually write the code in the following format by breaking it into multiple lines:
Text("Stay Hungry. Stay Foolish.")
    .fontWeight(.bold)
    .font(.title)
The functionality is the same but I believe you'll find the code above more easy to read. We will continue to use this coding convention for the rest of this book.
The font modifier also lets you change the text design. Let's say, you want the font to be rounded. You can write the font modifier like this:
.font(.system(.title, design: .rounded))
Here you specify to use the system font with title text style and rounded design. The preview canvas should immediately respond to the change and show you the rounded text.
Working with Buttons
Button is another common UI components you need to know. It is a very basic UI control which has the ability to handle users' touch, and trigger a certain action.
To create a button using SwiftUI, you just need to use the code snippet below to create a button:
Button {
    // What to perform
} label: {
    // How the button looks like
}
When creating a button, you need to provide two code blocks:
- What action to perform - the code to perform after the button is tapped or selected by the user.
- How the button looks - the code block that describes the look & feel of the button.
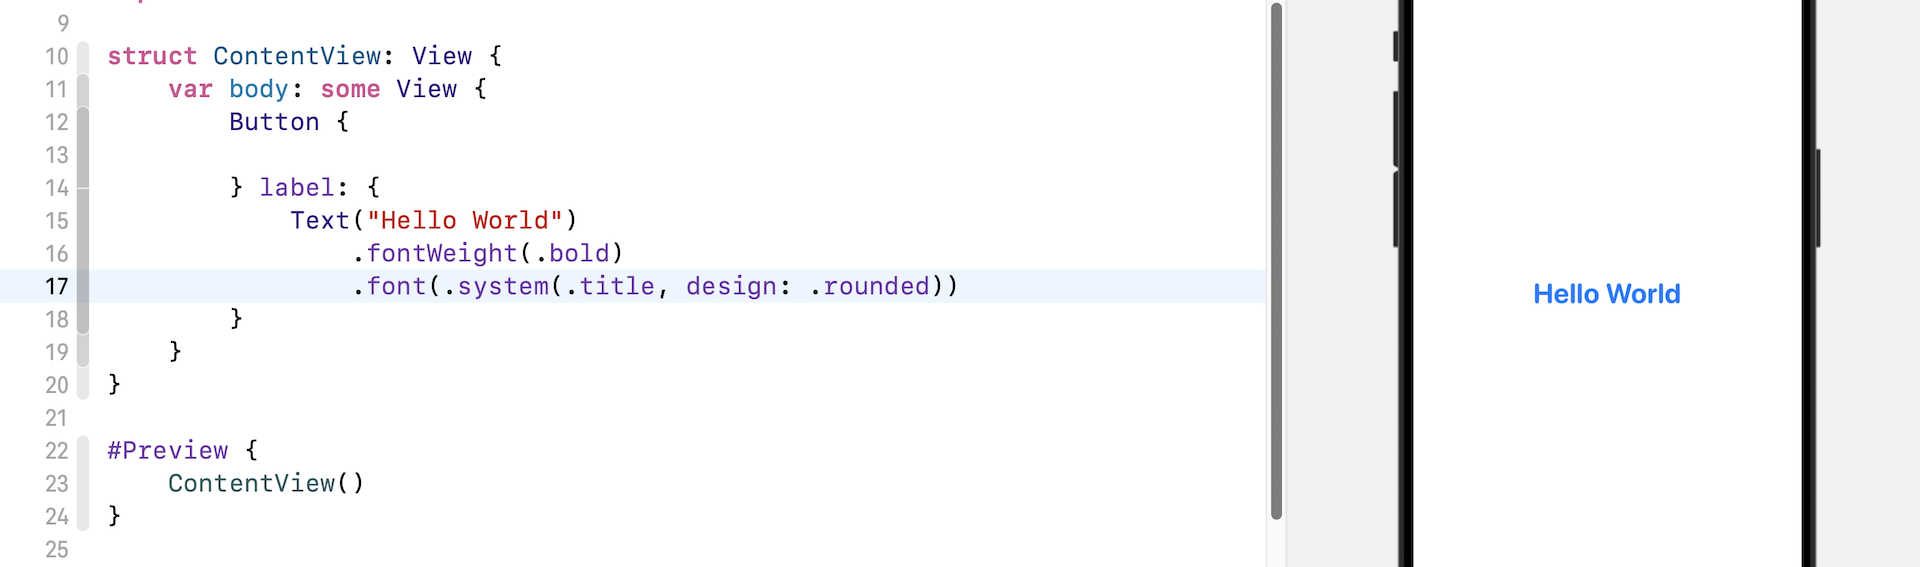
For example, if you just want to turn the Hello World label into a button, you can update the code like this:
struct ContentView: View {
    var body: some View {

        Button {

        } label: {
            Text("Hello World")
                .fontWeight(.bold)
                .font(.system(.title, design: .rounded))
        }

    }
}
The Hello World text becomes a tappable button, even though we didn't specify any follow-up actions. The text color is automatically changed to blue because this is the default color for buttons in iOS.
In the preview, you can tap the button to test it out. Though the button doesn't perform any actions, you should see a blink effect when tapping the button.
Customizing the Button Style
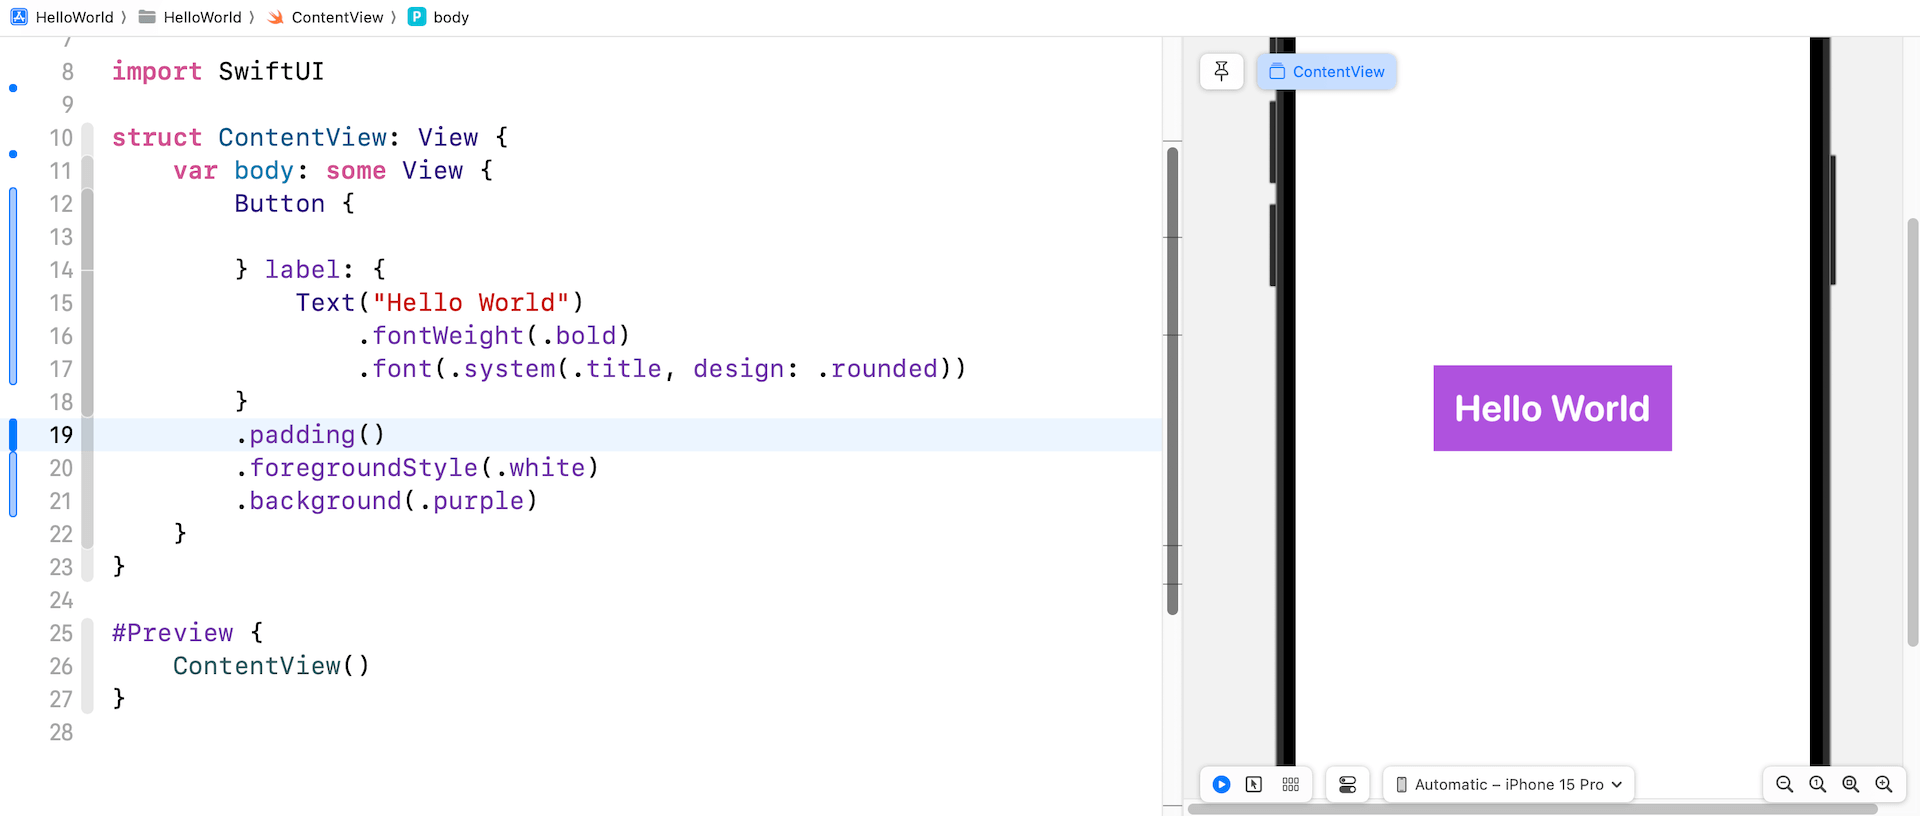
Similar to Text, you can customize the color of the button by attaching some modifiers. For example, you can attach the foregroundStyle and background modifiers to make a purple button.
Button {

} label: {
    Text("Hello World")
        .fontWeight(.bold)
        .font(.system(.title, design: .rounded))
}
.foregroundStyle(.white)
.background(.purple)
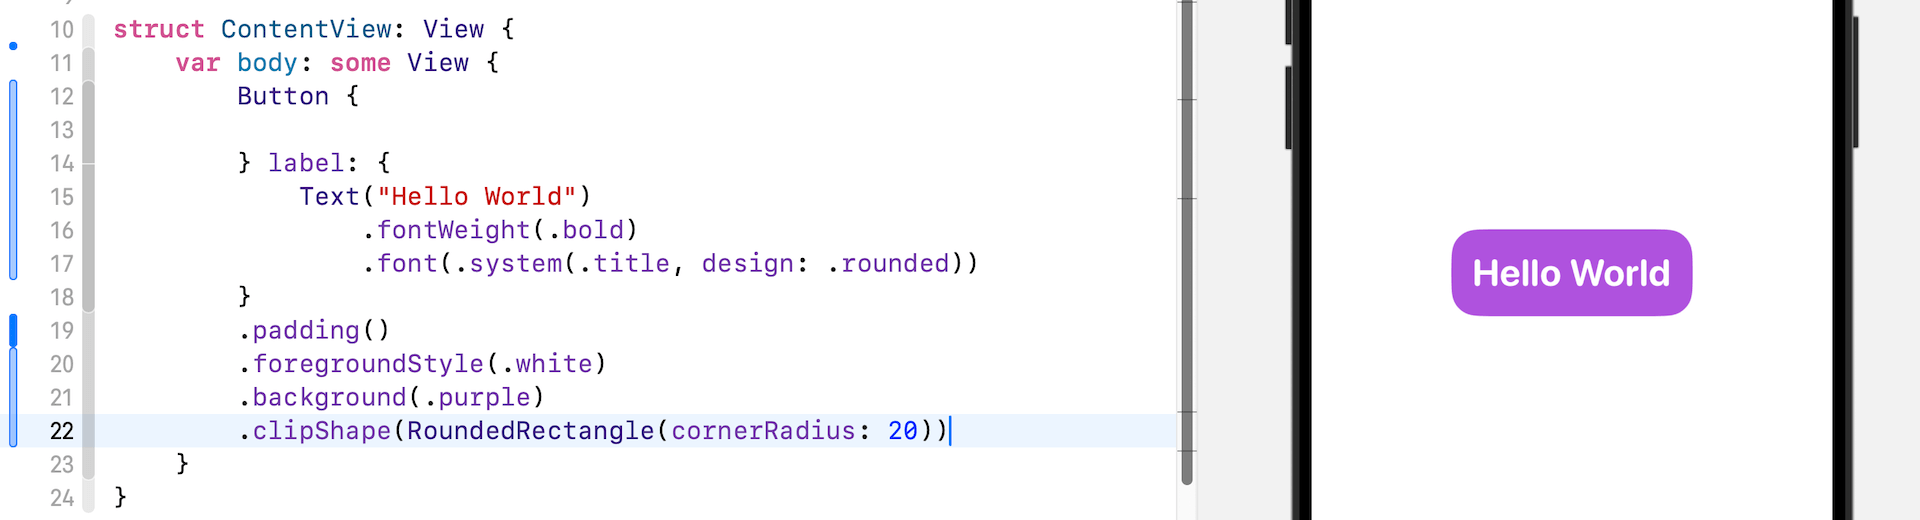
After the change, your button should look like the figure below.

As you can see, the button doesn't look very good. Wouldn't it be great to add some space around the text? To do that, you can use the padding modifier like this:
SwiftUI also makes it very easy to create a button with rounded corners. You just need to attach the clipShape modifier and set its value to RoundedRectangle(cornerRadius: 20) like this:
.clipShape(RoundedRectangle(cornerRadius: 20))
The value of cornerRadius describes how rounded the corners of the button. A larger value produces a more rounded corner, while a smaller value achieves a shaper corner. You can change the corner radius to other values to see the effect.
Adding the Button Action
A button is not useful if it doesn't perform any actions. Our objective is to make the button speak when tapped, speaking the phrase "Hello World!"
This task may seem challenging, as it involves text-to-speech functionality. However, Apple has made it remarkably simple, even for beginners.
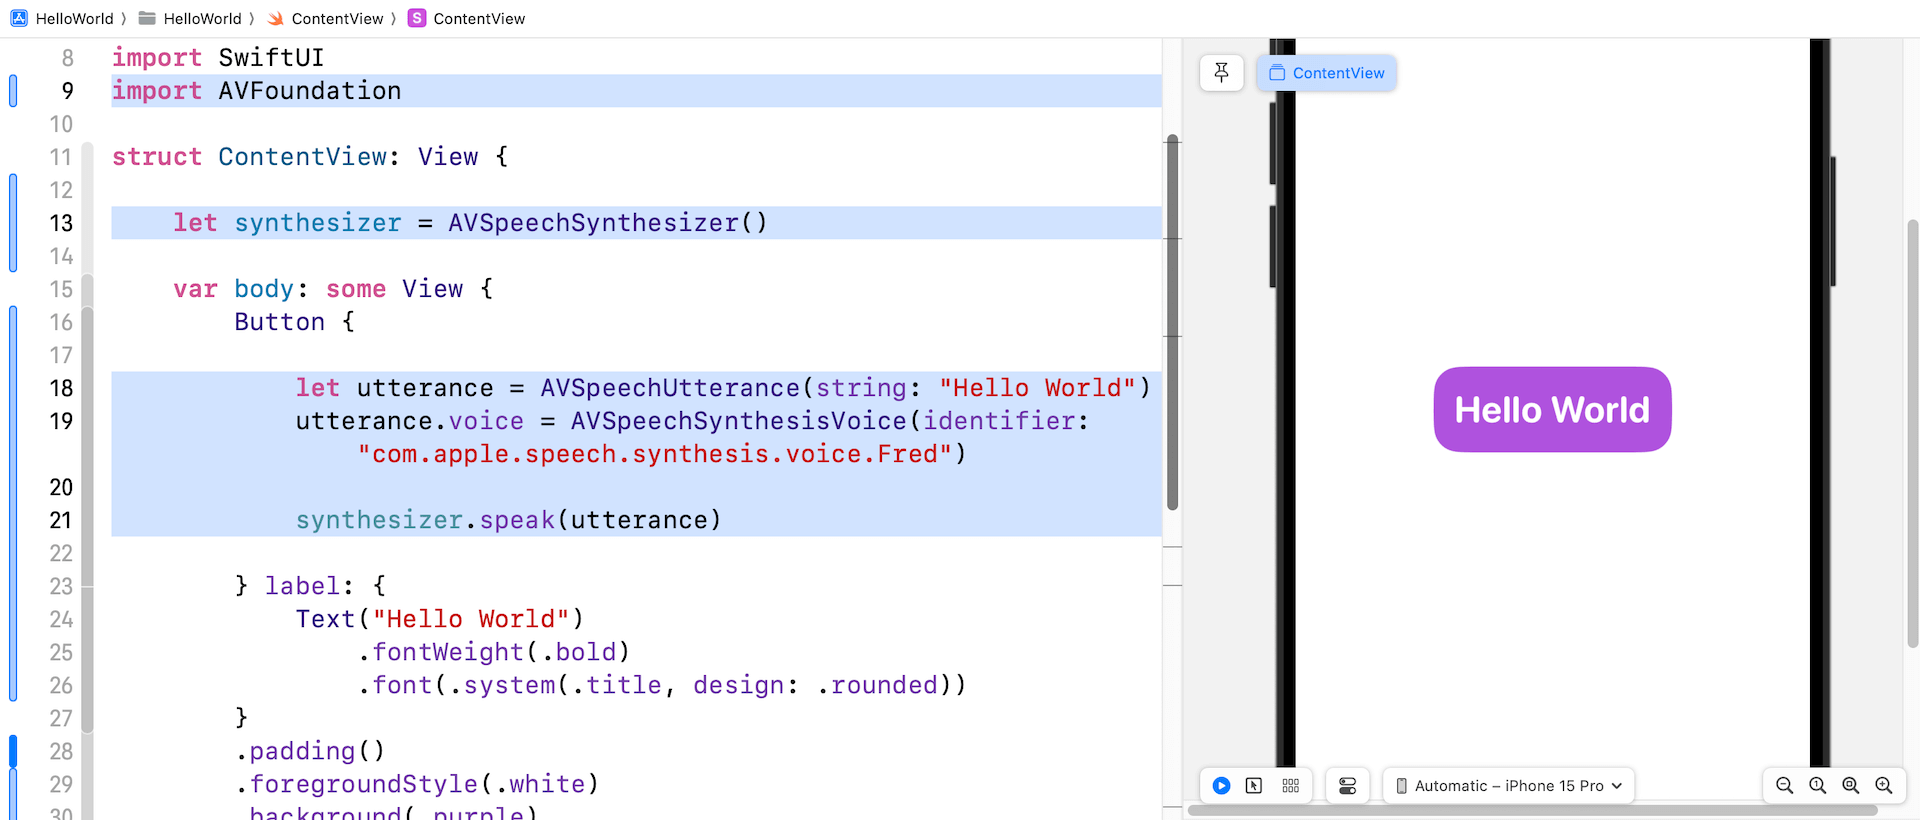
As mentioned previously, the iOS SDK includes numerous remarkable frameworks for developers to leverage. In our case, we are utilizing the SwiftUI framework to build the user interface. To achieve text-to-speech functionality, we can rely on the AVFoundation framework.
Before we can use the framework, we have to import it at the beginning of the code. Right below import SwiftUI, insert the following import statement:
import AVFoundation
Next, declare a variable in ContentView to create and hold the speech synthesizer (refer to figure 3-16):
let synthesizer = AVSpeechSynthesizer()
After that, update the code of Button like this:
Button {

    let utterance = AVSpeechUtterance(string: "Hello World")
    utterance.voice = AVSpeechSynthesisVoice(identifier: "com.apple.speech.synthesis.voice.Fred")

    synthesizer.speak(utterance)

} label: {
    Text("Hello World")
        .fontWeight(.bold)
        .font(.system(.title, design: .rounded))
}
.padding()
.foregroundStyle(.white)
.background(.purple)
.clipShape(RoundedRectangle(cornerRadius: 20))
Here, we added 3 lines of code in the action block. That's the code you need to instruct iOS to speak a piece of text for you. The first line of code specifies the text (i.e. "Hello World"), while the second line of code sets the voice to British English. The last line is to speak out the text with the chosen voice.
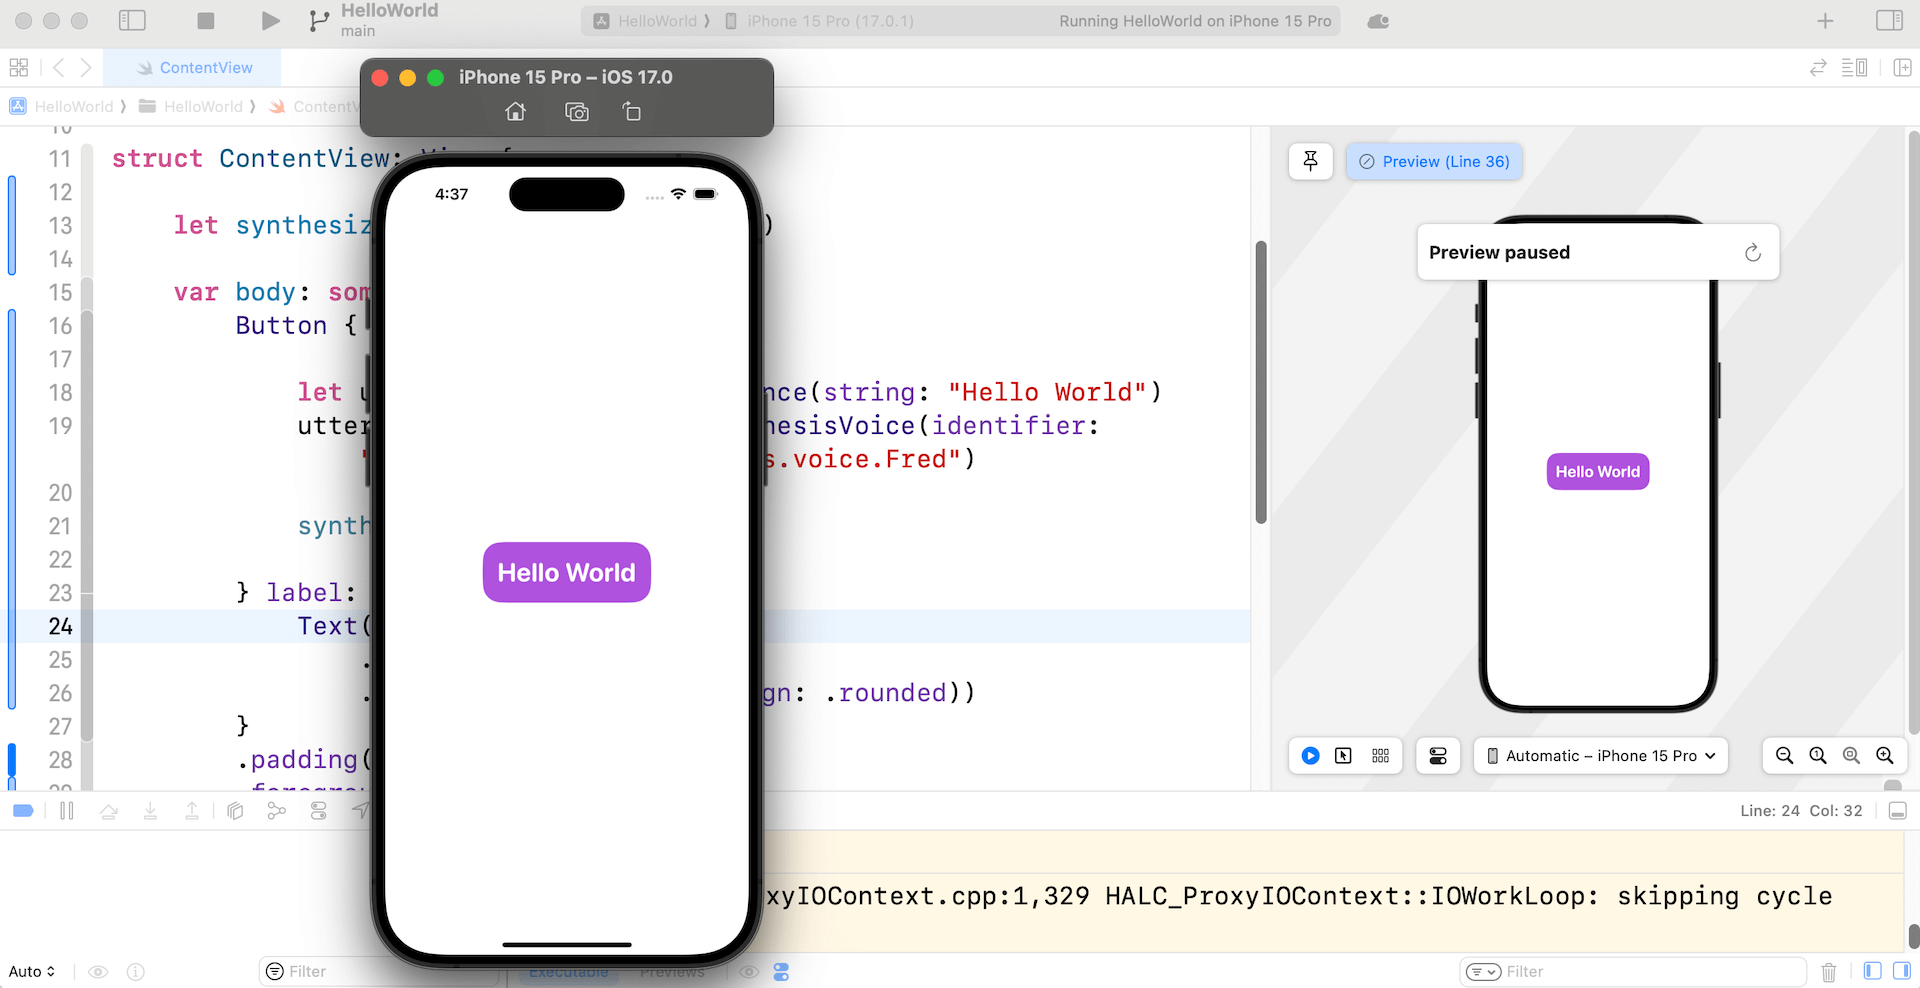
To test the app, you can click the Hello World button in the preview or run it in a simulator. Let's use the simulator. Click the Play button to run the app. Then, click the Hello World button to test the text-to-speech feature.
Introducing Stack Views
Your first app works great, right? With just around 10 lines of code, you already created an app that can translate text into speech. Presently, the button is designed to speak "Hello World". What if you want to create another button, which speaks a different sentence or words, above the Hello World button? How can you arrange the UI layout?
SwiftUI provides a special type of views known as Stack Views for you to construct complex user interfaces. More specifically, stack views lets you arrange multiple views (or UI components) in vertical or horizontal direction. For example, if you want to add a new button above the Hello World button, you can embed both buttons in a VStack like this:
VStack {

  // New Button

  // Hello World Button
}
VStack is a vertical stack view for laying out views vertically. The order of the views inside a VStack determines how the embedded views are arranged. In the code above, the new button will be placed on the top of the Hello World button.
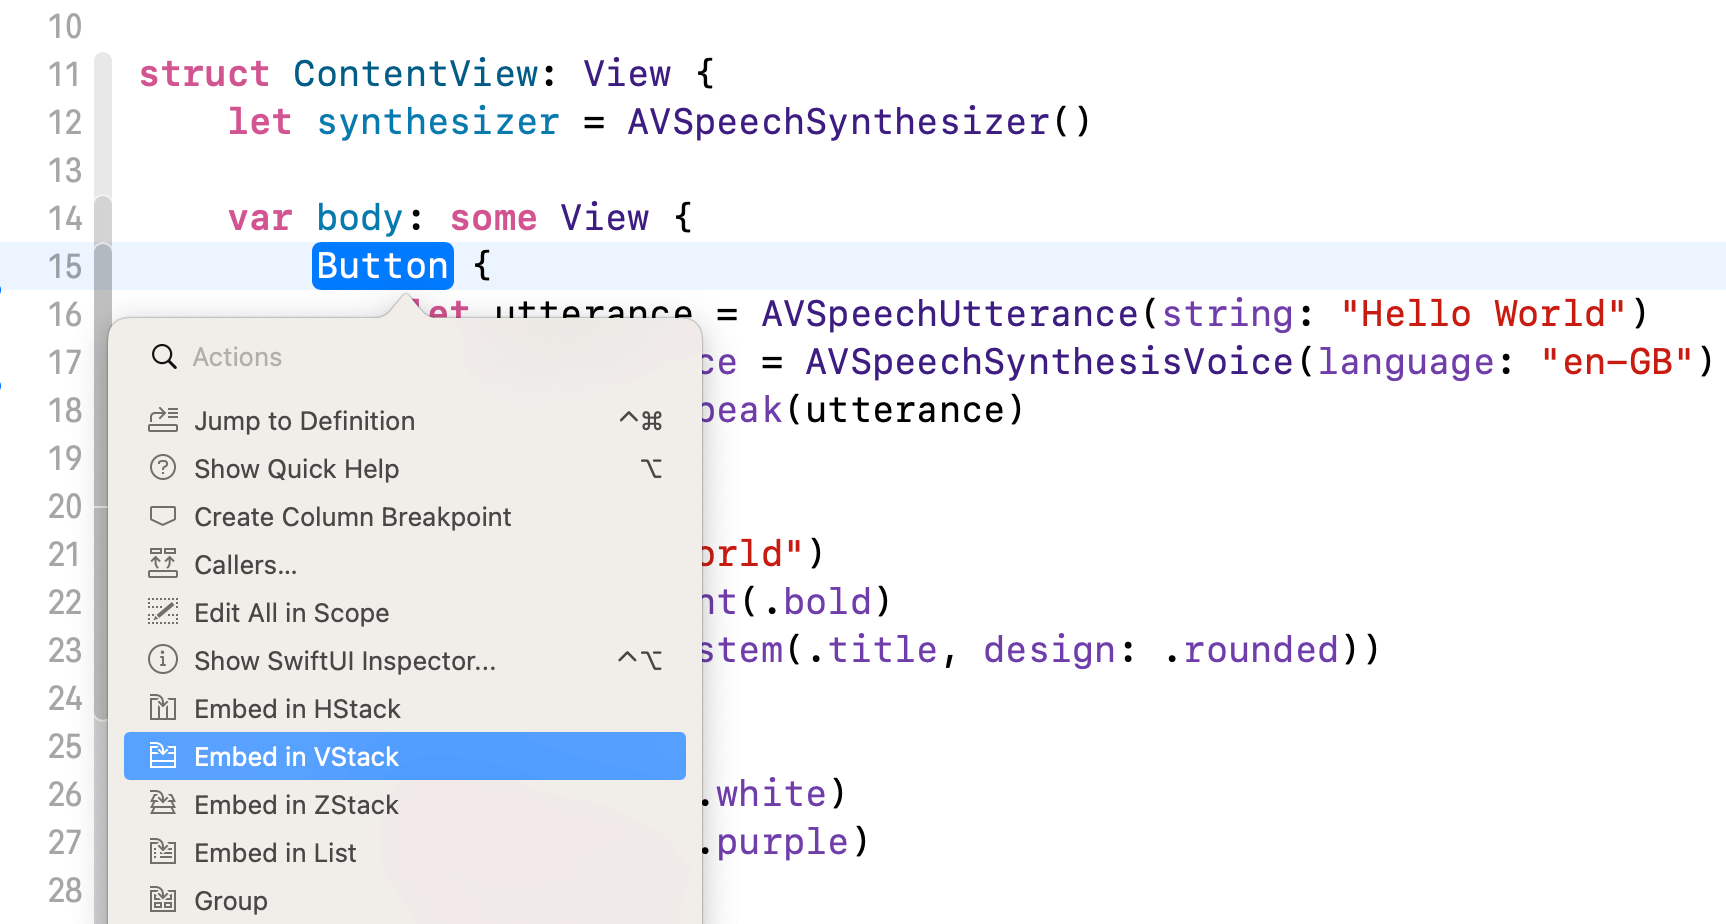
Now let's modify the actual code to see the changes in action. To embed the Hello World button in a VStack, you can hold the control key and click Button. In the context menu, choose Embed.... Xcode then wraps the Hello World button in a Container view. Simply replace Container with VStack.
Once you embedded the Hello World button in the VStack, duplicate the code of the Hello World button to create the new button like this:
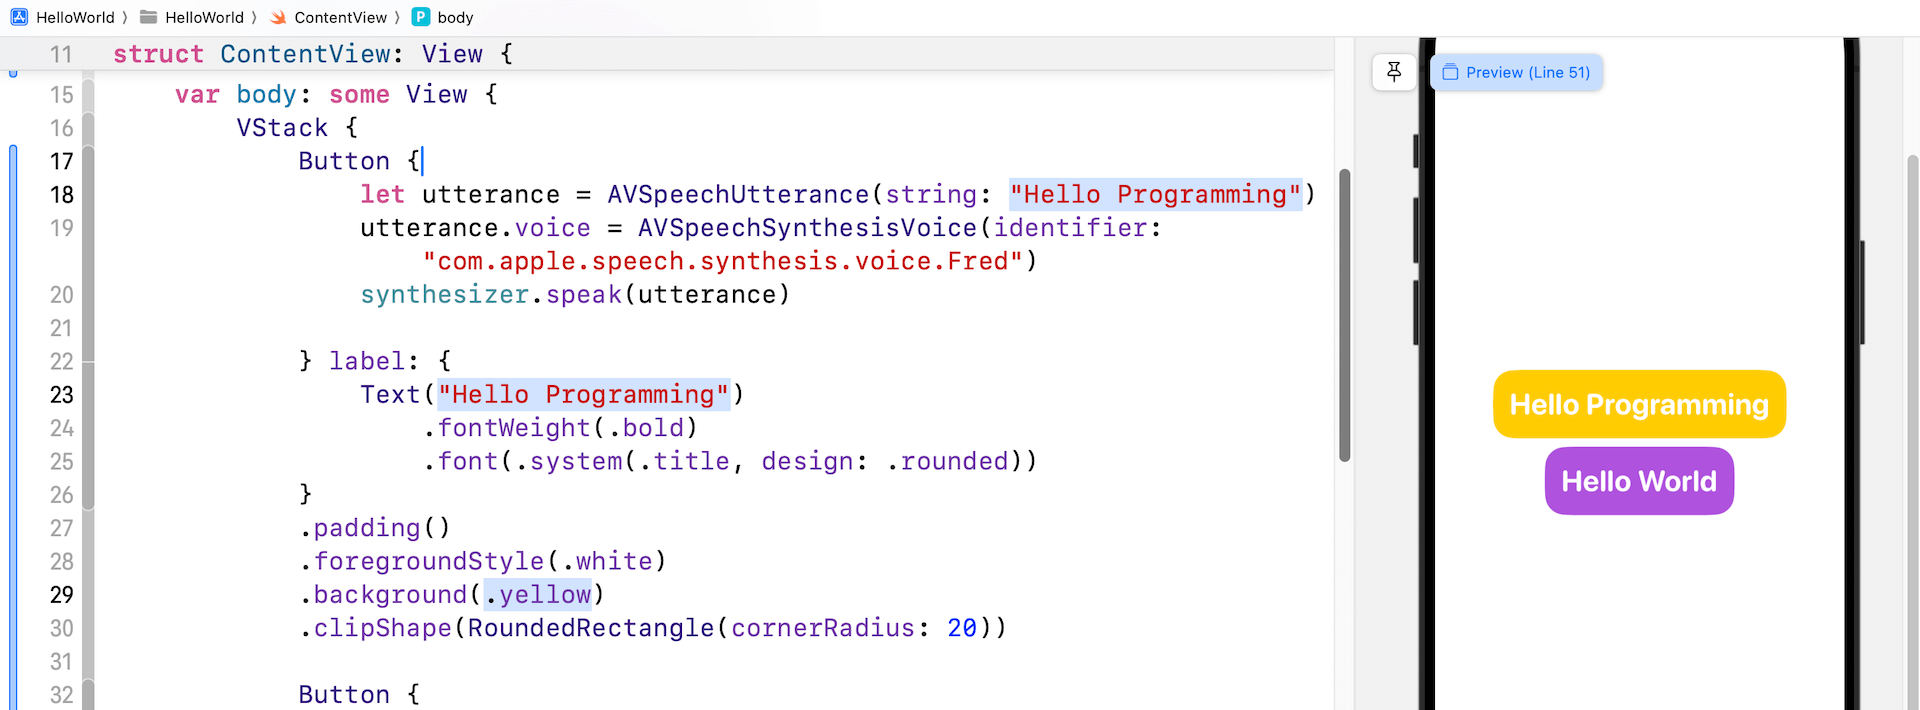
VStack {

    Button {
        let utterance = AVSpeechUtterance(string: "Hello Programming")
        utterance.voice = AVSpeechSynthesisVoice(identifier: "com.apple.speech.synthesis.voice.Fred")
        synthesizer.speak(utterance)

    } label: {
        Text("Hello Programming")
            .fontWeight(.bold)
            .font(.system(.title, design: .rounded))
    }
    .padding()
    .foregroundStyle(.white)
    .background(.yellow)
    .clipShape(RoundedRectangle(cornerRadius: 20))

    Button {
        let utterance = AVSpeechUtterance(string: "Hello World")
        utterance.voice = AVSpeechSynthesisVoice(identifier: "com.apple.speech.synthesis.voice.Fred")
        synthesizer.speak(utterance)

    } label: {
        Text("Hello World")
            .fontWeight(.bold)
            .font(.system(.title, design: .rounded))
    }
    .padding()
    .foregroundStyle(.white)
    .background(.purple)
    .clipShape(RoundedRectangle(cornerRadius: 20))
}
The label of the new button is changed to Happy Programming and its background color is also updated to .yellow. On top of these changes, the string parameter of AVSpeechUtterance is changed to "Happy Programming." You can refer to figure 3-20 for the changes.
This is how you arrange two buttons vertically. You can run the app for a quick test. The Happy Programming button works exactly the same as the Hello World button, but it speaks "Happy Programming!"
Understanding Methods
Before we end this chapter, let me introduce another basic programming concept. Take a look at the code of ContentView again. There are quite a lot of similarities and duplicated code for the two buttons. One duplicate is the code in the action block of the buttons.
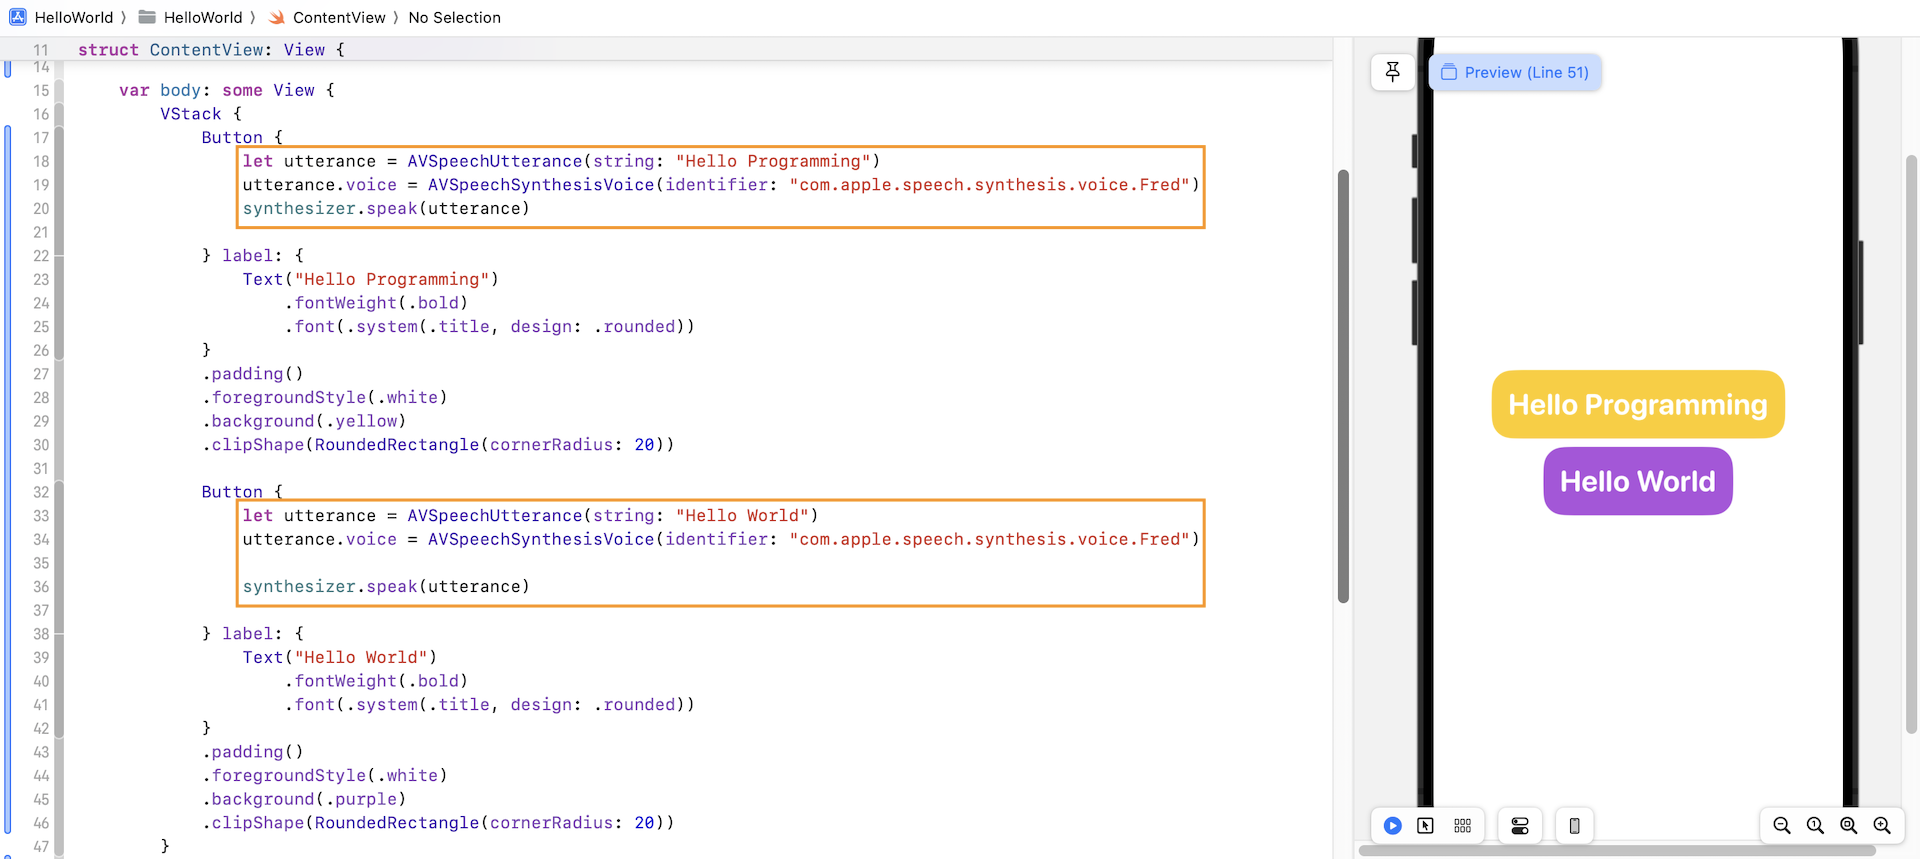
Both blocks of code are nearly the same except that the text to read is different. One is "Happy Programming", the other is "Hello World."
In Swift, you can define a method for this type of repetitive tasks. In this case, we can create a method named speak inside ContentView like this:
func speak(text: String) {
    let utterance = AVSpeechUtterance(string: text)
    utterance.voice = AVSpeechSynthesisVoice(identifier: "com.apple.speech.synthesis.voice.Fred")

    synthesizer.speak(utterance)
}
The func keyword is used to declare a method. Following the func keyword is the name of the method. This name identifies the method and makes it easy for the method to be called elsewhere in your code. Optionally, a method can take in parameters as input. The parameters are defined within the parentheses. Each of the parameters should have a name and a type, separated by a colon (:). In this example, the method accepts a text parameter which has the type String.
In the method, that's the lines of code for converting text into speech. The only change is this line of code:
let utterance = AVSpeechUtterance(string: text)
We set the string parameter to text, which is the text passed by the method caller.
Now that we have created the method, how can we call it? You just need to use the method name and pass it the required parameter like this:
speak(text: "Hello World")
Let's go back to the ContentView struct to modify the code. First, create the speak(text: String) method as shown in figure 3-21. Next, you can replace the action block of both button by calling the speak method.
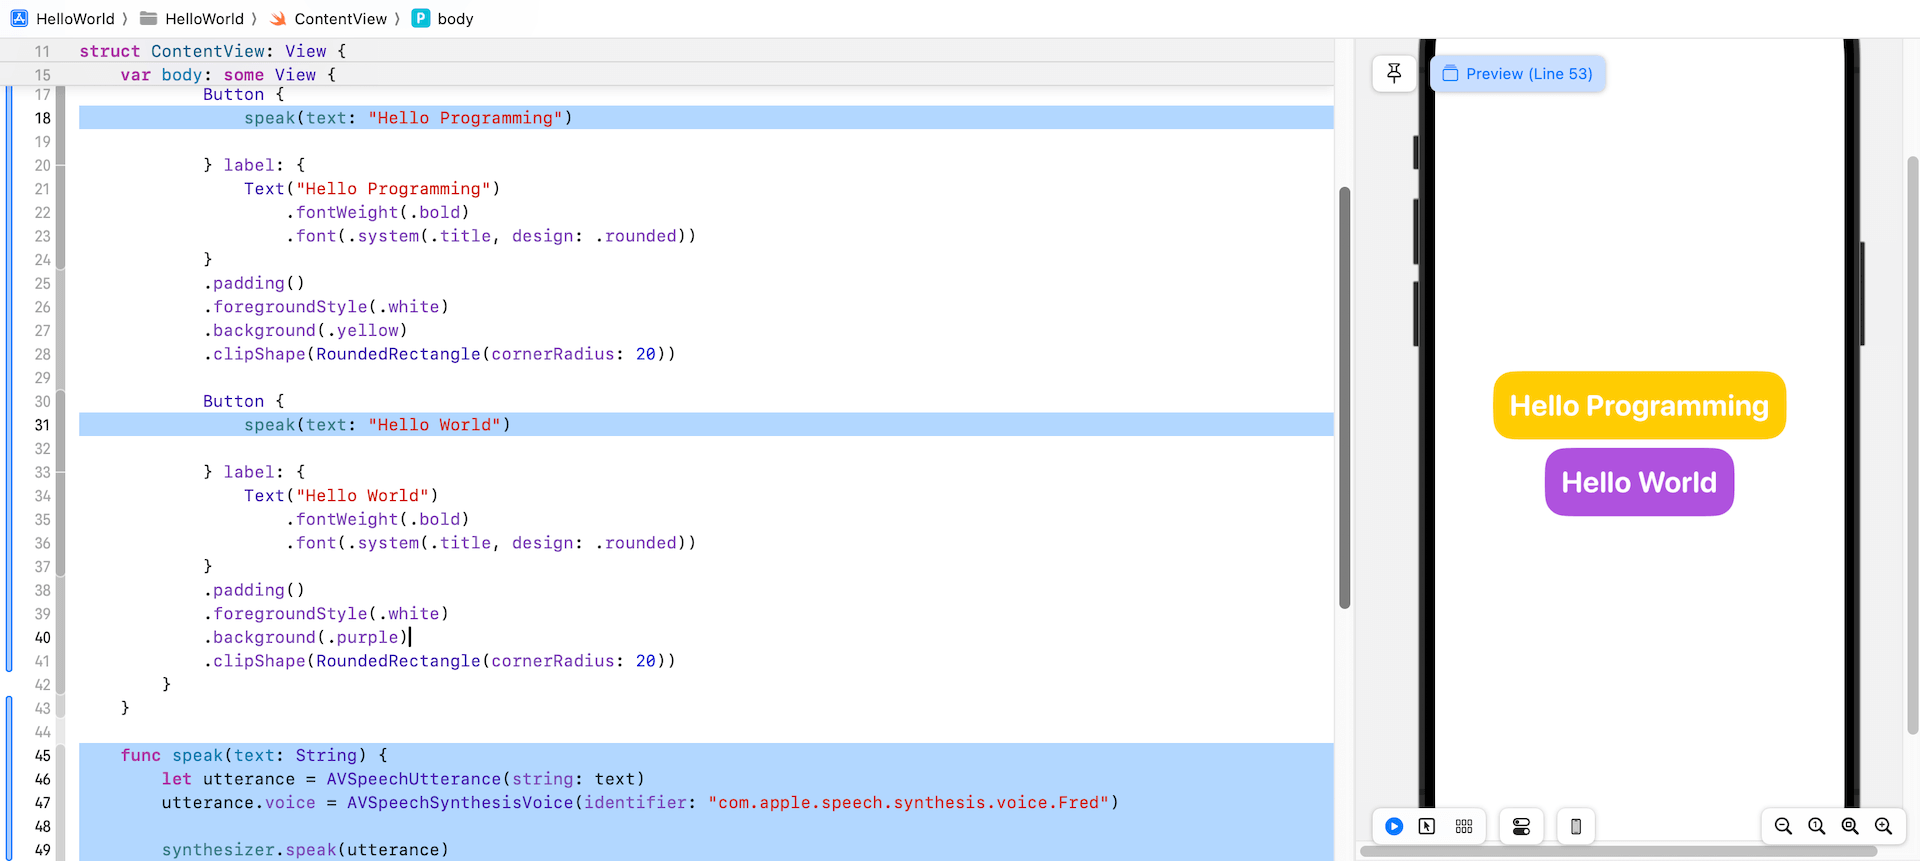
This new method doesn't change the functionality of the application. Both buttons work exactly the same as before. However, as you can see from the final code, it's easier to read and much cleaner.
And, what if you need to introduce another text-to-speech button to the application? You no longer need to duplicate the 4 lines of code but just call the speak method with the text to read. This is why we need to group common operations into methods.
Exercise
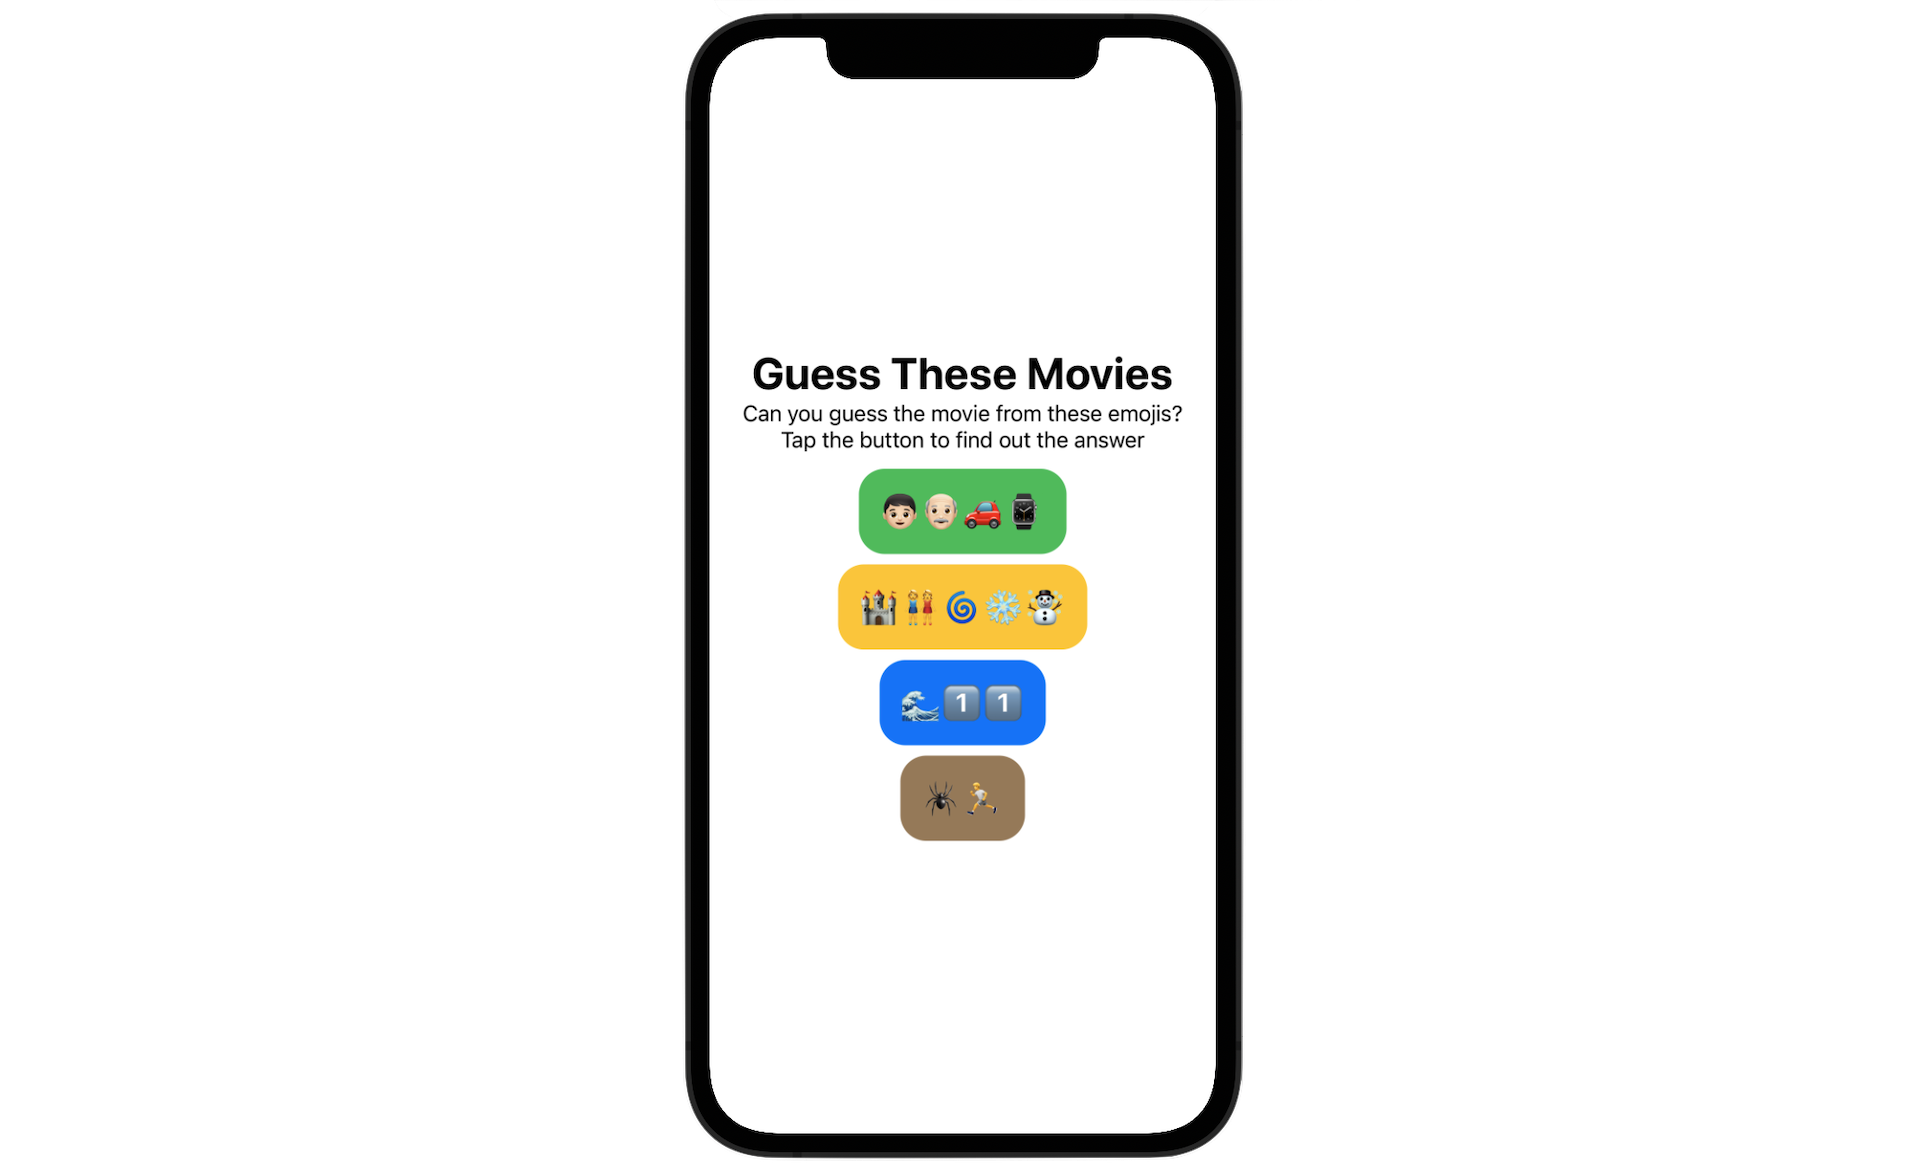
In order to help you fully understand how to work with buttons and methods, here is a simple exercise for you. Your task is to modify the existing code and build a "Guess These Movies" app. The UI and functions are very similar to the Hello World app. Each button displays a set of emoji icons. The player's task is to guess the movie's name from those emojis. By tapping the button, the app will speak out the correct answer. For example, when the player taps the button in blue, the app reads "The answer is Ocean 11!"
Summary
Congratulations! You've built your first iPhone app. It's a simple app, but I believe you already have a better understanding of Xcode, SwiftUI, and the built-in frameworks provided by the iOS SDK. It's easier than you thought, right?
For reference, you can download the complete Xcode project at http://www.appcoda.com/resources/swift7/swiftui-helloworld.zip. For the solution to the exercise, you can download it at http://www.appcoda.com/resources/swift7/swiftui-guessthesemovies.zip
To access the full version of the book, please get the full copy here. You will also be able to access the full source code of the project.