

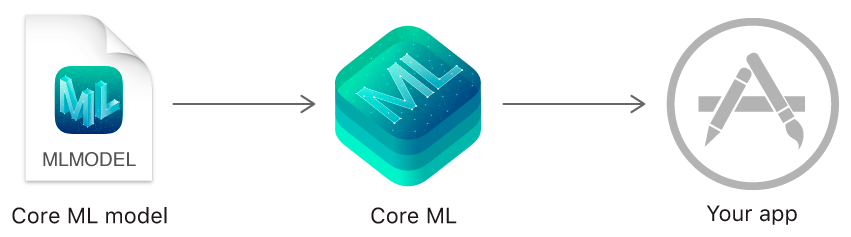
Core ML is Apple’s Machine Learning framework. Released just a year ago, Core ML offers developers a way to integrate powerful and smart machine learning capabilities into their apps with just a few lines of code! This year, at WWDC 2018, Apple released Core ML 2.0- the next version of Core ML all centered around streamlining the process by optimizing the size of the model, improving the performance, and giving developers the ability to customize their own Core ML models.
In this tutorial, I’ll catch you up on all of the new features introduced in Core ML 2.0 and how you can apply it to your Machine Learning app! In case you are new to Core ML, I would recommend getting familiar with Core ML with this tutorial. In case you are familiar with it, let’s get started!
A Quick Recap
There are lots of great apps in the App Store with the ability to perform powerful tasks. For example, you could find an app which understands text. Or maybe an app which knows what workout you’re doing based on the motion of your device. Even further, there are apps which apply filters to images based on a previous image. These apps have one thing in common: they are all examples of machine learning and all of them can be created with a Core ML model.
Source: Apple
Core ML makes it simple for developers to integrate machine learning models into their apps. You can create an app which understands context in a conversation or can recognize different audio. Furthermore, Apple has made it possible for developers to take the extra step with realtime image analysis and natural language understanding through 2 of their frameworks: Vision and Natural Language.
With the VNCoreMLRequest API and the NLModel API, you can heavily increase your app’s ML capabilities since Vision and Natural Language are built upon Core ML!
This year, Apple was focused on 3 main points for helping Core ML developers.
- The model size
- The performance of a model
- Customizing a model
Let’s explore these three points!
Model Size
One huge advantage of Core ML is that everything is done on-device. This way, a user’s privacy is always safe and the computation can be calculated from anywhere. However, as more accurate machine learning models are used, they can have a larger size. Importing these models into your apps can take up a large amount of space on a user’s device.
Apple decided to give developers the tools to quantize their Core ML models. Quantizing a model refers to the techniques used to store and calculate numbers in a more compact form. At the core roots of any machine learning model, it’s just a machine trying to compute numbers. If we were to reduce the numbers or store them in a form that would take less space, we can drastically reduce the size of a model. This can lead to a reduced runtime memory usage and faster calculations!
There are 3 main parts to a machine learning model:
- The number of models
- The number of weights
- The size of the weights
When we quantize a model, we are reducing the size of the weight! In iOS 11, Core ML models were stored in 32-bit models. With iOS 12 and Core ML 2, Apple has given us the ability to store the model in 16-bit and even 8-bit models! This is what we’ll be looking at in this tutorial!
In case you aren’t familiar with what weights are, here’s a really good analogy. Say that you’re going from your house to the supermarket. The first time, you may take a certain path. The second time, you’ll try to find a shorter path to the supermarket, since you already know your way to the market. And the third time, you’ll take an even shorter route because you have the knowledge of the previous 2 paths. Each time you go to the market, you’ll keep taking a shorter path as you learn over time! This knowledge of knowing which route to take is known as the weights. Hence, the most accurate path, is the one with the most weights!
Let’s put this into practice. Time for some code!
Weight Quantization
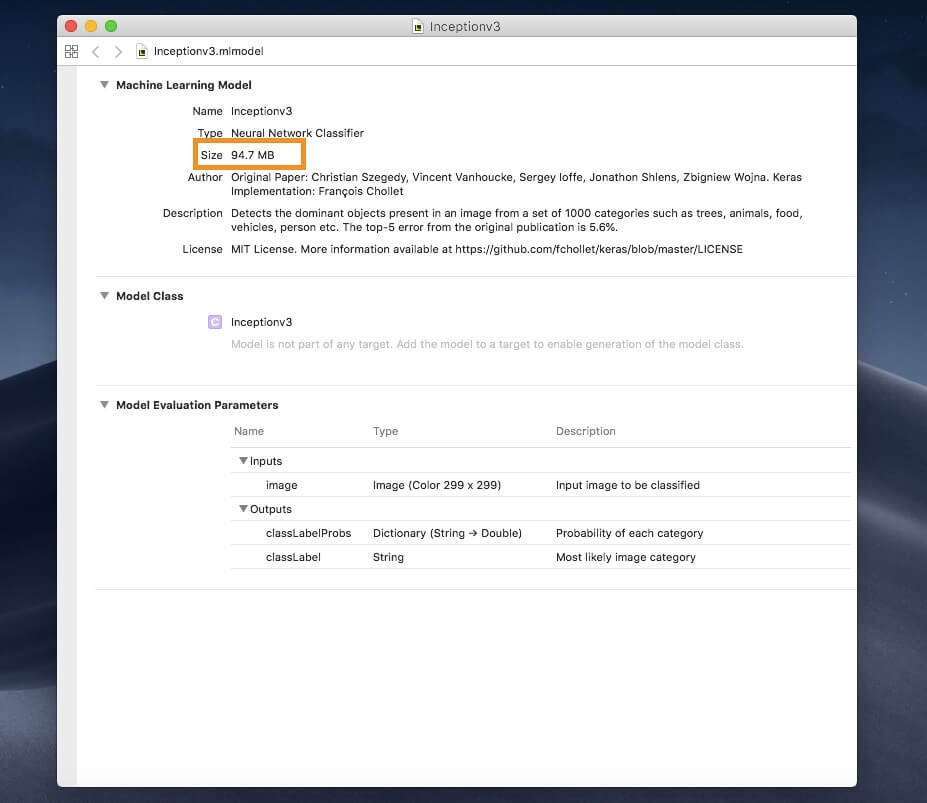
As an example, let’s use a popular machine learning model called Inception v3 for demo. You can download the model in the Core ML format here.
Opening this model, you can see that it takes up quite a bit of space at 94.7 MB.
We will use the Python package coremltools to quantize this model. Let’s see how!
In case you don’t have python or pip installed on your device, you can learn the installation procedures over here.
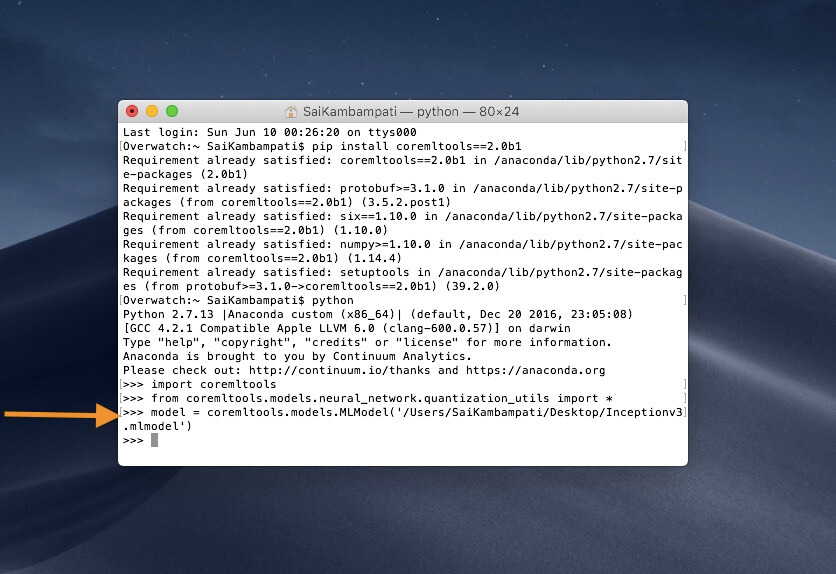
First, you need to make sure to install the beta version of coremltools. Open terminal and type in the following:
pip install coremltools==2.0b1
You should see an output like this.
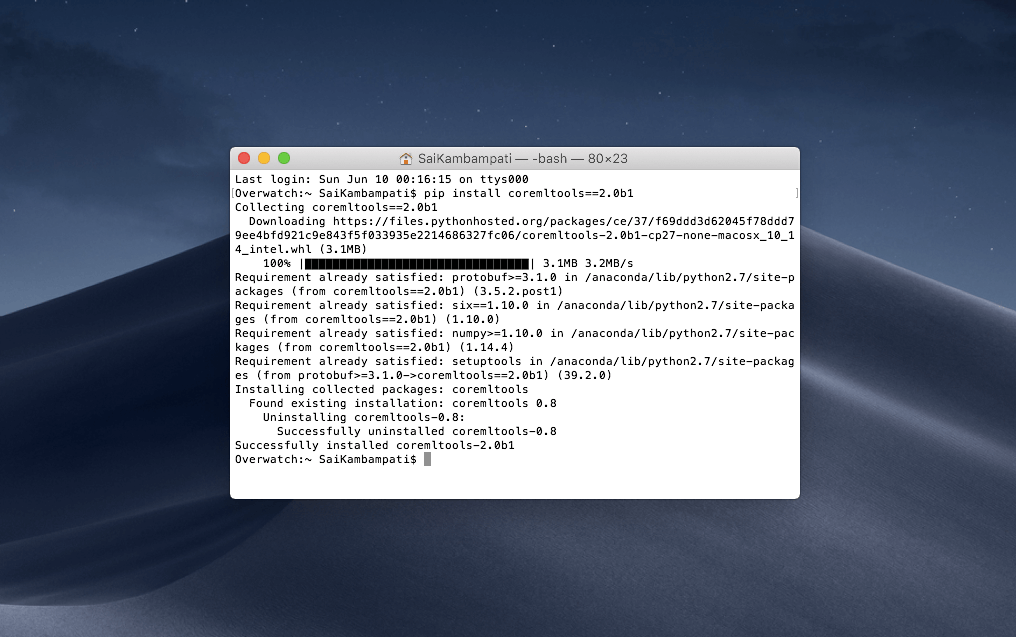
This command successfully installs the beta version of Core ML Tools beta 1. The next few steps require some Python. No worries however, it’s really simple and doesn’t require too much code! Opening up a Python editor of your choice or follow along in the Terminal. First, let’s import the coremltools package. Type python in the Terminal and then type the following once the editor shows up:
import coremltools
from coremltools.models.neural_network.quantization_utils import *
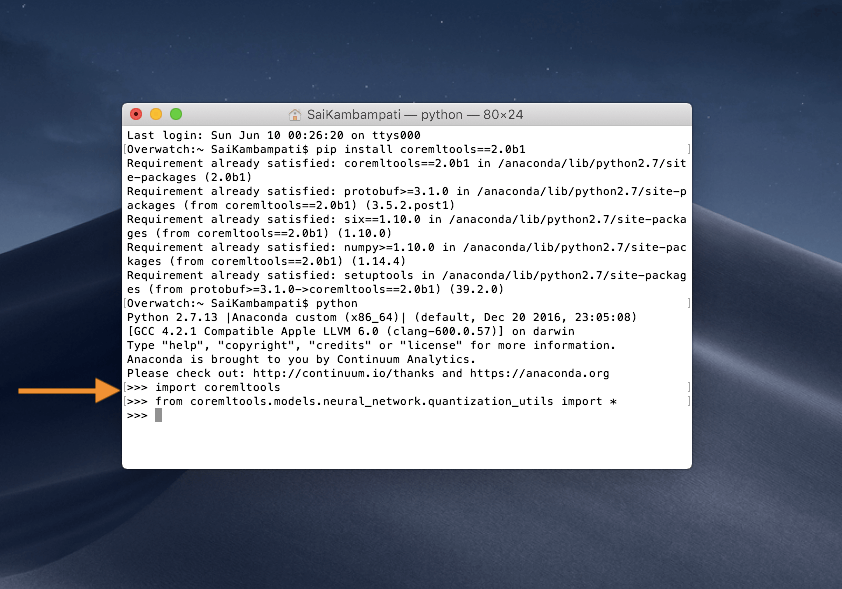
This imports the Core ML tools package, as well as, all the quantization utilities. Next, let’s define a variable model and set its URL to the Inceptionv3.mlmodel just downloaded.
model = coremltools.models.MLModel('/PATH/TO/Inceptionv3.mlmodel')
Before we quantize the model (it takes only 2 lines!), let me give you some background information of neural network.
A neural network is composed of different layers. These layers are nothing but math function which have many parameters. These parameters are known as weights.
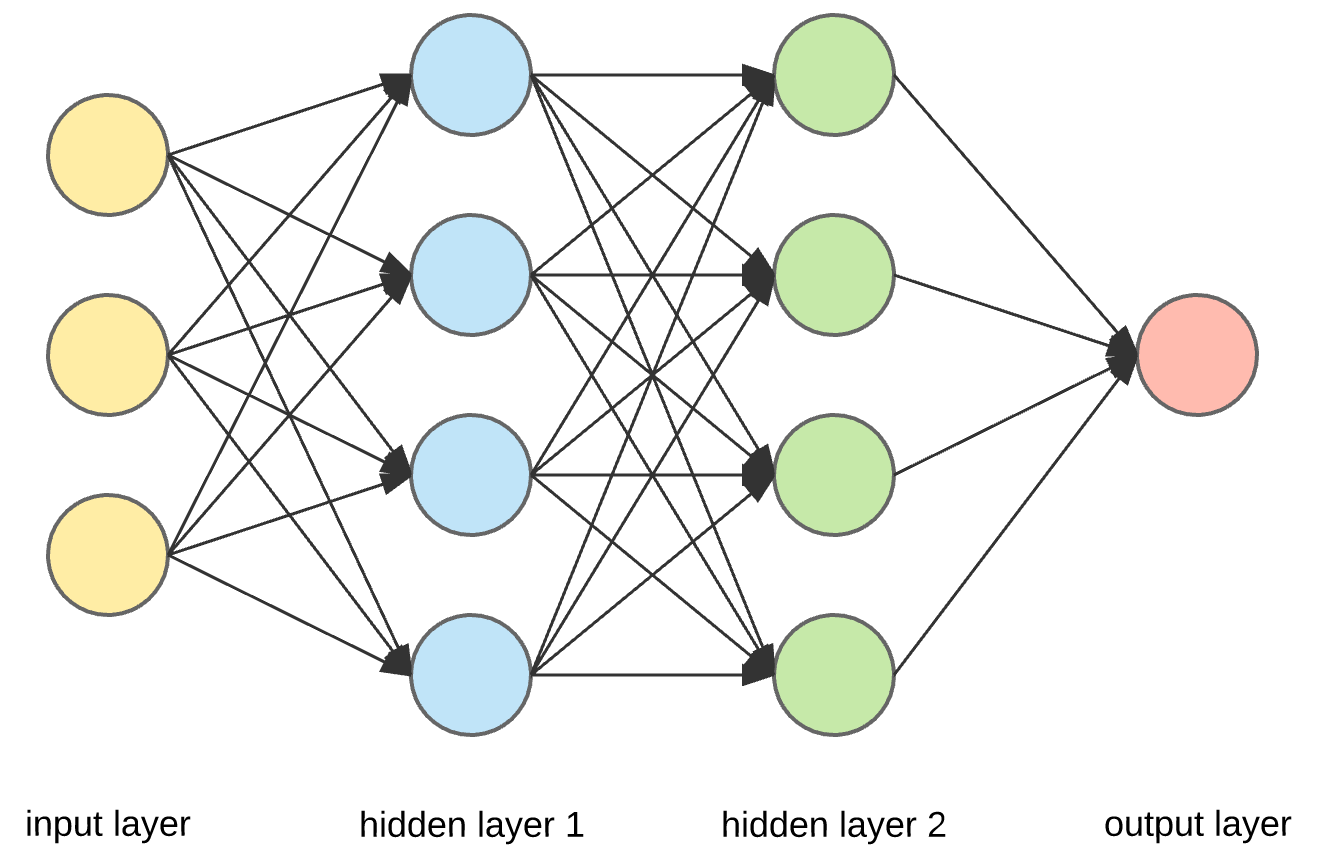
Source: Towards Data Science
When we quantize weights, we take the minimum value of a weight and the maximum value of a weight and map them. There are many ways to map them but the most commonly used ones are linear and lookup. Linear Quantization is when you map the weights evenly and reduce them. In a Lookup Table Quantization, the model constructs a table and groups the weights around based on similarity and reduces them.
If this sounds complicated, don’t worry. All we need to do is choose the number of bits we want our model to be represented by and the algorithm to choose. First, let’s see what happens if we choose linearly quantize a model.
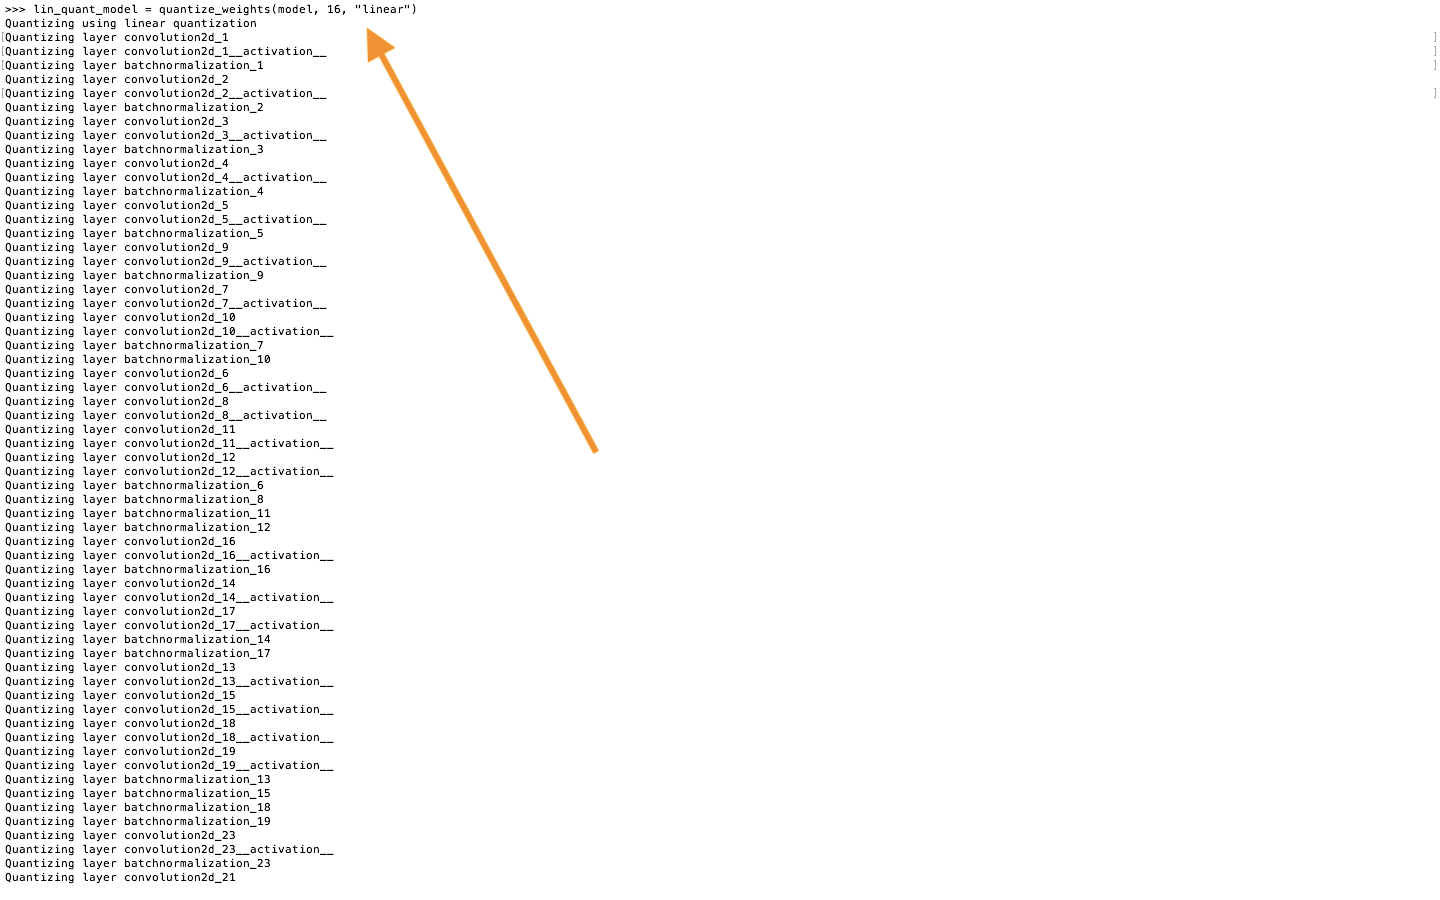
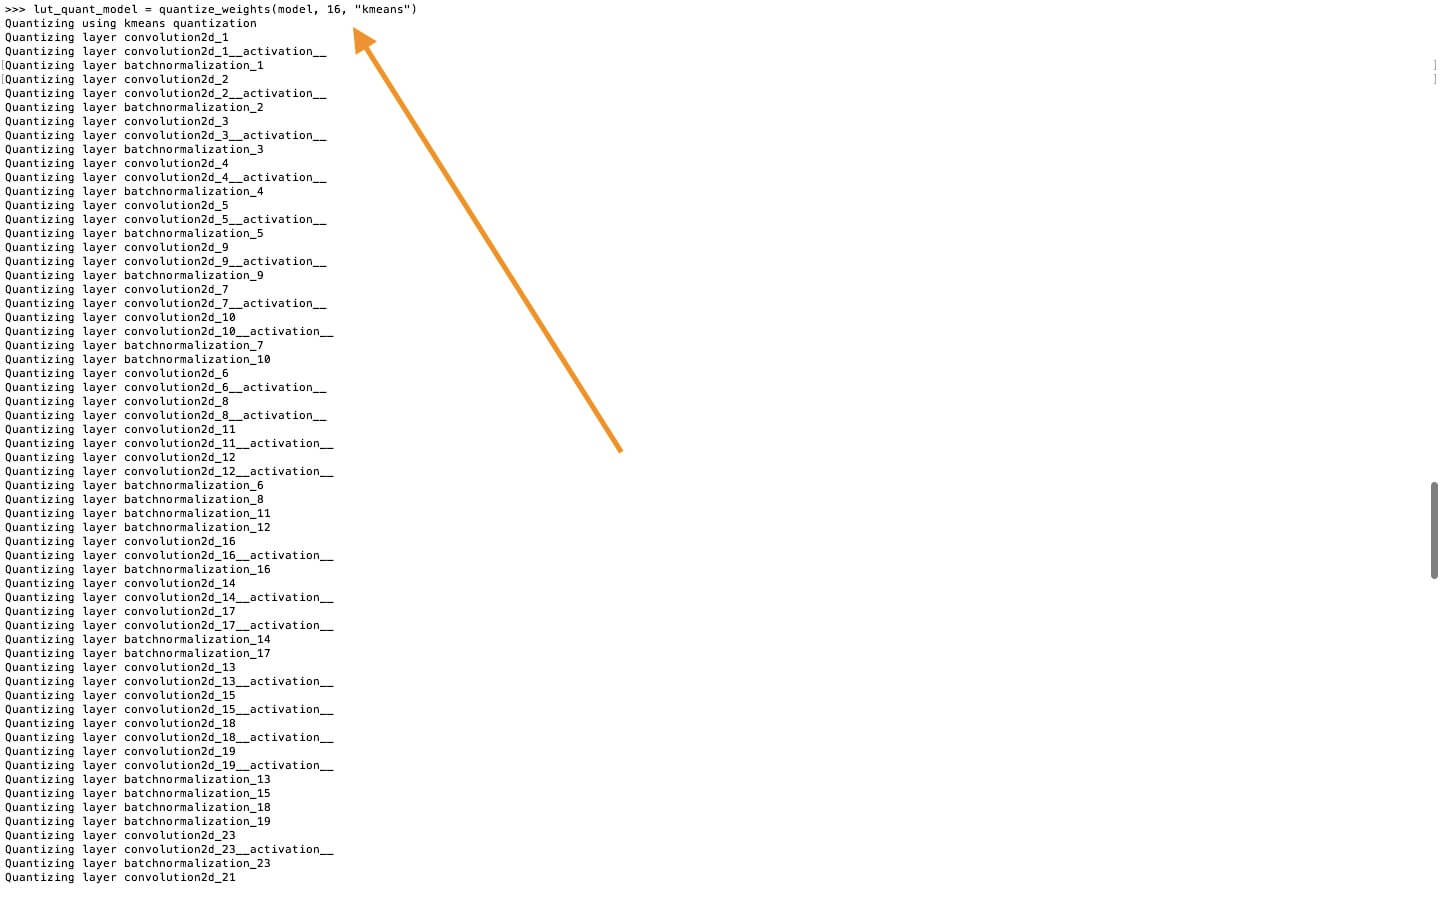
lin_quant_model = quantize_weights(model, 16, "linear")
In the above code, we quantize the weights of the Inceptionv3 model to 16 bits and use linear quantization. Running the code should give you a long list of every layer the program is quantizing.
Let’s save the model and see how it compares to the original model. Choose a path where to save it and type the following.
lin_quant_model.save('Path/To/Save/QuantizedInceptionv3.mlmodel')
Now open both models and compare the sizes.
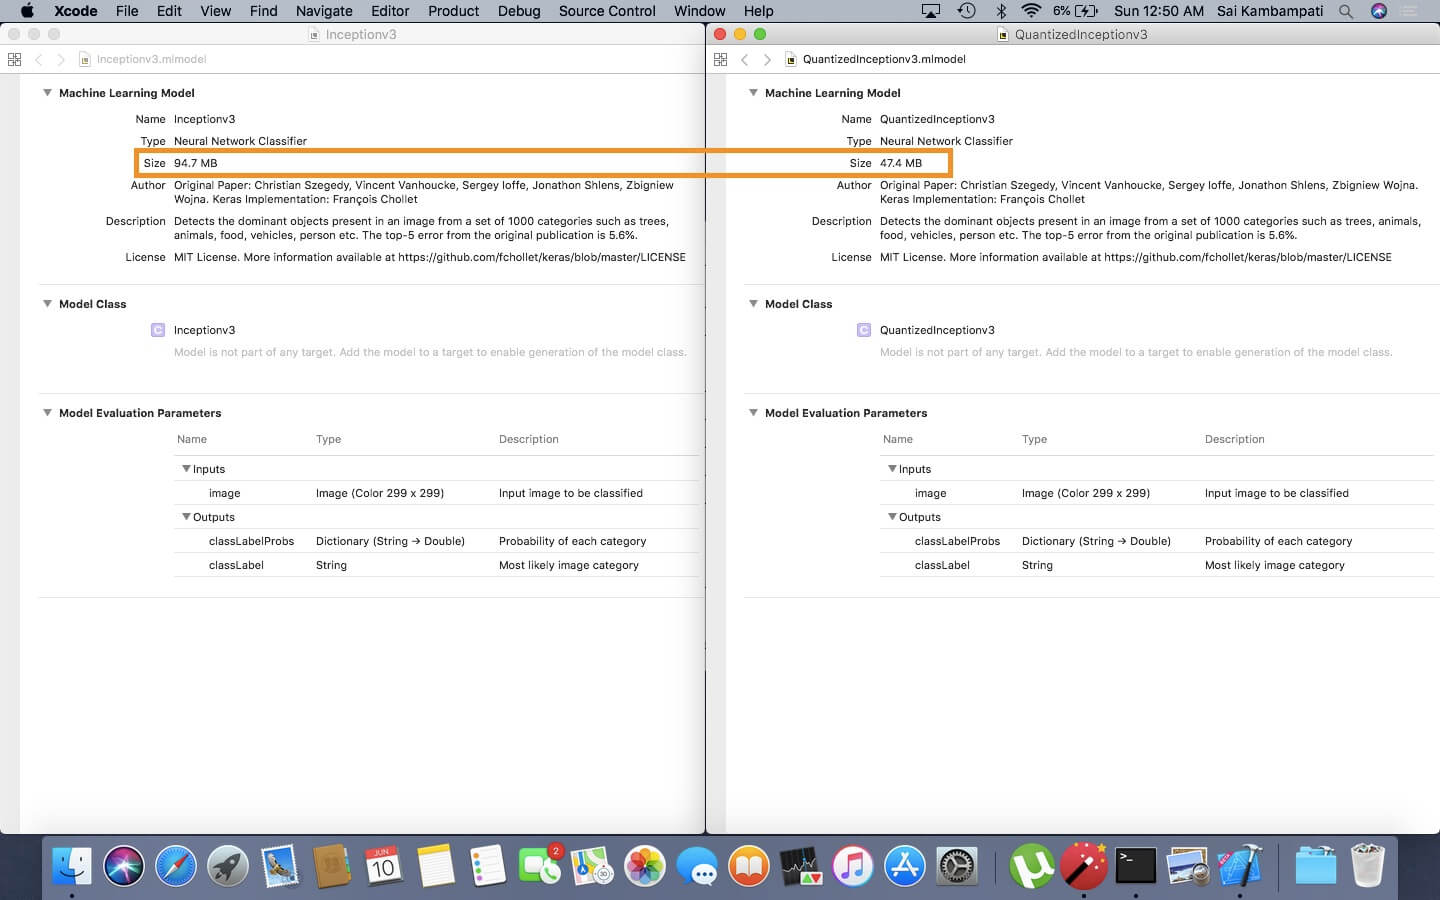
When we represent the Inceptionv3 model in a 16-bit format, it takes up less space!
However, it is important to remember what weight quantization really is. Earlier, in my analogy, I said that more weights yields more accuracy. When we quantize a model, we are also reducing the accuracy of the model along with the size. Quantization is an accuracy tradeoff. Quantized models are approximations of the size of the weight, so it is always important to run your quantized models and see how they perform.
Ideally, we want to quantize our models while retaining the highest possible accuracy. This can be done by finding the right quantization algorithm. In the previous example, we used Linear Quantization. Now let’s try to use Lookup Quantization now and see what happens. Just like before, type the following into Terminal:
lut_quant_model = quantize_weights(model, 16, "kmeans")
When the model is done quantizing, we need to compare both our lin_quant_model and our lut_quant_model to the original model by running it through some sample data. This way, we can find out which quantized model was most similar to the original model. Download a folder of sample images here. Type the following line and we can see which model performed better!
compare_models(model, lin_quant_model, '/Users/SaiKambampati/Desktop/SampleImages')
This may take a while but after both models are done processing, you will receive an output which looks like this:
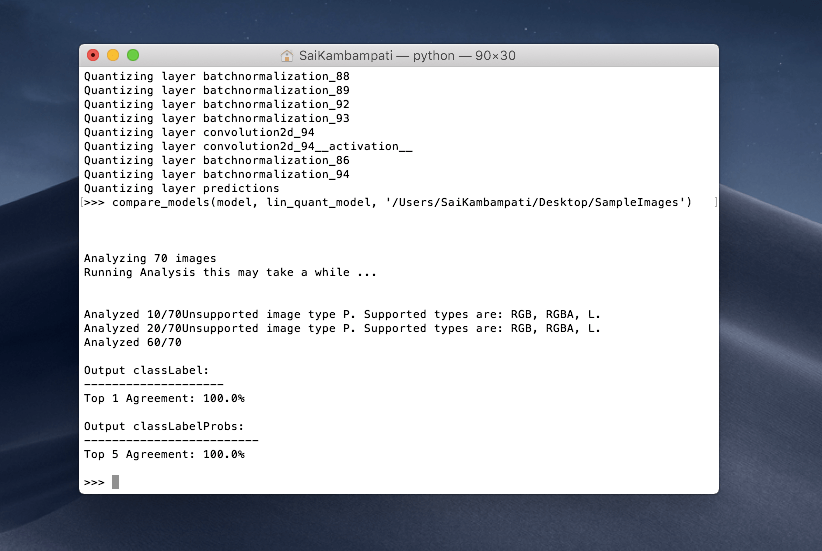
We are interested in the Top 1 Agreement. It shows 100% which means that it matches 100% with our model! This is great for us as we now have a quantized model which takes less space and has approximately the same accuracy as our original model! We can import this into a project now if we want but let’s compare the Lookup Table Quantized model as well!
compare_models(model, lut_quant_model, '/Users/SaiKambampati/Desktop/SampleImages')
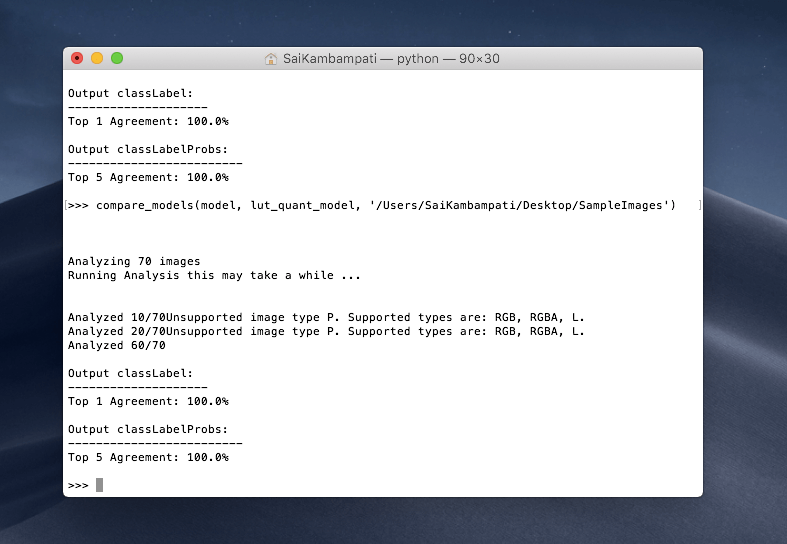
We receive an output of 100% as well so both models are compatible! I encourage you to play around with quantizing different models. In the above example, we quantized the Inceptionv3 model down to a 16-bit model. See if you can continue to quantize the model to an 8-bit representation and even a 4-bit representation and compare it with the sample data! How did it perform?
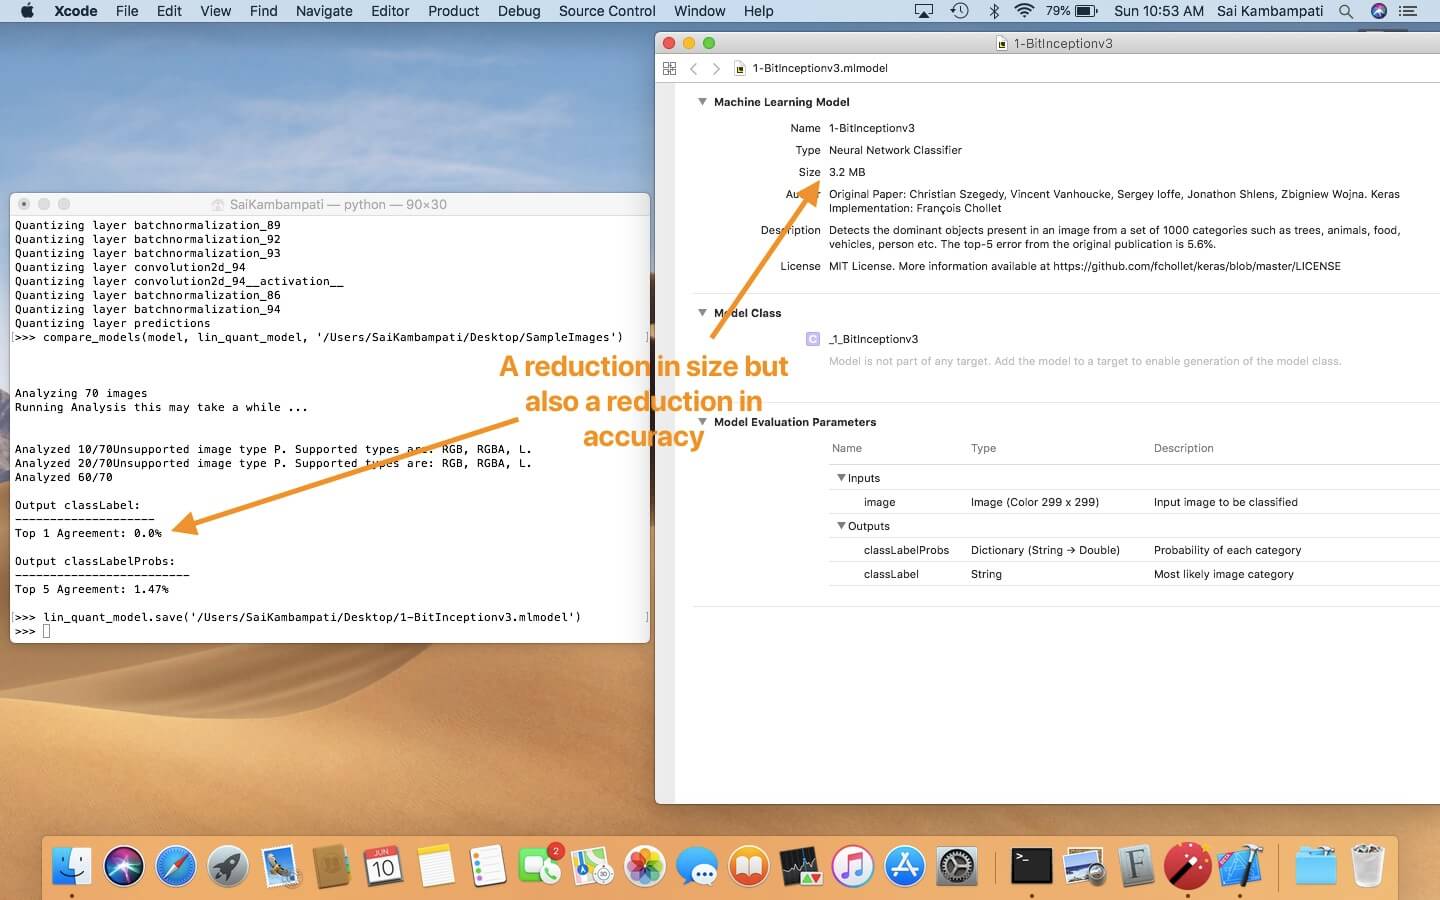
The above image depicts what happened when I quantized the Inceptionv3 model using a linear algorithm to a 1-bit representation! As you can see, the model size drastically reduced but so did the accuracy! In fact, it is completely inaccurate with a 0% accuracy. Play around with quantization to try and find the happy medium. Always remember to test your quantized models to make sure they perform accurately!
Performance
The next point Apple focused on with Core ML 2 was performance. Since we are running the ML computations on-device, we want it to be fast and accurate. This can be pretty complicated. Luckily, Apple has provided us with a way to improve the performance of our CoreML models. Let’s walk through an example.
Style Transfer is a machine learning application which basically transforms a certain image into the style of another. If you’ve the Prisma app before, that’s a sample use of Style Transfer.

If we were to look into the neural network of style transfer, this is what we would notice. There are a certain set of inputs for this algorithm. Each layer in the neural network adds a certain transformation to the original image. This means that the model has to take in every input and map it out to an output and make a prediction from that. The prediction then helps in the creation of the weights. What would this look like in code?
// Loop over inputs
for i in 0..< modelInputs.count {
    modelOutputs[i] = model.prediction(from: modelInputs[i], options: options)
}
In the above code, you see that for each input, we are asking the model to generate a prediction and yield an output based on some options. However, iterating over every input can take a long time.
To combat this, Apple has introduced a brand new Batch API! Unlike a for loop, a batch in machine learning is when all the inputs are fed to the model and an accurate prediction is its result! This can take much less time and more importantly, much less code!
Here is the above for-loop code written with the new Batch Predict API!
modelOutputs = model.prediction(from: modelInputs, options: options)
That’s all! Just one line of code is all it takes! You’re probably wondering, “Wait! I never did this before? This sounds complicated. Where do I even use this?” That bring me to my last point which is Customization.
Customization
When you open the hood of a neural network, you see that they are comprised of many layers. However, there may be some scenarios when you are trying to convert a neural network from Tensorflow to Core ML. Or maybe a pipeline from Keras to Core ML. However, there may be the occasional example where Core ML simply does not have the tools to convert the model correctly! What do I mean by this? Let’s take another example.
Image recognition models are built using a Convolutional Neural Network (CNN). CNNs consists of series of layers which are highly optimized. When you convert a neural network from one format to Core ML, you are transforming each layer. However, there may be some rare scenario where Core ML simply does not provide the tools to convert a layer. In the past, you could not do anything about it but with iOS 12, the Apple engineers have introduced the MLCustonLayer protocol which allows developers to create their own layers in Swift. With MLCustomLayer, you can define the behavior of your own neural network layers in Core ML models. However, it’s worth noting that custom layers only work for neural network models.
Now if this sounds very complicated, don’t worry. It usually takes a skilled data scientists or an machine learning engineer to understand all the intricacies of a neural network and have the talent of writing their own model. This is beyond the scope of the tutorial so we won’t delve into this.
Conclusion
That sums up all the new changes in Core ML 2.0. Core ML 2.0 aims to make models smaller, faster, and more customizable. We saw how to reduce the size of our Core ML models through weight quantization, improve the performance of our model through the new Batch API, and examples where we might need to write custom layers for our model. As developers, I predict (see what I did there) that you’ll be using weight quantization more than the other two techniques (Batch API and Custom Layers).
If you are interested in exploring Core ML 2.0 even more, here are some excellent resources to look over!


