Chapter 3
Hello World! Build Your First App in Swift

Learn by doing. Theory is nice but nothing replaces actual experience.
– Tony Hsieh
By now you should have installed Xcode and some understandings of Swift. If you have skipped the first two chapters, please stop here and go back to read them. You need to have Xcode 15 installed in order to work on all exercises in this book.
You may have heard of the "Hello World" program if you have read any programming book before. Hello World is a program for the first-time programmer to create. It's a very simple program that outputs "Hello, World" on the screen of a device. It's a tradition in the programming world. Let's follow the programming tradition and create a "Hello World" app using Xcode.
Despite its simplicity, the "Hello World" program serves a few purposes:
- It gives you an overview of the syntax and structure of Swift, the new programming language of iOS.
- It also gives you a basic introduction to the Xcode environment. You'll learn how to create an Xcode project and lay out your user interface using Interface Builder. Even if you've used Xcode before, you'll learn what's new in the latest version of Xcode.
- You'll learn how to compile a program, build the app and test it using the built-in simulator.
- Lastly, it makes you think programming is not difficult. I don't want to scare you away from learning programming. It'll be fun.
Your First App
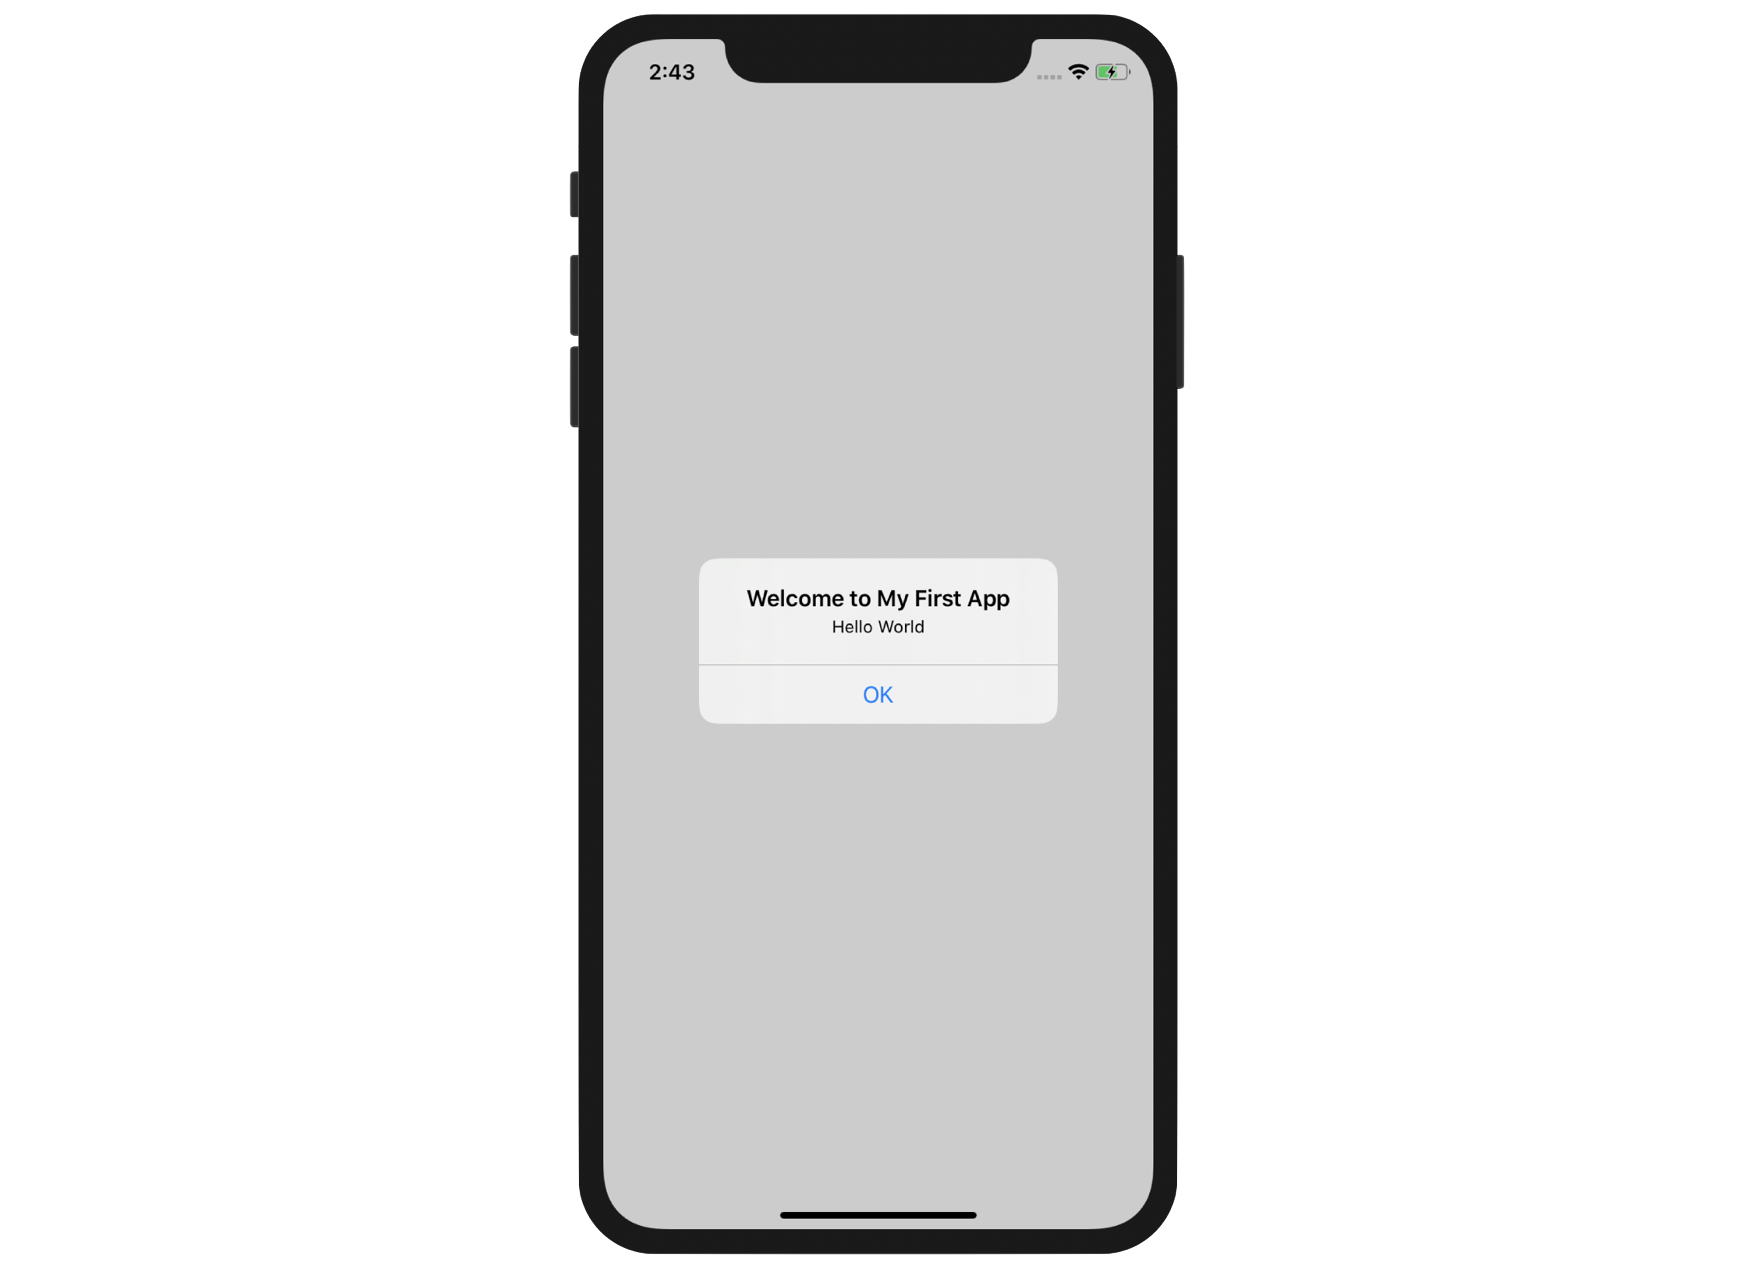
Your first app, as displayed in figure 3-1, is very simple and just shows a "Hello World" button. When a user taps the button, the app shows a welcome message. That's it. Extremely simple but it helps you kick off your iOS programming journey.
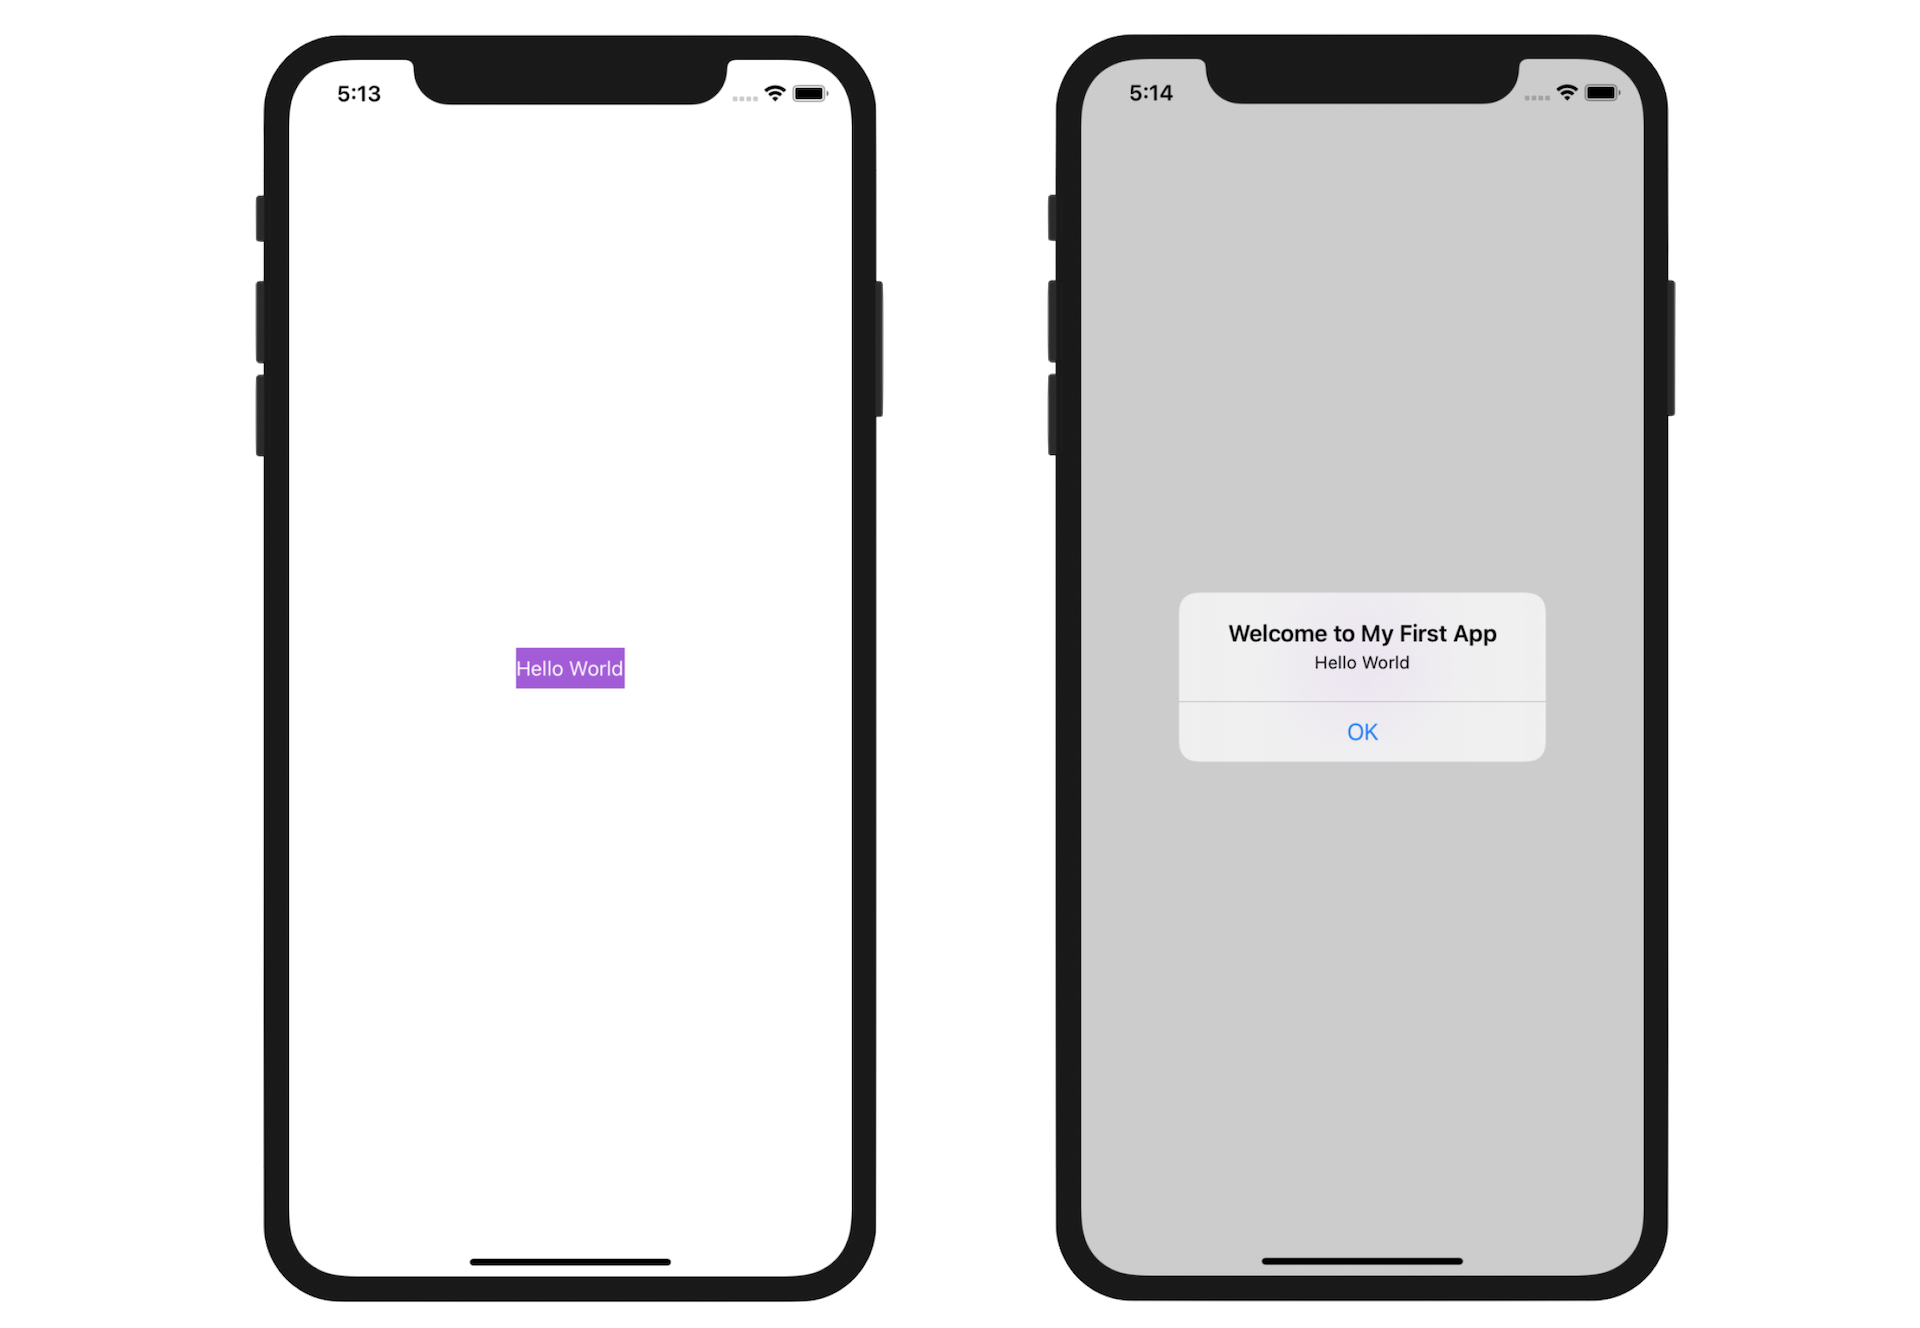
But this is just a start. After going through the challenges in this chapter, you will keep improving your first app to make it more interesting. To give you a sneak peak, figure 3-2 is your final deliverable.
When you're building your first app, I want you to keep one thing in mind: forget about the code and keep doing. Even though you now have some basic knowledge of Swift, I'm quite sure that you will find some of the code difficult to understand. No worries. Just focus on the exercises, and get yourself familarized with the Xcode environment. We will talk about the code in the next chapter.
Let's Jump Right Into the Project
First, open Xcode. Once launched, Xcode displays a welcome dialog. From here, choose "Create a new Xcode project" to start a new project.
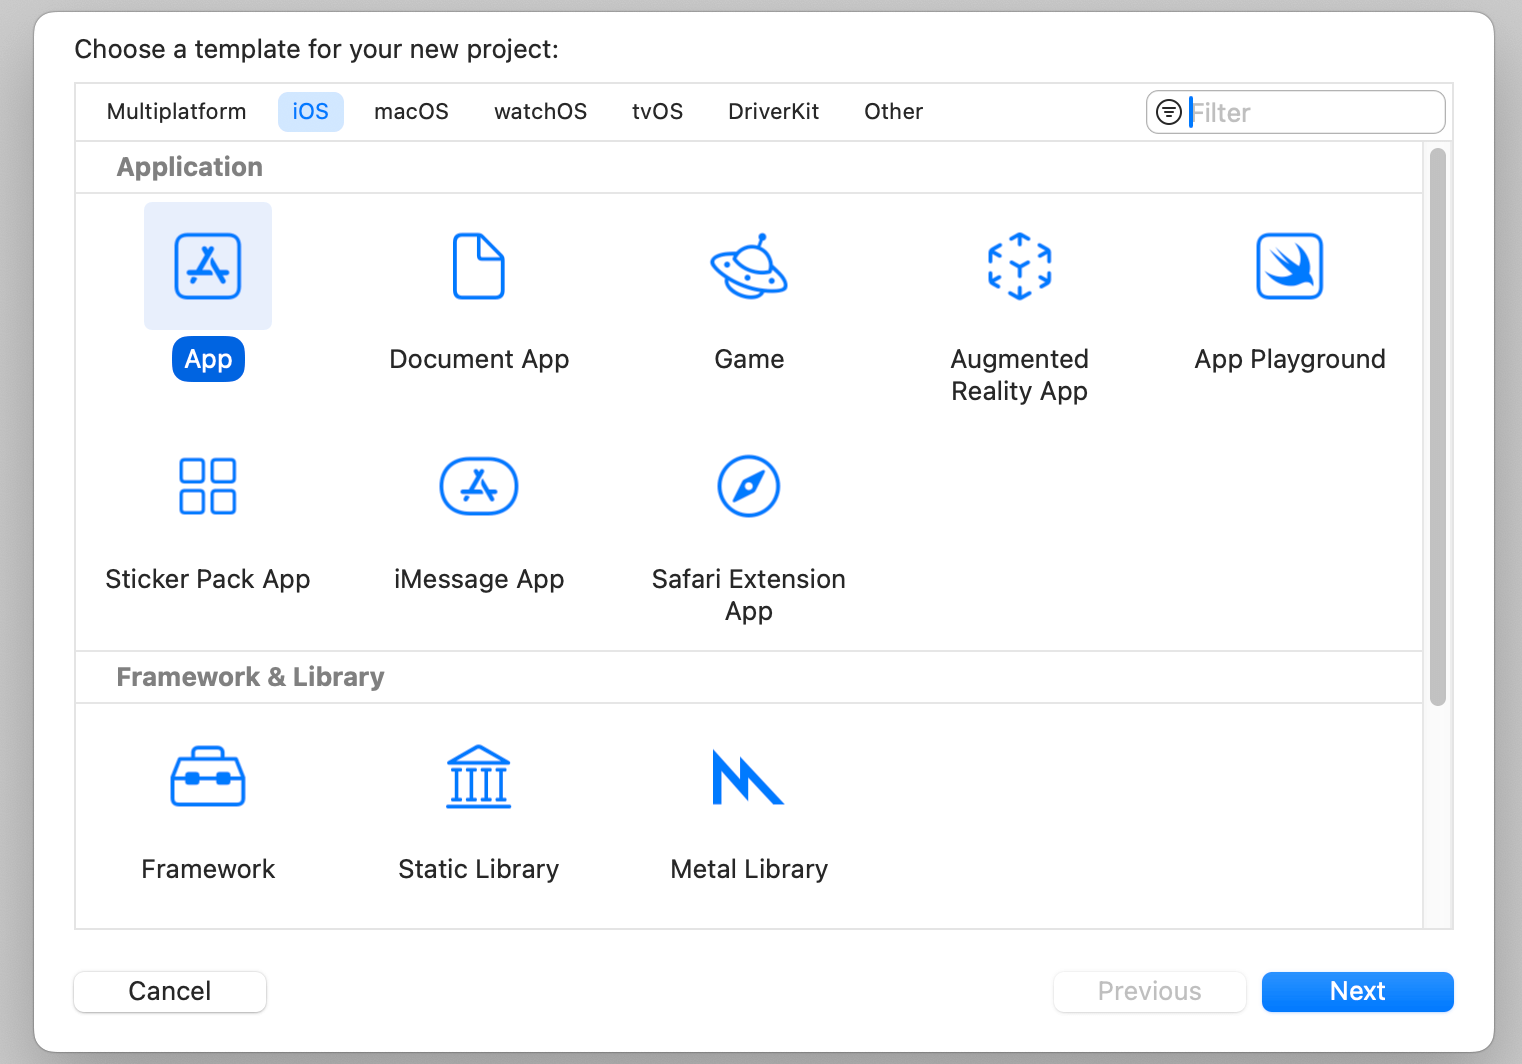
Xcode shows various project templates for selection. Each template serves different purposes and help you easier to get started with the development of a particular type of application. Say, if you want to develop a sticker pack for the Messages app, you will use the Sticker Pack App template. However, in most case, the App template is good enough for creating an iOS app. So, choose iOS > App and click Next.
This brings you to the next screen to fill in all the necessary options for your project.
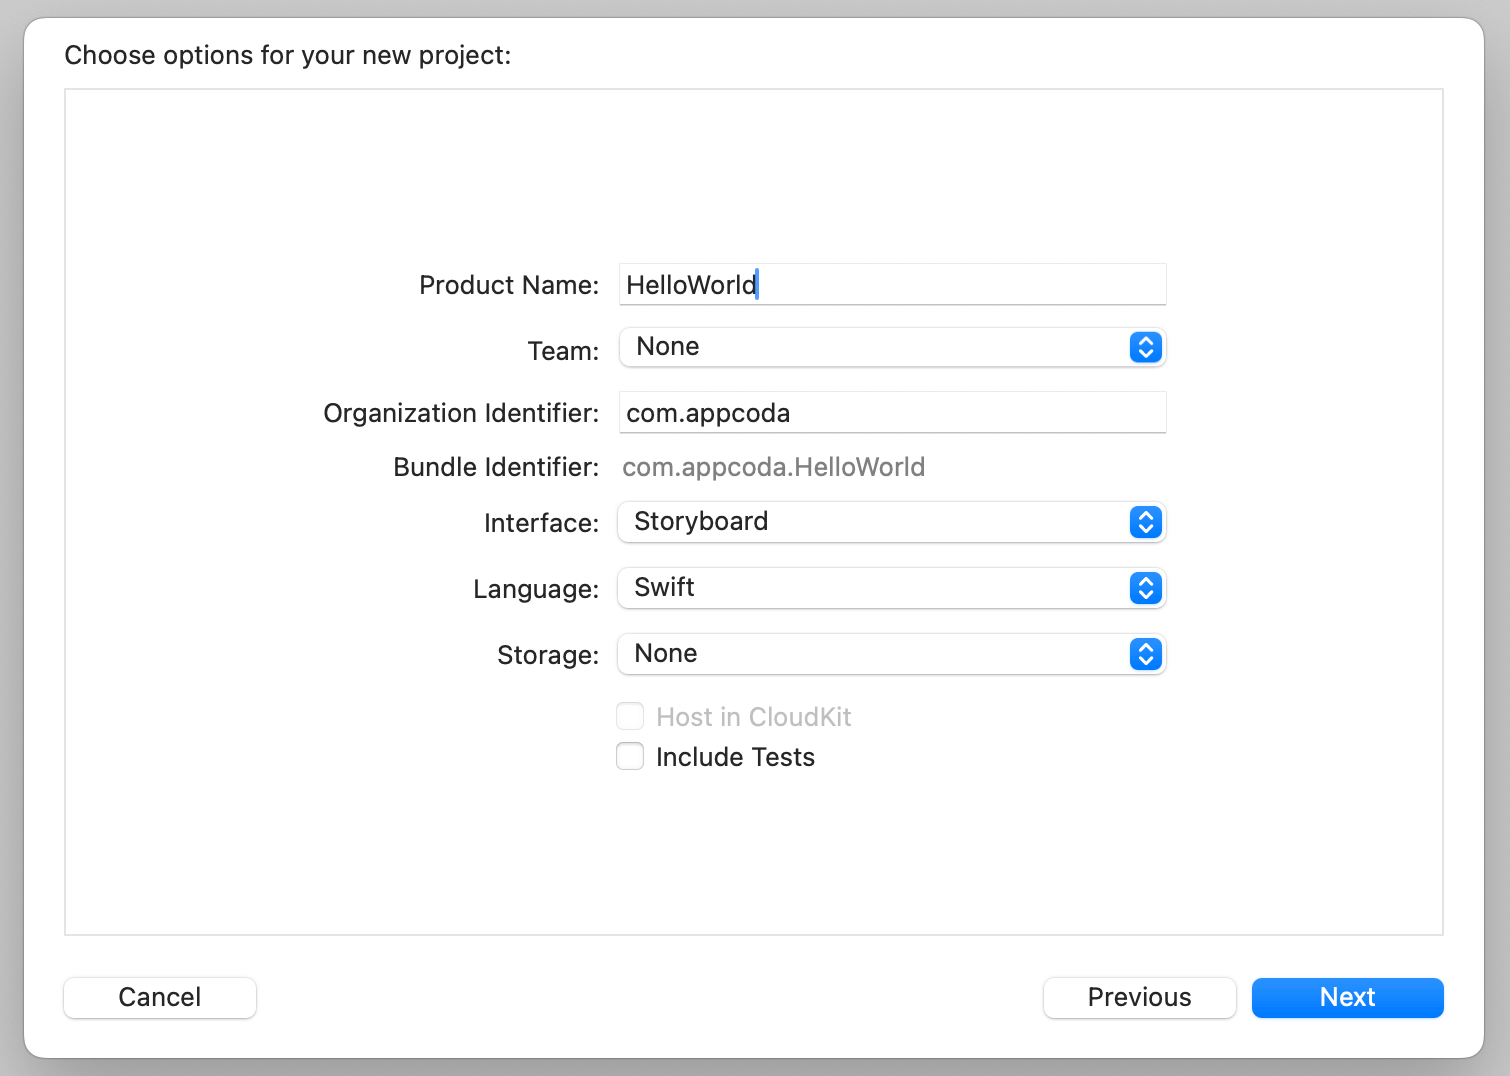
You can simply fill in the options as follows:
- Product Name: HelloWorld – This is the name of your app.
- Team: Just leave it as it is. You do not set the team yet. For your first app, just skip this step.
- Organization Identifier: com.appcoda – It's actually the domain name written the other way round. If you have a domain, you can use your own domain name. Otherwise, you may use "com.
". For instance, your name is Pikachi. Fill in the organization identifier as "com.pikachi". - Bundle Identifier: com.appcoda.HelloWorld - It's a unique identifier of your app, which is used during app submission. You do not need to fill in this option. Xcode automatically generates it for you.
- Interface: Storyboard - Xcode now supports two ways to build UI. Please change the option to
Storyboard. In this book, we use Storyboard. If you want to learn SwiftUI, you can refer to our new book (https://www.appcoda.com/swiftui). - Language: Swift – Xcode supports both Objective-C and Swift for app development. As this book is about Swift, we use Swift to develop the project.
- Include Tests: [unchecked] – Do not select this option. You do not need any tests for this simple project.
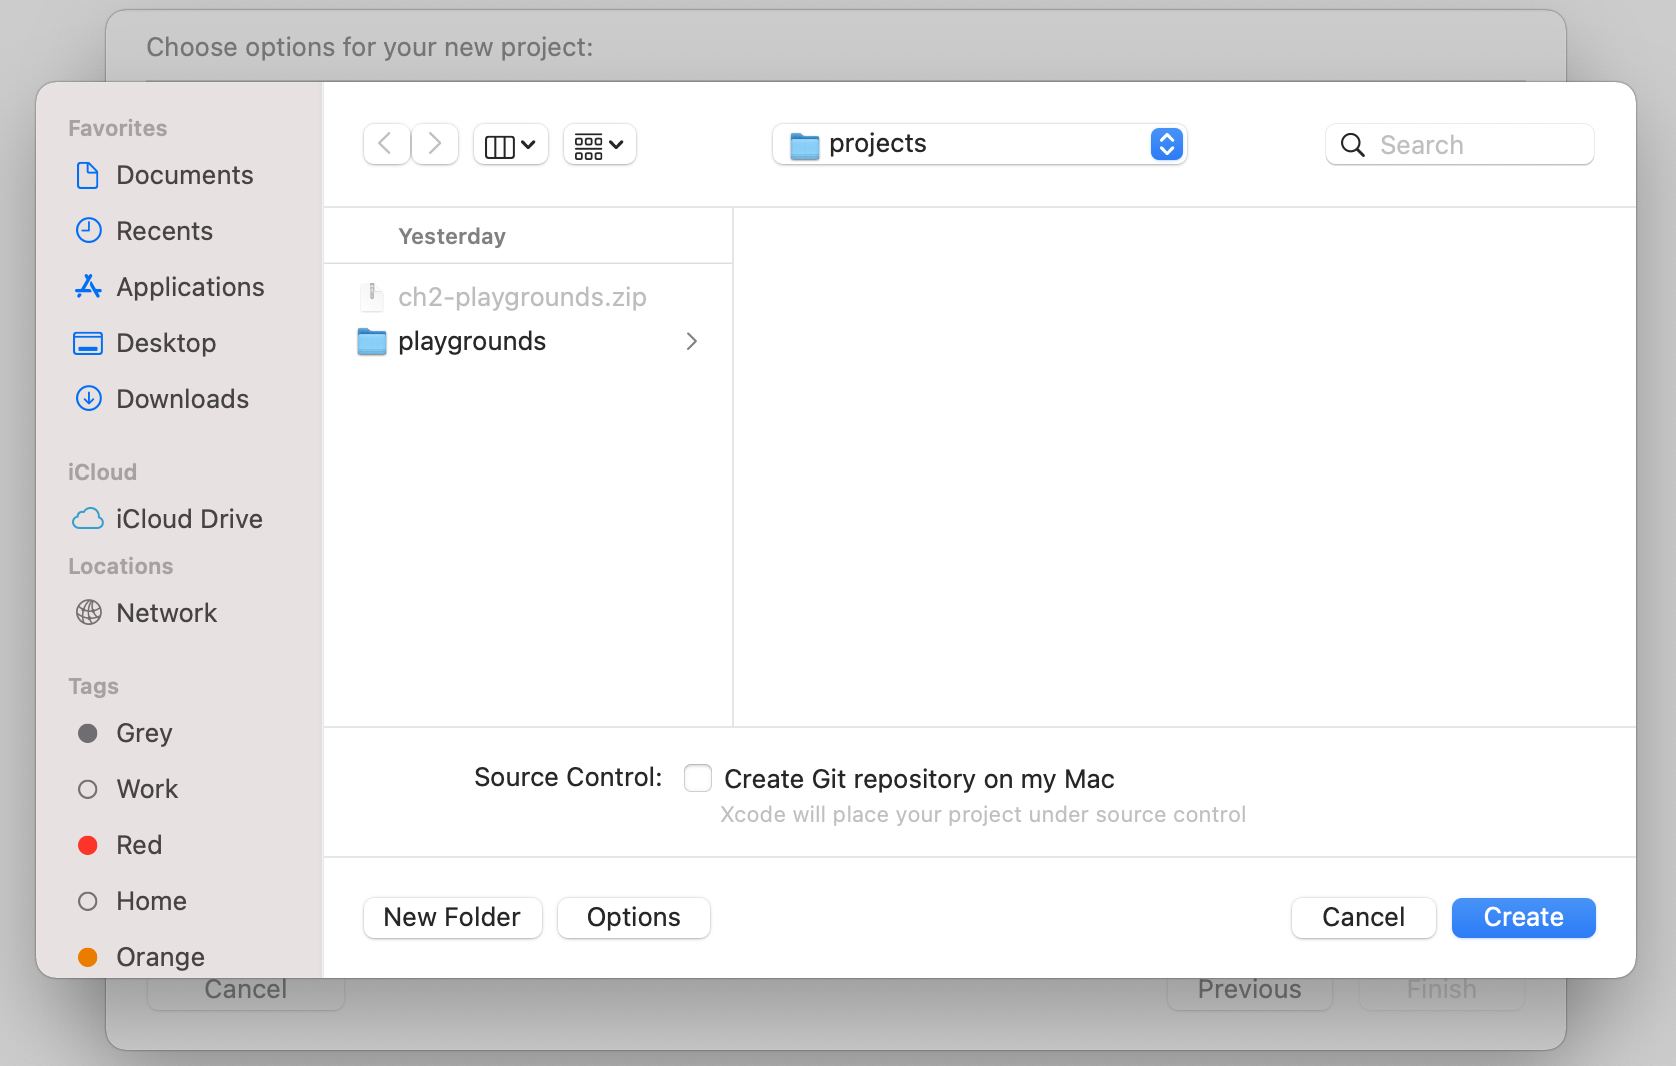
Click "Next" to continue. Xcode then asks you where to save the "HelloWorld" project. Pick any folder (e.g. Desktop) on your Mac. You may notice there is an option for source control. Just deselect it. We do not need to use the option in this book. Click "Create" to continue.
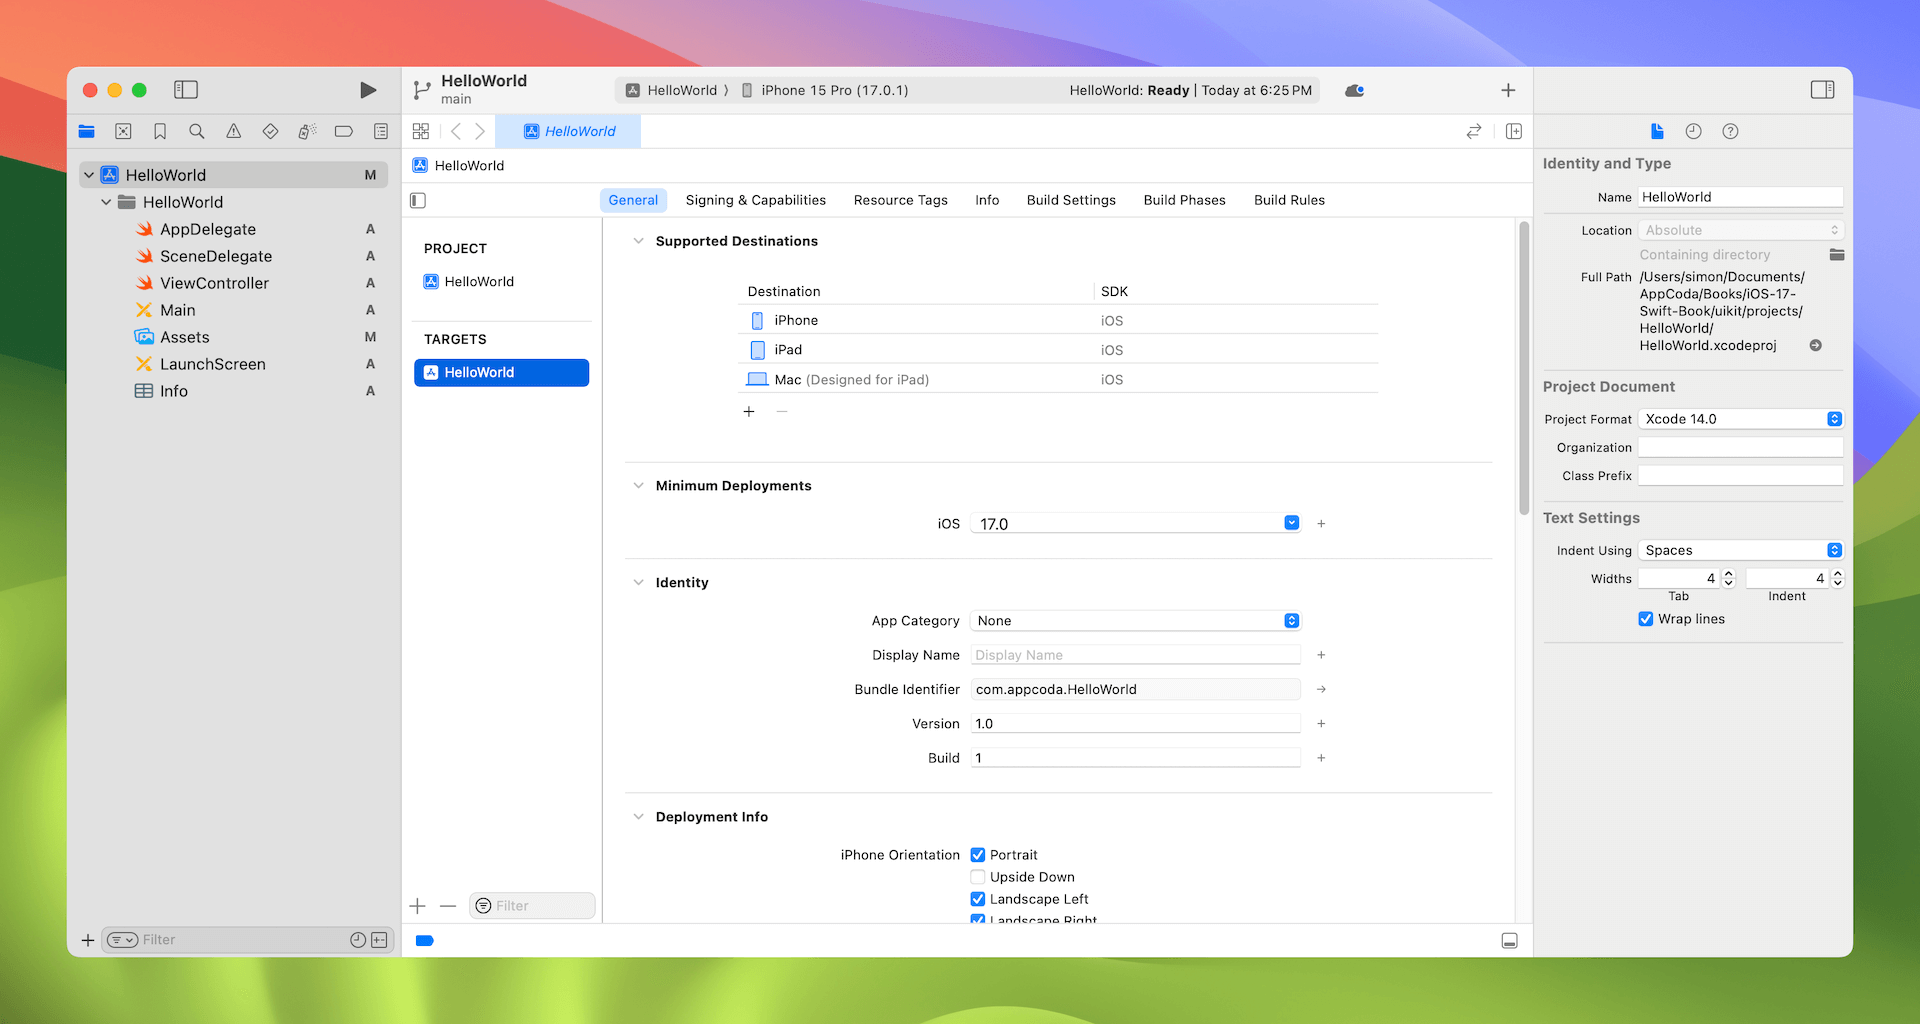
After you confirm, Xcode automatically creates the "Hello World" project. The screen will look like the screenshot shown in figure 3-7.
Familiarize Yourself with Xcode Workspace
Before we start to implement the Hello World app, let's take a few minutes to have a quick look at the Xcode workspace environment. In the left pane is the project navigator. You can find all your project files in this area. The center part of the workspace is the editor area. You do all the editing stuff here (such as editing the project setting, source code file, user interface) in this area.
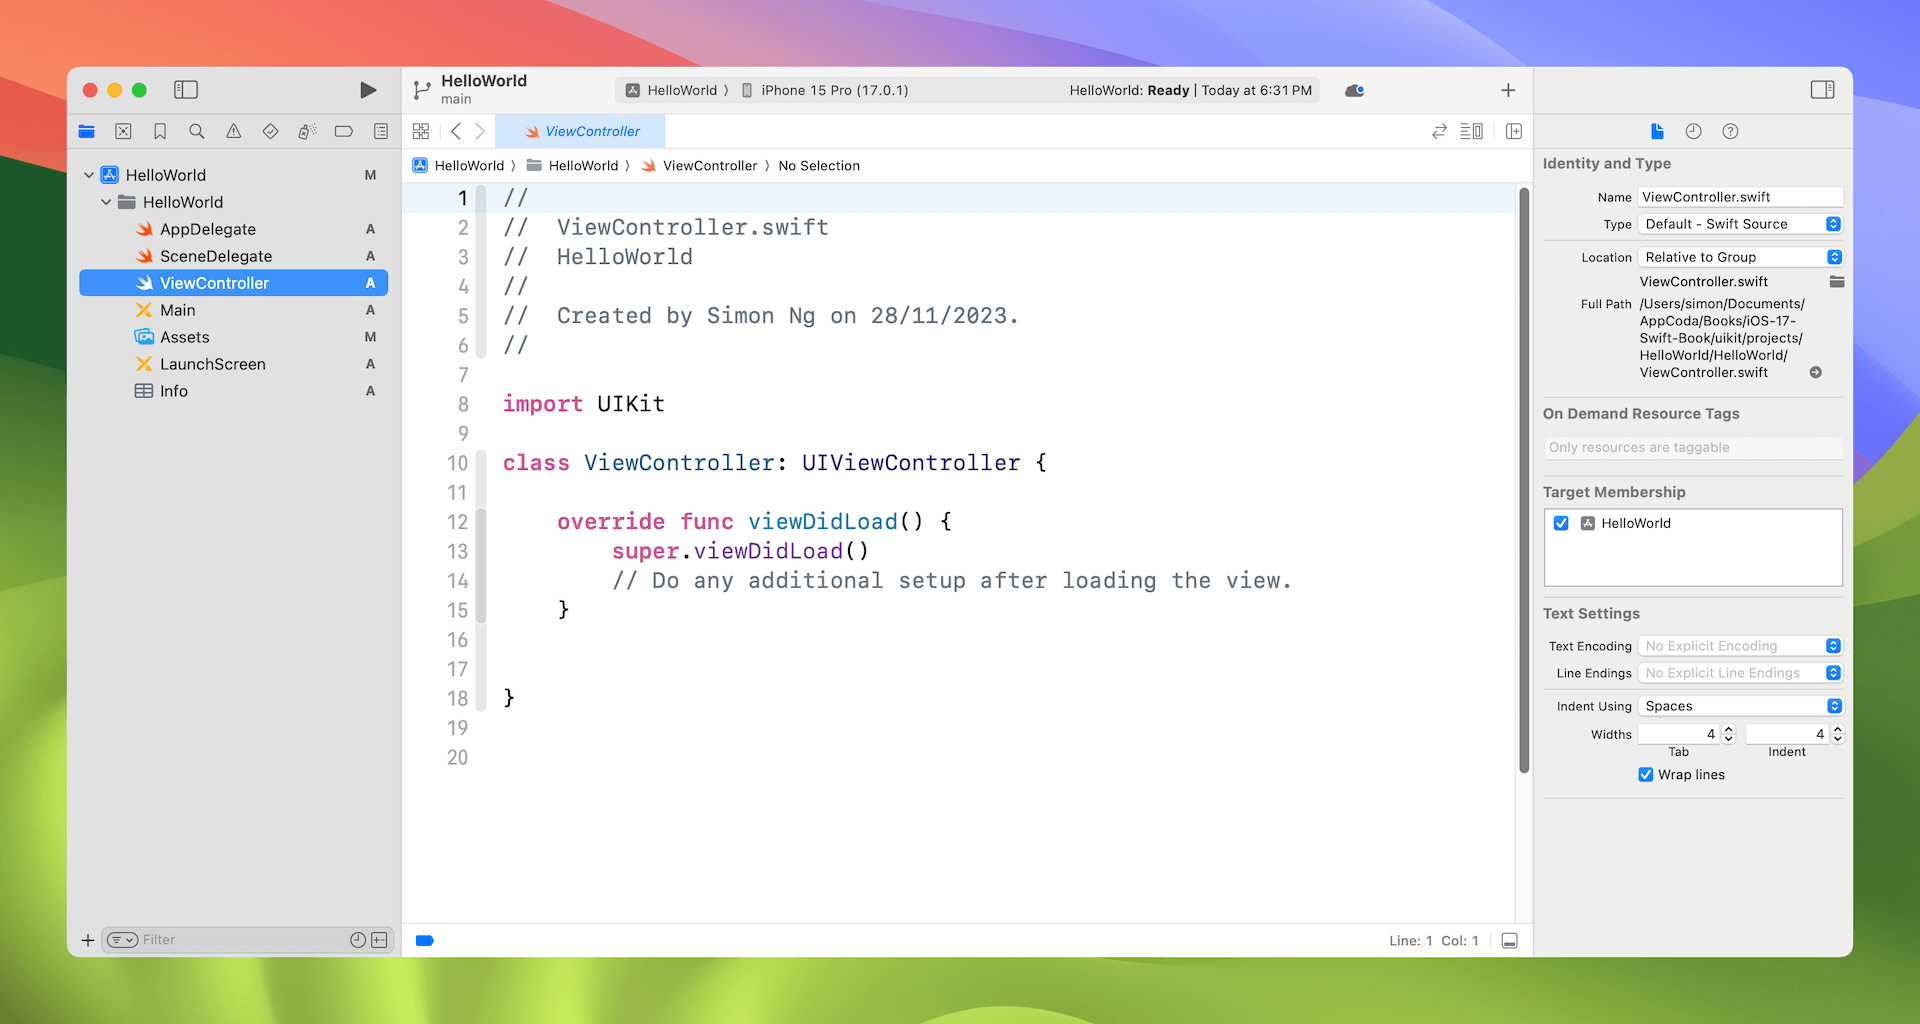
Depending on the type of file, Xcode shows you different interfaces in the editor area. For instance, if you select ViewController.swift in the project navigator, Xcode displays the source code in the center area (see figure 3-8). Xcode comes with several themes for you to choose from. Say, if you prefer dark themes, you can go up to the menu and choose Xcode > Preferences > Themes to change it.
If you select Main, which is the storyboard file for storing user interface, Xcode shows you the Interface editor for designing the storyboard and app UI (see figure 3-9).

The rightmost pane is the utility area. This area displays the properties of the file and allows you to access Quick Help. If Xcode doesn't show this area, you can select the rightmost button in the toolbar (at the top-right corner) to enable it.
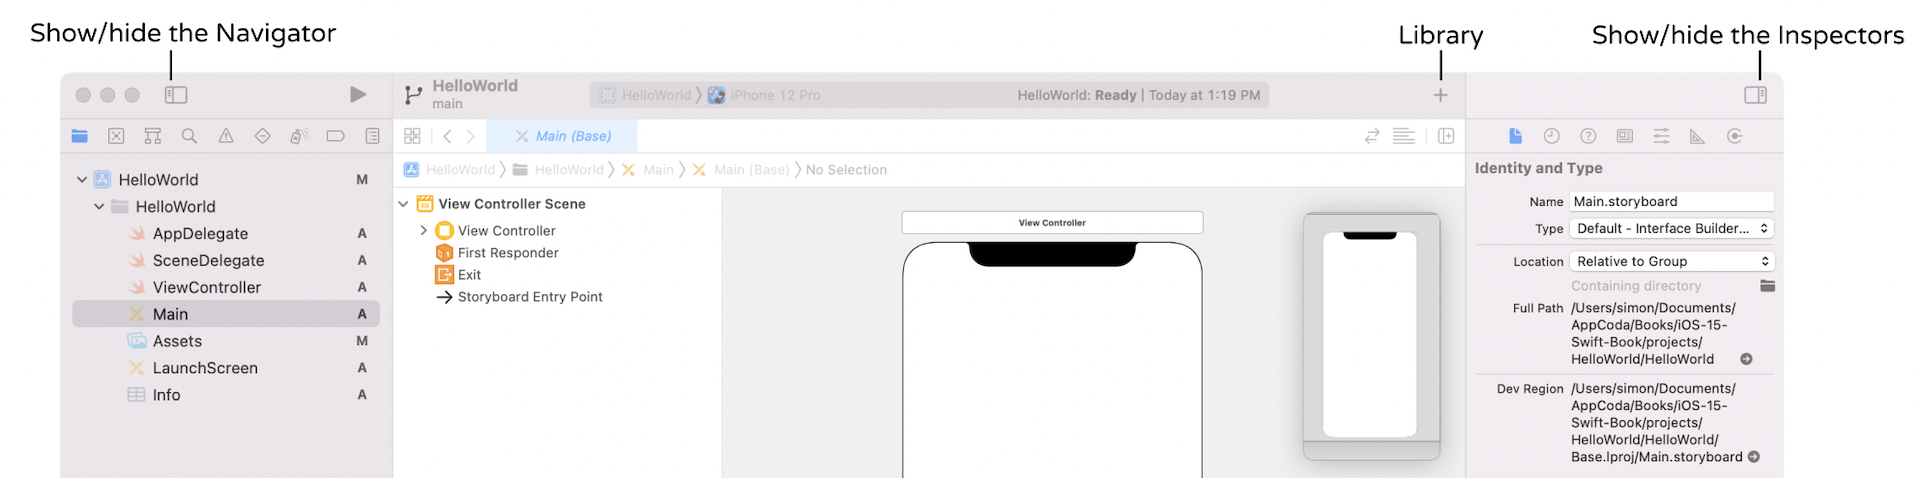
Sometimes, you may want to hide the project navigator to free up more screen space for editing your code or user interface. You can click the button at the top-left corner of the window to control its appearance. The plus button is used to bring up the UI library. We'll talk about it later in the chapter, so don't worry if you do not understand what it is for.
Run Your App for the First Time
Until now, we haven't written a single line of code. Even so, you can run your app using the built-in simulator. This will give you an idea how to build and test your app in Xcode. In the toolbar, you should see the Run button.

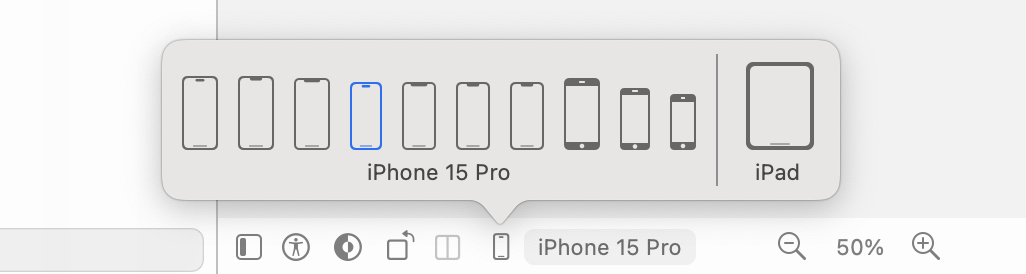
The Run button in Xcode is used to build an app and run it in the selected simulator. By default, the Simulator is set to iPhone 15 Pro. If you click the iPhone 15 Pro button, you'll see a list of available simulators such as iPhone SE and iPhone 15 Pro Max. Let's select iPhone 15 Pro as the simulator, and give it a try.
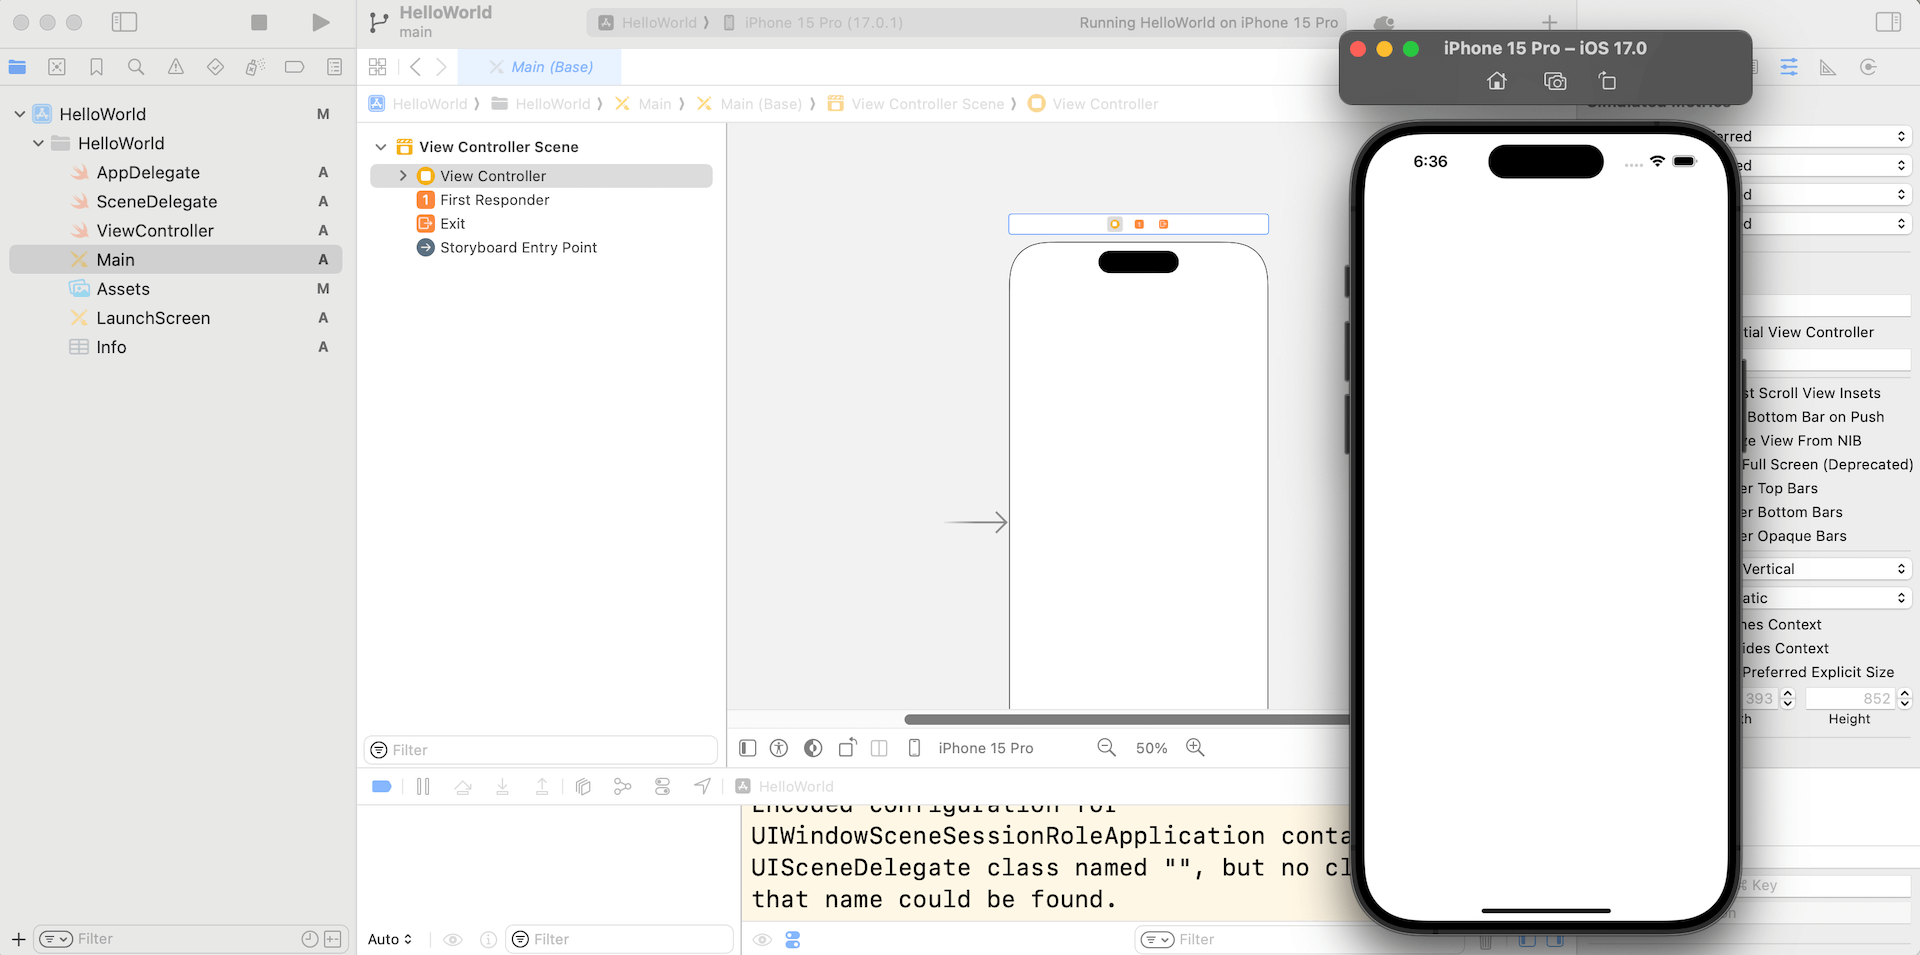
Once selected, you can click the Run button to load your app in the simulator. Figure 3-12 shows the simulator of an iPhone 15 Pro.
Quick tip: On non-retina Mac, it may not be able to show the full simulator window. You can select the simulator, and press command+1 to scale it down. Alternatively, you can place the mouse cursor near one of the corners of the device's bezel and scale down the size.
A white screen with nothing inside?! That's normal. So far we haven't designed the user interface or written any lines of code. This is why the simulator shows a blank screen. To terminate the app, simply hit the Stop button in the toolbar.
Try to select another simulator (e.g. iPhone SE) and run the app. You will see another simulator showing up on screen. Since the release of Xcode 9, you are allowed to run multiple simulators simultaneously.
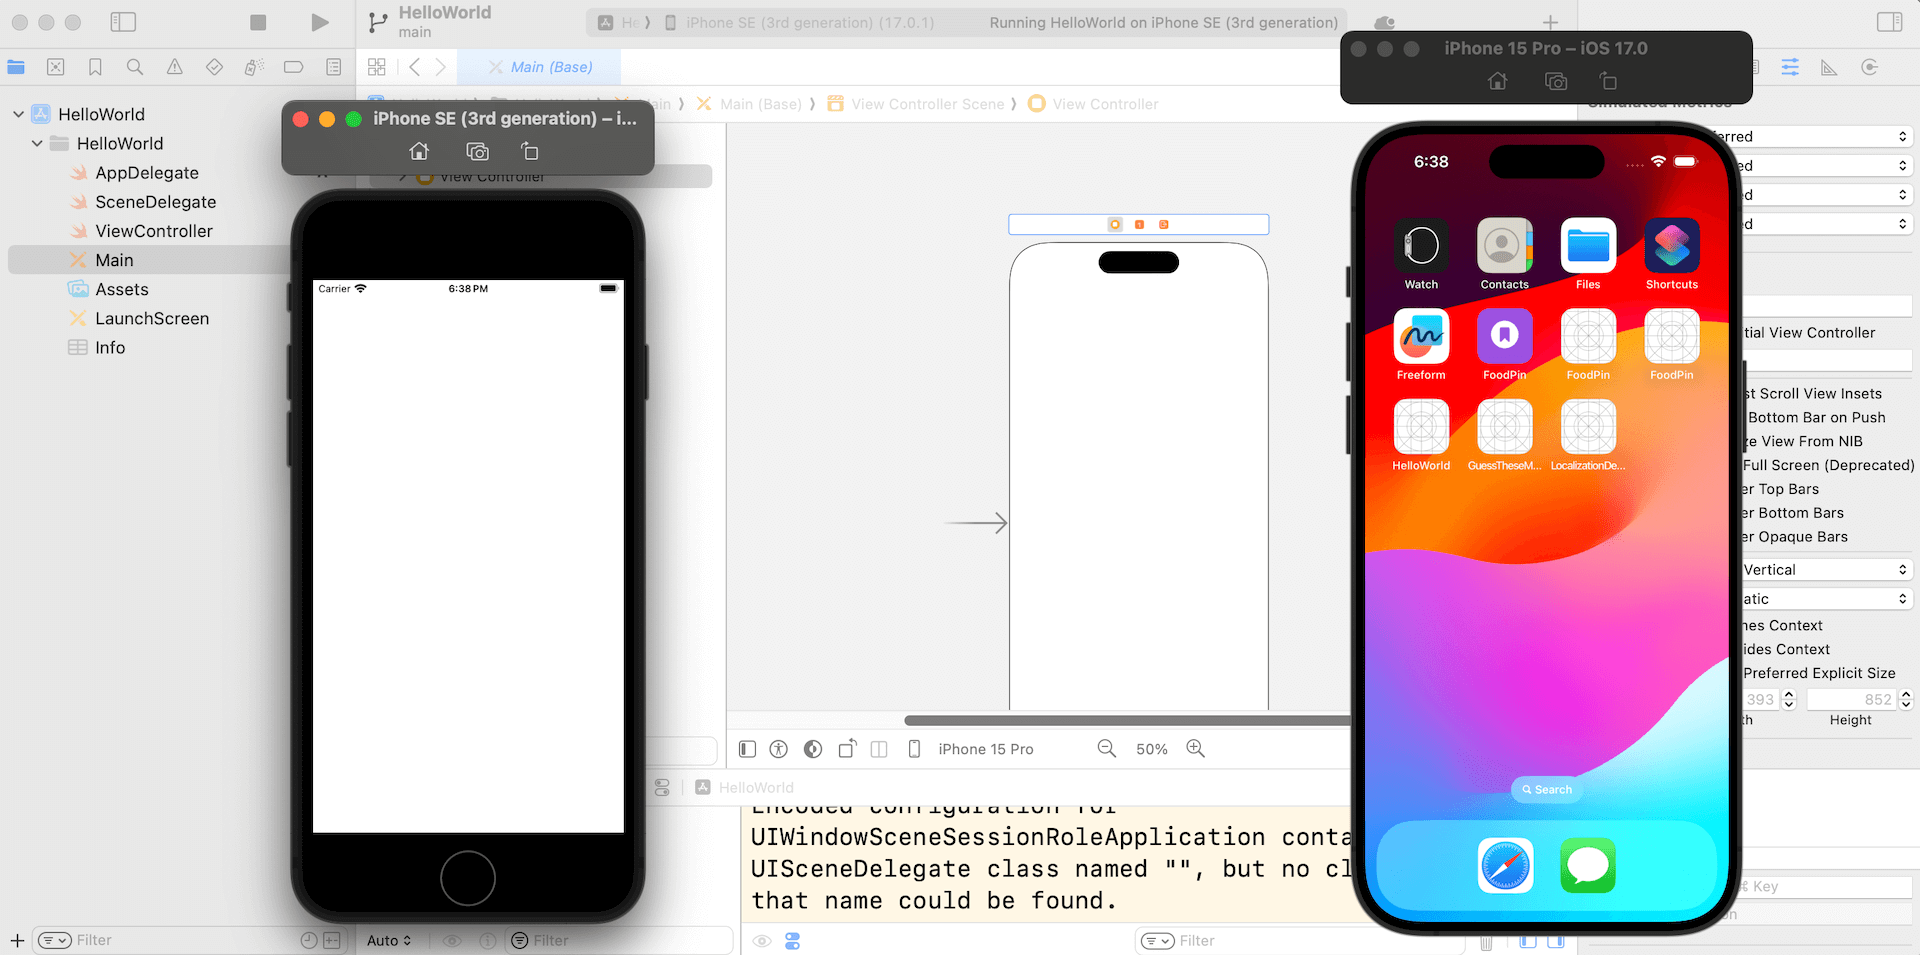
The simulator works pretty much like a real iPhone. You can click the home button (or press shift-command-h) to bring up the home screen. It also comes with some built-in apps. Just play around with it to familiarize yourself with Xcode and simulator environment.
Quick tip: Running multiple simulators at the same time requires extra memory usage on your Mac. If you do not need any of the simulators, you can select the simulator and press command+w to close it.
A Quick Walkthrough of Interface Builder
Now that you have a basic idea of the Xcode development environment, let's move on and design the user interface of your first app. In the project navigator, select the Main file. Xcode then brings up a visual editor for storyboards, known as Interface Builder.
The Interface Builder editor provides a visual way for you to create and design an app's UI. Not only can you use it to design individual view (or screen), the Interface Builder's storyboard designer lets you lay out multiple views, and chain them together using different types of transitions, so as to create the complete user interface. All these can be done without writing a line of code.
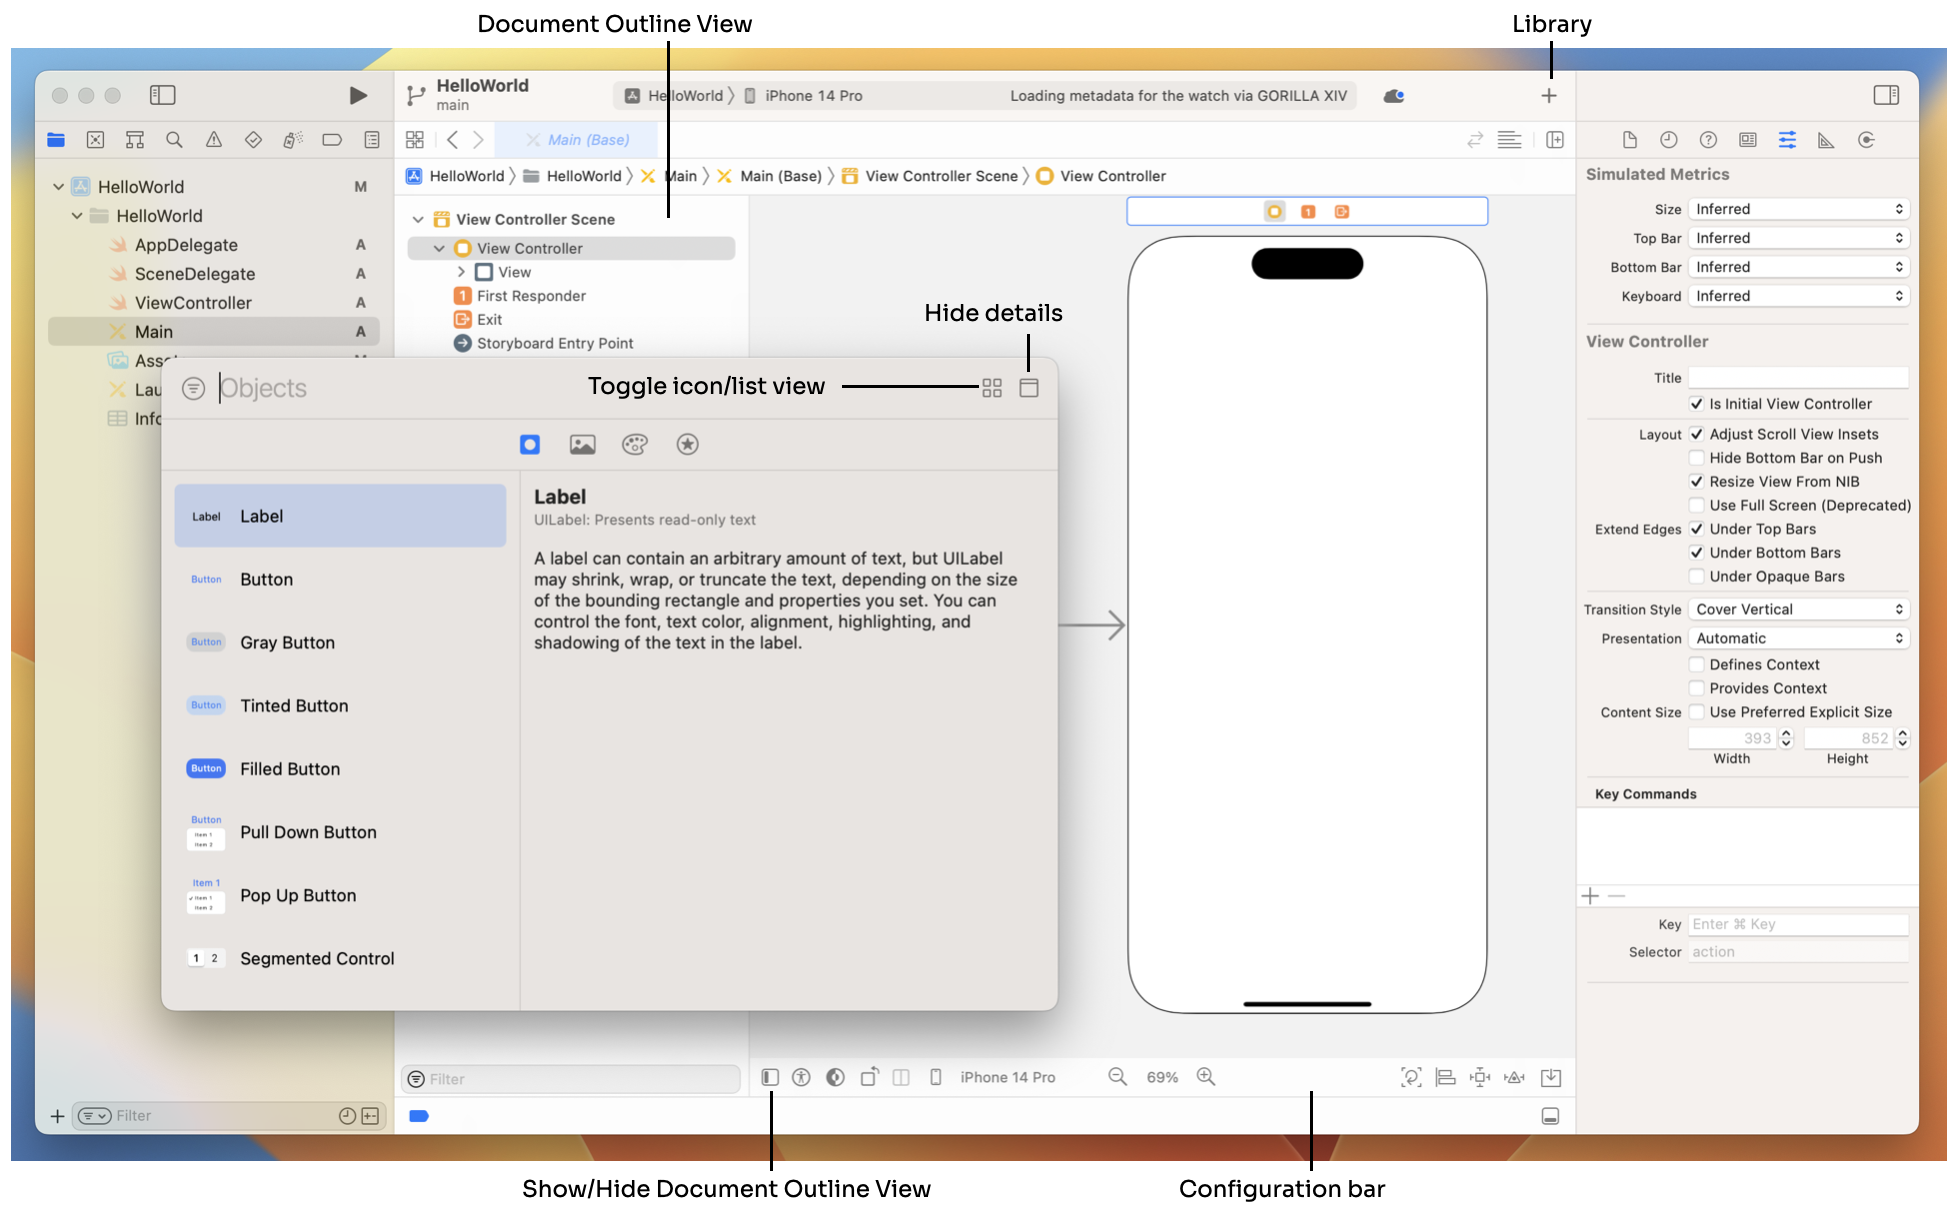
In Xcode 15, the Object library is hidden by default. You have to click the + button at the top menu, as displayed in figure 3-14, to make it appear as a floating window.
The Object library contains all the available UI objects such as button, label, image view for you to design your user interface. You can view the Object library in two difference modes: list view and icon view. I prefer to use icon view in this book. But if you want to change to the list view mode, simply use the toggle button to switch between them.
Since we chose to use the App template during project creation, Xcode generated a default view controller scene in the storyboard. In your Interface Builder, you should see a view controller in the editor area. This view controller is where you design the app's user interface. Each screen of an app is usually represented by a view controller. Interface Builder allows you to add multiple view controllers to the storyboard and link them up. Later in this book, we will further discuss about that. Meanwhile, focus on learning how to use Interface Builder to lay out the UI for the default view controller.
What is a Scene?
A scene in storyboard represents a view controller and its views. When developing iOS apps, views are the basic building blocks for creating your user interface. Each type of view has its own function. For instance, the view you find in the storyboard is a container view for holding other views such as buttons, labels, image views, etc. A view controller is designed to manage its associated view and subviews (e.g. button and label). If you are confused about the relationship between views and view controllers, no worries. We will discuss how a view and view controller work together in the later chapters.
The Document Outline view of the Interface Builder editor shows you an overview of all scenes and the objects under a specific scene. The outline view is very useful when you want to select a particular object in the storyboard. If the outline view doesn't appear on screen, use the toggle button (see figure 3-14) to enable/disable the outline view.
Lastly, there is a configuration bar in the Interface Builder. The configuration bar lets you live preview your app UI on different devices. To switch to another device, click the Device icon in the bar and choose the device you want (e.g. iPhone 15 Pro). Furthermore, you can use the + and - buttons to zoom in/out the storyboard. We will talk about this new feature later on.
Designing the User Interface
Now we are going to design the app's user interface. First, we will add a Hello World button to the view. Click the library (+) button to shows the Object library. You can then choose any of the UI objects, and drag-and-drop them into the view. If you're in the icon view mode of the Object library, you can click the Show Details button (refer to figure 3-14) to reveal the detailed description.
Okay, it's time to add a button to the view. All you need to do is drag a Button object from the Object library to the view.
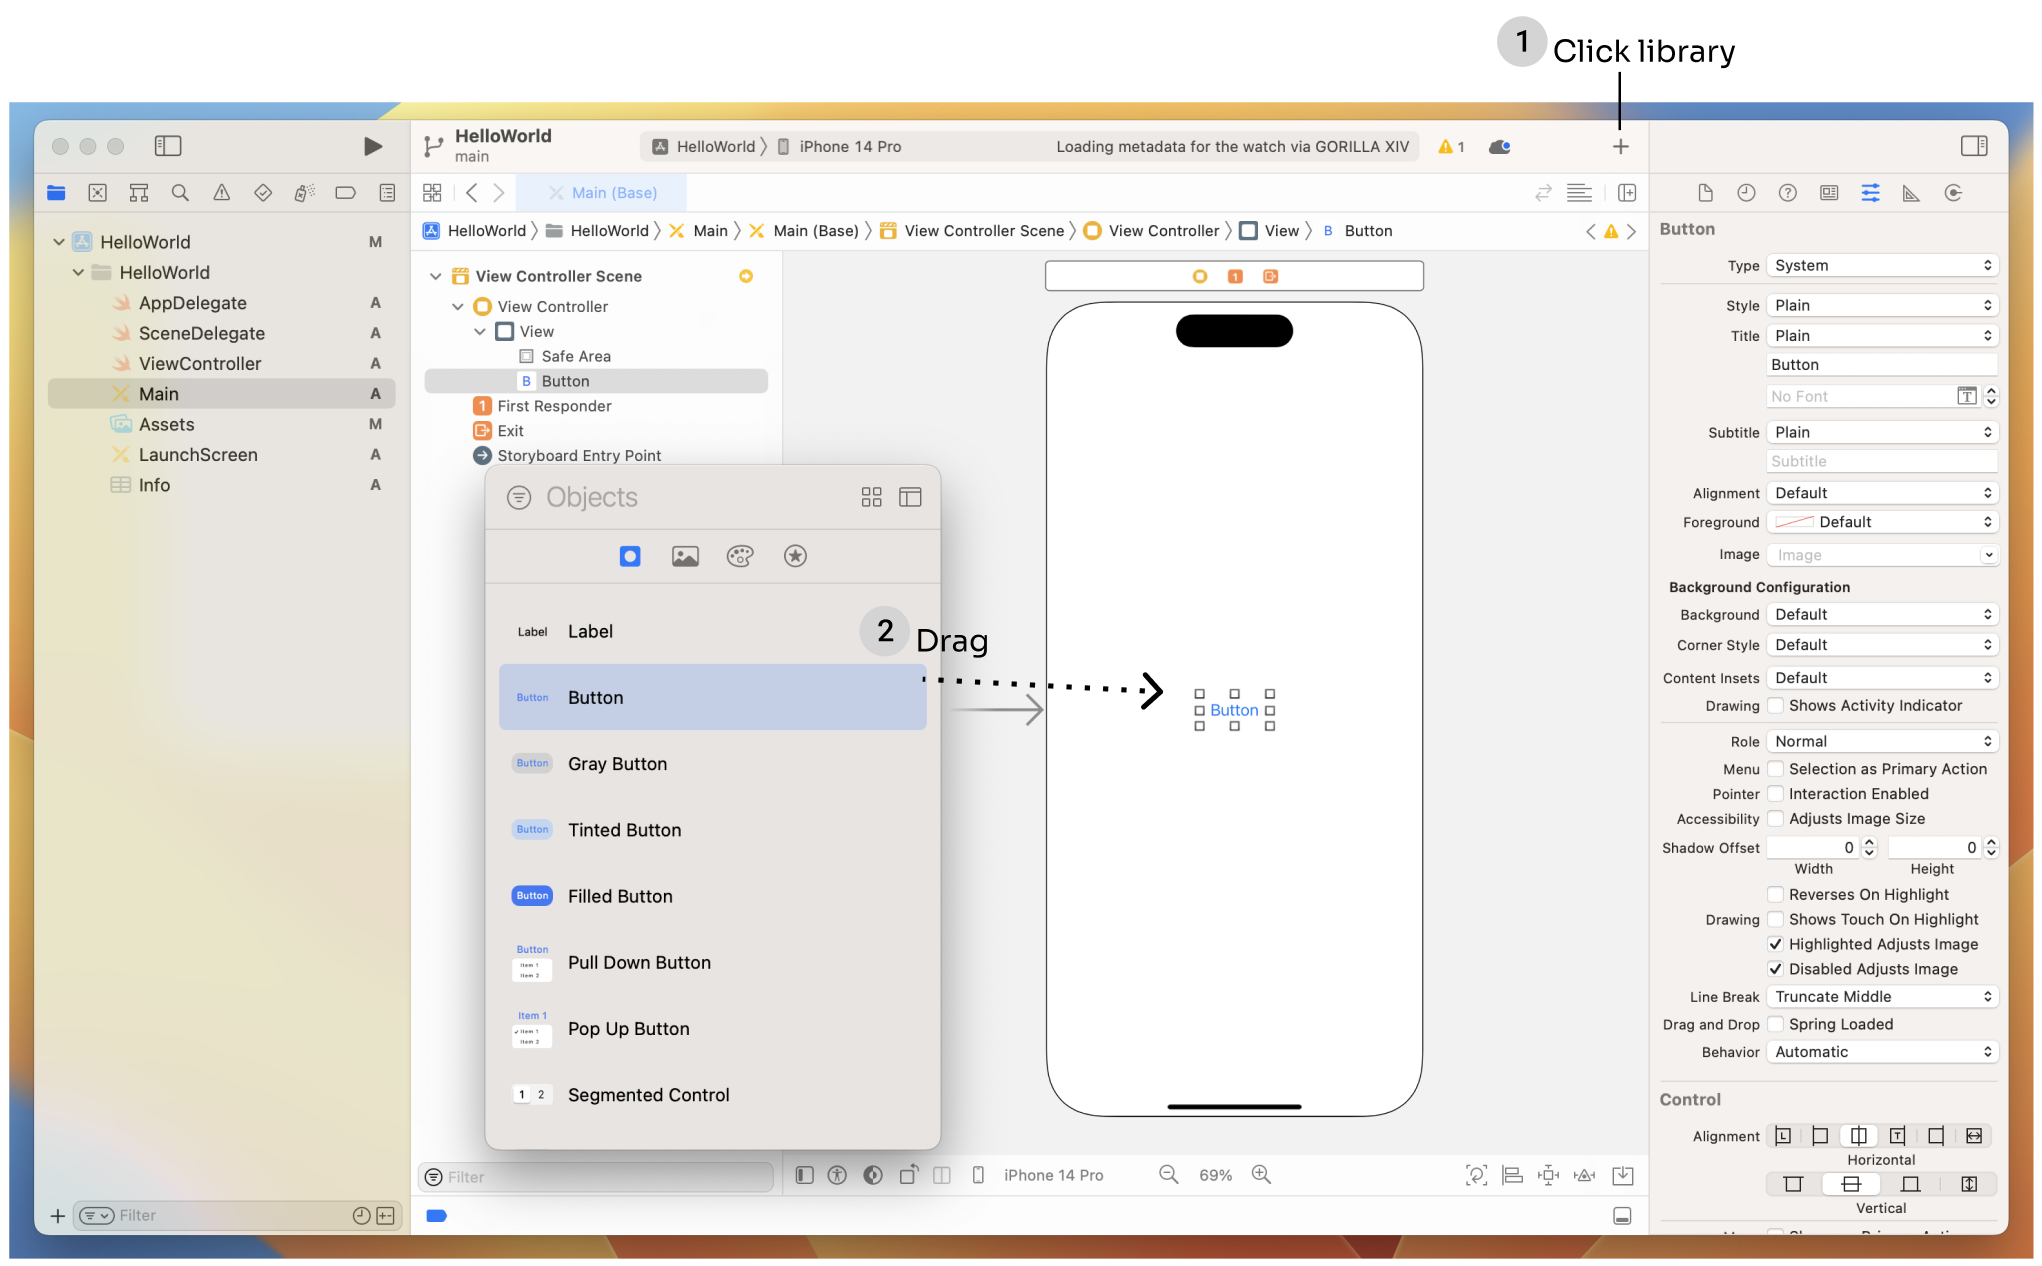
As you drag the Button object to the view, you'll see a set of horizontal and vertical guides if the button is centered. Stop dragging, and release your button to place the Button object there.
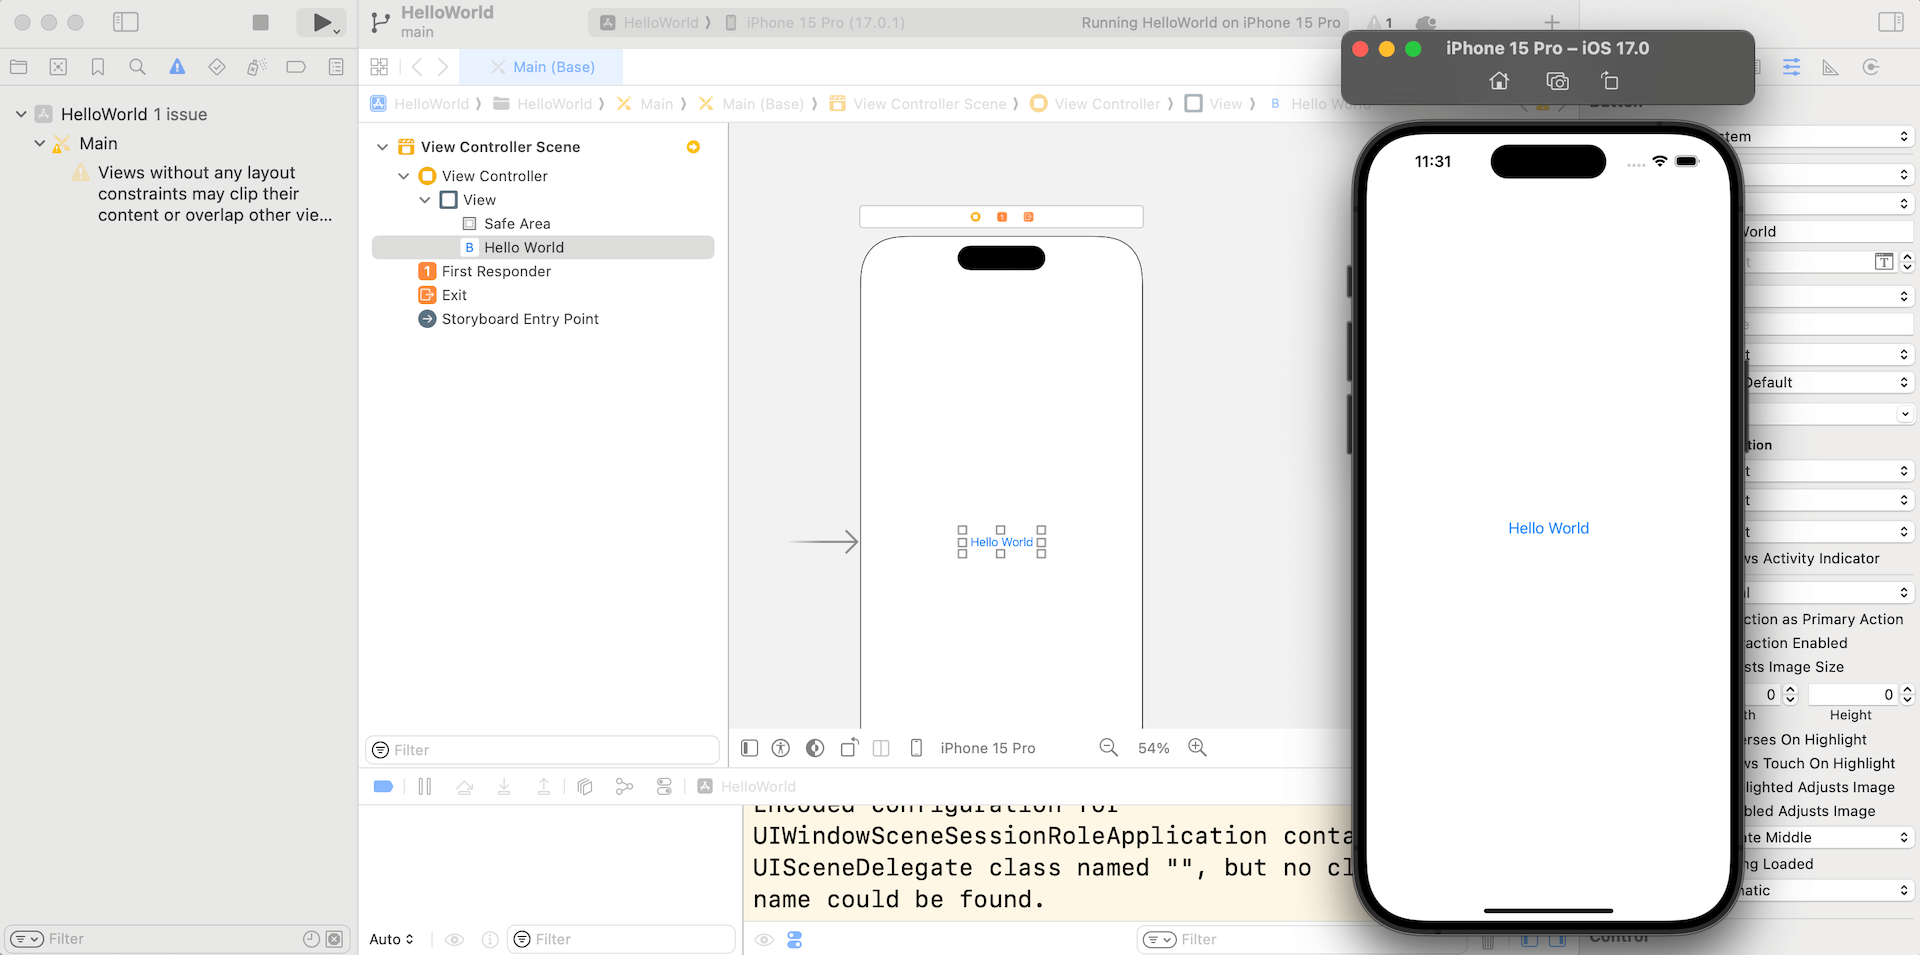
Next, let's rename the button. To edit the label of the button, double-click it and name it "Hello World". After the change, you may need to center the button again.

In case the words are truncated, you can resize the button to make it fit or press command+= to let Xcode resize it for you.

Great! You're now ready to test your app. Select the iPhone 14 Pro simulator and hit the Run button to execute the project, you should see a Hello World button in the simulator as shown in figure 3-19. Cool, right?
However, when you tap the button, it shows nothing. We'll need to add a few lines of code to display the "Hello, World" message.
Quick note: This is the beauty of iOS development. The code and user interface of an app are separated. You're free to design your user interface in Interface Builder and prototype an app without writing any lines of code.
Coding the Hello World Button
Now that you've completed the UI of the HelloWorld app, it's time to write some code. In the project navigator, you should find the ViewController.swift file. Because we initially selected the App project template, Xcode already generated a ViewController class in the ViewController.swift file. This file is actually associated with the view controller in the storyboard. In order to display a message when the button is tapped, we'll add some code to the file.
Swift versus Objective-CIf you have written code in Objective-C before, one big change in Swift is the consolidation of header (.h) and implementation file (.m). All the information of a particular class is now stored in a single .swift file.
Select the ViewController.swift file. The editor area immediately displays the source code. Insert the following lines of code inside the ViewController class:
@IBAction func showMessage(sender: UIButton) {
    let alertController = UIAlertController(title: "Welcome to My First App", message: "Hello World", preferredStyle: UIAlertController.Style.alert)
    alertController.addAction(UIAlertAction(title: "OK", style: UIAlertAction.Style.default, handler: nil))
    present(alertController, animated: true, completion: nil)
}
Note: I encourage you to type the code, rather than copy & paste it.
Your source code should look like this after editing:
import UIKit

class ViewController: UIViewController {

    override func viewDidLoad() {
        super.viewDidLoad()
        // Do any additional setup after loading the view.
    }

    @IBAction func showMessage(sender: UIButton) {
        let alertController = UIAlertController(title: "Welcome to My First App", message: "Hello World", preferredStyle: UIAlertController.Style.alert)
        alertController.addAction(UIAlertAction(title: "OK", style: UIAlertAction.Style.default, handler: nil))
        present(alertController, animated: true, completion: nil)
    }
}
What you have just done is added a showMessage(sender: UIButton) method in the ViewController class. The Swift code within the method is new to you. I will explain it to you in the next chapter. Meanwhile, just consider the showMessage(sender: UIButton) as an action. When this action is called, the block of code will instruct iOS to display a "Hello World" message on screen.
Note: Did you notice that some lines of the code were begun with "//"? In Swift, if the line is prefixed with "//", that line of code becomes a comment, which will not be executed.
You can try to run the project in the simulator. The behaviour of the app is still the same. When you tap the button, it still doesn't show you any response. The reason is that we haven't made the connection between the button and the code.
Connecting the User Interface with Code
I said before that the beauty of iOS development is the separation of code (.swift file) and user interface (storyboards). But how can we establish the relationship between our source code and the user interface?
To be specific for this demo, the question is:
- How can we connect the "Hello World" button in the storyboard with the
showMessage(sender: UIButton)method in theViewControllerclass?
You need to establish a connection between the "Hello World" button and the showMessage(sender: UIButton) method you've just added, such that the app responds when someone taps the Hello World button.
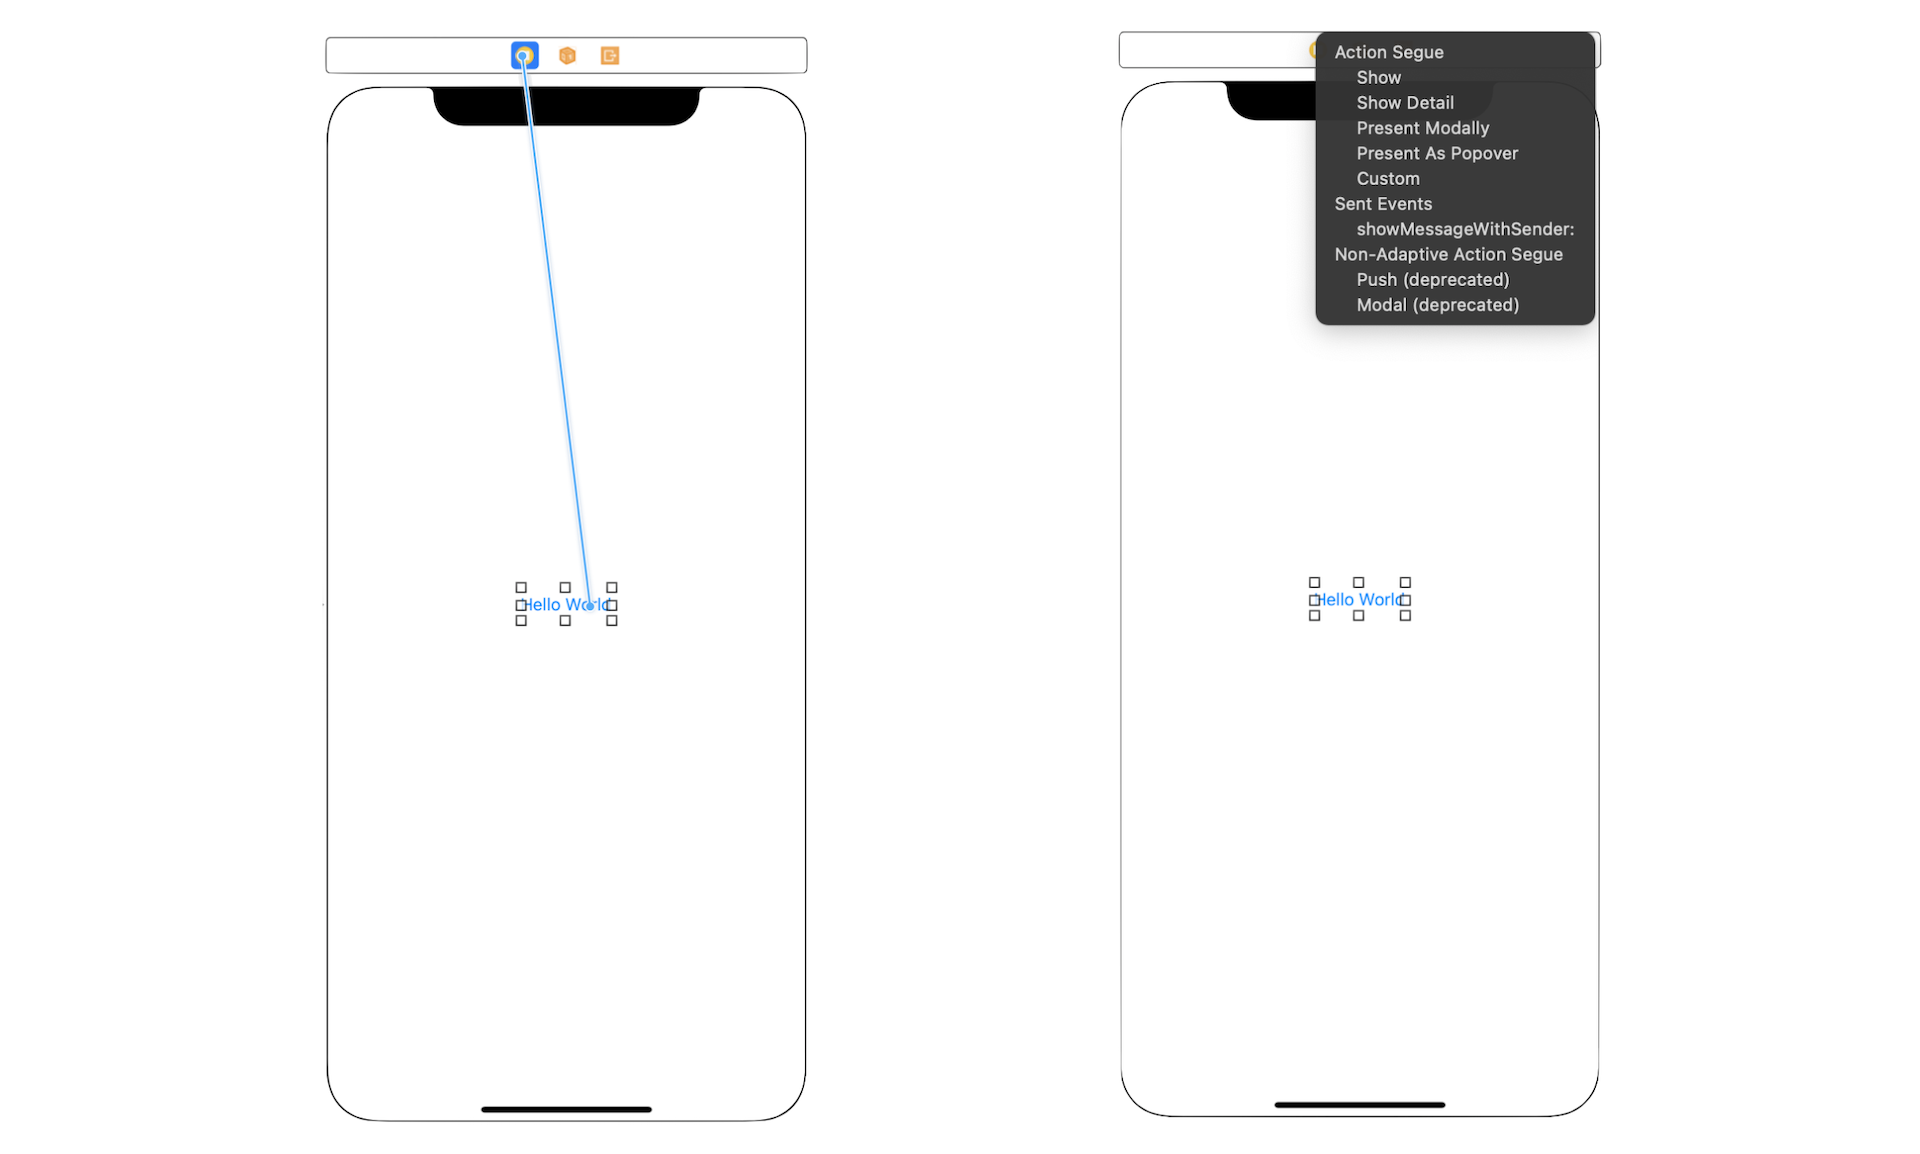
Now select Main to switch back to the Interface Builder. Press and hold the control key of the keyboard, click the "Hello World" button and drag it to the View Controller icon. Release both buttons (mouse + keyboard) and a pop-up shows the showMessageWithSender: option under Sent Events. Select it to make a connection between the button and showMessageWithSender: action.
Test Your App
That's it! You're now ready to test your first app. Just hit the Run button. If everything is correct, your app should run properly in the simulator. This time, the app displays a welcome message when you tap the Hello World button.
Changing the Button Color
As mentioned before, you do not need to write code to customize a UI control. Here, I want to show you how easy it is to change the properties (e.g. color) of a button.
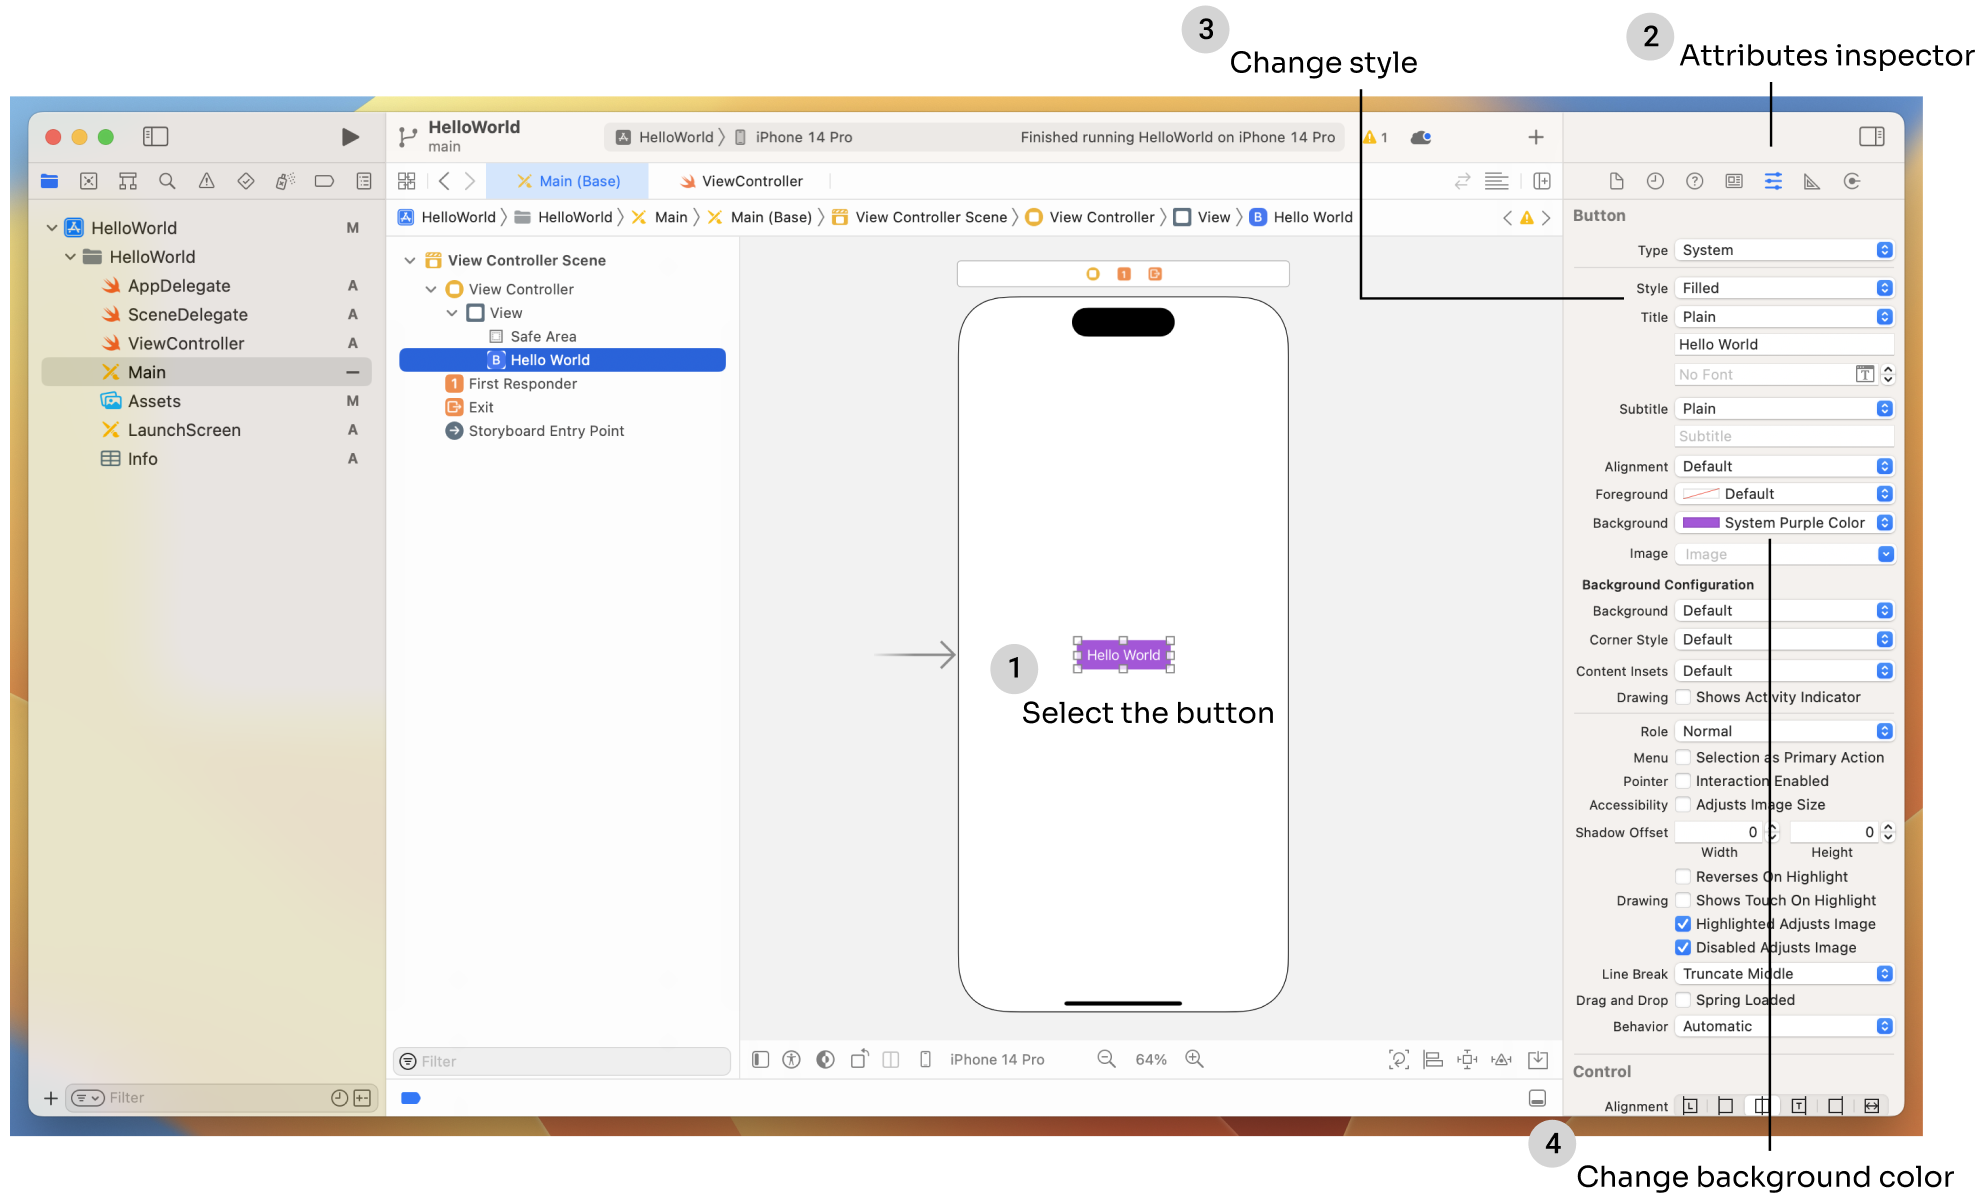
Select the "Hello World" button and then click the Attributes inspector under the Utility area. You'll be able to access the properties of the button. Here, you can change the button style, font, text color, background color, etc. Try to change the style (under Button section) to Filled and background (scroll down and you'll find it under View section) to System Purple Color or whatever color you want.
Run the project again and see what you get.
Your Exercise #1
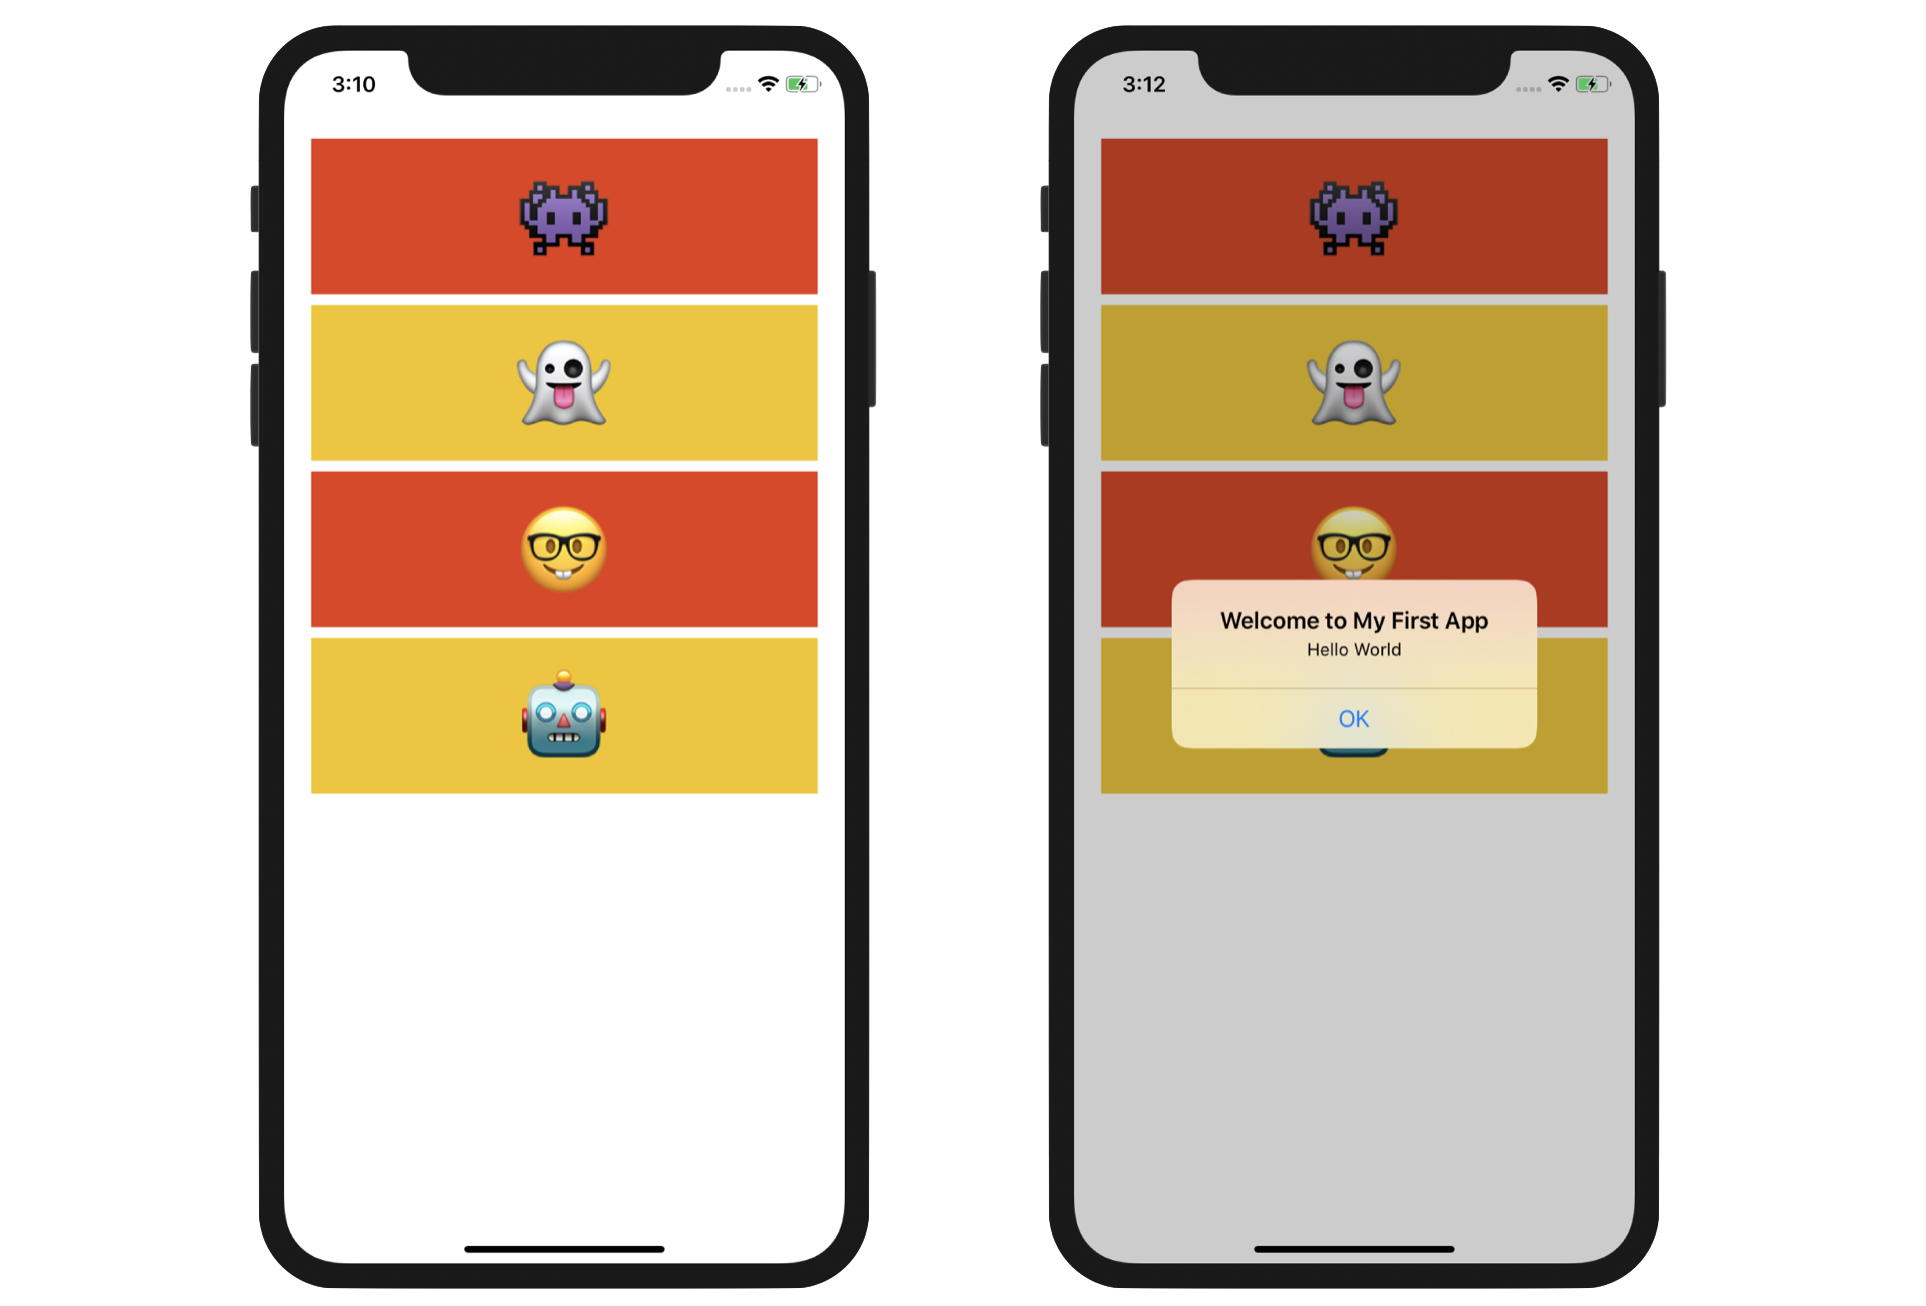
Not only can you change the color of a button, you can modify the font type and size in the Attributes inspector by setting the Font option. Your task is to continue to work on the project and create a user interface like figure 3-23. When a user taps any of the buttons, the app displays the same Hello World message.
To give you some hints, here are the things you will need to work on:
- Resize the "Hello World" button and change its font size to 70 points. Change its title from Hello World to 👾. To key in emoji characters, you can hold down control+command and then press spacebar.
- Add three more buttons. Each of them has an emoji icon as its title.
- Establish a connection between the buttons and the
showMessage(sender: UIButton)method.
Your Exercise #2
Wouldn't it be great if you can display the meaning of the emoji icon instead of the same "Hello World" message like what I have shown you in figure 3-2?
You've learned how to use a dictionary to store the meaning of emoji icons. Now try to modify the showMessage(sender: UIButton) method such that it displays the meaning of the emoji icon. I will give you a hint. Here is the code skeleton. Replace the code of your existing showMessage(sender: UIButton) method with the following and fill in the missing code:
@IBAction func showMessage(sender: UIButton) {

    // Initialize the dictionary for the emoji icons
    // If you forgot how to do it, refer to the previous chapter
    // Fill in the code below


    // The sender is the button that is tapped by the user.
    // Here we store the sender in the selectedButton constant
    let selectedButton = sender

    // Get the emoji from the title label of the selected button
    if let wordToLookup = selectedButton.titleLabel?.text {

        // Get the meaning of the emoji from the dictionary
        // Fill in the code below


        // Change the line below to display the meaning of the emoji instead of Hello World
        let alertController = UIAlertController(title: "Meaning", message: meaning, preferredStyle: UIAlertController.Style.alert)

        alertController.addAction(UIAlertAction(title: "OK", style: UIAlertAction.Style.default, handler: nil))
        present(alertController, animated: true, completion: nil)
    }

}
This exercise is more difficult than the first one. Try your best to complete it. It is really fun to see that you turn a Hello World app into a simple Emoji Translator.
What's Coming Next
Congratulations! You've built your first iPhone app. It's a simple app, but I believe you already have a better understanding of Xcode and understand how an app is built. It's easier than you thought, right?
Even if you couldn't complete exercise #2, that is completely fine. Don't be discouraged. I have included the solution for your reference. Just keep reading, you will get better and better as you have more coding practices.
In the next chapter, we'll discuss the details of the Hello World app and explain how everything works together.
To access the full version of the book, please get the full copy here. You will also be able to access the full source code of the project.